
It should be mentioned at this point that if you are thinking of doing a fair amount of work on the default site, then you are advised to actually work on a copy of the site on your own PC. This entails setting up what is a called a Development Environment on your machine; the idea being that you do all the hard work offline and only deploy the finished product to your live site.
However, this means that you have to install PHP, Apache, and MySQL before you install osCommerce and ensure that they are all up and running and working together before you can do any work at all. Since the aim of this book is to teach you specifically about osCommerce we do not cover any of that here. For more information on how to set up a development environment, you can take a look at the professional edition of this book, Building Online Stores with osCommerce: Professional Edition (ISBN 1-904811-14-0), or simply do a search on Google for installation instructions and work from there.
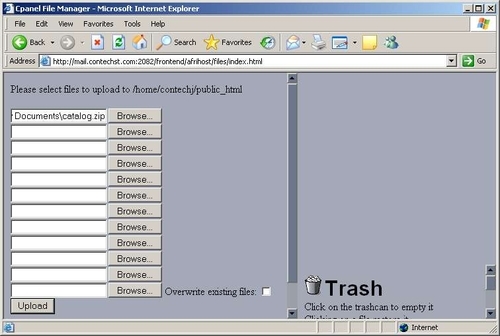
By far the easiest method would be to use a native upload feature from your host’s file manager over a quick connection. If this is available to you, simply use it to upload the archive file across to the host server. The following screenshot shows how this is achieved using the demo site’s host:
Alternatively, assuming your site has an FTP account enabled, the following two methods represent a quick and painless method of uploading files with FTP.
Windows users can open up the host file system using an FTP account in Windows Explorer or Internet Explorer and simply drag the catalog .zip folder from their file systems over to the host site, as shown here:
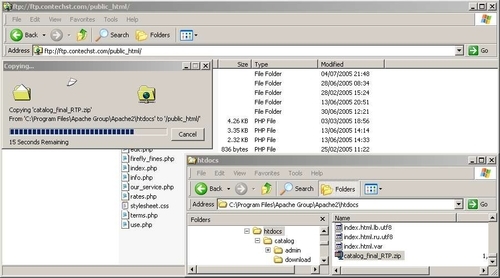
There are a few things to note about the previous screenshot. First, even though you can’t see it, I had to log on using my site’s administrator username and password. You should make sure that anonymous FTP access to your file system is disabled. In fact, once everything has been deployed and is up and running satisfactorily, you should disable your FTP account altogether until you need to make use of it again. Second, you can see that the file is being copied to the public_html folder. This will give the catalog folder a web address of http://www.domain.com/catalog once it is extracted on the other side.
The final point to note is that I had an estimate of about one minute for the total transfer time. This transfer was done over an ADSL line, which is fairly fast—if you don’t zip the files up, you can expect a seriously long upload time because the FTP utility has to create all the files and folders itself on the destination server. Remember, that it’s not only the speed of the connection, but also the speed of the FTP utility being used, that can affect upload times.
Not everyone will be able to do things this way, so for those of you who cannot make use of drag‑and-drop facilities, the next thing to do is make sure you have an FTP client. Linux and Windows machines all ship with one by default, so simply open up a command shell and type in the following command or its equivalent for your system:
C:> ftp --help
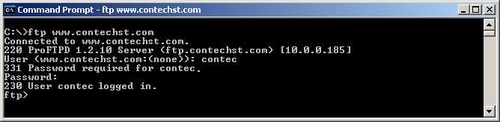
This should bring up a help file, which you can browse over to get a feel for things. Now, this utility works in a fairly intuitive manner. You need to make a connection to the host, and then tell the FTP utility to send over the files you want to upload. This can be achieved in a number of ways depending on the type of FTP utility you are using—some have graphical interfaces and others don’t. For the purposes of this chapter, we’ll simply look at the command-line version. To log on to your site, simply enter the host name, username, and password (which should be required), as shown here:
Once you have made a connection you can simply upload the archive file to the site using the commands as shown here (these may differ depending on how your FTP utility works):
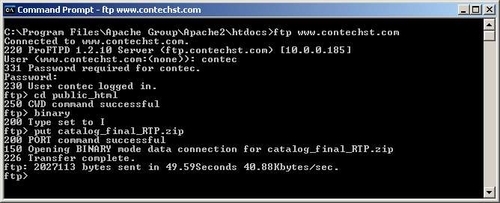
You can see that we have done the following:
- Logged on to the FTP account by supplying a username and password.
- Changed the remote working directory to
public_html; this is where we would like the file to be uploaded to. - Set the transfer type to
binary, because we are uploading a.zipfile and not a plain text file (which would useascii).
Your FTP client will then let you know how things turn out, and from the screenshot you can see we get a report of success. The files have been transferred without a hitch. So far so good...