
There are an indefinite number of adjustments or additions that you can make to the site—your imagination is the real limit in this respect. However, there are a few that deserve special mention because they are the most common. Remember that while we have only a bit of space to talk about some of the more important customizations, someone else has probably had to solve whatever customization problem you might have already. Make sure you use the online community to help you out if you get stuck.
The demo site needs to limit the size of the current pages to a determined width in order to provide space for some advertising, which is to appear down the right-hand side of the page. You might find that you wish to limit the width of your pages to keep everything compact and neat—especially if you have decided on a minimalist page design, which would look sparse on a large screen. Many companies do limit their page sizes for a variety of reasons, so it is important to have some control over your site’s page sizes.
In order to accomplish this task, we need to say goodbye to the stylesheet and begin working directly on the page HTML. For the sake of demonstration, we will work on the index page and allow the central column to resize up to a limit of 600 pixels. After that the page will stop expanding, and users who are viewing the page on full screen will instead be able to view adverts running down the right-hand side.
Keep in mind that osCommerce does not have a unified page sizing facility. In other words, whatever page modifications you make to one of you pages, you will need to record and implement on all the other pages that you wish to have the same behavior. This is a bit of a drag, but it really isn’t difficult to do with a bit of copying and pasting.
To begin with, open up index.php in your editor and search for the line that reads:
<table border="0" width="100%" cellspacing="3" cellpadding="3">
somewhere around line 49. This tag controls the overall width of the page, which you can see by examining the width tag, which is set to fill out the entire screen by always being 100%. You have another option in that you can set an absolute value in terms of the number of pixels to be used. For example, change the line to the following and then examine your page in a variety of different sizes:
<table border="0" width="800" cellspacing="3" cellpadding="3">
You will probably notice a problem with this page immediately. If you increase the page size above the 800 pixel mark, then the header and footer sections keep expanding leaving your page looking something like this:
This is pretty untidy, and we obviously would like to make the page stop expanding at the same point above and below. This means we are going to have to edit the header.php and footer.php files to reflect this change in width. So, open up both pages and in header.php look for the lines that read:
<table border="0" width="100%" cellspacing="0" cellpadding="1">
and:
<table border="0" width="100%" cellspacing="0" cellpadding="2">
somewhere near lines 55 and 63 respectively, and change them to the new width like so:
<table border="0" width="800" cellspacing="0" cellpadding="1">
...
<table border="0" width="800" cellspacing="0" cellpadding="2">
Then, in the footer you will need to change three table widths instead of two. Notice that unless the tables are set to the same width, the copyright message and the banner will shift further and further to the right as the page width increases. Accordingly, you should change the width attribute for all the tables (not just the first one) in the footer.php file to 800 pixels. This is because the alignment of the text and banner content is set to be center, and unless these table are all set to have the same length, the footer can end up looking skewed—like this:

Once those changes are all made, go along to the Conditions of Use page (conditions.php) and take a look—you should see something like this:

Oh dear! That’s not very good... Remember that you have to modify the HTML for every different page to reflect the changes made to the site. Once you have worked out how to make the changes to one page, simply copying them over to all the others is an easy task.
What we have demonstrated here is a pretty simple modification to your standard site pages. Of course, you may wish to effect far more grand or sweeping changes to your site, and whatever changes to the HTML you need to make, the process is exactly the same as the one we have outlined—with one additional warning!
Note
Be aware that each PHP page may contain several versions of the same page, depending on the state of the session. If this is the case, you need to modify all the versions of each page within the same PHP file, so make sure you check everything thoroughly.
A case in point is in fact the index page, which displays a default page, as well as other information based on user requests. Some changes to the HTML will be applied to one version only, and not the page as a whole, so you need to check the presentation on both the default and result versions of that page.
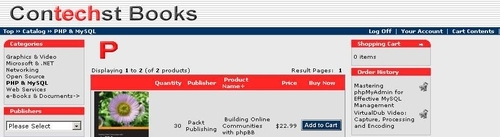
Of course, it is pretty likely that at some stage, as your online site grows, you will find that you want to present more pages than the ones provided by default. In such a case, you need to add a new page with all the correct layout information and HTML elements in place. The best way to do this is to copy a page that most closely resembles what you want the new page to look like, and then save it in the catalog folder under its new name.
For this example, we will take the shipping.php file and turn it into the feed.php file, which will be linked to from either a click on the feed box or from the Information box on the bottom left of the page. Open up shipping.php and save a copy as feed.php in the catalog folder. That’s it! You now have a new page, which you can confirm is working by modifying its content as follows:
<td><table border="0" width="100%" cellspacing="0" cellpadding="0">
<tr>
<td class="pageHeading"><?php echo "What’s New In Technology"; ?></td>
<td class="pageHeading" align="right"><?php echo tep_image
(DIR_WS_IMAGES . ‘table_background_specials.gif’,
HEADING_TITLE, HEADING_IMAGE_WIDTH, HEADING_IMAGE_HEIGHT); ?></td>
and navigating to it in your browser:
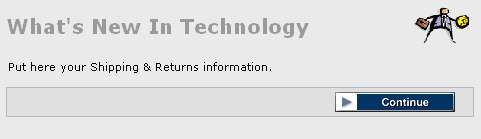
At the moment, this isn’t too helpful, and we have done something wrong in terms of developing with osCommerce conventions in mind. Can you tell what it is? Instead of allowing the new feed.php page to call the HEADING_TITLE constant, which all the other pages do, we simply inserted our own What’s New In Technology text to prove we had the right page. It’s no biggie, but we should make the proper changes anyway. So, return the feed.php file to its original state, and open up the shipping.php file in the includes/languages/english/ folder, save a copy as feed.php, and make the following changes:
define(‘NAVBAR_TITLE’, ‘Technology Feed’);
define(‘HEADING_TITLE’, ‘What’s new in Technology?’);
define(‘TEXT_INFORMATION’, ‘This is the future site of the RSS tech feed.’);
Once this is done, close this file and open up the feed.php file in the catalog directory. We need to tell feed.php where to look to pick up the definitions we have just created, and this involves making changes to the following line:
require(DIR_WS_LANGUAGES . $language . ‘/’ . FILENAME_SHIPPING);
$breadcrumb->add(NAVBAR_TITLE, tep_href_link(FILENAME_SHIPPING));
Of course, these constants are the ones used for the shipping.php file, and are defined in the includes/filenames.php file. We need to make our own definitions for this file within the filenames.php file, so we open that up as well and add the following line to the bottom of the page:
define(‘FILENAME_FEED’, ‘feed.php’);
Save that change and then modify the feed.php file to pick up the includes/languages/english/feed.php file via the FILENAME_FEED constant, like so:
require(DIR_WS_LANGUAGES . $language . ‘/’ . FILENAME_FEED);
$breadcrumb->add(NAVBAR_TITLE, tep_href_link(FILENAME_FEED));
Now when you navigate to the feed page, it should have no traces of its former self left:
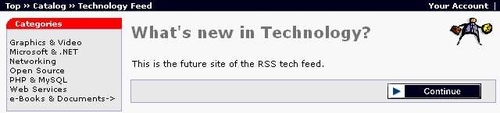
Notice that the bread crumb trail now reflects the fact that this is the technology-feed page, and the heading is being picked up via the constant instead of the original message typed directly into the file. With this done, the page is ready to be used as you wish, but we will only begin working on it later. The only thing left to do (if you wish) is add this page to the information bar. This can be done quite easily by a few simple modifications.
First, open up english.php in the Define Languages section of the admin tool, and make the following addition:
// information box text in includes/boxes/information.php
define(‘BOX_HEADING_INFORMATION’, ‘Information’);
define(‘BOX_INFORMATION_PRIVACY’, ‘Privacy Notice’);
define(‘BOX_INFORMATION_CONDITIONS’, ‘Conditions of Use’);
define(‘BOX_INFORMATION_SHIPPING’, ‘Shipping & Returns’);
define(‘BOX_INFORMATION_CONTACT’, ‘Contact Us’);
define(‘BOX_INFORMATION_FEED’, ‘Technology Feed’);
Save that and then in the includes/boxes/information.php file, make the following changes:
$info_box_contents[] = array(‘text’ => ‘<a href="’ . tep_href_link(FILENAME_SHIPPING) . ‘">’ . BOX_INFORMATION_SHIPPING . ‘</a><br>’ .
‘<a href="’ . tep_href_link(FILENAME_PRIVACY) . ‘">’ . BOX_INFORMATION_PRIVACY . ‘</a><br>’ .
‘<a href="’ . tep_href_link(FILENAME_CONDITIONS) . ‘">’ . BOX_INFORMATION_CONDITIONS . ‘</a><br>’ .
‘<a href="’ . tep_href_link(FILENAME_CONTACT_US) . ‘">’ . BOX_INFORMATION_CONTACT . ‘</a><br>’ . ‘<a href="’ . tep_href_link(FILENAME_FEED, ‘’, ‘NONSSL’) . ‘">’ . BOX_INFORMATION_FEED . ‘</a>’
Now when you view the Information box in your browser, you get the following:
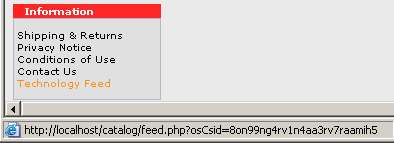
Notice that the status bar at the bottom of the screen shows that the highlighted link Technology Feed will take the customer to the feed.php file as expected. What you actually use the page for now is entirely up to you, but the process is the same for any page added.
Emails are an important interface between the customer and your business, and of course you will need to make some changes here and there to suit your site. Several different types of emails can be sent out from your store. These are the purchase confirmation, tell a friend, and welcome emails as well as the newsletters. The first three are very easy to change by simply editing them in the Language Definitions section of the admin tool—the files to modify are checkout_process.php, tell_a_friend.php, and create_account.php respectively.
The newsletter is slightly different in that you work with it through the Newsletter Manager in the admin tool. Using the tool is pretty easy; simply click on New Newsletter and add the information you want. You can choose one of two types of newsletter modules by default from the drop-down list in the New Newsletter editor. Choosing newsletter makes life simple because the store already knows which customers have chosen to receive the newsletter. Once you have written it out, you can preview, edit, delete, or send it provided it is locked. If it is unlocked, you can only preview or lock it; you can’t change it in any way.
If you choose product_notification, then you need to inform osCommerce which product(s) this notification is linked to so that it can send it off to the right people. As a result, when you click on send, you are brought to the following page:
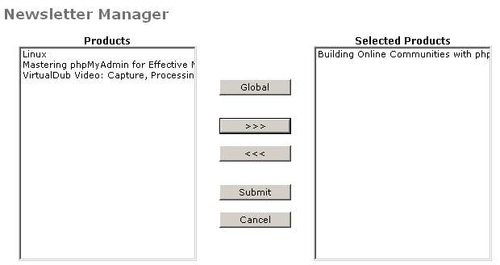
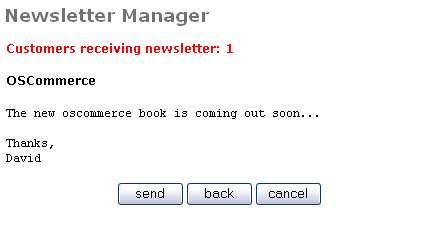
From here, you can select which products this notification is linked to—there is also a Global option to send it to all if need be. Once you have made your choices and clicked on submit, you will get the following confirmation screen, which you can use to check everything one last time before sending it out:
Of course, you may not always be happy sending out plain text emails. What happens if you would like to start sending out images of your new products in a monthly newsletter? The answer is to simply go along to the contributions section and add a WYSIWYG (What You See Is What You Get) editor for your newsletters. One package that you might want to look at, to begin with, is the MS2 HTML WYSIWYG Editor, Product Desc, Email + contribution, which can be found in the Features section or with a search on the term newsletter.