
Most games need text—at the very least to display a score or menu.
Text rendering is also very useful for rendering out variable values as the game is running. A basic font system can be made very simply; each letter and number is represented as a sprite. Then a string of text is translated into a list of sprites. This method is easy to extend to any language, though Asian languages such as Chinese will need a larger number of textures to account for all the different glyphs.
Figure 7.1 is a texture with the entire Roman alphabet, numbers, and some punctuation marks. This is a great base to use to draw text. Such textures are easy to create if the correct tools are used. An excellent tool for bitmap fonts is Andreas Jönsson’s Bitmap Font Generator, which is freely available on the internet and is also included on the CD in Apps folder. It can take a True Type font and generate a bitmap suitable for efficient rendering in a game. This is how the texture shown in Figure 7.1 was created. The font texture can be found on the CD in the Assets folder along with a data file that describes the U,V coordinates of the glyphs in the texture.

To display this font, I’ve created a new project with a new game state called TextTestState. I’ve added the font texture to the project as font.tga (you can find this on the CD in the Assets folder); this has also been loaded into the texture manager using the id font. Create a new sprite, set the new font texture as the texture, and render the font in the render loop.
class TextTestState : IGameObject
{
  Sprite _text = new Sprite();
  Renderer _renderer = new Renderer();
  public TextTestState(TextureManager textureManager)
  {
    _text.Texture = textureManager.Get("font");
  }
  public void Render()
  {
    Gl.glClearColor(0.0f, 0.0f, 0.0f, 1.0f);
    Gl.glClear(Gl.GL_COLOR_BUFFER_BIT);
    _renderer.DrawSprite(_text);
  }
  public void Update(double elapsedTime)
  {
  }
}
This displays the entire font in white on black. Change the clear color to confirm that the transparency is working correctly. Then uncomment the line with SetColor in it. This will turn the font black. It’s easy to change the font color using the sprite code.
To render a single character, the sprite must have its UV settings altered. Try entering the following UV information.
_text.Texture = textureManager.Get("font");
_text.SetUVs(new Point(0.113f, 0), new Point(0.171f, 0.101f));
This will display a giant dollar sign. It will be very large because the sprite size is still set to 256 by 256. The natural resolution of the dollar sign is 15 by 26 pixels. Change the height and width and something like Figure 7.2 will appear.
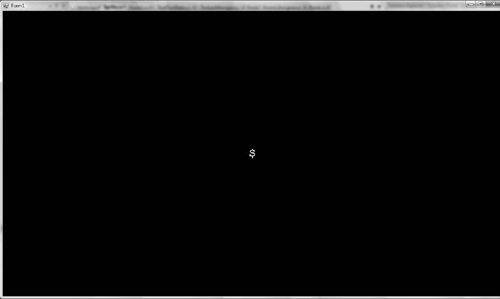
_text.SetUVs(new Point(0.113f, 0), new Point(0.171f, 0.101f));
_text.SetWidth(15);
_text.SetHeight(26);
This UV data forms a small box around the dollar sign and allows it to be clearly cut out, as shown in Figure 7.3. The information about the location of each character in the texture map was generated by the Bitmap Font Program when the texture was generated. This information can be used to get the correct UVs.

The font data is a simple text file that is used to identify all the characters in the texture. It is supplied on the CD and should be added to the font project in the same way the texture was added. Remember to set its properties to ensure it’s copied to the build directory. Here are the first few lines of the data file.
info face="Courier New" size=-32 bold=1 italic=0 charset="" unicode=1
stretchH=100 smooth=1 aa=1 padding=0,0,0,0 spacing=1,1 outline=0
common lineHeight=36 base=26 scaleW=256 scaleH=256 pages=1 packed=0
alphaChnl=0 redChnl=0 greenChnl=0 blueChnl=0
page id=0 file="font_0.tga"
chars count=95
char id=32 x=253 y=21  width=1  height=1  xoffset=0  yoffset=26
xadvance=19  page=0 chnl=15
char id=33 x=247 y=21  width=5  height=20 xoffset=7  yoffset=6
xadvance=19  page=0 chnl=15
char id=34 x=136 y=101 width=9 height=9  xoffset=4
The first three lines are header information and can be ignored. They contain information describing the font—that its size is 32 and its type is Courier New. This is all information our font system doesn’t need to know.
The fourth line is how many characters are contained in the font file; in this case there are 95 characters. After this line you see information about every character, its pixel position in the texture, and its pixel width and height.
xoffset and yoffset are used to align the characters when rendered one after another in a word. The “y” character has a larger yoffset than an “l” character. The xadvance parameter represents the amount to advance on the x axis once the current character has been rendered. The page value is an index to a texture that contains the current character. We’ll only be using fonts that have a single texture so the page value can be safely ignored. The channel information can also be ignored; it is sometimes used for a compression technique where different characters are written into the different color channels.
The characters need to be read into a suitable class.
public class CharacterData
{
  public int Id { get; set; }
  public int X { get; set; }
  public int Y { get; set; }
  public int Width { get; set; }
  public int Height { get; set; }
  public int XOffset { get; set; }
  public int YOffset { get; set; }
  public int XAdvance { get; set; }
}
This CharacterData class is a simple collection of parameters that we’re interested in. One of these objects will be made per character in the data file.
The CharacterData class will be stored in a dictionary. The key to the dictionary will be the character they represent, as the following code shows.
CharacterData aData = _characterDictionary['a'];
Given a string, it’s easy to iterate through all the characters and get the relevant character data for each one. To fill this dictionary from the data file, a parser is needed. Here’s the code for a simple parser; when given a path to a font data file, it will return a dictionary filled with character data.
public class FontParser
{
  static int HeaderSize = 4 ;
  // Gets the value after an equal sign and converts it
  // from a string to an integer
  private static int GetValue(string s)
  {
    string value = s.Substring(s.IndexOf('=') + 1);
    return int.Parse(value);
  }
  public static Dictionary<char, CharacterData> Parse(string filePath)
  {
    Dictionary<char, CharacterData> charDictionary = new
Dictionary<char, CharacterData>();
    string[] lines = File.ReadAllLines(filePath);
    for(int i = HeaderSize; i < lines.Length; i+=1)
    {
     string firstLine = lines[i];
     string[] typesAndValues = firstLine.Split(" ".ToCharArray(),
       StringSplitOptions.RemoveEmptyEntries);
     // All the data comes in a certain order,
     // used to make the parser shorter
     CharacterData charData = new CharacterData
     {
       Id = GetValue(typesAndValues[1]),
       X = GetValue(typesAndValues[2]),
       Y = GetValue(typesAndValues[3]),
       Width = GetValue(typesAndValues[4]),
       Height = GetValue(typesAndValues[5]),
       XOffset = GetValue(typesAndValues[6]),
       YOffset = GetValue(typesAndValues[7]),
       XAdvance = GetValue(typesAndValues[8])
     };
     charDictionary.Add((char)charData.Id, charData);
    }
    return charDictionary;
  }
}
This parser is very simple and doesn’t do any error checking or validation. It requires the using System.IO statement to allow text files to be read from the disk. Each CharacterData structure is filled up and then its Id is cast to a character to use as the index. The Id is the ASCII number representing the character; casting the number to C#’s char type will convert it to the correct character.
Here is a high-level look at how the text system will work. A new state has been created that shows the font system in action.
class TextRenderState : IGameObject
{
  TextureManager _textureManager;
  Font _font;
  Text _helloWorld;
  Renderer _renderer = new Renderer();
  public TextRenderState(TextureManager textureManager)
  {
    _textureManager = textureManager;
    _font = new Font(textureManager.Get("font"),
     FontParser.Parse("font.fnt"));
    _helloWorld = new Text("Hello", _font);
  }
  public void Render()
  {
    Gl.glClearColor(0.0f, 0.0f, 0.0f, 1.0f);
    Gl.glClear(Gl.GL_COLOR_BUFFER_BIT);
    _renderer.DrawText(_helloWorld);
  }
  public void Update(double elapsedTime)
  {
  }
}
There are two new classes in use here. First is a Font class, which determines what font will be used. The Font class contains a reference to the font texture and the character data. The second class is the Text class that is used to render text. Several different fonts could be loaded in and it would be very easy to swap between them.
The Renderer has been given an extra method called DrawText. DrawText takes a text object and uses it to render text. The text class will just be a collection of sprites so the renderer can reuse its DrawSprite code.
There is another class that isn’t in the example; it’s a class to represent the individual characters in the bitmap text string. It’s called the CharacterSprite class and has only two members: one is the sprite representing the letter and one is a CharacterData class that has information about the character and how the sprite will be used.
public class CharacterSprite
{
  public Sprite Sprite {get; set;}
  public CharacterData Data { get; set; }
  public CharacterSprite(Sprite sprite, CharacterData data)
  {
    Data = data;
    Sprite = sprite;
  }
}
The Text class is a list of CharacterSprites. It is also responsible for ordering the letters. Given a simple text string, it creates a CharacterSprite for each character and orders them one after the other. It also handles the correct offsets. Here is the code.
public class Text
{
  Font _font;
  List<CharacterSprite> _bitmapText = new List<CharacterSprite>();
  string _text;
  public List<CharacterSprite> CharacterSprites
  {
    get { return _bitmapText; }
  }
  public Text(string text, Font font)
  {
    _text = text;
    _font = font;
    CreateText(0, 0);
  }
  private void CreateText(double x, double y)
  {
    _bitmapText.Clear();
    double currentX = x;
    double currentY = y;
    foreach (char c in _text)
    {
     CharacterSprite sprite = _font.CreateSprite(c);
     float xOffset = ((float)sprite.Data.XOffset) / 2;
     float yOffset = ((float)sprite.Data.YOffset) / 2;
     sprite.Sprite.SetPosition(currentX + xOffset, currentY - yOffset);
     currentX += sprite.Data.XAdvance;
     _bitmapText.Add(sprite);
    }
  }
}
The class is quite straightforward. The CreateText function is the heart of the class; it positions the character sprites correctly. For each sprite, the CharacterData is checked and the x position is advanced by the amount specified. Each character sprite also has an offset. All sprites are positioned around their center, but the offset values are taken from the top left. To convert this offset to a central position, the offset values are halved. As the offsets are integers, they need to be converted to floating point numbers before being divided. If the numbers aren’t cast to floats, then the floating point information is thrown away and the text letters won’t be aligned correctly.
The final class to consider is the Font class. The Font class holds the dictionary that translates a character into a CharacterData object. Given a word or sentence, all the letters can be used to index the dictionary and a set Char-acterData will be returned, ready to be used to create text sprites.
public class Font
{
  Texture _texture;
  Dictionary<char, CharacterData> _characterData;
  public Font(Texture texture, Dictionary<char, CharacterData>
characterData)
  {
    _texture = texture;
    _characterData = characterData;
  }
  public CharacterSprite CreateSprite(char c)
  {
    CharacterData charData = _characterData[c];
    Sprite sprite = new Sprite();
    sprite.Texture = _texture;
    // Setup UVs
    Point topLeft = new Point((float)charData.X / (float)_texture.Width,
               (float)charData.Y / (float)_texture.Height);
    Point bottomRight = new Point( topLeft.X + ((float)charData.Width /
(float)_texture.Width),
                               topLeft.Y +((float)charData.Height /
(float)_texture.Height));
    sprite.SetUVs(topLeft, bottomRight);
    sprite.SetWidth(charData.Width);
    sprite.SetHeight(charData.Height);
    sprite.SetColor(new Color(1, 1, 1, 1));

    return new CharacterSprite(sprite, charData);
  }
}
The U,V coordinates are provided in pixels, but OpenGL textures are indexed from 0 to 1. Pixels values are converted to OpenGL coordinates by dividing the x and y pixel coordinates by the width and height of the texture. The CharacterData numbers are all stored as integers and need to be cast to floats to get a result with decimal places when dividing. The height and width of the sprite is set using the CharacterData information, and the color is set to white as a default. Once the sprite is created, it is made into a CharacterSprite and returned.
The font code is now usable. An immediate use for text is an fps, frames per second, display. The fps will indicate how fast the game code is running. Frames per second is a measure of how often the game loop is executed per second. Modern games aim for a frame-rate of 30 or 60 frames per second. The number of frames per second is not the only factor contributing to smooth graphics; the consistency of the frame-rate is also important. A game that hovers around 60 fps but sometimes drops to 30 fps will appear more choppy than one that runs consistently at 30 fps.
Create and add a new game state to the project. I’ve chosen FPSTestState but the name doesn’t really matter. Make sure it’s added to the StateSystem and is the first state loaded by default. The state requires the TextureManager to be passed in to the constructor to create the font object. Here is the code to render some text:
class FPSTestState : IGameObject
{
  TextureManager _textureManager;
  Font _font;
  Text _fpsText;
  Renderer _renderer = new Renderer();
  public FPSTestState(TextureManager textureManager)
  {
    _textureManager = textureManager;
    _font = new Font(textureManager.Get("font"),
     FontParser.Parse("font.fnt"));
    _fpsText = new Text("FPS:", _font);
  }
  #region IGameObject Members
  public void Render()
  {
    Gl.glClearColor(0.0f, 0.0f, 0.0f, 1.0f);
    Gl.glClear(Gl.GL_COLOR_BUFFER_BIT);
    _renderer.DrawText(_fpsText);
  }
  public void Update(double elapsedTime)
  {
  }
  #endregion
}
Before the code can be tested, the DrawText call for the Renderer needs to be written. This will draw the text to the middle of the screen, which is fine for now. The DrawText method goes through the text and draws each sprite.
public void DrawText(Text text)
{
  foreach (CharacterSprite c in text.CharacterSprites)
  {
    DrawSprite(c.Sprite);
  }
}
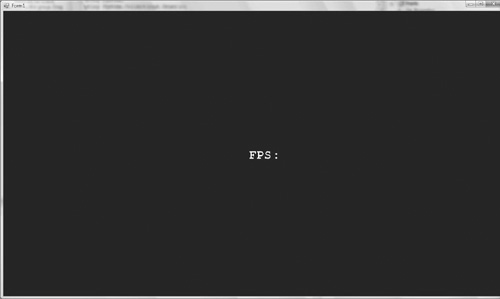
Once this is added to the renderer, running the code will render the text “FPS:” to the screen, as can be seen in Figure 7.4.
The frames per second is simple to calculate. The number of frames in a second need to be counted; then this number needs to be displayed to the screen. The higher the frame count, the faster your game is running. FPS is a useful statistic to have on screen because as you develop your game it’s easy to notice if, after adding a feature, the fps has suddenly dropped. Silly mistakes can be caught early and avoided.
To count the number of frames each time the game loops, a _numberOf-Frames variable can be increased by one. The elapsedTime in the update loop tells us how long each frame took; if all these elapsedTime values are summed, how much time has passed can be measured. Once a second has passed, then the _numberOfFrames is the number of frames that were rendered during that second. This can easily be wrapped up in a class, as shown here.
public class FramesPerSecond
{
  int _numberOfFrames = 0;
  double _timePassed = 0;
  public double CurrentFPS { get; set; }
  public void Process(double timeElapsed)
  {
    _numberOfFrames++;
    _timePassed = _timePassed + timeElapsed;
    if (_timePassed > 1)
    {
     CurrentFPS = (double)_numberOfFrames / _timePassed;
     _timePassed = 0;
     _numberOfFrames = 0;
    }
  }
}
This class calculates the frames per second. Its process method must be called every frame. Add FramesPerSecond to the FPSTestState so we can render this value to the screen using the Text class.
class FPSTestState : IGameObject
{
  TextureManager _textureManager;
  Font _font;
  Text _fpsText;
  Renderer _renderer = new Renderer();
  FramesPerSecond _fps = new FramesPerSecond();
  // Constructor and Render have been ommitted.
  public void Update(double elapsedTime)
  {
    _fps.Process(elapsedTime);
  }
}
When the state is run, the fps is now recorded. Generally, the FramesPerSecond class would not exist in a game state; instead, it probably would be in the Form class. In this case, it’s easier to test in the FPSTestState.
public void Render()
{
  Gl.glClearColor(0.0f, 0.0f, 0.0f, 1.0f);
  Gl.glClear(Gl.GL_COLOR_BUFFER_BIT);
  _fpsText = new Text("FPS: " + _fps.CurrentFPS.ToString("00.0"), _font);
  _renderer.DrawText(_fpsText);
}
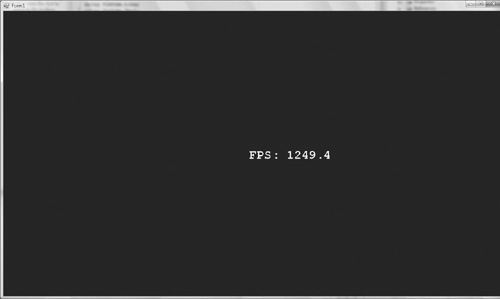
The render loop renders the text “FPS:” followed by the fps value converted to a string. The ToString method is given some formatting information. This causes the double that represents the fps to only have one decimal place when in string form and to have two or more digits before the decimal point.
Run the program and see what your frame-rate is. Frame-rates differ wildly from computer to computer. There’s not very much going on in the program, so the frame-rate is going be quite high. Figure 7.5 shows the output when running the program.
Initially the frame-rate displayed on my computer was about 60 frames per second. This was because I had V-Sync turned on under my display settings. Turning V-Sync off will give a better indication of the frames per second.
V-Sync is short for vertical synchronization. The computer screen refreshes a certain number of times a second. V-Sync is an option that ensures that the frame buffer is filled only as fast as the screen can read it. This prevents artifacts like tearing, where the frame buffer changes as the data is being written to the screen causing a visual tearing effect.
On some cards, V-Sync is turned on by default. V-Sync is the refresh rate of the monitor (how often the monitor updates its display). If your monitor refreshes at 60Hz and V-Sync is on, then your fps counter will never exceed 60fps. This is fine most of time, but when developing a game and profiling the frame-rate, it’s important to not have the frame-rate locked. It can usually be turned off through the video card settings, but the exact method for disabling V-Sync differs from card to card.
The fps counter can be used for some basic profiling. The game is currently rendering about ten textured quads with color information (the fps text). A 2D game might use a quad per tile and quads for the player and game enemies. Let’s be very generous and assume many particle systems, say, 10,000 quads. That’s a lot of quads to be on screen at one time and should be okay for most games. A rough test can be done to see if the current sprite can handle this many quads.
renderer.DrawText(_fpsText);
for (int i = 0; i < 1000; i++)
{
  _renderer.DrawText(_fpsText);
}
This renders the fps text 1,000 times. That’s about 10,000 quads total. On my computer, the fps goes from 1,000 plus to just over 30. Thirty is fine for most 2D games. This means most 2D games will probably be fine with the current efficiency of the sprite code. Computers with older graphics cards may not fair so well, so some efficiency measures will be covered toward the end of this chapter.
The text class is quite functional now, but it could do with some more methods that will make it easier to use. For instance, there is no way to set the position of a text string. There really needs to be a way to measure the text so it can be aligned. Also, text often needs to be constrained to columns. This can be achieved by giving the text a maximum width. If the text overflows this width, it will be wrapped on the next line. This is a very desirable feature, especially when filling a text box in a game.
Here’s the helper method to set the Text position.
public void SetPosition(double x, double y)
{
  CreateText(x, y);
}
To reposition the text, the quads are simply recalculated. This isn’t the most optimal way, but it’s very simple to code and highly unlikely to ever cause a bottleneck in game programming.
A function to alter the color of the entire text would also make things more convenient.
public void SetColor(Color color)
{
  _color = color;
  foreach (CharacterSprite s in _bitmapText)
  {
    s.Sprite.SetColor(color);
  }
}
In this snippet, the Text has a color member; this stores this current color of the text. When CreateText is called, all the vertices are remade including the color component. With the current color stored in the text class, the vertices can be remade maintaining the Text color. An overloaded SetColor function is added (doesn’t require a color parameter) for use in the CreateText function.
public void SetColor()
{
  foreach (CharacterSprite s in _bitmapText)
  {
    s.Sprite.SetColor(_color);
  }
}
At the end of the CreateText function, an extra line needs to be added
SetColor();
The width and height of the text is very important when trying to align text on the screen; therefore, a way to measure a text string in pixels would be useful. A MeasureText method in the Font class will give this functionality.
public Vector MeasureFont(string text)
{
  return MeasureFont(text, -1);
}
public Vector MeasureFont(string text, double maxWidth)
{
  Vector dimensions = new Vector();
  foreach (char c in text)
  {
    CharacterData data = _characterData[c];
    dimensions.X += data.XAdvance;
    dimensions.Y = Math.Max(dimensions.Y, data.Height + data.YOffset);
  }
  return dimensions;
}
There are two MeasureFont methods: the first method is an overload that doesn’t require a maximum width parameter, and the second is where all the measurement happens.
A vector is returned containing the width and height as the X and Y values. The Z component isn’t used. It’s returned as a vector, rather than some other data structure such as PointF because vectors store doubles and that’s how position is stored. The width and height is going to be mostly used to alter the position of other pieces of text or sprites; doubles mean no casting needs to be done. Vectors are also easy to scale and transform.
The text is measured by iterating through the character data and adding up the X advance to get the width for the entire string. The height of the string is the height of the tallest character.
Rather than calculate the width and height every time they are needed, it’s more convenient to store these dimensions in the Text class.
public class Text
{
  Font _font;
  List<CharacterSprite> _bitmapText = new List<CharacterSprite>();
  string _text;
  Vector _dimensions;
  public double Width
  {
    get { return _dimensions.X; }
  }
  public double Height
  {
    get { return _dimensions.Y; }
  }
}
The dimension member needs to be updated every time the text is changed. There is only one place in the code where the text gets changed: the CreateText method.
private void CreateText(double x, double y)
{
  _bitmapText.Clear();
  double currentX = x;
  double currentY = y;
  foreach (char c in _text)
  {
    CharacterSprite sprite = _font.CreateSprite(c);
    float xOffset = ((float)sprite.Data.XOffset) / 2;
    float yOffset = ((float)sprite.Data.YOffset) / 2;
    sprite.Sprite.SetPosition(currentX + xOffset, currentY - yOffset);
    currentX += sprite.Data.XAdvance;
    _bitmapText.Add(sprite);
  }
  _dimensions = _font.MeasureFont(_text);
  SetColor();
}
One more line is added at the end to measure the size of the string. To confirm this works, try centering the fps text, or render the fps text twice in a row, or twice in a column.
The final functionality to be added to the text class is the ability to set a max width. This will cause very long sentences to be wrapped onto a new line. This is very useful when attempting to keep text in a textbox or ensuring text doesn’t go off the edge of the screen. Try to work through what the algorithm would need to do to format text with a max width.
Split the text into words.
Get the next word in the text.
Measure the length of the word.
If the current length is greater than the max width, start a new line.
The Text class needs to redefine the CreateText method to handle a maximum width parameter.
private void CreateText(double x, double y)
{
 CreateText(x, y, _maxWidth);
}
private void CreateText(double x, double y, double maxWidth)
{
  _bitmapText.Clear();
  double currentX = 0;
  double currentY = 0;
  string[] words = _text.Split(' '),
  foreach (string word in words)
  {
    Vector nextWordLength = _font.MeasureFont(word);
    if (maxWidth != -1 &&
     (currentX + nextWordLength.X) > maxWidth)
    {
     currentX = 0;
     currentY += nextWordLength.Y;
    }
    string wordWithSpace = word + " "; // add the space character that was
removed.
    foreach (char c in wordWithSpace)
    {
     CharacterSprite sprite = _font.CreateSprite(c);
     float xOffset = ((float)sprite.Data.XOffset) / 2;
     float yOffset = (((float)sprite.Data.Height) * 0.5f) +((float)
sprite.Data.YOffset);
     sprite.Sprite.SetPosition(x + currentX + xOffset, y - currentY -
yOffset);
     currentX += sprite.Data.XAdvance;
     _bitmapText.Add(sprite);
    }
  }
  _dimensions = _font.MeasureFont(_text, _maxWidth);
  _dimensions.Y = currentY;
  SetColor(_color);
}
This code relies on a _maxWidth member. If _maxWidth equals –1 then no wrapping is done. Otherwise, the text is wrapped for the number of pixels specified in the _maxWidth value. Here’s an extra constructor that will take in a maximum width.
int _maxWidth = -1;
public Text(string text, Font font) : this(text, font, -1) { }
public Text(string text, Font font, int maxWidth)
{
  _text = text;
  _font = font;
  _maxWidth = maxWidth;
  CreateText(0, 0, _maxWidth);
}
Figure 7.6 shows text being wrapped using the new maxWidth parameter. It’s generated with the following piece of code.
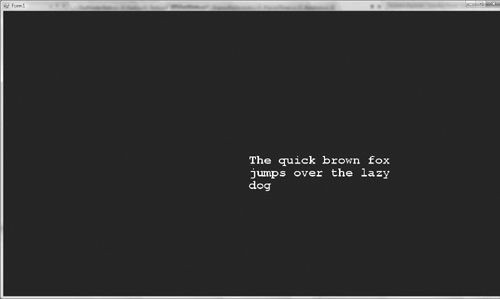
Text longText = new Text("The quick brown fox jumps over the lazy dog",
  _font, 400);
_renderer.DrawText(longText);
This word wrapping code doesn’t take account of new line characters or tab characters, but it wouldn’t be hard to extend it.
All the basic functionality to make the text class very usable has now been added. Another good feature to add would be a scale; this would scale the text up and down by a given amount.
longText.SetScale(0.5); // this would halve the text size
The MeasureText method could also be extended to take in a maxWidth parameter. This way even if text is wrapped the width and height can be correctly calculated.
Basic profiling using the frames per second count has shown that for 2D games, the current code isn’t that bad. But with only small changes, the performance can be vastly improved.
public void DrawSprite(Sprite sprite)
{
  Gl.glBegin(Gl.GL_TRIANGLES);
  {
    for (int i = 0; i < Sprite.VertexAmount; i++)
    {
     Gl.glBindTexture(Gl.GL_TEXTURE_2D, sprite.Texture.Id);
     DrawImmediateModeVertex(
       sprite.VertexPositions[i],
       sprite.VertexColors[i],
       sprite.VertexUVs[i]);
    }
  }
  Gl.glEnd();
}
This is the current render code. It is executed once for each sprite. The problem with the above code is that every time glEnd is called, everything is sent to the graphics card and then the CPU stops; it does nothing until the graphics card sends back a message saying it received all the vertices. With 10,000 sprites, that mounts up to a lot of waiting. The more draw calls, the slower the game will run.
The solution to this problem is to draw as much as possible at once. Generally, this is known as batching. Instead of the CPU talking to the GPU like “Draw this, now draw this sprite, now draw this sprite,” it instead makes a list of all the sprites and says to the GPU, “Draw all these sprites.” There is a lot less waiting so the code is a lot faster. With the way the code is laid out, only a few changes need to be made to get this performance increase.
A new class is needed to collect all the vertex information before sending it to the graphics card. A good name for this class is Batch. The Batch will take the sprites and pack all the vertex information together in some big arrays. It then gives OpenGL pointers to these arrays and sends a draw command. This new class will use the Tao framework so remember to include the proper using statements.
public class Batch
{
  const int MaxVertexNumber = 1000;
  Vector[] _vertexPositions = new Vector[MaxVertexNumber];
  Color[] _vertexColors   = new Color[MaxVertexNumber];
  Point[] _vertexUVs    = new Point[MaxVertexNumber];
  int _batchSize = 0;
  public void AddSprite(Sprite sprite)
  {
    // If the batch is full, draw it, empty and start again.
    if (sprite.VertexPositions.Length + _batchSize > MaxVertexNumber)
    {
      Draw();
    }
    // Add the current sprite vertices to the batch.
    for (int i = 0; i < sprite.VertexPositions.Length; i++)
    {
      _vertexPositions[_batchSize + i] = sprite.VertexPositions[i];
      _vertexColors[_batchSize + i]   = sprite.VertexColors[i];
      _vertexUVs[_batchSize + i]   = sprite.VertexUVs[i];
    }
    _batchSize += sprite.VertexPositions.Length;
  }
}
The max vertex number is how big a batch is allowed to get before it tells OpenGL to render all the vertices it has. The next members are the arrays that describe all the vertex information: its position, color, and U,V coordinates. The _batchSize member tracks how big the batch is becoming. This information needs to be passed on to OpenGL to draw the arrays. It’s also compared with the max vertex number to decide when to draw the batch.
The batch collects Sprites and the function it uses to do this is AddSprite. AddSprite first checks if adding this sprite will make the batch too big. If that’s the case, it forces the current batch to be drawn and emptied. The sprite vertex information is then iterated through and added to the batch arrays.
Two more functions handle the drawing of the batch.
const int VertexDimensions = 3;
const int ColorDimensions = 4;
const int UVDimensions = 2;
void SetupPointers()
{
  Gl.glEnableClientState(Gl.GL_COLOR_ARRAY);
  Gl.glEnableClientState(Gl.GL_VERTEX_ARRAY);
  Gl.glEnableClientState(Gl.GL_TEXTURE_COORD_ARRAY);
  Gl.glVertexPointer(VertexDimensions, Gl.GL_DOUBLE, 0,
_vertexPositions);
  Gl.glColorPointer(ColorDimensions, Gl.GL_FLOAT, 0, _vertexColors);
  Gl.glTexCoordPointer(UVDimensions, Gl.GL_FLOAT, 0, _vertexUVs);
}
public void Draw()
{
  if (_batchSize == 0)
  {
    return;
  }
  SetupPointers();
  Gl.glDrawArrays(Gl.GL_TRIANGLES, 0, _batchSize);
  _batchSize = 0;
}
The Draw function is the more important of the two here. If the batch is empty, the Draw function does nothing. Otherwise, it calls the SetupPointers function. SetupPointers first describes the vertex format using glEnableClient-State. In this case, the vertex described has color, position, and U,V information. Once this is done, OpenGL is told where this information exists using the glPointer calls.
All glPointer calls are of the same general format. The first argument is the number of elements. The glVertexPointer controls the position and has three elements; one each for X, Y, and Z. Texture is defined with two elements, one for U and one for V. Color is defined by four elements: red, green, blue, and alpha. These pointers will be used by OpenGL to fetch the graphics information that it’s going to render.
The pointers need to point to the memory address at the start of each of the arrays. The memory from that point on will be read sequentially. It then uses the dimension information to decide when to stop reading the memory. This is why the Vector, Color, and Point structures each have the [StructLayout (LayoutKind.Sequential)] attribute in their definitions. The order of their members is very important; swap them around and the rendering won’t work as expected.
To tell OpenGL to read from these pointers and render the data, the execution is returned to the Draw method. The glDrawArrays method is called; this takes in a type, a stride, and the number of vertices to draw. The type is GL_TRIANGLES, as each sprite is made from two triangles and this is how the vertex information should be interpreted. The stride is zero. The stride is how much memory to skip after reading each vertex. Sometimes for efficiency reasons different vertex information is all packed together in one continuous stretch of memory. The stride ensures the irrelevant bits can be skipped over. In the batch, all the data is relevant so no stride is needed. The final argument is how many vertices are to be rendered; this information has been recorded in the _batch-Size member.
The final command in Draw is to reset the _batchSize. The data in the arrays doesn’t need to be emptied as none of it will be drawn without overwriting it with new sprite data.
Batched drawing has a little more setup than using glBegin and glEnd, but it’s not that much more complicated. The final task is to replace the old glBegin, glEnd rendering in the Renderer with the new batch method.
class Renderer
{
  Batch _batch = new Batch();
  public void DrawSprite(Sprite sprite)
  {
    _batch.AddSprite(sprite);
  }
  public void Render()
  {
    _batch.Draw();
  }
}
Converting the renderer class is very simple: a Batch object is added as a member, and sprites are added to this when drawn. There is one additional method called Render, which has been added; this needs to be called every frame. If there is anything left in the batch that hasn’t been drawn by the end of the frame, then Render will ensure it gets drawn.
The Renderer currently doesn’t handle different textures very well. As all the sprites are drawn in a big batch, all the sprites in that batch must have the same texture. An easy way to handle this is to do a texture check each addition, and if the texture is different draw the batch.
Text will render just as before, but now it will be faster. If the previous example of rendering around 10,000 sprites is repeated, the frame-rate on my computer jumps from around 30 fps to over 80 fps—a significant increase. This will mean older computers will be much more likely to run smoothly.