
The SpriteBuilder project uses an older version of the Cocos2d-ObjC project. So, to add 2D lighting, let's take a look at how to download the latest version of Cocos2d-ObjC from GitHub to create a project.
The same code will work with project, which is created with SpriteBuilder; however, in this case, we need to make sure we change the code so that MainScene subclasses CCScene instead of CCNode.
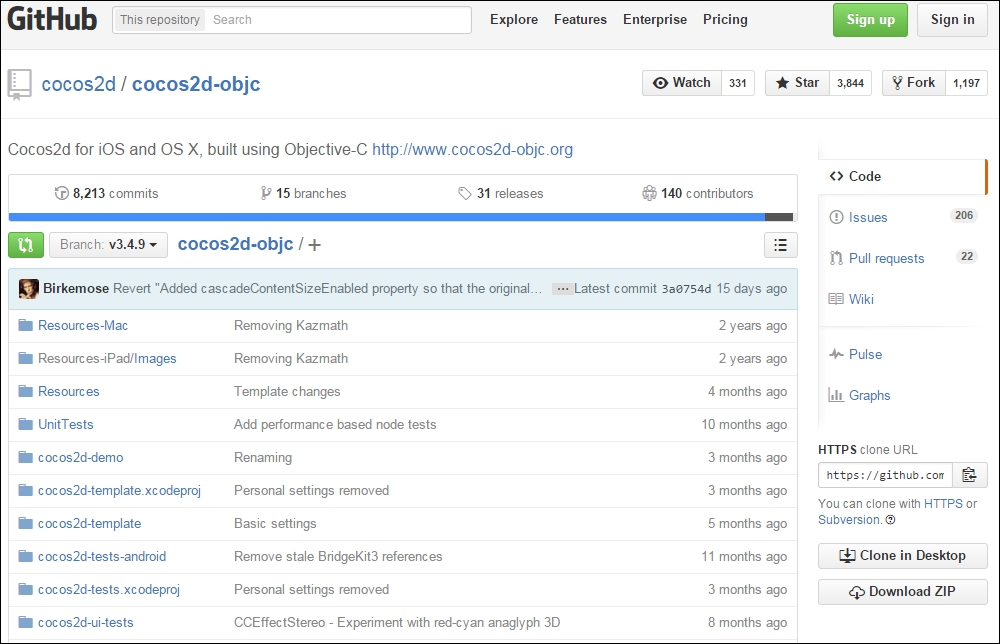
The project setup can be downloaded from the following link from GitHub:
https://github.com/cocos2d/cocos2d-objc
Click on the Download ZIP link to download the ZIP file.
Once the file is downloaded, extract the files onto the desktop.
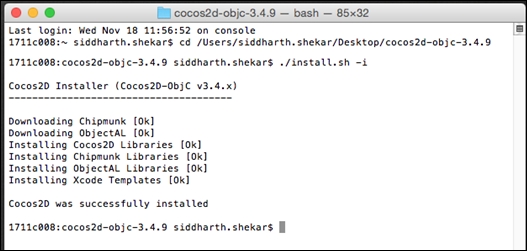
Next, open up a terminal within the extracted folder as we will write a small command that will run a script, which will enable us to create a Cocos2d 3.0 project using Xcode.
Once the terminal is open, type the following command:
./install.sh -i
The command will run, and it will download the necessary libraries and install the Cocos2d 3.0 Xcode template.
Now, if you open Xcode, you will see that you get a new option of creating a new Cocos2d 3.0 project.
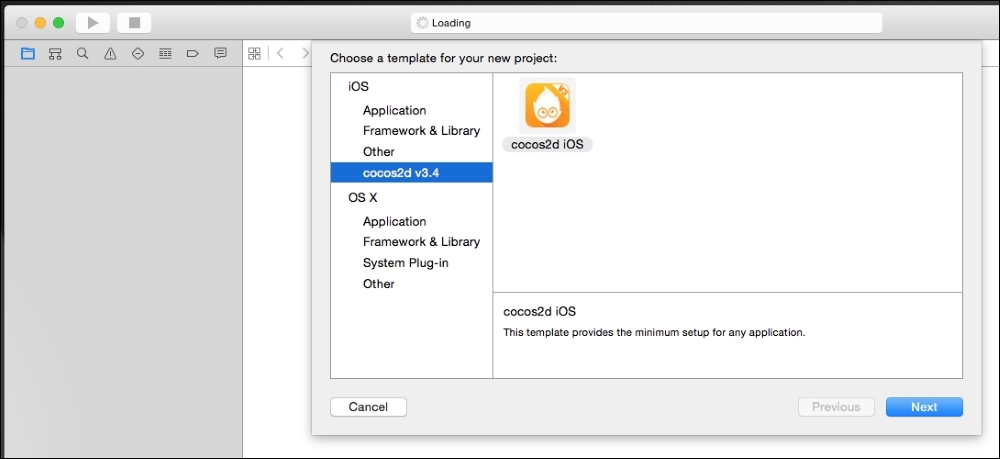
Select a location to create a new project that is convenient for you. Next, navigate to the folder and double-click on the project's file to open the project.
You will see that the folder structure is different from a project created with SpriteBuilder. Also, instead of the MainScene.h and MainScene.m files, you will see the HelloWorldScene.h and HelloWorldScene.m files.
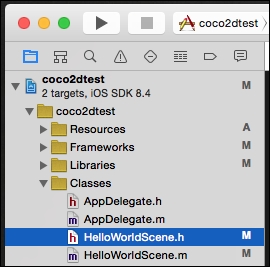
Don't be alarmed if you copy the code from the MainScene.h and MainScene.m SpriteBuilder projects into the HelloWorldScene.h and HelloWorldScene.m files and the code works without any changes.
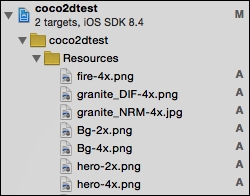
Well, this is not completely true. In the case of the projects created with the GitHub source, the images have to be labeled differently for them to work properly.
If you open the AppDelegate.m file, you will see the suffixes that need to be present for the images for different platforms. Then, you need to run the following code:
    [CCFileUtils sharedFileUtils].suffixesDict = [[NSMutableDictionary alloc]
      initWithObjectsAndKeys:
      @"-2x", CCFileUtilsSuffixiPad,
      @"-4x", CCFileUtilsSuffixiPadHD,
      @"-1x", CCFileUtilsSuffixiPhone,
      @"-1x", CCFileUtilsSuffixiPhoneHD,
      @"-1x", CCFileUtilsSuffixiPhone5,
      @"-2x", CCFileUtilsSuffixiPhone5HD,
      @"", CCFileUtilsSuffixDefault,
      nil];
So, in the project's file, rename the images to have the proper suffixes, as follows:
Now, this is all done. We can finally add the code into the init function in the HelloWorldScene.m file to make the lighting work, as follows:
CCLightNode* _lightNode = [CCLightNode lightWithType:CCLightPoint
  groups:nil
  color:[CCColor colorWithRed:1.0f green:1.0f blue:1.0f]
  intensity:0.5f
  specularColor:[CCColor colorWithRed:1.0f green:1.0f blue:1.0f]
  pecularIntensity:0.5f
   ambientColor:[CCColor colorWithRed:1.0f green:1.0f blue:1.0f]
  ambientIntensity:0.5f];

  [self addChild:_lightNode];
We will make sure the hero sprite and background sprite are also added to the scene by executing the following code:
    //Basic CCSprite - Background Image
    CCSprite* backgroundImage = [CCSprite spriteWithImageNamed:@"Bg.png"];
    backgroundImage.position = CGPointMake(winSize.width/2, winSize.height/2);
    [self addChild:backgroundImage];

    //hero sprite
    hero = [CCSprite spriteWithImageNamed:@"hero.png"];
    hero.position = CGPointMake(winSize.width/4, winSize.height/2);
    [self addChild:hero];
To see that the rest of the code and effects are also working, the HelloWorldScene.h and HelloWorldScene.m files should look similar to the following.
First, we will add the following to HelloWorldScene.h:
//HelloWorldScene.h

#import <Foundation/Foundation.h>
#import "cocos2d.h"
#import "cocos2d-ui.h"

// -----------------------------------------------------------------------

@interface HelloWorldScene : CCScene{


  CCSprite* hero;
  CCMotionStreak* streak;


}

// -----------------------------------------------------------------------

- (instancetype)init;
- (void)update:(CCTime)delta;
// -----------------------------------------------------------------------

@end
Next, add the following to the HelloWorldScene.m file. Here, we will first import the CCEffectLighting header file as it is required:
// HelloWorldScene.m

// -----------------------------------------------------------------

#import "HelloWorldScene.h"

#import "CCEffectLighting.h"

// -----------------------------------------------------------------------

@implementation HelloWorldScene

// -----------------------------------------------------------------------

- (void)onEnter {

  [super onEnter];
  self.userInteractionEnabled = YES;
}

- (void)onExit {

  [super onExit];
  self.userInteractionEnabled = NO;
}
In the init function, we will add the background image, hero, crystal image, and effects via the following:
- (id)init
{
  // Apple recommend assigning self with supers return value
  self = [super init];

  // The thing is, that if this fails, your app will 99.99% crash anyways, so why bother
  // Just make an assert, so that you can catch it in debug
  NSAssert(self, @"Whoops");

  // Background

  /*
  CCSprite9Slice *background = [CCSprite9Slice spriteWithImageNamed:@"white_square.png"];
  background.anchorPoint = CGPointZero;
  background.contentSize = [CCDirector sharedDirector].viewSize;
  background.color = [CCColor grayColor];
  [self addChild:background];
  */
  // The standard Hello World text
  CCLabelTTF *label = [CCLabelTTF labelWithString:@"Hello World" fontName:@"ArialMT" fontSize:64];
  label.positionType = CCPositionTypeNormalized;
  label.position = (CGPoint){0.5, 0.5};
  [self addChild:label];


  CGSize winSize = [[CCDirector sharedDirector]viewSize];
  CGPoint center = CGPointMake(winSize.width/2, winSize.height/2);

  //self.contentSize = winSize;

  //Basic CCSprite - Background Image
  CCSprite* backgroundImage = [CCSprite spriteWithImageNamed:@"Bg.png"];
  backgroundImage.position = CGPointMake(winSize.width/2, winSize.height/2);
  [self addChild:backgroundImage];

  //hero sprite
  hero = [CCSprite spriteWithImageNamed:@"hero.png"];
  hero.position = CGPointMake(winSize.width/4, winSize.height/2);
  [self addChild:hero];


  //crystal sprite
  CCSprite* crystal = [CCSprite spriteWithImageNamed:@"granite_DIF.png"];
  crystal.position = CGPointMake(winSize.width/2, winSize.height/2);
  [self addChild:crystal];
  crystal.normalMapSpriteFrame = [CCSpriteFrame frameWithImageNamed:@"granite_NRM.jpg"];

  //bloom, blur, brightness, ColorChannelOffset, Contrast, DropShadow
  //Hue, lighting, pixelate, reflection, refraction, saturation, Stack

  //** bloom
  //hero.effect = [CCEffectBloom effectWithBlurRadius:2 intensity: 0.5f luminanceThreshold: 0.5f];

  //** blur
  //hero.effect = [CCEffectBlur effectWithBlurRadius:2];

  //** brightness
  //hero.effect = [CCEffectBrightness effectWithBrightness:0.5f];

  //** dropshadow
  hero.effect = [CCEffectDropShadow effectWithShadowOffset:GLKVector2Make(0.5f, 0.5f)
    shadowColor: [[CCColor alloc]initWithRed:1.0f green:0.0f blue:0.0f]
    blurRadius: 1];

  //** pixellate -
  //hero.effect = [CCEffectPixellate effectWithBlockSize:2.0f];

  //** Glass effect

  CCEffectGlass* glassEffect = [CCEffectGlass effectWithShininess:1.0f
    refraction:1.0f
    refractionEnvironment:backgroundImage
  reflectionEnvironment:backgroundImage];

  crystal.effect = glassEffect;


  CCLightNode* _lightNode = [CCLightNode lightWithType:CCLightPoint
    groups:nil
    color:[CCColor colorWithRed:1.0f green:1.0f blue:1.0f]
    intensity:0.5f
    specularColor:[CCColor colorWithRed:1.0f green:1.0f blue:1.0f]
    specularIntensity:0.5f
    ambientColor:[CCColor colorWithRed:1.0f green:1.0f blue:1.0f]
    ambientIntensity:0.5f];

  [self addChild:_lightNode];

  _lightNode.position = CGPointMake(winSize.width/4, winSize.height/2);

  hero.effect = [CCEffectLighting effectWithGroups:nil
    specularColor:[CCColor colorWithRed:1.0f green:1.0f blue:1.0f]
    shininess:1.0f];


  //** Motion Streak
    streak = [CCMotionStreak streakWithFade:1.0f
    minSeg:20
    width:10.0f
    color:[CCColor colorWithRed:1.0f green:1.0f blue:1.0f]
    textureFilename:@"hero.png"];
  [self addChild:streak];


  CCParticleFire* fire = [[CCParticleFire alloc]initWithTotalParticles:20];
  fire.position = CGPointMake(winSize.width * 3/4, winSize.height/2);
  [self addChild:fire];

  // done
  return self;
}
In the update function, we will set the position of the streak the same as that of the hero. For this, we will use the following code:
- (void)update:(CCTime)delta{

  CCLOG(@"update");

  [streak setPosition:hero.position];
}
Finally, in the touches function, we will set the touch location of the hero to the location of the touch, as follows:
- (void)touchBegan:(CCTouch *)touch withEvent:(CCTouchEvent *)event
{
  // touch moved only works with touchBegan present

}


- (void)touchMoved:(CCTouch *)touch withEvent:(CCTouchEvent *)event
{
  CGPoint touchLocation = [touch locationInNode:self];

  // set positions for light and emitters
  hero.position = touchLocation;

}

- (void)touchEnded:(CCTouch *)touch withEvent:(CCTouchEvent *)event
{


}

// -----------------------------------------------------------------------

@end