The first order of business will be creating a project file for SpaceCraze. If you have worked with Cocos2d-x before, you know that earlier we had to use separate scripts and batch files to create projects for the various platforms supported by the engine. It was a cumbersome task at that. So, the brilliant guys from the Cocos2d-x community have come up with a unified solution that will create all your required project files in one shot. They call it, quite simply, the project-creator tool.
You can find project-creator inside the tools folder of Cocos2d-x. In the project-creator folder, you will find a Python executable by the name of create_project.py. This is the executable that we will use to create a cross-platform Cocos2d-x project. As a prerequisite, you will need Python installed on your machine before running create_project.py. The script has instructions on how it should be used but I will go over it just this once.
To create a cross-platform Cocos2d-x project, follow these steps:
- Navigate to the
project-creatorfolder by typing the following command into the terminal:cd PATH_TO_COCOS2DX/tools/project-creator/Here,
PATH_TO_COCOS2DXis the location of Cocos2d-x on your filesystem. - To create your project, type the following command into the terminal:
./create_project.py -project SpaceCraze -package com.karanseq.SpaceCraze -language cpp
You specified the project name, package name, and programming language for this project in the preceding steps—SpaceCraze, com.karanseq.SpaceCraze, and cpp, respectively. If you did everything right, your terminal window should look something like this:
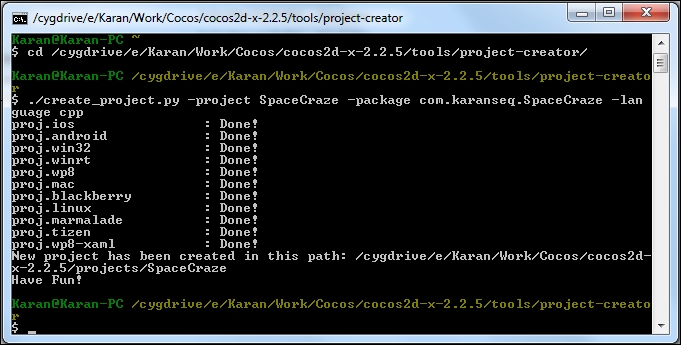
So, we've used the brilliantly written script to create our first Cocos2d-x project. You must have noticed the number of platforms you can deploy to! Notice how the newly-created project is placed inside the projects folder within Cocos2d-x-2.2.5. When you download the source code for this chapter and subsequent Cocos2d-x chapters, be sure to place the project inside the projects folder. It may not exist when you first set up the engine; in that case, you should simply create it.