The Tiled Map Editor (http://www.mapeditor.org/) is a free, flexible, general purpose tile map editor. This editor can be used to create levels for any kind of game—be it a full-scale RPG/RTS game, a Breakout clone, or a platformer (like in our case). At the time of writing this chapter, the latest version of Tiled is 0.10.2 and it is the Qt version of the same. You can choose to opt for the Java one and that works fine as well.
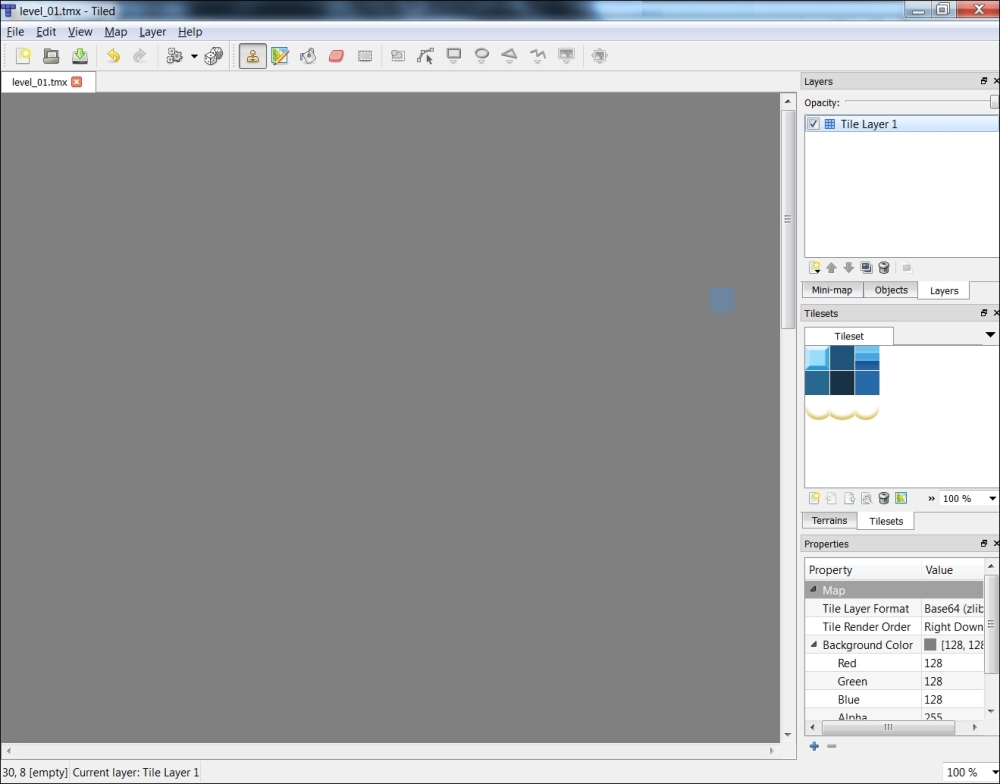
Once you have visited the preceding link and downloaded the appropriate version for your development environment, start Tiled and you will see a window like this:
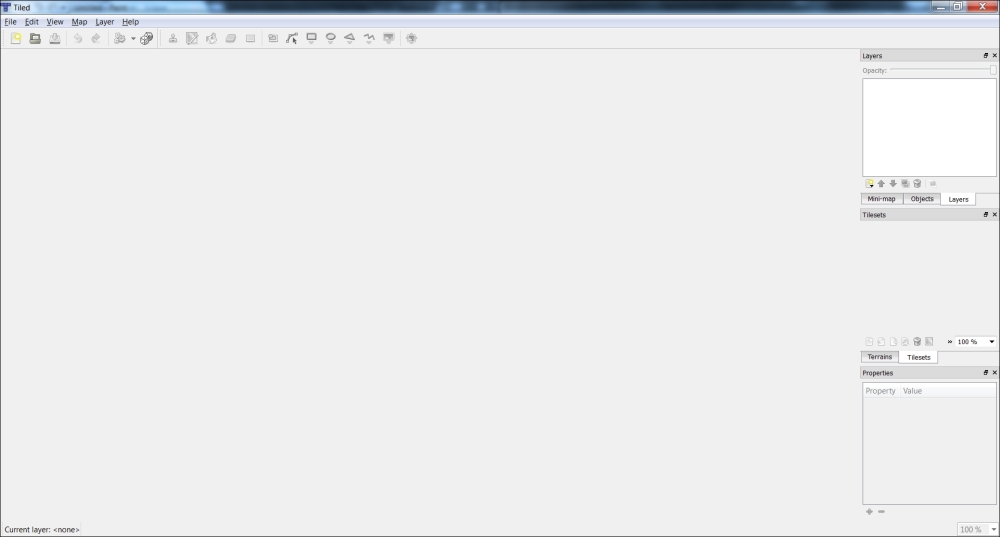
Looks pretty neat and simple, doesn't it? Tiled is extremely versatile and useful without being as intimidating as other editors. Well, what are you waiting for? Let's begin creating our first tile map. Select the New button from the toolbar or go to File | New. You will get a dialog box like this:
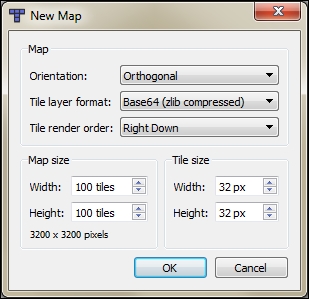
If you take a look at the different orientations supported, your options are: Orthogonal, Isometric, and Isometric (staggered). If you're wondering what orthogonal maps will look like, Mario is an excellent example, and SimCity is an example of isometric maps. As you can judge from the screenshot of the game, Iceman will use orthogonal maps. So, you can leave the orientation as orthogonal.
The next options of significance are the Map size and Tile size options. The map size will describe the width and height of the map in terms of number of tiles horizontally and vertically respectively. The tile size will describe the width and height of a single tile in pixels. If you look at the screenshot of the preceding dialog box, the final size of the map in pixels is given as 3200 x 3200 pixels.
The tile size for Iceman will be set as 32 pixels. Now, the size of the tiles within a game has to be decided carefully at the start of development. This is something that you, as a developer, will have to discuss with your graphics designer, since it is the graphics designer who will create the tilesets for the game. For this game, we settled for a tile size of 32 pixels in width and height.
For Iceman, our hero will start at the bottom of the screen and jump his way up to the top. So, this is a vertically scrolling platformer. As such, we will adjust the width of the map so that it matches the width of our design resolution of 1280 pixels, that is, 40 tiles. Since each level might get larger and larger in terms of height, let's just start off with 75 tiles. This will give you a map of size 1280 x 2400 pixels. That's it, hit OK and you're ready to go.
You will see that an empty layer has already been created for you under the Layers view. You are free to have any number of layers within a given map. The important thing to remember is that a layer can have only one tileset. Now, what exactly is this tile set you wonder? This is what the tile set for Iceman looks like:

You're smart enough to realize that the preceding image describes the various tiles that comprise a level. An image tells Tiled about the different kinds of tiles we would like to use for a given layer.
So, let's add the preceding tile set to the layer. Click on the New Tileset button from the Tilesets view or go to Map | New Tileset. You will now see a dialog box that looks like this:
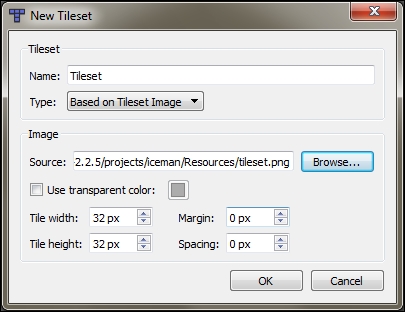
You can name this tileset whatever you like and select tileset.png as the image for this tileset from the Resources folder inside this chapter's source code bundle. You can leave the tile width and height as 32 pixels and hit the OK button. At this point, Tiled should look like this:
Notice how the image you selected shows up under the Tilesets view. We can now start adding some tiles to the layer.
Before you add any tiles to the layer, rename the layer named Tile Layer 1 as Bricks. When we write the code to create the tile map in our game world, we will fetch this layer by the name Bricks. Now, select the first tile in the tileset by clicking on it. As you move the cursor to the large vacant gray area, you can see the tile you just selected jumps around behind the cursor. It does so because it is actually snapping to the grid within the layer. At the bottom-left corner in the status bar, you will notice the details of the current column and row you are currently hovering over.
To place the tile, simply click anywhere on the grid. You can place multiple tiles at a time by clicking and dragging over an area, just like painting. If you glance at the toolbar, there are many tools using which you can fill single tiles, select a rectangular portion of the grid and bucket fill it with tiles, and even erase tiles. You can find a best practices guide complete with a handy set of keyboard shortcuts at https://github.com/bjorn/tiled/wiki.
This is what the first level looks like with all the tiles in place:
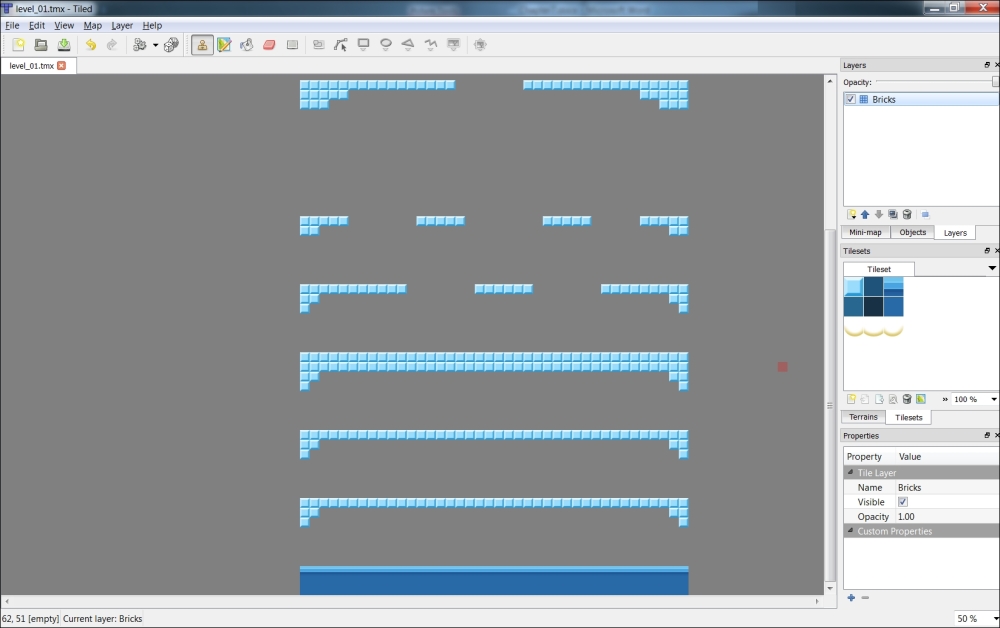
In this way, you can simply create a tile map and fill it with different tiles. Do remember to keep saving though.
We shall now take a break from Tiled to see how we can create and add this layer in Cocos2d-x. Take a look at the following code snippet:
  CCTMXTiledMap* tiled_map = CCTMXTiledMap::create("level_01.tmx");
  addChild(tiled_map);
This is all the code you need to write to have your tile map and all of its tiles appear on screen. The classes at "cocos2d-x-2.2.5cocos2dx ilemap_parallax_nodes" take care of parsing the TMX file and getting everything in place.
We can fetch our Bricks tile layer with the following code, which returns a pointer to a CCTMXLayer object:
CCTMXLayer* bricks_layer_ = tiled_map_->layerNamed("Bricks");We can then fetch the value of any tile within the layer with the following command, which returns an integer value that describes the GID at a particular tile:
bricks_layer_->tileGIDAt(ccp(column, row));
The GID is an efficient way to decide what type of tile exists at a particular position or whether it is empty. To know what a particular tile's GID will be, click on any one of the tiles in the Tilesets view. Now, glance at the ID parameter in the Properties view below the Tilesets view. This ID is incremented by 1 and returned as the GID when you query the tileGIDAt function.
Tiles within a tileset are given IDs incrementally. If you click the tile at the bottom-right corner of the tileset, you will notice that it has an ID of 8. For an empty tile, tileGIDAt will return 0. We will use this function when we write the collision detection algorithm later in the chapter.
Of course, filling tiles into the tile layer is just the beginning; we still need to figure out a way to position the iceman, the enemies, and the platforms. We will do this in our next section.
Along with adding tiles, providing IDs to individual tiles and providing an API to access the GID of any tile in the grid, Tiled also provides another type of layer called the objects layer. An objects layer lets you draw portions of the map and identify them as areas of significance. These portions or objects can be used to mark areas on the map where characters can spawn, where collectibles and power-ups can appear, or where hidden portals may lie.
For Iceman, we will use the objects layer to hold the following information:
- The hero's spawn point (
HeroSpawnPoint) - The enemies' spawn points (
EnemySpawnPoint) - The platforms' spawn points (
PlatformSpawnPoint) - The level completion point (
LevelCompletePoint)
Click on the New Layer button and select Add Object Layer or go to Layer | Add Object Layer. A new layer with a different icon will show up in the Layers view; name this layer Objects. Notice how the toolbar buttons change when you select the objects layer. We can now start adding the various points of significance that we had discussed previously.
We will only use simple rectangular areas to indicate the various points that we need so select the Insert Rectangle button from the toolbar and click anywhere on the map. Notice how a small square appears on the area you clicked. To reposition or resize this object, select the Select Objects button from the toolbar. You can also insert objects of other shapes and sizes by using the respective tools.
Now, select the rectangular object you just added and shift your attention to the Properties view at the bottom-right corner of Tiled to observe the various parameters for each object. We shall start by giving this object its name, that is, HeroSpawnPoint. We don't need anything else from this object other than its position, so we can move on to adding an object for an enemy spawning point.
Add an object at any location of your choice on the map and name the object EnemySpawnPoint. Along with providing so many options, Tiled also gives us the luxury of adding arbitrary properties to each object—be it Tile layers, object layers, tilesets, or objects. We can define custom properties for any of the preceding objects and access them through code.
Why is it so awesome to be able to add custom properties to everything? Imagine designing multiple levels where each level must be finished within a specific time limit. Simply add a custom property to the tile layer named TimeLimit and assign different values for different levels. Another scenario would be defining unique parameters for different objects. Like in our case, we want to be able to define a different speed for each enemy and moving platform to ensure our levels get progressively more difficult.
So, go ahead and add your first custom property to the EnemySpawnPoint object that you just created. To do so, click on the dark blue + sign below the Properties view. This will bring up a tiny box where you need to input the name of this custom property. Let's call it speed_x. Obviously, this will stand for the horizontal speed at which an enemy will move in the game. So, add another property speed_y to this object to represent the vertical speed.
After adding all the objects, this is what the tile map will look like:

Take a look at the list of objects in the view on the top-right of Tiled and you'll see the various objects added. Open up any of the TMX files for the levels from the Resources folder and check them out. For now, you need to learn how to access these objects and their custom properties in code. So, let's take a look at the CreateTiledMap function from the GameWorld.cpp file:
void GameWorld::CreateTiledMap()
{
  // generate level filename
  char buf[128] = {0};
  sprintf(buf, "level_%02d.tmx", GameGlobals::level_number_);
  // create & add the tiled map
  tiled_map_ = CCTMXTiledMap::create(buf);
  addChild(tiled_map_);

  // get the size of the tiled map
  columns_ = (int)tiled_map_->getMapSize().width;
  rows_ = (int)tiled_map_->getMapSize().height;

  // save a reference to the layer containing all the bricks
  bricks_layer_ = tiled_map_->layerNamed("Bricks");

  // parse the list of objects
  CCTMXObjectGroup* object_group =
    tiled_map_->objectGroupNamed("Objects");
  CCArray* objects = object_group->getObjects();
  int num_objects = objects->count();

  for(int i = 0; i < num_objects; ++i)
  {
    CCDictionary* object = (CCDictionary*)(
      objects->objectAtIndex(i));

    // create the Hero at this spawning point
    if(strcmp(object->valueForKey("name")->getCString(),
      "HeroSpawnPoint") == 0)
    {
      CreateHero(ccp(object->valueForKey("x")->floatValue(),
        object->valueForKey("y")->floatValue()));
    }
    // create an Enemy at this spawning point
    else if(strcmp(object->valueForKey("name")->getCString(),
      "EnemySpawnPoint") == 0)
    {
      CCPoint position = ccp(object->valueForKey("x")->floatValue(),
        object->valueForKey("y")->floatValue());
      CCPoint speed = ccp(object->valueForKey(
        "speed_x")->floatValue(), object->valueForKey(
        "speed_y")->floatValue());
      CreateEnemy(position, speed);
    }
    // create a Platform at this spawning point
    else if(strcmp(object->valueForKey("name")->getCString(),
      "PlatformSpawnPoint") == 0)
    {
      CCPoint position = ccp(object->valueForKey("x")->
        floatValue(), object->valueForKey("y")->floatValue());
      CCPoint speed = ccp(object->valueForKey(
        "speed_x")->floatValue(), object->valueForKey(
        "speed_y")->floatValue());
      CreatePlatform(position, speed);
    }
    // save the point where the level should complete
    else if(strcmp(object->valueForKey("name")->getCString(),
      "LevelCompletePoint") == 0)
    {
      level_complete_height_ = object->valueForKey(
        "y")->floatValue();
    }
  }
}
We start off by generating the path for the level, creating a new CCTMXTiledMap object with the given file as input, and adding it to the game world. We also store the size of the map and maintain a reference to the Bricks layer. Next, we call the objectGroupNamed function of the CCTMXTiledMap class that will return a pointer to an object of the CCTMXObjectGroup class. CCTMXObjectGroup will contain all the objects within a given objects layer. We can get these objects by calling the getObjects function, which will return a CCArray class containing the objects. The function then loops through each of the objects and accesses each of them. An object from the objects layer is represented as a CCDictionary object. I encourage you to print out all the keys for this dictionary and see for yourself how many properties of the object we can access.
For Iceman, we will only extract the information that we require, as you can see for yourself. The moment we find an object named HeroSpawnPoint, we create a hero and subsequently the enemies and platforms as well. We also save the y component of the LevelCompletePoint object into the level_complete_height_ variable. So, remember not to add two HeroSpawnPoint to your tile maps. That would have two icemen in the game world and one would simply stare back at you throughout the game (dangling pointers to elderly icemen are the worst!).
Just like that, we are all set to begin coding the gameplay. Tiled being so easy to use, anyone with zero programming knowledge can create a multitude of levels in no time and you can access it in code rather effortlessly, like we've seen in the past two sections. Next up, we'll write a collision detection algorithm that works well with our tiles.