
In this chapter, we will work through the creation of a brand new project that uses Entity Framework. We will create classes that map to tables in the target database. We will then insert a row into that table using the Entity Framework API. We will also query this using LINQ. Next, we will update and delete our test data. Finally, we will take a look at how to handle schema changes.
In this chapter, we will cover the following topics:
- Creating a new project using Entity Framework
- Adding the necessary references to be able to write Entity Framework code
- Creating a new database based on written classes
- Saving a new record
- Querying the saved data
- Deleting and updating the data in the database
- An introduction to schema changes
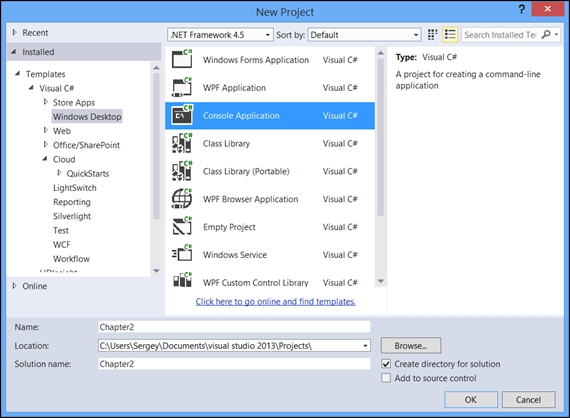
First of all, it is important to understand how Entity Framework is distributed. Even though it is an open source project, Microsoft employees curate the project as well as write the lion's share of all the code. You can actually download the source code from CodePlex at https://entityframework.codeplex.com/. However, the easiest way to add this technology to your project is to use NuGet. The NuGet technology allows anyone to create useful libraries and publish them on the web to let other developers take advantage of it. Microsoft is in charge of publishing Entity Framework on the NuGet website. The package is simply called Entity Framework. In addition to the core Entity Framework, it also contains the Entity Framework provider for SQL Server. We will work with the latest version of it. You can add it to any .NET project. Let's just create a Console Application for our project first, and then add the Entity Framework package to it. Create your project and solution by going through File | New | Project, then picking either C# or VB.NET, and then finally selecting Console Application under the Windows Desktop node, as shown in the following screenshot:
Now, you can use either the Package Manager Console window or Manage NuGet Packages for the Solution window, to add the EntityFramework package to your solution. Both windows are available by navigating to Tools | NuGet Package Manager for the Solution menu in Visual Studio. If you are using the Package Manager Console window, just type Install-Package EntityFramework.
In this window, hit Enter key. If you are using Manage Packages for the Solution window, type EntityFramework in the search box, click on Search, and then add the package with the ID of Entity Framework, which should be the first package in the result set. Once the package has been added, the project will contain all the necessary references. You are now ready to start writing code.