
Inputs and controls are really important for game design. Games are interactive by nature, and designers need to plan out and test controls in order to make an effective game.
In this chapter, we will learn about the following topics:
- Keyboard inputs
- Rotating the angle
- Mouse inputs
- Game loop
- Touch control inputs
Software works with human interaction. The most basic activity of any computer interface is a user providing information and the computer reacting to that information. In other programming languages, one of the most basic concepts you learn is the function. The basic premise of a function is to work with inputs.
The way the user inputs information is actually really important. Imagine a simple calculator application that has really nice buttons and works exactly the way you expect it to. Now, imagine a calculator application where the buttons were in a different order than the usual one. The application would be much harder to use. Obviously, you want the application and the user experience to be as good and as easy as possible. Applications such as games have a purpose, and the software and hardware should not interfere.
Let's move this concept to games. Let's imagine a platform game, which is a game where you run and jump onto platforms. For our example, we will be making the game for a computer. Touch devices have different inputs, which we will discuss shortly. In this platformer game, the player will have to run and jump. In order to do that, we need to have specific controls that the player can understand. There are various ways to implement controls, but the controls need to be easy to understand. In the case of classic game genres, they cannot be different from what the player is expecting.
Inputs to a game are really important. First of all, they make the computer software work; but more importantly, they make the game what it is. Without good input controls, a game doesn't live up to its potential and all of the time you spend on mechanics and art is wasted. It is good to spend a lot of time to make sure the controls and the inputs in the game are well thought out. Whether you are making a simple indie game or an AAA game, controls are vital for the success of the game.
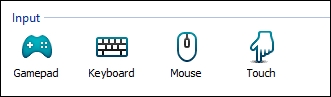
So, how do we think about controls in Construct 2? Well, the first thing you need to think about is for which platform are you making the game. Mobile games are very different from computer games. You have to approach the entire input design differently. Certain genres work on certain platforms, and these same genres might not work on other platforms. Imagine if you made a real-time strategy game such as Starcraft for the iPhone—it wouldn't work. This game can fundamentally not be on the iPhone because of the mechanics and the inputs. Knowing the limitations of your inputs is vital to making a good game. Construct 2 offers a lot of options for inputs, and the currently offered inputs are as follows:
- Keyboard inputs
- Mouse inputs
- Touch (mobile) inputs
- Gamepad (XBOX 360 Gamepad) inputs
Adding inputs is not an easy task in any game environment. Usually, the developer has to write a lot of code to make it work. Luckily, Construct 2 takes most of that out of the equation because most of the code is written in the backend and all you have to do is add the visual blocks.
Keyboard inputs simply involve the keyboard. There are many ways to use the keyboard. You can use the number pad, you can use the arrow keys, and you can even use the main keys itself. It is always important to know that not every keyboard has a number pad, so make sure the design takes this into account.
Let's add keyboard functionality. In order to work with this, we need to add at least one game object to Construct 2. Simply drag an image from your desktop to Construct 2. Your game should look something like the following screenshot:

We now have a game object to work with. In order to add any kind of controller functionality, you have to first add the functionality manually. Keyboard control does not come preloaded in a new Construct 2 project.
If you want to add the keyboard or any input functionality, double-click anywhere other than the game objects. You should get the Insert New Object window as shown in the following screenshot:
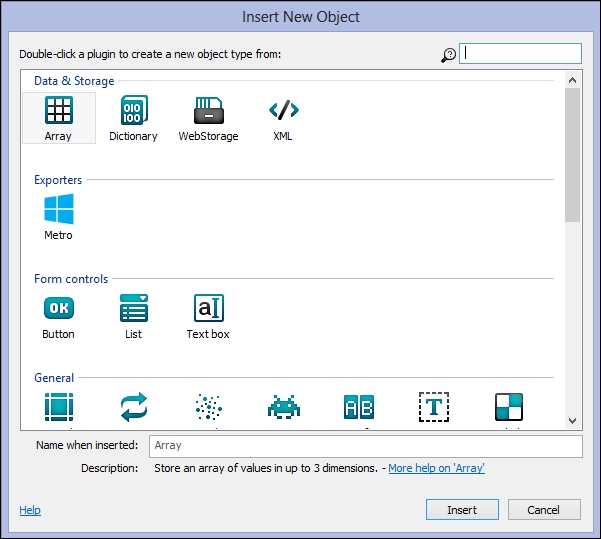
In the Insert New Object window, you can add a whole bunch of new objects. If you want to add more functionality, this is where we can add them.
The reason for this comes from the roots of software development. Generally, in order to add more functionality, you have to add more libraries and more functions. If you don't need these libraries or functions, there is no point having them in your project. They could cause conflicts or they could use up too much memory. You should always have just enough objects in your game to make it work. Keep in mind, however, that having too many objects is just as bad as having too few. Luckily in Construct 2, most of the problems with adding objects have been taken out of the equation.
Scroll down on the page and double-click on the Keyboard icon to add it to Construct 2's functionality, as shown in the following screenshot:
Let's start by adding some functionality to the Keyboard object. We need to open our event sheet to add some functionality to the object we have placed on the screen. In order to do that, double-click anywhere on the event sheet. You should see the Keyboard icon appear, as shown in the following screenshot. If you didn't add the keyboard functionality, this icon would not be there. Go ahead and double-click on the Keyboard icon.
Once you double-click on the Keyboard icon, the Add event window should pop up. This is shown in the following screenshot:
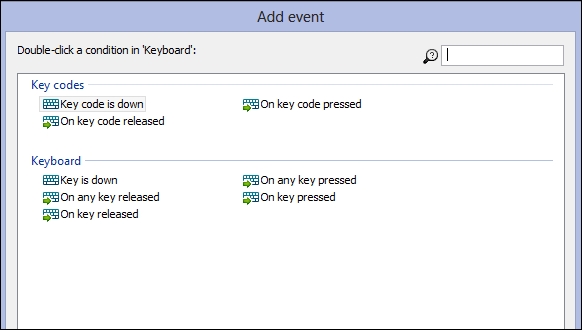
Remember that events in a game are possible outcomes. In this case, we are going to select On key pressed.
Now, we are going to add an action. In this case, the question is, "Is a certain key pressed?" If yes, then the object will move up. Once you click On key pressed, you should get the Parameters for Keyboard: On key pressed window shown in the following screenshot:
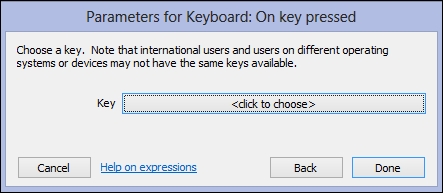
Go ahead and select <click to choose>. You should get the dialog box shown in the following screenshot:
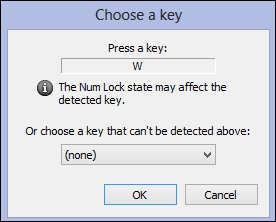
In the Choose a key window, you can simply press the key you want. This feature speeds up the workflow quite a bit. If you need to choose another key, for example, the return key, you can use the drop-down box. Once you have the key you want, press OK and click on Done. You should get something like the following screenshot:

This is the event or the "question" that is being asked: "Is the W key pressed?"
We can now add a variety of options, but what we really want to do is make the sprite move in a direction. In order to do that, we need to click on Add action. Double-click on the sprite and you should get the following window:
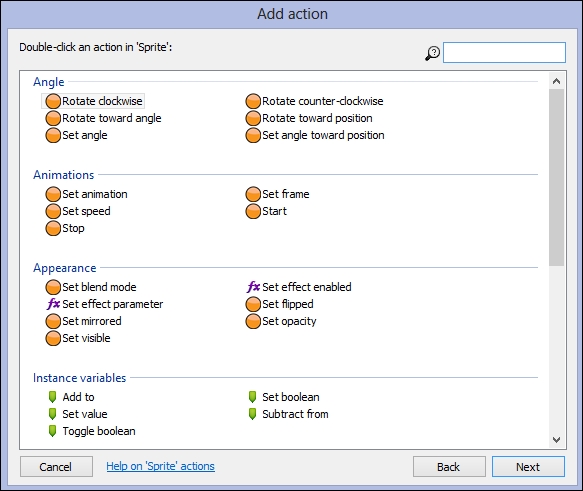
In the Add action window, we can see all of the possible actions we can add for a sprite. In this situation, we want the sprite to move up when the user presses the W key. Scroll down until you see Size & Position and double-click on Move at angle as shown in the following screenshot:

Once you have done that, it should bring up the Parameters for Sprite: Move at angle window shown in the following screenshot:
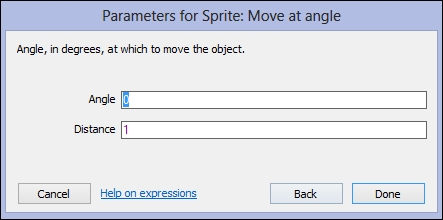
This window will tell the sprite to move at a certain angle and at a certain distance. The angle 0 is the direct right of the sprite. Angle 180 is the direct left of the sprite. Angle 90 is straight down from the sprite and angle 270 is straight up. We want to move the sprite straight up, so type in 270 where it says Angle and press Done. Once you do that, you should see the following on the screen:

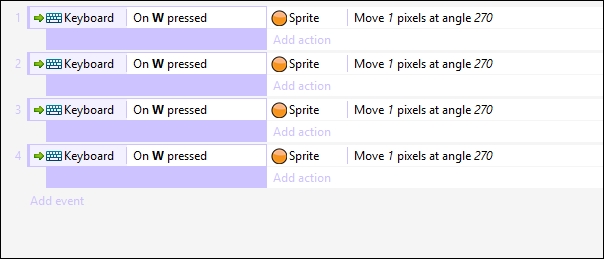
We have two options to set up commands to move in the other three directions. The first option is to manually do everything all over again, and the second option is to simply copy-and-paste the action. In order to copy-and-paste, you need to click on the purple bar below an event, press Ctrl + C to copy, and then press Ctrl + V to paste. Do this three more times so that we have four events in total, as shown in the following screenshot:
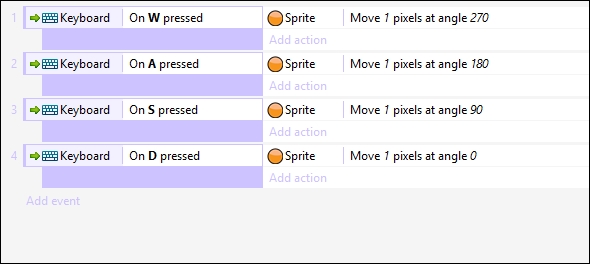
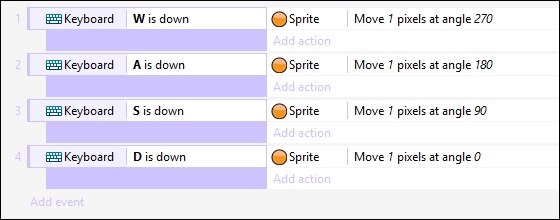
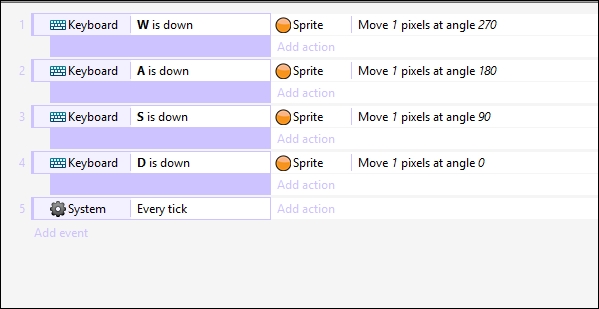
We need to change the keys that are being pressed and the angles that they correspond to. Change the keys by double-clicking on them. They should be in this order: W (up), A (left), S (down), and D (right). Then, change the angles by double-clicking them. Change them to 180, 90, and 0. When you're done, our event list should look like this:
Go ahead and run the game by pressing F5. This will then test run the game, and you can push W, A, S, and D to see the object move around. We now have a game with WASD controls that are easy to understand for most players.
Right now, the sprite just moves one pixel in each direction. If you hold any of the WASD keys down, the sprite still moves only one pixel. Let's change the appropriate line of code so that when we hold the key down, the sprite will constantly move. The steps are as follows:
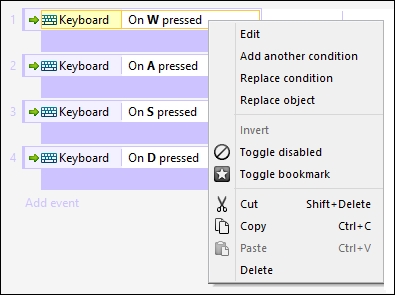
- Right-click on the Keyboard event and select Replace condition, as shown in the following screenshot:
- You should then get the Replace condition window shown in the following screenshot:
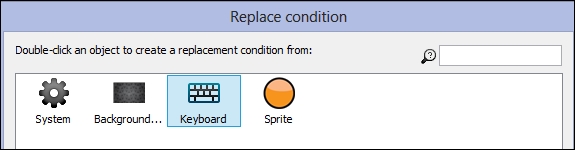
- The process is very similar to what we have done before. Go ahead and select Keyboard.
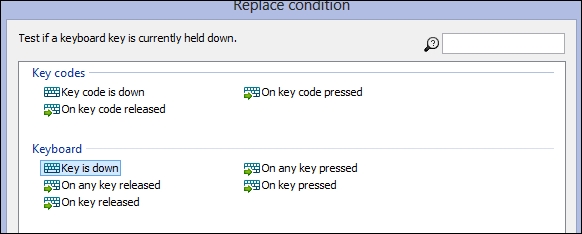
- Now, select Key is down.
- Then, repeat the process to set a keyboard key. Select W where W was before, and so on.
Once you have done that, the event list should look like the following screenshot:
You can see that there is only a subtle difference. However, run the game by pressing F5 and you can see that there is quite a bit of improvement to the controls. They are now much smoother. Running the game will give you a preview as to how the game will look when a player plays it.
If you want to change the speed with which the sprite moves, double-click on the sprite and set it to move more than 1 pixel in the Parameters for Sprite window.
You will notice that the sprite will move offscreen. In order to keep it onscreen, perform the following steps:
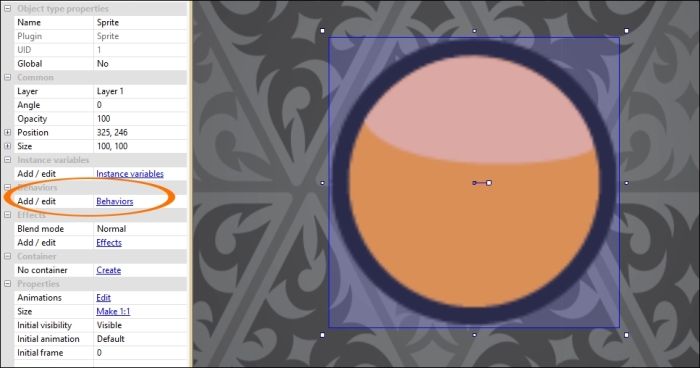
- Select the sprite and select Behaviors in the left-hand side panel, as shown in the following screenshot:
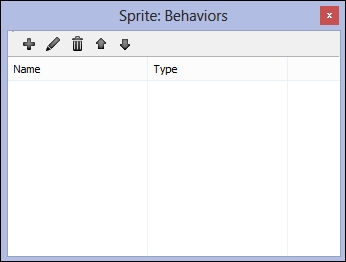
- Once you click on Behaviors, click on the plus icon in the Sprite: Behaviors window. This is what the window should look like:
- Now, you should get the Add behavior window. We will be talking about this window throughout the book. For now, just select Bound to layout, as shown in the following screenshot:
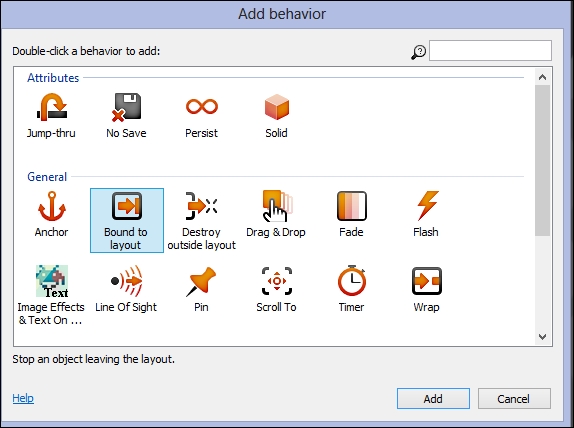
Now, your sprite will not move off the screen! It's as simple as that.
Mouse inputs are important when it comes to any kind of computer game. In other environments, this will take a lot of coding, and trial and error to call the mouse. Luckily, we can use the mouse with great ease in Construct 2.
The first thing we have to do is add the mouse functionality to the project. Double-click in the layout background and double-click on the Mouse icon.

This will add the mouse functionality to the project.
What we need to do next is to attach some of the mouse functions to the sprite. Open up the event sheet and click on Add event.
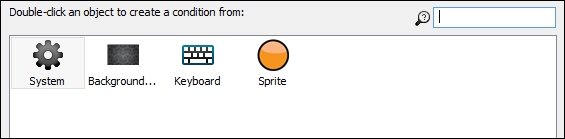
What we are going to do is rotate the object to the mouse location. Go ahead and choose System, as shown in the following screenshot:
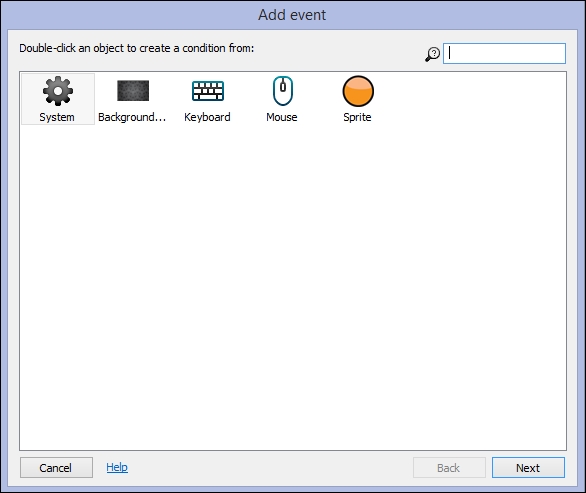
In the Add event window, we need to access the Every tick command.
In every game, there is something called game loop. This is a loop that constantly updates information. When we put code or logic in the game loop, it constantly checks to see whether it is true. Logic includes elements such as controls, collisions, scores, and virtually all other portions of a game. In other programming environments, the game loop is extremely important and accessing it can be very different depending on the environment.
We need to access the Every tick function because we need to constantly check where the mouse is. While the mouse moves around the screen, the computer will check to see its location. If we didn't use the Every tick function or the game loop, the sprite will only rotate once instead of constantly. You usually use the Every tick function for functions that require constant attention. For most other functions that need to be called once, you can use other functions. So, let's go ahead and click on Every tick.
Now that we have added the Every tick event, we need to add an action. This action is going to rotate the sprite to the mouse position. In order to do this, click on Add event. You should get the following window:

This time, we are going to select Sprite. If we want to rotate the sprite, we have to access the sprite via the Add action window. We can't just use the mouse function to rotate the sprite.
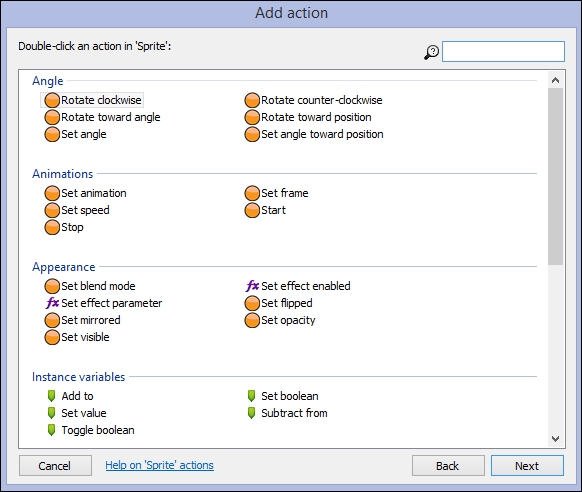
In the Add action window shown in the preceding screenshot, we can see that there are a lot of options to rotate the sprite. For this particular example, we are going to select Set angle toward position. This will open up the Parameters for Sprite: Set angle toward position dialog box, as shown in the following screenshot:
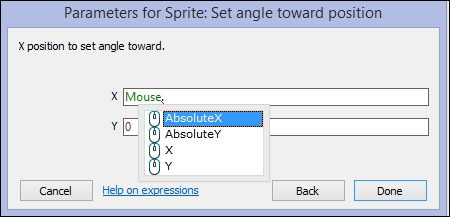
In the preceding window, you will see two options: X and Y. What you need to do is type in the word Mouse and then insert a period. As you can see, you have several different options; select X and Y for the respective option, not Absolute X and Absolute Y. Once you are finished, it should look like the following screenshot:
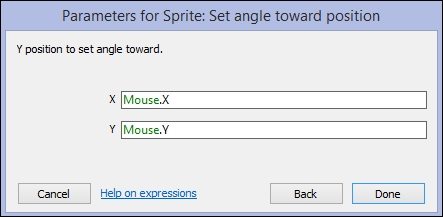
Then, press Done and your event sheet should look like the following screenshot:

You can go ahead and try this out. As you can see, the object will rotate to the mouse clicks.
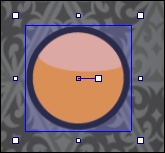
A common problem that arises when you make a sprite rotate to the mouse location is that the graphic seems to be off. This means that the object might be sideways or backwards and the object isn't facing the mouse correctly. Well, there is a simple reason for this. The code works perfectly; it's just that the graphic has not been put into Construct 2 correctly. If you click on the object, you can see where the object will be rotated to.
As you can see in the following screenshot, there is a little line pointing to the right. This line will always face the mouse.
If we want to rotate the graphic, we can do it in Construct 2; just double-click on the sprite. This will bring up the sprite editor, where we can change the rotation, collision, and many more sprite properties. It is shown in the following screenshot:
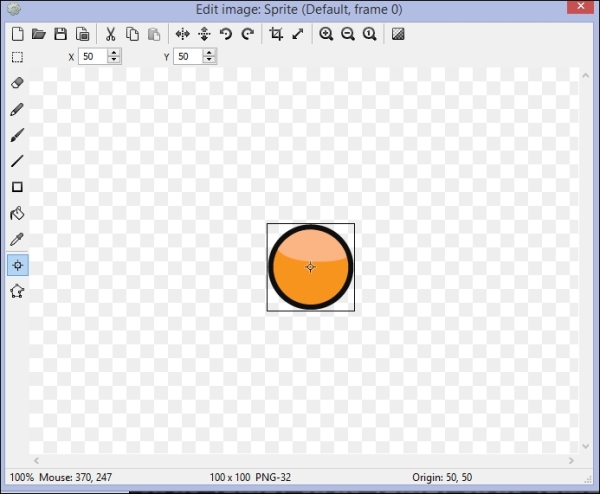
Go ahead and click on the icon for rotation; it is at the top and shows a curved arrow around a circle. Rotate your game object to make it face towards the right. This should change your game object to the right rotation.
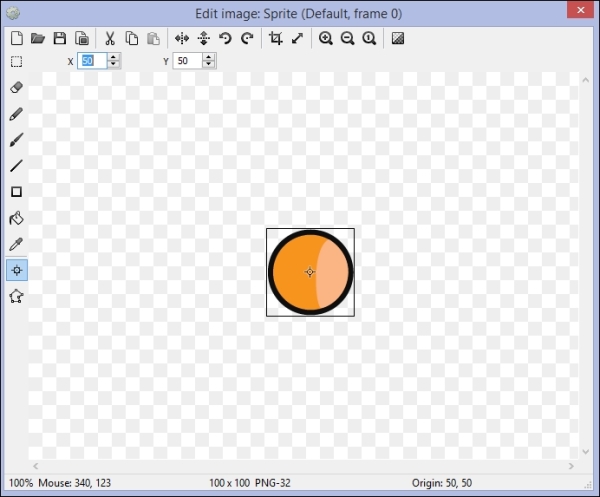
In the preceding screenshot, we can see that the object is now rotated the correct way. If you run the game, you can see this in action.
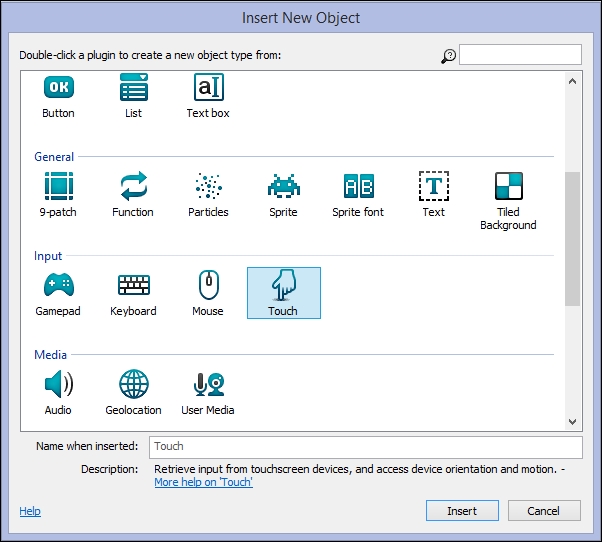
Touch controls are vital for mobile games. They are really important since a lot of HTML5 games run very well on mobile devices, while Flash does not. Open up a new Construct 2 file and add a sprite. Then, double-click on the layout background to get the Insert New Object window. Here, add the Touch functionality. This is shown in the following screenshot:
Once you have added the touch functionality, hop over to the event sheet and add the touch event. This is shown in the following screenshot:
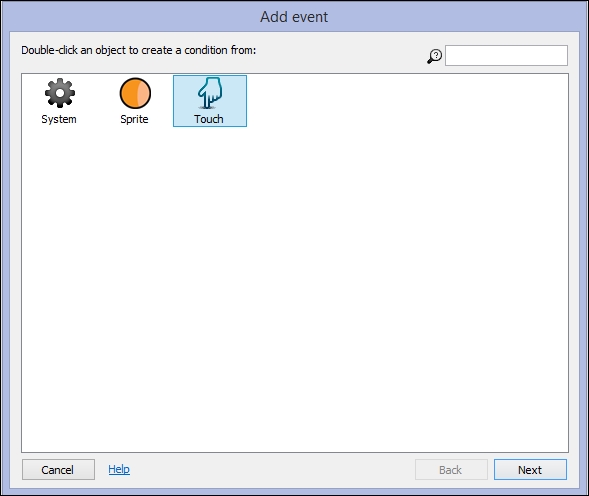
Double-clicking on the Touch event icon directs you to get the Add event page.
Once you have done this, go ahead and select On any touch end as shown in the following screenshot:
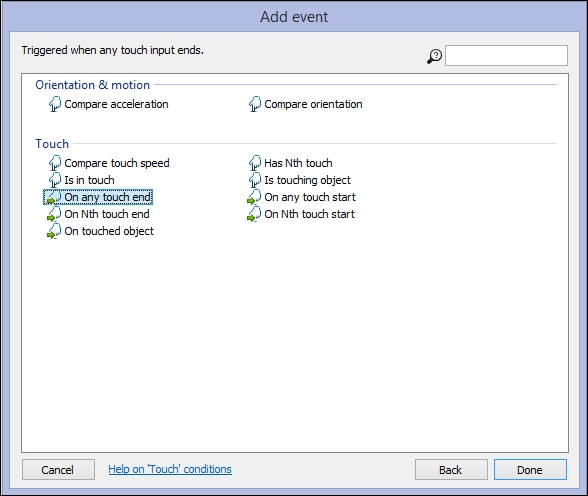
Click on Done. Your event sheet should look like the following screenshot:

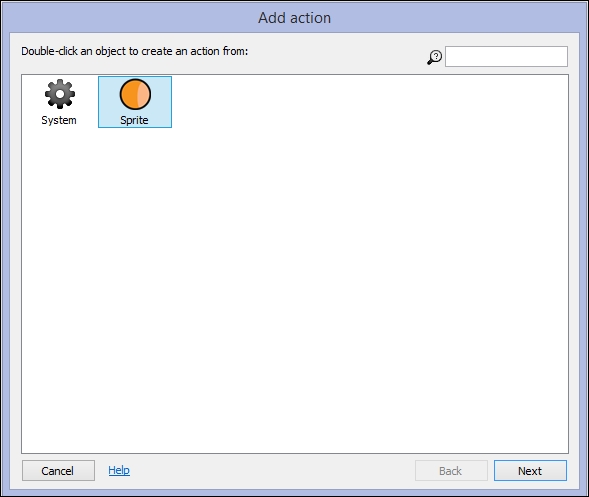
Now, add an action and click on Sprite in the Add action window, as shown in the following screenshot:
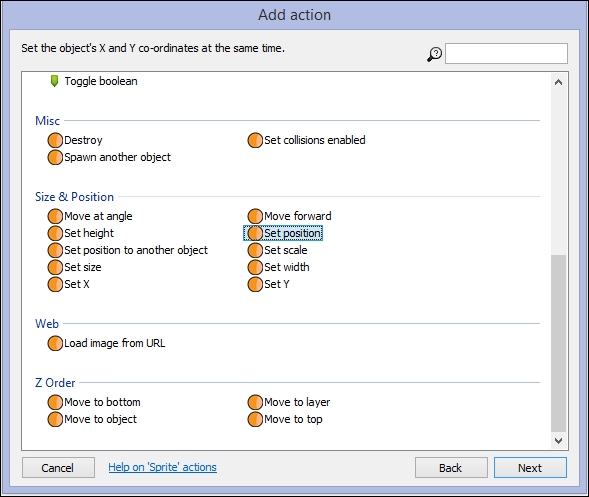
On the next Add Action window, scroll down and select Set position under the Size & Position list. This is shown in the following screenshot:
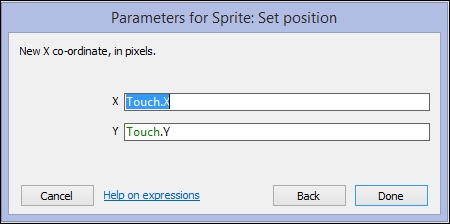
In the Parameters for Sprite: Set position window, which is shown in the following screenshot, set the position to Touch.X and Touch.Y in the same way as you set the mouse position. This will move the sprites' X and Y position to where you touch.
Go ahead and run the game; even if you are on a computer. The mouse button and the touch commands are synced for testing and a mouse click will simulate a touch. If you do not have a mouse-intensive game, we suggest you just use the touch command.