In this chapter, we will take a look at a subset of the fast-growing and wide-ranging set of data sources available over the Internet that you can use as a source of analytical data for Excel. While the data sources that you will see in the following pages may be extremely diverse, they all have one thing in common: they are stored outside the enterprise and are available using an Internet connection.
Looking at all the available sources in detail would take up an entire book, so I will only show you how to access some of the mainstream services that are currently on offer. Once you have learned how to access a few of them, you should be able to extend the basic techniques to access just about any of the web and cloud services that can currently be used by Power Query to import data into Excel.
The ever-increasing range of data sources that are accessible using Power Query are provided by several different suppliers. So nearly all of the data connections outlined in this chapter require access to a specific online source. Most of these sources are industrial strength—and not free. However, if your enterprise is not a subscriber to these services, and you wish, nevertheless, to experiment with them, it could be worth taking a look at the free trial offers available from many (if not all) of the service providers whose offerings are outlined in this chapter. Consequently, many of these data sources are only available with an Excel Pro or Enterprise licence.
Web and Cloud Services
Web pages
Online services, such as Salesforce or MS Dynamics 365
Microsoft Azure, which covers hosting files in Azure Blob services, storing data in an Azure SQL Database, or storing data in an Azure Synapse Analytics (or even reading big data in Azure HDInsight)
Web Pages
If you need to collect some data that you can see as a table in a web browser, you can use Power Query to connect to the URL for the page in question and then load all the data from any table on the page.
Online Services
Online Services Currently Available to Power Query
Source | Comments |
|---|---|
Salesforce Objects | Lets you access data in Salesforce |
Salesforce Reports | Lets you access the prestructured data objects (both native and custom) that underlie built-in Salesforce reports |
Accesses Facebook data | |
SharePoint Online | Connects to the cloud-hosted version of Microsoft SharePoint |
Microsoft Exchange Online | Connects to the cloud-hosted version of Microsoft Exchange |
Dynamics 365 Online | Connects to the cloud-hosted version of Microsoft Dynamics 365—the MS CRM and ERP solution |
Microsoft Azure
Azure Sources
Source | Comments |
|---|---|
Microsoft Azure SQL Database | Lets you connect to a Microsoft SQL Server cloud-based database and import records from all the data tables and views that you are authorized to access |
Microsoft Azure SQL data warehouse (now rebranded as Azure Synapse Analytics) | Lets you connect to Microsoft’s cloud-based, elastic, enterprise data warehouse |
Microsoft Azure Blob Storage | Reads from a cloud-based unstructured data store |
Microsoft Azure Table Storage | Reads from Microsoft Azure tables |
Microsoft Azure Data Lake Storage (Gen1 and Gen2) | Lets you connect to Microsoft’s raw data cloud storage |
Microsoft Azure HDInsight | Reads cloud-based Hadoop files in the Microsoft Azure environment |
Obviously, more Azure connection options may be added to Power Query in Excel by Microsoft as the Azure offering is extended.
Power Query can also access SharePoint on-premises and MS Exchange data. However, I shall not be examining these connections in this book.
Web Pages
As a first and extremely simple example, let’s grab some data from a web page. This is made extremely easy by Power Query, as it can read the tables of data present in any web page. Since I want to concentrate on the method rather than the data, I will use a web page that has nothing to do with the sample data used elsewhere in this book. I will not be using this other than as a simple introduction to the process of loading data from web pages using Power Query.
- 1.
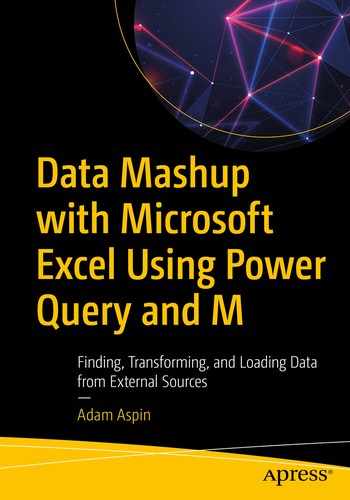
In the Data ribbon, click From Web.
- 2.
Enter the following URL (it is a Microsoft help page for Power Query that contains a few tables of data): http://office.microsoft.com/en-gb/excel-help/guide-to-the-power-query-ribbon-HA103993930.aspx. I am, of course, hoping that it is still available when you read this book. Of course, if you have a URL that you want to try out, then feel free! The dialog will look something like Figure 4-1.
The From Web dialog
- 3.
Click OK. The Navigator dialog will appear. After a few seconds, during which Power Query is connecting to the web page, the list of available tables of data in the web page will be displayed.
- 4.
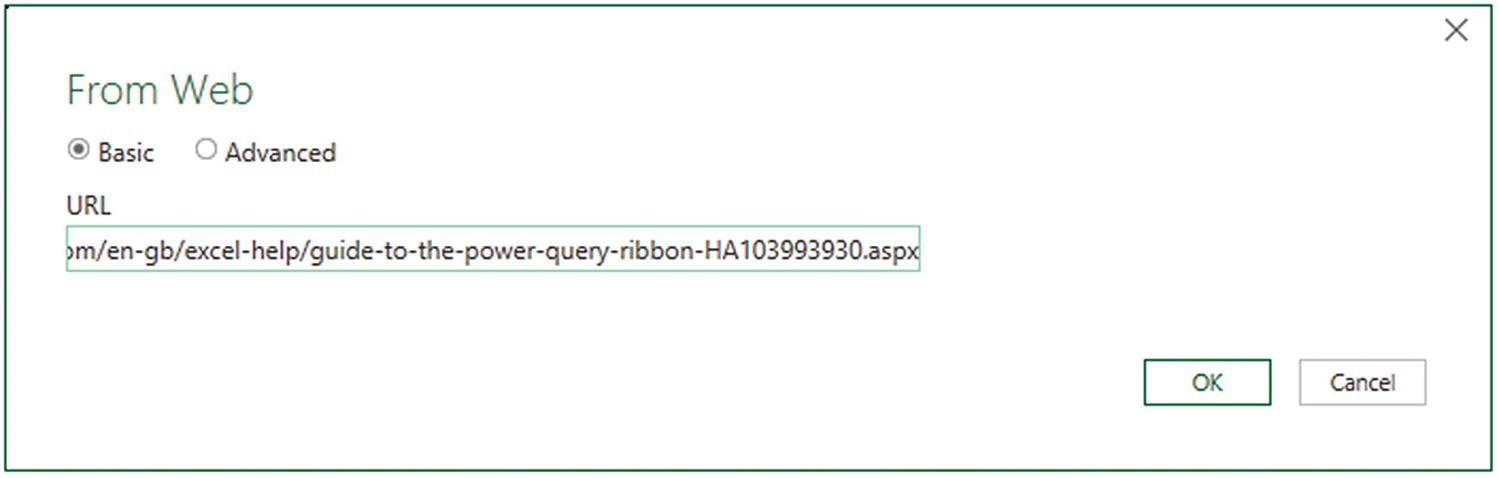
Click one of the table names on the left of the Navigator dialog. The contents of the table will appear on the right of the Navigator dialog to show you what the data in the chosen table looks like, as shown in Figure 4-2.
The Navigator dialog previewing the contents of a table on a web page
- 5.
Select the check box in the Navigator dialog (shown to the left of Table 4 in Figure 4-2).
- 6.
Click Load at the bottom of the window. The data will be loaded into a new worksheet.
Another way of accessing web pages is to click the small triangle at the bottom of the Get Data button in the Data ribbon and select From Other Sources ➤ From Web from the menu that appears.
This simple example showed how you can select tables of data from a web page and load them into Excel.
Advanced Web Options
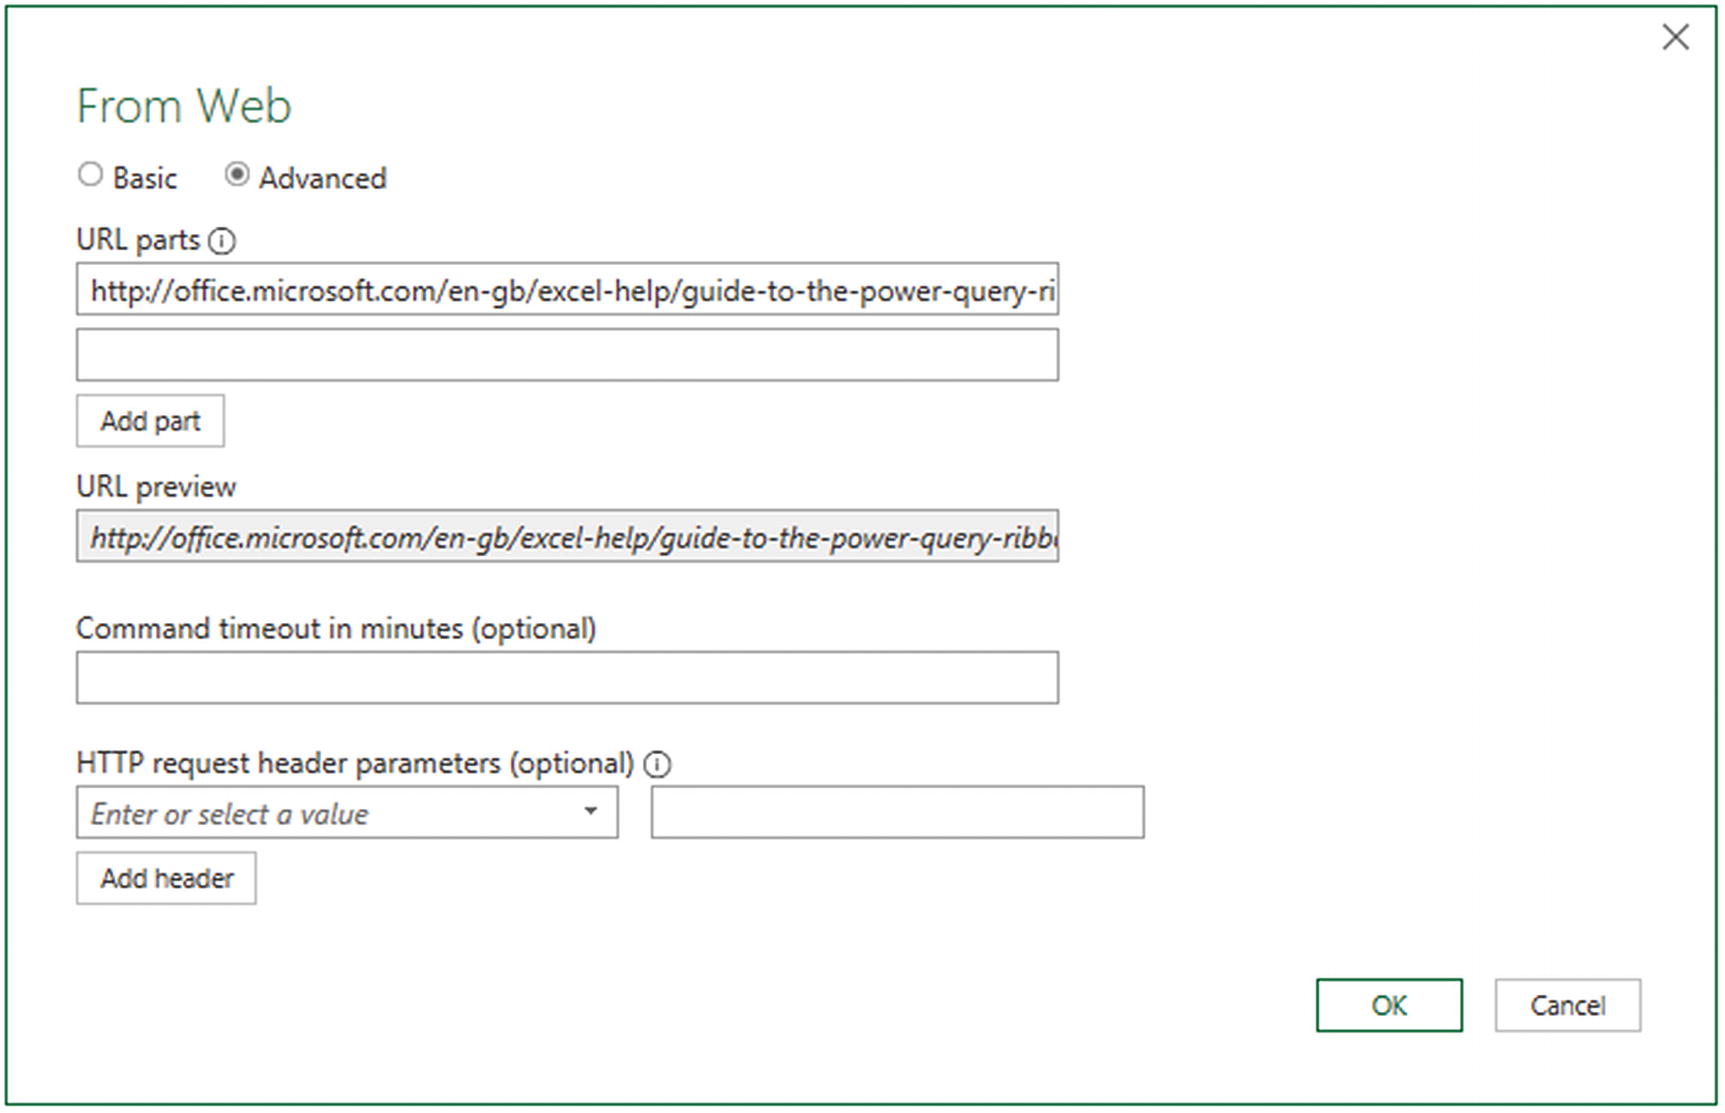
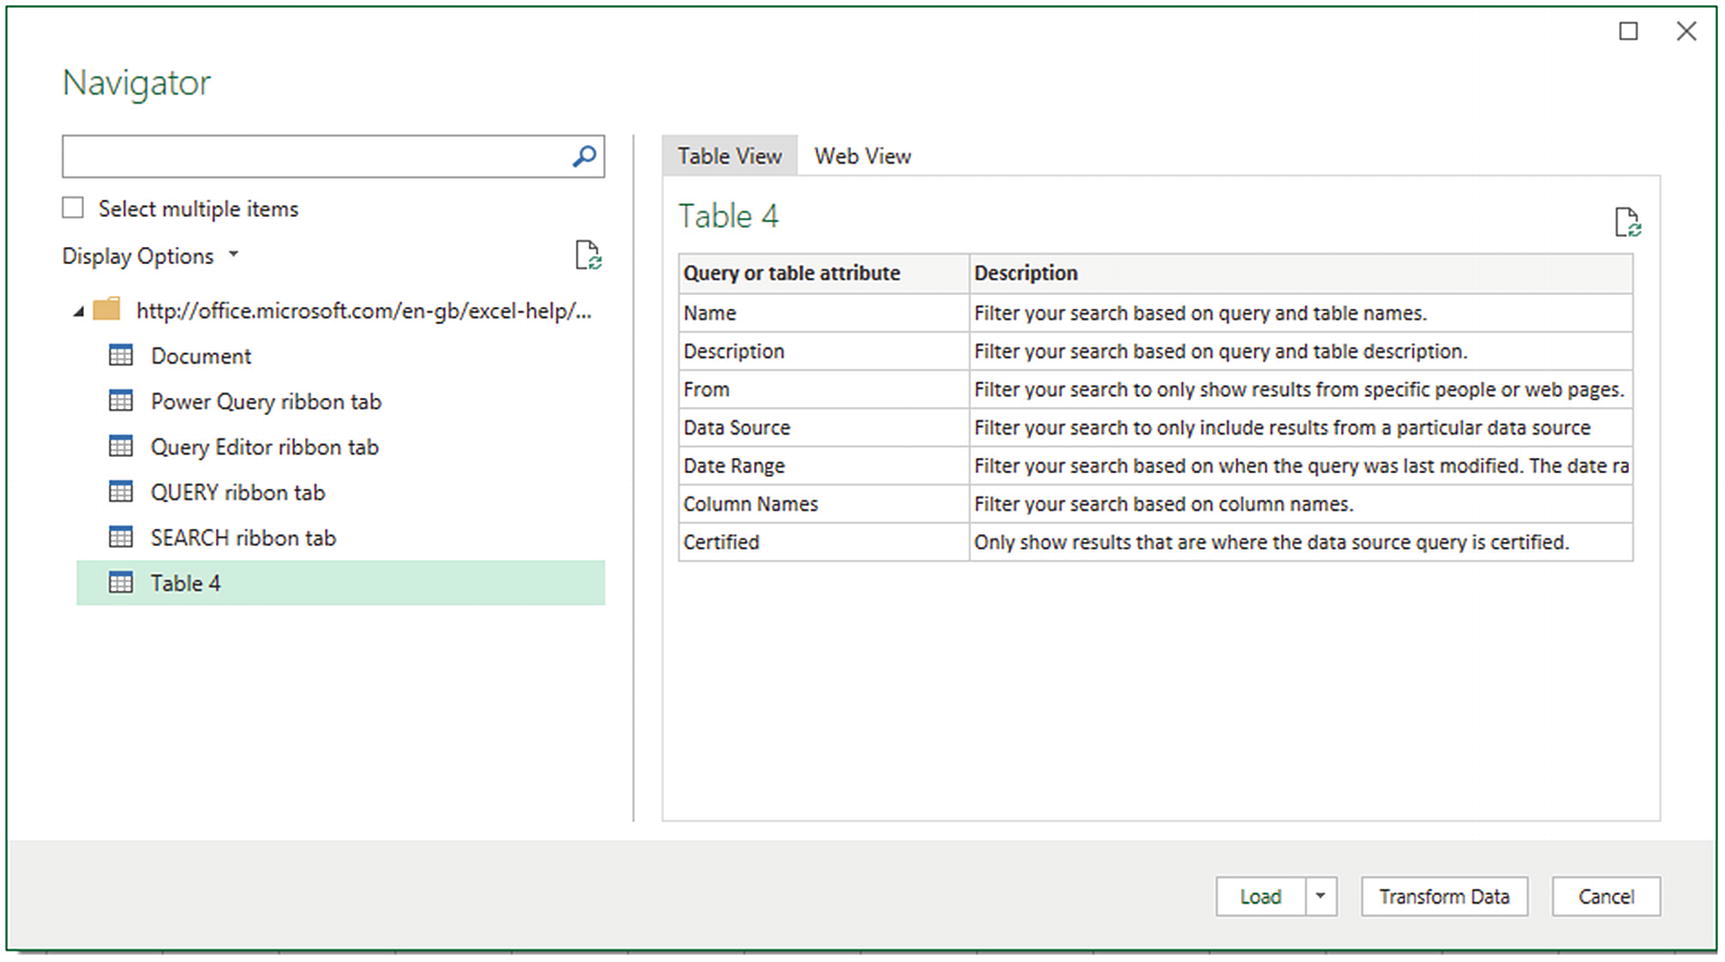
The Advanced options in the From Web dialog
Clicking the Add part button allows you to define multiple URL parts.
If necessary, you can also specify HTTP request header parameters that will be used when submitting the URL. These could be required by certain web pages. A discussion of these is outside the scope of this book.
Viewing the Source Web Page
It can be more than a little disconcerting to see only the tables from a web page—and not the actual page itself—in the Navigator. After all, the Web is a quintessentially visual medium.
- 1.
Follow steps 1 through 3 as described earlier.
- 2.
Click Web View on the right of the Navigator. You should see something like the page shown in Figure 4-4.
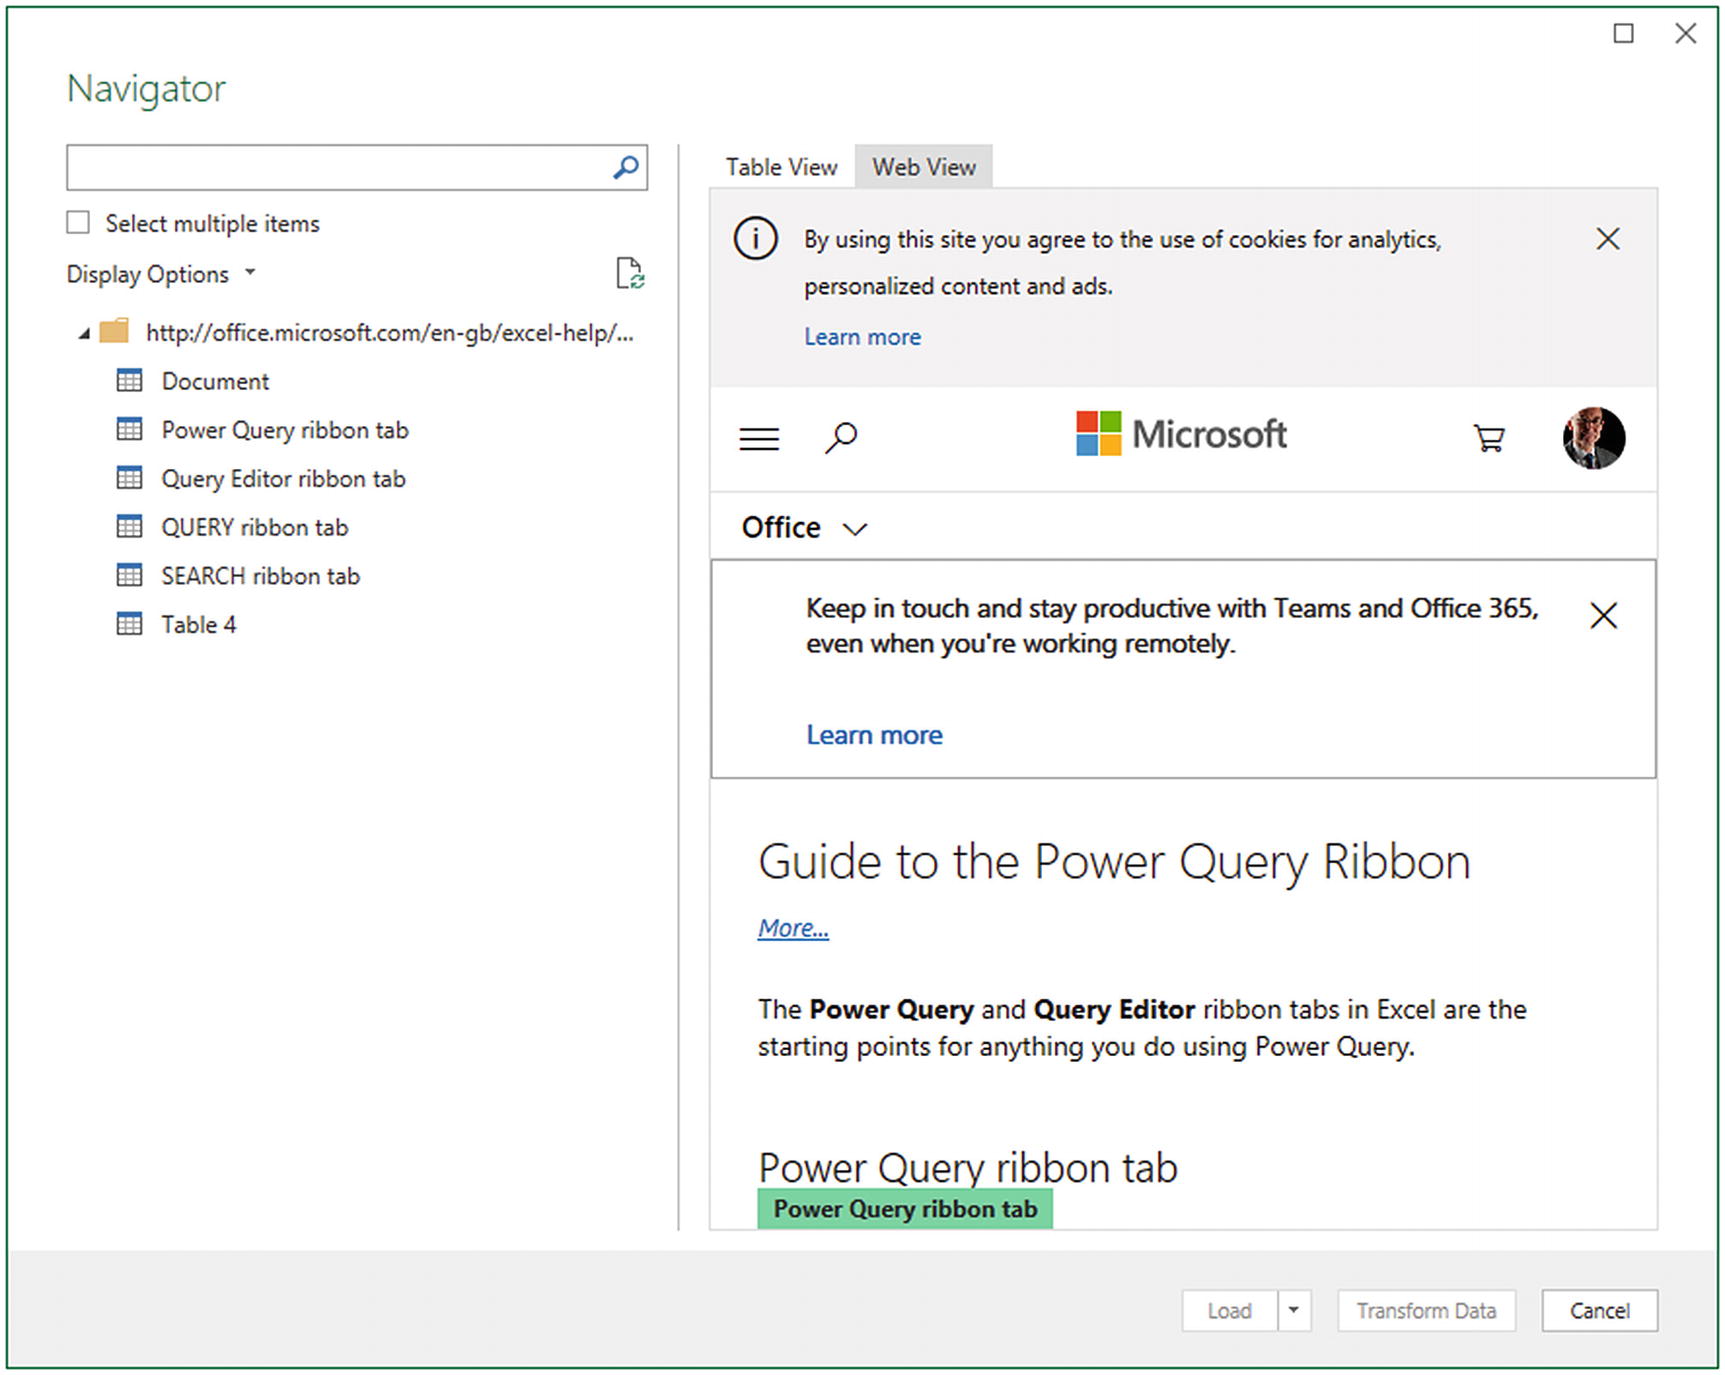
Viewing the source web page in the From Web dialog
You can now scroll down the page—and flip back to viewing only the data in the tables in the page by clicking Table View on the right-hand side of the dialog.
Salesforce
One of the pioneers in the software as a service (SaaS) space—and now, indisputably, one of the leaders—is Salesforce. So it is perhaps inevitable that Power Query will allow you to connect to Salesforce and load into Excel any data that you have permission to view using your Salesforce account.
Objects
Reports
Briefly, Salesforce objects are the underlying data structures (that you can consider as kinds of tables) that contain the information that you want to access. Salesforce reports are the data that has been collated from the data tables into a more accessible form of output.
If you do not have a corporate Salesforce account but want, nevertheless, to see how to use Power Query to connect to Salesforce data, you can always set up a free 30-day trial account. The URL for this is www.salesforce.com/form/signup/freetrial-sales.jsp.
Loading Data from Salesforce Objects
- 1.
Open a new Excel application.
- 2.
In the Excel Data ribbon, click the Get Data button.
- 3.
Click From Online Services ➤ From Salesforce Objects. The Salesforce Objects dialog will appear. It should look like the one shown in Figure 4-5.
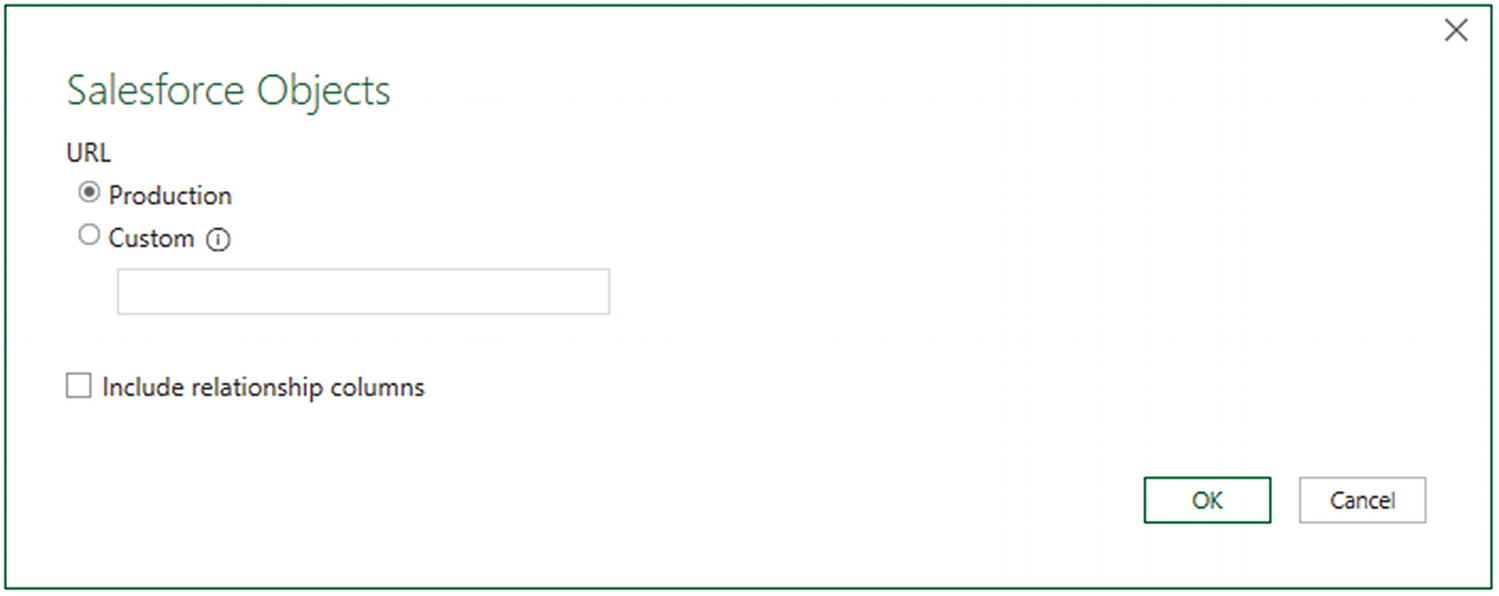
The Salesforce Objects dialog
- 4.
Select the Production button and click OK. The Access Salesforce login dialog will appear. It should look like the one shown in Figure 4-6.
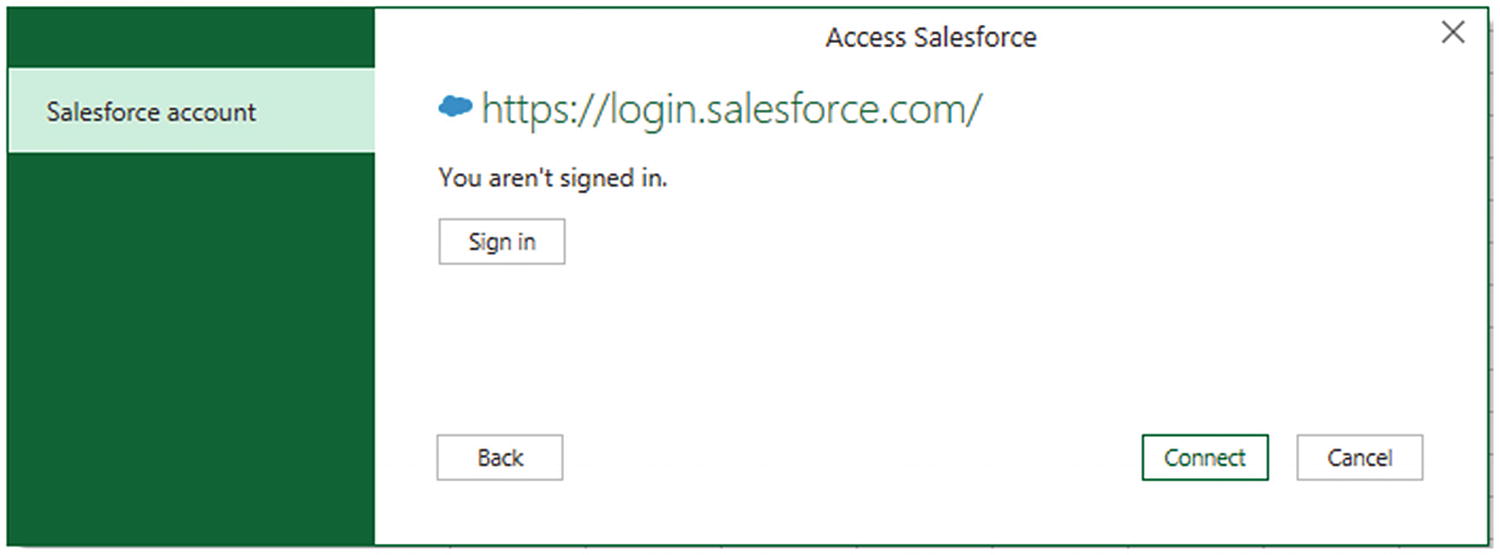
The Access Salesforce login dialog
- 5.
Unless you are already signed in, click Sign in. The Salesforce sign-in dialog will appear.
- 6.
Enter your Salesforce user name and password. The dialog should look something like the one shown in Figure 4-7.
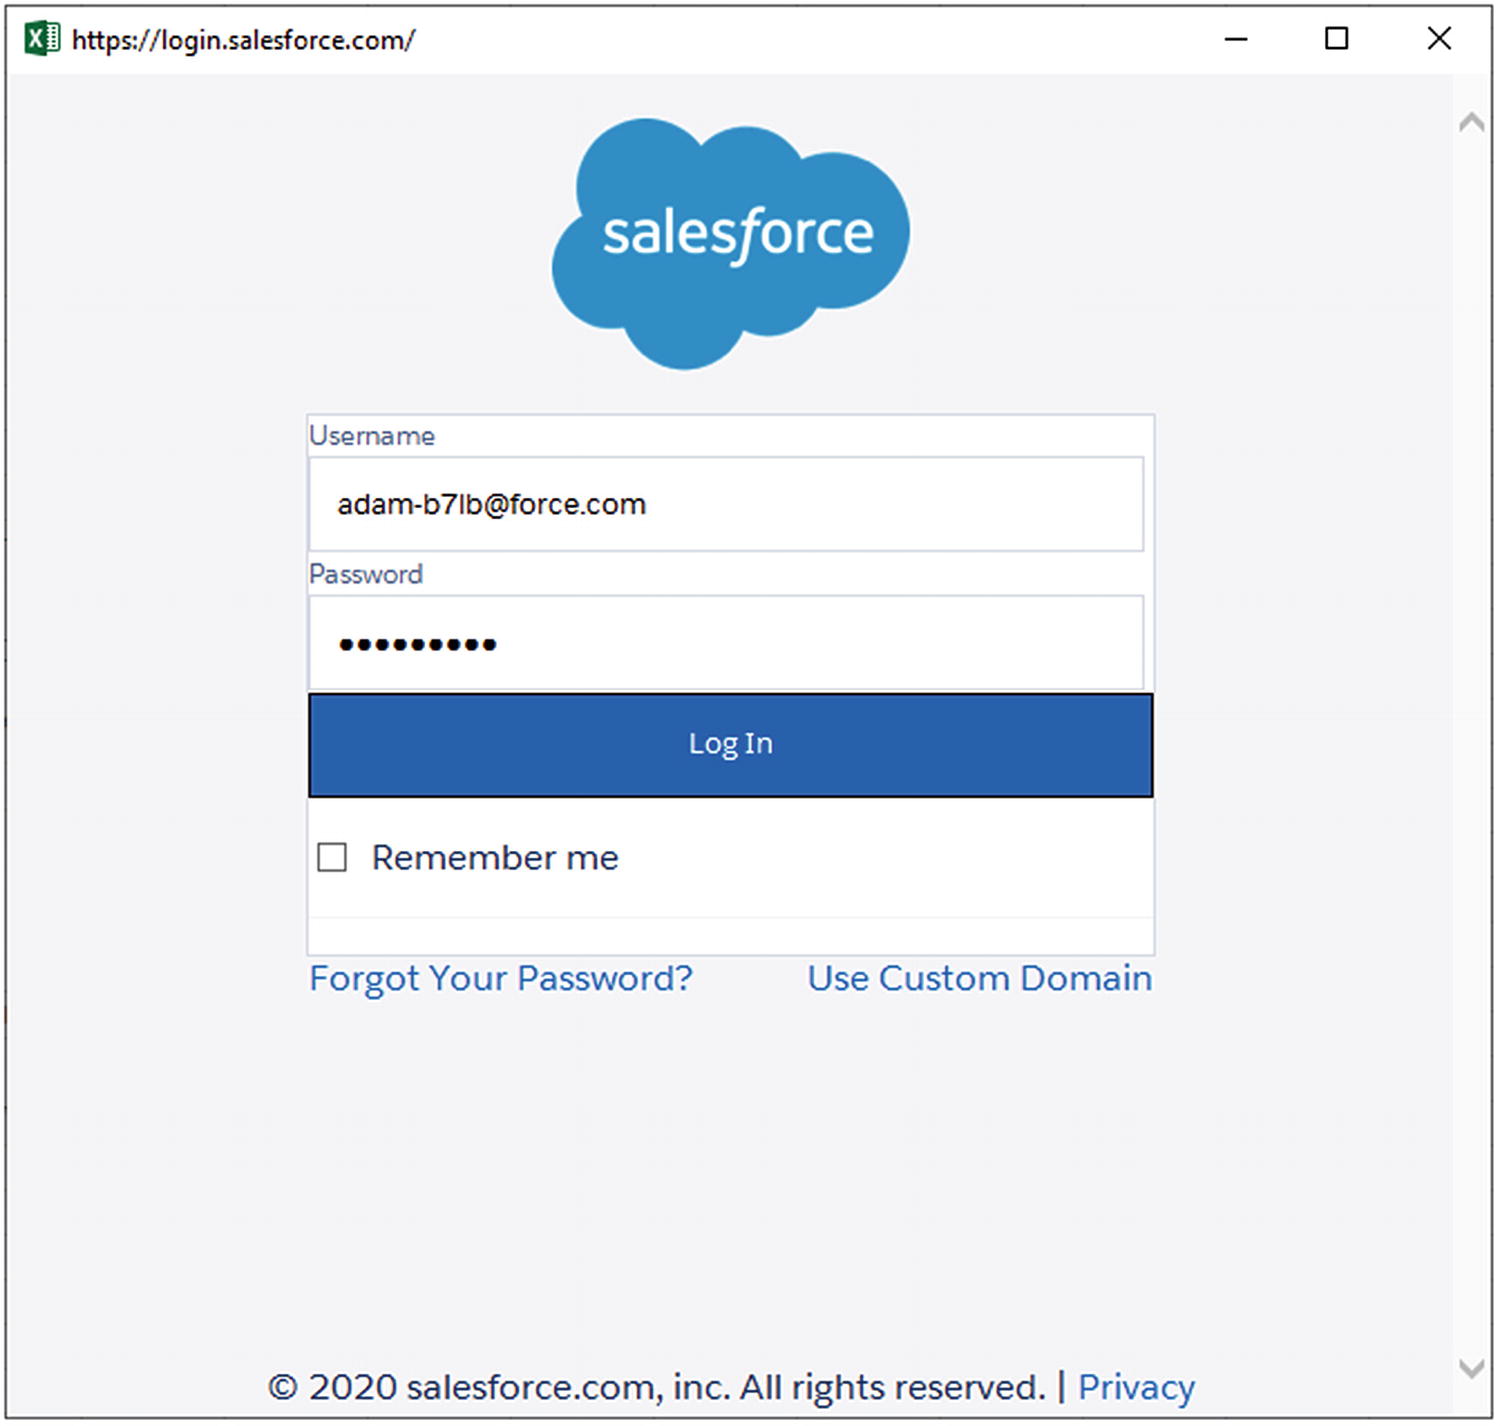
The Salesforce sign-in dialog
- 7.
If this is the first time that you are connecting to Salesforce from Power Query (or if you have requested that Salesforce request confirmation each time that you log in), you will be asked to verify your identity. The Salesforce Verify Your Identity dialog will appear, as shown in Figure 4-8.
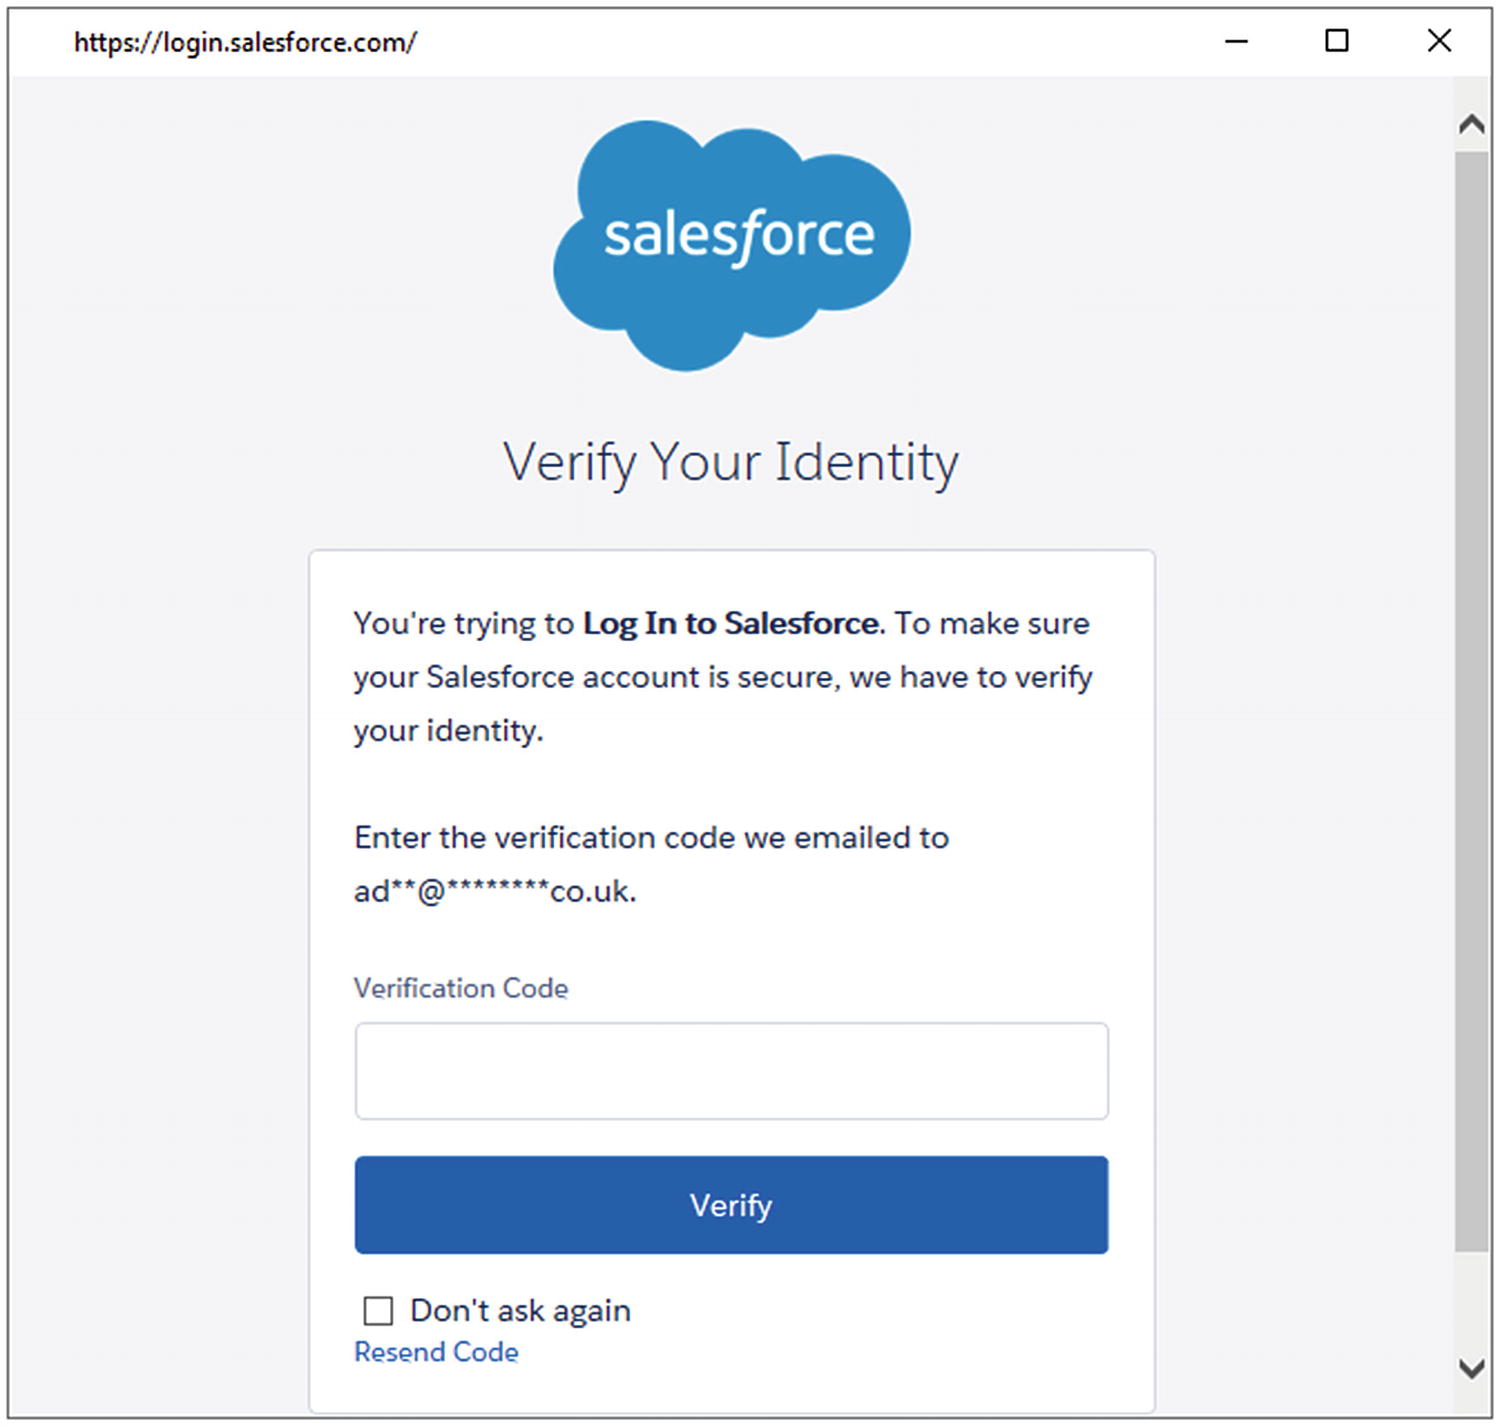
The Salesforce Verify Your Identity dialog
- 8.
Click Verify. Salesforce will send a verification code to the email account that you are using to log in to Salesforce.
- 9.
Enter the code in the Verification Code field and click OK. You will see the Allow Access dialog, as in Figure 4-9.

The Salesforce Allow Access dialog
- 10.
Click Allow. You will return to the Access Salesforce dialog, only now you are logged in.
- 11.
Click Connect. The Navigator will appear, showing the Salesforce objects that you have permissions to access. You can see an example of this in Figure 4-10.
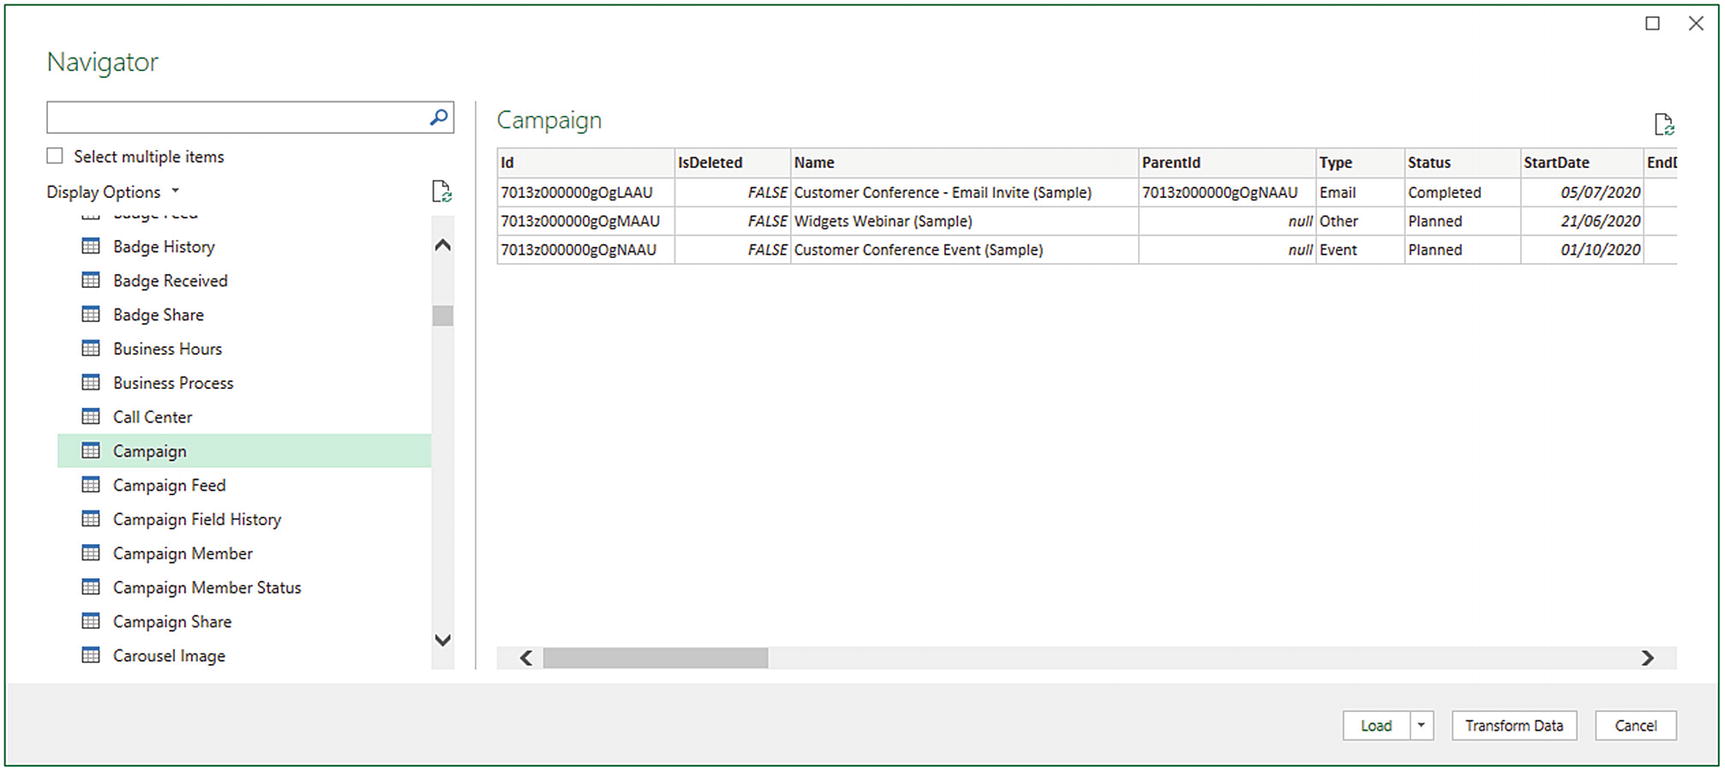
Salesforce objects viewed in the Navigator
- 12.
Select the objects whose data you wish to load into Excel and click Load. The data will be loaded into Excel ready for you to create reports based on your Salesforce data.
To avoid having to confirm your identity to Salesforce every time that you create a new suite of Excel reports using Salesforce data, you can check “Remember me” in the Salesforce sign-in dialog and “Don’t ask again” in the Salesforce Verify Your Identity dialog.
Salesforce objects contain a vast amount of data. However, from the point of view of Power Query, this is similar to accessing a database structure. This means that you have to have some understanding of how the underlying data is stored. Should you wish to learn about the way that Salesforce data is structured, then I suggest that you start with the Salesforce documentation currently available at https://trailhead.salesforce.com/en/modules/data_modeling/units/objects_intro.
Salesforce Reports
If you find that you are simply submerged by the amount of data that is available in Salesforce, you can, instead, go directly to the data that underlies standard Salesforce reports. This will avoid your having to learn about the underlying data structures. The downside is that you cannot easily extend these datasets.
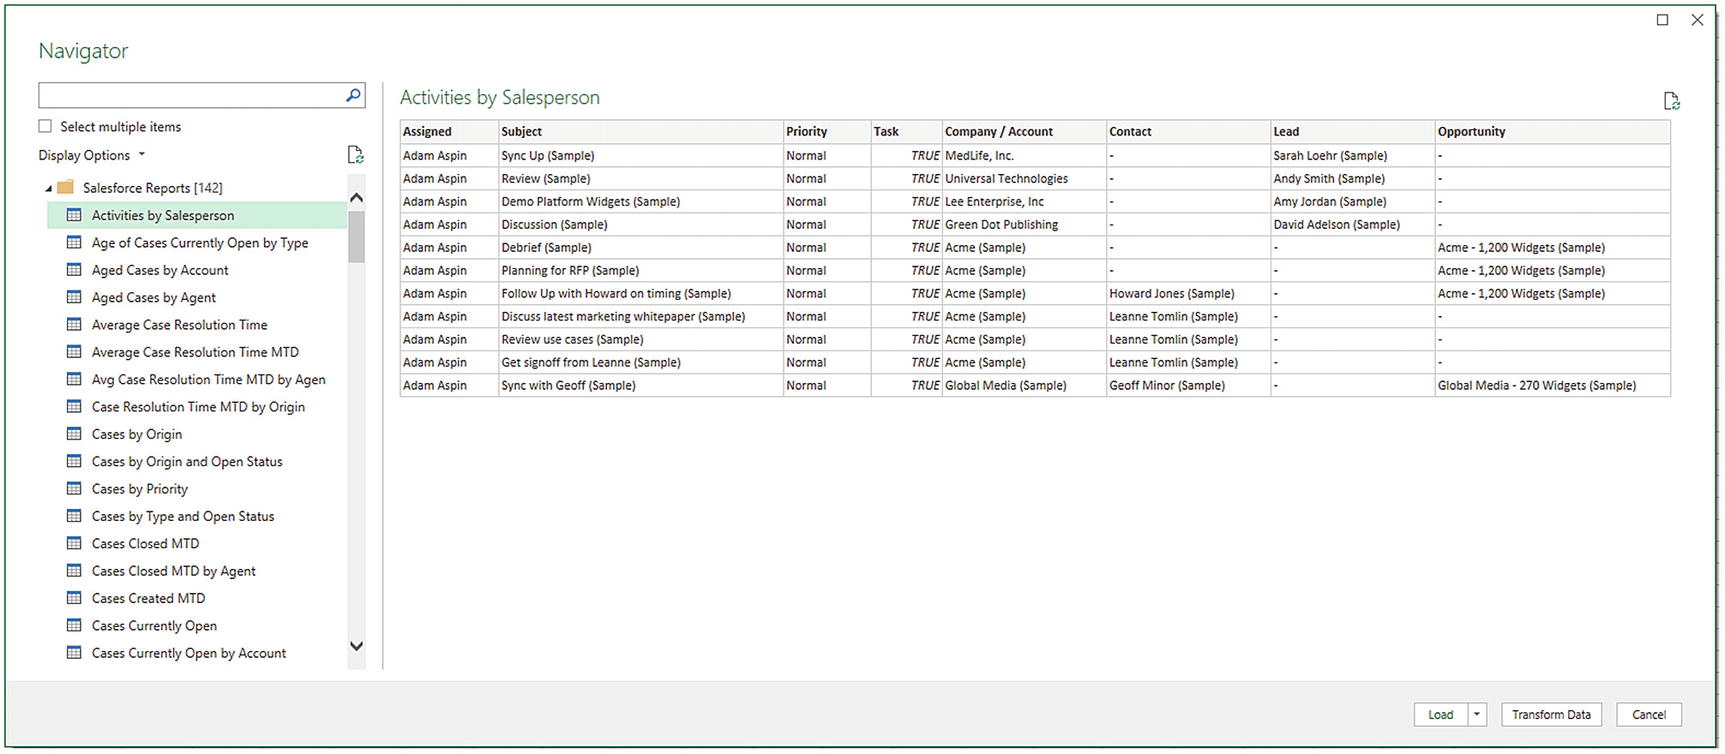
The Navigator dialog showing the data for Salesforce Reports
From here you can select and load the reports data from Salesforce that you want to use for further analysis.
Microsoft Dynamics 365
- 1.
Open a new Excel application.
- 2.
In the Excel Data ribbon, click the Get Data button.
- 3.
Click From Online Services ➤ From Dynamics 365 (online)
- 4.
Click Connect. The Dynamics 365 (online) dialog will appear.
- 5.
Enter the URL that you use to connect to Dynamics 365 and add /api/data/v8.1 (at least, this was the case as this book went to press). It could look like the one shown in Figure 4-12. Note, however, that this URL will vary depending on where you are in the world.
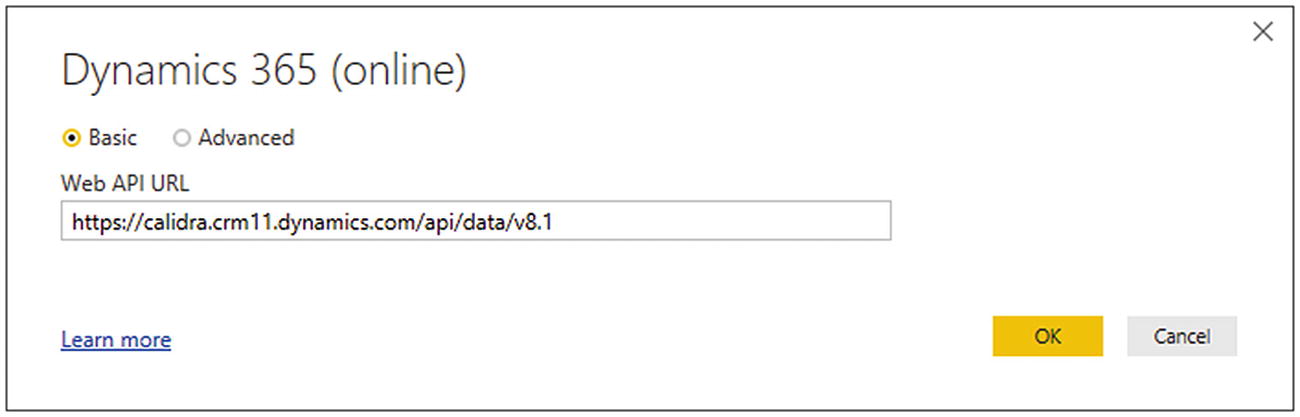
The Dynamics 365 (online) dialog
- 6.
Click OK. The OData feed dialog will appear. This is because Power Query uses OData to connect to Dynamics 365 Online.
- 7.
Select Organizational Account as the security access method.
- 8.
Click Sign In to sign in to your Dynamics 365 account and follow the Microsoft sign-in process.
- 9.
Click Connect. The Navigator dialog will appear showing all the Dynamics objects that you have permissions to connect to.
In step 6 you saw that an MS Dynamics 365 connection is really an OData connection. OData is explained in more detail in the following chapter.
There are a huge number of Dynamics 365 tables—and this number will vary depending on the subscription that your organization has taken out. However, you are, in reality, accessing a database structure. This means that you have to have some understanding of how the underlying data is stored. Should you wish to learn about Dynamics 365 tables, then I suggest that you start with the Microsoft online help at https://docs.microsoft.com/en-us/dynamics365/unified-operations/dev-itpro/data-entities/data-entities.
Azure SQL Database
SQL Server does not only exist as an on-premises database. It is also available as a “platform as a service ” (also known as PaaS). Simply put, this lets you apply a pay-as-you-go model to your database requirements where you can fire up a database server in the cloud in a few minutes and then scale it to suit your requirements, rather than buying hardware and software and having to maintain them.
Connecting to Microsoft’s PaaS offering, called Azure SQL Database, is truly simple. If you have the details of a corporate Azure SQL Database, you can use this to connect to. If you do not, and nonetheless want to experiment with connecting Power Query to Azure SQL Database, you can always request a free trial account from Microsoft and set up an Azure SQL Database database in a few minutes. If this is the path that you are taking, then you can find instructions on how to do this (including loading the sample data that you will connect to later in this section) at the following URL: https://docs.microsoft.com/en-gb/azure/sql-database/sql-database-get-started-portal.
When you are creating your own Azure SQL Database to test connectivity from Power Query, be sure to define the source to be Sample. This will ensure that the MS sample data is loaded into your test database.
- 1.
Open a new Excel application.
- 2.
In the Excel Data ribbon, click Get Data ➤ From Azure ➤ From Azure SQL Database. The SQL Server database dialog will appear (after all, an Azure SQL Database is a SQL Server database—but in the cloud).
- 3.
Enter the Azure SQL Database server name that you obtained from the Microsoft Azure Management Portal (or that was given to you by a corporate DBA). The SQL Server database dialog will look like the one shown in Figure 4-13.
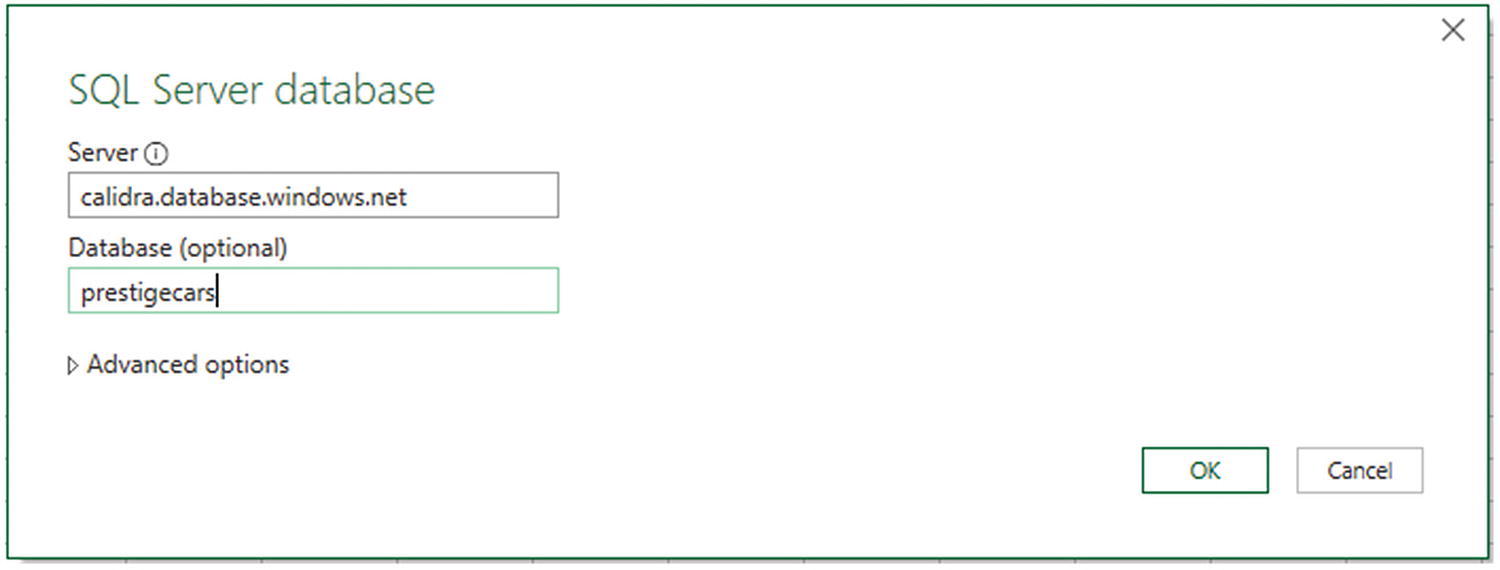
The SQL Server database dialog for an Azure SQL Database connection
- 4.
Click OK. The credentials dialog will appear.
- 5.
Click Database on the left and enter a valid user name and password. The credentials dialog will look like the one shown in Figure 4-14.
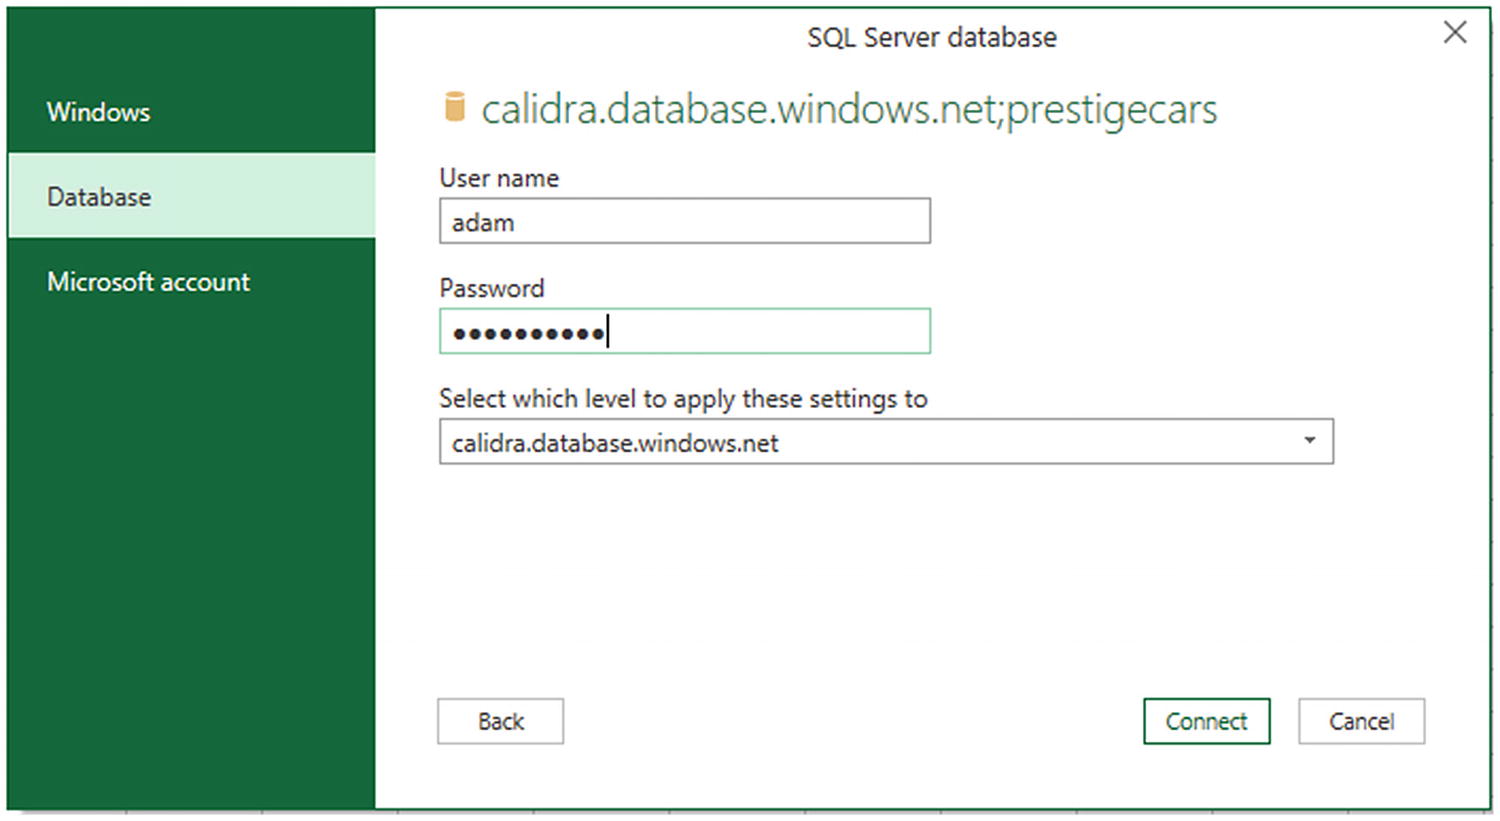
The SQL Server credentials dialog for an Azure SQL Database connection
- 6.
Click Connect. The Navigator dialog will appear showing the database(s) that you have permission to access in the Azure SQL Server Database.
If you are setting up an Azure SQL Database, make sure that you include firewall rules to allow connection from the computer where you are running Excel to the Azure SQL Database.
Ensuring that the DataSource settings are stored by Power Query and can be updated just as you can for an on-premises database connection
Azure SQL Data Warehouse (Azure Synapse Analytics)
Azure has many available platforms to store data. One that is particularly well adapted to Power Query is the Azure SQL Data Warehouse—now known as Azure Synapse Analytics . This is an MPP (massively parallel processing) data warehouse that is hosted in Azure.
Once again I will presume that you have a corporate Azure Synapse Analytics instance at hand and that you have the relevant access rights to Azure Synapse Analytics. Here, too, you need firewall rules to be set up correctly (although this may not be strictly necessary if you have previously set up firewall rules for, say, Azure SQL Database). I imagine that you could need the assistance of corporate IT support to ensure that the connection can be made successfully.
- 1.
Open a new Excel application.
- 2.
In the Data ribbon, click Get Data ➤ From Azure ➤ From Azure SQL Data Warehouse.
- 3.
Enter the Azure SQL Data Warehouse server name that you obtained from the Microsoft Azure Management Portal (or that was given to you by a corporate IT). The SQL Server database dialog will look like the one shown in Figure 4-15. This is because Azure Synapse Analytics is, essentially, a SQL Server database.

The SQL Server database dialog for an Azure Synapse Analytics connection
- 4.
Select the Import button and then click OK. The credentials dialog will appear.
- 5.
Click Database on the left and enter a valid user name and password.
- 6.
Click Connect. The Navigator dialog will appear showing the database(s) that you have permission to access in the Azure SQL Server database.
- 7.
Select the tables that you need and click Load or Edit to return to Excel. Remember to click Select multiple items if you want to import several tables simultaneously.
Do not be phased by the fact that the title for the dialog where you specify the server and database says “SQL Server database.” This will connect you to the Azure SQL Data Warehouse correctly.
Connecting to SQL Server on an Azure Virtual Machine
More and more databases are now hosted outside a corporate environment by cloud service providers. With a provider such as Amazon (with RDS for SQL Server) or Microsoft (that offers virtual machines —or VMs—for SQL Server in Azure), you can now site your databases outside the enterprise and access them from virtually anywhere in the world.
So, to extend the panoply of data sources available to Power Query, we will now see, briefly, how to connect to SQL Server on an Azure Virtual Machine. Admittedly, connecting to SQL Server on an Azure Virtual Machine is nearly the same as connecting to SQL Server in a corporate environment—as you saw in Chapter 3. However, it is worth a short detour to explain, briefly, how to return data to Excel from a SQL Server instance in the cloud using Power Query.
Once again, if you do not have a SQL Server instance that is hosted on an Azure Virtual Machine in your corporate environment, then you can always test this process using an Azure trial account. I cannot, however, explain here how to set up a SQL Server instance on a VM, as this is a large and separate subject that is outside the scope of this book. There are, however, many resources available that can explain how to do this should you need them.
- 1.
Open a new Excel application.
- 2.
In the Excel ribbon, click the small triangle at the bottom of the Get Data button and then click SQL Server. The SQL Server database dialog will appear.
- 3.
Enter the full string that describes the server in the Server text box. Either this will be given to you by a corporate DBA or, if you are using your own Azure account, you can find it in the Azure Management Portal.
- 4.
Enter the database name corresponding to the database that you have the right to access. The dialog will look like Figure 4-16.
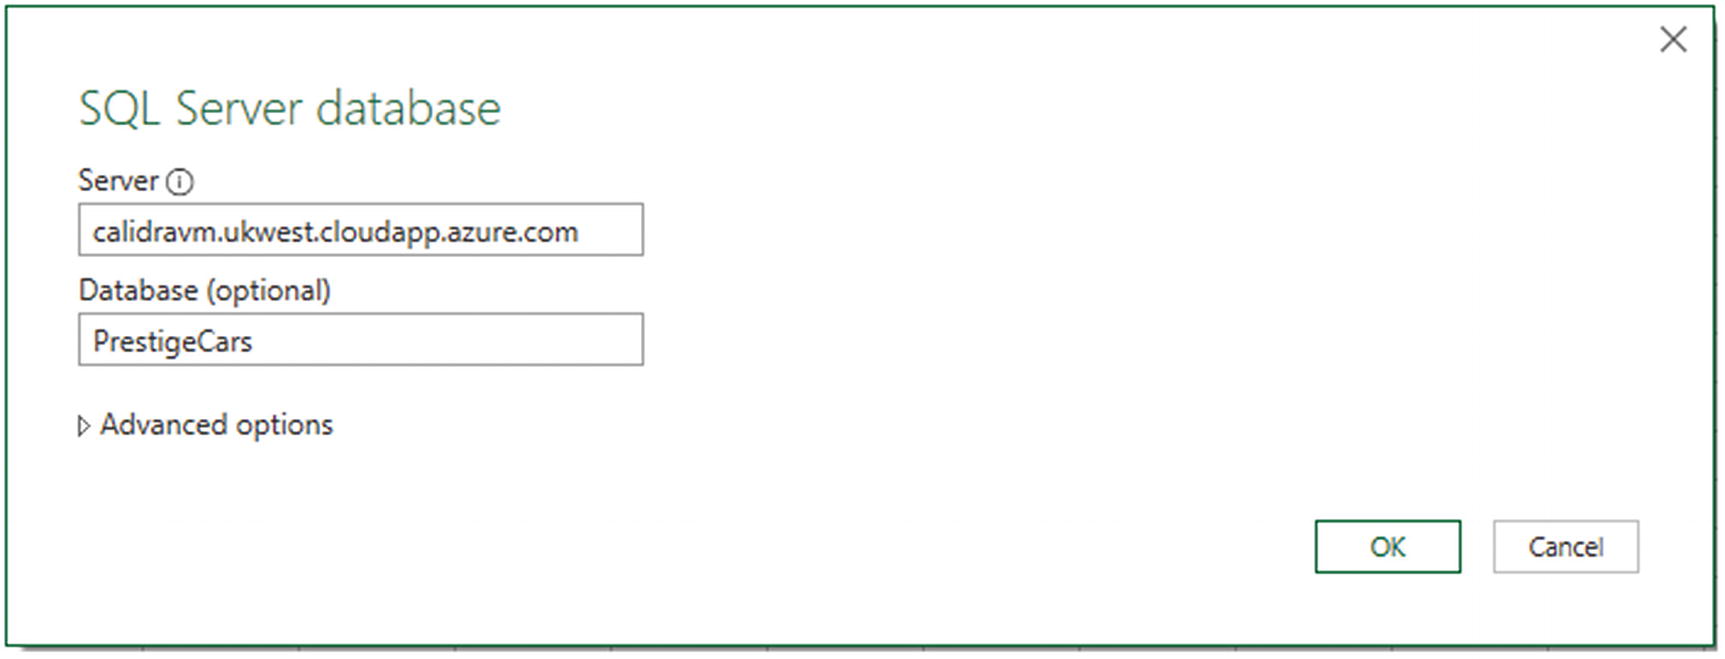
The Microsoft SQL Server database dialog for an Azure VM
- 5.
Click OK. The Access a SQL Server Database dialog will appear. Select Database as the security mode and enter the user name and password, as shown in Figure 4-17. If you are using your own Azure account, these can be the user name and password that you specified when setting up the virtual machine.
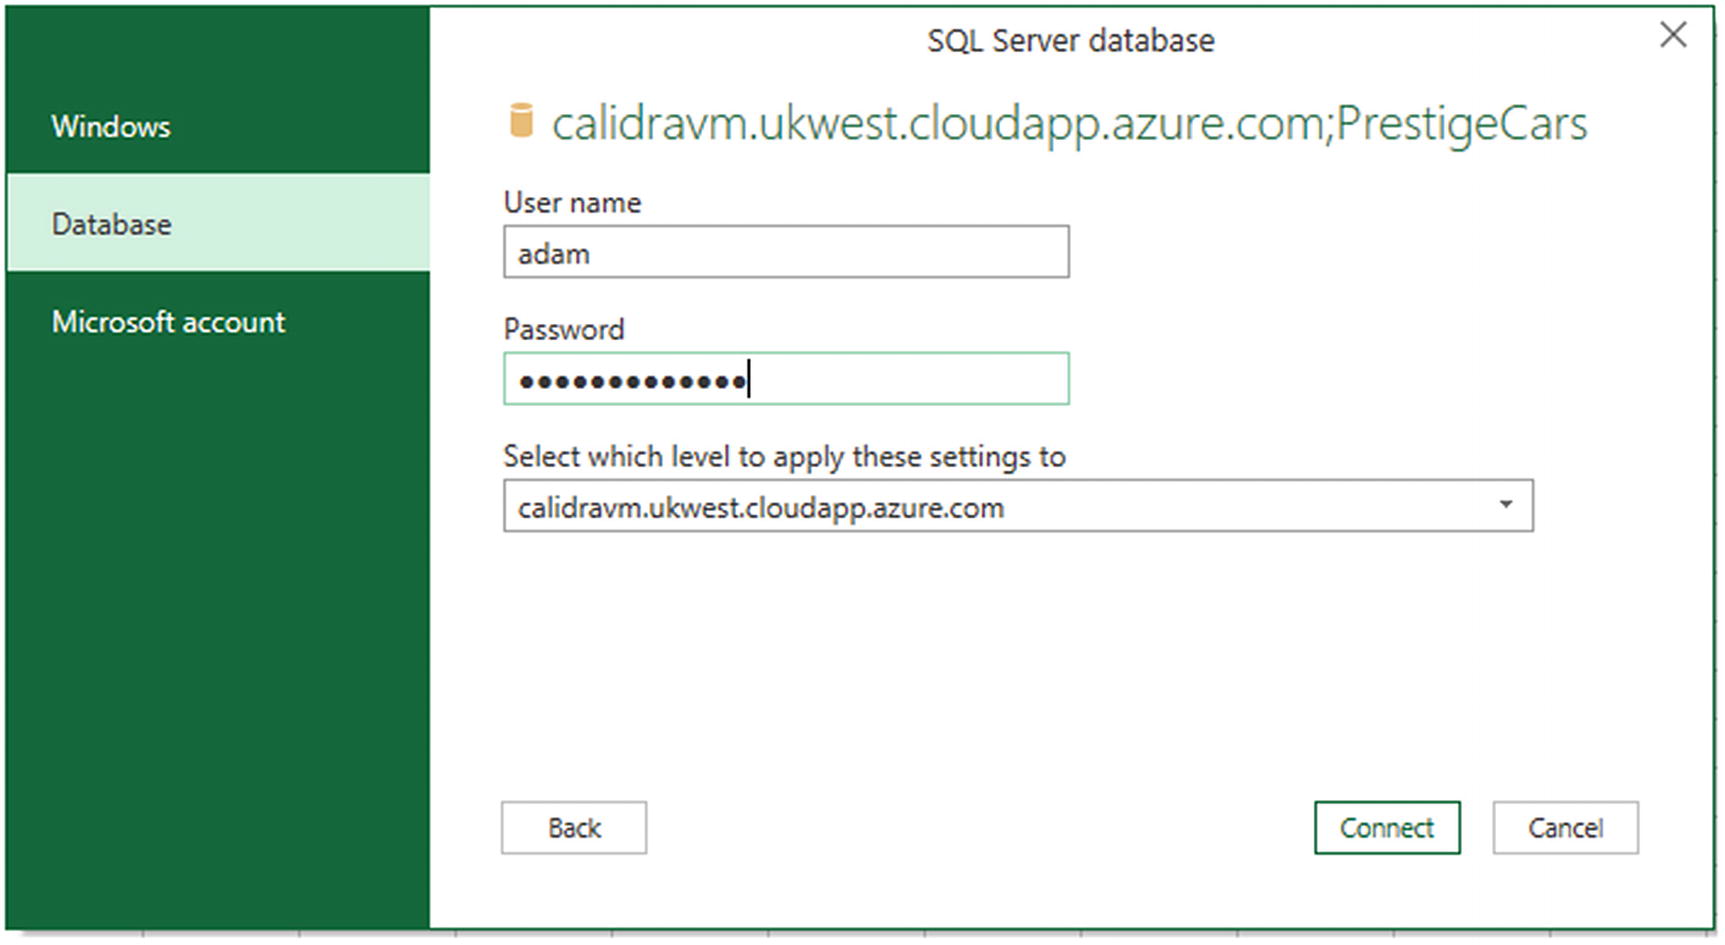
The SQL Server database dialog when connecting to a virtual machine
- 6.
If you see the encryption support dialog, click OK. The Navigator dialog will appear listing all the tables that you have permissions to see on the SQL Server hosted by the virtual machine.
You use the Azure VM multipart name as the server name.
As was the case when connecting to an on-premises SQL Server instance, you can select the database if required.
You can use the server’s IP address as the database name if the VM has specified a public IP address.
Security is a big and separate question. In a corporate environment, you might be able to use Windows security to connect. You will almost certainly have to use database security for a test VM.
As is always the case in Azure, firewalls must be set up correctly.
Azure Blob Storage
The final Azure data source that I want to introduce you to in this chapter is Azure Blob Storage . To all intents and purposes, you can consider this, as far as Excel is concerned, as a file share in the cloud. So if you need to access data that is stored as files, you can connect to them via Azure Blob Storage.
Once again, you will need either corporate access to Azure Blob Storage or an Azure trial account. In either case, you need to copy the two sample files that are in the folder C:PowerBiDesktopSamplesMultipleIdenticalFiles into a container in your Azure Blob Storage. Downloading the sample files is explained in Appendix A.
- 1.
Open a new Excel application.
- 2.
In the Data ribbon, click Get Data ➤ From Azure ➤ From Azure Blob Storage.
- 3.
Enter the account name that you are using to connect to Azure Blob Storage. The Azure Blob Storage dialog will look like the one shown in Figure 4-18. If you are using a corporate Azure Blob Storage account, then your system administrator will provide this. In a test scenario, you can find this in the Azure Management Portal by opening the Storage Account blade and copying the Blob Service Endpoint.
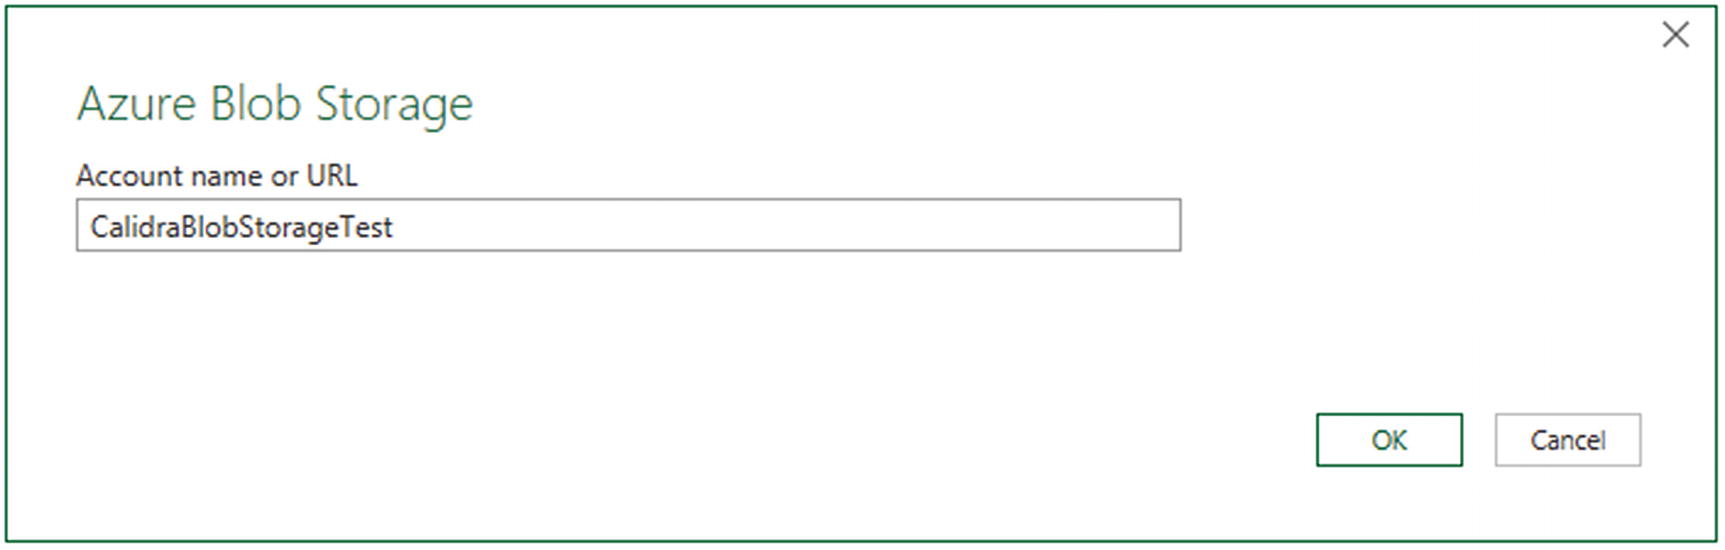
Connecting to an Azure Blob Storage
- 4.
Click OK. The Azure Blob Storage Account Key dialog will appear.
- 5.
In the Azure Management Portal, copy an account key. These can be found in the Azure Management Portal by clicking the Storage Account blade and then clicking Access Keys. If you have been sent an account key by a system administrator, then use that instead. You can see this dialog in Figure 4-19.

Azure Blob Storage Account key
- 6.
Paste the account key into the Azure Blob Storage Account key dialog.
- 7.
Click Connect. The Navigator will appear, showing the list of files in the selected container.
- 8.
Click Load. The list of files stored in Azure will appear in Power Query.
It is important to note that, for the moment at least, what you have returned from Azure is a list of available files. Chapter 9 explains how to select and load data from some or all of the available files into Excel, where they can be used as a basis for analytics.
Azure Security
All cloud service providers take security extremely seriously. As you have seen in this chapter, you will always be obliged to enter some form of security token and/or specify a valid user name and password to connect to cloud-based data.
Other Source Types
Clearly it would be impossible to explain how to use all of the potential data sources without devoting a considerable number of pages to the subject. Moreover, not everybody will need to access every place where external data is stored. Indeed, most users only ever need to ingest data from two or three external data sources at most.
Inevitably, this means that there are several data sources available in Power Query in Excel that you will not be seeing in this book. However, as I have mentioned, one of the fundamental advantages of Power Query is that once you have learned how to connect to a couple of data sources, you have learned how to use pretty nearly all of them.
Azure Data Lake
SharePoint (on-premises and online)
Microsoft Exchange (on-premises and online)
Microsoft Dynamics online
Active Directory
Hadoop
Azure HDInsight
Facebook
Connecting to SharePoint, Exchange, Microsoft Dynamics, Azure HDInsight, or Hadoop will mean, inevitably, that these are used by your organization—and that you have the necessary access rights.
I prefer to add a word of warning if you are using Power Query in Excel to connect to Azure HDInsight or Hadoop. These are “big data” sources and, as the moniker implies, they can contain vast amounts of data. The sheer size of the data that they contain can easily swamp Excel. Consequently, I advise you to read the next few chapters that explain how to select and filter data before loading it before you attempt to connect to big data sources.
Conclusion
In this chapter, you saw, briefly, how to retrieve data that you access using the Internet. This can range from a table of data on a web page to a massive Azure Synapse Analytics Data Warehouse. You may even need to access data held in Azure Blob Storage or in an Azure Data Lake. Alternatively, perhaps you need to create reports based on your Salesforce or MS Dynamics 365 data. In any case, Power Query can connect and access the data available in these services and repositories.
Given the number of online sources, this chapter could only scratch the surface of this range of potential data repositories. However, as Power Query is rigorous about standardizing access to data, you should be able to apply the approaches you have learned in this chapter to many other data services, both current and future.