Not all data flows are rigid and predictable. There will, inevitably, be cases where you also want to shape the data ingestion process depending on aspects of the source data. This can mean parameterizing your queries to allow user interaction or adjusting the data flow dynamically. Adding parameters to queries enables you to define and apply specific criteria to certain aspects of query processing.
All the files used in examples in this chapter are available for download from the Apress website as described in Appendix A.
As parameters are entirely managed inside the Query Editor, you will need to have the Query Editor open to carry out any of the examples in this chapter.
Parameterizing Queries
Select a value that can be used in one or more queries to alter the query flow by injecting a required element into a query step. This could be a file source or a filter value, for instance.
Restrict the selection of potential parameter values to a predefined list of options for a user to choose from.
A single value that you or the user enters
A selection of a value from a list of possible values that you enter manually
A selection of a value from a list of possible values that you create using existing queries
Create a parameter.
Apply it to a query.
Load it into the data model (although this is rarely required)
Reference it from another query
Build and modify it just like any other query
This chapter will explain how you can create and apply parameters. This will include showing you some of the ways that you can apply parameters in the Query Editor to filter or transform the data.
Creating a Simple Parameter
- 1.
Open the Excel file C:DataMashupWithExcelSamplesCarSalesDataForQueries.xlsx (unless it is already open, of course).
- 2.
Display the Queries & Connections pane (unless it is already visible). Double-click any of the queries in the Queries & Connections pane to open the Query Editor.
- 3.
In the Query Editor Home ribbon, click the small triangle at the bottom of the Manage Parameters button, then select New Parameter from the available menu options. The Parameters dialog will appear.
- 4.
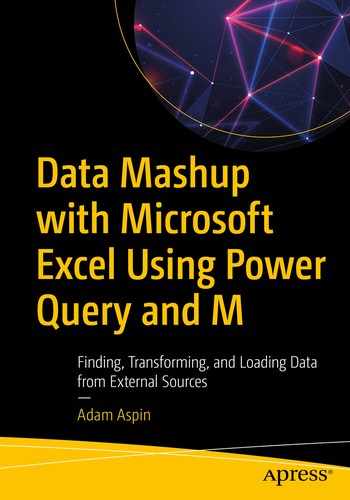
Enter DealerParameter as the parameter name and Filter dealer types as the description.
- 5.
Ensure that the Required check box is selected.
- 6.
Choose True/False from the popup list of types.
- 7.
Enter True as the Current Value from the popup list. The dialog will look like the one in Figure 11-1.
The Parameters dialog
- 8.
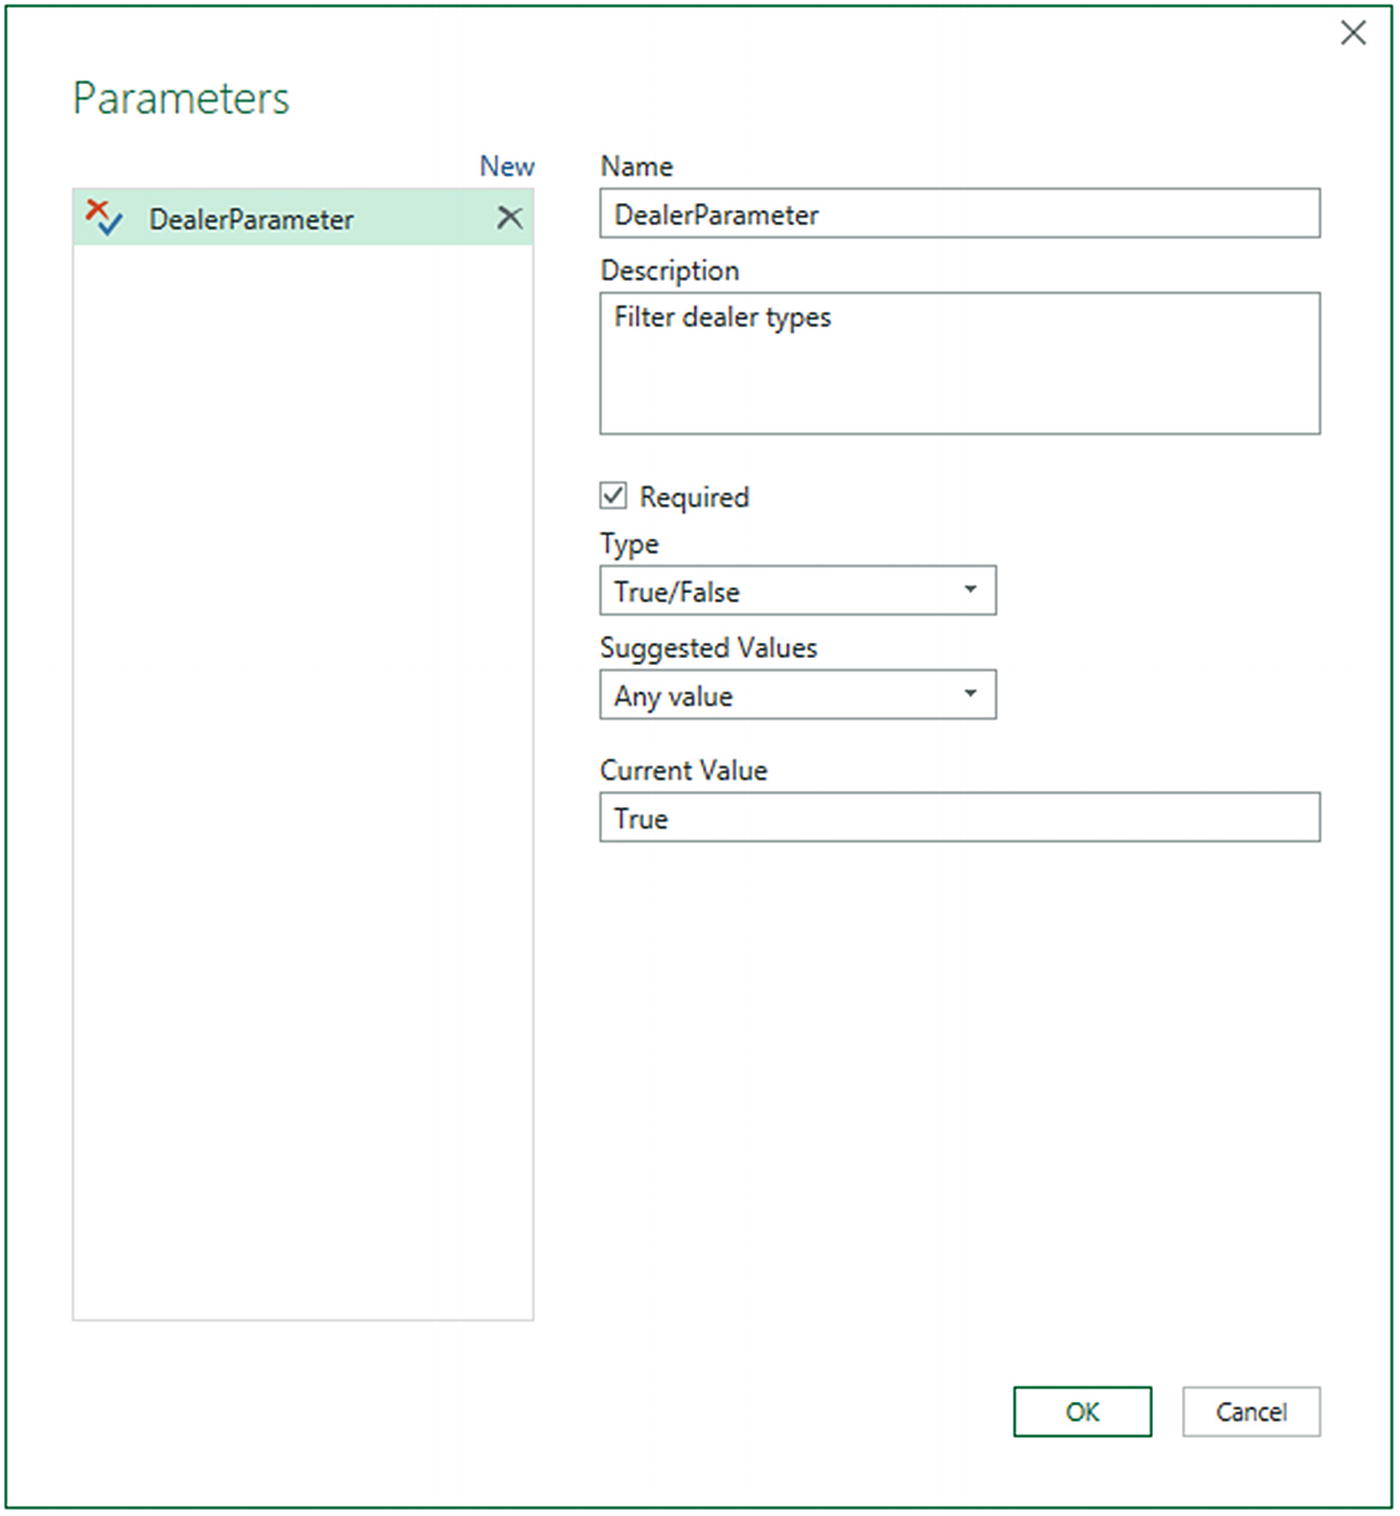
Click OK. The new parameter will appear in the Queries list on the left. You can see this in Figure 11-2.
A parameter in the Queries list
For the moment, all you have done is create a parameter and store a value in it. You will see how to use this parameter in a few pages’ time. As you can see, a parameter is stored as a type of query in the Power Query Editor Queries pane, and the default value is displayed after the query name in parentheses.
Creating a Set of Parameter Values
- 1.
Using the Excel file that you created in the previous section (the one based on the Excel file C:DataMashupWithExcelSamplesCarSalesOverview.xlsx), open the Query Editor—unless it is already open.
- 2.
In the Query Editor Home ribbon, click the small triangle at the bottom of the Manage Parameters button, then select New Parameter from the available menu options. The Parameters dialog will be displayed.
- 3.
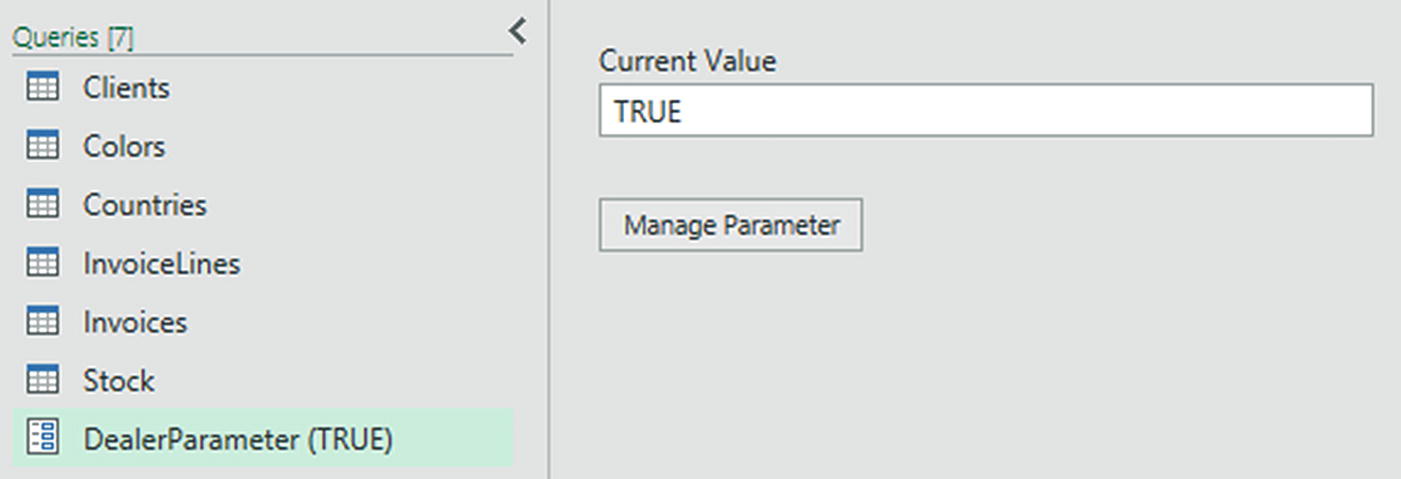
Enter CountriesParameter as the parameter name.
- 4.
Ensure that the Required check box is selected.
- 5.
Choose Text from the popup list of types.
- 6.
In the Suggested Values popup list, select List of values.
- 7.Enter the following three values in the grid that has now appeared:
- a.
France
- b.
Spain
- c.
Germany
- a.
- 8.
Select France as the Default Value from the popup list.
- 9.
Select Spain as the Current Value from the popup list. The dialog will look like the one shown in Figure 11-3.
The Parameters dialog for a set of options
- 10.
Click OK. The new parameter will appear in the Queries list on the left.
Once again, all you have done is create the parameter. You will see how it can be applied in a couple of pages’ time.
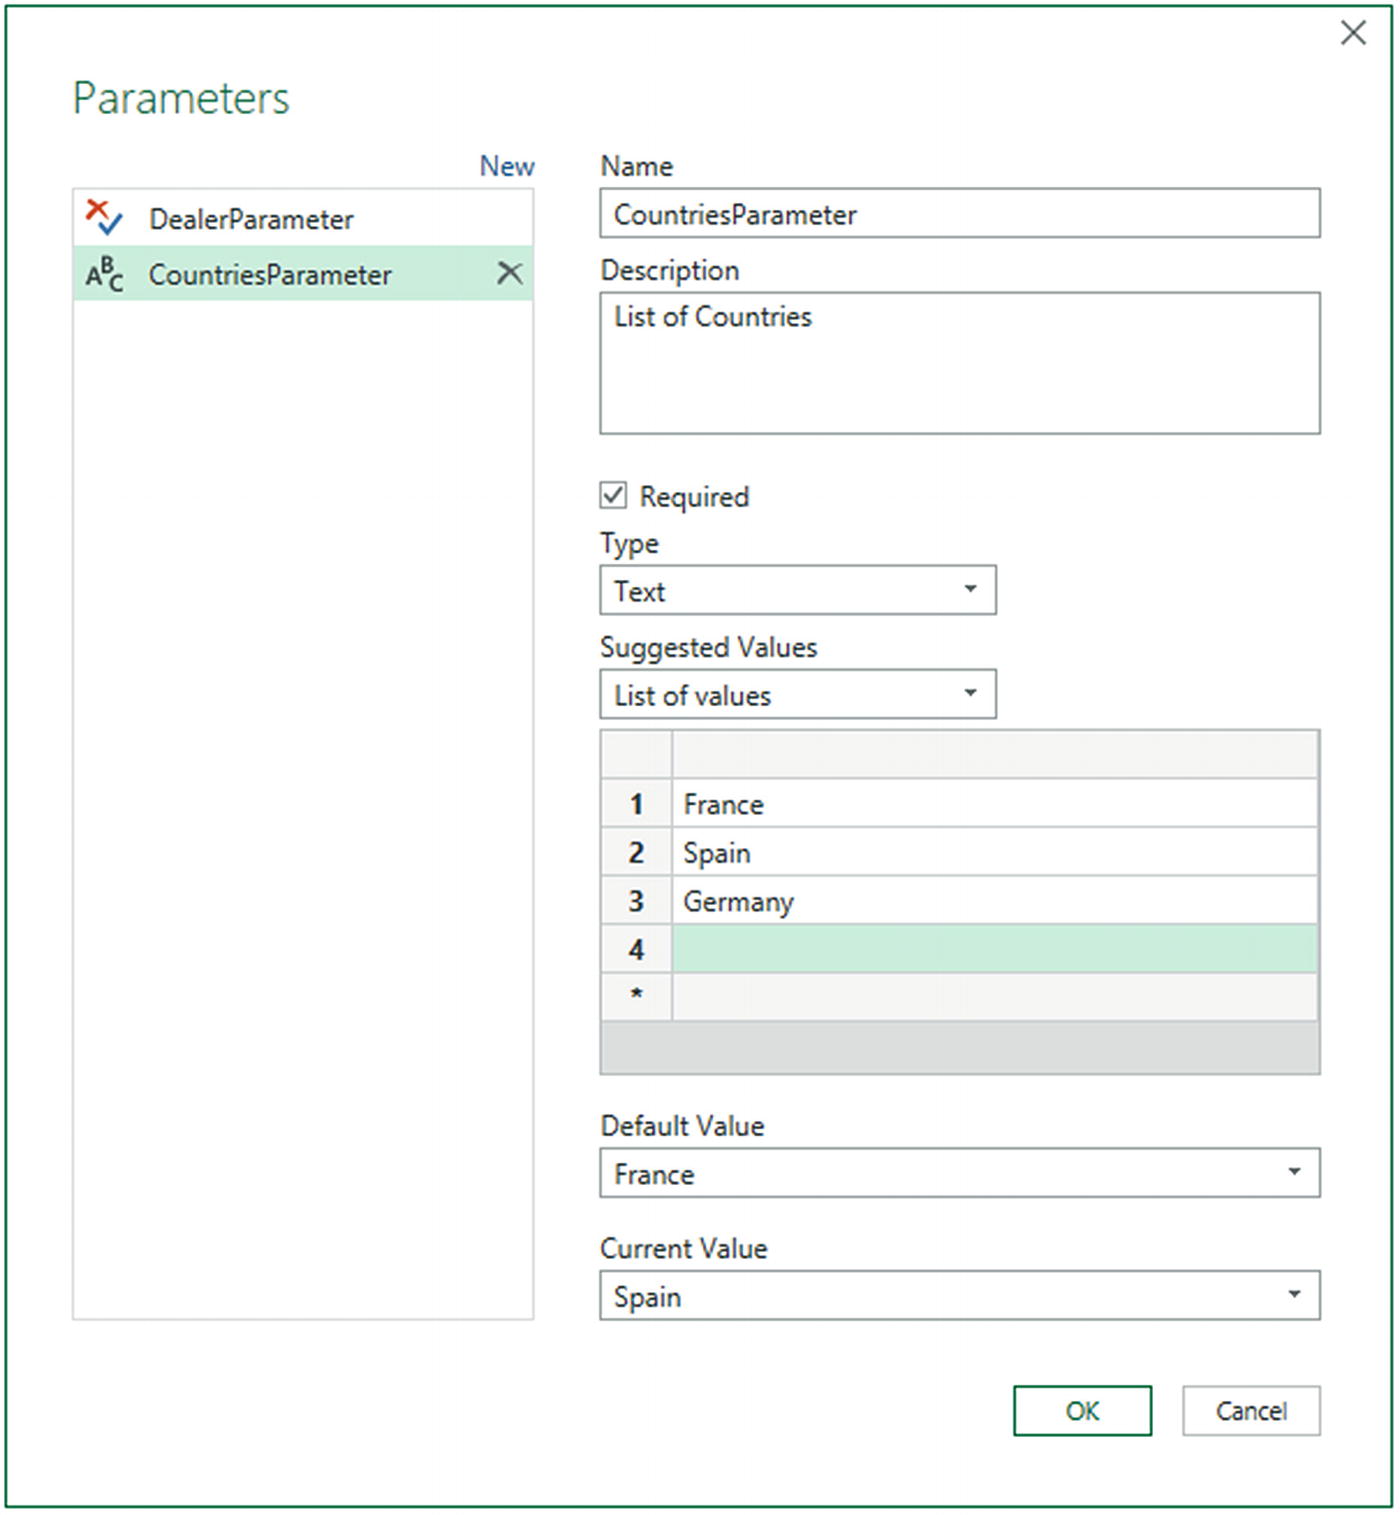
As you can see, any current value that you have chosen will appear in the Queries pane in parentheses to the right of the parameter name. This is to help you remember which value is current—and is possibly being used to shape a data flow process.
Creating a Query-Based Parameter
Typing lists of values that you can use to choose a parameter is not only laborious, it is also potentially error-prone. So you can use the data from existing queries to create the series of available elements that you use in a parameter instead of manually entering lists of values. Moreover, any lists that you enter manually are completely static. So you will have to remember to update them if the user requirements change. Parameter lists are, by contrast, dynamic. That is, they update automatically if the source data changes.
- 1.
Using the Excel file C:DataMashupWithExcelSamplesCarSalesDataForQueries.xlsx, open the Query Editor by double-clicking on any of the queries in the Queries & Connections pane.
- 2.
Select the query Stock in the Queries list.
- 3.
Right-click the title of the column named Model, and select Add as New Query. A new query named Model will appear in the Queries list. This query contains the contents of the column you selected.
- 4.
In the newly created query, click Remove Duplicates in the Transform ribbon. The List column will only display unique values.
- 5.
Rename the newly created query ModelList.
- 6.
In the Query Editor Home ribbon, click the small triangle at the bottom of the Manage Parameters button, then select New Parameter from the available menu options. The Parameters dialog will be displayed.
- 7.
Enter ModelsParameter as the parameter name.
- 8.
Ensure that the Required check box is selected.
- 9.
Choose Text from the popup list of types.
- 10.
In the Suggested Values popup list, select Query.
- 11.
Select ModelList as the query containing a list of values to use from the popup list of available lists.
- 12.
Enter DB7 as the Current Value. The Parameters dialog should look like the one in Figure 11-4.
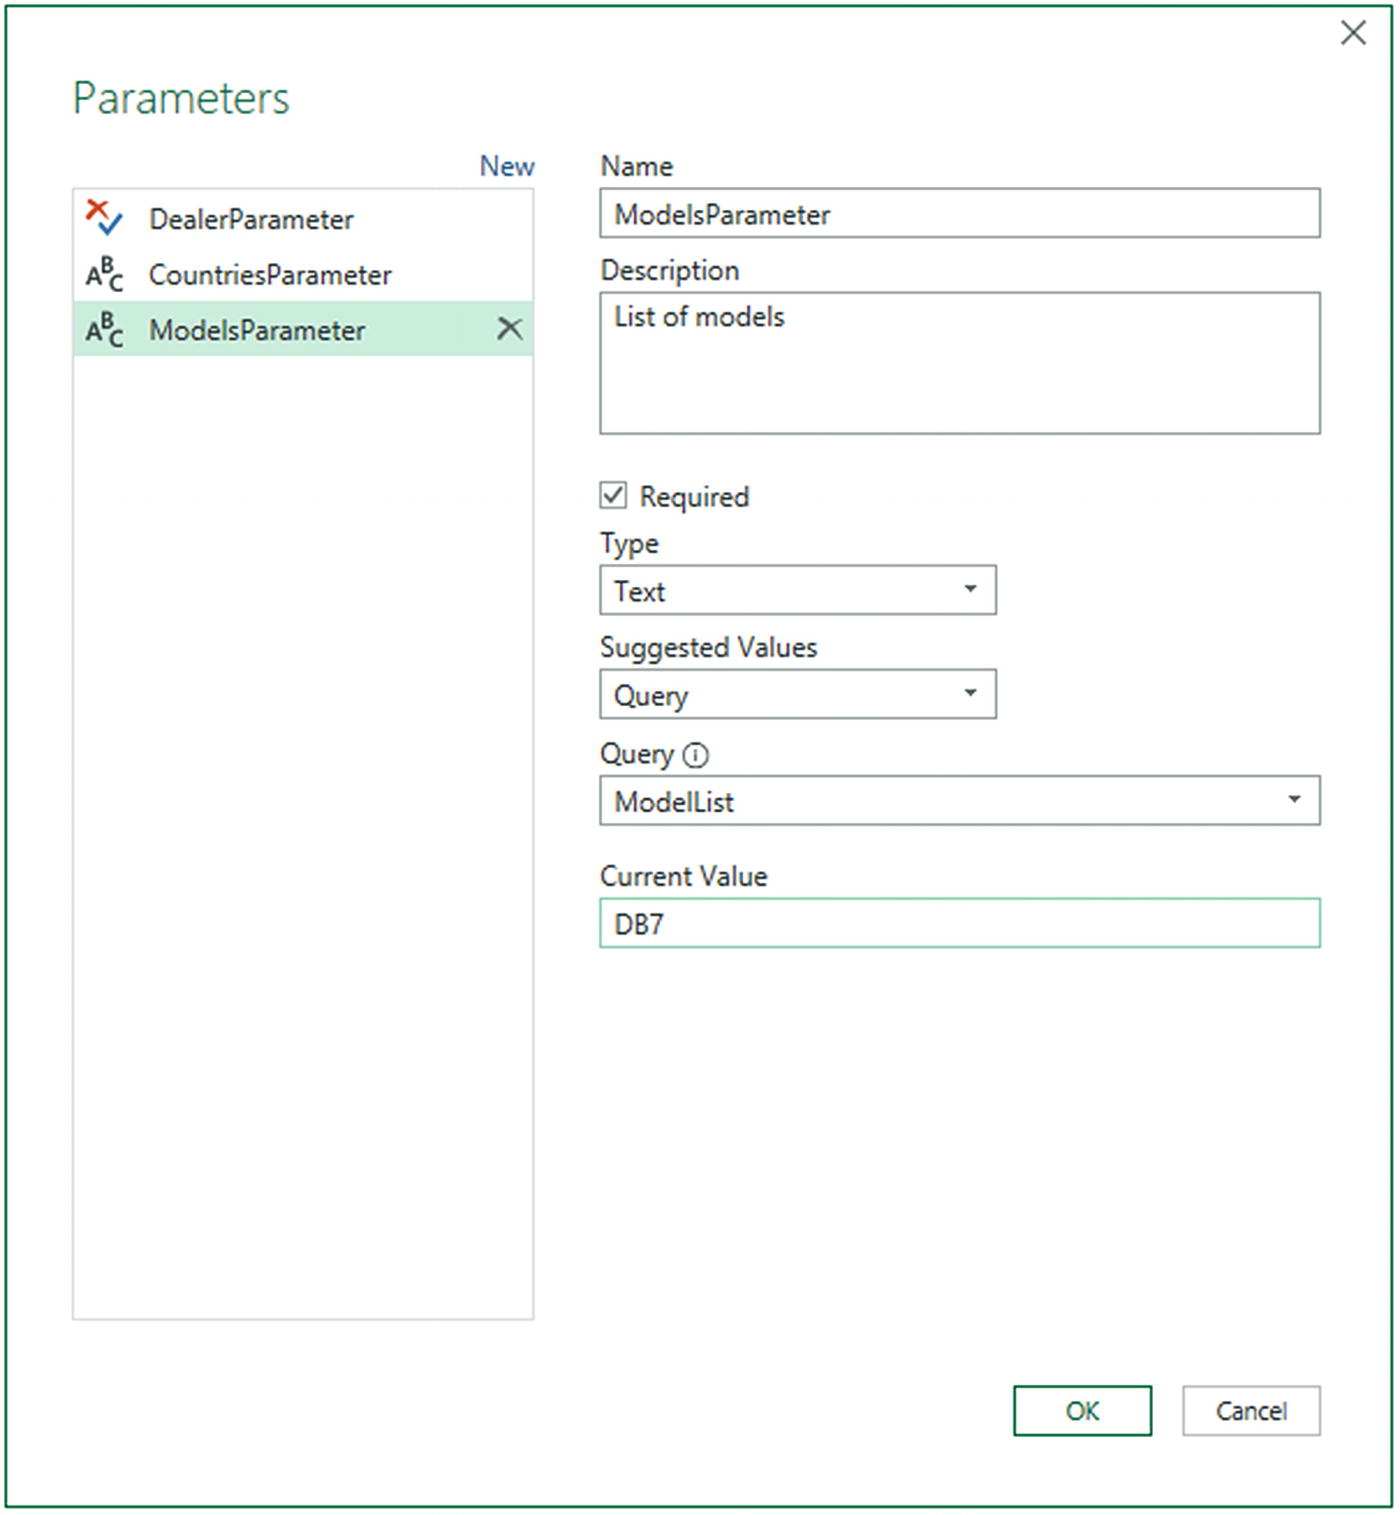
The Parameters dialog for a list of options
- 13.
Click OK. The new parameter will appear in the Queries list on the left.
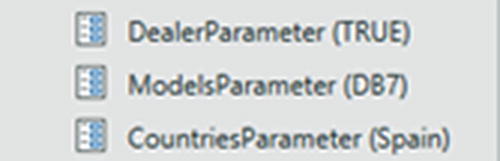
Parameters in the Queries list
Parameters and lists will appear in Excel in the Queries & Connections pane. Lists will also normally load to a new Excel worksheet. Unless you define these as “Connection only” you will need to remember—and to warn users—that these are not “classic” queries.
Once your parameters have been created, you can quit the Query Editor by clicking the Close & Load button. Your parameters can now be used to shape a data flow process.
It is also possible to create parameters “on the fly” (i.e., directly from inside a dialog that uses a parameter) when you want to use them. However, I find it better practice—and more practical—to prepare parameters beforehand. This forces you to think through the reasons for the parameter as well as the potential range of its use. It can also avoid your making errors when trying to do two different things at once.
Modifying a Parameter
The structure of a parameter
The selected parameter element (the current value)
Modifying the Structure of a Parameter
- 1.
In the Query Editor Home ribbon, click Manage Parameters. The Parameters dialog will be displayed as seen in the previous sections.
- 2.
In the left pane of the dialog, click the parameter that you want to modify. The parameter definition will appear on the right.
- 3.
Carry out any required modifications.
- 4.
Click OK.
- 1.
Click the parameter in the Queries pane on the left of the Query Editor.
- 2.
Click the Manage Parameters button. The Parameters dialog will appear.
- 3.
Carry out any required modifications.
- 4.
Click OK.
You can also, if you prefer, right-click a parameter in the Queries pane and select Manage from the popup menu to display the Parameters dialog.
Applying a Parameter When Filtering Records
- 1.
Open the file C:DataMashupWithExcelSamplesParametersExample.xlsx. This file contains the three parameters created previously.
- 2.
Double-click the Countries query in the Queries & Connections pane to open the Power Query Editor and select the Countries dataset. You may need to display the Queries & Connections pane by clicking Data ➤ Queries & Connections.
- 3.
Click the popup menu for the CountryName column on the right of the field name.
- 4.
Select Text Filters ➤ Equals. The Filter Rows dialog will appear.
- 5.
Leave Equals as the first choice.
- 6.
Click the central popup (between equals and enter or select a value) and select Parameter from the list. You can see this in Figure 11-6.
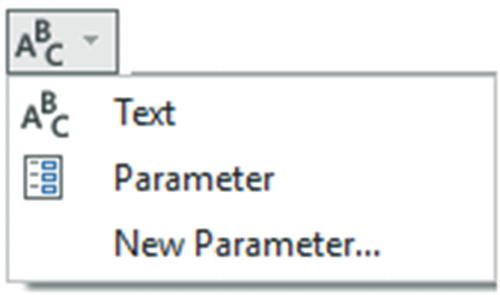
Selecting a parameter for a filter
- 7.
Select CountriesParameter for the third popup. The dialog will look like the one shown in Figure 11-7.
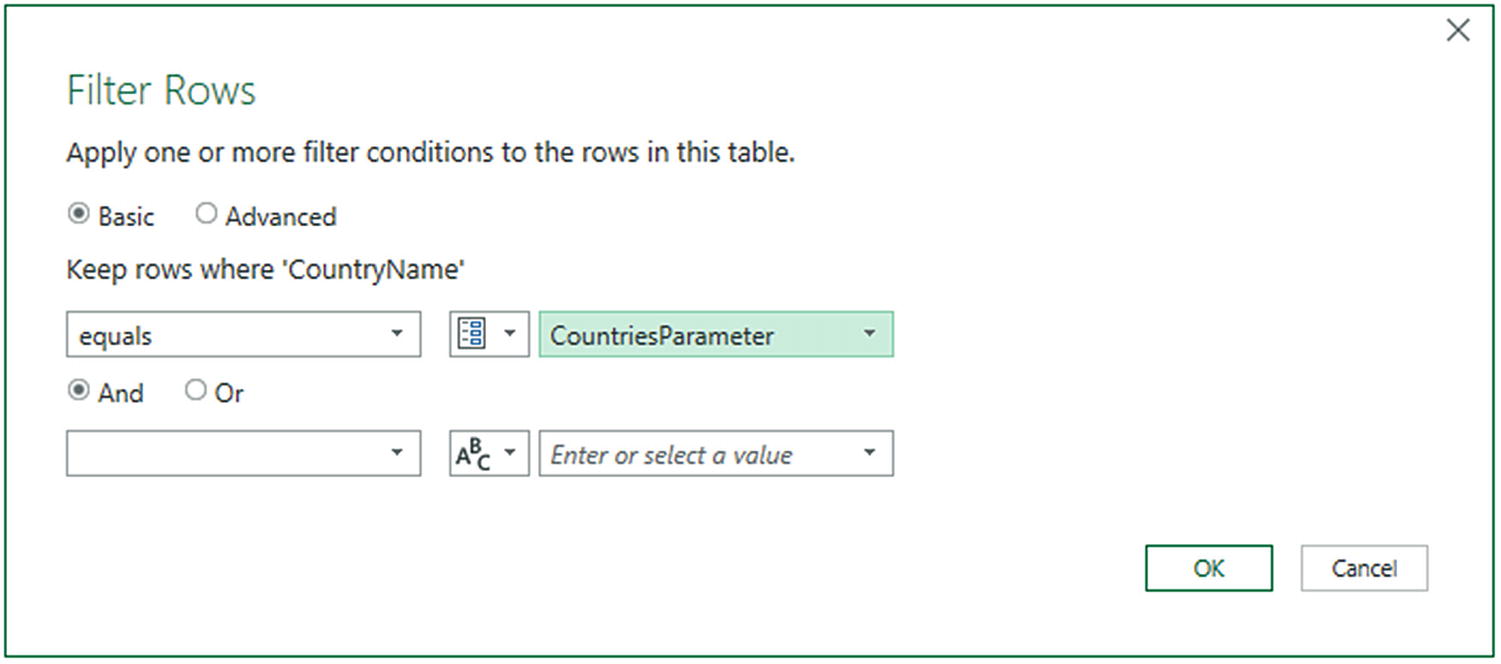
Applying a parameter for a filter
- 8.
Click OK. The current parameter value (the country that you selected) will be applied, and the dataset will be filtered using the current parameter value.
To remove a parameter from a filter, simply delete the relevant step in the Applied Steps list.
Modifying the Current Value of a Parameter
- 1.
In the Query Editor Home ribbon, click the small triangle to display the menu for the Manage Parameters button.
- 2.
Select Edit Parameters. The Enter Parameters dialog will appear.
- 3.
From the popup list of values for the CountriesParameter, select one of the available values (and not the value that was previously selected). The dialog should look like the one shown in Figure 11-8.
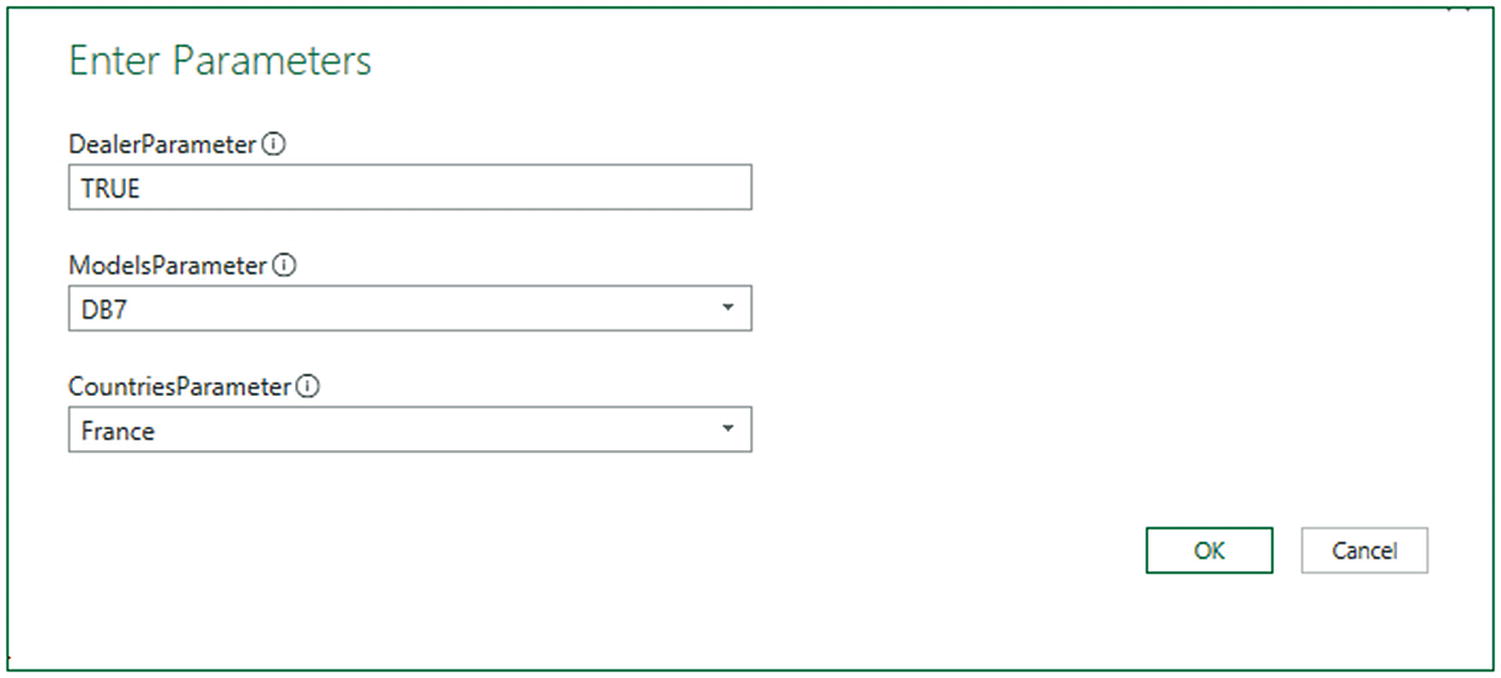
Modifying the current value of a parameter
- 4.
Click OK.
- 5.
In the Query Editor Home ribbon, click Refresh Preview. The data will be refreshed and the new parameter values applied to the filters that use these parameters.
This approach becomes particularly useful if you have many combinations of filter values to test. In essence, you can apply a series of filters to several columns (or create complex filters) using several parameters and then test the results of different combinations of parameters on a dataset using the Enter Parameters dialog. This technique avoids having to alter multiple filters manually—and repeatedly. As an added bonus, you can restrict the user (or yourself) to specific lists of parameter choices by defining the lists of available parameter options. You can see this for the popup lists that appear when you select the CountriesParameter popup or the ModelsParameter popup.
Applying a Parameter to a Data Source
In some corporate environments, there are many database servers that are available, and possibly even more databases. You may find it difficult to remember all of these—and so may the users that you are preparing reports for using Power Query in Excel.
One solution that can make a corporate environment easier to navigate is to prepare parameters that contain the lists of available servers and databases. These parameters can then be used—and updated—to guide users in their choice of SQL Server, Oracle, or other database data sources.
A list of servers
A list of databases
You can then see how to use these parameters to connect to data sources. Of course, you will have to replace the example server and database names that I use here in step 6 with names from your own environment.
You can only apply parameters if the check box Always allow is checked in the Query Editor View menu.
- 1.
Open a new Excel file.
- 2.
Click Get Data ➤ From Database ➤ From SQL Server Database.
- 3.
Enter your server and database, and connect to the database.
- 4.
Select a data table—or tables.
- 5.
Click Transform Data to open the Query Editor.
- 6.Create a new parameter using the following elements:
- a.
Name: Servers
- b.
Type: Text
- c.
Suggested Values: List of Values
- d.
Values in the list: ADAM03 and ADAM03SQL2017 (or your database server)
- e.
Default Value: ADAM03SQL2017 (or your database server)
- f.
Current Value: ADAM03SQL2017 (or your database server)
- a.
- 7.
Select the query that you created to connect to the source data.
- 8.
In the Applied Steps list, click the cog icon to the right of the first step, named Source.
- 9.
On the Server line, click the popup for the server and choose Parameter. Select the Server parameter. The SQL Server database dialog will look like the one shown in Figure 11-9.
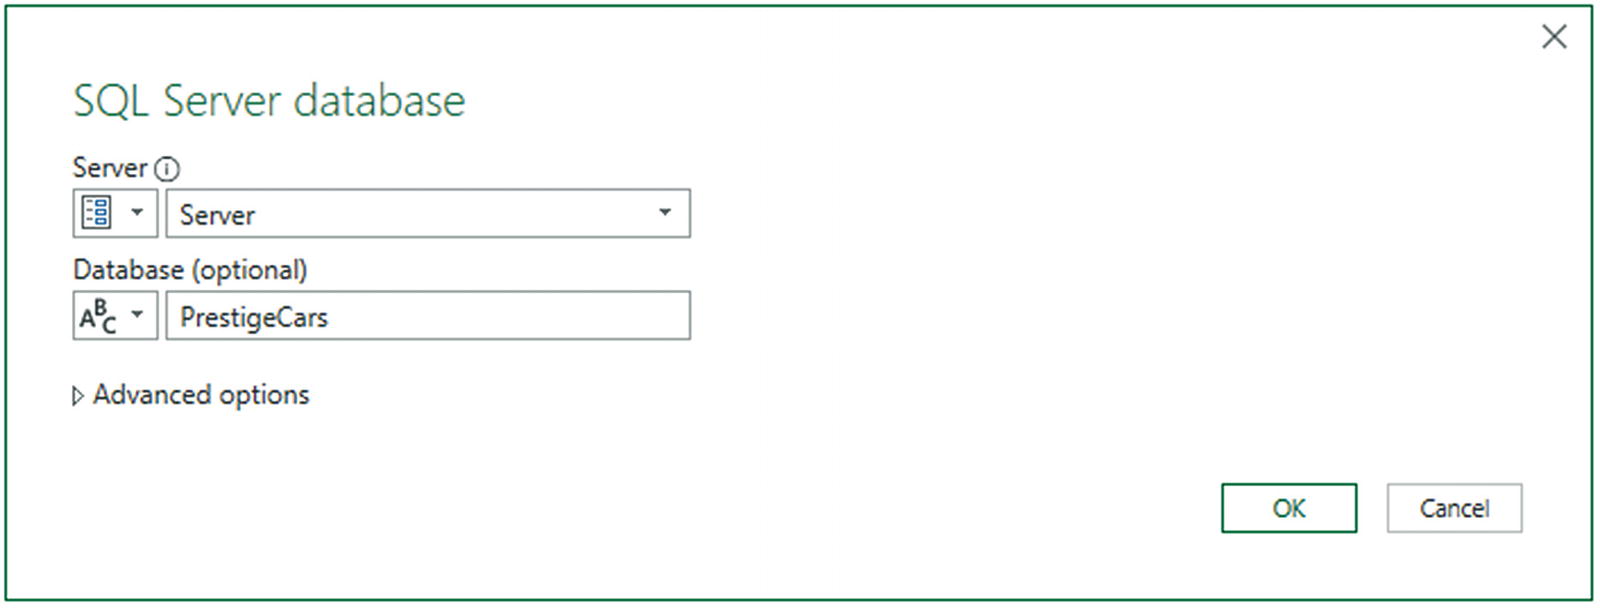
Using a parameter to select the server and database
- 10.
Choose the data connectivity mode and any advanced options that you want to set.
- 11.
Click OK. The server connection process and dialogs will appear, and you will then see the Navigator dialog displaying the tables and views for the current server and database values in the two parameters.
You could have defined and applied a database parameter as well. However, as the approach is virtually identical, I will leave you to attempt this unaided.
Other Uses for Parameters
These examples only cover a few of the cases where parameters can be applied in Power Query. Indeed, the range of circumstances where a parameter can be applied is increasing with each release of the product. So look out for all the dialogs that give you the option of using a parameter.
Using Parameters in the Data Source Step
An Excel file name
A file path
A database or data warehouse server
A database
Provides a central reference point for connection information
Avoids you having to type connection details for similar queries from the same server—and minimizes the risk of introducing typos
Makes it easier to switch between development, test, and production servers
- 1.
Create a connection to a SQL Server database (as described in Chapter 3).
- 2.
Click the Transform Data button in the Home ribbon.
- 3.
In the Query Editor, select the query created by the database connection.
- 4.
Click the first of the Applied Steps on the right. This step should be named “Source.”
- 5.
In the formula bar, replace the code that looks something like this:
- 6.
With this
- 7.
Confirm your modifications by clicking the check box in the formula bar—or by pressing Enter. You will almost certainly have to confirm your database credentials.
You need to be aware that hard-coded server and database names must be contained in double quotes, whereas parameters must not be enclosed in quotes. Also note that the M language used in the formula bar is case-sensitive. So you need to enter parameter names exactly as they were created. You will learn more about the M language in Chapter 12.
Applying a Parameter to a SQL Query
If you are using a relational database, such as Oracle or SQL Server, as a data source (and if you are reasonably up to speed with the flavor of SQL that the source database uses), you can query a database using SQL and then apply Power Query parameters to the source query.
- 1.
Open a new Excel file, open the Query Editor, and create the parameter named CountriesParameter that you saw a few pages ago.
- 2.
Click Close & Load to close the Query Editor.
- 3.
In the Excel Report screen, click SQL Server Database.
- 4.
Enter the server and database that you are using. (If you are using the examples from the Apress website, then it will be your server and the database CarSalesData.)
- 5.Click Advanced options and enter the following SQL statement:SELECT *FROM CarSalesData.Data.CarSalesDataWHERE CountryName = 'Germany'
- 6.
Click OK and confirm any dialogs about data access and permissions.
- 7.
Click Edit to connect to the data and open the Query Editor.
- 8.There should only be one Applied Step for the data connection. Expand the formula bar and tweak the formula so that it looks like this:= Sql.Database("ADAM03SQLSERVER2016", "CarSalesData", [Query="SELECT * FROM CarSalesData.Data.CarSalesData WHERE CountryName = '"& CountriesParameter &"'"])
- 9.
Click the tick icon in the formula bar to confirm your changes. The data will change to display the data for France (the current parameter value) rather than Germany (the initial value in the SQL).
You can now alter the parameter value and refresh the data. This will place the current parameter inside the SQL WHERE clause and only get the data for the current parameter.
The change was to replace
France
with
“& CountriesParameter &”
What you did was to replace the hard-coded criterion “France” with the parameter reference. Indeed, much as you would in Excel, you added double quotes and ampersands to the formula to allow the code to include an extraneous text element.
This was an extremely simple example, but I hope that it opens the door to some fairly advanced use of parameters in database connections.
Updating data once a parameter has changed might require accepting data changes and new permissions.
Query Icons
Conclusion
In this chapter, you saw how to add parameters to queries and how to interact with queries in a controlled fashion. This lets you make queries—and so the entire ETL process—more flexible and interactive.