
Now that you have learned how to create professional digital audio assets using the powerful features in Audacity 2.1 and you know how to export these assets to the most widely used audio file formats in popular content publishing platforms, it’s time to take a look at application programming platforms. I am covering this in its own chapter in case you want to take your digital audio compositing career to the next level. In this chapter you will learn about the internal programming language used for Audacity, called
Nyquist
, as well as external programming languages that support digital audio, such as C# (.NET), Objective C (iOS), Java (Android Studio, Linux), JavaFX, JavaScript, HTML5, and CSS3 (WebKit browsers, and HTML5 operating systems).
This is important information to know if you plan to use digital audio samples in programming projects or in open software development platforms, or if you have any interest in learning more about adding programming.
The platforms run a majority of the consumer electronics devices, and include Java (Android Studio and WebKit), JavaFX (Android, iOS, Windows, Linux, Mac OS X, Solaris) and JavaScript with CSS3 and HTML5 scripting (WebKit browsers).
This chapter is not going to teach you programming, for that would take an number of books (and coding experience), but it will expose you to what’s possible if you extend the journey you are on from digital audio compositing to new media software development. Everything covered in the chapter is free for commercial use. You can go and download Android Studio (IntelliJ), Java and JavaFX (NetBeans), HTML5 (NetBeans), and Nyquist (NyquistIDE).
Let’s start with Nyquist, the programming language for Audacity, and then cover open platform languages such as Java (Android and Kindle), JavaScript (HTML5), and the JavaFX new media engine, which is now a part of Java 7, 8, and 9.
Audacity’s Scripting Language: Nyquist 3
As you have seen already, Audacity 2.1 supports an internal scripting language for automating digital audio work processes. A scripting language is traditionally referred to in the computer industry as a
batch processing language
. This term comes from the old mainframe days when data was input during the day by employees, and then “batch processed” at night by computers while the employees got some sleep. I’ll first cover how to install Nyquist and then we’ll look at other languages that support digital audio compositing.
Downloading Nyquist: SourceForge.net Repository
You can download the NyquistIDE at SourceForge’s open source software repository at
http://sourceforge.net/projects/nyquist/
.
Figure 13-1 shows Nyquist’s project page on SourceForge.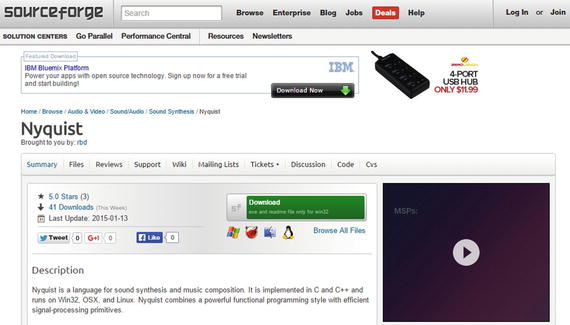
Figure 13-1.
Go to SourceForge.net and download the NyquistIDE
After you install the NyquistIDE, let’s look at the Nyquist scripting language and the integrated development environment (IDE) optimized for writing a Nyquist digital audio script.
Installing NyquistIDE: A Nyquist Integrated Editor
Download the Setup NyquistIDE Runtime version 3.05, which for Windows is named setupnyqiderun305.exe, to your hard disk drive. I have included this file in the ZIP archive for the book on the Apress repository, along with Nyquist documentation, and the half-dozen Nyquist plug-ins that you looked at in Chapter 11 as well. Right-click the EXE file and then select Run As Administrator from the context-sensitive menu. You get the Welcome to NyquistIDE Setup Wizard dialog, as shown in Figure 13-2. Next, accept the License Agreement, click Next, and accept the default destination location for the installation.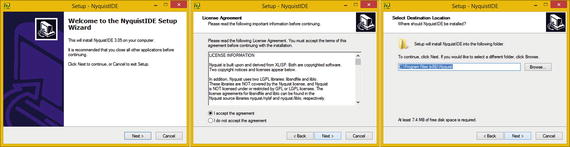
Figure 13-2.
Start an install, accept license, and select folder
Click Next and then select your Start Menu Folder. Click Next to select the Create a desktop icon option. Click Next to get to the Ready to Install dialog (see Figure 13-3). Click the Install button to start the installation process.
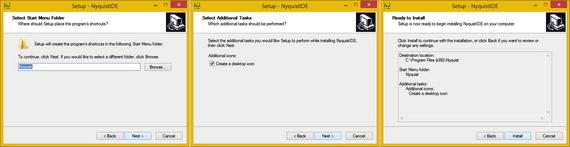
Figure 13-3.
Select Start Menu Folder, desktop icon, and Install
As you can see in Figure 13-4, you’ll get the Extracting files progress bar, which tells you which Nyquist files are being installed to your hard disk drive. After this process has finished, you get an Information dialog, which informs you what each version of Nyquist 3.0 added, the current version being 3.05. After you have reviewed this, click Next and make sure that your Launch NyquistIDE check box is selected.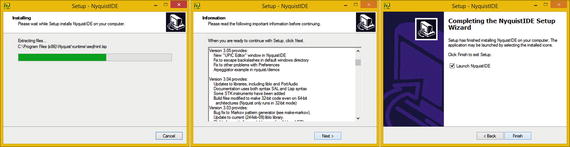
Figure 13-4.
Extract Files, Read Information and Launch Nyquist
Once you click the Finish button, the NyquistIDE launches, and you see the integrated development environment shown in Figure 13-5. Select the File ➤ Open menu sequence. Use the Open dialog to select one of the Nyquist digital audio processing sample files from your C:Program Files (x86)Nyquistdemos folder. I selected the FFT demo because you looked at FFT data analysis in Chapter 9.
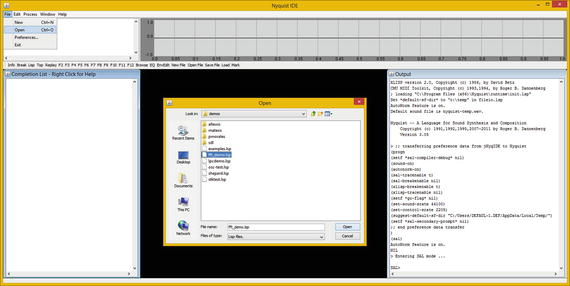
Figure 13-5.
Launch the NyquistIDE
to make sure that it is installed
Like other popular IDE software, such as IntelliJ 14 for Android Studio, NetBeans 8.1 for HTML5, or Java and JavaFX, the NyquistIDE has a number of editor panes, output panes, digital audio data display panes, and so forth.
When you play with the NyquistIDE, you see that you can resize the panes and position them in any UI layout configuration that you feel comfortable working with. I placed the Completion List Pane on the left and the Output Pane on the right. Once you learn Nyquist, you can use it right inside of Audacity!
Nyquist code is quite compact; for instance, to multiply a signal with a generated carrier signal, you should use the following
LISP command syntax
:
( mult s ( hzosc 22050 ) )
You could also use the
SAL programming language
version:
return s * hzosc( 22050 )
Next, let’s look at digital audio content delivery platforms, such as Android, Kindle, Java, and JavaScript.
Digital Audio Content Delivery Platforms
The Java (Android, JavaFX, and Kindle) and JavaScript (HTML5 and Kindle) programming languages support digital audio editing, compositing, effects, and playback. This covers many of the most popular platforms, including Android, Kindle, Blackberry, Linux OS, Tizen OS, Chrome OS, Firefox OS, Opera, HTML5 (WebKit), iOS, Open Solaris, and Windows 7, 8, and 10 OS.
Java and JavaFX API: javafx.scene.media Library
A digital audio compositing pipeline can be constructed and controlled by using Java 8 programming language code. Java has a library called JavaFX, which provides expansive new media assets support, spanning digital imaging, digital audio, digital video, and interactive 3D (i3D) real-time OpenGL ES 3 rendering. Many of the digital audio features and algorithms you have used in this book are in the javafx.scene.media library, which you will look at in this chapter. Java is used in Android, Kindle, HTML5, Windows, Mac OS X, Blackberry, Tizen, Linux, Unix, and Solaris. JavaFX apps can run on Android or iOS and gain support in Tizen, HTML5 and Blackberry. Thus Java, the world’s most popular programming language, is truly a “code once, deliver everywhere” platform.
The Java AudioClip Class : Digital Audio Sequencing
JavaFX has an AudioClip class that can be used to create AudioClip objects in memory. An AudioClip object contains short data samples of audio that can be played with minimal latency. Long form audio, such as songs, use Media, MediaPlayer, and MediaController Java object types; one holds your media, one plays it from memory, and one provides a transport UI.
An AudioClip playback behavior is “fire it and forget it.” Once the .play() method is called, the only operable control is to use the .stop() method. You can create and utilize your AudioClip object in Java with the following Java programming statement:
AudioClip myAudioClip = new
AudioClip
("
http://serverhost/path/
CH12.m4a
");
myAudioClip.
play
();
AudioClips can be played multiple times, simultaneously. To accomplish the same task using a Media object, you would have to create a new MediaPlayer object for each audio sample played in parallel. Media objects are therefore better suited for long-playing sounds or entire audio performances, such as music.
The reason for this is that AudioClip objects store a raw, uncompressed (PCM) data sample in memory holding an entire digital audio sample, which is why I went into the work process that I did in Chapter 12.
This memory allocation can be quite large for long audio clips. A MediaPlayer object “streams” audio in and out of memory, to only have enough decompressed audio data pre-rolled in memory to play for a short amount of time.
This makes Media classes (and objects) much more memory efficient for long clips, especially if longer audio data streams need to be decompressed in real time using the CPU.
AudioClips are decompressed into memory at the time your application is loaded into memory on start-up, and thus do not use any CPU overhead during your application execution.
This makes the end-user experience much smoother, as the CPU can focus on your application programming logic, and not on streaming digital audio media, where it has to take your sample assets from your storage resource into memory and then into the hardware audio decoder to complete the audio playback cycle.
The Java AudioTrack Class: Digital Audio Compositing
A Java Media object asset
might have multiple, parallel Tracks, such as a VideoTrack (object), a SubtitleTrack (object), and several AudioTrack objects, perhaps featuring different musical scores, or different narrator language translations, or both. The types of Track objects supported by an operating system may be inferred from the existing subclasses of the Track class, and currently include VideoTrack, AudioTrack, and SubtitleTrack.
Not all of your Media object assets contain each of these Track object types (Track subclasses). Additionally, the time span for a given Track object doesn’t need to commensurate with the total time span for its containing Media object.
An AudioTrack class is a subclass (type of Track object) that describes a digital audio sample track. An audio track may be a component track in a digital music composition, for example, or one of several language translation tracks in an audiovisual Media object resource. The important thing to recognize is that these Track classes give you the same digital audio compositing capabilities that the Tracks menu provides in Audacity.
The significance of this (and what I am demonstrating in this chapter) is that you can take the digital audio editing and composition work process to the next level by making it interactive using open source development programming languages.
The Java AudioEqualizer Class: Digital Audio Frequency Control
The JavaFX
AudioEqualizer
class provides audio equalization controls for your JavaFX MediaPlayer objects, just like the EQ algorithm, which you applied to your digital audio sample assets in Audacity 2.1.
The AudioEqualizer class contains a Java Observable List that contains EqualizerBand elements. This EqualizerBand class provides encapsulation and attributes for each of your digital audio frequency bands within the AudioEqualizer object.
Each AudioEqualizer object instance is connected to the MediaPlayer object instance, and may be obtained using the MediaPlayer.getAudioEqualizer() method call. As you can see, Java is really advanced where digital audio editing and compositing API support is concerned, allowing you to bridge Audacity and Java.
Next, let’s take a look at digital audio playback support implemented by using basic HTML5 markup language.
Using Digital Audio in HTML5: The <audio> Tag
The HTML5 content
distribution platform features the <audio> tag for playing back digital audio assets. This tag is used in the following way inside HTML5 markup:
<audio
controls
>
<source src="CH12.ogg" type="audio/ogg">
<source src="CH12.mp3" type="audio/mpeg">
<source src="CH12.wav" type="audio/wav">
Please Note: Your browser does not support digital audio playback! Please
upgrade to the latest version of your HTML5 browser or operating system.
</audio>
Using the controls attribute (parameter, flag, option) inside the opening <audio> tag adds digital audio playback (transport) user interface controls like the ones you see in Audacity. These include Play, Pause, Position (a shuttle slider), and Volume.
Multiple <source> elements can specify several different audio file formats. Your browser accesses these in the order they are specified, which is called the “fallback approach,” and utilizes the first supported format. Currently, there are three supported digital audio file formats for the <audio> element: MPEG (MP3), pulse- code modulation (WAV), and the open source Ogg Vorbis (OGG) format. I specified Ogg Vorbis format first because it has the best quality and file size result. Then I fall back to a MP3 format, and finally to WAV for Windows Explorer users.
The type= parameter for the <source> child tag inside the parent <audio> tag specifies what is called a MIME Type.
MIME stands for Multipurpose Internet Mail Extensions, although MIME now extends to cover digital platform types beyond e-mail clients and servers.
It is important to note that the MIME types utilized for HTML5 web sites also need to be specified on the web server, so the multimedia types that you use in the application are defined up front.
The text content that you place between the <audio> and </audio> opening and closing digital audio tags display in browsers that do not support the <audio> element. Provide your users with an informative message that the ancient browser that they are using does not support digital audio playback, and ask them to upgrade to the latest HTML5 browser revision. I show this in the earlier sample code that so you can see how it is formatted.
Android Studio : Digital Audio Class and Interfaces
The Google Android platform is running more smartphones, e-book readers, tablets, iTVs, game consoles, smartwatches, and IoT (Internet of Things) devices, than any other OS platform on the planet. Apps are developed using Android Studio, under the IntelliJ 14 IDE. I’ve written a number of Pro Android titles for Apress over the past few years, including Pro Android Graphics (2013), Pro Android UI (2014), Pro Android Wearables (2015), Pro Android IoT (2016), and Pro Java Games Development (2016).
I cover how to code for the MediaPlayer, MediaController, or SoundPool digital audio classes in the Pro Android UI book.
The Android SoundPool Class : Digital Audio Sequencing Engine
The Android SoundPool class is similar to the JavaFX AudioClip class. Like the Android MediaPlayer class, it is part of the android.media package. It is also important to note that SoundPool objects spawned by the SoundPool class and MediaPlayer objects spawned by the MediaPlayer class can be utilized at the same time, if need be. In fact, there are distinct applications for both of these audio playback classes. As in JavaFX, MediaPlayer should be used for long-form audio (and video) data, such as albums, songs, audio books, or movies. SoundPool is best used for short-form audio snippets, especially when they need to be played in rapid succession and (or) combined, such as in a game, e-book, user interface design, or other gamified multimedia application.
Your SoundPool collection of audio samples can be loaded into memory from one of two places. The most common place is from inside your APK file, which I call “captive” new media assets, as they are inside your
Android PacKage (APK)
.
In this case, assets live in your /res/raw project resource folder, as this is where digital audio assets go in an Android Studio project. The second place that samples are loaded from is an SD card or a similar storage location. This is what you would term your Android OS file system.
SoundPool uses the Android MediaPlayer Service to decode the audio asset into memory. It does this by using uncompressed 16-bit PCM (Mono or Stereo) audio. This is the main reason that I’ve been teaching you a work process that optimizes the audio using 16-bit sampling resolution, because if you utilize 8-bit, Android upsamples that audio into 16-bit, and you end up with wasted data that could have received better quality.
This means that if you are targeting Android Studio applications, you should optimize for sample frequency, but not for sample resolution (use 16-bit). Do not use Stereo audio unless you absolutely need to, as it will double the memory footprint used for each sample.
To get the optimal result across the largest number of consumer electronics devices, it’s important to conform your optimization work process to how Android SoundPool works. Thus, 48 kHz is the best sample frequency to use if possible, with 44.1 kHz coming in a close second. You used 44.1 kHz in Audacity because that’s the default setting (44.1 kHz 32-bit sample resolution).
To optimize, keep your sample short, remove all unneeded noise, trim unnecessary pre- and post-sample data, and use Mono, just as I taught you over the course of this book. Then use a modern codec—such as MPEG-4 AAC, Ogg Vorbis, or FLAC—to retain most of the quality while still culling a reasonable amount of digital audio data compression in your APK file. Calculate memory use with a raw uncompressed PCM (WAV or AIFF) audio file size.
When the SoundPool object is constructed in Java, you’ll specify a maxStreams parameter by using an integer value. This parameter determines the number of digital audio streams that will be composited, or rendered, in memory at the same time. Be sure to set this important parameter precisely, as it sets aside memory.
Setting the maximum number of streams parameter as a small number, if possible, is a good standard practice. This is because doing so helps to minimize CPU cycles used for processing audio samples. This reduces any likelihood that the SoundPool audio sequencing engine will affect any of those other areas of your application performance (CPU processor usage).
A SoundPool engine tracks the number of active audio streams (data samples) to make sure that it does not exceed the maxStreams setting. If the maximum number of audio streams has been exceeded, SoundPool aborts the previously playing streams. SoundPool does this based upon a sample priority value, which you can specify to control which sample’s playback stops first.
If SoundPool finds two (or more) digital audio samples that have an equal sample priority value, it makes a decision on which sample to stop playing, based solely on sample age, which means the sample that has been playing the longest is the one that is terminated (playback is stopped). I like to call this the “Logan’s Run principle.”
Priority level values are set using low to high numeric values. This means that higher (larger) numbers represent the higher priority levels. Priority is evaluated when any call to SoundPool’s .play() method causes a number of active streams to exceed the maxStreams value, which is set when the SoundPool object is instantiated (created in memory using a new keyword).
When the sample priority for the new stream is lower than all of the active streams, the new sound will not play, and the .play() function returns a stream ID of 0. For this reason, be sure that the application’s Java code keeps track of exactly what’s going on with the audio sample’s priority-level settings.
Samples can be looped in SoundPool by setting a non-zero looping value. The exception to this is that a value of –1 causes samples to loop forever, and under this circumstance, the application code must make a call to a SoundPool .stop() method to stop the infinitely looping sample.
So non-zero integer values cause a sample to repeat itself that specified number of times; thus, a value of 7 will cause your sample to play back a total of eight times, as computers start counting using the number 0 instead of the number 1.
The sample playback rate can be changed using SoundPool, which as mentioned, makes this class a part of your audio synthesis tool as well. A sample playback rate of 1 causes your sample to play at the original frequency. A sample playback rate of 2 causes your sample to play at twice its original frequency, which shifts it up a full octave higher if it is a musical instrument note.
Similarly, a sample playback rate set to 0.5 causes SoundPool to play the sample at half of its original frequency, which then sounds like the note is a full octave lower.
The sample playback-rate range of SoundPool is currently limited to 0.5 to 2.0; however, this may be upgraded in a future API revision to 0.25 to 4, which gives a developer a four-octave sample playback range.
Now it’s time to learn about a couple of the other audio-related classes in Android Studio. As you can see, I’m trying to cover as many key Android digital audio classes in this book as is humanly possible!
The Android AudioTrack Class : Digital Audio Compositing
Just like JavaFX, the Android OS has its own AudioTrack class, which allows you to composite digital audio using Tracks, as you do in Audacity. The AudioTrack class manages and plays a single audio resource for Android application development purposes. It allows streaming of PCM audio buffers to Android’s digital audio “sink” for layered playback, if more than one AudioTrack object is implemented.
AudioTrack instances can operate under two modes: static and streaming. In the streaming mode
, your application writes a continuous stream of data to an AudioTrack object. This is done by using one of this class’s .write() methods. A streaming mode is useful when playing blocks of audio data that are too big to fit in memory because of the duration of the sample, or that too big to fit in memory because of the audio data characteristics (a high sampling rate or sample resolution, or both), or the digital audio sample is received (or synthesized) while previously queued digital audio samples are playing.
The static mode
should be chosen when dealing with short sounds that fit into memory and that need to be played with the minimum amount of latency. This static mode should be the preferential mode for user interface feedback or game audio that is triggered frequently by the end user. It’s important to note that a SoundPool class may do the same thing with far more memory efficiency, as well as with other features, such as pitch shifting.
Upon instantiation (at the time of creation), your AudioTrack object initializes its associated
audio buffer
. The size of this audio buffer is specified during object construction; it determines how long your AudioTrack can play before running out of memory allocation (space) to hold the audio sample data. For an AudioTrack that is using a static mode, this size is the maximum size of the sound that can be played from it. For the streaming mode, audio data is transferred to the audio sink using data chunks in sizes less than or equal to the total audio data buffer size specification.
Next, let’s take a look at MediaPlayer and MediaRecorder classes for long-form audio playback and recording audio and video data streams.
The Android MediaPlayer Class : Digital Audio Playback
Also like Java and JavaFX, Android has a MediaPlayer class that can be used to play long-form audio and video media assets. The MediaPlayer is a complete player solution featuring a transport user interface and all controls necessary to play, stop, seek, reset, or pause new media assets such as digital audio or video.
This MediaPlayer class has a major amount of information attached to it in a programming scenario; the topic warrants an entire book. If you want to learn more about it, try the books Android Apps for Absolute Beginners (Apress, 2014) or Pro Android UI (Apress, 2014), or visit the Android Developer web site at
http://developer.android.com/reference/android/media/MediaPlayer.html
.
Let’s take a look at some Java statements needed to create a URL String, instantiate a new
myMediaPlayer object
, set an audio stream type and data source, and go through the states associated with an digital audio asset playback cycle, including asset preparation, playback (start), pause, stop, reset, remove from memory (release), and nullification, as outlined here:
String
url
= "
http://server-address/folder/file-name
"; // Audio Asset URL
MediaPlayer
myMediaPlayer
=
new
MediaPlayer();
myMediaPlayer.setAudioStreamType(AudioManager.
STREAM_MUSIC
);
myMediaPlayer.setDataSource(
url
);
myMediaPlayer.
prepare
(); // Prepare Audio Asset (buffer from server)
myMediaPlayer.
start
(); // Start Playback
myMediaPlayer.
pause
(); // Pause Playback
myMediaPlayer.
stop
(); // Stop Playback
myMediaPlayer.
reset
(); // Reset MediaPlayer object
myMediaPlayer.
release
(); // Remove MediaPlayer object from memory
myMediaPlayer =
null
; // Nullify your MediaPlayer
object
In Android Studio, this Java code creates a
String object
to hold the digital audio asset URL (line one). It declares and instantiates a
MediaPlayer object
(line two). It sets an AudioStreamType object using the STREAM_MUSIC constant from the AudioManager class (line three). It sets the
DataSource object
, the value of your String object (line four). Lines 5 through 11 go through the digital audio asset playback cycle states of preparations (loading into memory), playback start, playback pausing (if needed), playback halting (stop), playback reset, playback release (removing from memory), and object clearing to a null or unutilized state.
If you want to learn Java, check out the Beginning Java 8 Games Development (Apress, 2015); it covers Java programming in the context of new media assets, including digital audio.
MediaPlayer plays digital audio and digital video assets, usually in long form (several minutes), which were created and optimized outside of Java or Android using professional software like Audacity 2.1. For digital video editing, you can use the EditShare Lightworks open source software, which you can download at
http://www.lwks.com
.
The Android MediaRecorder Class : Digital Audio Recording
Unlike Java and JavaFX, Android has its own MediaRecorder class, probably because Android phones have built-in cameras. (Android also has its own Camera (and Camera2) API to control the camera hardware.) The MediaRecorder class can be used to record long-form audio and video, and thus to create new media assets.
The MediaRecorder is a complete media recorder solution, featuring all the controls necessary to start, stop, reset, and release multimedia recording hardware devices.
Let’s take a look at some Java statements needed to declare a MediaRecorder object, named myMediaRecorder. Use a Java new keyword to instantiate this object using a constructor method called MediaRecorder().
Set your AudioSource constant to MIC. Set the OutputFormat and AudioEncoder constants to AMR_NB. Set the OutputFile object reference and go through the recording states associated with a digital audio data recording lifecycle, including memory preparation, start recording, stop recording, and removing a data capture area from memory. All of this is outlined here:
MediaRecorder
myRecorder
;
myRecorder =
new
MediaRecorder();
myRecorder.setAudioSource(MediaRecorder.AudioSource.
MIC
);
myRecorder.setOutputFormat(MediaRecorder.OutputFormat.
AMR_NB
);
myRecorder.setAudioEncoder(MediaRecorder.AudioEncoder.
AMR_NB
);
myRecorder.setOutputFile(PATH_AND_FILE_NAME_REFERENCE);
myRecorder.
prepare
(); // This sets aside system memory for recording
myRecorder.
start
(); // This starts the camera hardware recording
myRecorder.
stop
(); // This stops the camera hardware from recording
myRecorder.
reset
(); // You can reuse a reset MediaRecorder object
myRecorder.
release
(); // Once released a MediaRecorder object can't be used
The MediaRecorder class has a huge amount of information attached to using it in a programming scenario; the topic could have an entire book written on it. If you want to learn more about it, visit the Android Developer web site at
http://developer.android.com/reference/android/media/MediaRecorder.html
.
Summary
In this chapter, you learned about topics that relate to digital audio programming and the programming languages used in digital editing software and app development software. The final chapter in this book covers publishing platforms.