
![]()
Installing Drupal
Drupal 8 is a much awaited release in the Drupal community, finally bringing Drupal into the world of object oriented programming, better configuration management, stricter separation of concerns by introducing TWIG for templating, and much more that will all be covered in later chapters. This chapter walks you through the easiest way to install Drupal and get it up and running: use the Acquia distribution called Acquia Dev Desktop, which is available for both PC and Mac users, on your local machine (your own computer). For additional install methods, see Chapter 18, “Publishing Your Site to a Production Linux Box,” which covers installing Drupal within a Linux Ubuntu server, and Appendix A, “Other Ways to Install Drupal,” which covers alternatives to Acquia Dev Desktop for installing Drupal on your local machine.
Installing Acquia Dev Desktop
You can download Acquia Dev Desktop 2 from www.acquia.com/downloads. If you use a Mac, choose the dmg version of the installer; if you have a PC, choose the exe version of the installer. After you have downloaded the appropriate version of the installer, double-click the downloaded file and follow the installer instructions.
Installing Drupal 8
After you have run through the Acquia Dev Desktop installer, you’ll be prompted to “Start from scratch, I don’t have an existing Drupal site.” Alternatively, you can start with an existing Drupal site. For the purposes of this chapter, click the link to start from scratch. You’ll then see a window prompting you to select a Drupal distribution to start from. Scroll down until you see the Drupal 8 installation, and click the Install button next to it (see Figure 1-1).

Figure 1-1. The Acquia Dev Desktop Drupal 8 installation screen
You’ll then see a window similar to the one shown in Figure 1-2. You can accept the default settings and click Finish. However, you may want to change the local site name (the name of your Drupal site) from the default name, because the site name will be featured on the top of every page of your Drupal website by default. Doing so will change the local site URL (uniform resource locator) and database to match the site name you provided.
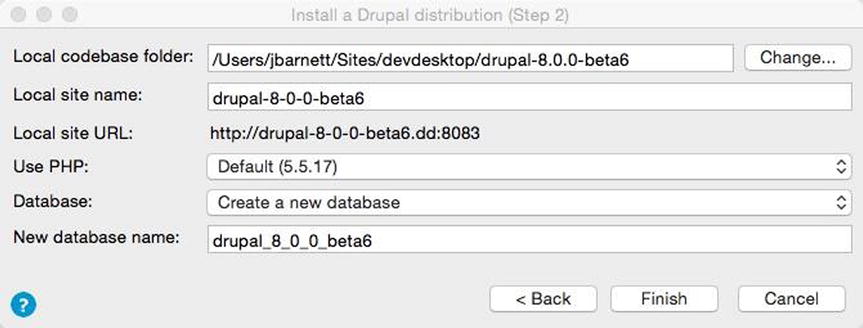
Figure 1-2. When installing Drupal 8, you can accept the defaults or change the local site name
Finally, you’ll see the window shown in Figure 1-3, which includes a link to where the code lives locally within your file system (the “Local code” link) and a link to view the raw data in the database (the “Local database” link). Most important, however, is the “Local site” link. Clicking this link will take you to your first Drupal 8 site. Acquia (a professional Drupal hosting company) has made it that easy to install Drupal 8 with Acquia Dev Desktop. Go ahead and click the “Local site” link now.
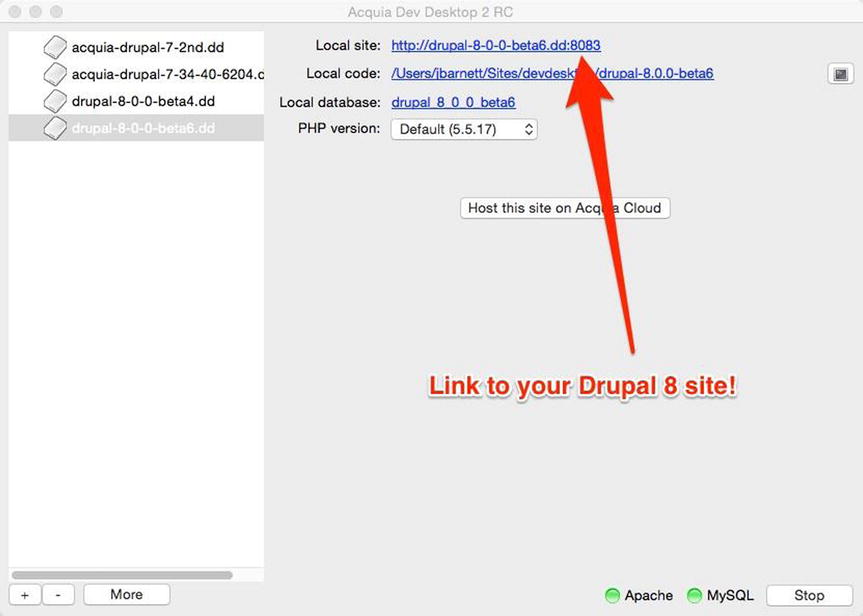
Figure 1-3. Links to your new Drupal 8 site, the code for the Drupal 8 installation, and the local database
After clicking the link to your Drupal 8) site, the basic installation process is complete, but you still have some configuration work to do.
Configuring Drupal 8
To begin the configuration process, choose the language you want to use for your Drupal site and then click the Save and continue button.
On the next screen, you can choose the standard installation or the minimal installation. Choose the standard installation and then click Save and continue.
The next screen prompts you for information about the database you’ll be using and asks for a database username. The password field is blank, and for now, you can just ignore this setting. This installation of Drupal will live only on your own computer, and you don’t need the installation to be secure; accepting the defaults in this case is fine. In a production Drupal installation, you would set up a MySQL database prior to installing Drupal, and you would at that time set up a secure MySQL database username and password combination (see Appendix A for more information). Click the “Save and continue” button.
The final screen, “Configure site” (see Figure 1-4), is where you enter a valid e-mail address for the site, as well as an admin username, password, and e-mail address. In addition, you can choose your default country and time zone settings. Enter that information now. Finally, you can choose to be notified about updates to the Drupal 8 software. When you are finished, click the “Save and continue” button.

Figure 1-4. The final configuration screen to set up Drupal 8
At this point, your Drupal site is set up (see Figure 1-5) and ready for tailoring to your heart’s delight. You can change the theme (the look) of your site, change the site’s title, create blogs, and more. As easy as it was to set up your first Drupal site on your local computer, you’ll soon be crafting your own web site, complete with blogs and all the rest.

Figure 1-5. Your new Drupal 8 site after using Acquia Dev Desktop to easily and quickly spin up your first site
Now that your Drupal 8 site is up and running, you can always bring up the Dev Desktop Control Panel by going to your applications list within a Mac, or within the Start ![]() All Programs area on your PC. The control panel has everything organized for you: it shows you the health of your Apache web server running locally (running on your computer) and the health of your local MySQL database (we’ll be diving into the database layer later, but basically it’s where all your Drupal back-end data is stored). Within a click or two, the control panel has a way to manage your MySQL database. Through the control panel, you can also spin up another new Drupal site (if you click the plus sign within the lower left-hand corner of the Acquia Dev Desktop control panel).
All Programs area on your PC. The control panel has everything organized for you: it shows you the health of your Apache web server running locally (running on your computer) and the health of your local MySQL database (we’ll be diving into the database layer later, but basically it’s where all your Drupal back-end data is stored). Within a click or two, the control panel has a way to manage your MySQL database. Through the control panel, you can also spin up another new Drupal site (if you click the plus sign within the lower left-hand corner of the Acquia Dev Desktop control panel).
There are many ways to install the LAMP stack on your computer and to then get Drupal installed (Appendix A goes over a few other options in detail). I usually use MAMP (www.mamp.info/en/index.html) and I use it for development on my Mac currently. I’ve also done well in the past using the Zend Community Edition of the LAMP stack (www.zend.com/en/products/server/free- edition). Often you will install Linux, Apache, MySQL, and PHP (LAMP for short) and manually download Drupal; this is a common way for some folks to get started. Also, once you have the LAMP stack installed you can install Drush (the Drupal command-line tool which is awesome) and you can use Drush to install Drupal (https://www.drupal.org/node/1791676 and http://www.drush.org/en/master/install/). I encourage and teach Drush usage in many scenarios throughout this book. I’m going to assume you’re using Acquia Dev Desktop right now (for either a PC or the Mac), since you’ll be up and running within a few minutes, and then I can give you a quick tour of the many things you can do in Drupal with just a half hour or so of training.
As always I’ll refer you to the programmer’s handbook for more information: Google. Anything you don’t know in the world of Drupal and you can usually, if you’re tenacious enough, figure out how to do most anything by googling the problem. But it helps to know the basics so you know what to search for. Throughout this book, I’ll be guiding you through the way to learn in the computer science arena. If you have a Mac, try Googling “How to install Drupal MAMP”; you’ll find plenty of blogs on how to get it set up. I just tried that Google search for you and sure enough it came up with five YouTube videos on how to set it up on a Mac.
Summary
This chapter walked you through the simplest way to get Drupal up and running on your own PC or Mac: using the Acquia Dev Desktop 2 installation package. Within minutes you should have been able to download and install Acquia Dev Desktop 2 and install and configure Drupal 8. In doing so, you should have been easily able to spin up your own basic Drupal 8 site on your local computer. In Chapter 2, you’ll learn to do lots of great things, like creating blogs, creating users, creating views, changing the site’s theme, and more.