
![]()
Getting Started with HTML
The most basic element of web programming is HTML, which stands for HyperText Markup Language, which is the core technology in creating web pages. In order to write HTML 5 code (the latest version of HTML is HTML version 5), you’ll need to use a code editor. This chapter uses Komodo Edit in the examples. If you have not yet downloaded this free, open source program, you can do so at http://komodoide.com/komodo-edit. The free version of Komodo Edit is actually very good.
In this chapter you’ll learn all about getting started with HTML so that you can use it later with Drupal. Specifically, you’ll learn to create and display a simple web page created with HTML. You’ll learn to add lists, tables, hyperlinks, and forms to your HTML page. By the end of the chapter, you’ll have a pretty solid grasp of HTML.
![]() Note If you already know HTML, feel free to skip ahead to Chapter 4 to see how to fit HTML into Drupal modules, themes, and forms.
Note If you already know HTML, feel free to skip ahead to Chapter 4 to see how to fit HTML into Drupal modules, themes, and forms.
Creating Your First Web Page
As you learned in Chapter 1, all code editors work in basically the same way. A good editor will sense which language you’re programming in and will format your code in a way that is easy for you—and others—to read. Komodo Edit is no exception.
Take a moment to review Figure 3-1, which shows a bit of HTML code written using Komodo Edit. (You’ll see in the figure that I’ve chosen a dark base theme for Komodo; out of the box Komodo has a white background—changing the color scheme is not necessary.) Notice how the Komodo editor has color-coded the HTML tags (in gold in this case) so your eye can easily separate the tags from the English text of the document. Each editor has some preconfigured color schemes for color coding.

Figure 3-1. Using Komodo Edit to write HTML. This is what HTML will look like within your Komodo editor
![]() Note I’ve created a video supplement to show you around how to use Komodo Edit. It’s not too difficult, but there are a few tricks to know to use the tool. Check out http://barnettech.com/content/drupal-web-programming-essentials-intro-and-code-editor-recommendation.
Note I’ve created a video supplement to show you around how to use Komodo Edit. It’s not too difficult, but there are a few tricks to know to use the tool. Check out http://barnettech.com/content/drupal-web-programming-essentials-intro-and-code-editor-recommendation.
Here is the code outside the context of the text editor as well for easier reading.
<!DOCTYPE html>

<html>
<head>
    <title>Drupal Essentials Primer</title>
</head>

<body>

  <p> This book will introduce you to everything you need to be a great
  Drupal Developer. </p>
  <b> This is a 2nd line of random text within a paragraph tag. </b>

</body>
</html>
Okay. So what are you looking at in Figure 3-1? It’s helpful to break it down.
- The first line—<!DOCTYPE HTML>—declares the document to the web browser as being an HTML 5 document. HTML 5, as I mentioned, is the latest version of the HTML language, but it is still backward compatible with previous HTML versions.
- The second line, which contains simply <html>, is the opening tag that starts the HTML.
- The eighth line, <body>, is the opening tag that starts the body of the HTML document.
- The fourth line is a bit more complicated. It begins with the <title> tag and ends with </title>, and includes some text in between. This title element will define the text that shows in the browser’s top tab area, it defines the title that shows up when the page is bookmarked, and defines the title that shows up in search engine results. In this case, the title is “Drupal Essentials Primer.”
- Lines 5 and 6 wrap the text to be displayed in the browser in paragraph elements (<p> some text </p>). These paragraph elements define wrapped text as a single paragraph. The text included between these tags is what will be displayed on the web page when viewed in a browser.
- In line 7 </body> closes the body element, signifying to the browser that you are done declaring your body in your HTML document.
- Line 8 includes </html>, which closes the HTML element and signifies you are done with your entire HTML.
The preceding markup creates the very simplest of HTML documents, but honestly HTML is fairly simple. Don’t sweat it—it doesn’t get much more complicated than this.
The basic idea is that when you want to treat text a certain way, you “wrap” said text in a tag to declare how that text should be treated. For example,
- To treat text as a paragraph, wrap it in a <p> tag like so:
<p> I’m a new paragraph. </p>
- To treat text as bold, wrap it in bold tags:
<b> I’m bolded text. </b>
- To treat text with italics formatting, you would do this:
<i> I’m italicized. </i>
- To use header tags, use the <h1> tag. Your most important header tag is <h1>, and you can also use <h2>, <h3>, and so on through <h6>. As the number decreases, the importance (size of the text) decreases.
<h1> I’m an important header. </h1>
Notice that for each chunk of text, you have a beginning (or opening) tag, like <b>, and then you have the closing tag, which is the same tag but with a forward slash added to it, like </b>. This setup allows you to tell the browser when to start using said tag and when to stop; you include exactly the text want to display in the browser within said tag.
![]() Note Chapter 5 teaches you about basic Cascading Style Sheets (CSS) and explains how you can write CSS rules to govern exactly how these tags render in a browser. By using CSS you can make your particular text show as blue (or whatever color); you can set the font size; you can set indentation; etc.
Note Chapter 5 teaches you about basic Cascading Style Sheets (CSS) and explains how you can write CSS rules to govern exactly how these tags render in a browser. By using CSS you can make your particular text show as blue (or whatever color); you can set the font size; you can set indentation; etc.
So you’ve seen basic HTML in a file, now what? All you need to do is open your favorite web browser (mine is Chrome or Firefox depending on the task), and then in the upper left click File ![]() Open File and browse for your saved HTML document. You will see the HTML document you just created with your new knowledge of some HTML elements! Figure 3-2 shows an example of what HTML looks like when displayed in a web page.
Open File and browse for your saved HTML document. You will see the HTML document you just created with your new knowledge of some HTML elements! Figure 3-2 shows an example of what HTML looks like when displayed in a web page.

Figure 3-2. Basic HTML displaying in a web page. The first line of text was placed within paragraph <p> </p> tags, and the second line was placed within paragraph tags and bold tags within the HTML document: <p><b> This is bold text </b></p>. Notice you can have “nested” tags (HTML tags within other HTML tags)
Now that you’ve seen how some basic HTML works, it’s time to give it a try. To begin, fire up Komodo Edit. Then complete the following steps.
- From the Start Page, click File and then click New to display a list of different file types you can create. Choose the first item in the list to create a new HTML 5.html file type. Some default code will be generated for you; this is the basic essential code that makes up an HTML page.
- In the editor that displays, type the following HTML code (see Figure 3-3) or feel free to use your own text:
<!DOCTYPE html>

<html>
<head>
    <title>HELLO WORLD</title>
</head>

<body>
  <h1> This is the header for the page. </h1>
  <p> This is a paragraph. </p>
  <b> This is bold text. </b>

</body>
</html>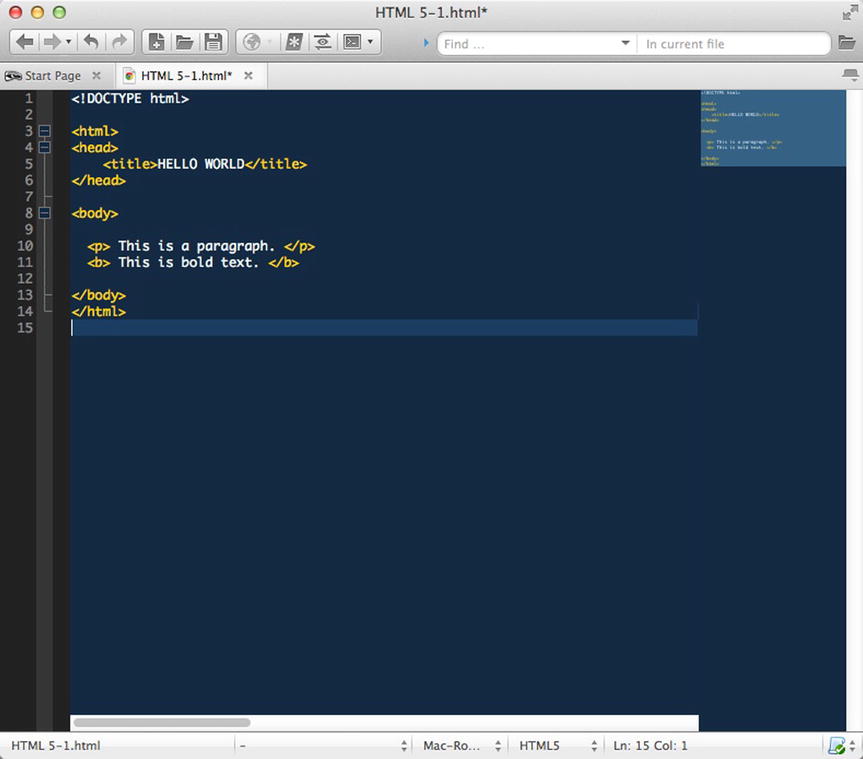
Figure 3-3. Some basic HTML showing in the Komodo editor
- Click File
 Save As and then save the file in a place where you can easily find it with a filename of your choosing. Make sure your file has an .htm or .html extension.
 - Open your favorite web browser. In the upper left-hand corner, click File, click Open File, and then browse to choose the HTML file you saved in step 3. Your screen should resemble Figure 3-4.

Figure 3-4. Basic HTML showing in a web browser
Now that you’ve learned some of the basics of HTML, the rest of this chapter calls out some specific HTML tags that are a bit more complex.
![]() Note Though you’ll have a great grasp of HTML after reading this HTML Primer, I recommend the web site www.w3schools.com/html/DEFAULT.asp for further reading about HTML elements not covered in this chapter.
Note Though you’ll have a great grasp of HTML after reading this HTML Primer, I recommend the web site www.w3schools.com/html/DEFAULT.asp for further reading about HTML elements not covered in this chapter.
Adding Comments to Your HTML
You can put comments in your HTML code to document your code. These HTML comments do not get rendered by the web browser; they just serve to help document your code, making it more readable and more understandable to any other developer who reads your code. Comments in code are really important even for your own usage. If you write thousands of lines of code, which many developers do, it will serve you to annotate your code with comments so you can easily understand the code you vaguely remember you wrote at a later date. Comments are created as follows, included between the opening <!-- tag and the closing comment tag, -->:
<!-- This is an HTML comment -->
Working with Images
To include an image on your web page, you use the following syntax, which includes the img element:
<img src="filename" alt="text to display if image cannot be shown">
The filename in the preceding line would just be something like imagename.jpg, and the image should be saved in the same location as your HTML file. alt is an attribute that allows you to display text that describes the image should the image not display in the web browser.
If you want to save your image(s) in a different location (i.e., not in the same folder as your HTML document), you can include a relative path to the image. For example, if I save an HTML document on my Mac in the /Users/barnettech/Sites/kindlebooks folder but I put the image in the /Users/barnettech/Sites/kindlebooks/images folder, I would write the preceding path as follows:
<img src="images/imagename.jpg" alt = "text to display if image
cannot be shown">
Because the path to the image is relative to where the HTML file lives, this is what is known as a “relative path.” You will come across relative paths quite often when referencing files, so be sure to commit this new term to memory.
An absolute path gives the whole path to the file rather than a path relative to the current HTML document. The absolute (full) path to the image in the preceding case would be /Users/barnettech/Sites/kindlebooks/images/imagename.jpg.
Now, you’ll practice adding code to your basic HTML document to add an image to the web page. I’ve moved an image (barnettech_logo.jpg) into the same folder as my HTML file. Then, after the line with the <b> and </b> tags, I’ve added the following line:
<img src="barnettech_logo.jpg" alt="text to display if image
cannot be shown">
Figure 3-5 shows the results of this action.

Figure 3-5. This is how the HTML page looks after adding an image. (Thanks goes to my brother for creating this nice Drupal superhero image.)
![]() Note It is always preferable to use relative paths so if your HTML page moves to another server with a different directory structure your code will still work. For instance, on my Mac the full path to a file always starts with /Users/barnettech/Sites and the full path might be /Users/barnettech/Sites/your_html_file.html, but on another system the beginning directory structure might be /var/www and the full path might be /var/www/your_html_file.html. So if you refer to an image file and hard code the full path which starts with /var/www, and then move that code to a different computer and try to load it into a browser, you will get an error that the web browser cannot locate the image. For the line <img src="barnettech_logo.jpg" alt="text to display if image cannot be shown">, the barnettech_logo.jpg file is located relative (a relative path is used) to where the HTML page is located. If you had an images folder in the same directory as your HTML file, the relative path would be "images/barnettech_logo.jpg", and the full line would read <img src="images/barnettech_logo.jpg" alt="text to display if image cannot be shown"
>.
Note It is always preferable to use relative paths so if your HTML page moves to another server with a different directory structure your code will still work. For instance, on my Mac the full path to a file always starts with /Users/barnettech/Sites and the full path might be /Users/barnettech/Sites/your_html_file.html, but on another system the beginning directory structure might be /var/www and the full path might be /var/www/your_html_file.html. So if you refer to an image file and hard code the full path which starts with /var/www, and then move that code to a different computer and try to load it into a browser, you will get an error that the web browser cannot locate the image. For the line <img src="barnettech_logo.jpg" alt="text to display if image cannot be shown">, the barnettech_logo.jpg file is located relative (a relative path is used) to where the HTML page is located. If you had an images folder in the same directory as your HTML file, the relative path would be "images/barnettech_logo.jpg", and the full line would read <img src="images/barnettech_logo.jpg" alt="text to display if image cannot be shown"
>.
Creating Lists
With HTML you can create two types of lists: ordered lists and unordered lists. With an ordered list, each item in the list is numbered. With unordered lists, bullets appear prior to each item in the list. Here’s the syntax.
Ordered list:
<ol>
  <li>Item 1</li>
  <li>Item 2</li>
</ol>
Unordered list:
<ul>
  <li>Item 1</li>
  <li>Item 2</li>
</ul>
Figure 3-6 illustrates what the two types of lists look like in a browser.

Figure 3-6. Ordered lists and unordered lists in a web browser
Notice that you first declare your opening tag for the ordered list, <ol>; then before you close out that tag with </ol> you have all your items within that list. Each item is declared with its own opening and closing tag. To start a list item, you open each one with <li>, add the item you want to display in the list, and then close out each item with </li>. After all the items are declared with their opening and closing tags, you tell the browser you’re done with this ordered list by adding the closing tag for the ordered list: </ol>.
The unordered list works in exactly the same way, except you open the unordered list with <ul> and close it with </ul>.
![]() Note You will see this a lot, where you will “nest” tags within other tags. For example, <li> tags nest within <ul> tags. Within paragraph tags, <p>, you could have any number of tags, such as bolded text, or italicized, or an image could appear in your paragraph. These tags are “nested” within the paragraph tag. For example, consider this code: <p> <b> hi there! </b> </p>. The “hi there!” text is bolded, and occurs within, or is nested within, the paragraph tags. This is an important concept in HTML.
Note You will see this a lot, where you will “nest” tags within other tags. For example, <li> tags nest within <ul> tags. Within paragraph tags, <p>, you could have any number of tags, such as bolded text, or italicized, or an image could appear in your paragraph. These tags are “nested” within the paragraph tag. For example, consider this code: <p> <b> hi there! </b> </p>. The “hi there!” text is bolded, and occurs within, or is nested within, the paragraph tags. This is an important concept in HTML.
Tables in HTML are much like ordered lists. First you declare the table opening tag <table> and then you declare a row with <tr>. Next you put in a nested column tag, <td>, then you put in your text, and you then close the column tag with </td>. You then repeat that code sequence for however many columns you would like in your table. When you are finished with your columns, you close the row with the </tr> closing tag. Then repeat for however many rows you would like, then close the table with the closing table tag </table>.
Figure 3-7 shows what a simple table might look like in your browser.

Figure 3-7. A basic HTML table
Here’s the code that builds the table shown in Figure 3-7. Note that border="1" gives each cell in the table the visible borders of the cell; this is optional when creating a table.
<table border="1">
  <tr>
    <td>row 1, cell 1</td>
    <td>row 1, cell 2</td>
  </tr>
  <tr>
    <td>row 2, cell 1</td>
    <td>row 2, cell 2</td>
  </tr>
</table>
Figure 3-8 shows what the table would look like with column headings added.

Figure 3-8. A basic HTML table with column headings
Following is the code that creates the table shown in Figure 3-8:
<table border="1">
  <tr>
    <th>Header 1</th>
    <th>Header 2</th>
  </tr>
  <tr>
    <td>row 1, cell 1</td>
    <td>row 1, cell 2</td>
  </tr>
  <tr>
    <td>row 2, cell 1</td>
    <td>row 2, cell 2</td>
  </tr>
</table>
Note that to add the headers, the <th> tags are nested within the <tr> tags, which puts the headers on their own row, at the top.
An anchor in HTML makes it possible to set up your web page so that if a visitor clicks on a link, also known as a hyperlink, they will be taken to another section of the same web page. You often see this functionality in frequently asked question (FAQ) pages, where there is a list of the most common questions at the top of the page. Those questions are then linked to the answers, which appear lower down on the page.
To create this functionality, you need two pieces of HTML. First, you need to create a link that, when clicked, will take visitors to the other section that appears later on the page.
<a href="#section5">Visit Section 5</a>
Then lower on the page, where the content that you linked to appears, you would put an anchor on the page with an id as follows:
<a id="section5">Section 5</a>
In this case, if a visitor clicks on the text “Visit Section 5,” that user will be taken to the text on the page “Section 5,” which you wrapped with an id of "section5".
This is different from an “href” link, which will send visitors to another web page either within your web site or on another external site and the page will just be loaded normally. You can also use anchors to send visitors to another web page and have the focus of the web page be on the section you send the visitors to. For example, you might have something similar to the following:
<a href="http://www.barnettech.com/anchors.htm#section5">
Visit Section 5</a>
You can send the visitor to the www.barnettech.com web site, as an example, to the anchors.htm web page for viewing, and the visitor will be taken directly to the “Section 5” area. (This is a fictitious example as I have no anchor set up on my web site or an anchor.html page.)
What follows next is an example of some “real” code that illustrates how to use an anchor. The English text embedded in the code is just nonsense text I generated using a “lorem ipsum” generator—well, kind of, instead of generating random Latin text, it generates random vegetable names. Lorem ipsum generators are often used to make up some random text for use in the publishing industry or for web page mock-ups. The amount of random text has to be long enough so it scrolls off your screen in a web browser, so when you click to go to another portion of the screen using the anchor tag, the result will demonstrate the effect properly. For this example code to work, you might have to decrease the size of the window in your web browser to get this effect to work properly. For example, when you display the code in your web browser, you may need to decrease the window size from the bottom so that the window ends at the first line of text that reads “Take me back to the top!” as shown in Figure 3-8.
The code shows some <p> tags to create paragraphs on the page. Also notice the first anchor tag has no text, so it’s a “hidden anchor” at the top of the page—later in the page, when the visitor clicks “Take me back to the top!” the visitor will be taken back to the top of the page to this hidden anchor tag.
<html>
  <body>
    <a id="top"></a>
    <h1>
      <p><a href="#section1">Visit Section 1</a></p>
      <p><a href="#section2">Visit Section 2</a></p>
</h1>

    <p><h2><a id="section1">Section 1</a></h2><p>
    <p>
      Veggies sunt bona vobis, proinde vos postulo esse magis
tigernut wakame jicama spring onion tatsoi zucchini yarrow.
Komatsuna amaranth catsear celery quandong zucchini chickweed
chard coriander spring onion winter purslane turnip greens
swiss chard radicchio bok choy mustard squash. Rock melon
carrot tomatillo cabbage rock melon leek courgette. Chickweed
beetroot tigernut epazote bitterleaf courgette dandelion bell
pepper earthnut pea salsify radicchio soko sea lettuce okra
pumpkin. Veggies sunt bona vobis, proinde vos postulo esse
magis tigernut wakame jícama spring onion tatsoi zucchini
yarrow.
    </p>

    <p>
      Komatsuna amaranth catsear celery quandong zucchini
chickweed chard coriander spring onion winter purslane turnip
greens swiss chard radicchio bok choy mustard squash. Rock
melon carrot tomatillo cabbage rock melon leek courgette.
Chickweed beetroot tigernut epazote bitterleaf courgette
dandelion bell pepper earthnut pea salsify radicchio soko sea
lettuce okra pumpkin.
    </p>
</p>
    <p><h2><a href="#top">Take me back to the top!</a></h2></p>
    <h2><a id="section2">Section 2</a></h2>
    <p>
      Peanut mustard chickweed lotus root yarrow summer purslane
desert raisin endive corn green bean rutabaga pumpkin lettuce.
Arugula zucchini courgette leek bunya nuts eggplant water spinach
tatsoi yarrow potato rock melon kohlrabi jícama bell pepper
shallot burdock. Pumpkin chicory caulie tigernut courgette
celery. Tigernut salad cress komatsuna earthnut pea cauliflower
bell pepper spring onion cucumber. Kale taro cress broccoli
beetroot corn salsify water spinach chickpea beet greens cucumber
dandelion arugula prairie turnip caulie cauliflower.
    </p>

    <p>
Peanut mustard chickweed lotus root yarrow summer purslane desert
raisin endive corn green bean rutabaga pumpkin lettuce. Arugula
zucchini courgette leek bunya nuts eggplant water spinach tatsoi
yarrow potato rock melon kohlrabi jícama bell pepper shallot
burdock. Pumpkin chicory caulie tigernut courgette celery.
Tigernut salad cress komatsuna earthnut pea cauliflower bell
pepper spring onion cucumber. Kale taro cress broccoli beetroot
corn salsify water spinach chickpea beet greens cucumber dandelion
arugula prairie turnip caulie cauliflower.
    </p>
    <p><h2><a href="#top">Take me back to the top!</a></h2></p>
</body>
</html>
Figure 3-9 shows how the page looks in a web browser. First, the page loads and we see the top of the page. If you click one of the anchors, say the one that says “Visit Section 2” at the top of the web page, then you’ll be taken to the “Section 2” part on the web page, as shown in Figure 3-9.
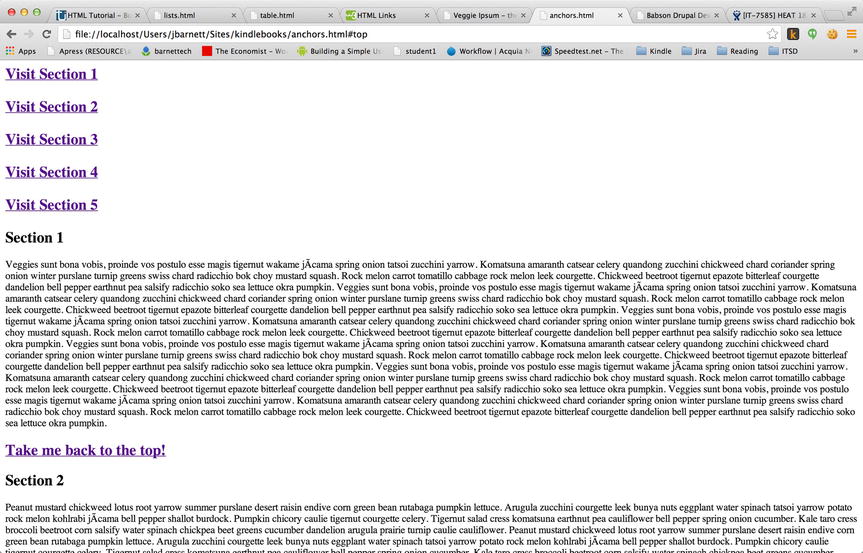
Figure 3-9. After clicking the “Section 2” link, you’ll be taken to the anchor at the bottom of the page for Section 2
HTML can be used to create forms to pass data back to the server. You can add text fields, radio buttons, select lists, text areas, and other elements. To make a form, you use the <form> tag. You basically use the opening <form> tag and then nest the various input elements you want to use, such as radio buttons, within the opening and closing tags (<form> </form>), as follows:
<form>
  input elements
</form>
Now let’s go over the input elements that you can choose to use (see Figure 3-10). These elements include text fields, password fields, radio buttons, drop-down menus, check box input fields, and text areas.

Figure 3-10. Examples of input elements in an HTML form
Text Fields
A text field is a basic text input box used to collect data from the person using your web site. A text field looks as follows:
<input type="text" name="yourname">
You can change "yourname" to be anything. When you learn some JavaScript or PHP in later chapters, you’ll learn to process the data entered by referencing "yourname".
Password Fields
A password field is a bit different from a text field—as you type into the password field, each character you type is masked with a little circle so that no one standing behind you can see what you’re typing. Here’s how you create a password field.
<input type="password" name="password">
Radio Buttons
Here’s how you form a radio button input element.
<input type="radio" name="sex" value="male">Male
<input type="radio" name="sex" value="female">Female
Again, you can change "sex", which is next to name= in the preceding code, to be anything you like. It will be used by the JavaScript or PHP or code you’ll soon be learning to gather to act on the data entered into this input element.
Here’s an example of a dropdown input element.
<select name="snackfood">
<option value="chips">Chips</option>
<option value="popcorn">Popcorn</option>
<option value="nuts">Nuts</option>
<option value="raisins">Raisins</option>
</select>
As I mentioned earlier, what is next to name= (and in this case what is next to value=) can be changed and will be used to refer to the data to process the form. For example, you could change "snackfood" to be "junkfood" and value="chips" to be value="saltychip". The key is to keep your code readable by keeping your code clean and easy to follow with meaningful names.
Here’s how to create a text area.
<textarea name="blogbody" rows="10" cols="30">Here is a
textarea, a large box to input text, good for inputting the
body of a blog, for instance.</textarea>
Again, name="blogbody" could be changed to anything that makes sense for your web site, like name="wikibody" or name="pagebody". It will be used to reference process, store, or act on the collected data in the text area by your JavaScript or PHP code. If you ever learn a different language like Java, .NET, or Ruby, these programming languages can also process forms, just like PHP can.
After you create your form, you need a way for users to submit their data. Enter the “Submit” button. You’ll learn some JavaScript or PHP in later chapters to get the “Submit” button to function, but for now, here’s how to display a “Submit” button.
<input type="submit" value="Submit">
All Together Now
Now that you’ve seen the input elements individually, let’s put them all together. Here is all the code that created the form shown in Figure 3-10.
Here is a textfield example. What is your name? <input
type="text" name="yourname"> </br></br></br></br>
<!-- This is an HTML comment. It does not get rendered in your
web browser. It can be used to document your HTML code. I wanted
to mention that the </br> tags you see above just create some new
lines in your HTML. These tags create better spacing between
elements, to make them look a bit better in the web browser.
This is a crude way to create line breaks. Later you will learn how
to do this with CSS. -->

Here is a password field example. Please choose your password: <input type="password" name="password"> </br></br></br></br>

Here is a radio button example. Are you male or female? </br>
<input type="radio" name="sex" value="male">Male </br>
<input type="radio" name="sex" value="female">Female </br></br></br></br>

Here is a drop-down input element example. Choose your favorite
snack food:
<select name="snackfood">
<option value="chips">Chips</option>
<option value="popcorn">Popcorn</option>
<option value="nuts">Nuts</option>
<option value="raisins">Raisins</option>
</select>
</br></br></br></br>

Here is an example of a check box input field. Do you want
chicken, fish, or a vegetarian meal? </br>
<input type="checkbox" name="mealtype" value="chicken">I want
chicken.</br>
<input type="checkbox" name="mealtype" value="fish">I want
fish.</br>
<input type="checkbox" name="mealtype" value="vegetarian">I
want vegetarian.</br></br></br></br>

<textarea rows="10" cols="30">Here is a textarea, a large box
to input text, good for inputting the body of a blog, for
instance.</textarea>
</br></br></br></br>

Here is the Submit button:
<input type="submit" value="Submit">
Another HTML element type is a layout element. Layout elements are essential to help your web site to stay “looking good.” The div element wraps whatever is nested within it inside of a “box.” This is often called the “box model,” and each area of a web page can be put into a box and then placed exactly the way you like it using CSS. You’ll learn how to do this in Chapter 5.
There is another way to put your content in a box. You can put it into a <span> tag. The difference between a div and a span is that a div tag forces content that comes after it to the next line, whereas a span does not force a new line. So, for instance, you could wrap the earlier form code in a div element as follows:
<div>
  Here is a textfield example. What is your name? <input
  type="text" name="yourname"> </br></br></br></br>

Here is a password field example. Please choose your password:
<input type="password" name="password"> </br></br></br></br>

   Here is a radio button example. Are you male or female? </br>
  <input type="radio" name="sex" value="male">Male </br>
  <input type="radio" name="sex" value="female">Female
  </br></br></br></br>

  Here is a drop-down input element example. Choose your
  favorite snack food:
  <select name="snackfood">
  <option value="chips">Chips</option>
  <option value="popcorn">Popcorn</option>
  <option value="nuts">Nuts</option>
  <option value="raisins">Raisins</option>
  </select>
  </br></br></br></br>

  Here is an example of a check box input field. Do you want
  chicken, fish, or a vegetarian meal?</br>
  <input type="checkbox" name="mealtype" value="chicken">I want
  chicken.</br>
  <input type="checkbox" name="mealtype" value="fish">I want
  fish.</br>
  <input type="checkbox" name="mealtype" value="vegetarian">I
  want vegetarian.</br></br></br></br>

  <textarea rows="10" cols="30">Here is a textarea, a large box
  to input text, good for inputting the body of a blog, for
  instance.</textarea>
  </br></br></br></br>

  Here is the Submit button:
  <input type="submit" value="Submit">
</div>
Notice the opening div tag, <div>, and the closing div tag, </div>, after the form. Right now, when you put this in a web browser, you won’t see a difference in how the page looks, but in later chapters, when you learn CSS, you’ll be able to make use of these div and span tags to style a web page. To use the span tag in the preceding example, you would just replace the <div> </div> opening and closing tags with the opening and closing span tags, <span> </span>.
Summary
In this chapter you were introduced to HTML, the core ingredient of web page creation. To begin this chapter, you opened up Komodo Edit and added the HTML code necessary for creating a basic web page. You then learned how to use comments in your code. Next, you learned to enhance a web page by adding images and creating lists and tables. You also learned to use anchors, so that you could create links within a single web page or to other web pages. Finally, you gained experience working with forms, which are necessary when you want to gather input from visitors to your site. There are various types of input elements used with forms, including text fields, password fields, radio buttons, drop-downs, and text areas. At this point, you should be familiar with some of the basic elements used to code HTML pages.