
Given Access’s graphical environment, your development efforts are often centered on forms. Therefore, you must understand all the Form and Control events and know which event you should code to perform each task. You should also know what types of forms are available and how you can get the look and behavior you want in them.
Often, you won’t need to design your own form because you can make use of one of the built-in dialog boxes that are part of the VBA language or supplied as part of the Microsoft Office 2002 Developer Edition tools. Whatever types of forms you create, you should take advantage of all the tricks and tips of the trade covered throughout this chapter, including adding menu bars and toolbars to your forms.
Microsoft Access traps for 34 Form events (excluding those specifically related to PivotTables), each of which has a distinct purpose. Access also traps events for Form sections and controls. The following sections cover the Form events and when you should use them.
A form’s Current event is one of the more commonly coded events. It happens each time focus moves from one record to another. The Current event is a great place to put code that you want to execute whenever a record is displayed. For example, you might want the company name to appear with a special background if the client is an important one. The following code is placed in the Current event of the frmClients form that’s part of the Time and Billing application:
Private Sub Form_Current()
    'If user is on a new record,
    'move the focus to the Contact First Name control
    If Me.NewRecord Then
        Me.txtContactFirstName.SetFocus
    End If
End Sub
This code moves focus to the txtContactFirstName control if the txtClientID of the record that the user is moving to happens to be Null; this happens if the user is adding a new record.
The BeforeInsert event occurs when the first character is typed in a new record, but before the new record is actually created. If the user is typing in a text or combo box, the BeforeInsert event occurs even before the Change event of the text or combo box. The frmProjects form of the Time and Billing application has an example of a practical use of the BeforeInsert event:
Private Sub Form_BeforeInsert(Cancel As Integer)
On Error GoTo Err_Form_BeforeInsert
    'Set the ClientID to the ClientID on the Clients form
    Me.ClientID = Forms.frmClients.txtClientID

Exit_Form_BeforeInsert:
    Exit Sub

Err_Form_BeforeInsert:
    MsgBox Err.Description
    Resume Exit_Form_BeforeInsert
End Sub
The frmProjects form is always called from the frmClients form. The BeforeInsert event of frmProjects sets the value of the txtClientID text box equal to the value of the txtClientID text box on frmClients.
The AfterInsert event occurs after the record has actually been inserted. It can be used to requery a recordset when a new record is added.
Note
Here’s the order of form events when a user begins to type data into a new record:
BeforeInsert->BeforeUpdate->AfterUpdate->AfterInsert
The BeforeInsert event occurs when the user types the first character, the BeforeUpdate event happens when the user updates the record, the AfterUpdate event takes place when the record is updated, and the AfterInsert event occurs when the record that’s being updated is a new record.
The BeforeUpdate event runs before a record is updated. It occurs when the user tries to move to a different record (even a record on a subform) or when the Records|Save Record command is executed. The BeforeUpdate event can be used to cancel the update process when you want to perform complex validations. When a user adds a record, the BeforeUpdate event occurs after the BeforeInsert event. The frmClients form in the Chap9Ex sample database provides an example of using a BeforeUpdate event:
Private Sub Form_BeforeUpdate(Cancel As Integer)

    'If the Contact FirstName, LastName, Company or
    'Phone Number is left blank, display a message
    'and cancel the update
    If IsNull(Me.txtContactFirstName) Or _
        IsNull(Me.txtContactLastName) Or _
        IsNull(Me.txtCompanyName) Or _
        IsNull(Me.txtPhoneNumber) Then
        MsgBox "The Contact First Name, " & vbCrLf & _
            "Contact Last Name, " & vbCrLf & _
            "Company Name, " & vbCrLf & _
            "And Contact Phone Must All Be Entered", _
            vbCritical, _
            "Canceling Update"
        Me.txtContactFirstName.SetFocus
        Cancel = True
    End If
End Sub
This code determines whether the first name, last name, company name, or phone number contains Nulls. If any of these fields contains Null, a message is displayed, and the Cancel parameter is set to True, canceling the update process. As a convenience to the user, focus is placed in the txtFirstName control.
The AfterUpdate event occurs after the changed data in a record is updated. You might use this event to requery combo boxes on related forms or perhaps to log record changes. Here’s an example:
Private Sub Form_AfterUpdate()
    Me.cboSelectProduct.Requery
End Sub
This code requeries the cboSelectProduct combo box after the current record is updated.
The Dirty event occurs when the contents of the form, or of the text portion of a combo box, changes. It also occurs when you programmatically change the Text property of a control. Here’s an example:
Private Sub Form_Dirty(Cancel As Integer)
    'Flip the Enabled properties of the appropriate
    'command buttons
    Call FlipEnabled(Me, ActiveControl)

    'Hide the form navigation buttons
    Me.NavigationButtons = False
End Sub
This code, located in the frmClients form of the Time and Billing application, calls FlipEnabled to flip the command buttons on the form. This has the effect of enabling the Save and Cancel command buttons and disabling the other command buttons on the form. The code also removes the navigation buttons, prohibiting the user from moving to other records while the data is in a “dirty” state.
The Undo event executes before changes to a row are undone. The Undo event initiates when the user clicks the Undo button on the toolbar, taps the Esc key, or executes code that attempts to undo changes to the row. If you cancel the Undo event, the changes to the row are not undone. Here’s an example:
Private Sub Form_Undo(Cancel As Integer)

    'Ask user if they meant to undo changes
    If MsgBox("You Have Attempted to Undo Changes " & _
        "to the Current Row.  Would You Like to Proceed " & _
        "with the Undo Process?", _
        vbYesNo) = vbYes Then

        'If they respond yes, proceed with the undo
        Cancel = False

    Else

        'If they respond no, cancel the undo
        Cancel = True
    End If

End Sub
This code, located in the frmProjects form of the Time and Billing application, displays a message to the user, asking him if he really wants to undo his changes. If he responds Yes, the Undo process proceeds. If he responds No, the Undo process is cancelled.
The Delete event occurs when a user tries to delete a record, but before the record is removed from the table. This is a great way to place code that allows deleting a record only under certain circumstances. If the Delete event is canceled, the BeforeDelConfirm and AfterDelConfirm events never execute, and the record is never deleted.
The BeforeDelConfirm event takes place after the Delete event, but before the Delete Confirm dialog box is displayed. If you cancel the BeforeDelConfirm event, the record being deleted is restored from the delete buffer, and the Delete Confirm dialog box is never displayed.
The AfterDelConfirm event occurs after the record is deleted, or when the deletion is canceled. If the code does not cancel the BeforeDelConfirm event, the AfterDelConfirm event takes place after Access displays the Confirmation dialog box.
The Open event occurs when a form is opened but before the first record is displayed. With this event, you can control exactly what happens when the form first opens. The Open event of the Time and Billing application’s frmProjects form looks like this:
Private Sub Form_Open(Cancel As Integer)
    'If the Clients form is not loaded,
    'Display a message to the user and
    'do not load the form
    If Not IsLoaded("frmClients") Then
        MsgBox "Open the Projects form using the Projects " & _
            "button on the Clients form."
        Cancel = True
    End If
End Sub
This code checks to make sure the frmClients form is loaded. If it isn’t, it displays a message box, and sets the Cancel parameter to True, which prohibits the form from loading.
The Load event happens when a form opens, and the first record is displayed; it occurs after the Open event. A form’s Open event can cancel the opening of a form, but the Load event can’t. The following routine is placed in the Load event of the Time and Billing application’s frmExpenseCodes form:
Private Sub Form_Load()
    'If the form is opened in Data Entry Mode
    'And the OpenArgs property is not null,
    'Set the txtExpenseCode text box equal to
    'the value of the opening arguments
    If Me.DataEntry _
        And Not (IsNull(Me.OpenArgs)) Then
        Me.txtExpenseCode = Me.OpenArgs
    End If
End Sub
This routine looks at the string that’s passed as an opening argument to the form. If the OpenArgs string is not Null, and the form is opened in data entry mode, the txtExpenseCode text box is set equal to the opening argument. In essence, this code allows the form to be used for two purposes. If the user opens the form from the database container, no special processing occurs. On the other hand, if the user opens the form from the fsubTimeCardsExpenses subform, the form is opened in data entry mode, and the expense code that the user specified is placed in the txtExpenseCode text box.
The Unload event happens when a form is closed, but before Access removes the form from the screen. It’s triggered when the user chooses Close from the File menu, quits the application by choosing End Task from the task list, quits Windows, or when your code closes the form. You can place code that makes sure it’s okay to unload the form in the Unload event, and you can also use the Unload event to place any code you want executed whenever the form is unloaded. Here’s an example:
Private Sub Form_Unload(Cancel As Integer)
    'Determine if the form is dirty
    If Me.cmdSave.Enabled Then
        'If form is dirty, ask user if they want to save
        Select Case MsgBox("Do You Want To Save", _
            vbYesNoCancel + vbCritical, _
            "Please Respond")

            'If user responds yes, save record and allow unload
            Case vbYes
                DoCmd.RunCommand Command:=acCmdSaveRecord
                Cancel = False

            'If user responds no, undo changes to record and
            'allow unload
            Case vbNo
                On Error Resume Next
                DoCmd.RunCommand Command:=acCmdUndo
                Cancel = False

            'If user clicks cancel, cancel unloading of form
            Case vbCancel
                Cancel = True
        End Select
    End If
End Sub
This code is in the Unload event of the frmClients form from the Time and Billing application. It checks whether the Save button is enabled. If it is, the form is in a dirty state. The user is prompted as to whether he wants to save changes to the record. If he responds affirmatively, the code saves the data, and the form is unloaded. If he responds no, the code cancels changes to the record, and the form is unloaded. Finally, if he opts to cancel, the value of the Cancel parameter is set to True, and the form is not unloaded.
The Close event occurs after the Unload event, when a form is closed and removed from the screen. Remember, you can cancel the Unload event but not the Close event.
The following code is located in the Close event of the frmClients form that’s part of the Time and Billing database:
Private Sub Form_Close()
    'If the frmProjects form is loaded,
    'unload it
    If IsLoaded("frmProjects") Then
        DoCmd.Close acForm, "frmProjects"
    End If
End Sub
When the frmClients form is closed, the code tests whether the frmProjects form is open. If it is, the code closes it.
The Activate event takes place when the form gets focus and becomes the active window. It’s triggered when the form opens, when a user clicks on the form or one of its controls, and when the SetFocus method is applied by using VBA code. The following code, found in the Activate event of the Time and Billing application’s frmClients form, requeries the fsubClients subform whenever the frmClients main form activates:
Private Sub Form_Activate()
    'Requery form when it becomes active
    'This ensures that changes made in the projects form
    'are immediately reflected in the clients form
    Me.fsubClients.Requery
End SubThe Deactivate event occurs when the form loses focus, which happens when a table, query, form, report, macro, module, or the Database window becomes active. However, the Deactivate event isn’t triggered when a dialog, pop-up form, or another application becomes active. The following is an example of the use of the Deactivate event:
Private Sub Form_Deactivate()
   'Use AllowEdits property setting to determine which toolbar to hide.
   'Show Form View toolbar.
   If Me.AllowEdits = True Then
       DoCmd.ShowToolbar "Enter Or Edit Products 2", acToolbarNo
   Else
       DoCmd.ShowToolbar "Enter Or Edit Products 1", acToolbarNo
   End If
   DoCmd.ShowToolbar "Form View", acToolbarWhereApprop
End Sub
This code evaluates the AllowEdits property to determine which custom toolbar is currently active. It hides the appropriate toolbar and shows the standard Form View toolbar.
The GotFocus event happens when a form gets focus, but only if there are no visible, enabled controls on the form. This event is rarely used for a form.
The LostFocus event occurs when a form loses focus, but only if there are no visible, enabled controls on the form. This event, too, is rarely used for a form.
The Click event takes place when the user clicks on a blank area of the form, on a disabled control on the form, or on the form’s record selector.
The DblClick event happens when the user double-clicks on a blank area of the form, on a disabled control on the form, or on the form’s record selector.
The MouseDown event occurs when the user clicks on a blank area of the form, on a disabled control on the form, or on the form’s record selector. However, it happens before the Click event fires. You can use it to determine which mouse button was pressed.
The MouseMove event takes place when the user moves the mouse over a blank area of the form, over a disabled control on the form, or over the form’s record selector. It’s generated continuously as the mouse pointer moves over the form. The MouseMove event occurs before the Click event fires.
The MouseUp event occurs when the user releases the mouse button. Like the MouseDown event, it happens before the Click event fires. You can use the MouseUp event to determine which mouse button was pressed.
The KeyDown event happens if there are no controls on the form, or if the form’s KeyPreview property is set to Yes. If the latter condition is true, all keyboard events are previewed by the form and occur for the control that has focus. If the user presses and holds down a key, the KeyDown event occurs repeatedly until the user releases the key. Here’s an example:
Private Sub Form_KeyDown(KeyCode As Integer, Shift As Integer)
    'If the form is dirty and the user presses page up or
    'page down, ignore the keystroke
    If Me.Dirty Then
        If KeyCode = vbKeyPageDown Or _
           KeyCode = vbKeyPageUp Then
           KeyCode = 0
        End If
    End If
End Sub
This code, found in the frmClients form that is part of the Time and Billing application, tests to see if the form is in a dirty state. If it is, and Page Down or Page Up is pressed, the keystroke is ignored. This prevents the user from moving to other records without first clicking the Save or Cancel command buttons.
Like the KeyDown event, the KeyUp event occurs if there are no controls on the form, or if the form’s KeyPreview property is set to Yes. The KeyUp event takes place only once, though, regardless of how long the key is pressed. You can cancel the keystroke by setting KeyCode to Zero.
The KeyPress event occurs when the user presses and releases a key or key combination that corresponds to an ANSI code. It takes place if there are no controls on the form or if the form’s KeyPreview property is set to Yes. You can cancel the keystroke by setting KeyCode to Zero.
The Error event triggers whenever an error happens while the user is in the form. Microsoft Jet Engine errors are trapped, but Visual Basic errors aren’t. You can use this event to suppress the standard error messages. You must handle Visual Basic errors using standard On Error techniques. Both the Error event and handling Visual Basic errors are covered in Chapter 16, “Error Handling: Preparing for the Inevitable.”
The Filter event takes place whenever the user selects the Filter By Form or Advanced Filter/Sort options. You can use this event to remove the previous filter, enter default settings for the filter, invoke your own custom filter window, or prevent certain controls from being available in the Filter By Form window. The later section “Taking Advantage of Built-In, Form-Filtering Features” covers filters in detail.
The ApplyFilter event occurs when the user selects the Apply Filter/Sort, Filter By Selection, or Remove Filter/Sort options. It also takes place when the user closes the Advanced Filter/Sort window or the Filter By Form window. You can use this event to make sure that the applied filter is correct, to change the form’s display before the filter is applied, or to undo any changes you made when the Filter event occurred. The later section “Taking Advantage of Built-In, Form-Filtering Features” covers filters in detail.
The Timer event and a form’s TimerInterval property work hand in hand. The TimerInterval property can be set to any value between 0 and 2,147,483,647. The value used determines the frequency, expressed in milliseconds, at which the Timer event will occur. For example, if the TimerInterval property is set to 0, the Timer event will not occur at all; if set to 5000 (5000 milliseconds), the Timer event will occur every five seconds. The following example uses the Timer event to alternate the visibility of a label on the form. This produces a flashing effect. The TimerInterval property can be initially set to any valid value other than 0, but will be reduced by 50 milliseconds each time the code executes. This has the effect of making the control flash faster and faster. The Timer events continue to occur until the TimerInterval property is finally reduced to 0.
Private Sub Form_Timer()
'If Label1 is visible, hide it, otherwise show it
If Me.Label2.Visible = True Then
    Me.Label2.Visible = False
Else
    Me.Label2.Visible = True
End If

'Decrement the timer interval, causing the
'label to flash more quickly
Me.TimerInterval = Me.TimerInterval - 50

'Once the timer interval becomes zero,
'make the label visible
If Me.TimerInterval = 0 Then
    Me.Label2.Visible = True
End If
End SubOne of the mysteries of events is the order in which they occur. One of the best ways to figure this out is to place Debug.Print statements in the events you want to learn about. This technique is covered in Chapter 15, “Debugging: Your Key to Successful Development.” Keep in mind that event order isn’t an exact science; it’s nearly impossible to guess when events will happen in all situations. It’s helpful, though, to understand the basic order in which certain events do take place.
When a user opens a form, the following events occur:
Open->Load->Resize->Activate->Current
After these Form events take place, the Enter and GotFocus events of the first control occur. Remember that the Open event provides the only opportunity to cancel opening the form.
When a user closes a form, the following events take place:
Unload->Deactivate->Close
Before these events occur, the Exit and LostFocus events of the active control triggers.
When a user resizes a form, what happens depends on whether the form is minimized, restored, or maximized. When the form minimizes, here’s what happens:
Resize->Deactivate
When a user restores a minimized form, these events take place:
Activate->Resize
When a user maximizes a form or restores a maximized form, just the Resize event occurs.
When a user moves from one form to another, the Deactivate event occurs for the first form; then the Activate event occurs for the second form. Remember that the Deactivate event doesn’t take place if focus moves to a dialog box, a pop-up form, or another application.
When a user types a character, and the form’s KeyPreview property is set to True, the following events occur:
KeyDown->KeyPress->Dirty->KeyUp
If you trap the KeyDown event and set the KeyCode to Zero, the remaining events never happen. The KeyPress event captures only ANSI keystrokes. This event is the easiest to deal with. However, you must handle the Keydown and KeyUp events when you need to trap for non-ANSI characters, such as Shift, Alt, and Ctrl.
Sections have only five events: Click, DblClick, MouseDown, MouseMove, and MouseUp. These events rarely play significant roles in your application.
Each control type has its own set of events to which it responds. Many events are common to most controls, but others are specific to certain controls. Furthermore, some controls respond to very few events. The following sections cover all the Control events and the controls they apply to.
The BeforeUpdate event applies to text boxes, option groups, combo boxes, list boxes, and bound object frames. It occurs before changed data in the control updates. The following code example is found in the BeforeUpdate event of the txtProjecttotalBillingEstimate control on the frmProjects form in the sample database:
Private Sub CustomerID_BeforeUpdate(Cancel As Integer)
    'If project total billings are less than or equal to zero
    'display a message to the user and cancel the update
    If Me.txtProjectTotalBillingEstimate <= 0 Then
        MsgBox "Project Total Billings Must Be Greater Than " & _
            "or Equal to Zero", vbCritical, "Canceling Update"
        Cancel = True
    End If

End Sub
This code tests whether the value of the CustomerID control is less than or equal to zero. If it is, the code displays a message box, and the Update event is canceled.
The AfterUpdate event applies to text boxes, option groups, combo boxes, list boxes, and bound object frames. It occurs after changed data in the control updates. The following code example is from the AfterUpdate event of the txtBeginDate control on the frmPrintInvoice form found in the Time and Billing database:
Private Sub txtBeginDate_AfterUpdate()
    'Requery the subforms when the begin
    'date changes
    Me.fsubPrintInvoiceTime.Requery
    Me.fsubPrintInvoiceExpenses.Requery
End Sub
This code requeries both the fsubPrintInvoiceTime subform and the fsubPrintInvoiceExpenses subform when the txtBeginDate control updates. This ensures that the subforms display the time and expenses appropriate for the selected date range.
The Updated event applies to a bound object frame only. It occurs when the OLE (Object Linking and Embedding) object’s data is modified.
The Change event applies to text and combo boxes and takes place when data in the control changes. For a text box, this event occurs when a character is typed; for a combo box, it happens when a user types a character or selects a value from the list. You use this event when you want to trap for something happening on a character-by-character basis.
The NotInList event applies only to a combo box and happens when a user enters a value in the text box portion of the combo box that’s not in the combo box list. By using this event, you can allow the user to add a new value to the combo box list. For this event to be triggered, the LimitToList property must be set to Yes. Here’s an example from the Time and Billing application’s frmPayments form:
Private Sub cboPaymentMethodID_NotInList _
    'If payment method is not in the list,
    'ask user if they want to add it
    If MsgBox("Payment Method Not Found, Add?", _
        vbYesNo + vbQuestion, _
        "Please Respond") = vbYes Then

        'If they respond yes, open the frmPaymentMethods form
        'in add mode, passing in the new payment method
        DoCmd.OpenForm "frmPaymentMethods", _
            Datamode:=acFormAdd, _
            WindowMode:=acDialog, _
            OpenArgs:=NewData

        'If form is still loaded, unload it
        If IsLoaded("frmPaymentMethods") Then
            Response = acDataErrAdded
            DoCmd.Close acForm, "frmPaymentMethods"

        'If the user cancels the add, redisplay the existing options
        Else
            Response = acDataErrContinue
        End If
    Else
        'If the user responds no, redisplay the existing options
        Response = acDataErrContinue
    End If

End Sub
This code executes when a user enters a payment method that’s not in the cboPaymentMethodID combo box. It asks the user if he wants to add the entry. If he responds yes, the frmPaymentMethods form displays. Otherwise, the user must select another entry from the combo box. The NotInList event is covered in more detail later in the “Handling the NotInList Event” section.
The Enter event applies to text boxes, option groups, combo boxes, list boxes, command buttons, object frames, and subforms. It occurs before a control gets focus from another control on the same form and before the GotFocus event. Here’s an example from the Time and Billing application’s frmTimeCards form:
Private Sub fsubTimeCards_Enter()
    'If the user clicks to enter time cards, and the EmployeeID
    'is Null, display a message and set focus back to the
    'cboEmployeeID combo box
    If IsNull(Me.EmployeeID) Then
        MsgBox "Enter employee before entering time or expenses."
        Me.cboEmployeeID.SetFocus
    End If
End Sub
When the user moves into the fsubTimeCards subform control, its Enter event tests whether the EmployeeID has been entered on the main form. If it hasn’t, a message box displays, and focus is moved to the cboEmployeeID control on the main form.
The Exit event applies to text boxes, option groups, combo boxes, list boxes, command buttons, object frames, and subforms. It occurs just before the LostFocus event.
The GotFocus event applies to text boxes, toggle buttons, options buttons, check boxes, combo boxes, list boxes, and command buttons. It takes place when focus moves to a control in response to a user action or when the SetFocus, SelectObject, GoToRecord, GoToControl, or GoToPage method is issued in code. Controls can get focus only if they’re visible and enabled.
The LostFocus event applies to text boxes, toggle buttons, options buttons, check boxes, combo boxes, list boxes, and command buttons. It occurs when focus moves away from a control in response to a user action, or when your code issues the SetFocus, SelectObject, GoToRecord, GoToControl, or GoToPage methods.
Note
The difference between GotFocus/LostFocus and Enter/Exit lies in when they occur. If focus is lost (moved to another form) or returned to the current form, the control’s GotFocus and LostFocus events are triggered. The Enter and Exit events don’t take place when the form loses or regains focus. Finally, it is important to note that none of these events takes place when the user makes menu selections or clicks toolbar buttons.
The Click event applies to labels, text boxes, option groups, combo boxes, list boxes, command buttons, and object frames. It occurs when a user presses, and then releases, a mouse button over a control. Here’s an example from the Time and Billing application’s frmProjects form:
Private Sub cmdToggleView_Click()
    'If the caption of the control is View Expenses,
    'hide the Projects subform and show the Project Expenses subform
    'Change caption of command button to View Hours
    If Me.cmdToggleView.Caption = "&View Expenses" Then
        Me.fsubProjects.Visible = False
        Me.fsubProjectExpenses.Visible = True
        Me.cmdToggleView.Caption = "&View Hours"
    'If the caption of the control is View Hours,
    'hide the Project Expenses subform and show the Project subform
    'Change caption of command button to View Expenses
    Else
        Me.fsubProjectExpenses.Visible = False
        Me.fsubProjects.Visible = True
        Me.cmdToggleView.Caption = "&View Expenses"
    End If
End Sub
This code checks the caption of the cmdToggleView command button. If the caption reads "&View Expenses" (with the ampersand indicating a hotkey), the fsubProjects subform is hidden, the fsubProjectExpenses subform is made visible, and the caption of the cmdToggleView command button is modified to read "&View Hours". Otherwise, the fsubProjectExpenses subform is hidden, the fsubProjects subform is made visible, and the caption of the cmdToggleView command button is modified to read “&View Expenses”.
Note
The Click event is triggered when the user clicks the mouse over an object, as well as in the following situations:
When the user presses the spacebar while a command button has focus
When the user presses the Enter key, and a command button’s Default property is set to
YesWhen the user presses the Escape key, and a command button’s Cancel property is set to
YesWhen an accelerator key for a command button is used
The DblClick event applies to labels, text boxes, option groups, combo boxes, list boxes, command buttons, and object frames. It occurs when a user presses, and then releases the left mouse button twice over a control. Here’s an example from the Time and Billing application’s fsubTimeCards form:
Private Sub cboWorkCodeID_DblClick(Cancel As Integer)
Dim strWorkCode As String

On Error GoTo Err_cboWorkCodeID_DblClick

    'If the cboWorkCodeID is Null, set the
    'strWorkCode variable to a zero-length string
    'otherwise set it to the text in the combo box
    If IsNull(Me.cboWorkCodeID.Text) Then
        strWorkCode = ""
    Else
        strWorkCode = Me.cboWorkCodeID.Text
    End If

    'If the cboWorkCodeID is Null, set the
    'Text property to a zero-length string
    If IsNull(Me.cboWorkCodeID) Then
        Me.cboWorkCodeID.Text = ""
    Else

        'Otherwise, set the cboWorkCodeID
        'combo box to Null
        Me.cboWorkCodeID = Null
    End If

    'Open the frmWorkCodes form modally
    DoCmd.OpenForm "frmWorkCodes", _
        DataMode:=acFormAdd, _
        windowmode:=acDialog, _
        OpenArgs:=strWorkCode

    'After the form is closed, requery the combo box
    Me.cboWorkCodeID.Requery

    'Set the text of the combo box to the value added
    Me.cboWorkCodeID.Text = strWorkCode

Exit_cboWorkCodeID_DblClick:
    Exit Sub

Err_cboWorkCodeID_DblClick:

    MsgBox Err.Description
    Resume Exit_cboWorkCodeID_DblClick
End Sub
In this example, the code evaluates the cboWorkCodeID combo box control to see whether it’s Null. If it is, the text of the combo box is set to a zero-length string. Otherwise, a long integer variable is set equal to the combo box value, and the combo box value is set to Null. The frmWorkCodes form is opened modally. When it’s closed, the cboWorkCodeID combo box is requeried. If the long integer variable doesn’t contain a zero, the combo box value is set equal to the long integer value.
The MouseDown event applies to labels, text boxes, option groups, combo boxes, list boxes, command buttons, and object frames. It takes place when a user presses the mouse button over a control, before the Click event fires.
The MouseMove event applies to labels, text boxes, option groups, combo boxes, list boxes, command buttons, and object frames. It occurs as a user moves the mouse over a control.
The MouseUp event applies to labels, text boxes, option groups, combo boxes, list boxes, command buttons, and object frames. It occurs when a user releases the mouse over a control, before the Click event fires.
The KeyDown event applies to text boxes, toggle buttons, option buttons, check boxes, combo boxes, list boxes, and bound object frames. It happens when a user presses a key while within a control; the event occurs repeatedly until the key is released. It can be canceled by setting KeyCode equal to Zero.
The KeyUp event applies to text boxes, toggle buttons, option buttons, check boxes, combo boxes, list boxes, and bound object frames. It occurs when a user releases a key within a control. It occurs only once, no matter how long a key is pressed.
The KeyPress event applies to text boxes, toggle buttons, option buttons, check boxes, combo boxes, list boxes, and bound object frames. It occurs when a user presses and releases an ANSI key while the control has focus. It can be canceled by setting KeyCode equal to Zero.
Just as Form events take place in a certain sequence when the form is opened, activated, and so on, Control events occur in a specific sequence. You need to understand this sequence to write the event code for a control.
When focus is moved to a control, the following events occur:
Enter->GotFocus
If focus is moving to a control as the form is opened, the Form and Control events take place in the following sequence:
Open(form)->Activate(form)->Current(form)->Enter(control) GotFocus(control)
When focus leaves a control, the following events occur:
Exit->LostFocus
When focus leaves the control because the form is closing, the following events happen:
Exit(control)->LostFocus(control)->Unload(form)->Deactivate(form) Close(form)
When you change data in a control and then move focus to another control, the following events occur:
BeforeUpdate->AfterUpdate->Exit->LostFocus
After every character that’s typed in a text or combo box, the following events take place before focus is moved to another control:
KeyDown->KeyPress->Change->KeyUp
For a combo box, if the NotInList event is triggered, it occurs after the KeyUp event.
The Me keyword is like an implicitly declared variable; it’s available to every procedure in a Form or Report module. Using Me is a great way to write generic code in a form or report. You can change the name of the form or report, and the code will be unaffected. Here’s an example:
Me.RecordSource = "qryProjects"
It’s also useful to pass Me (the current form or report) to a generic procedure in a module, as shown in the following example:
Call ChangeCaption(Me)
The ChangeCaption procedure looks like this:
Sub ChangeCaption(frmAny As Form)
   If IsNull(frmAny.Caption) Then
      frmAny.Caption = "Form For - " & CurrentUser
   Else
      frmAny.Caption = frmAny.Caption & " - " & CurrentUser
   End If
End Sub
The ChangeCaption procedure in a Code module receives any form as a parameter. It evaluates the caption of the form that was passed to it. If the caption is Null, ChangeCaption sets the caption to "Form For -", concatenated with the user’s name. Otherwise, it takes the existing caption of the form passed to it and appends the user’s name.
You can design a variety of forms with Microsoft Access. By working with the properties available in Access’s form designer, you can create forms with many different looks and types of functionality. This chapter covers all the major categories of forms, but remember that you can create your own forms. Of course, don’t forget to maintain consistency with the standards for Windows applications.
One of the most common types of forms, the Single form, allows you to view one record at a time. The Single form shown in Figure 9.1, for example, lets the user view one customer record and then move to other records as needed.

Creating a single form is easy—simply set the form’s Default View property to single Form. (See Figure 9.2.)

Often, the user wants to be able to view multiple records at a time, which requires creating a Continuous form, like the one shown in Figure 9.3. To do this, just set the Default View property to Continuous Forms.

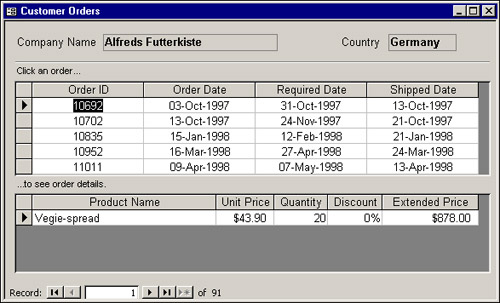
A subform is a common use for a Continuous form; generally, you should show multiple records in a subform. The records displayed in the subform are all the records that relate to the record displayed in the main form. Figure 9.4 shows two subforms, each with its Default View property set to Continuous Forms. One subform shows all the orders relating to a specific customer, and the other shows all the order detail items for the selected order.
Scarcity of screen real estate is a never-ending problem, but a multipage form can be a good solution. Figures 9.5 and 9.6 show the two pages of the multipage Employees form, which can be found in the Northwind.MDB database. When looking at the form in Design view, you can see a Page Break control placed just before the 3-inch mark on the form. (See Figure 9.7.) To insert a Page Break control, select it from the toolbox, and then click and drag to place it on the form.


When creating a multipage form, remember a few important steps:
Set the Default View property of the form to
Single Form.Set the Scrollbars property of the form to
NeitherorHorizontal Only.Set the Auto Resize property of the form to
No.Place the Page Break control exactly halfway down the form’s Detail section if you want the form to have two pages. If you want more pages, divide the total height of the Detail section by the number of pages and place Page Break controls at the appropriate positions on the form.
Size the Form window to fit exactly one page of the form.
A tabbed form is an alternative to a multipage form. Access 97, Access 2000, and Access 2002 all include a built-in Tab control that allows you to easily group sets of controls. A tabbed form could, for example, show customers on one tab, orders for a selected customer on another tab, and order detail items for the selected order on a third tab.
The form shown in Figure 9.8 uses a Tab control. This form, called Employees, is included in the Northwind database. It shows an employee’s company information on one tab and her personal information on the second tab. No code is needed to build the example.

To add a Tab control to a form, simply select it from the toolbox and drag and drop it onto the form. By default, two tab pages appear. To add more tabs, right-click the control and select Insert Page. To remove tabs, right-click the page you want to remove and select Delete Page. To change the order of pages, right-click any page and select Page Order.
You can add controls to each tab just as you would add them directly to the form. Remember to select a tab by clicking it before you add the controls. If you don’t select a specific tab, the controls you add will appear on every tab.
The controls on each page have their own tab order. To modify their tab order, right-click the page and select Tab Order. You can then reorder the controls in whatever way you want.
To change the properties of the Tab control, click to select it rather than a specific page. You can tell whether you’ve selected the Tab control because the words Tab Control appear in the upper-left corner of the title bar of the Properties window. (See Figure 9.9.) A Tab control’s properties include its name, the text font on the tabs, and more.

To change the properties of each page, select a specific page of the Tab control. You can tell whether you’ve selected a specific page because the word Page is displayed in the upper-left corner of the title bar of the Properties window. (See Figure 9.10.) Here you can select a name for the page, the page’s caption, a picture for the page’s background, and more.

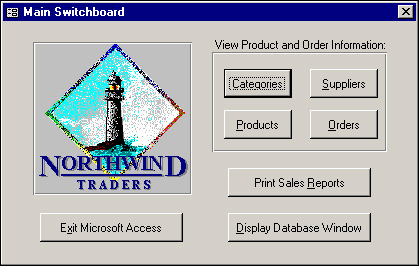
A Switchboard form is a great way to control your application. A Switchboard form is simply a form with command buttons that allow you to navigate to other Switchboard forms or to the forms and reports that make up your system.
The form shown in Figure 9.11 is a Switchboard form. It lets a user work with different components of the database. What differentiates a Switchboard form from other forms is that its purpose is limited to navigating through the application. It usually has a border style of Dialog, and it has no scrollbars, record selectors, or navigation buttons. Other than these characteristics, a Switchboard form is a normal form. There are many styles of Navigation forms; which one you use depends on your users’ needs.
Splash screens add professional polish to your applications and give your users something to look at while your programming code is setting up the application. Just follow these steps to create a Splash Screen form:
Create a new form.
Set the Scrollbars property to
Neither, the Record Selectors property toNo, the Navigation Buttons property toNo, the Auto Resize property toYes, the Auto Center property toYes, and the Border Style toNone.Make the form pop-up and modal.
Add a picture to the form and set the picture’s properties.
Add any text you want on the form.
Set the form’s timer interval to the number of seconds you want the splash screen to be displayed.
Code the form’s
Unloadevent to open your main Switchboard form.
Because the Timer event of the Splash Screen form closes the form after the amount of time specified in the timer interval, the Splash Screen form unloads itself. While it’s unloading, it loads a Switchboard form. The Splash Screen form included in CHAP9EX.MDB is called frmSplash. When it unloads, it opens the frmSwitchboard form.
You can implement a Splash Screen form in many other ways. For example, you can call a Splash Screen form from a Startup form; its Open event simply needs to open the Splash Screen form. The problem with this method is that if your application loads and unloads the Switchboard while the application is running, the Splash Screen is displayed again.
Tip
You can also display a Splash Screen by including a bitmap file with the same name as your database (MDB) in the same directory as the database file. When the application is loaded, the Splash Screen is displayed for a couple of seconds. The only disadvantage to this method is that you have less control over when, and how long, the Splash Screen is displayed.
Dialog forms are typically used to gather information from the user. What makes them Dialog forms is that they’re modal, meaning that the user can’t go ahead with the application until the form is handled. Dialog forms are generally used when you must get specific information from your user before your application can continue processing. A custom Dialog form is simply a regular form that has a Dialog border style and has its Modal property set to Yes. Remember to give users a way to close the form; otherwise, they might close your modal form with the famous “Three-Finger Salute” (Ctrl+Alt+Del) or, even worse, by using the PC’s Reset button. The frmArchivePayments form in CHAP9EX.MDB is a custom Dialog form.
Tip
Although opening a form with its BorderStyle property set to Dialog and its Modal property set to Yes will prevent the user from clicking outside the form (thereby continuing the application), it does not halt the execution of the code that opened the form. Suppose the intent is to open a dialog form to gather parameters for a report, and then open a report based on those parameters. In this case, the OpenForm method used to open the form must include the acDialog option in its Windowmode argument. Otherwise, the code will continue after the OpenForm method and open the report before the parameters are collected from the user.
Access comes with two built-in dialog boxes: the standard Windows message box and the input box. New to Access 2002 is the FileDialog object. It gives you access to other commonly used dialog boxes.
A message box is a predefined dialog box that you can incorporate into your applications; however, it can be customized by using parameters. The VBA language has a MsgBox statement—that just displays a message—and a MsgBox function, which can display a message and return a value based on the user’s response.
The message box in the VBA language is the same message box that’s standard in most Windows applications, so it’s already familiar to most Windows users. Rather than create your own dialog boxes to get standard responses from your users, you can use an existing, standard interface.
The MsgBox function receives five parameters. The first parameter is the message that you want to display. The second is a numeric value indicating which buttons and icon you want to display. Tables 9.1 and 9.2 list the values that can be numerically added to create the second parameter. The intrinsic constants in the table can be substituted for the numeric values, if you want.
MsgBox’s third parameter is the message box’s title. Its fourth and fifth parameters are the Help file and context ID that you want available if the user selects Help while the dialog box is displayed. The MsgBox function syntax looks like this:
MsgBox "This is a Message", vbInformation, "This is a Title"
This example displays the message "This is a Message" and the information icon. The title for the message box is "This is a Title". The message box also has an OK button that’s used to close the dialog box.
The MsgBox function is normally used to display just an OK button, but it can also be used to allow a user to select from a variety of standard button combinations. When used in this way, it returns a value indicating which button the user selected.
The values in Table 9.1 must be numerically added to one of the values in Table 9.2 if you want to include an icon other than the dialog box’s default icon.
In the following example, the message box displays Yes, No, and Cancel buttons:
Sub MessageBoxFunction()
    Dim intAnswer As Integer
    intAnswer = MsgBox("Are You Sure?", vbYesNoCancel + vbQuestion, _
          "Please Respond")
End Sub
This message box also displays the Question icon. (See Figure 9.12.) The Function call returns a value stored in the Integer variable intAnswer.

After you have placed the return value into a variable, you can easily introduce logic into your program to respond to the user’s selection, as shown in this example:
Sub MessageBoxAnswer()
    Dim intAnswer As Integer
    intAnswer = MsgBox("Are You Sure?", vbYesNoCancel + vbQuestion, _
          "Please Respond")
    Select Case intAnswer
        Case vbYes
            MsgBox "I'm Glad You are Sure!!"
        Case vbNo
            MsgBox "Why Aren't You Sure??"
        Case vbCancel
            MsgBox "You Coward! You Bailed Out!!"
    End Select
End Sub
This code evaluates the user’s response and displays a message based on her answer. Of course, in a real-life situation, the code in the Case statements would be more practical. Table 9.3 lists the values returned from the MsgBox function, depending on which button the user selected.
The InputBox function displays a dialog box containing a simple text box. It returns the text that the user typed in the text box and looks like this:
Sub InputBoxExample()
   Dim strName As String
   strName = InputBox("What is Your Name?", _
                  "This is the Title", "This is the Default")
   MsgBox "You Entered " & strName
End Sub
This subroutine displays the input box shown in Figure 9.13. Notice that the first parameter is the message, the second is the title, and the third is the default value. The second and third parameters are optional.

The FileDialog object is new in Access 2002. This object allows you to easily display the common dialog boxes previously available only by using the Common Dialog ActiveX control. Here’s an example of how FileDialog works:
Sub SaveDialog()

    'Declare a FileDialog object
    Dim dlgSaveAs As FileDialog

    'Instantiate the FileDialog object
    'indicating the it will act as a Save dialog
    Set dlgSaveAs = Application.FileDialog( _
        DialogType:=msoFileDialogSaveAs)

    'Display the dialog
    dlgSaveAs.Show

    'Display the specified file name in a message box
    MsgBox dlgSaveAs.SelectedItems(1)

End Sub
The code in the example declares a FileDialog object. It instantiates the object, setting its type to a File SaveAs dialog box. It shows the dialog box and then displays the first selected file in a message box. Here’s another example:
Sub OpenDialog()
    'Declare a FileDialog object
    Dim dlgOpen As FileDialog
    'Instantiate the FileDialog object, setting its
    'type to a File Open dialog
    Set dlgOpen = Application.FileDialog( _
        DialogType:=msoFileDialogOpen)

    With dlgOpen

        'Allow multiple selections in the dialog
        .AllowMultiSelect = True

        'Display the dialog
        .Show
    End With

    'Display the first file selected in the dialog
    MsgBox dlgOpen.SelectedItems(1)
End Sub
This code once again declares a FileDialog object. When the object is instantiated, the dialog box type is designated as a File Open dialog box. The AllowMultiSelect property of the dialog box is set to allow multiple selections in the dialog. The dialog box is displayed, and then the first selected file is displayed in a message box.
You can create custom menus to display with your forms and reports; there’s no limit as to how many you can use. You can attach each menu to one or more forms or reports. Quite often, you will want to restrict what users can do while they’re working with a form or report. By creating a custom menu, you can restrict and customize what users are allowed to do.
Prior to Access 97, Access users could create a custom menu bar by setting the MenuBar property to the name of a menu bar macro. This function was supported for backward compatibility only. In Access 97, Access 2000, and Access 2002, custom menu bars, toolbars, and pop-up menus are all referred to as command bars. To create any of these three objects, choose View|Toolbars and then select Customize. After a custom menu bar, toolbar, or pop-up menu has been created, you can easily associate it with forms and reports by using the Menubar, Toolbar, and Shortcut Menu Bar properties, respectively.
Follow these steps to create a custom menu bar:
Choose View|Toolbars and click Customize, or right-click any command bar and select Customize.
When the Customize dialog box opens, click the Toolbars tab and then click New. (See Figure 9.14.)
Assign a name to the new menu bar, toolbar, or pop-up menu. The new command bar then appears.
Click the Properties button on the Customize dialog box to view the properties for your newly created command bar. In the Toolbar Properties dialog box, you name the toolbar, select the toolbar type, indicate the type of docking that’s allowed, and set other options for the command bar. The Type drop-down list allows you to select Menu Bar, Toolbar, or Pop-up. The Docking options are Allow Any, Can’t Change, No Vertical, and No Horizontal. You can also choose whether the user will be allowed to customize or move the command bar.
Select the options you want and click Close.

Note
Menu bars, toolbars, and pop-up menus are all referred to generically as command bars. The process to create each type of object is very similar. The Type property of the command bar is used to designate the type of object you want to create.
Now you’re ready to add items to the new command bar. The process differs slightly, depending on whether you selected a toolbar, menu bar, or pop-up menu. To add items to a command bar, click the Commands tab of the Customize dialog box, shown in Figure 9.15, and drag and drop command icons onto your new command bar.

Here are some tips to help you to create custom menu bars, toolbars, and pop-up menus:
To add an entire built-in menu to the menu bar, select Built-in Menus from the Categories list box. Click and drag a menu pad from the Commands list box over to the menu bar to add the entire built-in menu pad to the custom menu.
To create a custom menu pad, select New Menu from the Categories list box. Click and drag the New Menu option to the menu bar. To modify the text on the menu pad, right-click the menu pad and type a new value in the Name text box.
To add a built-in command to the menu, select a category from the Categories list box, and then click and drag the appropriate command to the menu pad. The new item will appear underneath the menu pad.
To add a separator bar to a menu, right-click on the menu item that will follow the separator bar and select Begin a Group. To remove the separator bar, select Begin a Group again.
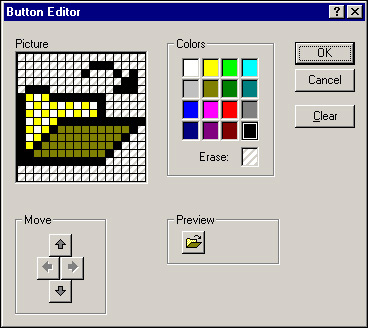
Menu items can contain text only or images and text. To select one of these options, right-click a menu item and select Default Style, Text Only (Always), Text Only (in Menus), or Image and Text. To customize an image, right-click a menu item and select Change Button Image. Choose one of the available images. To modify the button image, right-click a menu item and select Edit Button Image; this opens the Button Editor dialog box. (See Figure 9.16.) If you want to reset the button to its original image, right-click the menu item and select Reset Button Image.
If you want to modify several properties of a menu item at once, you can right-click the menu item and select Properties to open the File Control Properties dialog box. (See Figure 9.17.) Here you can select attributes for the menu item, such as the Caption, Screen Tip, Style, Help File, and Help ContextID. You can also associate an action with a custom menu item (covered in the next section).

In Access, it’s easy to customize your menus with both built-in commands and custom-built functions. For built-in commands, you can simply drag and drop commands onto your command bars. To have a command bar item run a custom-built function, you need to create a custom item and set its properties, as explained in the following steps:
Select the File category from the Categories list box in the Customize dialog box.
Click and drag the Custom option from the Commands list box to the position you want for the menu.
Right-click the new menu item and select Properties.
Type the name of the function or subroutine you want to call in the On Action drop-down list. If the procedure you’re calling is a function, you must precede the function name with an equal sign (
=) and include any parameters in parentheses following the function name.Click Close to close the Control Properties dialog box.
Click Close to close the Customize dialog box.
You can also use the Customize dialog box to delete and rename menus by following these steps:
You can add, modify, and remove command bars, all by using VBA code. This allows you to build flexibility into your application. You can easily modify a command bar in response to different conditions in your application. You can even give your user a front end to customize the command bars in your application, as shown in this example located in the basExamples module in Chap9Ex.mdb.
Sub CreateCustomCommandBar()
   Dim cbr As CommandBar
   Dim btn As CommandBarButton

   'Attempt to point the command bar object at
   'a command button named My Command Bar
   Set cbr = CommandBars("My Command Bar")

   'If an error occurs, the command bar doesn't exist
   'so create it
   If Err.Number Then
      Set cbr = CommandBars _
      .Add(Name:="My Command Bar", Position:=msoBarTop)
   End If
   'Attempt to add a button "Are You Sure?"
   Set btn = cbr.Controls("Are You Sure?")

   'If an error occurs, the custom button doesn't exist
   'so create it
   If Err.Number Then
      Set btn = cbr.Controls.Add(msoControlButton, , , , True)
   End If

   'Set properties of the button
   With btn
      .Caption = "Are You Sure?"
      .BeginGroup = True
      .OnAction = "MessageBoxAnswer"
      .Style = msoButtonCaption
   End With
End Sub
This code illustrates that, by using the VBA language, you have full control over command bar objects. It begins by creating CommandBar and CommandBarButton object variables; then it sets the CommandBar object variable to a command bar called My Command Bar. If this causes an error, you know that the My Command Bar command bar doesn’t exist. The Add method is used to add the command bar, which will be placed at the top of the screen. The routine then tries to point at a command bar button called Are You Sure?. If this causes an error, the Add method of the Controls collection of the CommandBar object is used to add a command button to the collection. The button’s caption is set to Are You Sure?, a group is added, and the command button’s action is set to call the subroutine MessageBoxAnswer. The command button’s style is set to display just a caption.
Access has several form-filtering features that are part of the user interface. You can opt to include these features in your application, omit them from your application entirely, or control their behavior. For your application to control their behavior, it needs to respond to the Filter event, which it does by detecting when a filter is placed on the data in the form. When it has detected a filter, the code in the Filter event executes.
Sometimes you might want to alter the standard behavior of a filter command. You might want to display a special message to a user, for example, or take a specific action in your code. You might also want your application to respond to a Filter event because you want to alter the form’s display before the filter is applied. For example, if a certain filter is in place, you might want to hide or disable certain fields. When the filter is removed, you could then return the form’s appearance to normal.
Fortunately, Access not only lets you know that the Filter event occurred, but it also lets you know how the filter was invoked. Armed with this information, you can intercept and change the filtering behavior as needed.
When a user chooses Filter By Form or Advanced Filter/Sort, the FilterType parameter is filled with a value that indicates how the filter was invoked. If the user invokes the filter by selecting Filter By Form, the FilterType parameter equals the constant acFilterByForm; however, if she selects Advanced Filter/Sort, the FilterType parameter equals the constant acFilterAdvanced. The following code demonstrates how to use these constants:
Private Sub Form_Filter(Cancel As Integer, FilterType As Integer)
    Select Case FilterType
        Case acFilterByForm
            MsgBox "You Just Selected Filter By Form"
        Case acFilterAdvanced
            MsgBox "You Are Not Allowed to Select Advanced Filter/Sort"
            Cancel = True
    End Select
End Sub
This code, placed in the form’s Filter event, evaluates the filter type. If Filter By Form was selected, a message box is displayed, and the filtering proceeds as usual. However, if the user selects Advanced Filter/Sort, she’s told she can’t do this, and the filter process is canceled.
Not only can you check how the filter was invoked, but you can also intercept the process when the filter is applied. You do this by placing code in the form’s ApplyFilter event, as shown in this example:
Private Sub Form_ApplyFilter(Cancel As Integer, ApplyType As Integer)
    Dim intAnswer As Integer
    If ApplyType = acApplyFilter Then
        intAnswer = MsgBox("You just selected the criteria: & _
                         Chr(13) & Chr(10) & Me.Filter & _
                         Chr(13) & Chr(10) & Are You Sure You Wish _
                         to Proceed?", vbYesNo + vbQuestion)
        If intAnswer = vbNo Then
            Cancel = True
        End If
    End If
End Sub
This code evaluates the value of the ApplyType parameter. If it’s equal to the constant acApplyFilter, a message box is displayed, verifying that the user wants to apply the filter. If the user responds Yes, the filter is applied; otherwise, the filter is canceled.
Microsoft Access is an ActiveX client application, meaning that it can contain objects from other applications. Access 97, Access 2000, and Access 2002 are also ActiveX server applications. Using Access as an ActiveX server is covered in Chapter 22, “Automation: Communicating with Other Applications.” Access’s ability to control other applications with programming code is also covered in Chapter 22. In the following sections, you learn how to link to and embed objects in your Access forms.
Bound OLE objects are tied to the data in an OLE field within a table in your database. An example is the Photo field that’s part of the Employees table in the Northwind database. The field type of the Employees table that supports multimedia data is OLE object. This means that each record in the table can contain a unique OLE object. The Employees form contains a bound OLE control, whose control source is the Photo field from the Employees table.
If you double-click the photo of an employee, the OLE object can be edited in-place. The picture of the employee is actually embedded in the Employees table. This means that the data associated with the OLE object is stored as part of the Access database (MDB) file, within the Employees table. Embedded objects, if they support the OLE 2.0 standard, can be modified In-place. This Microsoft feature is called In-Place activation.
To insert a new object, take the following steps:
Move to the record that will contain the OLE object.
Right-click the OLE Object control and select Insert Object to open the Insert Object dialog box.
Select an object type. Select Create New if you want to create an embedded object, or select Create from File if you want to link to or embed an existing file.
If you select Create from File, the Insert Object dialog box changes to look like the one shown in Figure 9.18.
Select Link if you want to link to the existing file. Don’t check Link if you want to embed the existing file. If you link to the file, the Access table will have a reference to the file as well as to the presentation data (a bitmap) for the object. If you embed the file, Access copies the original file, placing the copy in the Access table.
Click Browse and select the file you want to link to or embed.
Click OK.

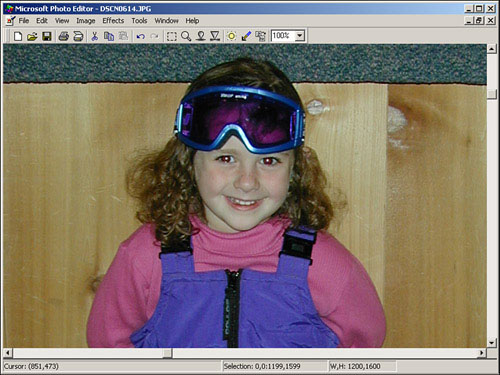
If you double-click a linked object, you launch its source application; you don’t get In-Place activation. (See Figure 9.19.)
The OpenArgs property gives you a way to pass information to a form as it’s being opened. The OpenArgs argument of the OpenForm method is used to populate a form’s OpenArgs property at runtime. It works like this:
DoCmd.OpenForm "frmPaymentMethods", _
            Datamode:=acFormAdd, _
            WindowMode:=acDialog, _
            OpenArgs:=NewData
This code is found in the Time and Billing application’s frmPayments form. It opens the frmPaymentMethods form when a new method of payment is added to the cboPaymentMethodID combo box. It sends the frmPaymentMethods form an OpenArg of whatever data is added to the combo box. The Load event of the frmPaymentMethods form looks like this:
Private Sub Form_Load()
    If Not IsNull(Me.OpenArgs) Then
       Me.txtPaymentMethod.Value = Me.OpenArgs
    End If
End Sub
This code sets the txtPaymentMethod text box value to the value passed as the opening argument. This occurs only when the frmPaymentMethods form is opened from the frmPayments form.
Many developers don’t realize how easy it is to switch a form’s RecordSource property at runtime. This is a great way to use the same form to display data from more than one table or query containing the same fields. It’s also a great way to limit the data that’s displayed in a form at a particular moment. Using the technique of altering a form’s RecordSource property at runtime, as shown in Listing 9.1, you can dramatically improve performance, especially for a client/server application. This example is found in the frmShowSales form of the Chap9Ex database. (See Figure 9.20.)

Example 9.1. Altering a Form’s RecordSource at Runtime
Private Sub cmdShowSales_Click()

    'Check to see that Ending Date is later than Beginning Date.
    If Me.txtEndingDate < Me.txtBeginningDate Then
        MsgBox "The Ending Date must be later than the Beginning Date."
        txtBeginningDate.SetFocus
        Exit Sub
    End If

    'Create an SQL statement using search criteria entered by user and
    'set RecordSource property of ShowSalesSubform.

    Dim strSQL As String
    Dim strRestrict As String
    Dim lngX As Long

    lngX = Me.optSales.Value
    strRestrict = ShowSalesValue(lngX)

    'Create SELECT statement.
    strSQL = "SELECT DISTINCTROW tblCustomers.CompanyName,_
      qryOrderSubtotals.OrderID, "
    strSQL = strSQL & "qryOrderSubtotals.Subtotal ," &  _
        "tblOrders.ShippedDate "
    strSQL = strSQL & "FROM tblCustomers INNER JOIN _
      (qryOrderSubtotals INNER JOIN tblOrders ON "
    strSQL = strSQL & "qryOrderSubtotals.OrderID = " & _
        "tblOrders.OrderID) ON "
    strSQL = strSQL & "tblCustomers.CustomerID = tblOrders.CustomerID "
    strSQL = strSQL & "WHERE (tblOrders.ShippedDate _
    Between Forms!frmShowSales!txtBeginningDate "
    strSQL = strSQL & "And Forms!frmShowSales!txtEndingDate) "
    strSQL = strSQL & "And " & strRestrict
    strSQL = strSQL & " ORDER BY qryOrderSubtotals.Subtotal DESC;"

    'Set RecordSource property of ShowSalesSubform.
    Me.fsubShowSales.Form.RecordSource = strSQL

    'If no records match criteria, reset subform's
    'RecordSource property,
    'display message, and move focus to BeginningDate text box.
    If Me.fsubShowSales.Form.RecordsetClone.RecordCount = 0 Then
        Me.fsubShowSales.Form.RecordSource = _
        "SELECT CompanyName FROM tblCustomers WHERE False;"
        MsgBox "No records match the criteria you entered.", _
         vbExclamation, "No Records Found"
        Me.txtBeginningDate.SetFocus
    Else
        'Enable control in detail section.
        EnableControls Me, acDetail, True
        'Move insertion point to ShowSalesSubform.
        Me.fsubShowSales!txtCompanyName.SetFocus
    End If

    End Sub

Private Function ShowSalesValue(lngOptionGroupValue As Long) As String

    'Return value selected in Sales option group.

    'Define constants for option group values.
    Const conSalesUnder1000 = 1
    Const conSalesOver1000 = 2
    Const conAllSales = 3

    'Create restriction based on value of option group.
    Select Case lngOptionGroupValue
        Case conSalesUnder1000:
            ShowSalesValue = "qryOrderSubtotals.Subtotal < 1000"
        Case conSalesOver1000:
            ShowSalesValue = "qryOrderSubtotals.Subtotal >= 1000"
        Case Else
            ShowSalesValue = "qryOrderSubtotals.Subtotal = True"
    End Select
End Function
Listing 9.1 begins by storing the value of the optSales option group on the frmShowSales main form into a Long Integer variable. It calls the ShowSalesValue function, which declares three constants; then it evaluates the parameter that was passed to it (the Long Integer variable containing the option group value). Based on this value, it builds a selection string for the subtotal value. This selection string becomes part of the SQL statement used for the subform’s record source and limits the range of sales values displayed on the subform.
The ShowSales routine builds a string containing a SQL statement, which selects all required fields from the tblCustomers table and qryOrderSubtotals query. It builds a WHERE clause that includes the txtBeginningDate and txtEndingDate from the main form as well as the string returned from the ShowSalesValue function.
When the SQL statement has been built, the RecordSource property of the fsubShowSales subform control is set equal to the SQL statement. The RecordCount property of the RecordsetClone (the form’s underlying recordset) is evaluated to determine whether any records meet the criteria specified in the RecordSource. If the record count is zero, no records are displayed in the subform, and the user is warned that no records met the criteria. However, if records are found, the form’s Detail section is enabled, and focus is moved to the subform.
Combo and list boxes are very powerful. Being able to properly respond to a combo box’s NotInList event, to populate a combo box by using code, and to select multiple entries in a list box are essential skills of an experienced Access programmer. They’re covered in detail in the following sections.
As previously discussed, the NotInList event occurs when a user types a value in the text box portion of a combo box that’s not found in the combo box list. This event takes place only if the LimitToList property of the combo box is set to True. It’s up to you whether you respond to this event.
You might want to respond with something other than the default error message when the LimitToList property is set to True and the user tries to add an entry. For example, if a user is entering an order and she enters the name of a new customer, you could react by displaying a message box asking whether she really wants to add the new customer. If the user responds affirmatively, you can display a customer form.
After you have set the LimitToList property to True, any code you place in the NotInList event is executed whenever the user tries to type an entry that’s not found in the combo box. The following is an example:
Private Sub cboPaymentMethodID_NotInList(NewData As String, _
    Response As Integer)
    'If payment method is not in the list,
    'ask user if they want to add it
    If MsgBox("Payment Method Not Found, Add?", _
        vbYesNo + vbQuestion, _
        "Please Respond") = vbYes Then

        'If they respond yes, open the frmPaymentMethods form
        'in add mode, passing in the new payment method
        DoCmd.OpenForm "frmPaymentMethods", _
            DataMode:=acFormAdd, _
            windowmode:=acDialog, _
            OpenArgs:=NewData

        'If form is still loaded, uload it
        If IsLoaded("frmPaymentMethods") Then
            Response = acDataErrAdded
            DoCmd.Close acForm, "frmPaymentMethods"

        'If the user responds no,
        Else
            Response = acDataErrContinue
        End If
    Else
        Response = acDataErrContinue
    End If

End Sub
When you place this code in the NotInList event procedure of your combo box, it displays a message asking the user whether she wants to add the payment method. If the user responds No, she is returned to the form without the standard error message being displayed, but she still must enter a valid value in the combo box. If the user responds Yes, she is placed in the frmPaymentMethods form, ready to add the payment method whose name she typed.
The NotInList event procedure accepts a response argument, which is where you can tell VBA what to do after your code executes. Any one of the following three constants can be placed in the response argument:
acDataErrAdded—. This constant is used if your code adds the new value into the record source for the combo box. This code requeries the combo box, adding the new value to the list.acDataErrDisplay—. This constant is used if you want VBA to display the default error message.acDataErrContinue—. This constant is used if you want to suppress VBA’s error message, using your own instead. Access still requires that a valid entry be placed in the combo box.
The NotInList technique just described employs the pop-up form. When the user opts to add the new payment method, the frmPaymentMethod form displays modally. This halts execution of the code in the form that loads the frmPaymentMethod form (in this case, the frmPayments form). The frmPaymentMethod form is considered a pop-up form because the form is modal, it uses information from the frmPayments form, and the frmPayments form reacts to whether the OK or Cancel button is selected. The code in the Load event of the frmPaymentMethods form in the Time and Billing database appears as follows:
Private Sub Form_Load()
    Me.txtPaymentMethod.Value = Me.OpenArgs
End Sub
This code uses the information received as an opening argument to populate the txtPaymentMethod text box. No further code executes until the user clicks either the OK or the Cancel command button. If the OK button is clicked, the following code executes:
Private Sub cmdOK_Click()
    Me.Visible = False
End Sub
Notice that the preceding code hides, rather than closes, the frmPaymentMethods form. If the Cancel button is clicked, this code executes:
Private Sub cmdCancel_Click()
    DoCmd.RunCommand acCmdUndo
    DoCmd.Close
End Sub
The code under the Cancel button first undoes the changes that the user made. It then closes the frmPaymentMethods form. Once back in the NotInList event of the cboPaymentMethod combo box on the frmPayments form, the code that follows executes:
If IsLoaded("frmPaymentMethods") Then
        Response = acDataErrAdded
        DoCmd.Close acForm, "frmPaymentMethods"
Else
        Response = acDataErrContinue
End If
The code evaluates whether the frmPaymentMethods form is still loaded. If it is, the user must have clicked OK. The Response parameter is set to acDataErrAdded, designating that the new entry has been added to the combo box and to the underlying data source. The frmPaymentMethods form is then closed.
If the frmPaymentMethods form is not loaded, the user must have clicked Cancel. The user is returned to the combo box where she must select another combo box entry. In summary, the steps are as follows:
Prior to Access 2002, it was very difficult to add and remove items from list boxes and combo boxes at runtime. The next section, “Populating a Combo or List Box with a Callback Function,” illustrates this point. Access 2002 list boxes and combo boxes support two new powerful methods that make it easier to programmatically manipulate these boxes at runtime. The AddItem method allows you to easily add items to a list box or a combo box. The RemoveItem method allows you to remove items from a list box. Here’s an example:
Private Sub Form_Load()
    Dim obj As AccessObject

    'Loop through all tables in the current database
    'adding the name of each table to the list box
    For Each obj In CurrentData.AllTables
        Me.lstTables.AddItem obj.Name
    Next obj

    'Loop through all queries in the current database
    'adding the name of each query to the list box
    For Each obj In CurrentData.AllQueries
        Me.lstTables.AddItem obj.Name
    Next obj
End Sub
This code is found in the frmSendToExcel form that’s part of the Chap9Ex database. It loops through all tables in the database, adding the name of each table to the lstTables list box. It then loops through each query in the database, once again adding each to the list box.
As mentioned in the previous section, prior to Access 2002, the only way to add items to a combo box or list box at runtime was to use a Callback function. Although the new AddItem method renders the Callback function technique nearly extinct, many legacy applications utilize Callback functions. The technique is therefore covered in this section.
As you know, it’s easy to populate a combo or list box by setting the control’s properties. This method is enough for many situations; however, there are times when you might want to populate a combo or list box programmatically—with values from an array, for example. You might also want to populate the box with table or report names or some other database component.
To populate a combo or list box using code, you create a Callback function, which tells Access how many rows and columns will be in the combo or list box and what data will be used to fill the box. This function becomes the Row Source type for your combo or list box. Access calls the function; then it uses its information to populate the combo or list box. The example in Listing 9.2 is found in the frmSendToExcelCallBack form that’s part of the Chap9Ex database.
Example 9.2. Filling a List Box By Using a Callback Function
Function FillWithTableList(ctl As Control, vntID As Variant, _
        lngRow As Long, lngCol As Long, intCode As Integer) _
        As Variant

    Dim cat As ADOX.Catalog
    Dim tdf As ADOX.Table
    Dim qdf As ADOX.View
    Dim intCounter As Integer
    Static sastrTables() As String
    Static sintNumTables As Integer
    Dim varRetVal As Variant

    varRetVal = Null

    Select Case intCode
        Case acLBInitialize         'Initialize.
        Set cat = New ADOX.Catalog
        cat.ActiveConnection = CurrentProject.Connection
        'Determine the Total Number of Tables + Queries
        sintNumTables = cat.Tables.Count + cat.Views.Count
        ReDim sastrTables(sintNumTables - 2)
        'Loop through each Table adding its name to
        'the List Box
        For Each tdf In cat.Tables
            If Left(tdf.Name, 4) <> "MSys" Then
               sastrTables(intCounter) = tdf.Name
               intCounter = intCounter + 1
            End If
        Next tdf
        'Loop through each Query adding its name to
        'the List Box
        For Each qdf In cat.Views
            sastrTables(intCounter) = qdf.Name
            intCounter = intCounter + 1
        Next qdf
        varRetVal = sintNumTables
        Case acLBOpen                 'Open
            varRetVal = Timer          'Generate unique ID for control.
        Case acLBGetRowCount          'Get number of rows.
            varRetVal = sintNumTables
        Case acLBGetColumnCount       'Get number of columns.
            varRetVal = 1
        Case acLBGetColumnWidth       'Get column width.
            varRetVal = -1             '-1 forces use of default width.
        Case acLBGetValue             'Get the data.
            varRetVal = sastrTables(lngRow)
    End Select
    FillWithTableList = varRetVal
End Function
The function must contain five predetermined arguments. The first argument must be declared as a control, and the remaining arguments must be declared as variants. The function itself must return a variant. The parameters are listed in Table 9.4.
Table 9.4. Five Predetermined Arguments of a Callback Function
Argument | Description |
|---|---|
| A control variable that refers to the combo or list box being filled. |
| A unique value that identifies the control being filled. It’s useful when you’re using the same function to populate more that one combo or list box. |
| The row being filled (zero-based). |
| The column being filled (zero-based). |
| A value specifying the information being requested. |
The List function is called several times. Each time it’s called, Access automatically supplies a different value for the code, indicating the information it’s requesting. The code item can have the values shown in Table 9.5.
Table 9.5. Code Item Values
Code | Intrinsic Constant | Meaning | Returns |
|---|---|---|---|
|
| Initialize | Nonzero if the function can fill the list; |
|
| Open | Nonzero ID value if the function can fill the list; |
|
| Number of rows | Number of rows in the list |
|
| Number of columns | Number of columns in the list |
|
| Column width | Width of the column specified |
|
| List entry | List entry to be displayed in the column and row specified |
|
| Format string | Format string used to format the list entry |
|
| Not used | N/A |
|
| End (last call) | Nothing |
The function is automatically called once for codes 0, 1, 3, and 4. These calls initiate the process and determine the number of rows and columns that the combo or list box contains. The function is called twice for code 5: once to determine the total width of the box, and again to set the column width. The number of times that codes 6 and 7 are executed varies, depending on the number of rows contained in the box (code 3). Code 9 is called when the form is closed, or the combo or list box is queried.
Armed with this knowledge, you can take a good look at the FillWithTableList function. This Callback function populates the list box with a list of tables and queries contained in the current database. When the user selects a table or query and clicks the Send To Excel command button, the data from the selected table or query is sent to Excel.
The Callback function uses ADO code to count all the tables and queries found in the current database. ADO (ActiveX Data Objects) is covered in Chapter 14, “What Are ActiveX Data Objects and Data Access Objects, and Why Are They Important?” Each element of the case structure seen in the routine is called as each code is sent by Access. Here’s what happens:
When Access sends the code of
0, the tables and views are counted. The code loops through each table and query in the database. If it is not a system table, its name is added to the sastrTables array. The return value of the function is the number of tables and views in the database.When Access sends the code
1, the return value is a unique value equal to the return value of theTimerfunction.When Access sends the code
3, the return value is set equal to the count of tables and queries in the database.When Access sends the code
4, the return value is set to1(one column).When Access sends the code
5, the return value is set to–1, forcing a default width for the combo or list box.Access then automatically calls code
6by the number of times that was returned for the number of rows in the combo or list box. Each time code6is called, the form object variable is set equal to a different element of the form collection. The table or query name is returned from the function. The table or query name is the value that’s added to the list box.
All this work might seem difficult at first. After you have populated a couple of combo or list boxes, though, it’s quite easy. In fact, all you need to do is copy the case structure you see in the FillWithTableList function and use it as a template for all your Callback routines.
Access 97, Access 2000, and Access 2002 list boxes have a Multiselect property. When set to True, this property lets the user select multiple elements from the list box. Your code can then evaluate which elements are selected and perform some action based on the selected elements. The frmReportEngine form, found in the Chap9Ex database, illustrates the use of a multiselect list box. The code under the Click event of the Run Reports button looks like Listing 9.3.
Example 9.3. Evaluating Which Items Are Selected in the Multiselect List Box
Private Sub cmdRunReports_Click()
    Dim varItem As Variant
    Dim lst As ListBox

    Set lst = Me.lstReports
    'Single select is 0, Simple multi-select is 1,
    'and extended multi-select is 2.
    If lst.MultiSelect > 0 Then
        'Loop through all the elements
        'of the ItemsSelected collection, and use
        'the Column array to retrieve the
        'associated value.
        If lst.ItemsSelected.Count > 0 Then
            For Each varItem In lst.ItemsSelected
                DoCmd.OpenReport lst.ItemData(varItem), acViewPreview
            Next varItem
        End If
    End If

End Sub
This code first checks to ensure that the list box is a multiselect list box. If it is, and at least one report is selected, the code loops through all the selected items in the list box. It prints each report that is selected.
Many new Access developers don’t know the ins and outs of creating and modifying a subform and referring to subform controls, so let’s first look at some important points you should know when working with subforms:
The easiest way to add a subform to a main form is to open the main form, and then drag and drop the subform onto the main form.
The subform control’s LinkChildFields and LinkMasterFields properties determine which fields in the main form link to which fields in the subform. A single field name, or a list of fields separated by semicolons, can be entered into these properties. When they are properly set, these properties make sure all records in the child form relate to the currently displayed record in the parent form.
Many developers don’t know how to properly refer to subform controls. You must refer to any objects on the subform through the subform control on the main form, as shown in this example:
Forms.frmCustomer.fsubOrders
This example refers to the fsubOrders control on the frmCustomer form. If you want to refer to a specific control on the fsubOrders subform, you can then point at its controls collection. Here’s an example:
Forms.frmCustomer.fsubOrders!txtOrderID
You can also refer to the control on the subform implicitly, as shown in this example:
Forms!frmCustomer!subOrders!txtOrderID
Both of these methods refer to the txtOrderID control on the form in the fsubOrder control on the frmCustomer form. To change a property of this control, you would extend the syntax to look like this:
Forms.frmCustomer.fsubOrders!txtOrderID.Enabled = False
This code sets the Enabled property of the txtOrderID control on the form in the fsubOrders control to False.
A form’s RecordsetClone property is used to refer to its underlying recordset. You can manipulate this recordset independently of what’s currently being displayed on the form. Here’s an example:
Private Sub cboCompany_AfterUpdate()
   'Use the recordset behind the form to locate the client
   'Selected in the combo box
   Me.RecordsetClone.FindFirst "[ClientID] = " & cboCompany.Value

   'If the client is not found, display a message
   'Otherwise, synchronize the form with the underlying recordset
   If Me.RecordsetClone.NoMatch Then
      MsgBox "Client Not Found"
   Else
      Me.Bookmark = Me.RecordsetClone.Bookmark
   End If
End Sub
This example issues the FindFirst method on the form’s RecordsetClone. It searches for a record in the form’s underlying recordset whose ClientID is equal to the current combo box value. If a match is found, the form’s bookmark is synchronized with the bookmark of the form’s underlying recordset. This code can be rewritten, using an object variable to point at the RecordsetClone:
Private Sub cboCompany_AfterUpdate()
   'Create a recordset based on the recordset underlying the form
   Dim rst As Recordset
   Set rst = Me.RecordsetClone

   'Search for the client selected in the combo box
   rst.FindFirst "ClientID = " & cboCompany.Value

   'If the client is not found, display an error message
   'If the client is found, move the bookmark of the form
   'to the bookmark in the underlying recordset
   If rst.NoMatch Then
      MsgBox "Client Not Found"
   Else
      Me.Bookmark = rst.Bookmark
   End If
End Sub
This code creates an object variable that points at the form’s RecordsetClone. The recordset object variable can then be substituted for Me.RecordsetClone because it references the form’s underlying recordset.
The RecordSetClone property allows you to navigate or operate on a form’s records independently of the form. This is often useful when you want to manipulate the data behind the form without affecting the appearance of the form. On the other hand, when you use the Recordset property of the form, the act of changing which record is current in the recordset returned by the form’s Recordset property also sets the current record of the form. Here’s an example:
Private Sub cboSelectEmployee_AfterUpdate()
    'Find the employee selected in the combo box
    Me.Recordset.FindFirst "EmployeeID = " _
        & Me.cboSelectEmployee

    'If employee not found, display a message
    If Me.Recordset.EOF Then
        MsgBox "Employee Not Found"
    End If
End Sub
Notice that it is not necessary to set the Bookmark property of the form equal to the Bookmark property of the recordset. They are one in the same.
Forms and reports are Class modules, which means they act as templates for objects you create instances of at runtime. Public procedures of a form and report become Custom properties and methods of the form object at runtime. Using VBA code, you can set the values of a form’s Custom properties and execute its methods.
You can create Custom properties of a form or report in one of two ways:
Create Public variables in the form or report.
Create
PropertyLetandPropertyGetroutines.
The following steps are used to create and access a Custom form or report property based on a Public variable. The example is included in CHAP9EX.MDB in the forms frmPublicProperties and frmChangePublicProperty.
Begin by creating the form that will contain the Custom property (Public variable).
Place a Public variable in the General Declarations section of the form or report. (See Figure 9.21.)
Place code in the form or report that accesses the Public variable. The code in Figure 9.21 creates a Public variable called
CustomCaption. The code behind theClickevent of the cmdChangeCaption command button sets the form’s (frmPublicProperties) Caption property equal to the value of the Public variable.Create a form, report, or module that modifies the value of the Custom property. Figure 9.22 shows a form called frmChangePublicProperty.
Add the code that modifies the value of the Custom property. The code behind the ChangeCaption button, as seen in Figure 9.21, modifies the value of the Custom property called
CustomCaptionthat’s found on the form called frmPublicProperties.


To test the Custom property created in the preceding example, run the form called frmPublicProperties, which is in the database CHAP9EX.MDB, found on your sample code CD-ROM. Click the Change Form Caption command button. Nothing happens because the value of the Custom property hasn’t been set. Open the form called frmChangePublicProperty and click the Change Form Property command button. Return to frmPublicProperties and again click the Change Form Caption command button. The form’s caption should now change.
Close the frmPublicProperties form and try clicking the Change Form Property command button. A runtime error occurs, indicating that the form you’re referring to is not open. You can eliminate the error by placing the following code in the Click event of cmdPublicFormProperty:
Private Sub cmdPublicFormProperty_Click()
   Form_frmPublicProperties.CustomCaption = _
         "This is a Custom Caption"
   Forms!frmPublicProperties.Visible = True
End Sub
This code modifies the value of the Public property by using the syntax Form_FormName.Property. If the form isn’t loaded, this syntax loads the form but leaves it hidden. The next command sets the form’s Visible property to True.
A PropertyLet routine is a special type of subroutine that automatically executes whenever the property’s value is changed. A PropertyGet routine is another special subroutine that automatically executes whenever the value of the Custom property is retrieved. Instead of using a Public variable to create a property, you insert two special routines: PropertyLet and PropertyGet. This example is found in CHAP9EX.MDB in the frmPropertyGetLet and frmChangeWithLet forms. To insert the PropertyLet and PropertyGet routines, follow these steps:
Choose Insert|Procedure. The dialog box shown in Figure 9.23 appears.
Type the name of the procedure in the Name text box.
Select Property from the Type option buttons.
Select Public as the Scope so that the property is visible outside the form.
Click OK. The
PropertyGetandPropertyLetsubroutines are inserted in the module. (See Figure 9.24.)


Notice that the Click event code for the cmdChangeCaption command button hasn’t changed. The PropertyLet routine, which automatically executes whenever the value of the CustomCaption property is changed, takes the uppercase value of what it’s being sent and places it in a Private variable called mstrCustomCaption. The PropertyGet routine takes the value of the Private variable and returns it to whomever asked for the value of the property. The sequence of events is as follows—the following code is placed in the form called frmChangeWithLet:
Private Sub cmdPublicFormProperty_Click()
   Form_frmPropertyGetLet.CustomCaption = "This is a Custom Caption"
   Forms!frmPropertyGetLet.Visible = True
End Sub
This routine tries to set the value of the Custom property called CustomCaption to the value "This is a Custom Caption". Because the property’s value is being changed, the PropertyLet routine in frmPropertyGetLet is automatically executed. It looks like this:
Public Property Let CustomCaption(ByVal CustomCaption As String)
   mstrCustomCaption = UCase$(CustomCaption)
End Property
The PropertyLet routine receives the value "This is a Custom Caption" as a parameter. It uses the UCase function to manipulate the value it was passed and convert it to uppercase. It then places the manipulated value into a Private variable called mstrCustomCaption. The PropertyGet routine isn’t executed until the user clicks the cmdChangeCaption button in the frmPropertyGetLet form. The Click event of cmdChangeCaption looks like this:
Private Sub cmdChangeCaption_Click()
   Me.Caption = CustomCaption
End Sub
Because this routine needs to retrieve the value of the Custom property CustomCaption, the PropertyGet routine automatically executes:
Public Property Get CustomCaption() As String
   CustomCaption = mstrCustomCaption
End Property
The PropertyGet routine takes the value of the Private variable, set by the PropertyLet routine, and returns it as the value of the property.
You might wonder why this method is preferable to declaring a Public variable. Using the UCase function within PropertyLet should illustrate why. Whenever you expose a Public variable, you can’t do much to validate or manipulate the value you receive. The PropertyLet routine gives you the opportunity to validate and manipulate the value to which the property is being set. By placing the manipulated value in a Private variable and then retrieving the Private variable’s value when the property is returned, you gain full control over what happens internally to the property.
Note
This section provides an introduction to custom properties and methods. A comprehensive discussion of custom classes, properties, and methods is found in Chapter 13, “Exploiting the Power of Class Modules.”
Custom methods are simply Public functions and subroutines placed in a form module or a report module. As you will see, they can be called by using the Object.Method syntax. Here are the steps involved in creating a Custom method; they are found in CHAP9EX.MDB in the forms frmMethods and frmExecuteMethod:
Open the form or report that will contain the Custom method.
Create a Public function or subroutine. (See Figure 9.25.)
Open the form module, report module, or code module that executes the Custom method.
Use the
Object.Methodsyntax to invoke the Custom method. (See Figure 9.26.)
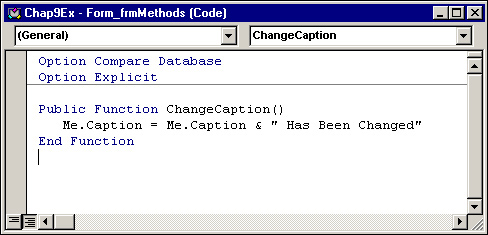

Figure 9.25 shows the Custom method ChangeCaption found in the frmMethods form. The method changes the form’s caption. Figure 9.26 shows the Click event of cmdExecuteMethod found in the frmExecuteMethod form. It issues the ChangeCaption method of the frmMethods form, and then sets the form’s Visible property to True.
The frmSwitchboard form is responsible both for displaying the splash screen, and for performing necessary setup code. The code in the Load event of the frmSwitchboard form looks like this:
Private Sub Form_Load()
    DoCmd.Hourglass True
    DoCmd.OpenForm "frmSplash"
    Call GetCompanyInfo
    DoCmd.Hourglass False
End Sub
The Form_Load event first invokes an hourglass. It then opens the frmSplash form. Next, it calls the GetCompanyInfo routine to fill in the CompanyInfo type structure that is eventually used throughout the application. (Type structures are covered in Chapter 12, “Advanced VBA Techniques.”) Finally, Form_Load turns off the hourglass.
The splash screen, shown in Figure 9.27, is called frmSplash. Its timer interval is set to 3,000 milliseconds (3 seconds), and its Timer event looks like this:
Private Sub Form_Timer()
   DoCmd.Close acForm, Me.Name
End Sub

The Timer event unloads the form. The frmSplash Pop-up property is set to Yes, and its border is set to None. Record selectors and navigation buttons have been removed.
Forms are the centerpiece of most Access applications, so it’s vital that you be able to fully harness their power and flexibility. This chapter showed you how to work with Form and Control events. You saw many examples of when and how to leverage the event routines associated with forms and specific controls. You also learned about the types of forms available, their uses in your applications, and how you can build them. Finally, you learned several power techniques that will help you develop complex forms.