
You’re hopefully fairly comfortable with using sprites to create graphical objects that can move around the game screen and interact with each other. You’ve seen sprites in action in several programs’ examples and a couple of complete games. One thing you might have found missing in the sprites that you’ve worked with is that they don’t have any capability to change their appearance. Granted, being able to move around is certainly a huge benefit, but it would also be nice for some sprites to change their appearances every so often. For example, the guys moving across the screen in the Battle Office game would look much better if their legs were moving to give a more realistic impression that they were running. This hour takes a look at how to add frame animation features to your sprites so that their appearances can change.
In this hour, you’ll learn:
How frame animation can be incorporated into sprite animation
How to design and integrate frame animation support into the existing game engine
How to modify an existing game to take advantage of frame-animated sprites
Back in Hour 9, “A Crash Course in Game Animation,” you learned all about animation, including the two fundamental types of animation: frame-based animation and cast-based (sprite) animation. Although you learned that both types of animation are equally useful, you’ve focused solely on sprite animation since Hour 9 because it is more immediately useful in terms of allowing you to move objects around on the game screen. However, frame-based animation, or frame animation for short, is still very important to games. In fact, you’ll find that the ideal usage of frame animation in games is when you combine it with sprite animation.
To better understand how frame animation fits in with sprite animation, consider a simple maze game such as Pac-Man. In Pac-Man, the main character moves around the game screen eating dots. To convey the effect of the main character eating, his mouth opens and closes as he moves around. The simple movement of the character is made possible with sprite animation, but the change in his appearance brought on by his mouth moving is made possible by frame animation. In other words, frame animation makes it possible to change the appearance of a sprite, independent of whether the sprite is moving with respect to the game screen.
Okay, so frame animation makes it possible to change the appearance of a sprite, but how does it work? If you recall, a basic sprite without frame animation uses a single bitmap image to reflect its appearance; when you draw the sprite, you are just drawing the bitmap image. A frame-animated sprite relies on a series of bitmap images to represent more than one appearance for the sprite. You can think of this series of images as a roll of film on a traditional film projector. The illusion of frame animation is made possible by cycling through the images on the roll of film. Figure 17.1 shows how this concept applies to adding animation to the Pac-Man character.
Figure 17.1. A series of images shows how frame animation can make Pac-Man appear to be eating something.
In the figure, the Pac-Man character consists of a series of four images. When this image series is incorporated into a game and played in sequence, the effect will be that Pac-Man is moving his mouth and eating something. If you look carefully, you’ll notice that frame 4 is the same as frame 2. This is necessary because the animation sequence cycles back to frame 1 when it finishes, so duplicating frame 2 provides a smooth transition back to the first frame. Just visualize the frames being displayed in succession to see what I’m talking about.
One problem associated with frame animation is that of controlling how fast the frame images are cycled through. For example, a frame-animated Pac-Man sprite might need to change its appearance slower than an animated sprite of an explosion, for example. For this reason, there needs to be a way to establish a timing delay that controls how fast the frames change. Increasing the delay would slow down the frame animation, which in some cases would be a desirable effect. You will definitely take a frame delay into consideration as you design and develop frame animation support for the game engine throughout the remainder of this hour.
Even though sprites are already animated in the sense that they can move around on the game screen, for the purposes of this discussion I’m going to refer to a frame-animated sprite as simply an animated sprite. The animation, in this case, means that the sprite’s appearance is being animated. The first place to start in designing an animated sprite is its bitmap image.
You learned in the previous section how a series of images is used to represent an animated sprite because the images can be cycled through to give the effect of animation. There are a variety of different ways to store a series of images for an animated sprite, but the easiest I’ve found is to store the frame images horizontally in a single image. For example, the series of Pac-Man images you saw in Figure 17.1 shows several frame images appearing next to each other. These four frame images could be stored together just as they appear in the figure as a single image. It then becomes the responsibility of the animated sprite to draw only the frame image representing the current frame. You can think of the sprite image at any given moment as being a little window that moves from one frame image to the next to reveal only one frame image at a time. Figure 17.2 shows what I’m talking about.
This figure shows how the second frame of the Pac-Man sprite is currently being displayed. The figure also reveals how the bitmap image for an animated sprite is put together. The image is the same height as a normal unanimated sprite image, but its width is determined by the number of frames. So, if a single frame is 25 pixels wide and there are a total of four frames of animation, the entire image is 100 pixels wide. To create an image like this, you just place the frame images immediately next to each other with no space in between them.
With the animated sprite image in place, you can now turn your attention to the actual data for the sprite that is used to manage frame animation. First of all, you know that the sprite needs to understand how many frame images there are because this is crucial in determining how to cycle through the frames of the sprite’s bitmap image. In addition to knowing the total number of animation frames, it’s also necessary to keep track of the currently selected frame—this is the frame image currently being displayed.
Earlier in the hour, I talked about how it’s important to be able to control the speed at which an animated sprite cycles through its frame images. This speed is controlled by a piece of information known as a frame delay. The frame delay for a sprite basically determines how many game cycles must elapse before the frame image is changed. In order to carry out the frame delay feature for an animated sprite, you must keep up with a trigger (counter) that counts down the delay and indicates that it’s time to move to the next frame. So, when an animated sprite first starts out, the trigger is set to the frame delay, and it begins counting down with each game cycle. When the trigger reaches zero, the sprite moves to the next frame and resets the trigger to the frame delay again.
To recap, the following pieces of information are required of the new animated sprite, in addition to the bitmap image that contains the horizontal frame images:
Total number of frames
Current frame
Frame delay
Frame trigger
The next section puts code behind this sprite data as you add animated sprite support to the game engine.
In order to add animated
sprite support to the game engine, a few changes have to be made to existing code. These changes impact the Bitmap and Sprite classes, but strangely enough they don’t directly impact the GameEngine
class at all. The next couple of sections show you exactly what changes need to be made to the Bitmap and Sprite classes to integrate frame-animated sprites into the game engine.
The first change is related
to the Bitmap class, which represents a bitmap image. As you know, the Sprite class already relies on the Bitmap class to handle the details of storing and drawing a sprite’s visual appearance. However, the Bitmap class is currently only designed to draw a complete image. This presents a problem for animated sprites because the frame images are all stored in a single bitmap image. It is therefore necessary to modify the Bitmap class so that it supports drawing only a part of the bitmap.
If you recall, the Bitmap class includes a Draw()
method that accepts a device context and an XY coordinate to indicate where the bitmap is to be drawn. The new method you now need is called DrawPart(), and it accepts the familiar device context and XY coordinate, as well as the XY position and width and height of the frame image within the overall sprite bitmap. So, the new DrawPart() method basically allows you to select and draw a rectangular subsection of a bitmap image. Listing 17.1 contains the code for the Bitmap::DrawPart() method.
Example 17.1. The Bitmap::DrawPart()
Method Supports Frame Animation by Allowing You to Draw Only a Part of a Sprite’s Bitmap Image
 1: void Bitmap::DrawPart(HDC hDC, int x, int y, int xPart, int yPart,
 2:   int wPart, int hPart, BOOL bTrans, COLORREF crTransColor)
 3: {
 4:   if (m_hBitmap != NULL)
 5:   {
 6:     // Create a memory device context for the bitmap
 7:     HDC hMemDC = CreateCompatibleDC(hDC);
 8:
 9:     // Select the bitmap into the device context
10:     HBITMAP hOldBitmap = (HBITMAP)SelectObject(hMemDC, m_hBitmap);
11:
12:     // Draw the bitmap to the destination device context
13:     if (bTrans)
14:       TransparentBlt(hDC, x, y, wPart, hPart, hMemDC, xPart, yPart,
15:         wPart, hPart, crTransColor);
16:     else
17:       BitBlt(hDC, x, y, wPart, hPart, hMemDC, xPart, yPart, SRCCOPY);
18:
19:     // Restore and delete the memory device context
20:     SelectObject(hMemDC, hOldBitmap);
21:     DeleteDC(hMemDC);
22:   }
23: }
This code is very similar
to the original Draw() method in the Bitmap class, except that it doesn’t take for granted the parameters of the source bitmap image. More specifically, the DrawPart() method uses the new arguments xPart, yPart, wPart, and hPart to single out a frame image within the bitmap image to draw. These arguments are passed in to the TransparentBlt() function to draw a frame image with transparency (lines 14 and 15) and the BitBlt() function to draw a frame image without transparency (line 17).
It’s important to note that the Draw() method still works fine for drawing sprites that don’t involve frame animation. In fact, the Draw() method has now been modified to use the DrawPart() method, which helps to conserve code since the methods are very similar. Listing 17.2 shows the code for the new Bitmap::Draw() method, which is surprisingly simple.
Example 17.2. The New Bitmap::Draw()
Method Simply Calls the DrawPart() Method to Draw a Bitmap Image In Its Entirety
Notice that the new Draw() method just calls the DrawPart() method and passes in arguments that result in the entire bitmap image being drawn (line 4). You could’ve kept the original Draw() method without modifying it, but it’s wasteful to duplicate code without a good reason. More importantly, if you ever need to change the manner in which a bitmap is drawn, you only have to modify one section of code, the DrawPart() method.
Now that you’ve altered the
Bitmap class to support the drawing of only part of a bitmap image, you’re ready to make changes to the Sprite class to support frame animation. Earlier in the hour, you worked through the design of a frame-animated sprite that involved adding several important pieces of information to a traditional unanimated sprite. The following new member variables of the Sprite class represent these pieces of information:
int m_iNumFrames, m_iCurFrame;
int m_iFrameDelay, m_iFrameTrigger;
These member variables correspond one-to-one with the pieces of animated sprite information mentioned earlier in the hour. They are all initialized in the Sprite() constructors, as the following code reveals:
m_iNumFrames = 1;
m_iCurFrame = m_iFrameDelay = m_iFrameTrigger = 0;
The default value of the m_iNumFrames variable is 1 because a normal sprite that doesn’t use frame animation includes only one bitmap image. The other three variables are initialized with values of 0, which is suitable for a sprite without frame animation.
In order to create a sprite that takes advantage of frame animation, you must call the SetNumFrames()
method and possibly even the SetFrameDelay() method. Listing 17.3 contains the code for the SetNumFrames() method.
Example 17.3. The Sprite::SetNumFrames()
Method Turns a Normal Sprite Into an Animated Sprite by Setting Its Number of Frames
The listing shows how the
number of frames is set by assigning the specified argument to the m_iNumFrames member variable (line 4). It’s also important to recalculate the sprite’s position because it is no longer based upon the entire image size (lines 7–9).
The SetFrameDelay()
method goes hand in hand with the SetNumFrames() method, and it’s even easier to follow:
void SetFrameDelay(int iFrameDelay) { m_iFrameDelay = iFrameDelay; };
As you can see, the SetFrameDelay() method is a simple accessor method that sets the m_iFrameDelay member variable. Setting the number of frames and the frame delay is all that is required to turn an ordinary sprite into a frame-animated sprite. Of course, you also need to make sure that you’ve laid out the frame images for the sprite in the sprite’s single bitmap image.
Although the SetNumFrames() and SetFrameDelay() methods are all you need to worry about from the perspective of game code, work still needs to be done to get the Sprite class ready to use its new member variables. For example, the GetWidth() method needs to take into consideration the number of frames when calculating the width of the sprite image. This width is either the entire sprite image for an unanimated sprite, or the width of a single frame image for an animated sprite. Following is the code for the new GetWidth() method:
int GetWidth() { return (m_pBitmap->GetWidth() / m_iNumFrames); };
Notice that this code simply divides the width of the sprite image by the number of frames. For an unanimated sprite, the number of frames is one, which means that the normal bitmap width is returned. For animated sprites, the width returned reflects the width of an individual frame image.
A new helper method is included in the Sprite class to handle the details of updating the current animation frame. This method is called UpdateFrame()
and is shown in Listing 17.4.
The UpdateFrame() method is
called by the Update() method to update the frame image of the sprite, if necessary. The method starts off by making sure that the frame indeed needs to be updated. This check involves seeing if the frame delay is greater than or equal to 0, as well as if the frame trigger is less than or equal to 0 (line 3). If both of these conditions are met, the frame trigger is reset to the frame delay (line 6) and the current frame is moved to the next frame (lines 9 and 10).
The Update() method
is responsible for calling the UpdateFrame() method to make sure that the frame is updated. Listing 17.5 shows how the UpdateFrame() method is now called in the Update() method.
Example 17.5. The Sprite::Update()
Method Now Calls the UpdateFrame() Method to Update the Sprite’s Animation Frame
The update of the frame is now taken care of first thing in the Update() method (line 4). I deliberately left out the remainder of the Update() code because none of it changed, and it’s quite lengthy; the only code of importance to this discussion is the new call to UpdateFrame().
The last Sprite method impacted by the addition of animation support is the Draw()
method, which must now take into account the current frame when drawing a sprite. Listing 17.6 shows the new and improved Draw() method—complete with frame animation support.
Example 17.6. The Sprite::Draw()
Method Draws the Sprite Differently Depending on Whether It Is an Animated Sprite
 1: void Sprite::Draw(HDC hDC)
 2: {
 3:   // Draw the sprite if it isn't hidden
 4:   if (m_pBitmap != NULL && !m_bHidden)
 5:   {
 6:     // Draw the appropriate frame, if necessary
 7:     if (m_iNumFrames == 1)
 8:       m_pBitmap->Draw(hDC, m_rcPosition.left, m_rcPosition.top, TRUE);
 9:     else
10:       m_pBitmap->DrawPart(hDC, m_rcPosition.left, m_rcPosition.top,
11:         m_iCurFrame * GetWidth(), 0, GetWidth(), GetHeight(), TRUE);
12:   }
13: }
This version of the Draw() method now takes a look at the number of frames before deciding how to draw the sprite (line 7). If there is only one frame, the familiar Bitmap::Draw() method is called to draw the single bitmap image as you’ve been accustomed to doing (line 8). However, if there is more than one frame, the new Bitmap::DrawPart() method is used to draw only the current frame image within the sprite bitmap (lines 10 and 11). This is a critical piece of code that justifies why you needed to make the changes to the Bitmap class earlier in the hour.
You’re now sitting there with a perfectly good game engine with a shiny new feature, so you’re no doubt anxious to see how it works in a practical game. Fortunately, it’s not too difficult to find a good application for animated sprites. I mentioned earlier in the book that the Battle Office game had a deficiency in that the guys moving across the hallway near the top of the game screen appear to slide, as opposed to run. It would only look as if they were running if their legs were moving as they moved across the game screen. This kind of visual effect is only possible through frame animation, which you now have the capability of carrying out within the game engine you’ve now grown to love. Okay, love might be too strong a word, but hopefully you’ve at least grown to appreciate what it can do.
The next couple of sections focus on what it takes to animate the two moving guys in the Battle Office game using frame-animated sprites. Because you’ve already built the animation logic into the game engine, modifying the Battle Office game takes very little effort. You’ll call the new version of the game with the animated guys Battle Office 2.
I mentioned earlier this hour that the only thing required from a programming perspective to add animated sprites to a game is setting the number of frames and the frame delay for each sprite. Of course, you’ll also need to create a suitable bitmap image containing the frames for the sprite, but that doesn’t directly impact the programming side of things. In the case of the Battle Office 2 game, the only two sprites being altered for frame animation are the two moving guy sprites. Both sprites use four frame images, which means that they each need to be set to use four frames. Listing 17.7 contains the sprite creation code for the first moving guy sprite.
Note

If you set the number of frames for a sprite to a number greater than one but you don’t change the sprite’s bitmap image, you definitely will get strange results. This has to do with the fact that the sprite automatically assumes that the individual frame images are arranged horizontally across the sprite image.
Example 17.7. The Sprite Creation Code for the First Moving Guy Establishes the Number of Frames for the Animated Sprite
This code shows how easy it is to change a normal sprite into an animated sprite. A single call to the SetNumFrames() method is all it takes to inform the sprite that it is to use four frames of animation (line 2). It’s important to note that the frame delay is not being set for this sprite, which means that it is cycling through the frames at maximum speed.
The second guy sprite is a little different in that it opts for a frame delay, as shown in Listing 17.8.
Example 17.8. The Sprite Creation Code for the Second Moving Guy Establishes the Number of Frames and the Frame Delay for the Animated Sprite
 1: _pGuySprites[4] = new Sprite(_pGuyBitmaps[4], rcBounds, BA_WRAP);
 2: _pGuySprites[4]->SetNumFrames(4);
 3: _pGuySprites[4]->SetFrameDelay(5);
 4: _pGuySprites[4]->SetPosition(260, 60);
 5: _pGuySprites[4]->SetVelocity(5, 0);
 6: _pGuySprites[4]->SetZOrder(1);
 7: _pGuySprites[4]->SetHidden(TRUE);
 8: _pGame->AddSprite(_pGuySprites[4]);
This code not only sets the number of frames for the sprite (line 2), but it also sets the frame delay for the sprite (line 3). Setting the frame delay to 5, as in this code, means that the sprite’s animation frame will be updated in every fifth game cycle. In other words, the second guy sprite is animating at one-fifth the speed of the first sprite.
Testing the animated sprites in the Battle Office 2 game is not a very involved process, as you might imagine. Figure 17.3 shows the two guys moving across the hallway, and although it’s difficult to see on the static page of a book, I promise you that they’re kicking their legs like crazy!
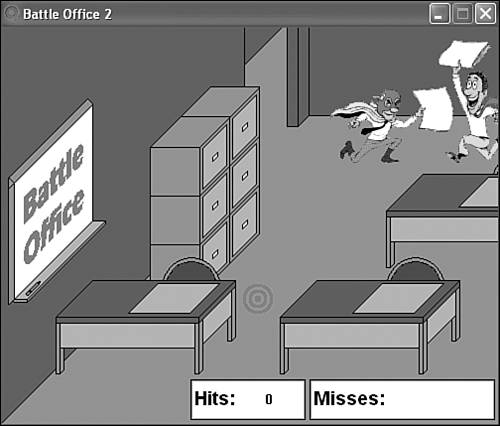
Figure 17.3. The Battle Office 2 game shows off the new animated sprite features in the game engine.
Granted, the new animated sprites in the Battle Office 2 game don’t really impact the play of the game very much. However, it’s still hard to argue that a little more playful realism can never hurt a game. In fact, anything you can do to make a game more interesting will ultimately add to the satisfaction of game players, and ultimately the success of the game.
This hour built on your knowledge of sprite animation by expanding the sprite support in the game engine to support frame-animated sprites. Frame animation allows you to change the appearance of a sprite, which can be used to achieve a variety of different effects. This hour demonstrated how to use animated sprites to make the moving guys in the Battle Office game appear to run across the game screen. You could also make similar modifications to the Henway game so that the chicken appears to be running, or maybe change the car images so that their brake lights come on every once in a while. Regardless of how you use them, animated sprites can add significantly to the allure of games.
The next hour continues along the same path of improving games with better graphics effects by showing you how to create interesting backgrounds. You’ve grown accustomed to seeing backgrounds that are just a fixed image, but how about a space background complete with twinkling stars? Read on to find out how it’s done.
The Workshop is designed to help you anticipate possible questions, review what you’ve learned, and begin learning how to put your knowledge into practice. The answers to the quiz can be found in Appendix A, “Quiz Answers.”
Modify the images for the moving guys in the Battle Office 2 game so that there are more animation frames that better convey the effect of the guys running.
Modify the images for the stationary guys in the Battle Office 2 game so that they wave their arms a little; it shouldn’t take more than two or three frames to get this effect. Also, try altering the frame delay for these guys to see how you can speed up and slow down their motions.