Applying Cell-level Security to a Cube
Dimension-level security prevents the user from seeing certain members. Such security does not directly prevent viewing of cell values, but, clearly, if a member does not appear, the values for that member will not be visible either. In short, in most situations, dimension-level security is all you’ll ever need. In some situations, however, you might want reports to display all the members but block the values for some of the cells. When you need to secure specific cells without removing members, you need to apply cell-level security to a cube.
Prevent Values in Cells from Being Read
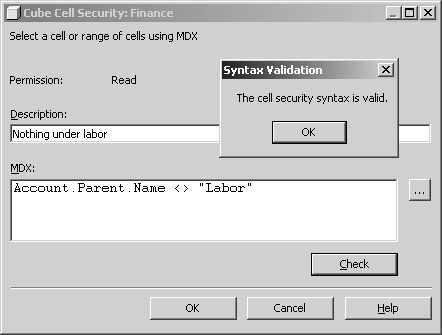
The Finance cube contains, among other things, expense information. It includes Headcount, Salary, and Benefits members. Salary information is typically very sensitive within a company. You might want to change a cube so that budget reviewers can see the higher level financial information but not the detailed financial information. You can use cell-level security to do this. Start by reviewing the complete information in the Finance cube.
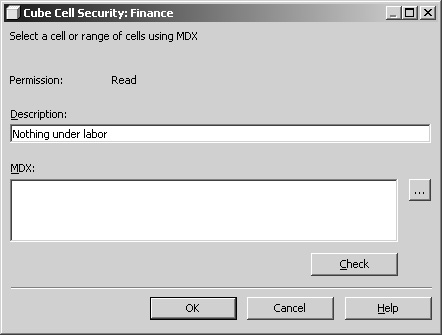
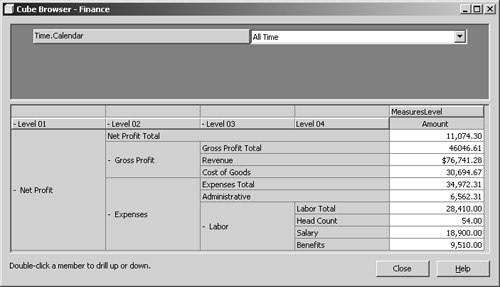 All the cells contain values. You want to prevent the reviewer from seeing the values under the Labor member.
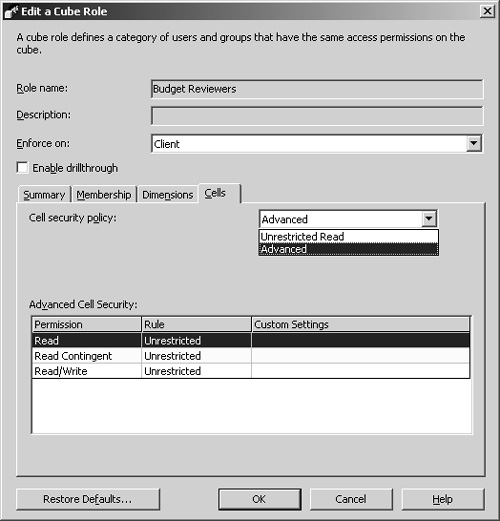
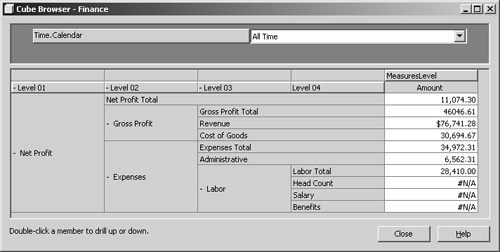 The detailed Labor members still appear, but #N/A appears in all the cells.
Allow Users to Write to Cells
Cell-level security is particularly important in write-enabled cubes because you might want different groups of people to be able to modify different cell values. The Sales Forecast cube has been write-enabled. As a default, a role gives unrestricted read permission but no write permission even if the cube is writeenabled. To allow the members of a role to write to a cube, the cube must be write-enabled and then the role must be given read/write permission.
1. | Right-click the Sales Forecast cube, and click Manage Roles. |
2. | With the Budget Analysts role selected, click the ellipsis button in the Cells column. 
|
3. | In the Cell Security Policy drop-down list, select Unrestricted Read/Write. Note The Unrestricted Read/Write policy is available only if the cube has already been write-enabled. A cube that has not been write-enabled has only two options: Unrestricted Read and Advanced. |
4. | Click OK to close the Cube Role Editor window, and click Close to close Cube Role Manager. |
Security is an important part of an Analysis Services application, and Cube Role Manager gives you tremendous flexibility for applying security. You can apply security with broad brush strokes at the cube level, with small brush strokes at the dimension level, or with single-hair precision by using the full flexibility of MDX expressions.