
12. Audio Effects
In This Chapter
The previous chapter covered the most important and fundamental aspects of working with audio: adjusting volume and working with the pan settings. But you can do much more to improve and enhance your sound or, in some cases, to fix mistakes that were made during production.
Final Cut Pro has a collection of audio-related features designed for these purposes. Some of these tools are automatic—based on the analysis you can optionally perform during ingest. Using that data, Final Cut Pro can automatically find and remove hums and other background noise, adjust your volume, and enable you to match the tone and timbre of one clip to that of another.
Additionally, there are a large number of highly customizable audio filters that you can add manually to perform a range of effects such as equalization, compression, frequency modulation, and a host of other audio-specific tasks.
This chapter will cover both of these types of audio effects.
Automatic Audio Enhancements
One of the more significant new features in Final Cut Pro is the ability to perform an optional analysis on your source footage, either at ingest or at any later point during the editing process.
You can analyze both video and audio clips for a variety of elements. The video side of things is covered in Chapter 6, “Ingesting Footage.” The audio analysis evaluates your clips—looking for background noise and electrical hum—as well as determines each clip’s optimal volume and equalization settings.
Analysis can be performed during ingest or at any point after your clips have been imported.
To analyze audio files during import
• In the Audio section of the Import Files dialog, select the “Analyze and fix audio problems” checkbox ![]() .
.
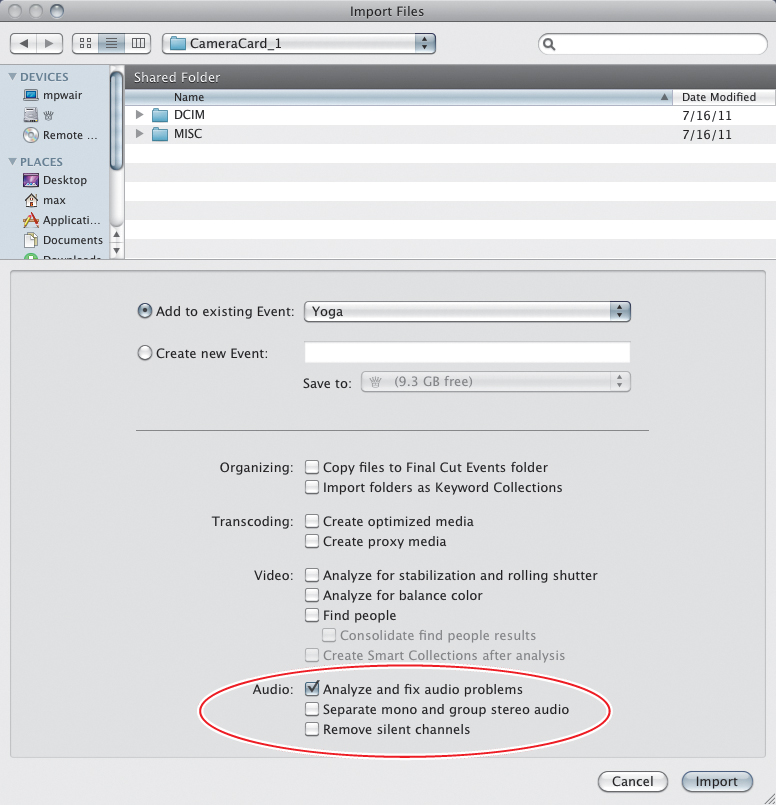
![]() When Importing, choose the “Analyze and fix audio problems” checkbox.
When Importing, choose the “Analyze and fix audio problems” checkbox.
You can also analyze and fix audio problems when you import directly from a camera using the Camera Import window.
To analyze audio files after import
1. Select the clip or clips you want to analyze, and do one of the following:
• Choose Modify > Analyze and Fix.
• Right-click the selected clips, and, from the shortcut menu, choose Analyze and Fix.
The Analyze and Fix sheet opens ![]() .
.
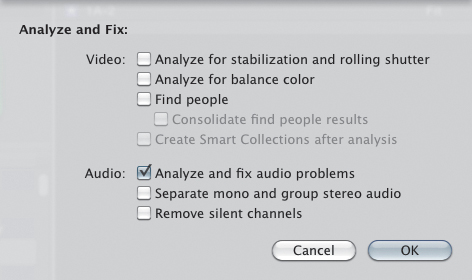
![]() Analyze imported clips by opening the Analyze and Fix sheet.
Analyze imported clips by opening the Analyze and Fix sheet.
2. In the Audio section, select the “Analyze and fix audio problems” checkbox, and click OK.
The analysis begins in the background.
Applying Enhancements
Once your files have been analyzed, you have several options for implementing that data in order to improve your clips’ audio.
You can enable Auto Audio Enhancement, which applies enhancement settings for whatever elements Final Cut Pro thinks need improving, and you can manually control each of the enhancement options in the Audio Enhancements pane of the Inspector.
To enable Auto Audio Enhancement
• Select a clip, and do one of the following:
• Click the Auto Enhancement menu in the toolbar and choose Auto Enhance Audio, or press Option-Command-A ![]() .
.
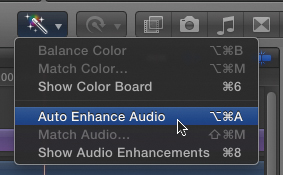
![]() Choose Auto Enhance Audio from the Auto Enhancement menu.
Choose Auto Enhance Audio from the Auto Enhancement menu.
• If the Audio Enhancements Inspector is already showing, click the Auto Enhance button at the bottom of the Inspector ![]() .
.
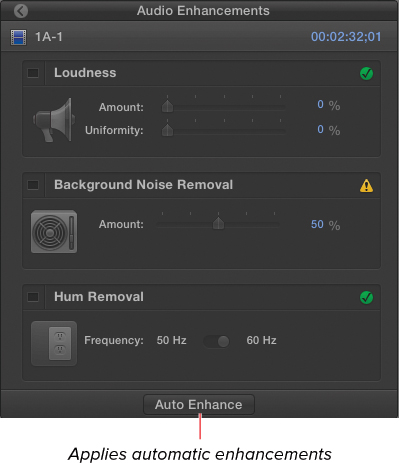
![]() In the Audio Enhancements Inspector, click Auto Enhance.
In the Audio Enhancements Inspector, click Auto Enhance.
All audio enhancements are automatically applied as needed. See “Specific Audio Enhancements” for more details.
To open the Audio Enhancements Inspector
• Do one of the following:
• Click the Auto Enhancement menu in the toolbar, and choose Show Audio Enhancements ![]() .
.
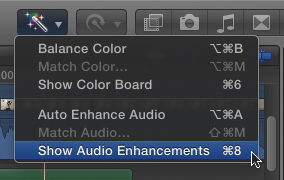
![]() To open the Audio Enhancements Inspector, select Show Audio Enhancements from the Auto Enhancement menu.
To open the Audio Enhancements Inspector, select Show Audio Enhancements from the Auto Enhancement menu.
• In the Audio Inspector, click the Show Audio Enhancements button ![]() .
.
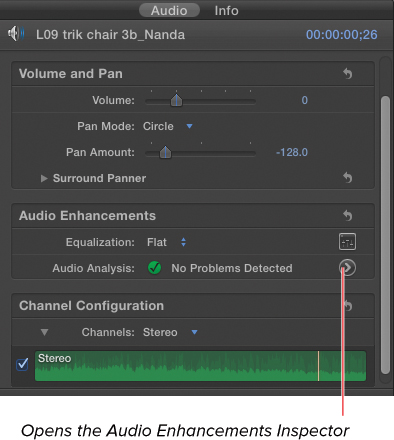
![]() In the Audio Inspector, click the Show Audio Enhancements button.
In the Audio Inspector, click the Show Audio Enhancements button.
If audio enhancements have been applied, the Show Audio Enhancements button turns blue ![]() .
.
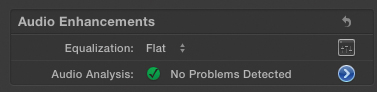
![]() The button turns blue once you’ve enabled one of the enhancements.
The button turns blue once you’ve enabled one of the enhancements.
• In the Clip Actions menu, choose Audio Enhancements ![]() .
.
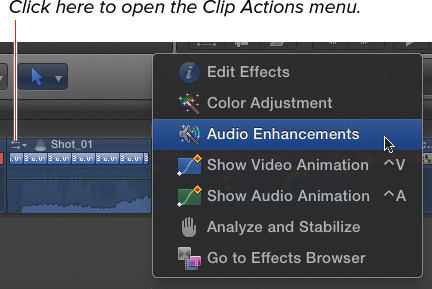
![]() The Clip Actions menu also provides access to the Audio Enhancements Inspector.
The Clip Actions menu also provides access to the Audio Enhancements Inspector.
• Press Command-8.
The Audio Enhancements Inspector opens.
To close the Audio Enhancements Inspector
• Do one of the following:
• Click the Return to Audio Inspector button in the upper-left corner of the Audio Enhancements Inspector ![]() .
.
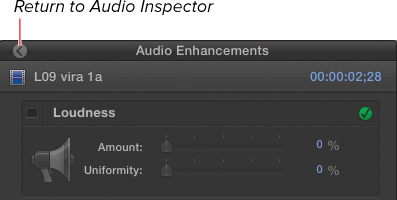
![]() To return from the Audio Enhancements Inspector to the Audio Inspector, click the button in the upper-left corner.
To return from the Audio Enhancements Inspector to the Audio Inspector, click the button in the upper-left corner.
• Click the Auto Enhancements menu in the toolbar, and choose Hide Audio Enhancements.
• Press Command-8.
The Audio Enhancements Inspector closes.
Specific Audio Enhancements
Once the Audio Enhancements Inspector is open, you can observe which settings Final Cut Pro thinks should be applied and which have already been applied, and you can modify the specific settings of the different enhancements.
• A green icon with a check mark indicates that no correction is necessary ![]() .
.
![]() A green check mark icon indicates the clip has been analyzed and needs no correction.
A green check mark icon indicates the clip has been analyzed and needs no correction.
• A yellow hazard icon indicates that Final Cut Pro recommends enabling the correction ![]() .
.
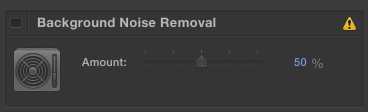
![]() A yellow hazard icon indicates that corrections are necessary.
A yellow hazard icon indicates that corrections are necessary.
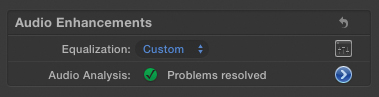
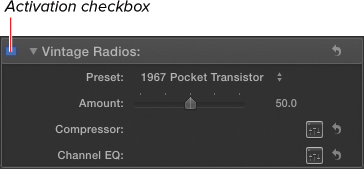
• When a correction is applied, the Activation checkbox turns blue, and the icon changes to text describing the status of the effect ![]() .
.
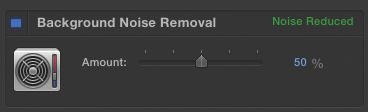
![]() Once a correction has been applied, the status updates to descriptive text.
Once a correction has been applied, the status updates to descriptive text.
If you open the Audio Enhancements Inspector before a clip has been analyzed, it is analyzed immediately. While the analysis is underway, you will see a rotating progress indicator ![]() .
.
![]() If a clip hasn’t yet been analyzed, you’ll see a rendering-in-progress indicator.
If a clip hasn’t yet been analyzed, you’ll see a rendering-in-progress indicator.
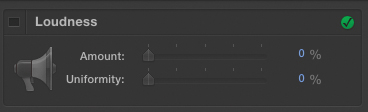
Loudness
Loudness is a way to make your clips sound “louder” without having to actually adjust the clip’s volume.
The Loudness setting applies a compressor effect to the audio clip. A compressor reduces the dynamic range of the clip by attenuating the peaks in the audio signal. This makes the loudest and quietest parts of the clip more uniform, which means you can turn the overall clip volume up without those peaks touching 0 dB.
Dynamic range is the distance in decibels between the loudest and quietest moments within a clip.
To apply the automatic compressor
1. Click the blue Activation checkbox for the Loudness section in the Audio Enhancements Inspector ![]() .
.
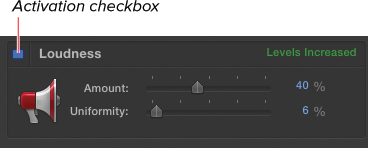
![]() Enable the correction by clicking the Activation checkbox.
Enable the correction by clicking the Activation checkbox.
2. Adjust the Amount slider to increase the amount of compression.
3. Adjust the Uniformity slider to control how much dynamic range is affected.
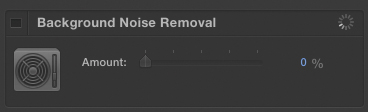
Background Noise Removal
If Final Cut Pro detects a constant noise signal in the background of your audio, a frequency-specific noise gate is applied to remove the offending noise.
The Amount slider allows you to customize how much noise to remove. If you select too high of a setting, the remaining sound will begin to sound hollow and flanged.
To reduce background noise
1. Click the blue Activation checkbox for the Background Noise Removal section in the Audio Enhancements Inspector.
2. Adjust the Amount slider until the noise is reduced but the rest of the signal still sounds natural ![]() .
.

![]() Adjust the slider to create the optimal noise reduction setting.
Adjust the slider to create the optimal noise reduction setting.
The background noise is removed.
It’s often better to allow a little background noise rather than create an unnatural-sounding or over-processed clip.
Hum Removal
If electrical interference is observed in the audio clip, Final Cut Pro will determine whether the noise is of the 50 Hz (European) or 60 Hz (North American) variety, and the offending frequency (and its related harmonic frequencies) are attenuated to remove the hum.
To reduce electrical hum
1. Click the blue Activation checkbox for the Hum Removal section in the Audio Enhancements Inspector ![]() .
.
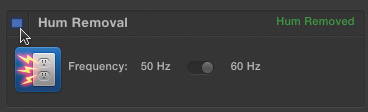
![]() Choose 50 Hz in Europe and 60 Hz in North America.
Choose 50 Hz in Europe and 60 Hz in North America.
2. Choose the 50 Hz or 60 Hz frequency.
The hum is removed.
Audio Equalization
Equalization (EQ) is a fancy word to describe the process of assigning different volume settings for the various audio frequencies in your audio clip.
For example, equalization allows you to turn down only the low frequencies of a clip to remove an unwanted rumble. Or you might boost a certain range of mid-tone frequencies that contain the bulk of an interview subject’s voice to help make it pop out from the background noise.
Equalization is incredibly powerful and extremely common. There are hundreds of common EQ presets that can be implemented in a variety of circumstances. For example, a low-pass filter is an EQ filter that lets the low frequencies pass through the filter, thereby attenuating the high frequencies. A high-pass filter does the opposite. A notch filter lets you select a specific frequency range and control its volume separately from the rest of the clip. The Hum Remover is an example of a notch filter.
Final Cut Pro contains a built-in equalizer in the Audio Inspector for every audio clip. You can choose to apply a preset, make manual frequency volume adjustments, or match the frequency map from one clip to another.
To apply an equalization preset
1. Select a clip in the Timeline, and open the Audio Inspector ![]() .
.
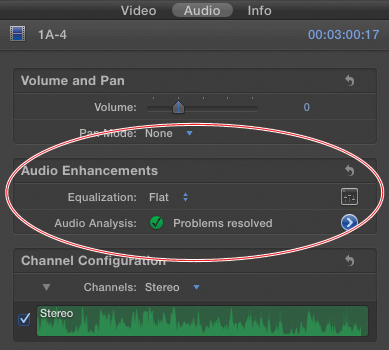
![]() Select a clip, and open the Audio Inspector.
Select a clip, and open the Audio Inspector.
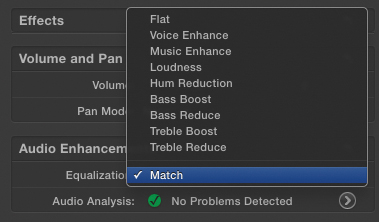
2. In the Audio Enhancements section, click the Equalization pop-up menu, and select a preset from the list ![]() .
.
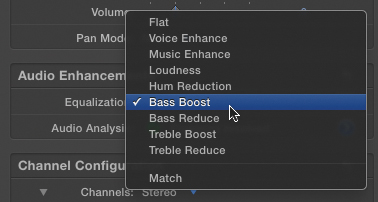
![]() Choose one of the EQ presets from the pop-up menu.
Choose one of the EQ presets from the pop-up menu.
The EQ preset is applied to the clip.
To apply a manual EQ setting
1. Select a clip in the Timeline, and open the Audio Inspector.
2. In the Audio Enhancements section, click the Graphic Equalizer button ![]() .
.
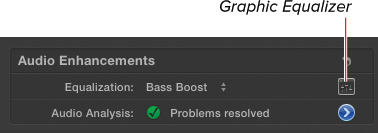
![]() In the Audio Inspector there is an icon to access the Graphic Equalizer.
In the Audio Inspector there is an icon to access the Graphic Equalizer.
The Graphic Equalizer window opens ![]() .
.

![]() The Graphical Equalizer window
The Graphical Equalizer window
3. Click the Frequency Bands pop-up menu to choose between 10 and 31 frequency bands ![]() .
.
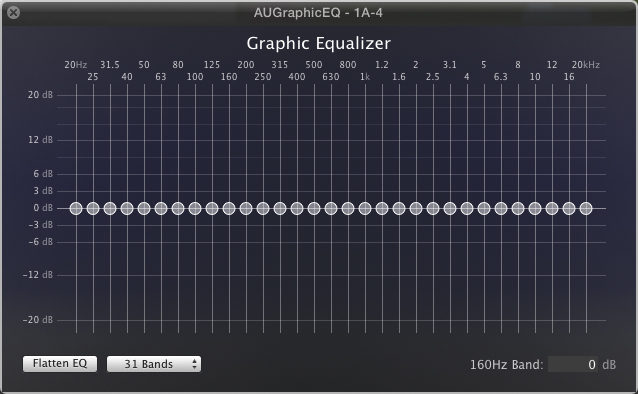
![]() The Graphical Equalizer showing 31 bands
The Graphical Equalizer showing 31 bands
4. Adjust the individual volume sliders to change the volume for different frequencies within your clip.
The sliders to the left control the lower frequencies, and the sliders to the right control the higher frequencies.
5. Drag a box around multiple volume sliders, and then move any of the selected sliders to move the group of sliders together ![]() .
.
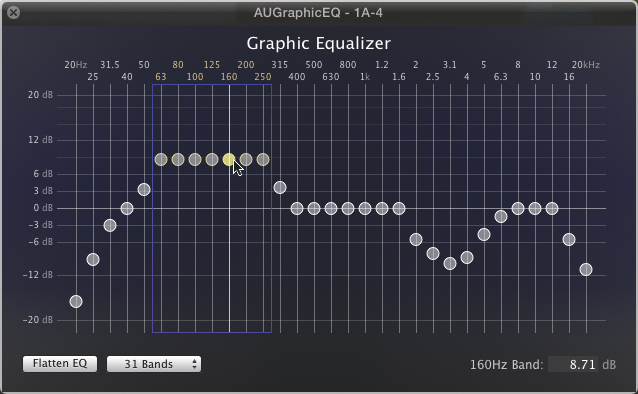
![]() To adjust multiple bands together, drag a box around them and adjust any of the selected sliders.
To adjust multiple bands together, drag a box around them and adjust any of the selected sliders.
6. To reset all sliders to their default (neutral) settings, click Flatten EQ.
The equalizer is reset.
7. To close the Graphic Equalizer, click the close box in the upper-left corner.
The Equalization pop-up menu displays Custom ![]() .
.
![]() Once you have manually changed the Graphical Equalizer, the pop-up menu displays Custom.
Once you have manually changed the Graphical Equalizer, the pop-up menu displays Custom.
Matching Audio
Final Cut Pro allows you to match the sound of one clip to that of another clip. When clips are analyzed, a frequency map is saved that identifies the relative volumes of the various frequencies. That map is then translated into the arrangement of sliders in the equalizer, and those settings can be copied from one clip to another.
To match an audio clip’s EQ to that of another clip
1. Select a clip in the Timeline, and open the Audio Inspector.
2. Do one of the following:
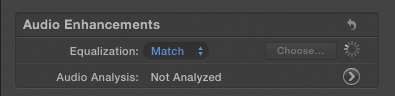
• In the Audio Enhancements section, click the Equalization pop-up, and choose Match ![]() .
.
![]() Choose Match from the EQ presets pop-up, or press Shift-Command-M.
Choose Match from the EQ presets pop-up, or press Shift-Command-M.
• Choose Modify > Match Audio, or press Shift-Command-M.
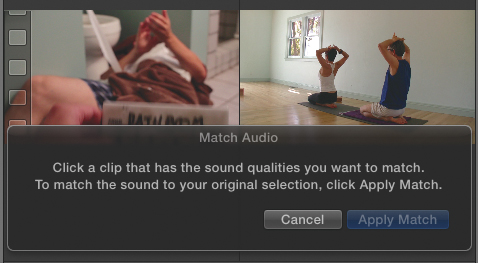
The Match Audio window appears ![]() .
.
![]() The Match Audio window contains instructions to help you select the new audio clip.
The Match Audio window contains instructions to help you select the new audio clip.
3. Click another clip in the Timeline or in an event.
The frequency map of the clicked clip is applied to the selected clip.
4. Click Apply Match in the Match Audio window ![]() .
.
![]() The Match setting applies a custom EQ setting based on the frequency map of the matched clip.
The Match setting applies a custom EQ setting based on the frequency map of the matched clip.
A custom equalization setting is applied to the selected clip to approximate the sound of the clip to which you chose to match it.
To remove equalization
• In the Audio Enhancements section of the Audio Inspector, click the Equalization pop-up menu, and choose Flat ![]() .
.
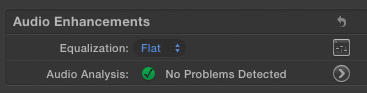
![]() To remove all EQ settings, choose Flat from the EQ Presets pop-up menu.
To remove all EQ settings, choose Flat from the EQ Presets pop-up menu.
Adding Audio Filters
In addition to the automatic audio enhancements, Final Cut Pro contains a large number of audio filters you can apply to your audio clips to produce a wide range of effects, including echo and reverberation, pitch adjustments, specialized types of equalization, modulation, and many others. Some of these filters are plug-ins from Apple Logic. Third-party Logic plug-ins will also appear in Final Cut Pro.
The Effects Browser
Audio filters are found in the Effects Browser, in eight categories: Distortion, Echo, EQ, Levels, Modulation, Spaces, Specialized, and Voices. Within each category, the effects are inexplicably divided into subgroups called Final Cut, Logic, and Mac OS X.
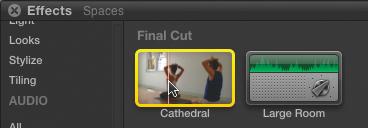
Some of the items labeled as “Final Cut” are not specific filters; rather, they are presets that utilize other filters to create easy-to-use effects. These allow you to add a single effect, such as Vintage Radios, Cathedral, or Cartoon Animals.
To open the Effects Browser
• Click the Effects Browser icon, or press Command-5.
The Effects Browser opens ![]() .
.
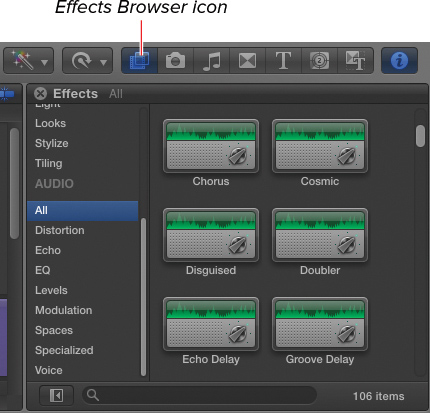
![]() Click the Effects Browser icon to open the Effects Browser.
Click the Effects Browser icon to open the Effects Browser.
The Effects Browser displays all the effects available to you, including third-party Logic plug-ins if you have any installed. Each effect is displayed with a thumbnail icon and a descriptive name. The Effects Browser contains both audio and video effects.
The Effects Browser has two parts: the stack, where the list of effects is displayed; and a sidebar, which contains category names. Scroll the sidebar down to access the Audio effects.
You can find specific effects either by searching for a particular name or by browsing through the various categories.
To find specific audio effects
• Do one of the following:
• Type the name of the effect you’re looking for in the search field at the bottom of the Effects Browser ![]() .
.
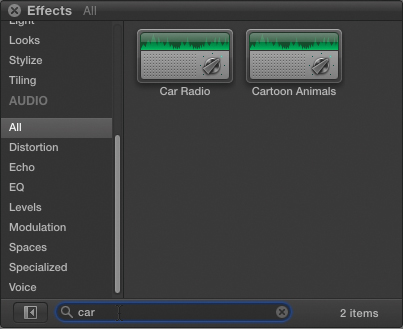
![]() Search for a specific effect by typing in the search field.
Search for a specific effect by typing in the search field.
The stack is filtered to show only effects containing the letters in the search field.
Clear the search field by clicking the circled X at the right edge of the field or by pressing Escape.
• Click one of the category names in the sidebar on the left side of the Effects Browser, and scroll through the main stack area on the right ![]() .
.
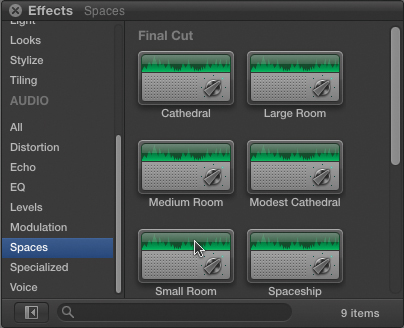
![]() Click a category in the sidebar to filter the list.
Click a category in the sidebar to filter the list.
The stack is filtered by category.
Hide or show the sidebar by clicking the Show/Hide Sidebar button in the lower-left corner of the Effects Browser.
Previewing Audio Effects
You can preview what each effect sounds like prior to adding it to your project. This enables you to experiment with a variety of effects quickly.
To preview an audio effect
• Select a clip in the Timeline; then click an effect in the Effects Browser, and press the Spacebar to hear a preview of the effect ![]() .
.
![]() Be sure to select a clip in the Timeline first, then select one of the audio effects, and finally press the Spacebar to preview the effect.
Be sure to select a clip in the Timeline first, then select one of the audio effects, and finally press the Spacebar to preview the effect.
A preview of the effect is played.
To apply an audio effect
• Select a clip in the Timeline to which you want to apply the audio effect, and then do one of the following:
• In the Effects Browser, double-click an audio effect.
• Drag the audio effect from the Effects Browser to a clip in the Timeline.
The effect is applied to the clip.
Modifying Audio Effects
Once you have applied audio effects to a clip, many audio effects have parameters you can modify to customize the effect and tailor it to work with your particular shot.
Some effects have parameters that you can modify directly in the Inspector, others have custom interface elements that must be controlled in their own window, and some effects have a combination of such parameters.
To modify parameters in the Inspector
1. Select the clip in the Timeline.
2. Open the Audio Inspector ![]() .
.
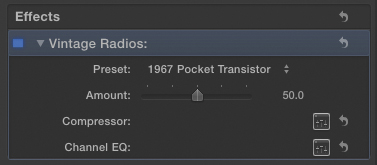
![]() When audio effects are applied to a clip, their controls appear in the Effects category of the Audio Inspector.
When audio effects are applied to a clip, their controls appear in the Effects category of the Audio Inspector.
3. In the Effects category, identify the effect you want to modify, and choose menu items from pop-up menus, drag sliders, and click checkboxes as desired.
To open custom interface windows
1. In the Audio Inspector, click the custom interface icon ![]() .
.
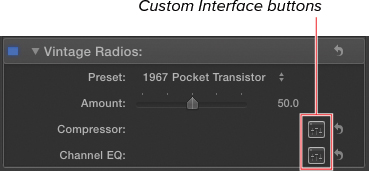
![]() Any effect that has a custom interface window will have the Custom Interface button to the right of the parameter name in the Audio Inspector.
Any effect that has a custom interface window will have the Custom Interface button to the right of the parameter name in the Audio Inspector.
A new window opens containing the custom filter interface ![]() .
.
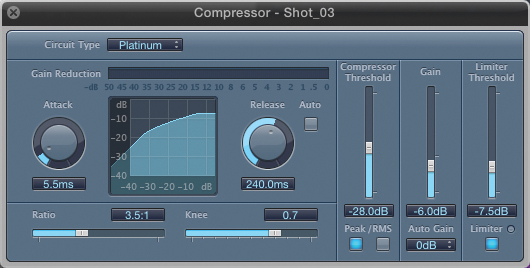
![]() Click the Custom Interface button to open the Custom Interface.
Click the Custom Interface button to open the Custom Interface.
2. Modify the controls within the Custom Interface window.
You can continue to preview a clip while the Custom Interface window is open, allowing you to hear the results of your changes before you close the window.
3. Close the Custom Interface window.
The effect settings are applied.
To disable an audio effect
• In the Effects section of the Audio Inspector, click the blue activation checkbox to the left of the effect name ![]() .
.
![]() To disable an audio effect without deleting it, simply click the blue activation checkbox.
To disable an audio effect without deleting it, simply click the blue activation checkbox.
The blue light goes out and the audio effect is disabled.
To delete an audio effect
• In the Effects section of the Audio Inspector, click the name of the effect, and press Delete.
Recording Live Audio
Final Cut Pro allows you to record audio directly to the Timeline using any microphone built into, or connected to, your Mac. This allows you to add voice-overs, record foley (custom sound effects), or create any other sound you want to add directly to your project.
For best results, use headphones. This allows you to hear the existing audio in the Timeline without the microphone hearing that sound and creating a duplicate or unwanted echo.
To record live audio into your project
1. Position the playhead at the beginning of the section where you want to record ![]() .
.
![]() Position your playhead where you want the recording to begin.
Position your playhead where you want the recording to begin.
It’s a good idea to give yourself a little lead-in time, so you might want to set the playhead a few seconds before the frame where you want to begin recording.
2. Choose Window > Record Audio ![]() .
.
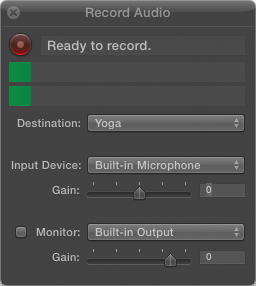
![]() Open the Record Audio window.
Open the Record Audio window.
The Record Audio window opens.
3. In the Record Audio window, set the event where you want your new audio saved in the Destination pop-up menu ![]() .
.
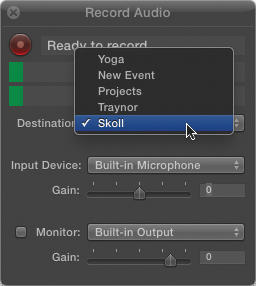
![]() Choose the event in which you want to save the new media files that recording audio creates.
Choose the event in which you want to save the new media files that recording audio creates.
4. Select the microphone you will be recording from.
5. Practice the recording while watching the audio levels in the Record Audio window.
6. Adjust the Microphone Gain slider so your practice recording generates solid green bars, making sure you don’t hit the red ![]() .
.
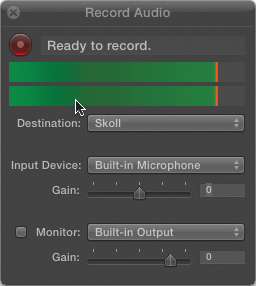
![]() Be sure to practice your recording and get a good audio level (don’t touch the red).
Be sure to practice your recording and get a good audio level (don’t touch the red).
7. Adjust the Monitor settings and level so you can hear the existing audio in your headphones but so that the sound will not bleed into the new recording.
8. Click the red record button at the top of the window ![]() .
.
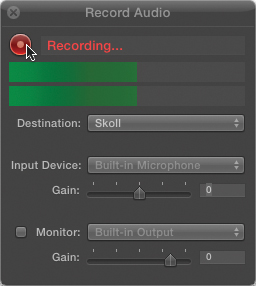
![]() When you’re ready, click the record button to begin recording.
When you’re ready, click the record button to begin recording.
Recording starts immediately, causing the project to begin playing.
9. When you are done recording, click the red record button again to stop.
Recording is stopped.
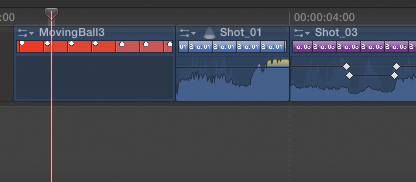
A new audio-only clip is added to your project ![]() .
.
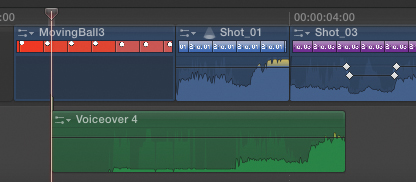
![]() When you’re finished recording, a new connected audio-only clip is added to your project.
When you’re finished recording, a new connected audio-only clip is added to your project.
10. If you’re unsatisfied with the recording, repeat steps 8 and 9.
Each new recording will add a clip to the Timeline, attached at the frame where the recording started ![]() . The clip’s file is stored in the Event folder you selected.
. The clip’s file is stored in the Event folder you selected.
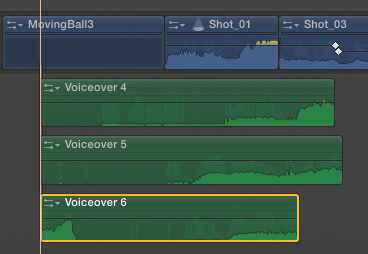
![]() Make as many audio recordings as you want. Each one will be added to the Timeline.
Make as many audio recordings as you want. Each one will be added to the Timeline.