
19. Text and Titles
In This Chapter
Nearly every project needs some bit of text—even if it’s nothing more than an introductory title or some credits at the end. But text can be used in all sorts of other ways too.
Many projects require subtitles or lower thirds (text identifying an interview subject). Sometimes text can be used as a design element, as a way to communicate branding, or as a way of identifying the images on-screen.
Sometimes text is superimposed over video; other times it’s displayed over a black screen. In some cases, you might create an interesting visual background, either by using one of Final Cut Pro’s built-in generators or by applying effects to still images or video clips. And sometimes text just pops, fades, or scrolls on and off, but other times you may want a more expressive animated entrance and exit.
FCP has a plethora of prebuilt, animated titles to use in all of these situations, and employing them is as simple as dragging and dropping them.
The Titles Browser
You can find all of the titles that come with FCP neatly arranged in the Titles Browser. Like effects, transitions, and other items in the media browsers, the Titles Browser has a stack and a sidebar.
The stack shows previewable icons for each of the text objects, and the sidebar provides organizational categories and groups.
To show the Titles Browser
• Click the Show Titles Browser button in the toolbar.
The Titles Browser opens to the right of the Timeline ![]() .
.
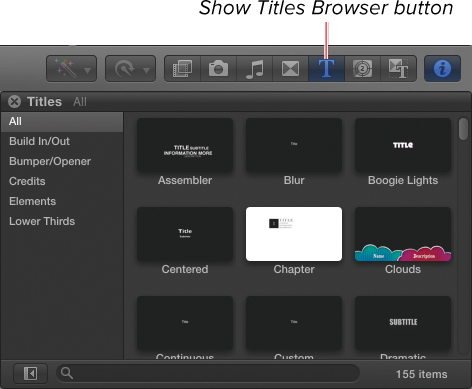
![]() Click the Show Titles Browser button to open the Titles Browser.
Click the Show Titles Browser button to open the Titles Browser.
To find specific titles
• Do one of the following:
• Type the name of the title you’re looking for in the search field at the bottom of the Titles Browser ![]() .
.
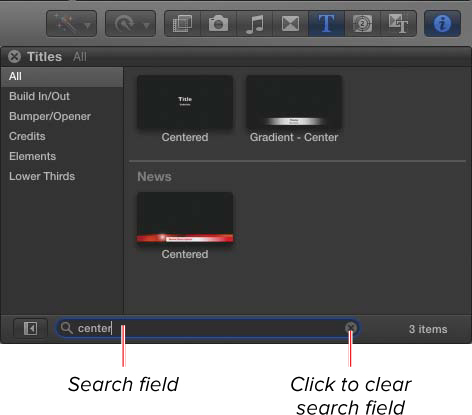
![]() Search for a specific title effect by typing in the search field.
Search for a specific title effect by typing in the search field.
The stack is filtered to show only titles containing the letters in the search field.
Clear the search field by clicking the circled X at the right edge of the field or by pressing Escape.
• Click one of the category names in the sidebar on the left side of the Titles Browser, and scroll through the main stack area on the right ![]() .
.

![]() Click a category in the sidebar to filter the list.
Click a category in the sidebar to filter the list.
The stack is filtered by category.
Previewing Titles
You can preview what each title looks like prior to adding it to your project. Remember, however, that you will be able to choose the font as well as modify a wide range of text style settings, enabling you to customize the title to a great degree.
To preview a title
• Do one of the following:
• Hover your pointer over a title icon in the Titles Browser to skim ![]() .
.
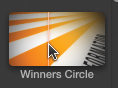
![]() Skim across title icons to see a preview or hover over the icon, and press the Spacebar to play.
Skim across title icons to see a preview or hover over the icon, and press the Spacebar to play.
• Position your pointer over a title icon, and press the Spacebar.
The Viewer loops a sample of the animated title.
Adding Titles to a Project
When you’ve decided which title you want to use, you can add it to the Timeline in one of two ways: You can add it as a regular clip to any storyline (so the text appears over black), or you can connect it to the primary storyline, superimposing the text over the background graphics or video in the storyline beneath it. This latter choice is the default behavior.
To connect a title to the primary storyline
• Position the playhead at the frame in the project where you want the title to begin, and do one of the following:
• Double-click the title in the Titles Browser.
• Click the title in the Titles Browser to select it, and press Q.
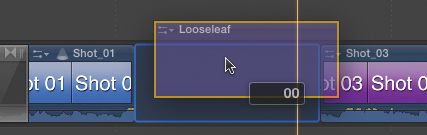
• Drag the title to the playhead position, and drop it above the primary storyline ![]() .
.
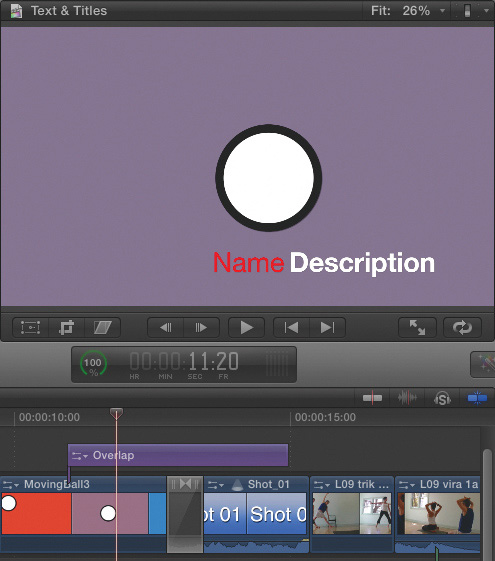
![]() Connect a title to the primary storyline, and it will be superimposed over the clips beneath it.
Connect a title to the primary storyline, and it will be superimposed over the clips beneath it.
The title is added to the Timeline as a connected clip.
To add a title to the project as a regular clip
• Do one of the following:
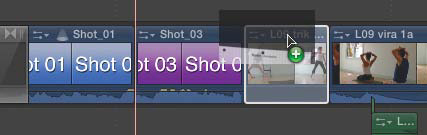
• Drag the title into a storyline, and drop it between two clips to perform an insert edit ![]() .
.
![]() Alternatively, a title can be treated just like a regular clip. It can be inserted between two shots.
Alternatively, a title can be treated just like a regular clip. It can be inserted between two shots.
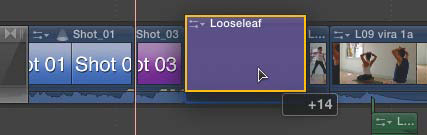
• Drag the title into a storyline, and drop it on top of an existing clip to perform a replace edit ![]() .
.
![]() A title can replace an existing clip or gap.
A title can replace an existing clip or gap.
• Press P to activate the Position tool, and drag the title anywhere in an existing storyline to perform an overwrite edit ![]() .
.
![]() You can overwrite existing clips if you edit using the Position tool.
You can overwrite existing clips if you edit using the Position tool.
• Click the title in the Titles Browser, and press W, E, or D to perform an insert, append, or overwrite edit.
The title is added to the project as if it were a normal video clip.
To learn more about the various edit types, see Chapter 7, “Basic Editing.”
Entering Title Text
Once you’ve added the title to your project, the first thing you’re probably going to want to do is replace the sample text with the custom test required by your movie. Fortunately, in Final Cut Pro, you can enter your custom text directly in the Viewer.
To enter custom text in a title
1. Click the title object in the Timeline to select it ![]() .
.
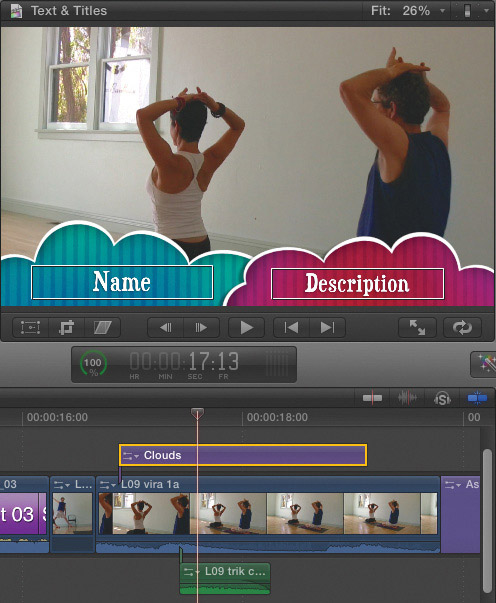
![]() When a title is selected in the Timeline, the text boxes become active in the Viewer.
When a title is selected in the Timeline, the text boxes become active in the Viewer.
The text boxes become highlighted in the Viewer.
2. Position the playhead so you can see the title text on-screen in the Viewer.
3. In the Viewer, double-click a text box, and type your desired custom text ![]() .
.
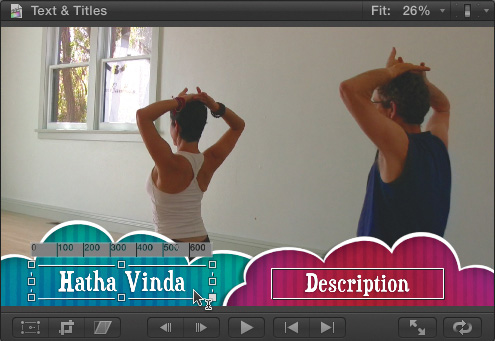
![]() Double-click the text boxes to enter your own custom text.
Double-click the text boxes to enter your own custom text.
4. Repeat step 3 until all the text boxes have been customized.
In some cases, the way the text object animates onto the screen means you won’t be able to see all the text at one time. In such a case, repeat steps 2 and 3 until you’ve customized all the text.
5. When all the text is updated, deselect the title by clicking in a blank area of the Timeline, or press Shift-Command-A.
Modifying Titles
Most titles were created with specific design ideas in mind. The font, font size, color, and so on, were all preselected. The position of the text and even the duration of the title were preset to make it especially easy to drop the title into your project, enter your desired text, and go.
However, despite the availability of these presets, you can customize any of the titles in a variety of ways. You can choose your own fonts, styles, colors, and a variety of other attributes specific to the individual title effects.
These settings are controlled in the Inspector. You can modify title settings in two Inspector panes: the Title Inspector and the Text Inspector.
Changing Title Attributes
The Title Inspector contains different settings depending upon which title is selected. These may include the font and size for individual lines in a multiline title or the background color or attributes of a background effect. For the build in/build out category, the Title Inspector usually contains checkboxes to enable or disable the build-in or build-out effects.
Some titles have no title-specific attributes at all. When you select one of these titles, there will be no settings to adjust in the Title Inspector.
To change title-specific attributes
1. Select the title in the Timeline, and park your playhead over it ![]() .
.
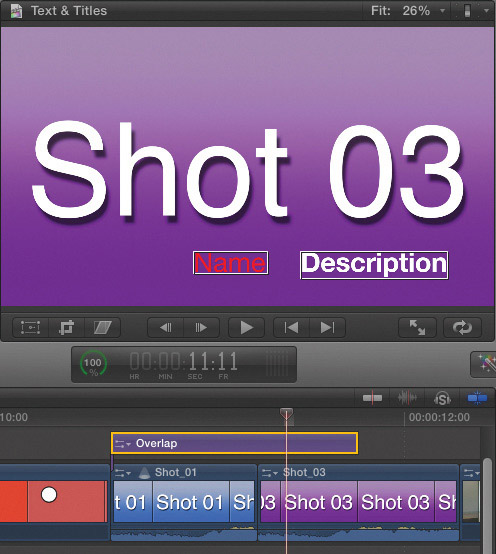
![]() Select the title you want to modify.
Select the title you want to modify.
2. Open the Inspector by clicking the I button in the toolbar or pressing Command-4.
3. In the Inspector, click the Title header to open the Title pane (if it’s not already showing) ![]() .
.
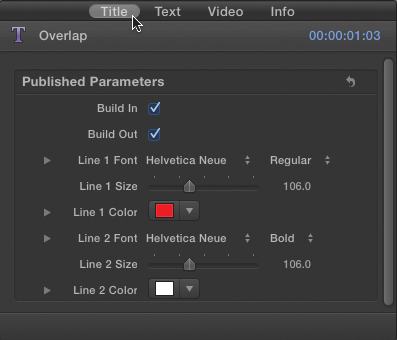
![]() In the Inspector, click the Title header to open the Title pane.
In the Inspector, click the Title header to open the Title pane.
4. Adjust the parameters to your heart’s content.
5. Play around the title in the project to see the results of your work.
Changing Text Attributes
In addition to the title-specific attributes available in the Title Inspector, all titles also have a Text Inspector that controls the appearance of the text itself. The Text Inspector always contains the same settings, regardless of which title type you are modifying.
There are five categories of controls in the Text Inspector: Basic, Face, Outline, Glow, and Drop Shadow ![]() .
.
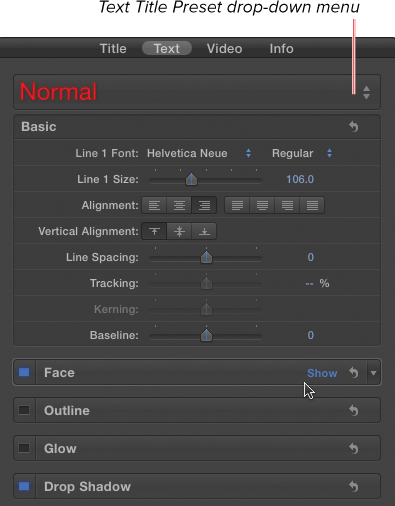
![]() The Text pane contains specific parameter fields to control optional Face, Outline, Glow, and Drop Shadow settings.
The Text pane contains specific parameter fields to control optional Face, Outline, Glow, and Drop Shadow settings.
Depending on the presets saved in the individual title, one or more of these settings will already have attributes assigned, but you can always override those defaults to customize the title.
To choose from a preset text style
• Click the Preset Style pop-up menu at the top of the Text Inspector, and select a new text style from the list ![]() .
.
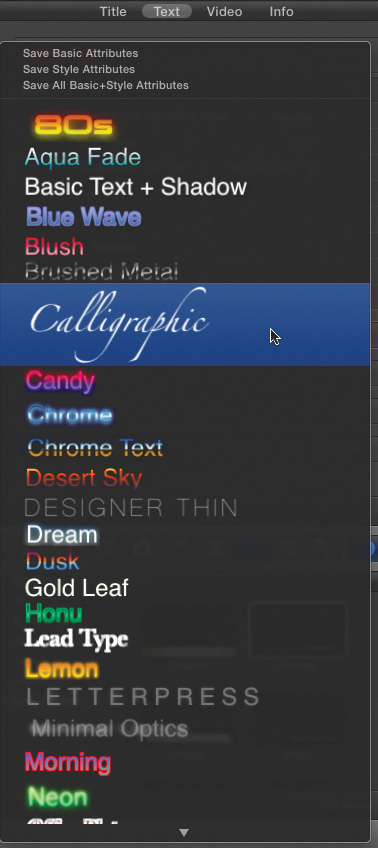
![]() Click the Preset Style pop-up at the top of the Text pane to select from one of the preset text styles.
Click the Preset Style pop-up at the top of the Text pane to select from one of the preset text styles.
Some styles contain both Basic and Style attributes. Others contain only Basic or only Style settings.
The WYSIWYG pop-up menu gives you a preview of what attributes will be changed if you apply a particular preset.
To save the current text style as a preset
1. Click the Preset Style pop-up menu at the top of the Text Inspector, and do one of the following:
• Choose Save Basic Attributes to save just the font, font size, alignment, and other attributes in the Basic category ![]() .
.
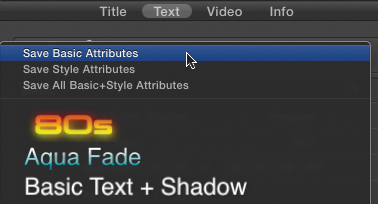
![]() Save your own text preset styles by setting the parameters to your desired state, clicking the Preset Style pop-up menu, and choosing one of the Save Preset choices at the top of the menu.
Save your own text preset styles by setting the parameters to your desired state, clicking the Preset Style pop-up menu, and choosing one of the Save Preset choices at the top of the menu.
• Choose Save Style Attributes to save the Face, Outline, Glow, and Drop Shadow settings.
• Choose Save All Basic+Style Attributes to save all the Inspector settings into a single preset.
The Save Preset To Library window opens ![]() .
.
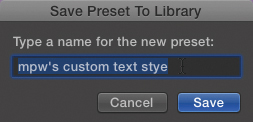
![]() Name your preset something descriptive and memorable.
Name your preset something descriptive and memorable.
2. Type a name for your new preset, and click Save.
Your saved preset appears in the popup list ![]() .
.
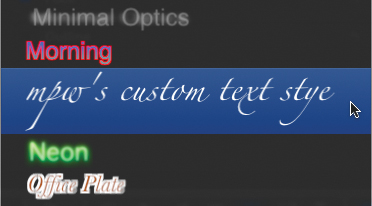
![]() Once saved, your preset will appear in the Preset Style pop-up menu forevermore.
Once saved, your preset will appear in the Preset Style pop-up menu forevermore.
Share saved text presets by sharing the file in the Finder ![]() . Preset text styles are saved in User > Library > Application Support > Motion > Library > Text Styles.
. Preset text styles are saved in User > Library > Application Support > Motion > Library > Text Styles.
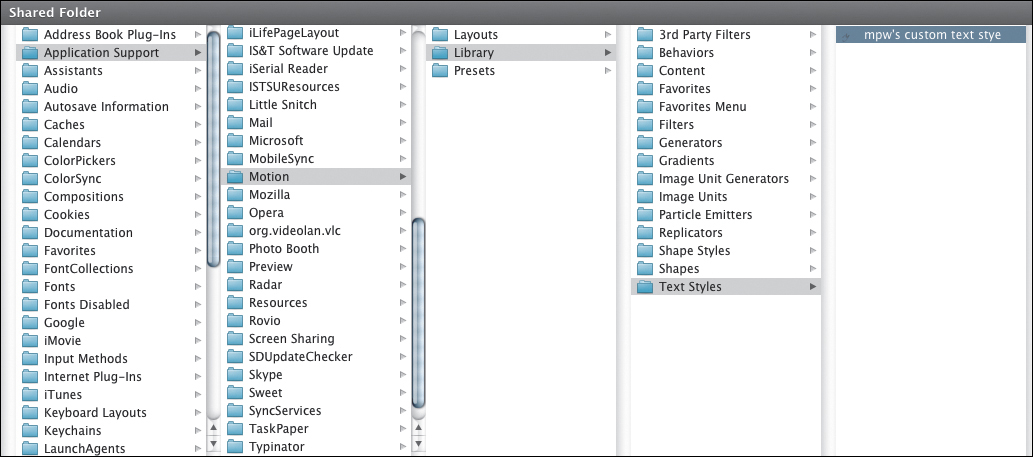
![]() Preset text styles are saved as files in the Finder so you can share them with your friends; you can delete them if you want them to go away forever.
Preset text styles are saved as files in the Finder so you can share them with your friends; you can delete them if you want them to go away forever.
To modify specific text style parameters
1. In the Viewer, select the specific text you want to modify ![]() .
.

![]() Select the specific text you want to modify. You can select a whole text box or just individual characters.
Select the specific text you want to modify. You can select a whole text box or just individual characters.
You can set different text style attributes for individual text objects, or even individual letters within a text object.
2. To enable or disable specific Face, Outline, Glow, and/or Drop Shadow attributes, click the blue box to the left of the category header ![]() .
.
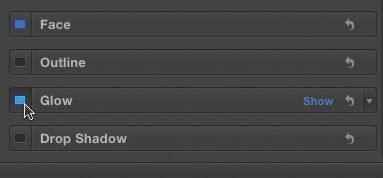
![]() The blue box enables or disables all the settings in that category.
The blue box enables or disables all the settings in that category.
3. Position your pointer over the header area, and when the Show text appears, click it to expand the category ![]() .
.
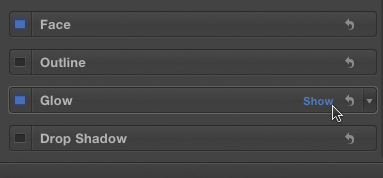
![]() When the word Show appears, click it to expand the category of settings.
When the word Show appears, click it to expand the category of settings.
4. Modify any specific parameters to your liking ![]() .
.
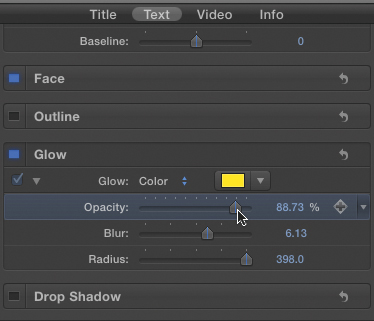
![]() Modify any of the settings you want to change.
Modify any of the settings you want to change.
Changes update dynamically in the Viewer ![]() .
.

![]() As you modify the settings, changes appear instantly in the Viewer. In this example, a yellow glow has been added to the word Hero.
As you modify the settings, changes appear instantly in the Viewer. In this example, a yellow glow has been added to the word Hero.
Changing Animation Duration
Because the preset text effects have animations associated with them, different text effects have different default durations. When you add a text object to a project, it appears at its default duration.
You can speed up or slow down the animation effect by changing the overall duration of the text effect.
Note that you cannot apply retiming effects to titles.
To change the speed of a text object’s animation
• Using the Arrow pointer, drag the left or right edge of the title object in the Timeline ![]() .
.
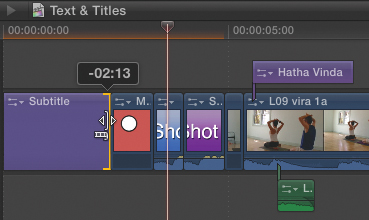
![]() Control the speed of the title animation by shortening (to speed up) or lengthening (to slow down) the duration of the text object in the Timeline.
Control the speed of the title animation by shortening (to speed up) or lengthening (to slow down) the duration of the text object in the Timeline.
Making the title object shorter will speed up the animation effect, and making the object longer will slow down the animation.