
11. GameKit
This chapter introduces various ways you can create connected game play through GameKit. GameKit offers features that enable your applications to move beyond a single-player/single-device scenario toward using Game Center and device-to-device networking.
Apple’s Game Center adds a centralized service that enables your game to offer shared leaderboards and Internet-based matches. GameKit also provides an ad-hoc networking solution for peer-to-peer connectivity. Built on a technology called Bonjour, this ad-hoc connection offers simple, no-configuration communications between devices.
In this chapter, you discover how to use GameKit to build connected applications. You see how to create Game Center features. You read about adding GameKit Voice to your code for walkie-talkie-style voice chats. Ready to start? It’s time to let your apps connect.
Enabling Game Center
Game Center features expand your users’ experience. With Game Center, you provide matches, leaderboards, and other enhancements that bring your user out of the boundaries of a single application and into a shared communal experience. Game Center isn’t just for games—although they’re great for that, obviously. You can use Game Center to track progress for weight loss and fitness, to create shared design spaces, or to provide tutorial support. If you can imagine a way to share app execution across devices, Game Center is there to provide the infrastructure you need.
Before you start coding a Game Center application, there are several steps you need to take:
1. Register a unique application identifier at Apple’s iOS developer portal (https://developer.apple.com/ios/manage/overview/index.action).
2. Create a 1024x1024-pixel application icon and a stand-in iPhone-sized image (640x960-pixels). You need these for iTunes Connect to build a new app listing.
3. Visit iTunes Connect (http://itunesconnect.apple.com). Register a new application using your identifier and artwork. Information need not be finalized at this time. Just add enough details so the app listing is properly saved.
4. Visit Manage Your Applications > Application Name > Manage Game Center, as shown in Figure 11-1. Ensure that Game Center is enabled; it should be by default.
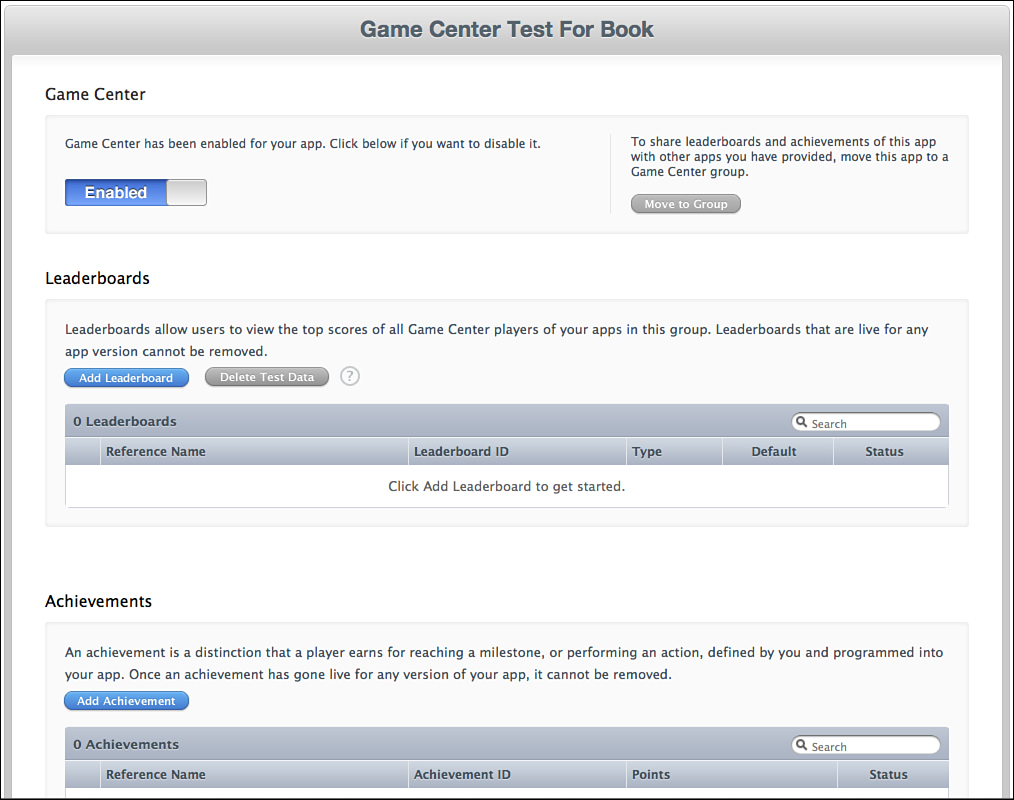
Figure 11-1. Enable Game Center on an application-by-application basis. When established, you can set up new leaderboards and achievements and allow your application to interact with other Game Center features.
You cannot test your application until you have created an iTunes Connect entry that matches your project’s application identifier and enabled Game Center. If you fail to set up Game Center in advance, you cannot access standard features such as logging users and viewing achievements. A telltale warning states that your game is not recognized by Game Center. This occurs when Game Center does not recognize the identifier for the currently running application (see Figure 11-2).
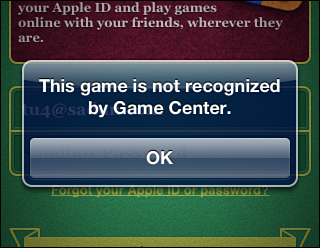
Figure 11-2. You can use Game Center features only with applications you have registered at iTunes Connect.
The previous steps have already been performed for the recipes in this chapter. The samples should work without any further setup when using these com.sadun.cookbook apps.
Testing for Game Center Compatibility
If you plan to deploy earlier than iOS 4.1, you may want to check to see if Game Center is available on the current device. You can easily check for class existence on, for example, GKLocalPlayer, to infer GameKit Game Center support:
if (NSClassFromString(@"GKLocalPlayer")) ...
Recipe: Signing In to Game Center
The easiest way to test whether your application has been properly set up for Game Center is to attempt to sign in a user. Recipe 11-1 retrieves the shared local player singleton object and provides an authentication handler for that player.
This behavior has changed in iOS 6. The authenticateWithCompletionHandler: method previously used is now deprecated. If you plan to deploy to iOS 5, make sure you include firmware-specific tests to run the proper code.
Authentication does not necessarily mean that the user must sign in each time the app is launched. Sessions can last quite a while. If the authentication remains valid (player.authenticated), your user will be greeted with a welcome-back notice rather than a password prompt.
The GKPlayerAuthenticationDidChangeNotificationName notification fires whenever the authentication system signs in or fails to sign in. Listen for this and update your GUI to reflect the current user state. Only present Game Center features when users have been properly authenticated:
[[NSNotificationCenter defaultCenter]
addObserverForName:GKPlayerAuthenticationDidChangeNotificationName
object:nil queue:[NSOperationQueue mainQueue]
usingBlock:^(NSNotification *notification)
{
[weakself updateUserGUI];
}];
You can best test authentication states by resetting and then quitting the iOS simulator and rerunning your application.
Note
As you develop, you will test in a GameKit sandbox environment. All scores and achievements made there will not leak through to the production leader boards. iTunes Connect enables you to delete test data from the app’s Game Center management page.
When testing on-device, visit the Game Center app, and log out of your normal account before running your beta application. This should allow you to log into the sandbox upon running your app.
Recipe 11-1. Establishing a Game Center Player
- (void) establishPlayer
{
TestBedViewController __weak *weakself = self;
[GKLocalPlayer localPlayer].authenticateHandler =
^(UIViewController *controller, NSError *error)
{
if (error)
{
NSLog(@"Error authenticating: %@",
error.localizedDescription);
alert(@"Restore game features by logging
in via the Game Center app.");
return;
}
if (controller)
{
// User has not yet authenticated
[weakself presentViewController:controller
animated:YES completion:nil];
}
};
}
Get This Recipe’s Code
To find this recipe’s full sample project, point your browser to https://github.com/erica/iOS-6-Advanced-Cookbook and go to the folder for Chapter 11.
Designing Leaderboards and Achievements
Game Center offers a pair of items that help to engage users with games. Leaderboards enable users to view a shared list of top scores for your application. Achievements let users unlock goal milestones through game play, for example, Scored First Win, Twenty Games Played, and so on.
Both features are established at iTunes Connect. Create these (on a per-application basis or as a group that’s shared among multiple apps) by clicking the Manage Game Center button in the iTunes Connect application information page. The following sections introduce the details involved in this process.
Building Leaderboards
Choose Leaderboard > Add Leaderboard > Single Leaderboard > Choose to create a new leaderboard for your application. iTunes Connect will prompt you to specify the following information:
• Reference Name—Enter a human-readable private name created for your own reference. This name is not used outside iTunes Connect. For example, you might want to keep track of Top Overall Point Scores or Fastest Reaction Time. Keep the reference name easy to understand and simple to search for.
• Leaderboard ID—This is a unique string, which is used by your application to identify the specific leaderboard. For simplicity, use reverse domain naming. Append a feature name to your application identifier (for example, com.sadun.cookbook.topPoints).
• Score Format—Select the way the score is counted and shown. Your choices are integer (a whole number score), fixed point (a floating point number, with one, two, or three fixed decimal places), a time interval (to the minute, second, or hundredth of a second), or currency (whole units, or units and two decimal places). Choose whether to sort from high to low (higher numbers win, for example, as in points) or low to high (lower numbers win, for example, as in shortest time elapsed).
• Score Range (optional)—Enter the lowest and highest possible scores for your application.
After entering this information, you must enter one or more localized descriptions, and then you can save the new leaderboard. Figure 11-3 shows a newly created leaderboard.
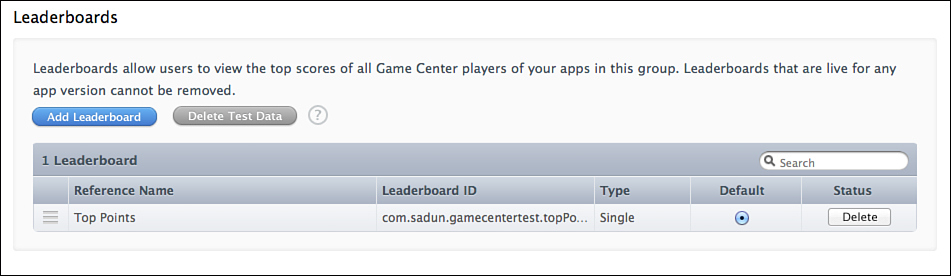
Figure 11-3. iTunes Connect enables you to create and manage leaderboards. You cannot delete leaderboards after they go live. The first leaderboard you create is your default. You can use radio buttons to select a different default if you want after adding several. You can also rearrange the order of your leaderboards and achievements.
Localized Descriptions
The reference name you entered to create the leaderboard is not used when presenting that leaderboard to your users. Instead, you create localized descriptions that provide the text material and any other formatting options your application will use. Leaderboards must be localized to at least one language. Click Add Language and select a language.
Enter a real-world name for your leaderboard. This name will be used by your application and displayed to users. Keep it short and to the point, such as Top Scores, Best Shooters, or Quickest Reactions.
Select a score format and enter optional suffixes used for your items. (Pro tip: Add a space before your suffix so that your users can earn “50 coins” rather than “50coins”.) This information can vary for each localization, enabling you to have “truckloads” in the United States and “lorry loads” in the UK. You supply an optional 512x512 pixel image to supplement each leaderboard. This image, too, is localized. You can create different images for each locale/culture you support.
Click Save to save your localization. You can revisit the description you just edited later and make any changes needed, but you cannot remove the leaderboard after it goes live.
Creating Achievements
Build achievements by adding them in iTunes Connect, much the same way as you create leaderboards. Choose Achievements > Set Up > Add New Achievement. You specify the following items:
• Reference Name—This is a human-readable private name that is not used outside iTunes Connect (for example, Great Start Achievement or 100 Certified Kills).
• Achievement ID—Provide a unique string, which is used by your application to identify the specific achievement. As with leaderboards, you’ll probably want to use reverse domain naming, with your application identifier appended by some meaningful phrase (for example, com.sadun.cookbook.greatStart).
• Hidden—Specify whether these items are hidden on Game Center until the user has achieved them. This does not hide the number of items; it just hides the names and descriptions. Hiding allows you to surprise and delight your user with new accomplishments that they did not expect. When not hidden, you provide emotional incentives to unlock the complete set of items and a preview of what those items are.
• Point Value—You can assign up to 100 points per achievement and up to 1,000 points per application across all achievements. This adds a limiting factor, so you don’t overwhelm your users with You Have Played This Game for 15 Minutes and 30 Seconds achievements.
Each achievement requires at least one localized description. You can use English (as shown in Figure 11-4) to add a basic write-up before adding further languages later.
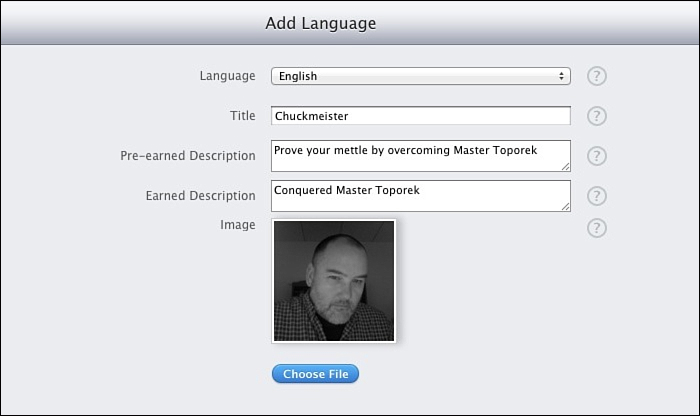
Figure 11-4. Specify the achievement elements by providing a human-readable name, a pair of descriptions for before and after the item is earned, and an image to associate with the achievement. When testing, keep in mind that the space available to display text is smaller on iPhone-family devices than iPads.
Click Add Language, choose a language, enter a human-readable title that will be displayed to your readers, and choose two descriptions. The Pre-earned Description describes the achievement before your user has unlocked it or is in the process of unlocking it; the Earned Description describes it after. For example, you might have Prove Your Mettle by Overcoming Master Toporek as the pre-earned version, and Conquered Master Toporek as the earned one. Keep the descriptions short or they’ll be automatically clipped.
Nonhidden achievements always display the pre-earned description until they are achieved. Hidden achievements also display the pre-earned description to the user after you assign a (nonzero) percent-achieved value to it. If your user has gone 50% of the way toward “conquering the master,” make sure that your per-earned text matches the presentation of that concept.
In addition to text, each achievement requires a (localized) 512x512 or 1024x1024 pixel art image (see Figure 11-4). Images must be jpeg, jpg, tif, tiff, or png, at least 72 DPI, and in the RGB color space.
Recipe: Accessing Leaderboards
Many applications have just one leaderboard for posting top scores. Others use leaderboards for various categories, like most accurate shooter, greatest word length, or most steps taken per week. The following method retrieves categories (the developer-defined leaderboard identifiers such as com.sadun.cookbook.topPoints) and titles (for example, Top Points) for each available leaderboard:
- (void) peekAtLeaderboards
{
[GKLeaderboard loadLeaderboardsWithCompletionHandler:
^(NSArray *leaderboards, NSError *error)
{
if (error)
{
NSLog(@"Error retrieving leaderboards: %@",
error.localizedFailureReason);
return;
}
for (GKLeaderboard *leaderboard in leaderboards)
{
NSString *category = leaderboard.category;
NSString *title = leaderboard.title;
NSLog(@"%@ : %@", category, title);
}
}];
}
The GKLeaderboard Class
Each GKLeaderboard instance can retrieve scores from Game Center. You can search globally to report high scores or use scopes to limit your query. For example, you might specify a playerScope that limits the search to a player and his friends rather than returning all top scores outside of that group. The range property sets which scores to show. (The range count starts at 1, not at 0, by the way.) Normally, it defaults to the top 25 scores, but you can choose the top 10 instead. You can choose a time scope as well, to look at high scores for just the current day or week, and so on.
Recipe 11-2 demonstrates how you might load the data for a specific category. It requests the top ten scores within the last week, and then attempts to load the game center display names for each player. If it fails at doing so, it falls back to using the GKScore’s player ID property.
Recipe 11-2. Retrieving Leaderboard Information
- (void) peekAtLeaderboard: (GKLeaderboard *) leaderboard
{
// top ten scores. Default range is 1,25
leaderboard.range = NSMakeRange(1, 10);
// Within last week
leaderboard.timeScope = GKLeaderboardTimeScopeWeek;
// Load in the scores
[leaderboard loadScoresWithCompletionHandler:^(
NSArray *scores, NSError *error)
{
if (error)
{
NSLog(@"Error retrieving scores: %@",
error.localizedFailureReason);
return;
}
// Retrieve player ids
NSMutableArray *array = [NSMutableArray array];
for (GKScore *score in scores)
[array addObject:score.playerID];
// Load the player names
[GKPlayer loadPlayersForIdentifiers:array
withCompletionHandler:
^(NSArray *players, NSError *error)
{
if (error)
{
// Report only with player ids
for (GKScore *score in scores)
NSLog(@"[%2d] %@: %@ (%@)",
score.rank, score.playerID,
score.formattedValue, score.date);
return;
}
for (int i = 0; i < scores.count; i++)
{
// Report with actual player names
GKPlayer *aPlayer = [players objectAtIndex:i];
GKScore *score = [scores objectAtIndex:i];
NSLog(@"[%2d] %@: %@ (%@)",
score.rank, aPlayer.displayName,
score.formattedValue, score.date);
}
}];
}];
}
Get This Recipe’s Code
To find this recipe’s full sample project, point your browser to https://github.com/erica/iOS-6-Advanced-Cookbook and go to the folder for Chapter 11.
Recipe: Displaying the Game Center View Controller
Normally, you do not access leaderboard data directly. GameKit provides a much friendlier already built view controller to show to your user (see Figure 11-5). Recipe 11-3 demonstrates how you can create, present, and dismiss the Game Center view controller. Make sure your calling class declares the GKGameCenterControllerDelegate protocol. This enables your code to catch the “did finish” delegate callback, so you can dismiss the view controller when the user has finished interacting with it.
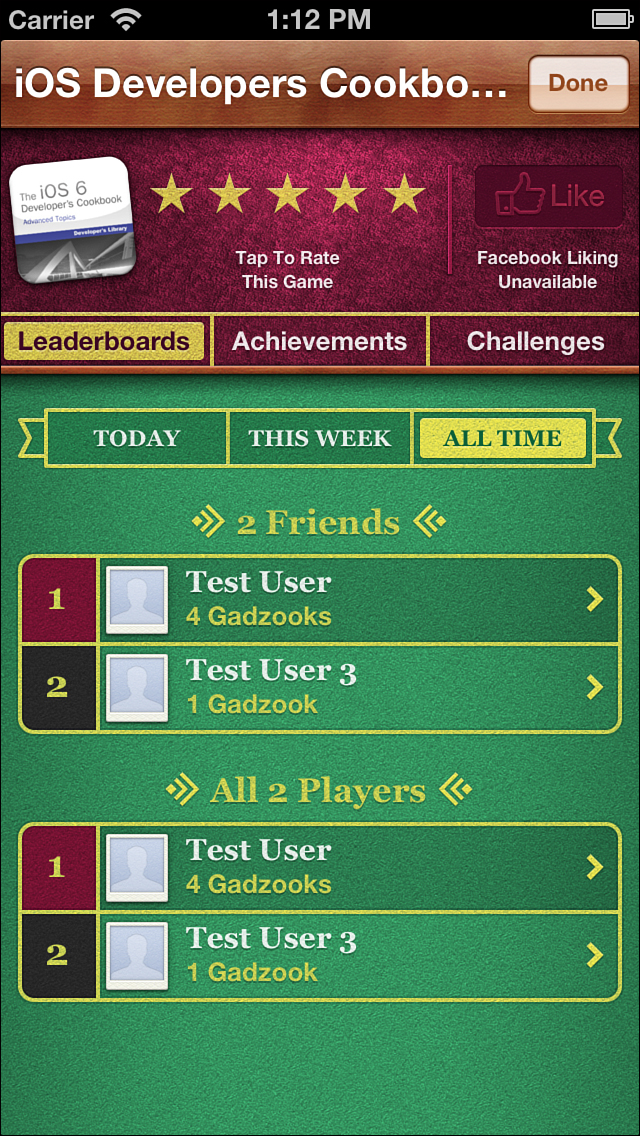
Figure 11-5. GameKit offers preconfigured Game Center view controllers that you access from your application.
For those readers familiar with pre-iOS 6 Game Center, this new class duplicates features found previously in the separate leaderboard and achievement controllers. Apple writes, “The GKGameCenterViewController class aggregates many common Game Center features into a single user interface. It replaces GKAchievementViewController and GKLeaderboardViewController as the preferred way to show Game Center content in your game.” Use the viewState property to set the default tab displayed by the Game Center controller.
Recipe 11-3. Presenting the Game Center View Controller
- (void)gameCenterViewControllerDidFinish:
(GKGameCenterViewController *)gameCenterViewController
{
// You can save the user's selection here if desired
// and re-use it later
// e.g. _leaderboard_Category =
// _gameCenterViewController.leaderboardCategory
[self dismissViewControllerAnimated:YES completion:nil];
}
- (void) showGameCenterViewController
{
GKGameCenterViewController *gvc =
[[GKGameCenterViewController alloc] init];
gvc.gameCenterDelegate = self;
[self presentViewController:gvc
animated:YES completion:nil];
}
Get This Recipe’s Code
To find this recipe’s full sample project, point your browser to https://github.com/erica/iOS-6-Advanced-Cookbook and go to the folder for Chapter 11.
Recipe: Submitting Scores
Submit scores by creating new GKScore instances and setting their value, as in Recipe 11-4. You can specify the category directly, as the following method does, or you can just call init and let Game Center use the default leaderboard instead.
Each user can collect many scores. These are differentiated by the category you submit. Each category stores just one value, however, and is associated with just one leaderboard. You design how you want your leaderboards to work, with various tracking statistics such as accuracy, kills, and so forth.
Recipe 11-4. Submitting User Scores
- (void) createScore
{
NSNumber *userScore = [self requestScore];
if (!userScore) return;
GKScore *score = [[GKScore alloc] initWithCategory:GKCATEGORY];
score.value = userScore.intValue;
[score reportScoreWithCompletionHandler:^(NSError *error){
if (error)
{
NSLog(@"Error submitting score to game center: %@",
error.localizedFailureReason);
return;
}
NSLog(@"Success. Score submitted.");
}];
}
Get This Recipe’s Code
To find this recipe’s full sample project, point your browser to https://github.com/erica/iOS-6-Advanced-Cookbook and go to the folder for Chapter 11.
Recipe: Checking Achievements
Achievements are goals that users work toward. Each achievement can be unlocked and reset by your application as needed. Because achievements can be partially attained, you can assign a percentComplete value to each kind. These are displayed as partial achievements (with the pre-achieved text description) in the Game Center view controller.
Recipe 11-5 checks achievements programmatically. It calls home to Game Center to see which achievements have been activated and at what level of completion. This enables you to update the GUI if some achievement has already been unlocked. For example, advanced weapons may be available only to users who have passed some sort of initial training.
Note
You likely want to create a special-purpose class to handle achievement semantics rather than spreading achievement code throughout your game. It’s easy to intermingle Game Center code with application semantics and end up with a giant jumble. Keep MVC design patterns in mind when working with Game Center elements, just as you would with other application development tasks.
Recipe 11-5. Testing Achievements
- (void) checkAchievement
{
[GKAchievement loadAchievementsWithCompletionHandler:
^(NSArray *achievements, NSError *error)
{
if (error)
{
NSLog(@"Error loading achievements: %@",
error.localizedFailureReason);
return;
}
for (GKAchievement *achievement in achievements)
{
NSLog(@"Achievement: %@ : %f",
achievement.identifier, achievement.percentComplete);
if ([achievement.identifier isEqualToString:GKBEGINNER])
{
// unlock some GUI feature
}
}
}];
}
Get This Recipe’s Code
To find this recipe’s full sample project, point your browser to https://github.com/erica/iOS-6-Advanced-Cookbook and go to the folder for Chapter 11.
Recipe: Reporting Achievements to Game Center
To unlock an achievement, you report it to Game Center. If the report errors out and is not successfully updated at Game Center, make sure you set up some fallback for a future repeat attempt so the user does not lose her progress.
Reward the user for completing an achievement. In Recipe 11-6, the showsCompletionBanner property creates the visual update shown in Figure 11-6, letting the user know that the achievement has been unlocked.
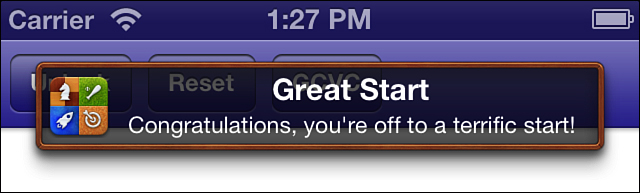
Figure 11-6. Completion banners let users know when they have unlocked achievements.
Each achievement report represents a network access at a minimum. Although reporting achievements is not especially expensive, it’s not something you’ll want to overuse in your applications. You don’t want requests stumbling over each other, and you don’t need to update an achievement many times a second as the user makes a tiny percentage of progress toward some goal. Instead, think about where achievement updates make sense rather than reflexively sticking them into code wherever the user has any state change.
Recipe 11-6. Unlocking Achievements
- (void) unlockAchievement
{
GKAchievement *achievement =
[[GKAchievement alloc] initWithIdentifier: GKBEGINNER];
if (achievement)
{
achievement.percentComplete = 100.0f;
achievement.showsCompletionBanner = YES;
[achievement reportAchievementWithCompletionHandler:^(NSError *error)
{
if (error)
{
NSLog(@"Error reporting achievement: %@",
error.localizedFailureReason);
// Make sure to try again later in real
// world deployment!!!
return;
}
// Achievement is now unlocked
}];
}
}
Get This Recipe’s Code
To find this recipe’s full sample project, point your browser to https://github.com/erica/iOS-6-Advanced-Cookbook and go to the folder for Chapter 11.
Resetting Achievements
You may want to allow users to reset achievements and restart the game from scratch. Users can re-earn each achievement and relive the fun a second time around, even with the same Game Center ID.
The following method shows a typical way to approach this. It requests the reset and provides a completion handler to respond to the user about the success or failure of the request. Obviously, you want to confirm resets with the user—and you may want to provide a way to undo that reset by resubmitting achievements if needed. You cannot reset achievements on a category-by-category basis. A reset applies to all earned items at once:
- (void) resetAchievements
{
[GKAchievement resetAchievementsWithCompletionHandler:
^(NSError *error)
{
if (error)
{
NSLog(@"Error resetting achievements: %@",
error.localizedFailureReason);
return;
}
// Achievements are now reset
}];
}
Recipe: Multiplayer Matchmaking
GameKit enables your users to solicit matches with other players, whether those players are friends or anonymous other persons. The matchmaker view controller handles both specific invitations and general random game matches. To start with a matchmaking session, create a new match request. Specify how many players are required for gameplay and how many players can be handled total.
For Game Center gameplay, you can create matches for two to four players. Hosted matches on your own servers can allow up to 16 players at once. (This chapter does not cover hosted matches outside of Game Center.) Recipe 11-7 creates a request for a basic two-player game and presents a matchmaker controller initialized with that request.
Make sure your primary class declares the GKMatchmakerViewControllerDelegate protocol, and assign the matchmakerDelegate property. As a delegate, your controller responds to common matchmaker state updates, detailed in the next sections.
After you present the controller, it’s up to the user to choose whether to invite friends or use Game Center’s auto-match.
Recipe 11-7. Requesting a Match Through the Match Maker
- (void) requestMatch
{
// Clean up any previous game
sendingView.text = @"";
receivingView.text = @"";
// This is not a hosted match, which allows up to 16 players
GKMatchRequest *request = [[GKMatchRequest alloc] init];
request.minPlayers = 2; // Between 2 and 4
request.maxPlayers = 2; // Between 2 and 4
GKMatchmakerViewController *mmvc =
[[GKMatchmakerViewController alloc]
initWithMatchRequest:request];
mmvc.matchmakerDelegate = self;
mmvc.hosted = NO;
[self presentViewController:mmvc animated:YES completion:nil];
}
Get This Recipe’s Code
To find this recipe’s full sample project, point your browser to https://github.com/erica/iOS-6-Advanced-Cookbook and go to the folder for Chapter 11.
Handling Matchmaker Fails
The matchmaker delegate protocol uses the following two (required) methods to handle failed match making. These deal with the user canceling the controller and with a failure to connect to Game Center. Here’s how you might implement those, making sure that both methods dismiss the modal view controller. Further delegate methods are detailed in the next section:
- (void) matchmakerViewControllerWasCancelled:
(GKMatchmakerViewController *)viewController
{
[self dismissViewControllerAnimated:YES completion:nil];
}
- (void) matchmakerViewController:(GKMatchmakerViewController *)viewController
didFailWithError:(NSError *)error
{
[self dismissViewControllerAnimated:YES completion:nil];
NSLog(@"Error creating match: %@",
error.localizedFailureReason);
}
Recipe: Responding to the Matchmaker
Implement the (optional) matchmakerViewController:didFindMatch: method to start a Game Center-hosted game. (For your own server-hosted games, implement the players-found callback instead.) The match-found delegate method is called after making a successful match between your application’s current player and an external player on another device.
Upon finding a match, Recipe 11-8 checks to see if you’ve already started playing—sometimes, race conditions mean that you’ve already set up another match first. Otherwise, it dismisses the matchmaker controller, saves the match to a local instance variable, and sets the match’s delegate. This is a different delegate from the matchmaker delegate; a match delegate handles in-game state updates, just as the matchmaker delegate handles pre-game ones.
The delegate declares the GKMatchDelegate protocol. It receives data and status updates from the other parties in the game. It handles the actual gameplay after the match has been made.
Hold onto the match in a local variable. You can use that object to send data to other players. It also enables you to send queries, offer voice chatting, and disconnect an in-progress game.
Recipe 11-8. Responding to a Found Match
- (void) matchmakerViewController:
(GKMatchmakerViewController *)viewController
didFindMatch:(GKMatch *)aMatch
{
// Already playing. Ignore.
if (matchStarted)
return;
if (viewController)
{
[self dismissModalViewControllerAnimated:YES];
match = aMatch;
match.delegate = self;
self.navigationItem.rightBarButtonItem = nil;
}
// Normal matches now wait for player connection
// Invited connections may be ready to go now. If so, begin
if (!matchStarted && !match.expectedPlayerCount)
{
// Start game!
[self activateGameGUI];
}
}
Get This Recipe’s Code
To find this recipe’s full sample project, point your browser to https://github.com/erica/iOS-6-Advanced-Cookbook and go to the folder for Chapter 11.
Starting the Game
After a match has been made, wait until the match’s expectedPlayerCount goes down to zero before you start game play. Each time a player connects, the number decreases by one. When it hits zero, all players are connected and your game can start the actual match.
There are two points, programmatically, at which the count may hit zero, at which your game can get going. It may take place in the matchmaker’s match-found callback, or it may take place in the match delegate’s match:player:didChangeState: callback. Check in both locations.
Typically, invited games go live in the matchmaker callback and auto-match games go live in the player state callback, when the player state changes to connected. This trips up developers when they first implement matching in their apps. The sample code that accompanies this chapter demonstrates both situations.
Recipe: Creating an Invitation Handler
Your application can decide in advance how it will automatically handle invitation requests. By establishing an invitation handler, you create a code block that will be executed whenever the shared matchmaker object receives an invitation. This inviteHandler property of the shared matchmaker should be set early in your application’s interactions with Game Center.
This handler, shown in Recipe 11-9, takes two arguments, an invitation and an array of players. When your game receives a direct invitation, the invitation parameter is used and set to some non-nil value. When you detect an invitation, the match has already been established; you should not create a new match request. Instead, just present a matchmaker view controller preloaded with the invitation details. Your user then waits for the host to start the game. The view controller offers a Cancel option, which allows the user to dismiss the view controller and cancel the invitation. Only the host will see a Play Now button.
The finishMatch method called here may be as simple as sending disconnect to the current match object and resetting the game GUI to its initial state.
Recipe 11-9. Implementing an Invitation Handler
- (void) addInvitationHandler
{
[GKMatchmaker sharedMatchmaker].inviteHandler =
^(GKInvite *invitation, NSArray *playersToInvite)
{
// This cleans up any in-progress game and changes
// the focus to handling the invitation. YMMV.
[self finishMatch];
if (invitation)
{
GKMatchmakerViewController *mmvc =
[[GKMatchmakerViewController alloc]
initWithInvite:invitation];
mmvc.matchmakerDelegate = self;
[self presentViewController:mmvc
animated:YES completion:nil];
}
else if (playersToInvite)
{
GKMatchRequest *request = [[GKMatchRequest alloc] init];
request.minPlayers = 2;
request.maxPlayers = 2; // 2-player matches for this example
request.playersToInvite = playersToInvite;
GKMatchmakerViewController *mmvc =
[[GKMatchmakerViewController alloc]
initWithMatchRequest:request];
mmvc.matchmakerDelegate = self;
[self presentViewController:mmvc
animated:YES completion:nil];
}
};
}
Get This Recipe’s Code
To find this recipe’s full sample project, point your browser to https://github.com/erica/iOS-6-Advanced-Cookbook and go to the folder for Chapter 11.
Managing Match State
After establishing a match, the match delegate manages changes in the match state. The two ways things usually fall apart include failed matches (the connection to Game Center drops) and a failed player connection. (That is, the connection from Game Center to another player breaks.)
Respond to failed matches by alerting the user, cleaning up your ongoing gameplay, and reverting to a prematch ready-to-play state, as shown in the following method:
- (void)match:(GKMatch *) aMatch didFailWithError:(NSError *)error
{
// Revert GUI
[self setPrematchGUI];
// Alert the user
alert(@"Lost Game Center Connection: %@",
error.localizedDescription);
}
For lost players, you can either treat the game as ended, as is done in the following method, or you might want to alert the user and wait for the other player to reconnect:
- (void)match:(GKMatch *) aMatch
connectionWithPlayerFailed:(NSString *)playerID
withError:(NSError *)error
{
NSLog(@"Connection failed with player %@: %@",
playerID, error.localizedFailureReason);
[self setPrematchGUI];
}
To simplify reconnection, implement an optional delegate method. When this method returns YES, Game Center automatically reinvites the player whose connection was lost:
- (BOOL)match:(GKMatch *) aMatch
shouldReinvitePlayer:(NSString *)playerID
{
return YES;
}
Recipe: Handling Player State Changes
Although disconnect notices are generated when players’ device go to sleep or they lose their Internet connection, players can change state in a more orderly fashion as well. For example, a player might tap a Quit button, with the application sending disconnect to the match object. This sends a proper state change before disconnecting and does not invoke the reinvite query that a lost connection does.
Your application also receives state changes when players first connect. This is where you should check the current match’s expected player count, launching the game when the count goes down to zero.
Recipe 11-10 handles state callbacks for both connect and disconnect events, showing an example of how you might react to both of these state changes:
Recipe 11-10. Responding to Player State
- (void)match:(GKMatch *) aMatch
player: (NSString *) playerID
didChangeState: (GKPlayerConnectionState) state
{
if (state == GKPlayerStateDisconnected)
{
NSLog(@"Player %@ disconnected", playerID);
[match disconnect];
[self setPrematchGUI];
}
else if (state == GKPlayerStateConnected)
{
if (!matchStarted && !match.expectedPlayerCount)
{
[GKPlayer loadPlayersForIdentifiers:@[playerID]
withCompletionHandler:
^(NSArray *players, NSError *error)
{
[self activateGameGUI];
NSString *opponentName = playerID;
if (!error)
{
GKPlayer *opponent = [players lastObject];
opponentName = opponent.displayName;
}
alert(@"Commencing Match with %@", opponentName);
}];
}
else
{
NSLog(@"Player state changed to unknown");
}
}
Get This Recipe’s Code
To find this recipe’s full sample project, point your browser to https://github.com/erica/iOS-6-Advanced-Cookbook and go to the folder for Chapter 11.
Recipe: Retrieving Player Names
Matches use player identifiers, not player names. Identifiers are basically numerical indicators of a particular Game Center player in the form of a string. You can retrieve an array of GKPlayer objects, with their human-readable displayName name property, on demand. This operation runs asynchronously, so if you want to display the “name” of your new opponent, you must wait for the completion block to execute. Store the opponent (or opponents) locally, as demonstrated in Recipe 11-11, so you do not need to run this operation more than once. The PlayerHelper class used in Recipe 11-13 and later demonstrates how to do this.
Recipe 11-11. Loading Opponent Name
// Retrieve the player information for the opponent
[GKPlayer loadPlayersForIdentifiers:@[playerID]
withCompletionHandler:^(NSArray *players, NSError *error)
{
[self activateGameGUI];
if (error) return;
// Store the opponent object (2-player game)
opponent = [players lastObject];
// Announce the match
GKPlayer *opponent = [players lastObject];
alert(@"Commencing Match with %@", opponent.displayName);
}];
Get This Recipe’s Code
To find this recipe’s full sample project, point your browser to https://github.com/erica/iOS-6-Advanced-Cookbook and go to the folder for Chapter 11.
Comparing Players
You often compare players by their IDs. The following two functions offer solutions for these checks:
BOOL playerEqual(GKPlayer *p1, GKPlayer *p2)
{
return [p1.playerID isEqualToString:p2.playerID];
}
BOOL playerIDCheck(GKPlayer *p1, NSString *playerID)
{
return [p1.playerID isEqualToString:playerID];
}
Retrieving the Local Player
The GKLocalPlayer class offers instant access to the player currently interacting with your application:
GKPlayer *me()
{
return [GKLocalPlayer localPlayer];
}
Game Play
Games primarily involve sending data back and forth through the GKMatch object and updating the local GUI to reflect any remote changes. Generally, you need to send tiny bits of data quickly for real-time updates. You can bend or break this rule as needed, especially if you don’t need your updates to arrive quickly. Matches use two kinds of data transmission: reliable and unreliable.
If your data must arrive coherently and cannot be lost, use reliable transmission. Reliable transmissions are delivered in the order they are sent, are guaranteed to arrive, and will be re-sent until they are fully transmitted. Think Transmission Control Protocol (TCP) transmission when working with reliable connections.
Unreliable data is sent once and may be received out-of-order by recipients. Use this approach for data that arrives in small packets but that must use near-instantaneous transmission to be useful, such as in a live shooting action game. Think User Datagram Protocol (UDP) transmission for unreliable connections.
Here’s an example of a simple texting application that sends string data as it is typed into a sending text view. It uses reliable transmission ensuring that every character is transmitted in order as it is typed. As the application receives data, it converts that information back into a string and shows it on the receiving text view:
- (void)textViewDidChange:(UITextView *)textView
{
NSError *error;
NSData *dataToSend =
[sendingView.text dataUsingEncoding:NSUTF8StringEncoding];
BOOL success = [match sendDataToAllPlayers:dataToSend
withDataMode:GKMatchSendDataReliable error:&error];
if (!success)
NSLog(@"Error sending match data: %@", error.localizedFailureReason);
}
- (void)match:(GKMatch *) aMatch didReceiveData:(NSData *)data
fromPlayer:(NSString *)playerID
{
NSString *received = [[NSString alloc]
initWithData:data encoding:NSUTF8StringEncoding];
receivingView.text = received;
}
Serializing Data
When sending data for complex gameplay, you may want to send information that’s more structured than simple strings. JSON serialization provides an easy-to-use solution for compact structured data objects, both for dictionaries with key/value pairs and arrays with information sent in a key-less pre-ordained order. For example, imagine you have an application that “rolls” a local die and then transmits its value. Rolling a number might be just one action among many that a game might use. Creating a key/value dictionary pair enables your game to differentiate between rolls, moving pieces, selecting cards, and other game-specific commands:
// Roll the [1d6] die
localRoll = @((random() % 6) + 1);
// Create an info dictionary for the roll
NSDictionary *dictionary = @{@"Roll" : localRoll};
// Transmit the roll as serialized JSON data
NSData *json = [NSJSONSerialization
dataWithJSONObject:dictionary options:0 error:nil];
[match sendDataToAllPlayers:json
withDataMode:GKMatchSendDataReliable error:nil];
On the receiving side, the other player’s app can deserialize the data, recover the roll value, and apply it locally. More complex actions (for example, if the player has several pieces that can be moved, not just one) require slightly more complicated structures, but the send and receive components remain the same: Convert a JSON-serializable object to data, send it, and translate it back to the object form on the receiving end:
- (void)match:(GKMatch *) aMatch
didReceiveData:(NSData *)data
fromPlayer:(NSString *)playerID
{
NSDictionary *dict =
[NSJSONSerialization JSONObjectWithData:data
options:0 error:nil];
NSString *key = [[dict allKeys] lastObject];
if (!key) return;
if ([key isEqualToString:@"Roll"])
{
// take action here, e.g. move n spaces
// or extract which piece to move
}
}
Top-level JSON-serializable objects must be arrays or dictionaries. Below that, they can contain further arrays, dictionaries, strings, numbers, and NSNull instances. Numbers cannot be NaN (the “not a number” value) or infinity. You can test whether your objects are valid JSON instances by calling isValidJSONObject:.
Sending Other Forms of Data
Although JSON serialization is simple to implement, it may not provide sufficient flexibility for your needs. If you need to send NSData or NSDate objects in addition to your dictionaries, arrays, strings, or numbers, you may want to investigate standard property list serialization instead.
Property lists provide a helpful abstract data type. A property list object can point to data (NSData), strings (NSString), arrays (NSArray), dictionaries (NSDictionary), dates (NSDate), and numbers (NSNumber). When working with collection objects (that is, arrays and dictionaries), all members and keys must be property list objects as well (that is, data, strings, numbers, and dates, as well as embedded arrays and dictionaries).
Although that seems limiting, you can transform most structures and objects to and from strings. For example, you can use the built-in NSStringFromCGPoint() or NSStringFromClass() functions, or you can create your own. The following pair of methods extends the UIColor class, providing functionality needed to send color information across a GameKit connection as strings:
@implementation UIColor (utilities)
- (NSString *) stringFromColor
{
// Recover the color space and store RGB or monochrome color
const CGFloat *c = CGColorGetComponents(self.CGColor);
CGColorSpaceModel csm =
CGColorSpaceGetModel(CGColorGetColorSpace(self.CGColor));
return (csm == kCGColorSpaceModelRGB) ?
[NSString stringWithFormat:@"%0.2f %0.2f %0.2f %0.2f",
c[0], c[1], c[2], c[3]] :
[NSString stringWithFormat:@"%0.2f %0.2f %0.2f %0.2f",
c[0], c[0], c[0], c[1]];
}
+ (UIColor *) colorWithString: (NSString *) colorString
{
// Read a color back from a string
const CGFloat c[4];
sscanf([colorString cStringUsingEncoding:NSUTF8StringEncoding],
"%f %f %f %f", &c[0], &c[1], &c[2], &c[3]);
return [UIColor colorWithRed:c[0] green:c[1] blue:c[2] alpha:c[3]];
}
@end
When in property list form, you can serialize your data and send it as a single chunk. On receipt, the deserialized data is ready to use. Listing 11-1 shows example transmit and receivedData: methods that handle serialization and deserialization. This code comes from a sample that stores various kinds of game state in an NSDictionary object.
Note
You can use the NSKeyedArchiver and NSKeyedUnarchiver classes, as well as the NSPropertyListSerialization class and CFPropertyListCreateWithData function demonstrated here.
Listing 11-1. Serializing and Deserializing Property Lists
- (void) transmit
{
NSString *errorString;
// Send a copy of the local points to the peer
// by serializing the property list into data
NSData *plistdata = [NSPropertyListSerialization
dataFromPropertyList:pointData
format:NSPropertyListXMLFormat_v1_0
errorDescription:&errorString];
if (plistdata)
[match sendDataToAllPlayers: plistdata
withDataMode:GKMatchSendDataReliable error:nil];
else
NSLog(@"Error serializing property list: %@", errorString);
}
- (void)match:(GKMatch *) aMatch
didReceiveData:(NSData *)data
fromPlayer:(NSString *)playerID
{
// Deserialize the data back into a property list
CFStringRef errorString;
CFPropertyListRef plist =
CFPropertyListCreateWithData (kCFAllocatorDefault,
(CFDataRef)data, kCFPropertyListMutableContainers,
kCFPropertyListXMLFormat_v1_0, &errorString);
if (!plist)
{
NSLog(@"Error deserializating data: %@", errorString);
return;
}
// Do something with the received data
}
Recipe: Synchronizing Data
Although Apple provides a turn-by-turn gaming option via Game Center (see the following section), you may want to develop games that perform similar features in a more immediate atmosphere, where gamers are not free to leave and return to take their turn. You can implement a turn-by-turn style game for direct matches by synchronizing data between each player. For example, one of the most common tasks for turn-based games is to choose who goes first. You can create your own roll-for-first system by generating a random number and comparing it to your opponent’s.
Because each application may be slightly out of sync with the other, never assume that your roll will occur before or after the other player’s. Instead, store both values locally, and wait until both items are available before checking for a winner. That means you should call your startup check both in the received-data method and in the method that performs the roll on your side.
Recipe 11-12 demonstrates how to do this. It always checks to see if it’s resolved a winner. If so, the method returns because it may be called more than once after a winner has been selected. Next, it checks for the existence of both a local and remote roll. Only when those two are available does it move on to the check.
In the case of a tie, it resets both values and starts a new roll and check. Otherwise, it selects the winner (higher value wins here) and starts the game play either deferring to the other player (opponentGoesFirst) or not.
Recipe 11-12. Rolling for First Position
- (void) checkStartupWinner
{
// Already resolved the startup winner?
if (startupResolved)
return;
// Need data from both remote and local rolls in order to
// determine a winner
if (!remoteRoll || !localRoll)
{
[self performSelector:@selector(checkStartupWinner)
withObject:nil afterDelay:1.0f];
return;
}
// Both rolls are in. Decide a winner
NSLog(@"Remote roll: %@, local roll: %@", remoteRoll, localRoll);
unsigned int local = localRoll.unsignedIntValue;
unsigned int remote = remoteRoll.unsignedIntValue;
// Handle a tie conflict by resetting and trying again
if (local == remote)
{
NSLog(@"TIE!");
remoteRoll = nil;
localRoll = nil;
[self sendRoll:GKROLLFORFIRST];
return;
}
startupResolved = YES;
if (remote > local)
{
// they go first.
opponentGoesFirst = YES;
}
else
{
// you go first
opponentGoesFirst = NO;
}
// reset both rolls
localRoll = nil;
remoteRoll = nil;
}
Get This Recipe’s Code
To find this recipe’s full sample project, point your browser to https://github.com/erica/iOS-6-Advanced-Cookbook and go to the folder for Chapter 11.
Recipe: Turn-by-Turn Matchmaking
Turn-based matches enable your applications to hook into a Game Center feature that moderates games based on one-at-a-time gameplay, such as checkers, gin rummy, Scrabble, or bridge. It introduces store-and-forward game state, allowing each player to make a move and then pass that updated state back to the Game Center store.
The turn-based matchmaker enables users to connect both anonymously and by invitation, just as the standard game matchmaker does. What differs is how you establish your game and how game control moves from person to person to person by passing a virtual “baton.” The person holding that baton has control of the game until she makes a move.
From there, the baton is passed to the next player—it may be the next player in order or someone based on another rule. For example, after each full round it might pass to the person with the highest score or the lowest. Or a player might choose whom to discard an item to, passing game control at the same time.
How you implement that control is up to you and the requirements of your game. How you establish a match and implement turn-by-turn follows a few basic patterns. The process to initiate a turn-by-turn match mirrors the approach for standard games. You create the same kind of standard match request, specifying the minimum and maximum number of players.
Use that request to initialize a GKTurnBasedMatchmakerViewController and present it. Your handler class implements the GKTurnBasedMatchmakerView-ControllerDelegate protocol. The delegate responds to successful and unsuccessful match attempts. Setting the showExistingMatches property to YES enables your user to select from a new match as well as presenting existing matches. Recipe 11-13 shows the steps involved in requesting a match. This implementation may return a brand-new match or a match that’s already in-progress.
The turn-by-turn matchmaker doesn’t always succeed. As with standard game center controllers, respond to the user tapping the Cancel button and to any connection fail situations. Implement basic responses to these situations that dismiss the controller and then restore the interface to a state where the user can try again to establish a match.
Recipe 11-13. Starting a Match
// Build a 2-player match request
- (GKMatchRequest *) matchRequest
{
GKMatchRequest *request = [[GKMatchRequest alloc] init];
request.minPlayers = 2; // Between 2 and 4
request.maxPlayers = 2; // Betseen 2 and 4
return request;
}
// Request a match from the turn-based matchmaker
- (void) requestMatch
{
GKMatchRequest *request = [self buildMatchRequest];
GKTurnBasedMatchmakerViewController *viewController =
[[GKTurnBasedMatchmakerViewController alloc]
initWithMatchRequest:request];
viewController.turnBasedMatchmakerDelegate = self;
viewController.showExistingMatches = YES;
[self presentViewController:viewController
animated:YES completion:nil];
}
// User selected match
- (void)turnBasedMatchmakerViewController:
(GKTurnBasedMatchmakerViewController *)viewController
didFindMatch:(GKTurnBasedMatch *)aMatch
{
// Handle dismissal
if (viewController)
[_delegate dismissViewControllerAnimated:YES completion:nil];
// Add match to matches
MatchHelper *helper = [MatchHelper helperForMatch:match];
_matchDictionary[match.matchID] = helper;
[helper loadData];
[helper loadParticipants];
// Set this match to the current match
[_delegate chooseMatch:helper];
}
// Game Center Fail
- (void)turnBasedMatchmakerViewController:
(GKTurnBasedMatchmakerViewController *)viewController
didFailWithError:(NSError *)error
{
[self dismissViewControllerAnimated:YES completion:^(){
alert("Error creating match: %@",
error.localizedDescription);
}];
}
// User cancel
- (void)turnBasedMatchmakerViewControllerWasCancelled:
(GKTurnBasedMatchmakerViewController *)viewController
{
[self dismissViewControllerAnimated:YES completion:nil];
}
To find this recipe’s full sample project, point your browser to https://github.com/erica/iOS-6-Advanced-Cookbook and go to the folder for Chapter 11.
Recipe: Responding to Turn-Based Invitations
As with many Game Center features, your code should handle both in-game match requests and external invitation requests. Game updates such as invitations are processed through a handler delegate, as shown in Recipe 11-14. Declare and implement the GKTurnBasedEventHandlerDelegate. This protocol offers the invitation entry-point for matchmaking and allows your application to respond to turn-by-turn updates.
To subscribe, set the event handler’s delegate as follows. This is a shared handler, which updates you for all matches your user is currently involved with in your game:
[GKTurnBasedEventHandler sharedTurnBasedEventHandler].delegate
= turnByTurnHelper;
After establishing the delegate, you may receive invitation callbacks. These invitations originate from other players and are specifically targeted toward their friends. Implement the handleInviteFromGameCenter: method to respond to them.
As before with user-directed matchmaking, you set the matchmaking controller’s match request. With invitations, however, you set the request’s playersToInvite property to the array passed to you. Further, set the view controller’s showExistingMatches property to NO. When handling an invitation, you should work only with the match you’ve been invited to.
Recipe 11-14. Handling Invitations
- (void)handleInviteFromGameCenter:
(NSArray *)playersToInvite
{
GKMatchRequest *request = [self matchRequest];
request.playersToInvite = playersToInvite;
GKTurnBasedMatchmakerViewController *viewController =
[[GKTurnBasedMatchmakerViewController alloc]
initWithMatchRequest:request];
viewController.showExistingMatches = NO;
viewController.turnBasedMatchmakerDelegate = self;
[_delegate presentViewController:viewController
animated:YES completion:nil];
}
To find this recipe’s full sample project, point your browser to https://github.com/erica/iOS-6-Advanced-Cookbook and go to the folder for Chapter 11.
Recipe: Loading Matches
Each time your game launches and your player authenticates, you should check in with game center. Set the GKTurnBasedEventHandler delegate to catch turn and state changes, and load in any existing matches that your player may be involved in. Turn-by-turn matches can go on for days, weeks, or months, and your player may have any number of matches in progress:
[[NSNotificationCenter defaultCenter] addObserverForName:
GKPlayerAuthenticationDidChangeNotificationName
object:nil queue:[NSOperationQueue mainQueue]
usingBlock:^(NSNotification *notification)
{
BOOL authenticated =
[GKLocalPlayer localPlayer].isAuthenticated;
if (authenticated)
{
turnByTurnHelper = [[TurnByTurnHelper alloc] init];
turnByTurnHelper.delegate = self;
[GKTurnBasedEventHandler
sharedTurnBasedEventHandler].delegate = turnByTurnHelper;
[turnByTurnHelper loadMatchesWithCompletion:^()
{
[weakself nextMatch];
}];
}
}];
Recipe 11-15 demonstrates how to request a set of current matches. This process runs asynchronously, so this implementation includes a completion handler that runs on the main thread, enabling you to set up the game interface after the match data fully arrives.
This method stores recovered matches in a local dictionary, using a custom MatchHelper class to manage each match. As you see, the helper’s first task is to load the match data and participants, which also takes time to finish downloading.
Although match participant IDs are immediately available as soon as the match finishes loading from the game center, the actual player names (see Recipe 11-11), photos, and the data representing the state of the current match are not.
Recipe 11-15. Loading Matches from Game Center
- (void) loadMatchesWithCompletion: (CompletionBlock) completion
{
if (!_matchDictionary)
_matchDictionary = [NSMutableDictionary dictionary];
NSLog(@"Loading matches from Game Center");
[GKTurnBasedMatch loadMatchesWithCompletionHandler:
^(NSArray *theMatches, NSError *error)
{
if (error)
{
NSLog(@"Error retrieving matches: %@",
error.localizedDescription);
return;
}
NSLog(@"Number of matches: %d", theMatches.count);
for (GKTurnBasedMatch *match in theMatches)
{
MatchHelper *helper = [MatchHelper helperForMatch:match];
_matchDictionary[match.matchID] = helper;
[helper loadData];
[helper loadParticipants];
}
[[NSOperationQueue mainQueue] addOperationWithBlock:^()
{
if (completion)
completion();
}];
}];
}
Get This Recipe’s Code
To find this recipe’s full sample project, point your browser to https://github.com/erica/iOS-6-Advanced-Cookbook and go to the folder for Chapter 11.
Recipe: Responding to Game Play
As you already know, the GKTurnBasedEventHandlerDelegate offers a way to respond to external invitations. The same protocol enables you to know when turns occur. These happen after users finish a turn and update the game data, and when a user quits. Your game determines what the actual scenario is upon receiving this callback and responds accordingly.
Recipe 11-16 offers a handful of methods that derive from several classes in the sample code. These are put together like this so that you can see how the flow progresses. The recipe starts with the turn callback, which calls the game’s takeTurn: method on the main thread.
This method proceeds by checking whether the updated turn is for the displayed game. If a user is involved in several games, the update may arrive from a game that he is not currently viewing.
It also checks whether the updated match has finished. A match is done when its state updates to done. For a simple two-player game, you can also consider it finished when any match participant’s state updates to done as well. What’s “done” for one is also “done” for all. This is not the case for all games. You could imagine a multiplayer match where one character has died but the others continue fighting. Adapt this approach for your specific gameplay requirements.
The takeTurn: method works by checking each possibility. If the other player has quit but the game is still ongoing, it ends the match. If the match is ongoing, it checks which player’s turn it is and updates the GUI to reflect that state. In updating the GUI, don’t forget to request the latest gameplay data, so your user is ready to play only after that data arrives.
After allowing the local user to proceed with the game, complete the turn by calling the match’s end turn method. You pass the updated game state data and an array of the next participants in order. For a two-player game, that array is simply the other participant.
Unlike game-ending requests, it doesn’t matter whether that other participant has been matched yet. To get another player to join your new game, you must take a first turn before a second player can be found. When testing, always take the first turn on one device before trying to join the match on the second.
Recipe 11-16. Handling Turn Events
// This is a Turn Event Delegate Method
- (void)handleTurnEventForMatch:(GKTurnBasedMatch *) match
didBecomeActive:(BOOL)didBecomeActive
{
MatchHelper *helper = [self matchForID:match.matchID];
helper.didBecomeActive = didBecomeActive;
[helper loadDataWithCompletion:^(BOOL success) {
if (!success) return;
[[NSOperationQueue mainQueue] addOperationWithBlock:^()
{
[_delegate takeTurn:helper];
}];
}];
}
// This game method is called by the delegate
- (void) takeTurn: (MatchHelper *) match
{
BOOL isCurrentMatch =
matchEqual(currentMatch.match, match.match);
BOOL matchEnded = match.matchIsDone;
// Should I quit?
if (matchEnded && match.amActive)
{
[match winMatch];
}
// Update ended match?
if (matchEnded)
{
if (isCurrentMatch)
[self chooseMatch:currentMatch];
else
alert(@"Match %@ has ended", match.matchID);
return;
}
// Match has not ended. It is someone's turn
if (!isCurrentMatch && match.isMyTurn)
{
alert(@"Your turn for match %@", match.matchID);
return;
}
if (!isCurrentMatch)
{
NSLog(@"Non-turn activity on match %@", match.matchID);
return;
}
// It is the current match and it is your turn
[self chooseMatch:currentMatch];
}
// The following helper methods are implemented by the
// match helper class to support gameplay
- (BOOL) isMyTurn
{
if (!_match.currentParticipant.playerID)
return NO;
return playerIDCheck(me(),
_match.currentParticipant.playerID);
}
- (BOOL) amActive
{
GKTurnBasedParticipant *me = myParticipantForMatch(_match);
return (me.status == GKTurnBasedParticipantStatusActive);
}
- (BOOL) matchIsDone
{
if (_match.status == GKTurnBasedMatchStatusEnded)
return YES;
// Note -- this assumes "done for one is done for all"
for (GKTurnBasedParticipant *participant in _match.participants)
{
if (participant.status == GKTurnBasedParticipantStatusDone)
return YES;
}
return NO;
}
// End turn at this player's end
- (void) endTurnWithTimeout: (NSTimeInterval) timeout
withCompletion: (SuccessBlock) completion
{
if (!myCurrentPlayerForMatch(_match))
{
NSLog(@"Error: You are not current player for match %@",
_match.matchID);
return;
}
NSMutableArray *participants = [NSMutableArray
arrayWithArray:_match.participants];
GKTurnBasedParticipant *me = myParticipantForMatch(_match);
[participants removeObject:me];
// Unlike ending games, it's okay to pass unmatched participants
// to the following method
[_match endTurnWithNextParticipants:participants
turnTimeout:timeout
matchData:_data
completionHandler:^(NSError *error)
{
if (error)
NSLog(@"Error completing turn: %@", error.localizedDescription);
[[NSOperationQueue mainQueue] addOperationWithBlock:^()
{
if (completion)
completion(error == nil);
}];
}];
}
Get This Recipe’s Code
To find this recipe’s full sample project, point your browser to https://github.com/erica/iOS-6-Advanced-Cookbook and go to the folder for Chapter 11.
Recipe: Ending Gameplay
Most games eventually come to an end. Players may quit, win, lose, draw, or come in at some place such as second, third, or fourth. Your game can produce one of these scenarios, or your user may quit directly from a Game Center view controller. The following method catches the GUI callback and redirects the quit request to my match helper class:
// Quit through GUI
- (void)turnBasedMatchmakerViewController:
(GKTurnBasedMatchmakerViewController *)viewController
playerQuitForMatch:(GKTurnBasedMatch *) match
{
if (viewController)
[_delegate dismissViewControllerAnimated:YES completion:nil];
MatchHelper *helper = _matchDictionary[match.matchID];
[helper quitMatch];
}
Recipe 11-17 shows how you can terminate matches, regardless of whether it’s your player’s turn (“in turn”) or not (“out of turn”).
Each match has an outcome. This is an enumeration that specifies the player’s state at the end of gameplay. Game Center uses these states to display completed matches that have not yet been removed from the system. The legal outcomes supported by Game Center are as follows:
• GKTurnBasedMatchOutcomeNone
• GKTurnBasedMatchOutcomeQuit
• GKTurnBasedMatchOutcomeLost
• GKTurnBasedMatchOutcomeTied
• GKTurnBasedMatchOutcomeTimeExpired
• GKTurnBasedMatchOutcomeFirst
• GKTurnBasedMatchOutcomeSecond
• GKTurnBasedMatchOutcomeThird
• GKTurnBasedMatchOutcomeFourth
• GKTurnBasedMatchOutcomeCustomRange
When quitting in-turn, you must pass an array of participants to the nextParticipants: parameter. Never do this with unmatched players—that is, players that Game Center has not yet found for you. If there are no other legitimate players yet (check the participant PlayerIDs to be sure; if they are nil, the player is unmatched), quit out of turn instead.
// Quit immediately
- (void) quitOutOfTurnWithOutcome:
(GKTurnBasedMatchOutcome) outcome
{
GKTurnBasedParticipant *participant =
myParticipantForMatch(_match);
participant.matchOutcome = outcome;
[_match participantQuitOutOfTurnWithOutcome:outcome
withCompletionHandler:^(NSError *error)
{
if (error)
NSLog(@"Error while quitting match out of turn %@: %@",
_match.matchID, error.localizedDescription);
else
NSLog(@"Participant quit match out of turn: %@",
_match.matchID);
}];
}
// Finish the game
- (void) finishMatchWithOutcome:
(GKTurnBasedMatchOutcome) outcome
{
GKTurnBasedParticipant *participant =
myParticipantForMatch(_match);
if (!participant)
{
NSLog(@"Error: Cannot finish game.
You are not playing in match %@.", _match.matchID);
return;
}
participant.matchOutcome = outcome;
NSArray *participants = self.otherCurrentParticipants;
BOOL isCurrent = myCurrentPlayerForMatch(_match);
if ((participants.count == 0) || !isCurrent)
{
// no other valid players or out of turn
[self quitOutOfTurnWithOutcome:outcome];
return;
}
[_match participantQuitInTurnWithOutcome:outcome
nextParticipants:participants
turnTimeout:GKTurnTimeoutNone
matchData:_data
completionHandler:^(NSError *error)
{
if (error)
NSLog(@"Error while quitting match %@ in turn: %@",
_match.matchID, error.localizedDescription);
else
NSLog(@"Participant did quit in turn");
}];
}
// You quit the game
- (void) quitMatch
{
[self finishMatchWithOutcome:GKTurnBasedMatchOutcomeQuit];
}
// You win the game
- (void) winMatch
{
[self finishMatchWithOutcome:GKTurnBasedMatchOutcomeWon];
}
// You lose the game
- (void) loseMatch
{
[self finishMatchWithOutcome:GKTurnBasedMatchOutcomeLost];
}
To find this recipe’s full sample project, point your browser to https://github.com/erica/iOS-6-Advanced-Cookbook and go to the folder for Chapter 11.
Recipe: Removing Matches
After a game is over, you can request its removal from the Game Center. Make sure your player has finished playing. You cannot remove a game where your player is active. The following method requests Game Center removal. This method won’t error out—but it will also not succeed—if any other players are still active in the game. For this reason, take special care with your bookkeeping after requesting a match removal:
- (void) removeFromGameCenter
{
[_match removeWithCompletionHandler:^(NSError * error)
{
if (error)
{
NSLog(@"Error removing match %@: %@",
_match.matchID, error.localizedDescription);
return;
}
NSLog(@"Match %@ removed from Game Center",
_match.matchID);
_terminated = YES;
}];
}
During debugging, there are times that you simply want to clear out all ongoing matches for a test user. Recipe 11-18 takes a brute-force approach, quitting and removing all current matches. This method is obviously not meant for deployment to App Store end users but provides a handy tool in your debugging arsenal.
Recipe 11-18. Obliterating Game Center Matches for the Current Player
- (void) removeAllMatches
{
// This is nuclear armageddon. Prepare!
[GKTurnBasedMatch loadMatchesWithCompletionHandler:
^(NSArray *matches, NSError *error)
{
if (error)
{
NSLog(@"Error loading matches: %@",
error.localizedFailureReason);
return;
}
NSLog(@"Attempting to remove %d matches", matches.count);
for (MatchHelper *helper in _matchDictionary.allValues)
{
GKTurnBasedMatch *aMatch = helper.match;
GKTurnBasedParticipant *me =
myParticipantForMatch(aMatch);
if (me && (me.status ==
GKTurnBasedParticipantStatusActive))
{
NSLog(@"Quitting match %@", aMatch.matchID);
[helper quitOutOfTurnWithOutcome:
GKTurnBasedMatchOutcomeQuit];
sleep(1);
NSLog(@"Removing Match %@", aMatch.matchID);
[_matchDictionary removeObjectForKey:aMatch.matchID];
[helper removeFromGameCenter];
}
else
{
NSLog(@"Removing Match %@", aMatch.matchID);
[_matchDictionary removeObjectForKey:aMatch.matchID];
[helper removeFromGameCenter];
}
}
}];
}
Get This Recipe’s Code
To find this recipe’s full sample project, point your browser to https://github.com/erica/iOS-6-Advanced-Cookbook and go to the folder for Chapter 11.
Recipe: Game Center Voice
Each Game Center match can establish voice chats. These work best as push-to-talk walkie-talkies between players. Your application can create a group chat for everyone, limit chat between team members, or create a single one-to-one channel between two players. That’s because all chats are named. When players connect into the same-named chat, they can hear and participate in that chat. Your application controls the names, and API-provided hooks enable you to build some high-level GUI controls to manage the chat.
Make sure to test Voice Chat connected to Wi-Fi, not to your cellular network data, as you may encounter errors when trying to connect to the chat.
Testing for Chat Availability
Before offering chat to your users, test whether the feature is available. The GKVoiceChat class offers a simple check that determines whether Voice over IP is currently permitted on the device. As Apple puts it in its documentation, “Some countries or phone carriers may restrict the availability of voice over IP services.”
if (![GKVoiceChat isVoIPAllowed])
return;
Establishing a Play and Record Audio Session
To use Game Center Voice, you need to link your project to the AVFoundation framework. Then, as the program launches, set the shared AVFoundation audio session to use a play-and-record category. Recipe 11-19 updates the shared session to both play and record audio.
Recipe 11-19. Establishing an Audio Session for Voice Chat
- (BOOL) establishPlayAndRecordAudioSession
{
NSLog(@"Establishing Audio Session");
NSError *error;
AVAudioSession *audioSession =
[AVAudioSession sharedInstance];
BOOL success = [audioSession setCategory:
AVAudioSessionCategoryPlayAndRecord error:&error];
if (!success)
{
NSLog(@"Error setting session category: %@",
error.localizedDescription);
return NO;
}
else
{
success = [audioSession setActive: YES error: &error];
if (success)
{
NSLog(@"Audio session is active");
return YES;
}
else
{
NSLog(@"Error activating audio session: %@",
error.localizedDescription);
return NO;
}
}
return NO;
}
Get This Recipe’s Code
To find this recipe’s full sample project, point your browser to https://github.com/erica/iOS-6-Advanced-Cookbook and go to the folder for Chapter 11.
Creating a Voice Chat
Create and hold onto a GKVoiceChat instance for each chat you want to use within your application, typically by assigning it to a strong instance variable or an array. Each voice chat channel uses a simple string to identify it. For example, you might create a “GeneralChat” for your match:
chat = [match voiceChatWithName:@"GeneralChat"];
There are no further security elements in place. All chats are limited to the current match and are controlled by your application. You programmatically provide access to the chats as required.
Starting and Stopping a Chat
To start your chat, create it, set its active property to NO, optionally initialize its volume property, and send it the start message. The chat is immediately ready to use but will not start recording or sending data yet. It won’t do that until you explicitly make it active:
chat = [match voiceChatWithName:@"GeneralChat"];
chat.active = NO;
chat.volume = 1.0f;
[chat start];
To finish a chat, send it stop. You can start it again later or, if you reassign the variable that is holding onto it, allow it to be deallocated:
[chat stop];
chat = nil;
Chat State Monitoring
When you call start or stop on a chat, Game Center sends out notifications that the local player has joined the chat. There are four possible voice chat states: connected, disconnected, speaking, and silent. Notifications go out for each of these. So, if you have an active chat and your user pauses to take a breath, GKVoiceChat propagates a GKVoiceChatPlayerSilent event, followed by GKVoiceChatPlayerSpeaking, when she starts talking again.
You can use these events to update local icons, highlighting them when a user is speaking, dimming them when they are not, or removing them from view when the user is no longer part of the chat. Add a state update handler to each chat to control the GUI presentation when a player’s chat state changes:
chat.playerStateUpdateHandler =
^(NSString *playerID, GKVoiceChatPlayerState state)
{
switch (state)
{
case GKVoiceChatPlayerSpeaking:
// Highlight player's picture
break;
case GKVoiceChatPlayerSilent:
// Dim player's picture
break;
case GKVoiceChatPlayerConnected:
// Show player name/picture
break;
case GKVoiceChatPlayerDisconnected:
// Hide player name/picture
break;
}
};
Implementing a Chat Button
It helps to treat your chats as push-to-talk items, activating them only when a user opts in to speak. For example, you might create a talk button that activates the local microphone as it is pressed and deactivates it when released. Here’s how you could define that button:
talkButton = [UIButton buttonWithType:UIButtonTypeRoundedRect];
[talkButton setTitle:@"Speak" forState:UIControlStateNormal];
talkButton.frame = CGRectMake(0.0f, 0.0f, 200.0f, 40.0f);
[self.view addSubview:talkButton];
[talkButton addTarget:self action:@selector(startSpeaking)
forControlEvents:UIControlEventTouchDown];
[talkButton addTarget:self action:@selector(stopSpeaking)
forControlEvents:UIControlEventTouchUpInside |
UIControlEventTouchUpOutside];
The two callbacks involve nothing more than setting the chat’s active property to YES (microphone enabled and live) or NO (microphone disabled). As you’ve already seen, always initially set this property to NO when you create the chat:
- (void) stopSpeaking
{
chat.active = NO;
}
- (void) startSpeaking
{
chat.active = YES;
}
Controlling Volume
The chat’s volume property ranges between 0.0 (muted) and 1.0 (full volume). This controls how loudly the chat plays back on the local device’s speakers. In addition, you can control whether you’re listening to other players on a player-by-player basis. Mute individual players by calling setMute:forPlayer:. Like the player state update handler, this feature is meant to be integrated into a player-by-player icon GUI, allowing your users to mute others individually:
[chat setMute:YES forPlayer: playerID];
You can mute all players by iterating through the chat’s list of player identifiers. This affects audio for only the selected chat. If the player is participating in more than one chat, you must mute each one or set the volume property for each chat to 0.0:
- (void) muteChat: (GKVoiceChat *) aChat
{
NSLog(@"Muting chat %@", aChat.name);
for (NSString *playerID in aChat.playerIDs)
[aChat setMute:YES forPlayer:playerID];
}
- (void) unmuteChat: (GKVoiceChat *) aChat
{
NSLog(@"Unmuting chat %@", aChat.name);
for (NSString *playerID in aChat.playerIDs)
[aChat setMute:NO forPlayer:playerID];
}
GameKit Peer Services
GameKit provides peer-to-peer connectivity between iOS devices outside of the Game Center milieu. The framework helps you create interconnected applications that exchange live data in real time. In its default implementation, GameKit works by creating and managing an ad-hoc Bluetooth network that lets devices find each other, establish a connection, and transmit data through that connection. GameKit also allows you to find, connect, and transmit to devices on the same Wi-Fi network.
Using Bluetooth and Wi-Fi provides a fast and reliable approach to interdevice communications. Unfortunately, peer-to-peer communication using GameKit isn’t fast, although it’s far more reliable under iOS 6 than older firmware. Using GameKit peering can prove frustrating for end users. You should expect your support commitments to be tested accordingly if you decide to include this GameKit feature in your applications.
The standard use scenario requires that users own more than one device and use them in close quarters. No matter how nifty the peer-to-peer idea is, business-wise, it’s a poor investment of time. Using Game Center is simpler, rugged, and provides a greater potential user base for those features.
With that said, here is a quick introduction to the peer-to-peer aspects of GameKit.
GameKit Bluetooth Limitations
For Bluetooth, you need proximity. Connections are limited to approximately 10 meters (30 feet). Think of your audience including people riding together on a train or in a car, in a convention-hall’s meeting room, or working in the same office. Within that range, your application can establish a peer-to-peer connection.
GameKit offers excellent performance for short, tight blips of information. Apple recommends that GameKit transmissions be limited to 1,000 bytes and under. Although GameKit can handle larger blobs, up to 95 Kilobytes at a time, it’s not meant for use as general device-to-device data transfer. Try to send too much data at once, and you will receive transmission errors.
If you must transfer large files, you need to break those files into manageable chunks. Make sure that you use standard handshaking and packet checksumming to ensure the reliability of your data.
GameKit’s Bluetooth networking works on all modern iOS devices. The peer-peer key in the Info.plist UIRequiredDeviceCapabilities entry lets you explicitly require support for peer-to-peer connectivity over Bluetooth.
Bonjour Sessions
GameKit’s peer-to-peer connections are built using Bonjour networking. Bonjour, which is Apple’s trade name for zero-configuration networking, enables devices to advertise and discover network services. Built into Mac OS X since version 10.2, Bonjour offers these features without calling attention to itself. For example, Bonjour powers the features that let users find shared music for iTunes or connect to wireless printers without requiring custom configuration. These services automatically appear when they become available and disappear when they’re not. It’s a powerful OS feature.
GameKit provides that same Bonjour power without building the complicated Bonjour callbacks for registering and detecting services. With GameKit, you request a connection using a “peer picker” controller and then manage a “session” after the connection has been established.
GameKit’s session objects provide a single focus point for data transfer management. Each session uses a unique name, which you choose, to advertise itself. When an application looks for another device to connect to, it uses this name to identify compatible services.
If you use a Bonjour browsing service to look for that name, you’ll fail. Apple encodes the service name using a SHA-1 hash. For example, a service called MacBTClient Sample becomes the _11d7n7p5tob54j._udp. Bonjour service. GameKit automatically transforms the name you supply so it knows how to find matching services.
Servers, Clients, and Peers
GameKit offers three session modes: Applications can act as servers, clients, and peers. Servers advertise a service and initialize a session, allowing clients to search for and connect to them. This is the kind of behavior that a smart printer uses, letting clients find and use its capabilities. It’s handy for devices that provide a fixed functionality, but it’s not the best choice for most iOS applications, especially games.
Peers work as both servers and clients. They advertise and search simultaneously. When a peer selects a service, its client/server role is hidden both from the user and the developer. This makes the peer approach easy to develop for iOS. You don’t have to build separate client and server applications. One peer-based application does all the work.
The Peer Connection Process
The peer picking process is handled by a class called GKPeerPickerController. It provides a built-in series of interactive alert dialogs that automate the task of advertising device availability and selecting a peer. Using this class is not mandatory. You can bypass it and create a custom class to search for and connect to peers.
For simple connections, however, the GKPeerPickerController class offers a ready-to-use interface that sidesteps the need for detecting and negotiating with peers. To use the peer picker, you allocate it, set a delegate (which must implement the GKPeerPickerControllerDelegate protocol), and show it.
Displaying the Peer Picker
The following code allocates and shows a new peer picker controller, setting its connection style to nearby. This skips an optional interaction step where a user selects between Online and Nearby modes. When presented, it shows the interface in Figure 11-7. You do not have to use a peer picker to establish GameKit sessions. The iOS SDK lets you create your own custom interfaces to work with the underlying GameKit connections:
// Create and present a new peer picker
GKPeerPickerController *picker = [[GKPeerPickerController alloc]
init];
picker.delegate = self;
picker.connectionTypesMask = GKPeerPickerConnectionTypeNearby;
[picker show];
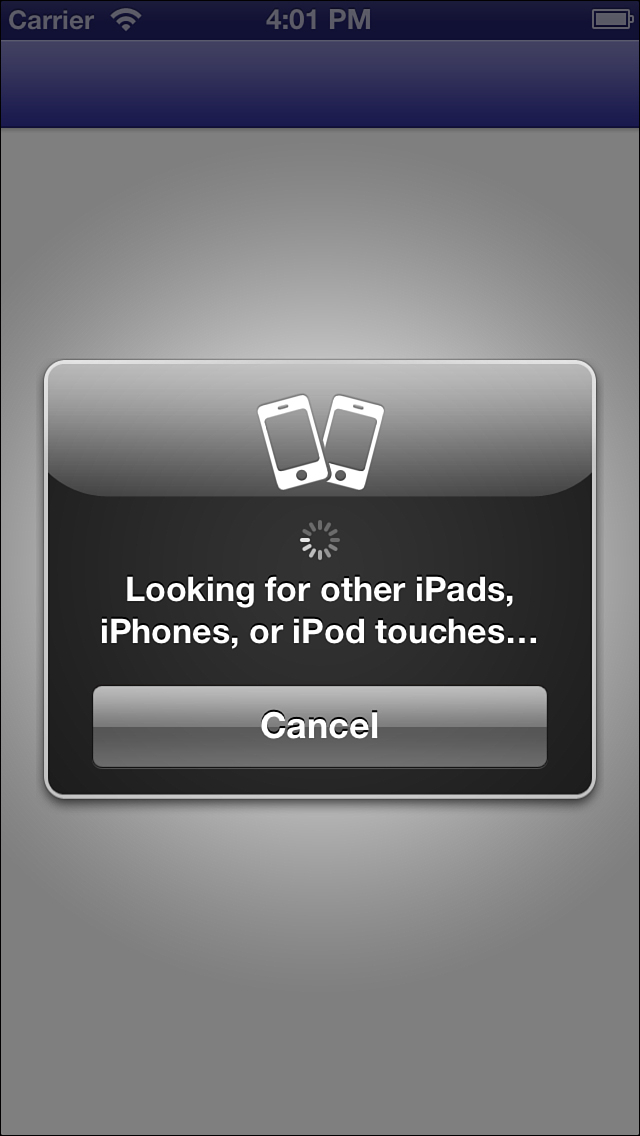
Figure 11-7. This is the first screen presented to the user for peer-to-peer Bluetooth/Wi-Fi connections.
When your mask also includes the online type (GKPeerPickerConnectionTypeOnline), the picker first asks the user which kind of connection to use before moving on to either the nearby connection interface or to a custom online interface that you build.
Pressing Cancel
Users may cancel out of the peer picker alert. When they do so, the delegate receives a peerPickerControllerDidCancel: callback. If you display a Connect button in your application, make sure to restore it at this point so that the user can try again:
- (void) peerPickerControllerDidCancel: (GKPeerPickerController *)picker
{
[self setupConnectButton];
}
Creating the Session Object
As the picker delegate, you must supply a session object on request. Sessions, which provide an abstract class that creates and manages a data socket between devices, belong to the GKSession class and must be initialized with a session identifier. This is the unique string used to create the Bonjour service and link together two iOS devices (peers) both advertising the same service. By setting the display name to nil, the session uses the built-in device name:
- (GKSession *)peerPickerController:(GKPeerPickerController *)picker
sessionForConnectionType:(GKPeerPickerConnectionType)type
{
// Create a new session if one does not already exist
if (!self.session) {
self.session = [[GKSession alloc] initWithSessionID:
(self.sessionID ? self.sessionID : @"Sample Session")
displayName:nil sessionMode:GKSessionModePeer];
self.session.delegate = self;
}
return self.session;
}
Although this is an optional method, you’ll usually want to implement it so that you can set your session ID and mode. Upon detecting another iOS device with the same advertised service ID, the peer picker displays the peer as a compatible match, as shown in Figure 11-8.
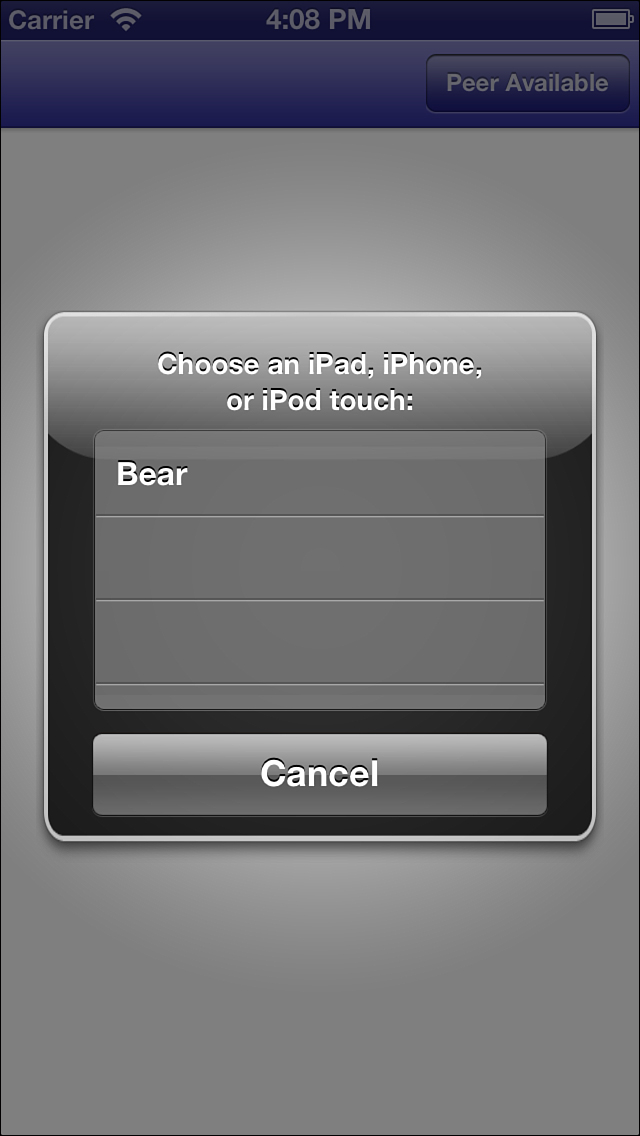
Figure 11-8. The peer picker lists all devices that can act as peers.
Waiting for the peer picker list can take a few seconds (typical) or up to a few minutes (exceedingly rare under modern firmware). Apple recommends always debugging from a clean restart. If debugging delays get frustrating enough, make sure to reboot.
In normal use, connection delays usually hover approximately 45 seconds at a maximum. Warn your users to be patient. In Figure 11-9, Bear is the device name for a second iOS device running the same application. When the user taps the name Bear, this device automatically goes into client mode, and Bear goes into server mode.
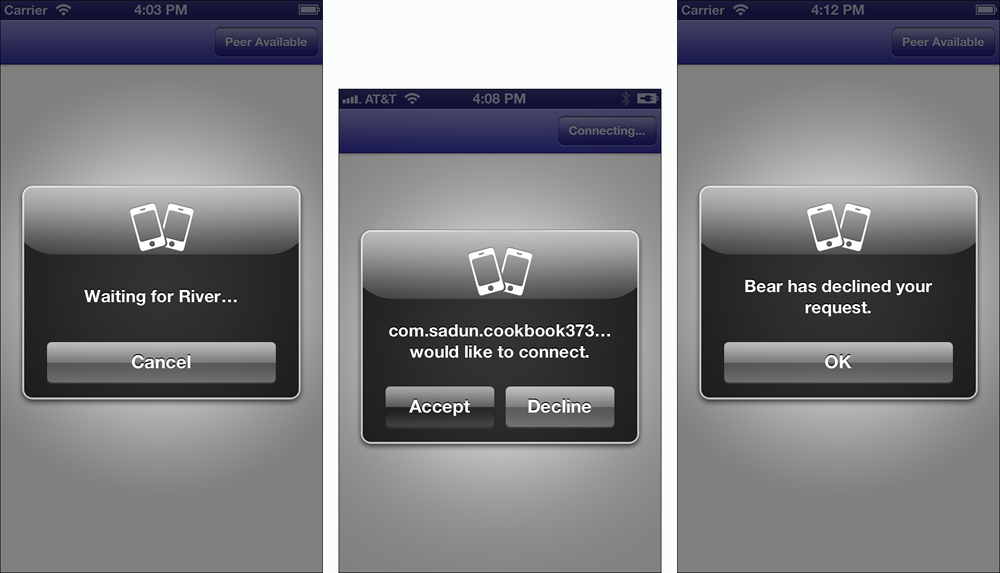
Figure 11-9. Upon choosing a partner, the client goes into wait mode (left) as the server decides whether to accept or decline the connection (middle). Should the server decline, the client receives a notice to that effect (right).
Client and Server Modes
When a device changes into client mode, it stops advertising its service. The device-choice dialog shown previously in Figure 11-8 changes on the server unit. The client’s peer name dims to dark gray, and the words “is not available” appear underneath. A few seconds later (and this can actually run up to 1 minute, so again warn your users about delays), both units update their peer picker display.
Figure 11-9 shows the server and client peer pickers during this process. The client waits as the server receives the connection request (left). On the server, the host user must accept or decline the connection (middle). Should they decline, an updated peer picker notifies the client (right). If they accept, both delegates receive a new callback.
The delegate callback lets the new peers dismiss the peer picker and set their data received handler:
- (void)peerPickerController:(GKPeerPickerController *)picker
didConnectPeer:(NSString *)peerID
toSession: (GKSession *) session
{
// Dismiss the picker, then set the data handler
[picker dismiss];
[self.session setDataReceiveHandler:self withContext:nil];
}
Sending and Receiving Data
The data handler (in this case, self) must implement the receiveData:fromPeer:inSession:context: method. The data sent to this method uses an NSData object; there are no hooks or handles for partial data receipt and processing. As the data arrives as a single chunk, keep your data bursts short (under 1,000 bytes) and to the point for highly interactive applications:
- (void) receiveData:(NSData *)data fromPeer:(NSString *)peer
inSession: (GKSession *)session context:(void *)context
{
// handle data here
}
Send data via the session object. You can send in reliable mode or unreliable mode. Reliable mode uses error checking and retrying until the data is properly sent. All items are guaranteed to arrive in the order they are sent, using TCP transmission. With unreliable mode, data is sent once using UDP transmission, with no retry, Data may arrive out of order. Use reliable mode (GKSendDataReliable) when you must guarantee correct delivery and unreliable mode for short bursts of data that must arrive nearly instantaneously:
- (void) sendDataToPeers: (NSData *) data
{
// Send the data, checking for success or failure
NSError *error;
BOOL didSend = [self.session sendDataToAllPeers:data
withDataMode:GKSendDataReliable error:&error];
if (!didSend)
NSLog(@"Error sending data to peers: %@",
Error.localizedDescription);
}
One error you’ll encounter here results from queuing too much data in reliable mode. This produces a buffer full error.
State Changes
The following session delegate callback lets you know when a peer’s state has changed. The two states you want to look for are connected—that is, when the connection finally happens after the peer picker has been dismissed, and disconnected, when the other user quits the application, manually disconnects, or moves out of range:
- (void)session:(GKSession *)session peer:(NSString *)peerID
didChangeState:(GKPeerConnectionState)state
{
/* STATES: GKPeerStateAvailable, GKPeerStateUnavailable,
GKPeerStateConnected, GKPeerStateDisconnected,
GKPeerStateConnecting */
if (state == GKPeerStateConnected)
{
// handle connected state
}
if (state == GKPeerStateDisconnected)
{
// handle disconnection
}
}
To force a session to disconnect, use the disconnectFromAllPeers method:
- (void) disconnect
{
[session disconnectFromAllPeers];
}
Creating a GameKit Helper
You can find a simplified peer-to-peer helper class in the sample code that accompanies this chapter. This class hides most of the GameKit details connection and data transfer details, while providing a demonstration of how to use these features. More important, it breaks down how you might look at the GameKit process, with its two key details: connection and data.
Peer-to-Peer Voice Chat
GameKit’s In-Game Voice service lets applications create a walkie-talkie-style voice channel connecting two devices together. The voice additions, provided by the GKVoiceChatService class, sit outside normal GameKit. Chat services connect into the iPhone’s audio playback and recording system, so voice chat can listen to and play back audio. Voice Chat then sends its data through GameKit and plays back the data it receives from GameKit.
GKVoice expects a GKSession with GKPeers to transmit its data. If you need to use voice transmission for another connection style, you must write that layer yourself.
Implementing Voice Chat
When working with voice, there’s no difference in the way you start. You display a peer picker and negotiate the connection, as you would normally do with GameKit. The difference arrives after the peer connects. You need to establish the voice chat and redirect the data to and from that service.
Upon connecting to the new peer, set up the voice chat basics. Activate a play-and-record audio session (as shown earlier in this chapter), set the default chat service client, and start a new voice chat with that peer. By setting the client property, you ensure that your class receives the voice chat callbacks needed for negotiating data:
// Set the voice chat client and start voice chat
[GKVoiceChatService defaultVoiceChatService].client = self;
if (![[GKVoiceChatService defaultVoiceChatService]
startVoiceChatWithParticipantID: peerID error: &error])
{
NSLog(@"Error starting voice chat");
return;
}
Your primary class must declare the GKVoiceChatClient protocol to do this. When the chat service gathers data through the microphone, it triggers the voiceChat-Service:sendData:toParticipantID: callback. Here, you can redirect voice data to your normal GameKit session. For a voice-only connection, just send along the data. When your application handles both voice and other data, build a dictionary and tag the data with a key, such as @"voice", or when your class receives data through the normal receiveData:fromPeer:inSession:context: callback, the same approaches apply. For voice only, use receivedData:fromParticipantID: to send the data off to the chat service. Voice Chat enables you to mix game audio with in-game voice. For voice-data hybrid applications, deserialize the data, determine whether the packet included voice or regular data, and redirect that data to the appropriate recipient:
- (void)voiceChatService:(GKVoiceChatService *)voiceChatService
sendData:(NSData *)data
toParticipantID:(NSString *)participantID
{
// Send the next burst of data to peers
[self.session sendData: data toPeers:[NSArray arrayWithObject:
participantID] withDataMode: GKSendDataReliable error: nil];
}
- (void) receiveData:(NSData *)data
fromPeer:(NSString *)peer
inSession: (GKSession *)session context:(void *)context
{
// Redirect any voice data to the voice chat service
[[GKVoiceChatService defaultVoiceChatService]
receivedData:data fromParticipantID:peer];
}
Creating an “Online” GameKit Connection
In the GameKit peer-to-peer world, “online” currently means any valid connection style other than Game Center or Bluetooth. You might use a local WLAN network to connect to another device on the same network or connect through WWAN (that is, the cellular service) or Wi-Fi to a remote Internet-based host. GameKit takes you only so far, as shown in Figure 11-10. By selecting Online, your user depends on you to create a custom connection to another device or service.
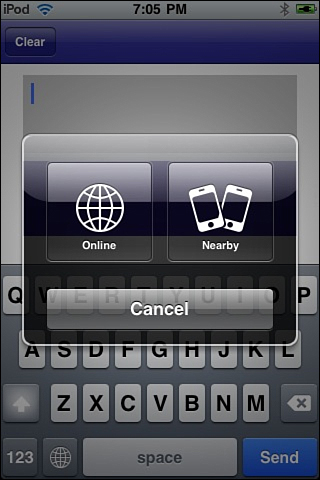
Figure 11-10. The Online GameKit connection means “bring your own networking.”
You create this two-item dialog by supplying the online option to the peer picker mask. In all other ways, there’s no change in how you create and present a standard GameKit peer picker controller:
- (void) startConnection
{
if (!self.isConnected)
{
GKPeerPickerController *picker = [[GKPeerPickerController
alloc] init];
picker.delegate = self;
picker.connectionTypesMask =
GKPeerPickerConnectionTypeNearby |
GKPeerPickerConnectionTypeOnline;
[picker show];
if (self.viewController)
self.viewController.navigationItem.rightBarButtonItem =
nil;
}
}
Catch the user selection in the peerPickerController:didSelectConnectionType: callback. You can assume that if the user selected Nearby that all the handshaking dialogs are taken care of for you. Should the user select Online, however, it’s up to you to move things to the next step. You need to dismiss the picker and display the next stage of the connection task. Here, control passes away from the peer picker to a custom class. It’s up to you to produce that class. The following example method uses BonjourHelper, which was introduced in a previous edition of this book. Whatever class you use, its role is to begin an online connection, choose a peer to share data with, and serve that data directly to that peer:
- (void)peerPickerController:(GKPeerPickerController *)picker
didSelectConnectionType:(GKPeerPickerConnectionType)type
{
if(type == GKPeerPickerConnectionTypeOnline)
{
[picker dismiss];
// Establish your own custom connection class here
[BonjourHelper sharedInstance].sessionID = self.sessionID;
[BonjourHelper sharedInstance].viewController =
self.viewController;
[BonjourHelper sharedInstance].dataDelegate =
self.dataDelegate;
[BonjourHelper connect];
}
}
Summary
GameKit offers an exciting new player in the iPhone development arena. Its easy-to-use Game Center connections make it simple for you to deliver applications that communicate between remote iOS devices for satisfying information transfer and game play. In this chapter, you saw how to build those connections and produce real-time data transfers that allow games and other applications to coordinate information between separate devices. Here are a few last-minute thoughts on these technologies:
• GameKit has finally debuted OS X. Your users can now play across platforms. Consider looking into developing clients for OS X and iOS.
• Just because the name has the word “Game” doesn’t mean that you cannot use GameKit and Game Center to transfer other kinds of information and data between devices. Don’t limit your applications because of Apple’s game branding of the service. GameKit provides a wonderful data-transfer infrastructure. The game-specific features lie on top of those. A number of terrific utilities employ these techniques.
• When working with Voice Chat locally, especially during testing, remember that nearby users may produce sound loops creating feedback distortion unless they use headsets. For peer-to-peer use, consider that people sitting 10 feet apart from each other can easily talk without the use of technology. For remote Game Center Voice Chat, be aware of how easily the technology can be abused and provide local muting options for your users.
• Don’t forget to incentivize your users. Leaderboards and achievements provide wonderful ways to motivate and engage game play beyond a single device or a single session of use. Both Achievements and Leaderboards displays now enable users to quickly and easily rate your app. In iOS 6, users can tap achievements they’ve attained to brag about them socially.
• Game Center Matches are designed for turn-based games without timers (either per move or per game). Although you can build your own timers on top of Game Center, it’s not a feature that’s directly supported by Apple and could possibly impact app review.
• The turn-by-turn gaming coverage in this edition has been massively updated. However, there are still edges to smooth out and bugs to kill. If you have any suggestions for improving the code, please let me know. You can submit tickets at the github repository or just ping me by email.