
5. Networking
As an Internet-connected device, the iPhone and its other iOS family members are particularly well suited to retrieving remote data and accessing web-based services. Apple has lavished the platform with a solid grounding in all kinds of network computing and its supporting technologies. The Networking chapter in the Core Cookbook introduced network status checks, synchronous and asynchronous downloads, JSON, and XML parsing. This chapter continues that theme by introducing more advanced techniques. These include authentication challenges, using the system keychain, working with OAuth, and so forth. Here are handy approaches that should help with your development.
Recipe: Secure Credential Storage
Before diving into actual networking, consider the role of user credentials. They form a fundamental part of any modern network access scenario. You use credentials to log in to social services, to upload to file-sharing sites, or to retrieve information from a user’s account. There are hardly any network development tasks these days that don’t involve some sort of username and password situation. For that reason, the first two recipes in this chapter introduce secure credential storage.
iOS’s credential system offers a secure mechanism for storing and retrieving usernames and passwords. Credentials are specific to a server or “realm.” You don’t use the same credentials with Facebook, for example, that you would on Twitter or imgur, or other Web sites. Each server therefore has its own protection “space”, and you have access to only credentials that are specific to that host.
You specify the scope of the credentials, establish how long the credentials will last, and allow the system-supplied storage to manage that information. You can use three kinds of persistence with credential storage:
• NSURLCredentialPersistenceNone means the credential must be used immediately and cannot be stored for future use.
• NSURLCredentialPersistenceForSession enables the credential to be stored for just this application session.
• NSURLCredentialPersistencePermanent permits the credential to be stored to the user’s keychain and be shared with other applications as well.
Here is how you might create a credential. You create a key/value pair (in the form of username and password) and specify the persistence:
NSURLCredential *credential = [NSURLCredential credentialWithUser:key
password:value persistence: NSURLCredentialPersistencePermanent];
Credentials also enable you to store certificates associated with a signing identity and to establish server trust authentication.
Add credentials to storage by assigning them to a protection space. Protection spaces store the authentication details for a single host. Each protection space defines a scope for which the credential is valid. For example, you might create a protection space specific to ericasadun.com as follows:
[[NSURLProtectionSpace alloc] initWithHost:@"ericasadun.com" port:0
protocol:@"http" realm:nil authenticationMethod:nil]
Setting the port to 0 means Use the Default Port. For http, this defaults to port 80. Pass a different value if needed. The protocol defines the scheme used to access resources: via http, https, ftp, and so forth.
You save credentials to a central credential storage, which is a system-supplied singleton. Here’s how you might store a credential for a particular protection space. The “setting” method saves that credential for you:
[[NSURLCredentialStorage sharedCredentialStorage]
setCredential:credential forProtectionSpace:self.protectionSpace];
Recipe 5-1 builds a helper class that stores and retrieves secure information. Each instance is primed with a specific host, and its protection space is tied to that host. With the helper, you can add new credentials, set new values for exist credentials, remove credentials, and basically treat the credential storage system as a dictionary.
This dictionary support is provided because the helper class implements keyed subscript methods. This means you can use the class as follows, taking advantage of Objective-C literal shortcuts:
CredentialHelper *helper =
[CredentialHelper helperWithHost:@"ericasadun.com"];
helper[@"John Doe"] = @"FooBarGaz";
NSLog(@"%@", helper[@"John Doe"]);
The protection space details are encapsulated in the helper, making this a simple solution for most secure solution needs.
@implementation CredentialHelper
// Create a helper specific to a supplied host
+ (id) helperWithHost: (NSString *) host
{
CredentialHelper *helper = [[CredentialHelper alloc] init];
helper.host = host;
return helper;
}
// Return the current protection space for the host
- (NSURLProtectionSpace *) protectionSpace
{
if (!_host) return nil;
return [[NSURLProtectionSpace alloc] initWithHost:_host
port:0 protocol:@"http" realm:nil authenticationMethod:nil];
}
// Return all the credentials for the supplied protection space
- (NSDictionary *) credentials
{
if (!_host) return nil;
NSDictionary *credentials =
[[NSURLCredentialStorage sharedCredentialStorage]
credentialsForProtectionSpace:self.protectionSpace];
return credentials;
}
// Store a credential
- (void) storeCredential: (NSString *) value forKey: (NSString *) key
{
if (!_host)
{
NSLog(@"Error: Cannot store credential for nil host");
return;
}
NSURLCredential *credential =
[NSURLCredential credentialWithUser:key password:value
persistence: NSURLCredentialPersistencePermanent];
[[NSURLCredentialStorage sharedCredentialStorage]
setCredential:credential
forProtectionSpace:self.protectionSpace];
}
// Store a credential but make it act as the default
- (void) storeDefaultCredential: (NSString *) value
forKey: (NSString *) key
{
if (!_host)
{
NSLog(@"Error: Cannot store credential for nil host");
return;
}
NSURLCredential *credential =
[NSURLCredential credentialWithUser:key password:value
persistence: NSURLCredentialPersistencePermanent];
[[NSURLCredentialStorage sharedCredentialStorage]
setDefaultCredential:credential
forProtectionSpace:self.protectionSpace];
}
// Return the default credential
- (NSURLCredential *) defaultCredential
{
return [[NSURLCredentialStorage sharedCredentialStorage]
defaultCredentialForProtectionSpace:self.protectionSpace];
}
// Remove a credential associated with a username (key)
- (void) removeCredential: (NSString *) key
{
NSArray *keys = self.credentials.allKeys;
if (![keys containsObject:key])
{
NSLog(@"Key %@ not found in credentials.
Skipping remove request.", key);
return;
}
[[NSURLCredentialStorage sharedCredentialStorage]
removeCredential:self.credentials[key]
forProtectionSpace:self.protectionSpace];
}
// Remove all credentials associated with the protection space
- (void) removeAllCredentials
{
NSArray *keys = self.credentials.allKeys;
for (NSString *key in keys)
[self removeCredential:key];
}
// Return a credential for a given user (key)
- (NSURLCredential *) credentialForKey: (NSString *) key
{
if (!_host) return nil;
return self.credentials[key];
}
// Return the password (value) for a given user (key)
- (NSString *) valueForKey:(NSString *)key
{
NSURLCredential *credential = [self credentialForKey:key];
if (!credential) return nil;
return credential.password;
}
// Provide indexed access to the helper, e.g. helper[username]
// and helper[username] = value
- (id) objectForKeyedSubscript: (NSString *) key
{
return [self valueForKey:key];
}
- (void) setObject: (NSString *) newValue
forKeyedSubscript: (NSString *) aKey
{
[self storeCredential: newValue forKey: aKey];
}
@end
Get This Recipe’s Code
To find this recipe’s full sample project, point your browser to https://github.com/erica/iOS-6-Advanced-Cookbook and go to the folder for Chapter 5.
Recipe: Entering Credentials
There’s a lot you can do to simplify your user’s life when it comes to entering and retrieving credentials. Proactively auto-filling passwords is part of that. Recipe 5-2 demonstrates how.
Recipe 5-2 uses the credential storage mechanism introduced in Recipe 5-1 to create a secure password entry form. As its view appears, the recipe loads any default credentials if available. It then sets those in the username and password fields. Upon being dismissed with Done, the recipe stores any updates. If the user taps Cancel rather than Done, the dialog is dismissed without saving.
The storeCredentials method always sets the default credential. The most recently updated username/password pair is saved (or resaved) to the keychain and marked as the default.
The recipe implements several text field delegate methods as well. If users tap Done on the keyboard, it’s treated as if they had tapped Done on the navigation bar. The text field resigns first responder, the data is stored, and the password-entry view controller is dismissed.
Another text field delegate method looks for the start of editing. Whenever the user edits the name field, the password is invalidated and cleared. At the same time, the should-change-characters method examines any text in the username field. When it finds a credential that matches the new username, it automatically updates the password field. This allows users to switch between several usernames for a given service without retyping in the password each time they do so.
You can easily expand this recipe to list known usernames to offer one-tap access to stored credentials.
Recipe 5-2. Password Entry View Controller
@implementation PasswordBaseController
{
UITextField *userField;
UITextField *passField;
CredentialHelper *helper;
}
- (id) initWithHost: (NSString *) hostName
{
if (self = [super init])
{
_host = hostName;
helper = [CredentialHelper helperWithHost:hostName];
}
return self;
}
- (void) listCredentials
{
// Never log passwords in production code
NSLog(@"Protection space for %@ has %d credentials:",
_host, helper.credentialCount);
for (NSString *userName in helper.credentials.allKeys)
NSLog(@"%@: %@", userName, helper[userName]);
}
// Save the current credentials as default
- (void) storeCredentials
{
if (!userField.text.length) return;
[helper storeDefaultCredential:passField.text
forKey:userField.text];
[self listCredentials];
}
// Remove the currently-displayed credential
// from the credential storage
- (void) remove
{
[helper removeCredential:userField.text];
[self listCredentials];
// Update GUI
userField.text = @"";
passField.text = @"";
UIBarButtonItem *removeButton = self.navigationItem.leftBarButtonItems[1];
removeButton.enabled = NO;
}
// Finish and store credentials
- (void) done
{
[self storeCredentials];
[self dismissViewControllerAnimated:YES completion:nil];
}
// Finish without updating credentials
- (void) cancel
{
[self dismissViewControllerAnimated:YES completion:nil];
}
#pragma mark - Text Edits
// User tapping Done confirms changes. Store credentials
- (BOOL)textFieldShouldReturn:(UITextField *)textField
{
[textField resignFirstResponder];
[self done];
return YES;
}
// Only enable Cancel on edits
- (void)textFieldDidBeginEditing:(UITextField *)textField
{
UIBarButtonItem *cancelButton = self.navigationItem.leftBarButtonItems[0];
cancelButton.enabled = YES;
}
- (BOOL)textFieldShouldClear:(UITextField *)textField
{
// Empty the passfield upon a username clear
if (textField == userField)
passField.text = @"";
return YES;
}
// Watch for known usernames during text edits
- (BOOL)textField:(UITextField *)textField
shouldChangeCharactersInRange:(NSRange)range
replacementString:(NSString *)string
{
if (textField != userField) return YES;
// Initially disable remove until there's a credential match
UIBarButtonItem *removeButton =
self.navigationItem.leftBarButtonItems[1];
removeButton.enabled = NO;
// Preemptively clear password field until there's a value for it
passField.text = @"";
// Calculate the target string that will occupy the username field
NSString *username = [textField.text
stringByReplacingCharactersInRange:range withString:string];
if (!username) return YES;
if (!username.length) return YES;
// Always check if there's a matching password on file
NSURLCredential *credential = [helper credentialForKey:username];
if (!credential)
return YES;
// Match!
passField.text = credential.password;
removeButton.enabled = YES;
// Never log passwords in production code!
NSLog(@"Found match: %@: %@", username, passField.text);
return YES;
}
#pragma mark - Load Defaults
- (void) viewWillAppear:(BOOL)animated
{
// Disable the cancel button, there are no edits to cancel
UIBarButtonItem *cancelButton =
self.navigationItem.leftBarButtonItems[0];
cancelButton.enabled = NO;
// Disable the remove button, until a credential has been matched
UIBarButtonItem *removeButton =
self.navigationItem.leftBarButtonItems[1];
removeButton.enabled = NO;
NSURLCredential *credential = helper.defaultCredential;
if (credential)
{
// Populate the fields
userField.text = credential.user;
passField.text = credential.password;
// Enable credential removal
removeButton.enabled = YES;
}
}
- (void) loadView
{
[super loadView];
self.navigationItem.rightBarButtonItem =
BARBUTTON(@"Done", @selector(done));
self.navigationItem.leftBarButtonItems = @[
BARBUTTON(@"Cancel", @selector(cancel)),
BARBUTTON(@"Remove", @selector(remove)),
BARBUTTON(@"List", @selector(listCredentials)),
];
userField = [self textField];
userField.placeholder = @"User Name";
passField = [self textField];
passField.secureTextEntry = YES;
passField.placeholder = @"Password";
}
@end
To find this recipe’s full sample project, point your browser to https://github.com/erica/iOS-6-Advanced-Cookbook and go to the folder for Chapter 5.
Recipe: Handling Authentication Challenges
Some Web sites are protected with usernames and passwords. NSURLConnection helps you access pages by responding to a site’s authentication challenges. To test authentication, Recipe 5-3 connects to http://ericasadun.com/Private, which was set up for use with this authentication discussion. This test folder uses the username PrivateAccess and password tuR7!mZ#eh.
To test an unauthorized connection—that is, you will be refused—set the password to nil or to a nonsense string. When the password is set to nil, the challenge will be sent a nil credential, producing an immediate failure. With nonsense strings, the challenge will fail after the server rejects the credentials.
Each time the challenge fails, the connection’s previousFailureCount property increases by one. You can easily check this count to see if you’ve already failed a challenge and, if so, implement some kind of can’t-connect handler. You might, for example, want to request a different password to try.
This recipe does two things to demonstrate failed and successful authentications that you will not want to do in your own code:
• It clears the shared URL cache after each connection to ensure that your request can fail after a success. If you do not do so, the cache remembers the authentication and continues connecting even if you send garbage down the line. Don’t put this into production code because users expect authentication to persist.
• The credentials used here are created on-demand and use a persistence of None. Again, this is not an entirely realistic use unless you want your users to enter their credentials for every web page access. That would not be a successful or satisfying browsing experience.
Recipe 5-3. Authentication with NSURLCredential Instances
- (void)connection:(NSURLConnection *)connection
didReceiveData:(NSData *)data
{
// Load the data into the view
NSString *source = DATASTR(data);
[webView loadHTMLString:source baseURL:_url];
// Force clean the cache -- so you can "fail" after success
[[NSURLCache sharedURLCache] removeAllCachedResponses];
}
- (void)connection:(NSURLConnection *) connection
willSendRequestForAuthenticationChallenge:
(NSURLAuthenticationChallenge *)challenge
{
if (!challenge.previousFailureCount)
{
// Build a one-time use credential
NSURLCredential *credential =
[NSURLCredential credentialWithUser:@"PrivateAccess"
password:_shouldFail ? @"foo" : @"tuR7!mZ#eh"
persistence:NSURLCredentialPersistenceNone];
[challenge.sender useCredential:credential
forAuthenticationChallenge:challenge];
}
else
{
// Stop challenge after first failure
[challenge.sender cancelAuthenticationChallenge:challenge];
[webView loadHTMLString:@"<h1>Failed</h1>" baseURL:nil];
}
}
- (BOOL)connectionShouldUseCredentialStorage:(NSURLConnection *)connection;
{
NSLog(@"Being queried about credential storage. Saying no.");
return NO;
}
Get This Recipe’s Code
To find this recipe’s full sample project, point your browser to https://github.com/erica/iOS-6-Advanced-Cookbook and go to the folder for Chapter 5.
Recipe: Uploading Data
Recipe 5-4 uses POST to create a multipart form data submission. It uploads images to the imgur.com service. Imgur offers anonymous image uploading without credentials, so it offers a particularly good example for simple posting. “Anonymous” refers to your users and not to you as a developer. An anonymous upload enables you to upload images to imgur without those images being tied to a specific user account. As a developer, you still need to register for the API and use it to place your requests. Request your API key at https://imgur.com/register/api_anon. Make sure to add your key to the sample code for Recipe 5-4.
The challenge for Recipe 5-4 is to create a properly formatted body that can be used by the imgur service. It implements a method that generates form data from a dictionary of keys and values. For the purposes of this example, the objects in that dictionary are limited to strings and images. You can extend this approach for other data types by changing the content type string with different MIME types. It’s obviously not an ideal way to create this data, but it’s been getting the job done for many years now.
This recipe uses a synchronous request to perform the upload, which can take up to a minute or so to process. To avoid blocking GUI updates, the entire submission process is embedded into an NSOperation subclass. Operations encapsulate code and data for a single task, enabling you to run that task asynchronously.
Using NSOperation objects lets you submit them to an asynchronous NSOperationQueue. Operation queues manage the execution of individual operations. Each operation is prioritized and placed into the queue, where it is executed in that priority order.
Whenever you subclass NSOperation, make sure to implement a main method. This method is called when the operation executes. When main returns, the operation finishes.
Recipe 5-4. Uploading Images to imgur
#define NOTIFY_AND_LEAVE(MESSAGE) {[self bail:MESSAGE]; return;}
#define STRDATA(STRING)
([STRING dataUsingEncoding:NSUTF8StringEncoding])
#define SAFE_PERFORM_WITH_ARG(THE_OBJECT, THE_SELECTOR, THE_ARG)
(([THE_OBJECT respondsToSelector:THE_SELECTOR]) ?
[THE_OBJECT performSelectorOnMainThread:THE_SELECTOR
withObject:THE_ARG waitUntilDone:NO] : nil)
// Form data constants
#define IMAGE_CONTENT(_FILENAME_)
@"Content-Disposition: form-data; name="%@";
filename="_FILENAME_"
Content-Type: image/jpeg
"
#define STRING_CONTENT
@"Content-Disposition: form-data; name="%@"
"
#define MULTIPART
@"multipart/form-data; boundary=------------0x0x0x0x0x0x0x0x"
@implementation ImgurUploadOperation
// Operation failure. Send an error off to the delegate.
- (void) bail: (NSString *) message
{
SAFE_PERFORM_WITH_ARG(_delegate,
@selector(handleImgurOperationError:), message);
}
// Create multipart data from a dictionary
- (NSData*)generateFormDataFromPOSTDictionary:(NSDictionary*)dict
{
NSString *boundary = @"------------0x0x0x0x0x0x0x0x";
NSArray *keys = [dict allKeys];
NSMutableData *result = [NSMutableData data];
for (int i = 0; i < keys.count; i++)
{
// Start part
id value = dict[keys[i]];
NSString *start =
[NSString stringWithFormat:@"--%@
", boundary];
[result appendData:STRDATA(start)];
if ([value isKindOfClass:[NSData class]])
{
// handle image data
NSString *formstring =
[NSString stringWithFormat:IMAGE_CONTENT(@"Cookbook.jpg"),
[keys objectAtIndex:i]];
[result appendData:STRDATA(formstring)];
[result appendData:value];
}
else
{
// all non-image fields assumed to be strings
NSString *formstring =
[NSString stringWithFormat:STRING_CONTENT,
[keys objectAtIndex:i]];
[result appendData: STRDATA(formstring)];
[result appendData:STRDATA(value)];
}
// End of part
NSString *formstring = @"
";
[result appendData:STRDATA(formstring)];
}
// End of form
NSString *formstring =
[NSString stringWithFormat:@"--%@--
", boundary];
[result appendData:STRDATA(formstring)];
return result;
}
- (void) main
{
if (!_image)
NOTIFY_AND_LEAVE(@"ERROR: Please set image before uploading.");
// Establish the post dictionary contents
NSMutableDictionary *postDictionary =
[NSMutableDictionary dictionary];
postDictionary[@"key"] = IMGUR_API_KEY;
postDictionary[@"title"] = @"Random Image";
postDictionary[@"caption"] =
@"Created by the iOS Developer's Cookbook";
postDictionary[@"type"] = @"base64";
postDictionary[@"image"] =
[UIImageJPEGRepresentation(_image, 0.65)
base64EncodedString];
// Create the post data from the post dictionary
NSData *postData =
[self generateFormDataFromPOSTDictionary:postDictionary];
// Establish the API request.
NSString *baseurl = @"http://api.imgur.com/2/upload.json";
NSURL *url = [NSURL URLWithString:baseurl];
NSMutableURLRequest *urlRequest =
[NSMutableURLRequest requestWithURL:url];
if (!urlRequest)
NOTIFY_AND_LEAVE(@"ERROR: Error creating the URL Request");
[urlRequest setHTTPMethod: @"POST"];
[urlRequest setValue:MULTIPART
forHTTPHeaderField: @"Content-Type"];
[urlRequest setHTTPBody:postData];
// Submit & retrieve results
NSError *error;
NSURLResponse *response;
NSData* result = [NSURLConnection
sendSynchronousRequest:urlRequest
returningResponse:&response error:&error];
if (!result)
{
[self bail:[NSString stringWithFormat:
@"Submission error: %@", error.localizedFailureReason]];
return;
}
// Success. Return results
SAFE_PERFORM_WITH_ARG(_delegate,
@selector(finishedImgurOperationWithData:), result);
}
// Helper method to return a pre-populated operation
+ (id) operationWithDelegate: (id <ImgurUploadOperationDelegate>) delegate andImage:
(UIImage *) image
{
ImgurUploadOperation *op = [[ImgurUploadOperation alloc] init];
op.delegate = delegate;
op.image= image;
return op;
}
@end
Get This Recipe’s Code
To find this recipe’s full sample project, point your browser to https://github.com/erica/iOS-6-Advanced-Cookbook and go to the folder for Chapter 5.
Recipe: Building a Simple Web Server
A web server provides one of the cleanest ways to serve data off your phone to another computer on the same network. You don’t need special client software. Any browser can list and access web-based files. Best of all, a web server requires just a few key routines. You must establish the service, creating a loop that listens for a request (startServer), and then pass those requests onto a handler (handleWebRequest:) that responds with the requested data. Recipe 5-5 shows a WebHelper class that handles establishing and controlling a basic web service that serves the same image currently shown on the iOS device screen.
The loop routine uses low-level socket programming to establish a listening port and catch client requests. When the client issues a GET command, the server intercepts that request and passes it to the web request handler. The handler could decompose it, typically to find the name of the desired data file, but in this example, it serves back an image, regardless of the request specifics.
Recipe 5-5. Serving iPhone Files Through a Web Service
#define SAFE_PERFORM_WITH_ARG(THE_OBJECT, THE_SELECTOR, THE_ARG)
(([THE_OBJECT respondsToSelector:THE_SELECTOR]) ?
[THE_OBJECT performSelectorOnMainThread:THE_SELECTOR
withObject:THE_ARG waitUntilDone:NO] : nil)
@implementation WebHelper
// Process the external request by sending an image
// (Customize this to do something more interesting.)
- (void) handleWebRequest: (int) fd
{
// Request an image from the delegate
if (!_delegate) return;
if (![_delegate respondsToSelector:@selector(image)]) return;
UIImage *image = (UIImage *)[_delegate performSelector:@selector(image)];
if (!image) return;
// Produce a jpeg header
NSString *outcontent = [NSString stringWithFormat:
@"HTTP/1.0 200 OK
Content-Type: image/jpeg
"];
write (fd, [outcontent UTF8String], outcontent.length);
// Send the data and close
NSData *data = UIImageJPEGRepresentation(image, 0.75f);
write (fd, data.bytes, data.length);
close(fd);
}
// Listen for external requests
- (void) listenForRequests
{
@autoreleasepool {
static struct sockaddr_in cli_addr;
socklen_t length = sizeof(cli_addr);
while (1) {
if (!isServing) return;
if ((socketfd = accept(listenfd,
(struct sockaddr *)&cli_addr, &length)) < 0)
{
isServing = NO;
[[NSOperationQueue mainQueue]
addOperationWithBlock:^(){
SAFE_PERFORM_WITH_ARG(delegate,
@selector(serviceWasLost), nil);
}];
return;
}
[self handleWebRequest:socketfd];
}
}
}
// Begin serving data
- (void) startServer
{
static struct sockaddr_in serv_addr;
// Set up socket
if((listenfd = socket(AF_INET, SOCK_STREAM,0)) < 0)
{
isServing = NO;
SAFE_PERFORM_WITH_ARG(delegate,
@selector(serviceCouldNotBeEstablished), nil);
return;
}
// Serve to a random port
serv_addr.sin_family = AF_INET;
serv_addr.sin_addr.s_addr = htonl(INADDR_ANY);
serv_addr.sin_port = 0;
// Bind
if (bind(listenfd, (struct sockaddr *)&serv_addr,
sizeof(serv_addr)) <0)
{
isServing = NO;
SAFE_PERFORM_WITH_ARG(delegate,
@selector(serviceCouldNotBeEstablished), nil);
return;
}
// Find out what port number was chosen.
int namelen = sizeof(serv_addr);
if (getsockname(listenfd, (struct sockaddr *)&serv_addr,
(void *) &namelen) < 0) {
close(listenfd);
isServing = NO;
SAFE_PERFORM_WITH_ARG(delegate,
@selector(serviceCouldNotBeEstablished), nil);
return;
}
chosenPort = ntohs(serv_addr.sin_port);
// Listen
if(listen(listenfd, 64) < 0)
{
isServing = NO;
SAFE_PERFORM_WITH_ARG(delegate,
@selector(serviceCouldNotBeEstablished), nil);
return;
}
isServing = YES;
[NSThread
detachNewThreadSelector:@selector(listenForRequests)
toTarget:self withObject:NULL];
SAFE_PERFORM_WITH_ARG(delegate,
@selector(serviceWasEstablished:), self);
}
- (void) stopService
{
printf("Shutting down service
");
_isServing = NO;
close(listenfd);
SAFE_PERFORM_WITH_ARG(_delegate, @selector(serviceDidEnd), nil);
}
+ (id) serviceWithDelegate:(id)delegate
{
if (![[UIDevice currentDevice] networkAvailable])
{
NSLog(@"Not connected to network");
return nil;
}
WebHelper *helper = [[WebHelper alloc] init];
helper.delegate = delegate ;
[helper startServer];
return helper;
}
@end
Get This Recipe’s Code
To find this recipe’s full sample project, point your browser to https://github.com/erica/iOS-6-Advanced-Cookbook and go to the folder for Chapter 5.
Recipe: OAuth Utilities
OAuth is the bane of many an iOS developer. Developed as an open standard for protecting user credentials, it provides a secure way to grant sensitive access on a limited basis. Many popular APIs are based around OAuth and its controversial successor OAuth 2.0, which remains under development. For most developers, OAuth is fussy, detail-oriented, and a pain to use.
Apple has simplified some of the OAuth situation with its new Accounts framework, but at the time of this writing, the framework is limited to Facebook, Sina Weibo, and Twitter. In addition, a private OAuth support framework remains out of bounds for developer API calls.
Recipe 5-6 introduces a number of utilities that may help you when working with OAuth. Its code base goes back some number of years and is built around the CommonCrypto library. It builds an OAuthRequestSigner class, whose job it is to build, sign, and encode requests. This implementation is hard-coded to use HMAC-SHA1 signing.
Recipe 5-6 forms the basis for all the signing requests discussed in Recipe 5-7, which introduces the OAuth token exchange process.
Note
The sample code for Recipe 5-6 uses imgur OAuth credentials. Register for your keys at https://imgur.com/register/api_oauth. You will need these to compile and run the sample code.
Recipe 5-6. Basic OAuth Signing Utilities
#import <CommonCrypto/CommonHMAC.h>
@implementation OAuthRequestSigner
// Sign the clear text with the secret key
+ (NSString *) signClearText: (NSString *)text
withKey: (NSString *) secret
{
NSData *secretData = STRDATA(secret);
NSData *clearTextData = STRDATA(text);
//HMAC-SHA1
CCHmacContext hmacContext;
uint8_t digest[CC_SHA1_DIGEST_LENGTH] = {0};
CCHmacInit(&hmacContext, kCCHmacAlgSHA1,
secretData.bytes, secretData.length);
CCHmacUpdate(&hmacContext,
clearTextData.bytes, clearTextData.length);
CCHmacFinal(&hmacContext, digest);
// Convert to a base64-encoded result,
// Thanks to Matt Gallagher's NSData category
NSData *out = [NSData dataWithBytes:digest
length:CC_SHA1_DIGEST_LENGTH];
return [out base64EncodedString];
}
// RFC 3986
+ (NSString *) urlEncodedString: (NSString *) string
{
NSString *result = (__bridge_transfer NSString *)
CFURLCreateStringByAddingPercentEscapes(
kCFAllocatorDefault, (__bridge CFStringRef)string,
NULL, CFSTR(":/?#[]@!$&'()*+,;="),
kCFStringEncodingUTF8);
return result;
}
// Return url-encoded signed request
+ (NSString *) signRequest: (NSString *)
baseRequest withKey: (NSString *) secret
{
NSString *signedRequest = [OAuthRequestSigner
signClearText:baseRequest withKey:secret];
NSString *encodedRequest = [OAuthRequestSigner
urlEncodedString:signedRequest];
return encodedRequest;
}
// Return a nonce (a random value)
+ (NSString *) oauthNonce;
{
CFUUIDRef theUUID = CFUUIDCreate(NULL);
NSString *nonceString =
(__bridge_transfer NSString *)CFUUIDCreateString(
NULL, theUUID);
CFRelease(theUUID);
return nonceString;
}
// Build a token dictionary from a
// key=value&key=value&key=value string
+ (NSDictionary *) dictionaryFromParameterString:
(NSString *) resultString
{
if (!resultString) return nil;
NSMutableDictionary *tokens = [NSMutableDictionary dictionary];
NSArray *pairs = [resultString componentsSeparatedByString:@"&"];
for (NSString *pairString in pairs)
{
NSArray *pair =
[pairString componentsSeparatedByString:@"="];
if (pair.count != 2) continue;
tokens[pair[0]] = pair[1];
}
return tokens;
}
// Build a string from an oauth dictionary
+ (NSString *) parameterStringFromDictionary: (NSDictionary *) dict
{
NSMutableString *outString = [NSMutableString string];
// Sort keys
NSMutableArray *keys =
[NSMutableArray arrayWithArray:[dict allKeys]];
[keys sortUsingSelector:@selector(caseInsensitiveCompare:)];
// Add sorted items to parameter string
for (int i = 0; i < keys.count; i++)
{
NSString *key = keys[i];
[outString appendFormat:@"%@=%@", key, dict[key]];
if (i < (keys.count - 1))
[outString appendString:@"&"];
}
return outString;
}
// Create a base oauth (header) dictionary
+ (NSMutableDictionary *) oauthBaseDictionary: (NSString *) consumerKey;
{
NSMutableDictionary *dict = [NSMutableDictionary dictionary];
dict[@"oauth_consumer_key"] = consumerKey;
dict[@"oauth_nonce"] = [OAuthRequestSigner oauthNonce];
dict[@"oauth_signature_method"] = @"HMAC-SHA1";
dict[@"oauth_timestamp"] =
[NSString stringWithFormat:@"%d", (int)time(0)];
dict[@"oauth_version"] = @"1.0";
return dict;
}
+ (NSMutableString *) baseRequestWithEndpoint: (NSString *) endPoint
dictionary: (NSDictionary *)dict
andRequestMethod: (NSString *) method
{
NSMutableString *baseRequest = [NSMutableString string];
NSString *encodedEndpoint =
[OAuthRequestSigner urlEncodedString:endPoint];
[baseRequest appendString:
[NSString stringWithFormat:@"%@&%@&",
method, encodedEndpoint]];
NSString *baseParameterString =
[OAuthRequestSigner parameterStringFromDictionary:dict];
NSString *encodedParamString =
[OAuthRequestSigner urlEncodedString:baseParameterString];
[baseRequest appendString:encodedParamString];
return baseRequest;
}
@end
Get This Recipe’s Code
To find this recipe’s full sample project, point your browser to https://github.com/erica/iOS-6-Advanced-Cookbook and go to the folder for Chapter 5.
Recipe: The OAuth Process
Working with OAuth generally requires five steps before you can access a service. These steps enable you to authenticate your application with the provider and ensure that the user has properly granted permission to the application. The following sections detail how these steps proceed in a standard OAuth application.
Step 1: Request Tokens from the API Provider
To start, your application needs base OAuth tokens to work with. The application posts a request to a server’s token endpoint, for example, https://api.imgur.com/oauth/request_token.
This request includes the application’s unique consumer key (“oauth_consumer_key”) supplied by the API provider, and the standard elements of an OAuth header dictionary. These are a nonce (a unique nonsense string, “oauth_nonce”), a timestamp (“oauth_timestamp”), a signature method (“oauth_signature_method” such as HMAC-SHA1), and a version (“oauth_version”).
You construct a parameter string from these items and sign it with the application’s secret key. Pro tip: Make sure you append “&” to the key. If the key is “XYZZYPLUGH”, you sign with “XYZZYPLUGH&”. That’s because the signing key is always composed of a combination of the application (consumer) secret key and the end-user (token) secret key, and at this stage of the process, the token secret key remains as-yet undefined.
You add the signature to the request and send it up to the API provider. The requestTokens: method in Recipe 5-7 demonstrates this process.
Step 2: Retrieve and Store Tokens
Upon receiving an authenticated token request, the service sends back a number of items in its response. These include an important pair, specifically a user token (“oauth_token”) and a user secret token (“oauth_token_secret”). You extract these values by decomposing the parameter-encoded string returned by the service to its component keys and values. Recipe 5-7’s processTokens: method shows how this is done.
Because the user has not yet granted access for your application to use his credentials, these are temporary items. They enable your app to move to the next stage of the process but no further. Your app cannot use them to make general requests. Store these items securely in the user keychain, and not in user defaults.
Step 3: Request User Access
Users must now visit a web page and authorize your application. You construct the URL from an API endpoint and the OAuth user token returned in step 2. The URL will look something like this, but the specific URL will vary by provider:
https://api.imgur.com/oauth/authorize?oauth_token=token
This URL includes a base authorization endpoint that uses the token returned by step 2 of this process. Figure 5-1 shows the imgur version of this authorization screen. Control passes to a web page, and your app is responsible for monitoring and retrieving a verifier from this process.
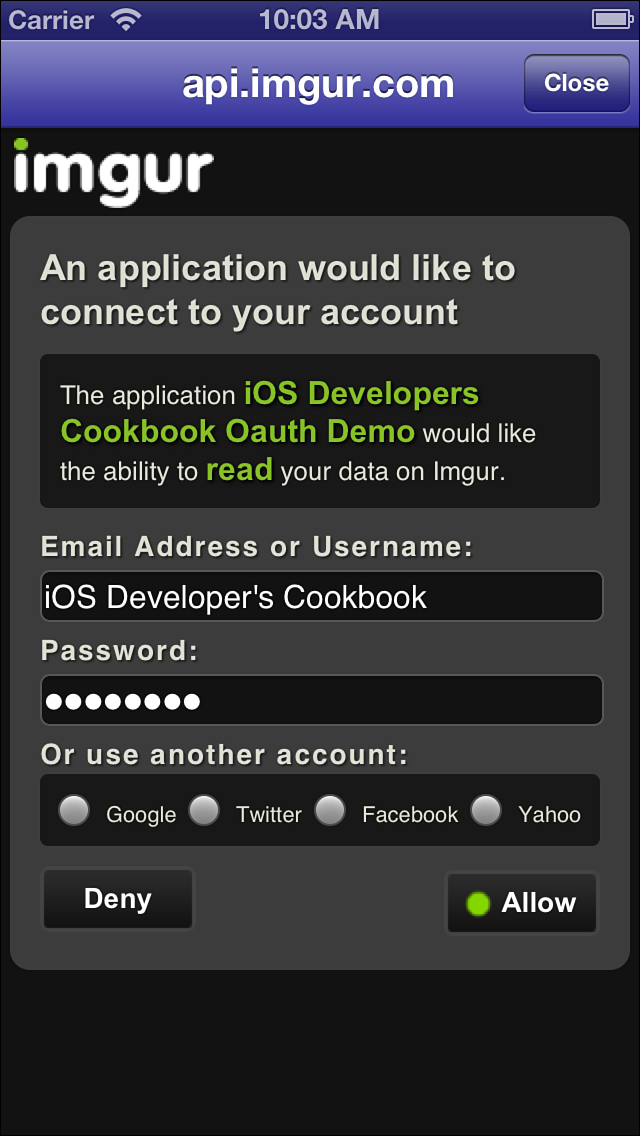
Figure 5-1. Users must explicitly grant access to OAuth-based applications to allow API calls.
In the simplest possible case, you can open the URL in Safari or direct your user to visit a Web site and enter the URL. Most iOS developers would prefer to keep control within the app, however, and should supply an in-app UIWebView to display the authentication screen, as shown in Figure 5-1.
Step 4: Retrieve an OAuth Verifier Token
The API authorization web interface concludes its interaction by providing a verification code, as shown in Figure 5-2. The authentication process is conducted entirely in HTML and lies outside of standard Objective-C interaction.
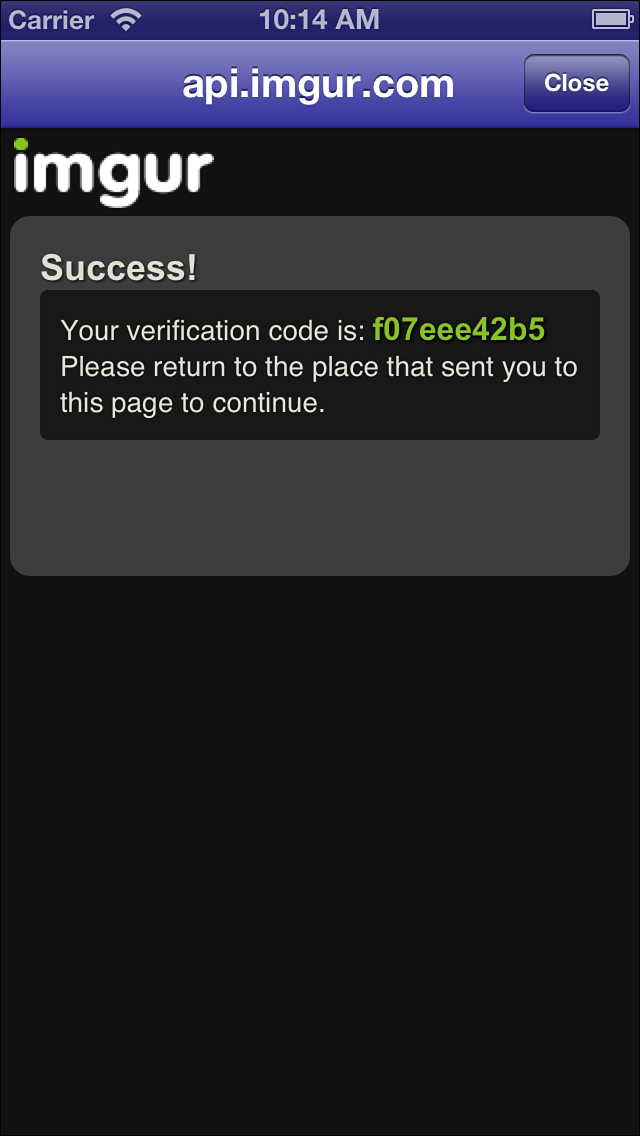
Figure 5-2. Users must explicitly grant access to OAuth-based applications to allow API calls.
Your app should either instruct users to copy this code so that they can type it in or should retrieve it directly from the page source using JavaScript, for example:
// Look for the "Your verification code is" pattern that imgur provides
- (void)webViewDidFinishLoad: (UIWebView *)aWebView
{
// Retrieve HTML
NSString *string = [webView
stringByEvaluatingJavaScriptFromString:
@"document.getElementById('content').innerHTML;"];
// Check for code
NSString *searchString = @"Your verification code is";
if ([string rangeOfString:searchString].location == NSNotFound)
return;
// Split into lines
NSArray *lines = [string componentsSeparatedByCharactersInSet:
[NSCharacterSet newlineCharacterSet]];
for (NSString *line in lines)
{
// Search each line for code
if ([line rangeOfString:searchString].location == NSNotFound)
continue;
NSString *code = [self scanForCode:line];
if (code)
{
// Store the credential
CredentialHelper *helper =
[CredentialHelper helperWithHost:HOST];
[helper storeCredential:code forKey:@"oauth_verifier"];
}
}
// Automatically close the window
[self close];
}
As you can tell, this HTML/Objective-C hybridization is ugly, hard-to-maintain, and subject to failure should the API-provider change any wording. That’s why some providers now offer xAuth access instead. xAuth enables apps to directly supply the same credentials that users normally type into an OAuth authentication web page. That’s handy for iOS apps because you don’t have to display a web page and then use JavaScript to scrape for results. Sadly, many providers are moving away from xAuth.
You supply the username (“x_auth_username”), password (“x_auth_password”), the OAuth token, and set an authentication mode (“x_auth_mode”) such as “client_auth”, for client authentication. This enables you to bypass the web page authentication phase entirely and provide a seamless experience for the application user.
Not all API providers offer xAuth options, and those that do tend to limit the scope of that access to guard against abuse. Check with your API provider to see if xAuth is an option for your application.
Step 5: Authenticate with the Access Token
Use the verification code returned in step 4 to complete the authentication process, as shown in Recipe 5-7’s authenticate: method. Submit a final token request to your API provider, supplying the verifier as part of your request. This request uses a different endpoint from step 1, for example:
https://api.imgur.com/oauth/access_token
Your request contains both the code (“oauth_verifier”) and the OAuth token returned in step 2.
The way you sign your requests now changes. The first token request in step 2 was signed only with the application’s consumer secret key. Starting with step 5, and continuing from there, all requests must be signed with both the consumer secret key and the OAuth secret token (consumer_secret&user_token_secret). What’s more, this step returns a new OAuth secret token.
That means the secret token returned in step 2 is used exactly once, to request a new pair of keys. This step returns a new OAuth token and a new OAuth secret token. Discard your previous values; replace them with these new ones. Make sure they’re stored to the secure keychain and not to user defaults. Your application is now authorized and ready to submit requests.
Note
Always use the keychain to save your OAuth tokens. Never store OAuth credentials to end user-readable places such as plain-text files, data base entries, or user defaults. Several well-publicized hacks have allowed access to these tokens, opening up user accounts on popular social networking services to mischievous exploits. Protect your users by safeguarding their tokens, as demonstrated in Recipe 5-1.
// Request initial tokens
- (BOOL) requestTokens: (NSString *) tokenEndpoint
{
NSURL *endpointURL = [NSURL URLWithString:tokenEndpoint];
// Create the preliminary (no token) dictionary
NSMutableDictionary *dict = [self baseDictionary];
if (!dict) return NO;
// Create signature
NSMutableString *baseRequest =
[OAuthRequestSigner baseRequestWithEndpoint:tokenEndpoint
dictionary:dict andRequestMethod:@"POST"];
NSString *secretKey =
[_consumerSecret stringByAppendingString:@"&"];
dict[@"oauth_signature"] =
[OAuthRequestSigner signRequest:baseRequest withKey:secretKey];
// Produce the token request
NSString *bodyString = [OAuthRequestSigner
parameterStringFromDictionary:dict];
NSMutableURLRequest *request =
[NSMutableURLRequest requestWithURL:endpointURL];
request.HTTPMethod = @"POST";
request.HTTPBody = STRDATA(bodyString);
[request setValue:@"application/x-www-form-urlencoded"
forHTTPHeaderField:@"Content-Type"];
// Request the tokens
NSError *error;
NSURLResponse *response;
NSData *tokenData =
[NSURLConnection sendSynchronousRequest:request
returningResponse:&response error:&error];
if (!tokenData)
{
NSLog(@"Failed to retrieve tokens: %@",
error.localizedFailureReason);
return NO;
}
return [self processTokenData:tokenData];
}
// Process and store tokens
- (BOOL) processTokens: (NSData *) tokenData
{
NSString *tokenResultString = DATASTR(tokenData);
// Check that we've received the right data
NSRange range = [tokenResultString
rangeOfString:@"oauth_token_secret"];
if (range.location == NSNotFound)
{
NSLog(@"Failed to retrieve tokens: %@", tokenResultString);
return NO;
}
// Convert the tokens
NSDictionary *tokens = [OAuthRequestSigner
dictionaryFromParameterString:tokenResultString];
if (!tokens)
{
NSLog(@"Unable to process tokens: %@", tokenResultString);
return NO;
}
// Store the tokens
for (NSString *key in tokens.allKeys)
credentialHelper[key] = tokens[key];
return YES;
}
// Finish the end-user authentication step
- (BOOL) authenticate: (NSString *) accessEndpoint
{
NSURL *endpointURL = [NSURL URLWithString:accessEndpoint];
// This verifier invalidates after use
NSString *access_verifier = credentialHelper[@"oauth_verifier"];
if (!access_verifier)
{
NSLog(@"Error: Expected but did not find verifier");
return NO;
}
// Add the token and verifier
NSMutableDictionary *dict = [self baseDictionary];
if (!dict) return NO;
dict[@"oauth_token"] = credentialHelper[@"oauth_token"];
dict[@"oauth_verifier"] = credentialHelper[@"oauth_verifier"];
// Create signature
NSMutableString *baseRequest =
[OAuthRequestSigner baseRequestWithEndpoint:accessEndpoint
dictionary:dict andRequestMethod:@"POST"];
NSString *compositeKey = [NSString stringWithFormat:@"%@&%@",
_consumerSecret, credentialHelper[@"oauth_token_secret"]];
dict[@"oauth_signature"] =
[OAuthRequestSigner signRequest:baseRequest
withKey:compositeKey];
// Build the request
NSString *bodyString =
[OAuthRequestSigner parameterStringFromDictionary:dict];
NSMutableURLRequest *request =
[NSMutableURLRequest requestWithURL:endpointURL];
request.HTTPMethod = @"POST";
request.HTTPBody = STRDATA(bodyString);
[request setValue:@"application/x-www-form-urlencoded"
forHTTPHeaderField:@"Content-Type"];
// Place the request
NSError *error;
NSURLResponse *response;
NSData *resultData =
[NSURLConnection sendSynchronousRequest:request
returningResponse:&response error:&error];
// Check for common issues
if (!resultData)
{
NSLog(@"Failed to retrieve tokens: %@",
error.localizedFailureReason);
return NO;
}
// Convert results to a string
NSString *resultString = DATASTR(resultData);
if (!resultString)
{
NSLog(@"Expected but did not get result string with tokens");
return NO;
}
// Process the tokens
NSDictionary *tokens = [OAuthRequestSigner
dictionaryFromParameterString:resultString];
if ([tokens.allKeys containsObject:@"oauth_token_secret"])
{
NSLog(@"Success. App is verified.");
for (NSString *key in tokens.allKeys)
credentialHelper[key] = tokens[key];
// Clean up
[credentialHelper removeCredential:@"oauth_verifier"];
credentialHelper[@"authenticated"] = @"YES";
}
return YES;
}
To find this recipe’s full sample project, point your browser to https://github.com/erica/iOS-6-Advanced-Cookbook and go to the folder for Chapter 5.
Summary
This chapter introduced advanced network-supporting technologies. You saw how to work with the keychain, handle secure authentication challenges, upload data, use basic OAuth, and more. Here are a few thoughts to take away before leaving this chapter:
• Most of Apple’s networking support is provided through low-level C-based routines. If you can find a friendly Objective-C wrapper to simplify your programming work, consider using it. The only drawback occurs when you specifically need tight networking control at the most basic level of your application, which is rare. There are superb resources out there. Just Google for them.
• iOS’s system keychain has become so incredibly simple to use, there’s no reason not to take advantage of it—especially when working with secure credentials. Protect your user and safeguard your application’s reputation.
• If you can get access to xAuth rather than OAuth, use it. You’ll generally apply with a specific application and some providers require screen shots, descriptions, and so on. In return, you gain a cleaner interface without having to scrape web pages.