7. Managing Files and Using External Storage
In this chapter, you find out how to manage stored and downloaded files on your Chromebook and on external devices connected to your Chromebook.
Your Chromebook is designed to be a cloud-based computing device. That is, it’s designed to work with web-based applications and files stored on the web. As such, most Chromebooks don’t have much in the way of internal storage—a relatively meager 16MB of flash memory and no hard drive. (The big exception is the Acer C7 with its 320GB hard drive, which is big enough to store lots of big picture files.)
In addition to your Chromebook’s internal storage, you can connect memory cards and USB memory devices to your Chromebook and use those devices for external storage. You manage these local files using Chrome’s built-in File Manager. (And, of course, you can store anything you want online at Google Drive—which is covered in the next chapter.)
Using Chrome’s File Manager
Chrome’s File Manager is similar in concept to the file management utilities in the Windows and Mac operating systems. You can use the File Manager to view, open, copy, cut, paste, and delete files stored in your Chromebook’s memory and on external devices connected to your Chromebook. It’s relatively easy to access and, because of its limited functionality, quite easy to use.
To open the File Manager, press Ctrl+M on your Chromebook keyboard. You can also open the File Manager by clicking the Apps icon in the Launcher and selecting Files.
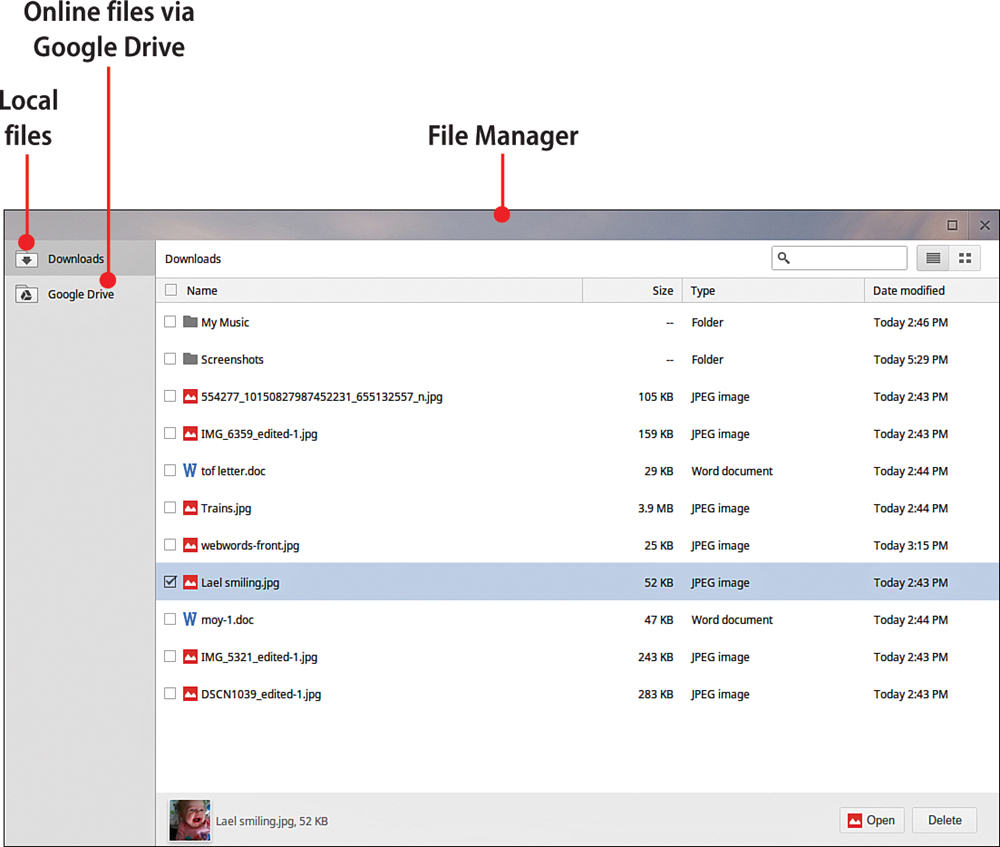
The File Manager itself consists of two sections. The sidebar, on the left, displays the three main types of storage on your Chromebook: Downloads (storage on the Chromebook itself), Google Drive (online storage with Google), and any external devices you have connected. The main part of the File Manager window displays the contents of the selected storage or folder.
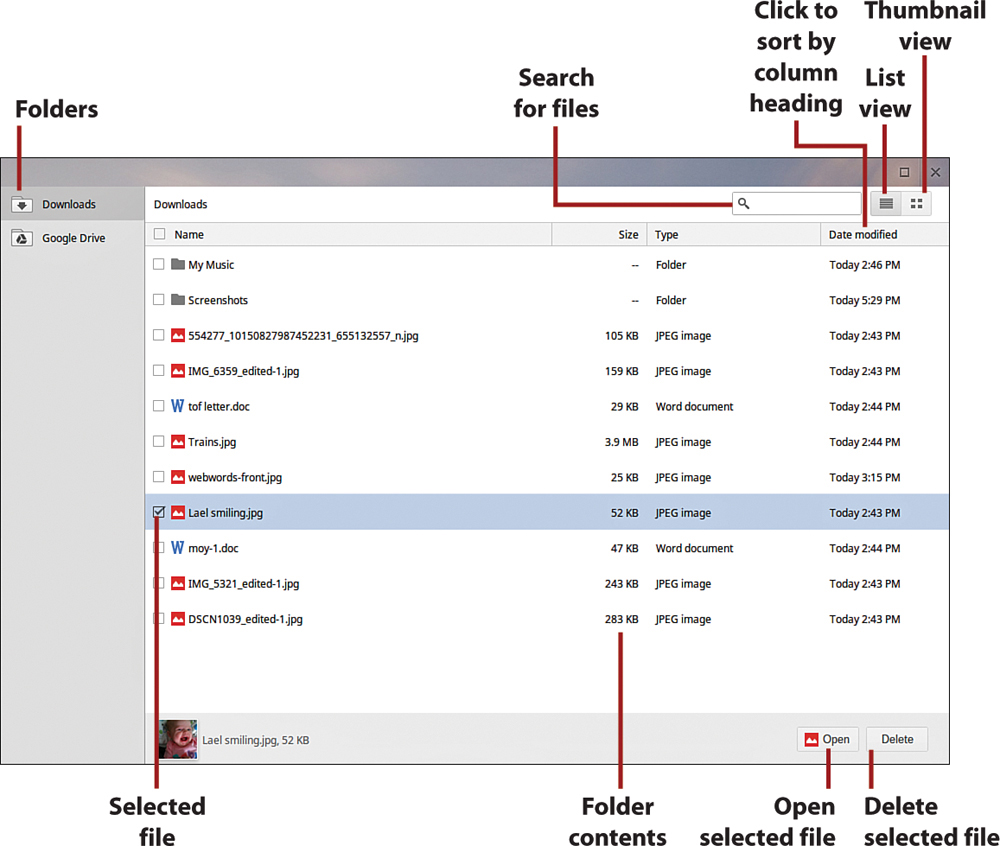
The main window can display contents either as a list or as large thumbnails. You select the file view by clicking either the List View or Thumbnail View buttons at the top right of the File Manager window.
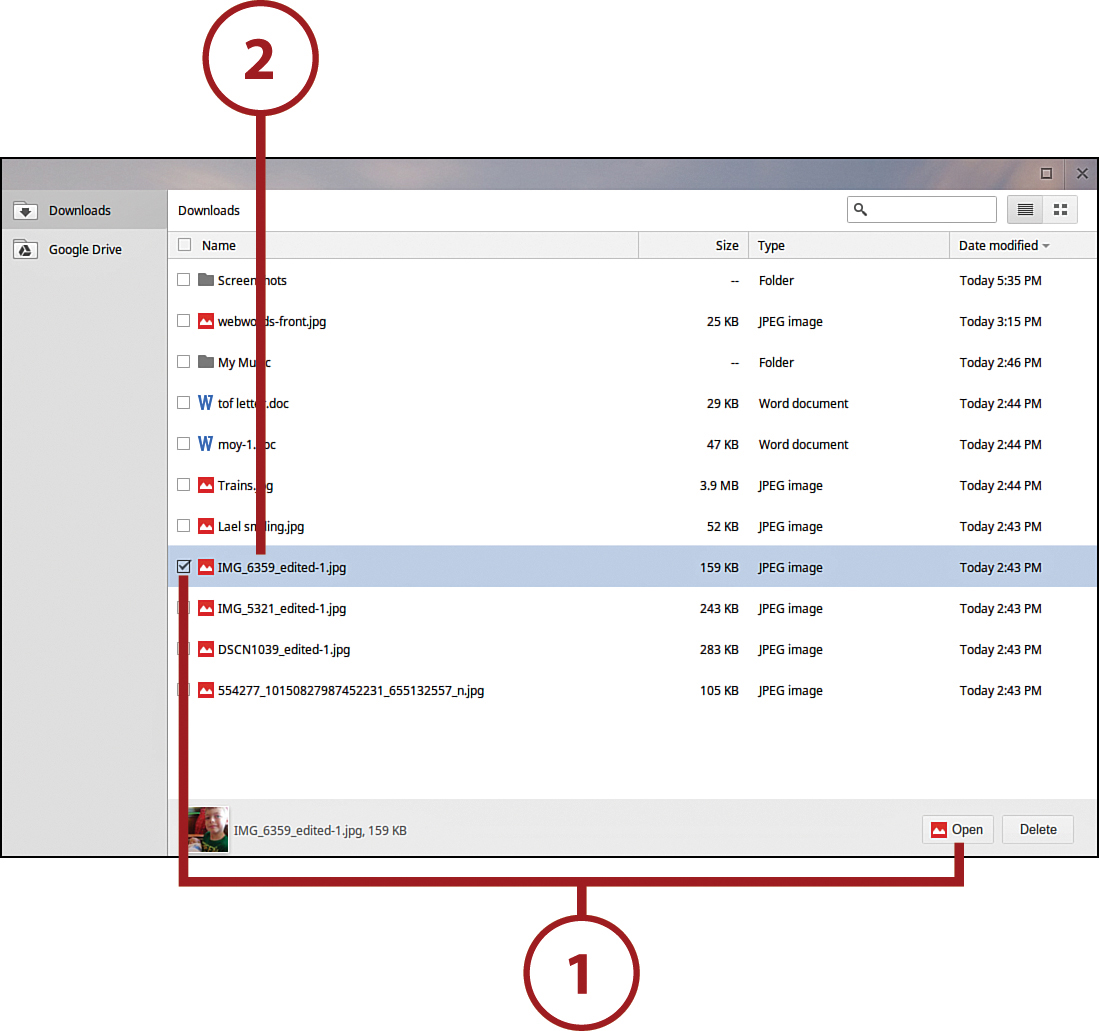
In List View, the contents of the selected folder are displayed by default in reverse chronological order—that is, the most recent files first. For each file, you see the filename, size, type, and date modified. You can sort by any of these attributes by clicking the top of the selected column.
In Thumbnail view, you see only the name of the file—along with a thumbnail image of the file’s contents. For a picture file, the thumbnail is the picture itself. For other types of files, the thumbnail image is more generic, and sometimes reflective of the file type.
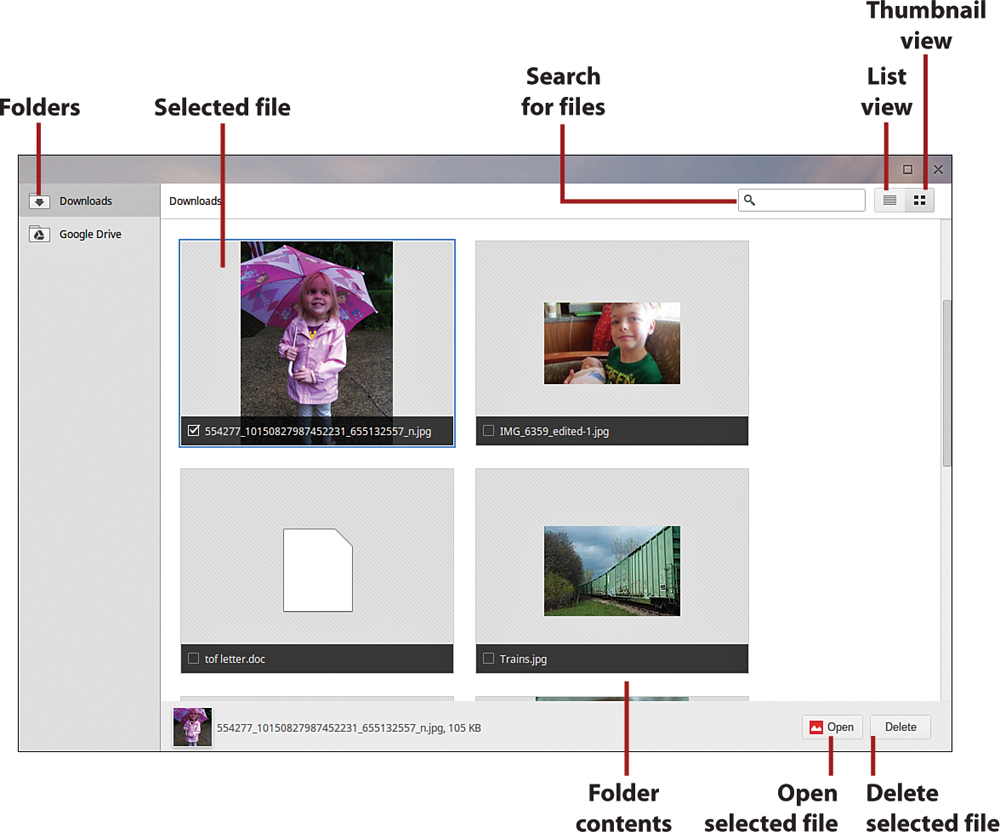
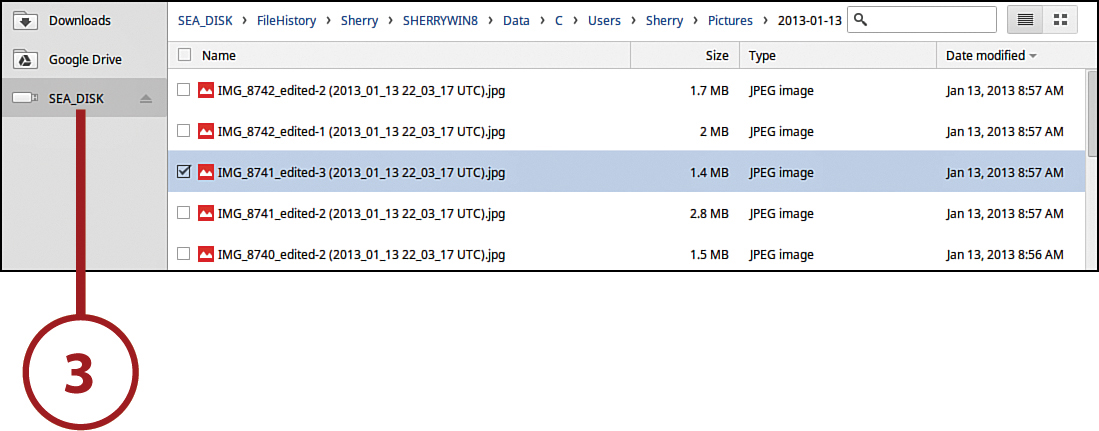
At the top of the File Manager is a nested list of all the folders and subfolders in the path above the current folder. Click any folder or subfolder in this list to return directly to that folder.

Opening Files and Folders
There are several ways to open files and folders from within the File Manager.
1. Click the file or folder and then click the Open button at the bottom of the window.
2. Double-click the file or folder.
3. Right-click the file or folder and then select Open.
Office Files
If you try to open a Word, Excel, or PowerPoint file, File Manager displays a Chrome Office Viewer button instead of the normal Open button. Click this button to open the file in the Chrome Office View app.
Renaming Files and Folders
You can, if you wish, change the names of files from within the File Manager.
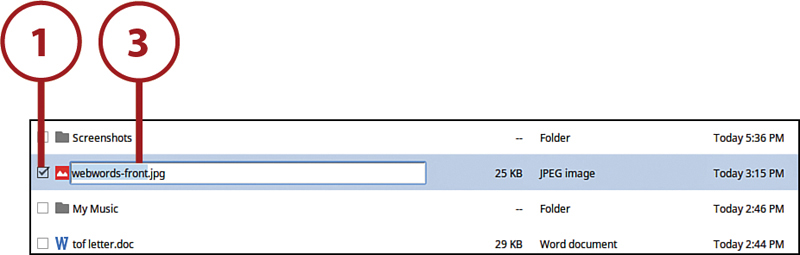
1. From within the File Manager, navigate to and right-click the file or folder you want to rename.
2. Select Rename from the pop-up menu.
Right-Clicking
To right-click using your Chromebook’s touchpad, press the touchpad with two fingers.
3. The file or folder name is now highlighted. Type the new name into the highlighted area and press Enter.
Copying a File
It’s relatively easy to copy a file from its current location to another folder on your Chromebook, to an external storage device, or to your Google Drive.
1. From within the File Manager, click to select the file you want to copy.
2. Right-click this file to display the pop-up menu.
3. Select Copy from the pop-up menu.
4. Navigate to and open the location where you want to copy the file.
5. Right-click an open area of the File Manager window to display the pop-up menu.
6. Click Paste.
Moving a File
Moving a file is different from copying it. When you copy a file, you leave that file in its original location, and paste a copy of that file to a new location; two files remain. When you move a file, via the cut-and-paste operation, the file is removed from its original location and pasted into the new location; only one file remains.
1. From within the File Manager, click to select the file you want to move.
2. Right-click this file to display the pop-up menu.
3. Select Cut from the pop-up menu.
4. Navigate to and open the location where you want to move the file.
5. Right-click an open area of the File Manager window to display the pop-up menu.
6. Click Paste.
Deleting Files
Naturally, you can use File Manager to delete files and folders. This is often necessary to free up the limited storage space on your Chromebook.
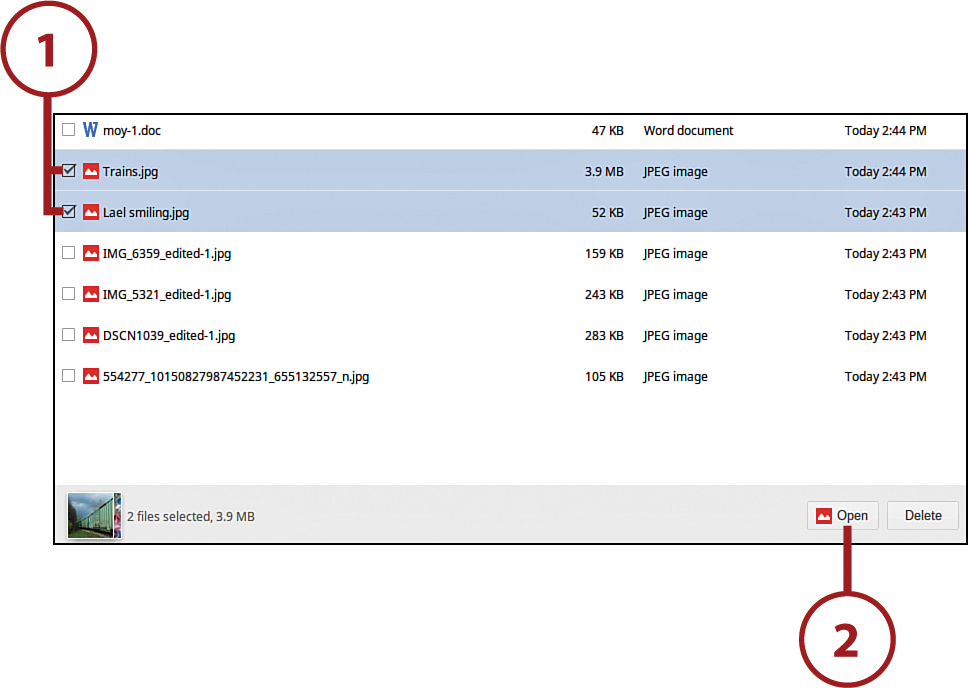
1. Navigate to and click the file(s) or folder(s) you want to delete.
Selecting Multiple Files
You can select multiple files from within the File Manager. Just check the checkbox for each file you want to select, or hold down the Ctrl key while selecting multiple files.
2. Click the Delete button. Alternatively, you can right-click and select Delete from the pop-up menu.
Creating a New Folder
To better organize your stored files, you can use the File Manager to create multiple folders and subfolders.
1. Navigate to the folder where you want to add the new subfolder.
2. Right-click anywhere in an open area of the File Manager window to display the pop-up menu.
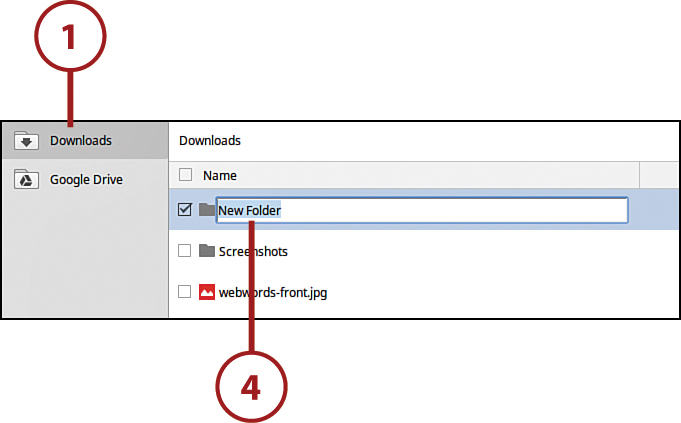
3. Click New Folder.
4. File Manager creates the new folder with the name area open for editing. Enter a name for the new folder and press Enter.
Saving Files from the Web
Often you’ll find images and other files on websites that you’d like to save copies of. You can save these files directly to your Chromebook, or to a memory card or external USB memory device connected to your Chromebook.
Limited Storage
Because your Chromebook has limited storage on board, you should probably save most downloaded files to an external storage device or to your Google Drive.
1. From within the Chrome browser, right-click the file or image you want to save and then select Save Image As or Save File As from the pop-up menu.

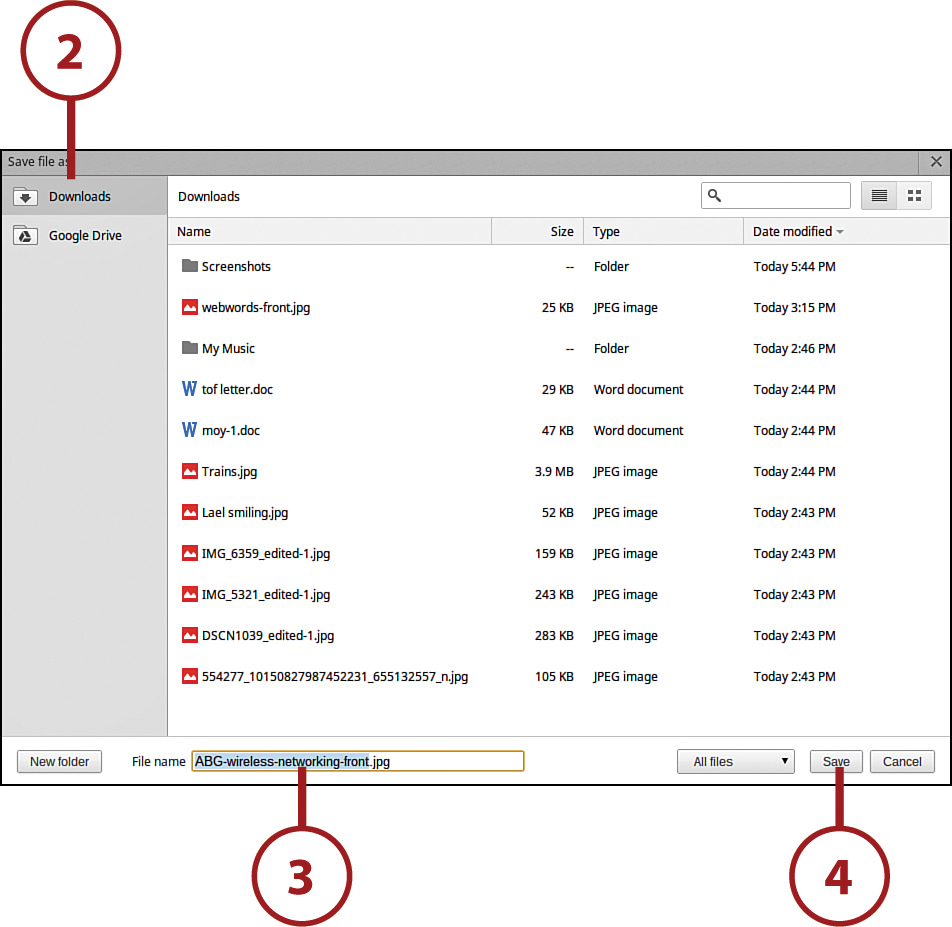
2. When the Save File As window appears, select a folder in which to save the file.
3. Confirm or change the name of the file in the File Name field.
4. Click the Save button.
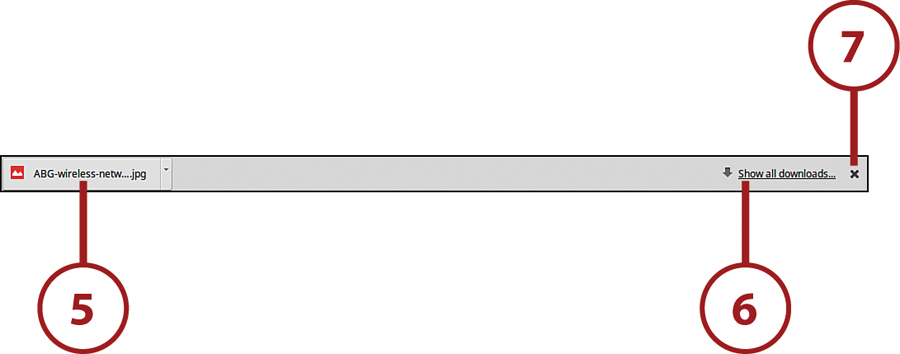
5. Chrome displays the Downloads pane at the bottom of the browser window, with a button for the selected file on the far left. To view the downloaded file, click the file button.
6. Click the Show All Downloads link to view all recently downloaded files.
7. Click the X at the far right to close the downloads pane.
Using External Storage Devices
You can connect various types of external file storage to your Chromebook. In particular, you can connect USB memory devices, memory cards (such as those used in digital cameras), and any external hard drive that connects via USB.
Connecting a USB Memory Device
You can connect any USB memory device (sometimes called a flash drive or thumb drive) to your Chromebook’s USB ports and then access data stored on the drive using Chrome’s File Manager.
1. Insert the USB memory device into an open USB port on your Chromebook.
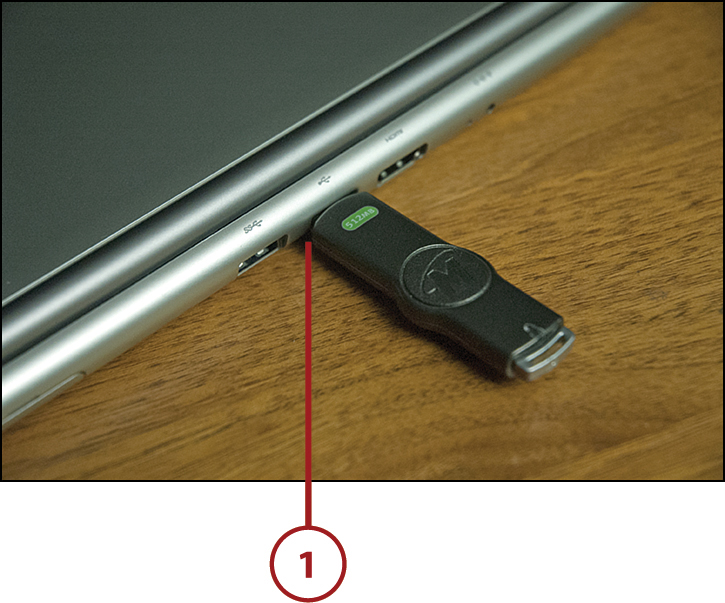
2. Chrome recognizes the USB device, opens the File Manager, and displays the contents of the device.
Inserting a Memory Card
Your Chromebook’s Multi-Card slot can read and write data to and from popular types of memory cards. The Samsung Chromebook reads/writes SD (Secure Digital), SDHC (Secure Digital High Capacity), SDXC (Secure Digital Extended Capacity), and MMC (MultiMediaCard) cards. The Acer C7 Chromebook reads/writes SD and MMC cards.
These memory cards are typically used to store images taken from digital cameras. When you insert a memory card into your Chromebook, you can view the images stored on the card. You can also use memory cards to store files downloaded from the Internet.
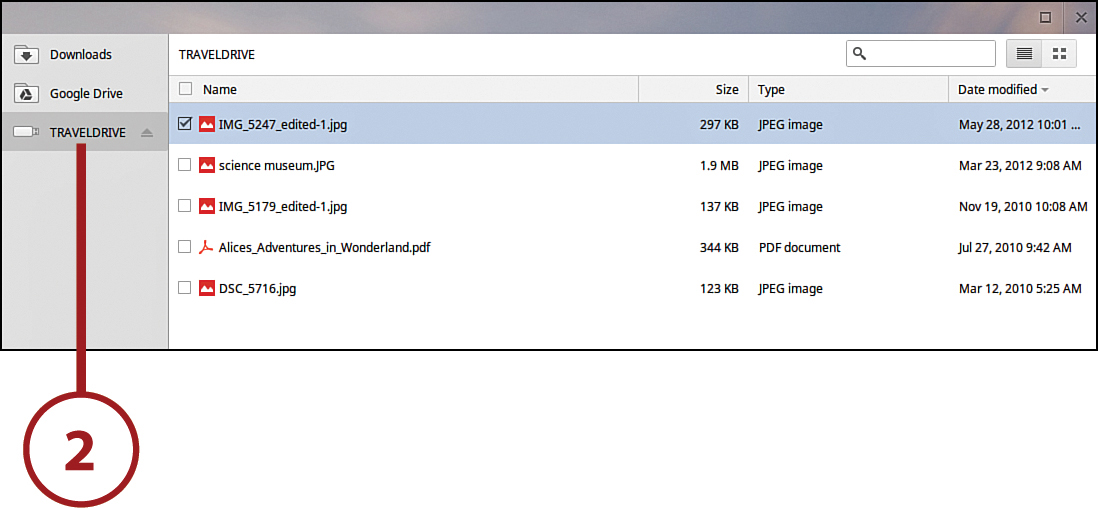
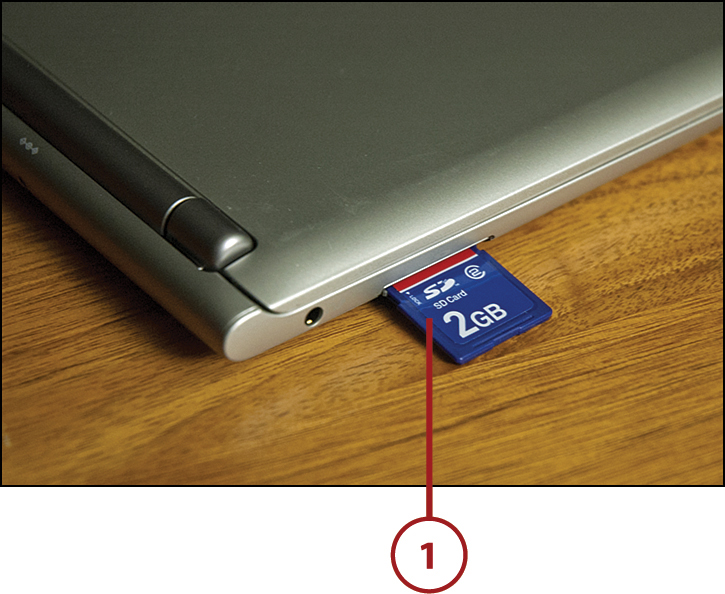
1. Insert the memory card into the memory card slot on your Chromebook.
2. Chrome recognizes the memory card, opens the File Manager, and displays the contents of the card.
Screen Captures
If you need to capture a picture of the current screen on your Chromebook, press the Ctrl+Next Window button. Screen captures are stored in the File Shelf, Screenshots folder.
Connecting an External Hard Drive
Current-generation Chromebooks also let you use external USB hard drives for additional storage. This way, you can store more and larger files than you can with the Chromebook’s internal storage; you can also use the external hard drive to store backup copies of your most important files.
1. Connect one end of a USB cable to the USB connector on the external hard drive.
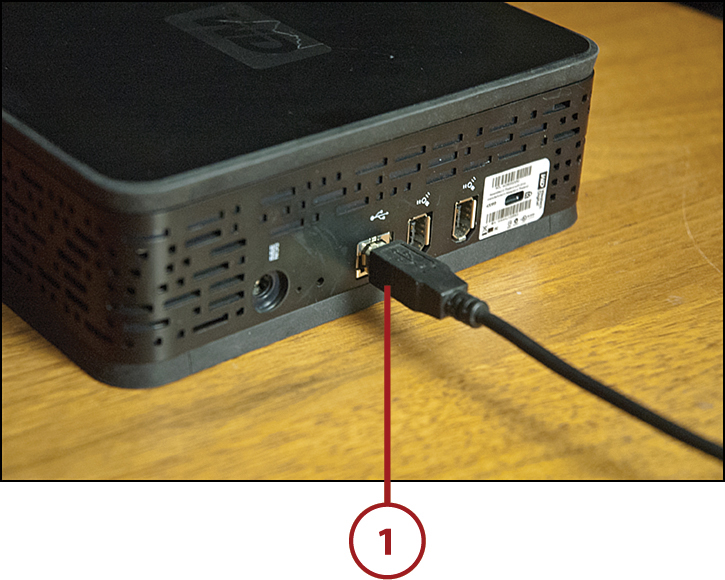
2. Connect the other end of the USB cable to an open USB port on your Chromebook.
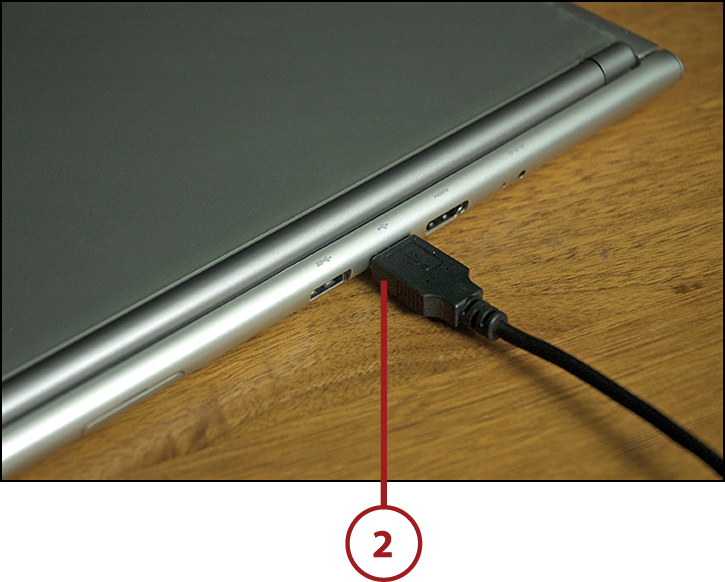
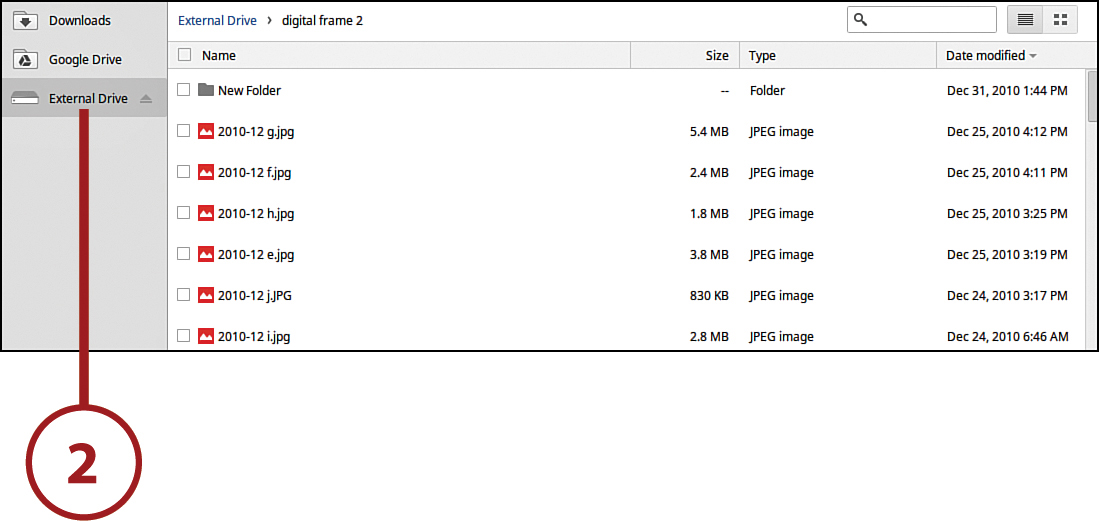
3. Chrome recognizes the external drive, opens the File Manager, and displays the contents of the drive.