3. Making the Phone Your Own
In this chapter, you find out how to customize your phone by populating the Home screen with widgets, shortcuts, and folders; change the default wallpaper; organize your Apps pages and create folders; set default and contact-specific ringtones; and configure and enable special system settings, such as Blocking mode and One-Handed Operation. Topics include the following:
![]() Customizing the Home screen with new wallpaper, shortcuts, folders, and widgets
Customizing the Home screen with new wallpaper, shortcuts, folders, and widgets
Nothing prevents you from using the phone exactly as it was when you first opened the box—keeping the default wallpaper, installing no additional widgets, downloading no new apps, and ignoring Settings for the operating system and apps. But the fun of having a powerful smartphone is in customizing it—personalizing the phone in ways that make it easier, more efficient, and fun to use.
Customizing the Home Screen
The easiest and most obvious way to personalize the phone is to customize its Home screen. In fact, many of the Home screen customization options, such as changing the wallpaper, adding widgets, and adding shortcuts to your favorite apps, are what users do first with their new phones.
Select Wallpaper
The simplest way to customize the phone is to change its Home screen background (called wallpaper) by selecting an image that’s aesthetically pleasing, amusing, or touching. Wallpaper can be a static image or a live, moving image. The image you choose is applied to all Home screen pages.
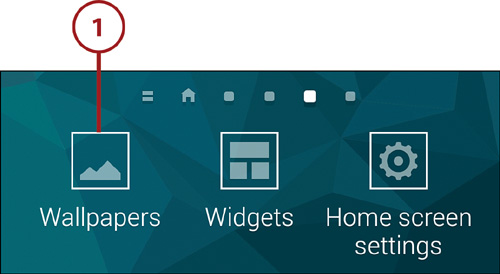
1. On the Home screen, press and hold the Recent Apps key and tap the Wallpapers icon at the bottom of the screen.
Wallpaper Shortcuts
As alternatives, you can press and hold any empty spot on a Home screen page or pinch your fingers together on an empty spot, and then tap the Wallpapers icon.
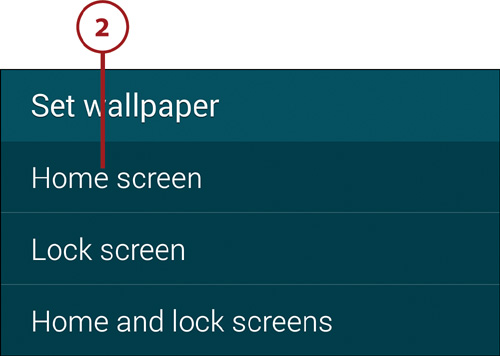
2. Tap Home Screen, Lock Screen, or Home and Lock Screens—depending on the screen(s) for which you want to select a new wallpaper image.
Using a Photo as Home Screen Wallpaper
Photos make excellent lock screen wallpaper but so-so Home screen wallpaper. When a photo is used as a Home screen background, it’s obliterated on most pages by widgets and shortcuts. When placed on the lock screen, on the other hand, you’ll actually be able to see your treasured photo. You’ll probably be happier with a pattern, color, or another simple wallpaper as the Home screen background.
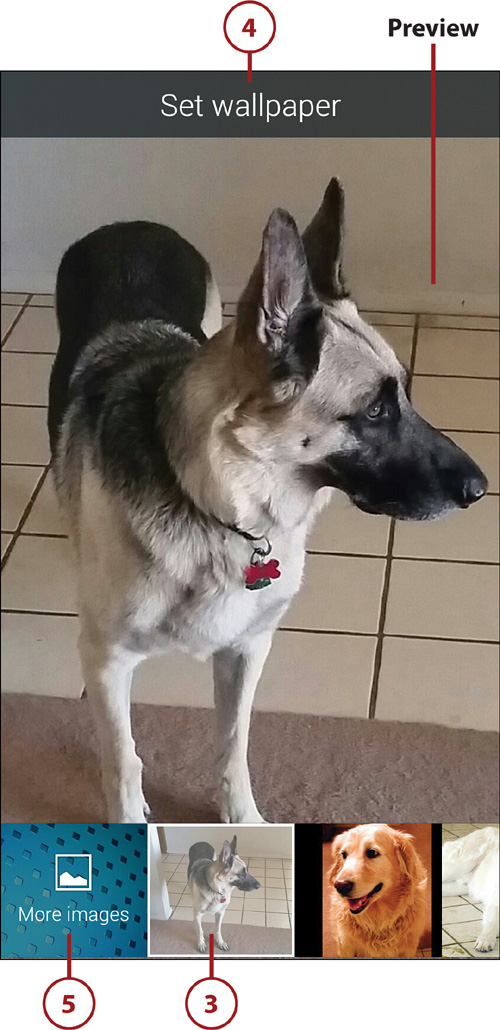
3. Scroll through and tap thumbnails to view the available types of wallpaper. Options include More Images (a cropped area of a photo or other image that’s stored on the phone or in an online account), personal images you’ve previously used as wallpaper, static images provided by Samsung and your carrier, and live wallpaper.
4. To apply an image or live wallpaper shown in the scrolling list, select its thumbnail and tap Set Wallpaper. If you want to use a photo or image that isn’t in the Wallpapers list, continue with Step 5.
Static Versus Live Wallpaper
Live wallpaper contributes more to battery drain than a static wallpaper design or personal photo. If you find that you’re running out of power too quickly, consider replacing your live wallpaper with static wallpaper.
5. Tap the More Images thumbnail.
6. If a Complete Action Using dialog box appears, select an app or image source, and tap Just Once.

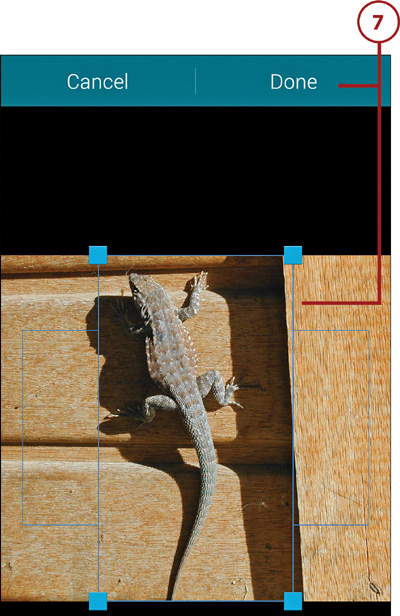
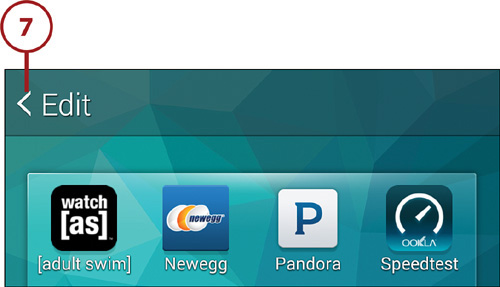
7. Open the folder that contains the image. Tap the thumbnail to open the image for cropping, resize and move the selection rectangle as necessary to select the desired area, and tap Done.
Managing Personal Wallpaper Images
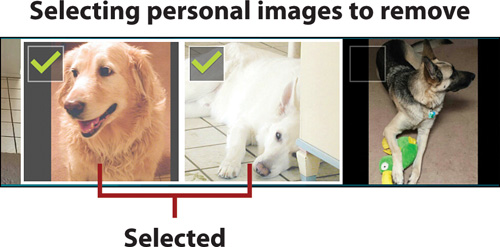
Each time you try out a personal image as wallpaper (Step 5), an image thumbnail is added to the scrolling Wallpapers list. To remove any image that you don’t intend to reuse, perform Steps 1–2, press and hold one of the images to select it, select other images that you want to remove, and then tap the Trash icon at the top of the screen.
Rearrange, Remove, and Add Home Screen Pages
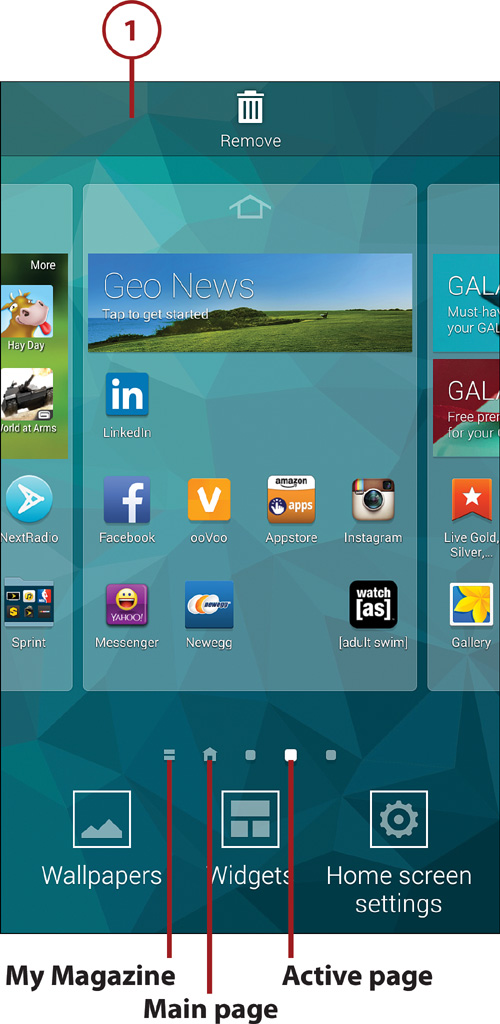
The default Home screen has four horizontally scrolling pages, plus a special page dedicated to My Magazine/Flipboard—a news and social networking aggregator. You can rearrange the pages, remove ones that you don’t need, or add new pages (up to the maximum of seven).
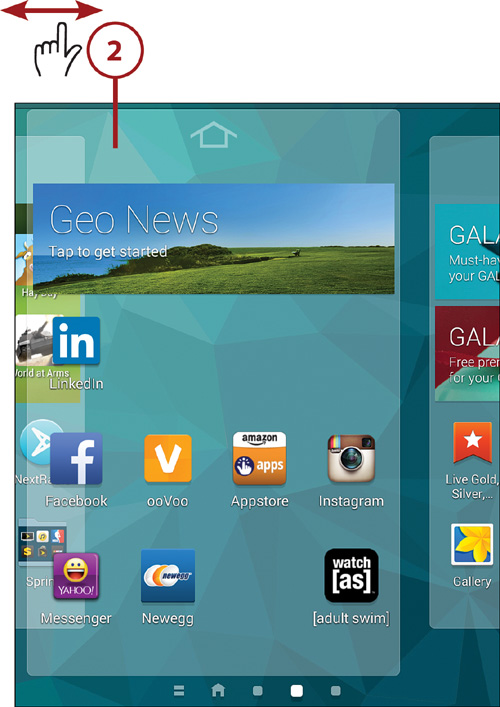
1. On the Home screen, press and hold the Recent Apps key, or press and hold (or pinch) an empty spot on a Home screen page.
2. Move a page. To change the position of a page, press and hold it, and then drag to the left or right. As you drag, affected pages automatically slide out of the way to make room for the page. Release the page when it’s in the correct position.
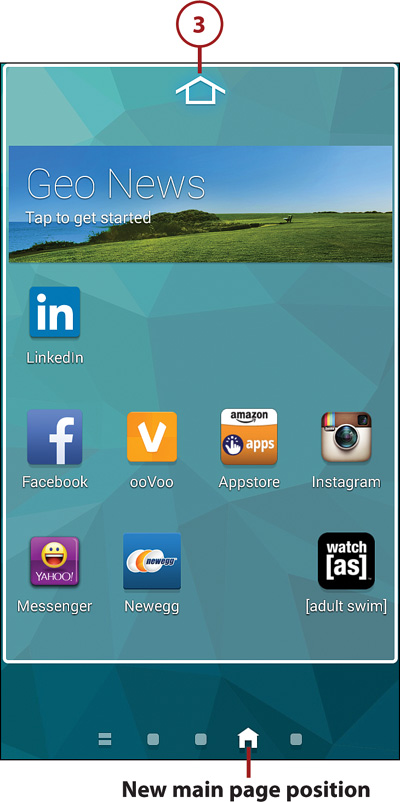
3. Designate a different main page. The main page (marked with a house icon) can be any Home screen page, not just the first one. Whenever you’re on the Home screen, pressing the Home key always takes you to this main page. To set a new main page, tap the house icon at the top of the page.
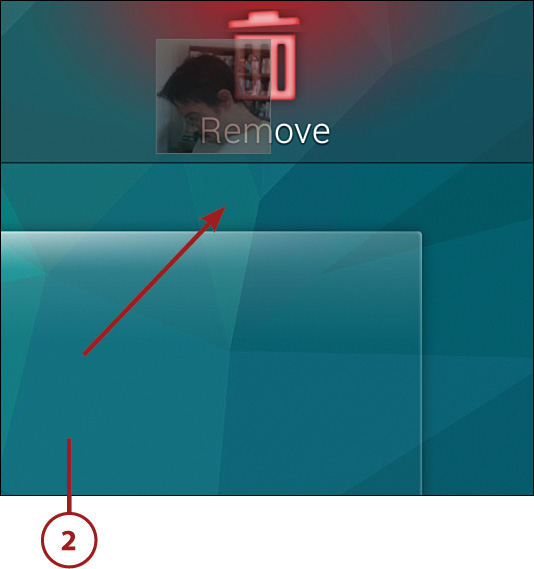
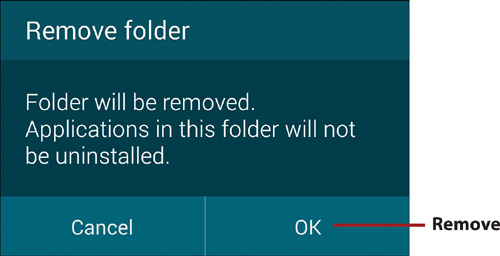
4. Delete a page. Press and hold a page’s thumbnail, and then drag it onto the Remove icon at the top of the screen. If the page contains one or more items, a confirmation dialog appears. Tap OK to confirm the deletion.
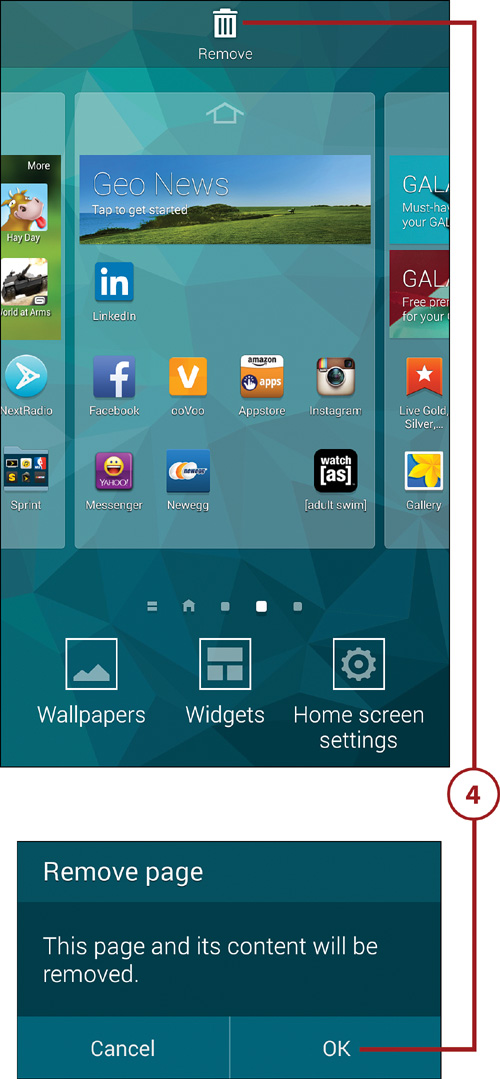
Effects of Deleting a Page
As indicated in the confirmation dialog, deleting a page also removes the items on that page, such as widgets and shortcuts. Of course, you can add those items to the remaining or new pages, if you want.
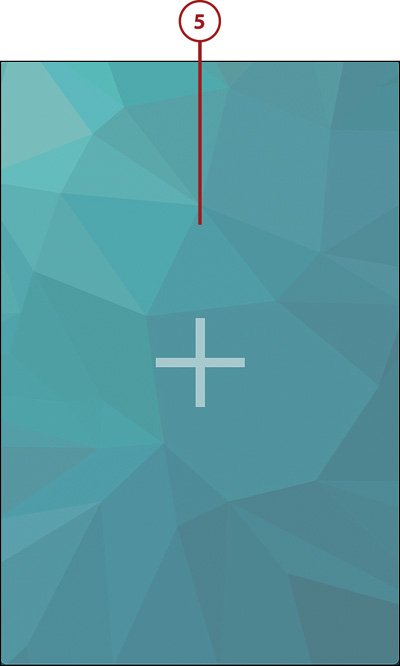
5. Add a new page. You can have a maximum of seven Home screen pages. To create a new page, scroll to the last page (marked with a plus (+) symbol) and tap the symbol. After adding a new page, you can optionally change its position (see Step 2).
6. When you finish editing, complete the process by pressing the Back key, pressing the Home key, or tapping the thumbnail of the Home screen page that you want to view.
Home Screen Settings
Another option that can affect the number of Home screen pages is found by tapping the Home Screen Settings icon (see the figure for Step 1). You can elect to remove the My Magazine/Flipboard page and specify a transition effect to use when flipping through the Home screen pages.
Add Shortcuts
You can place shortcuts to your favorite apps on the Home screen. When you tap an app shortcut, the app that it represents launches. An Android shortcut is the equivalent of a Mac alias or a Windows shortcut.
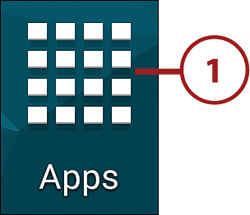
1. Navigate to the Home screen page to which you want to add the shortcut, ensure that it has an open space for the shortcut, and tap the Apps icon. (You can add the shortcut to any page, but the current one is initially offered as the destination.)
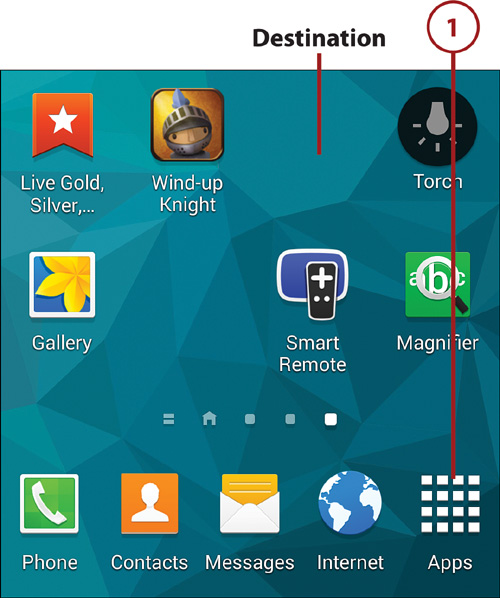
2. Find the app for which you want to create a shortcut.
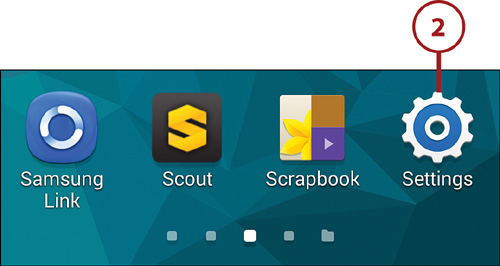
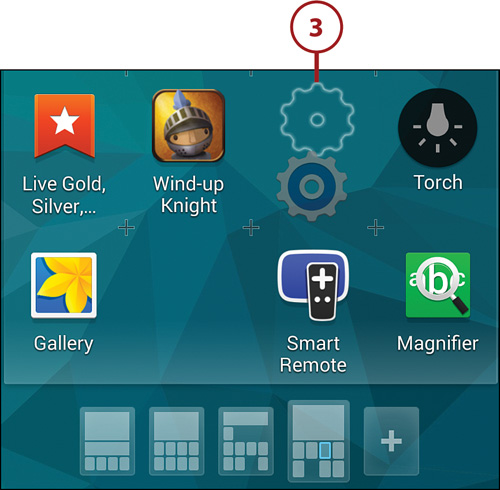
3. Press and hold the app’s icon, drag it into an open spot on the current Home screen page, and release the icon.
Repositioning or Removing a Shortcut
After creating a shortcut, you can reposition it on the current or a different Home screen page. Press and hold the shortcut, and then drag it to the desired position.
To remove a shortcut that you no longer want, press and hold it, and then drag it onto the Remove icon at the top of the screen. Removing a shortcut doesn’t affect the item it represents.
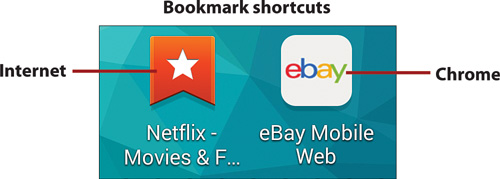
Creating a Bookmark Shortcut
You can also create shortcuts to your favorite web pages. In the Internet or Chrome app, open the page or site for viewing. In Internet, tap the menu icon and choose Add Shortcut to Home Screen. In Chrome, tap the menu icon and choose Add to Homescreen, edit the name, and tap Add. The bookmark is added to a Home screen page.
Add Widgets
A widget is an application that runs on the Home screen. Many, such as Weather, aren’t interactive or are only minimally so. For example, you can tap the refresh icon on the Weather widget to force an update of the weather info. Otherwise, such widgets simply provide continuously updated information. Other widgets, such as Music, are designed for interaction. By tapping its buttons, you can pause or restart playback, and skip to the next or previous song.
You can add a widget in any free space on a Home screen page, as long as there’s room for it. Widgets come in a variety of sizes, from one- or two-section widgets to full-screen ones. In addition to the widgets supplied with your phone, downloaded applications sometimes include their own widgets.
1. Navigate to the Home screen page to which you want to add the widget and ensure that it has an open space for the widget.
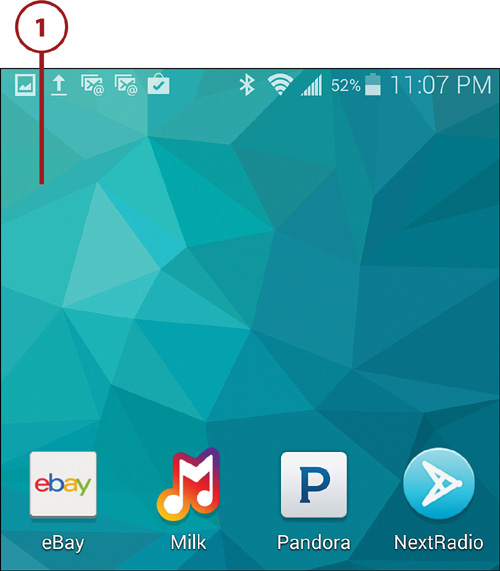
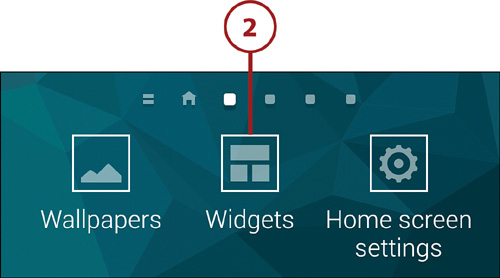
2. Press and hold the Recent Apps key, and then tap the Widgets icon.
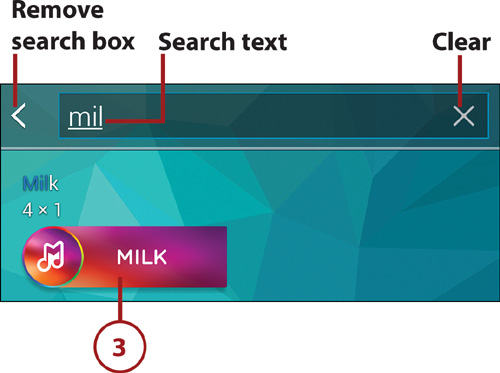
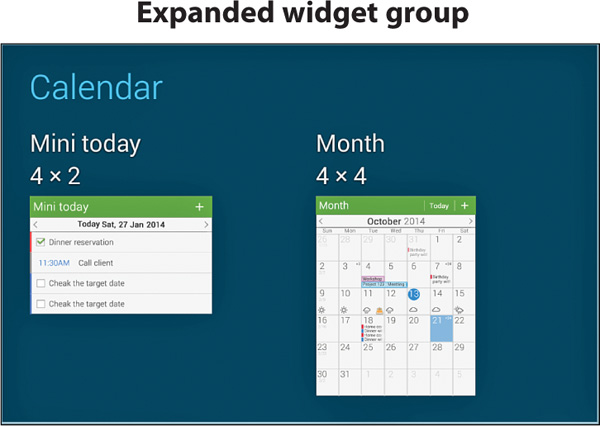
3. Find the widget that you want to install. Above each widget is the number of screen sections (horizontal × vertical) it requires. To assist in your search, you can do any of the following:
• Navigate the widget pages by swiping left and right or by tapping navigation dots.
• Search for a widget by tapping the menu icon and choosing Search Widgets. Enter part of the widget’s name. As you type, matches are displayed. To dismiss the search box, tap the less than (<) icon on the box’s left edge.
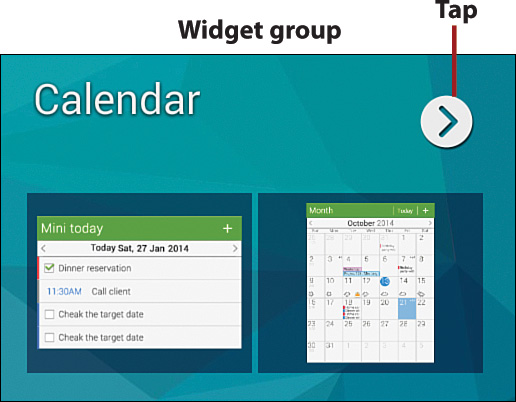
• Any widget followed by a greater than (>) icon is a widget group. To view or select one of its widgets, tap the > icon.
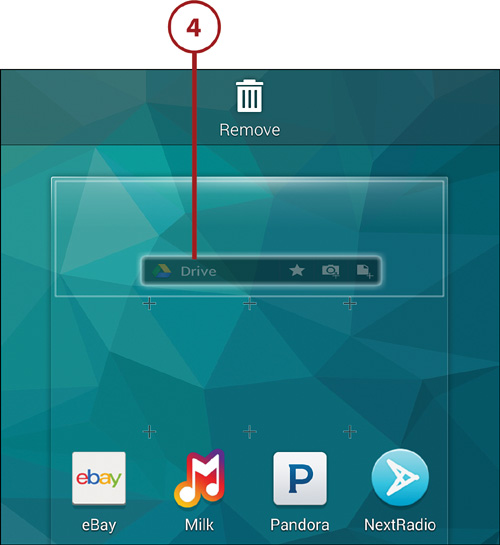
4. Press and hold the widget, and then drag it into position on the current (or another) Home screen page.
>>>Go Further: Widget Shortcuts
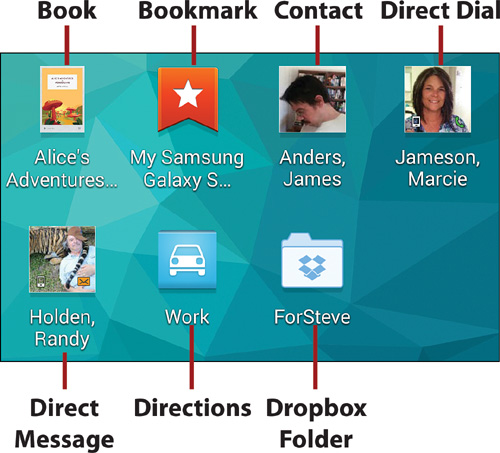
• Book. Links to a downloaded ebook.
• Bookmark. Links to a web page in Internet or Chrome.
• Contact. Links to a person’s record in Contacts, enabling you to easily call, message, email, or locate the person.
• Direct Dial. Automatically dials the specified number, based on a selected record in Contacts.
• Direct Message. Enables you to create a new text or multimedia message to a specific person in Contacts.
• Directions. Provides turn-by-turn navigation to a single specified destination.
• Dropbox Folder. Enables you to open a specific folder in your Dropbox account.
Create Folders
To help organize your Home screen shortcuts, you can add folders in which to store them.
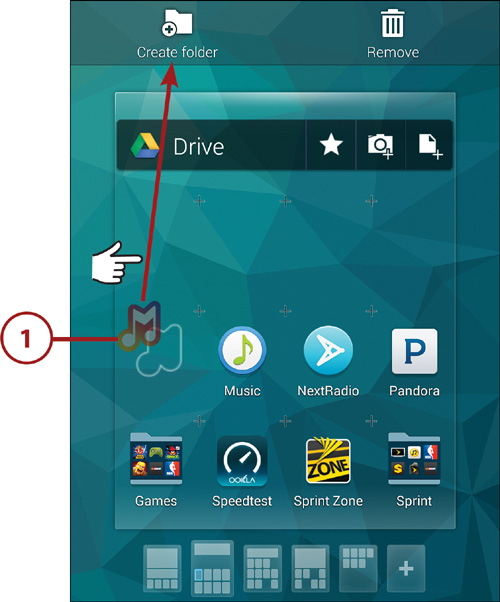
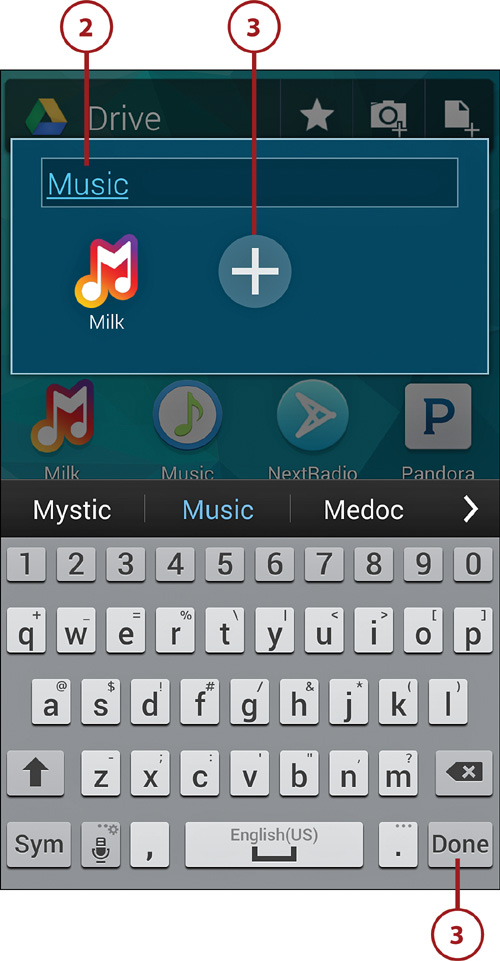
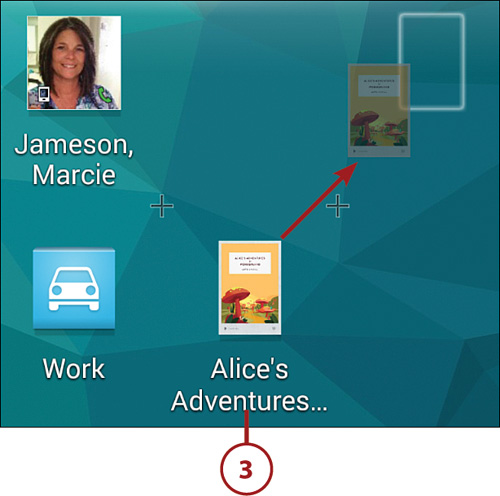
1. On the Home screen, navigate to the page to which you want to add a folder. Press and hold the first shortcut that you want to add to the folder and drag it onto the Create Folder icon at the top of the screen.
2. Type a name for the folder in the text box.
3. To populate the folder, do one of the following:
• Tap the Done key. When desired, you can add other shortcuts to the folder (or any other folder) by long-pressing each shortcut and dragging it onto the folder icon.
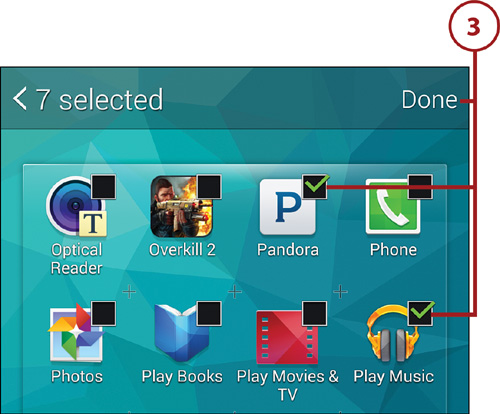
• Tap the + (plus) icon, select apps by tapping each one’s icon, and then tap Done. A shortcut is created for each checked app and inserted into the folder.
>>>Go Further: Working with Folders
• Tap a folder to view the items it contains. In the pop-up window that appears, tap an item to launch or open it. To reposition an item in the folder, press and hold it, and then drag it to a new position. To close an open folder, tap anywhere outside of the folder.
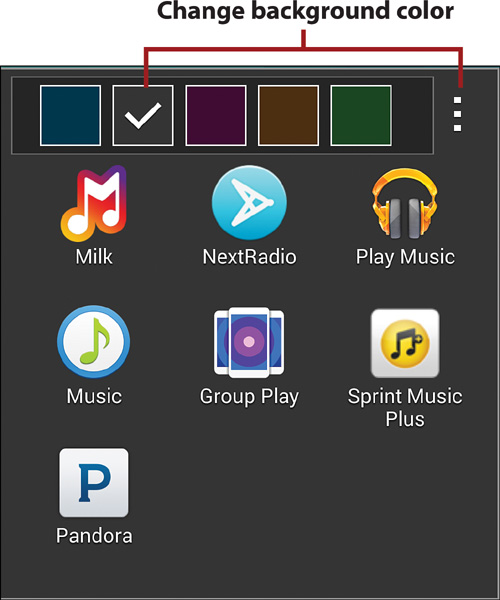
• To change a folder’s background color, open the folder, tap the menu icon, and then tap a color swatch.
• To remove an item from a folder, tap the folder to open it, press and hold the item’s icon, and then drag it to any location outside of the folder. (To delete an app shortcut that’s in a folder, drag the shortcut out of the folder. Then press and hold the shortcut, and drag it onto the Remove icon.)
• Finally, like other Home screen items, you can reposition a folder by pressing and holding its icon, and then dragging it to a destination on the current or a different Home screen page.
Reposition and Remove Home Screen Items
Part of the fun of setting up your Home screen pages is that you can freely rearrange items. Because many items are shortcuts, removing them from the Home screen has no effect on the actual items they represent. Follow these steps to reposition or remove Home screen items.
1. On the Home screen page, press and hold the item you want to reposition or remove.
2. Remove the item by dragging it onto the Remove icon that appears at the top of the screen. When you release the item, it is removed.
3. Reposition the item by dragging it to an empty or occupied spot on the current or another Home screen page. If the destination is occupied, items will shift to make room (if possible). When you release the item, the move is completed.
Moving Between Pages
When moving an item between Home screen pages, don’t let up on the finger pressure until the destination page appears. If you inadvertently release the item on the wrong page or in the wrong spot, press and hold the item again and finish the move.
>>>Go Further: Rearranging and Replacing the Primary Shortcuts
• To rearrange the primary shortcuts, press and hold the one you want to move, drag it to the left or right, and then release it when it’s in the correct position.
• To remove a primary shortcut, press and hold it, and then drag it to the Remove icon at the top of the page. If you want to remove the primary shortcut from the bottom of the screen but keep it on the page, drag it to any blank spot on the current Home screen page.
• To replace a primary shortcut (or add one, if you have less than four), drag the replacement or addition from a Home screen or Apps page onto the primary shortcut you want to replace or into position between a pair, respectively.

Setting the Apps View
The default method of viewing your installed apps is an alphabetical, multipage grid. Because you’ll spend a lot of time in Apps, you may prefer to change this display to show your apps as a custom grid that you’ve arranged in a fashion and order you prefer.
1. On the Home screen, tap the Apps icon.
2. Tap the menu icon and choose View As.
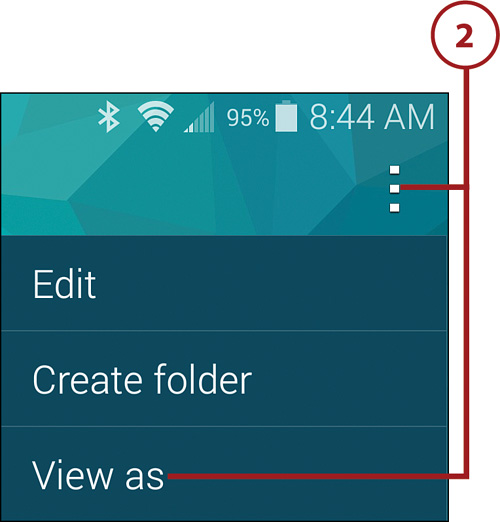
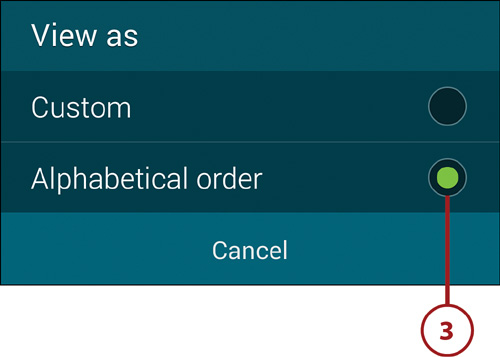
3. In the View As dialog, select one of the following:
• Alphabetical Order. This is the default display style, presenting and maintaining all app icons alphabetically. Whenever you install a new app, it is automatically inserted into the correct spot.
• Custom. This option enables you to create additional grid pages and arrange the app icons however you like, such as putting all games or image-editing apps together and placing your most frequently used apps on the first page.
Change Is Constant
In previous versions of the Android operating system, you could also display your apps as a scrolling alphabetical list. That option is no longer supported. Another big change is that folders can be created and used in either view—not just Custom. Folders are always displayed on the last Apps page.
4. In either view, you make most changes in Edit mode. To enable Edit mode, open the menu and choose Edit.
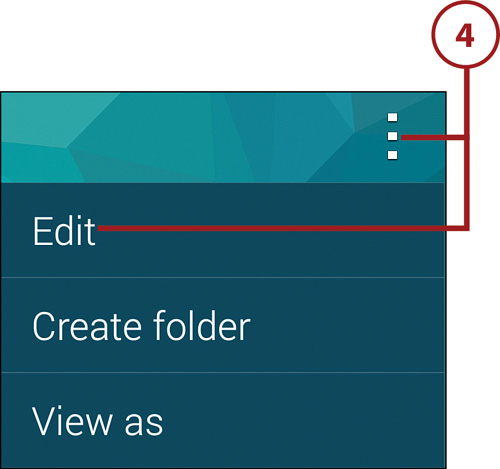
Most modifications you make to the Apps pages require that you first switch to Edit mode. If you neglect (or forget) to do this, changes are made to Home screen pages rather than Apps pages. If you mistakenly find yourself on the Home screen while dragging an app or folder, drag the item onto the Cancel icon at the top of the screen.
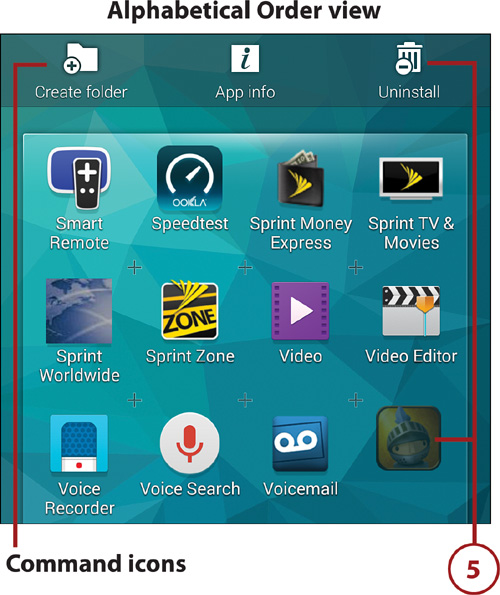
5. Alphabetical Order view. Although you can’t rearrange the apps, you can use Edit mode to create folders, view an app’s App Info screen (normally accessed by tapping Settings, Application Manager), and uninstall or disable certain apps. Press and hold an app and then drag it onto the appropriate icon at the top of the screen.
Uninstalling and Disabling Apps
As explained in “Uninstall, Disable, and Hide Apps” in Chapter 10, “Installing and Using Applications,” whether you can uninstall, disable, or do neither with an app depends on the app. Apps that you downloaded can normally be uninstalled. Certain Android, Samsung, and carrier-provided apps can be uninstalled or disabled, whereas others—especially critical system apps—must remain on your phone and cannot be disabled. When you press and hold an app, only the allowable action is presented as an icon: Uninstall, Disable, or neither icon.
6. Custom view. In addition to the Edit mode actions in Step 5, you can rearrange apps by dragging them to new positions. You can also create additional app pages by long-pressing an icon you want to add to the new page, and then dragging it onto the Create Page icon at the top of the screen.
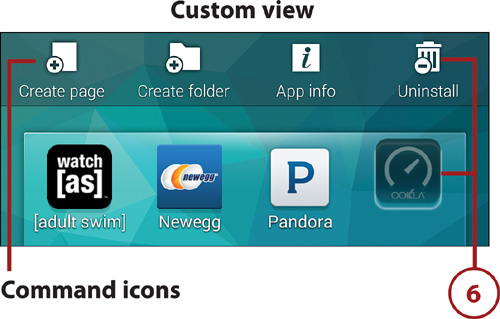
When rearranging apps, blank spaces are only allowed at the end of each Apps page. Similarly, if a page is blank after you finish your edits, the page is automatically removed.
7. When you finish making changes to the Apps pages, exit Edit mode by tapping the Back icon or by pressing the Back key.
Creating and Working with App Folders
As mentioned, folders are now supported in both Apps views and are automatically placed on the last Apps page. The purpose of creating folders is to reduce app clutter and impart additional organization to the Apps pages, grouping similar apps in one convenient location. When an app is added to a folder, its icon is removed from the Apps grid.
Create App Folders
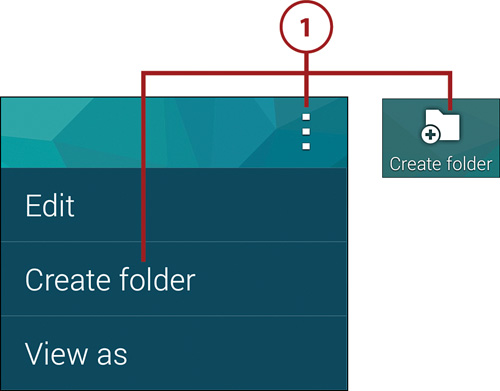
1. To create a folder in Apps, do one of the following:
• Open the menu and choose Create Folder.
• Press and hold an app that you want to move into the new folder, and drag it onto the Create Folder icon at the top of the screen.
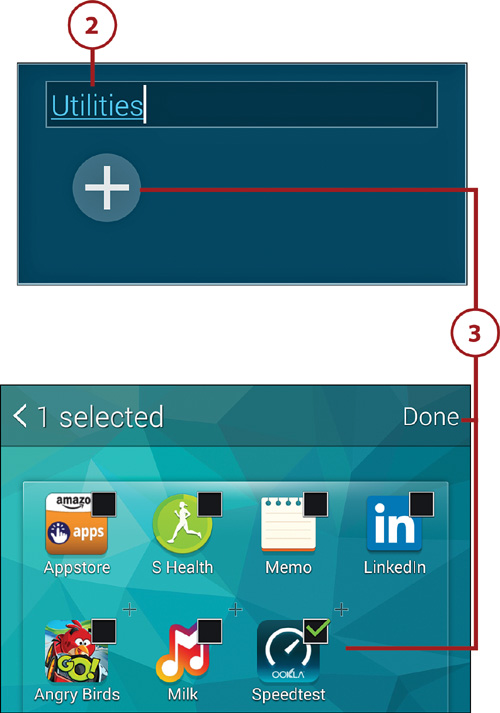
3. During the folder-creation process, you can optionally select apps to populate the folder. Do one of the following:
• To immediately add apps to the folder, tap the plus (+) icon, tap the check box of each app you want to add, and tap Done. The added apps are moved into the folder.
• To create the named folder without adding other apps at this time, tap the Done key on the keyboard.
Manually Adding Apps to a Folder
To manually add apps to a folder, enable Edit mode and then drag app icons onto the folder. You can add and remove apps from a folder whenever you want.
Work with App Folders
After creating a folder and adding some apps to it, you can do the following:
• Launch an app. Scroll to the last page of Apps, tap the folder to open it, and then tap the icon of the app you want to launch.
Closing the Folder
If you decide not to launch an app, you can close the open folder by tapping any blank space inside the folder or by pressing the Back key.
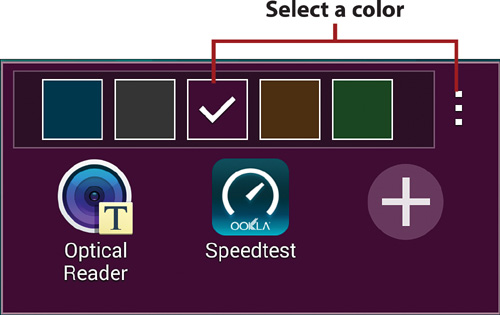
• Change the background color. Open the folder, tap the menu icon, select a color, and then tap anywhere in the folder. You set the background color individually for each folder. You can change the color even when Edit mode isn’t active.
• Remove apps from a folder. Enable Edit mode, tap the folder to display its contents, and then drag the app out of the folder onto any Apps page—other than a folders page. If you release the app on a folders page, it’s assumed that you want to create a folder to enclose the app.
• Rearrange folders (Custom view only). Enable Edit mode, press and hold a folder to select it, and then drag it into a new position on a folders page. As is the case when rearranging apps, no blank spaces are allowed within a folders page.
• Remove a folder. Enable Edit mode, press and hold the folder, and then drag it onto the Remove icon at the top of the screen. Tap OK in the Remove Folder confirmation dialog. Apps within the deleted folder are restored to the Apps pages.
Changing System Settings
By changing preferences in Settings, you can make the phone look and work to match your needs. Although system and app settings are discussed throughout the book, this section points out some that aren’t mentioned elsewhere but are important in customizing your phone.
To access system settings, go to the Home screen and tap Apps, Settings. You can also tap a Home screen Settings shortcut (if you’ve created one), or you can open the Notification panel and tap the Settings icon at the top. (An advantage of the latter approach is that you can go to Settings no matter what you’re doing without first having to return to the Home screen.)
To access an app’s settings (for those that provide them), launch the app, tap the menu icon, and choose Settings.
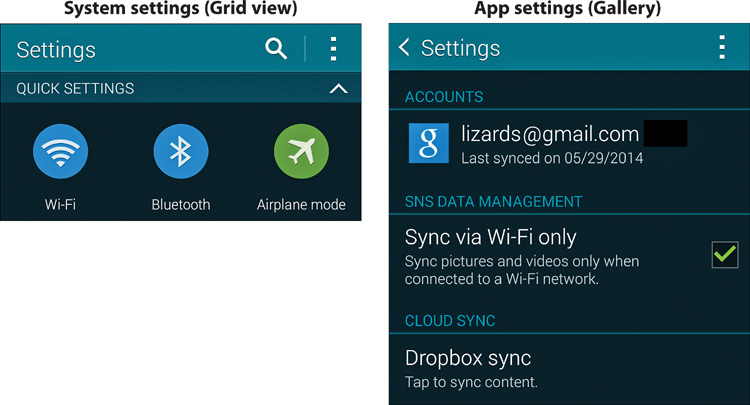
Different Views of Settings
There are three different methods of of displaying Settings: Grid, List, and Tab view. To switch views, tap the menu icon and choose a new view. If what you see onscreen looks substantially different from the figures in this and other chapters, it’s probably because you’ve set a different view. Most Settings figures in this book show Grid view—the default view for a brand new S5.
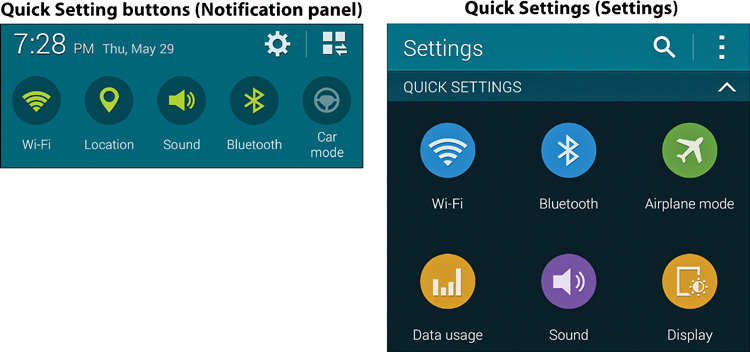
Customize the Quick Setting Buttons
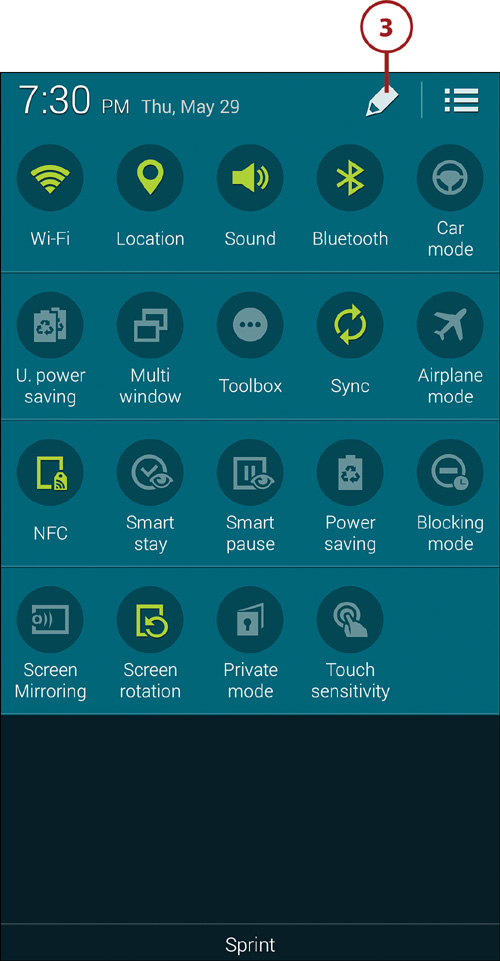
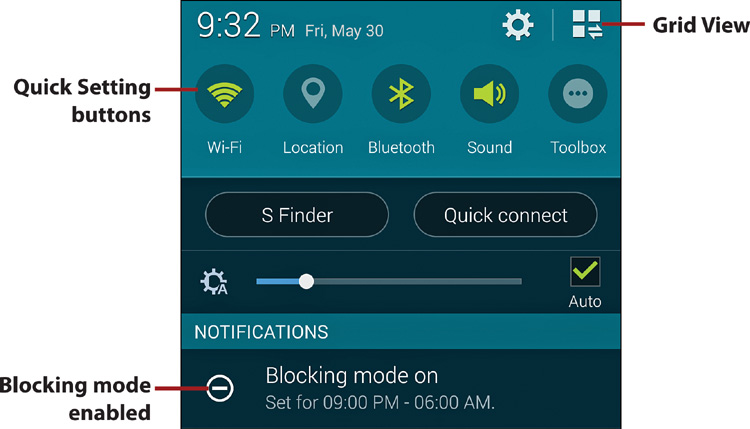
At the top of the Notification panel is a horizontally scrolling string of icons called Quick Setting buttons. By tapping these buttons, you can quickly enable or disable system features. If you press and hold most of these buttons, you go directly to that feature’s screen in Settings. You can customize the Quick Setting buttons by selecting different settings to display and changing the order in which they’re listed.
1. Open the Notification panel by swiping the top of the screen downward.
2. Tap the Grid View icon to display the entire array of Quick Setting buttons.
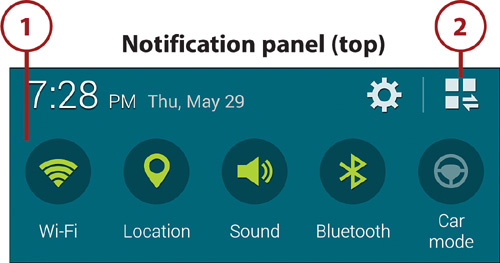
3. Tap the Edit icon.
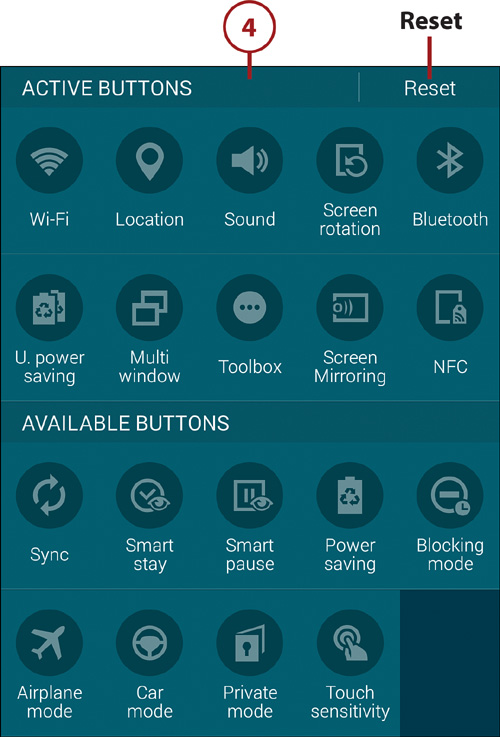
4. The Quick Setting buttons are divided into two sets: Active Buttons (those currently in use in the Notification panel) and Available Buttons (other buttons that can be moved into the Active Buttons set). You can edit the Quick Setting buttons in these ways:
• Swap any pair of buttons by long-pressing a button in one set and dragging it onto a button in the other set. (The final set of Active Buttons can contain either nine or ten buttons.)
• Change the order of the Active Buttons by long-pressing a button and dragging it to a new position. The two buttons swap places.
• Restore the original Quick Setting buttons and their order by tapping Reset.
Customize the Quick Settings
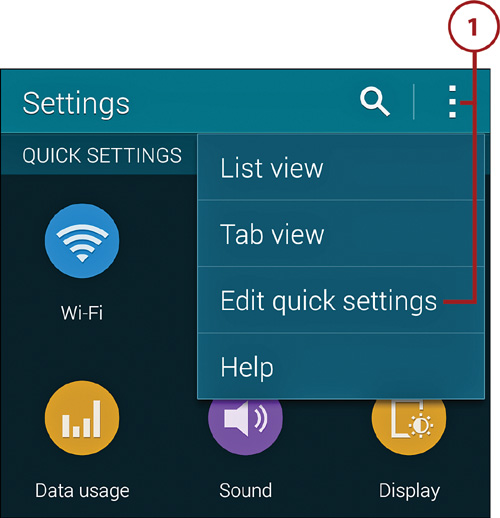
Whenever you open Settings, the first section—regardless of the view you’ve set (Grid, List, or Tab)—is always Quick Settings. The purpose of the Quick Settings is to make a dozen of your most frequently used settings easily accessible without having to remember the Settings section in which each one can otherwise be found.
1. Open Settings by tapping Apps, Settings (or any other method previously discussed) and choose Edit Quick Settings from the menu.
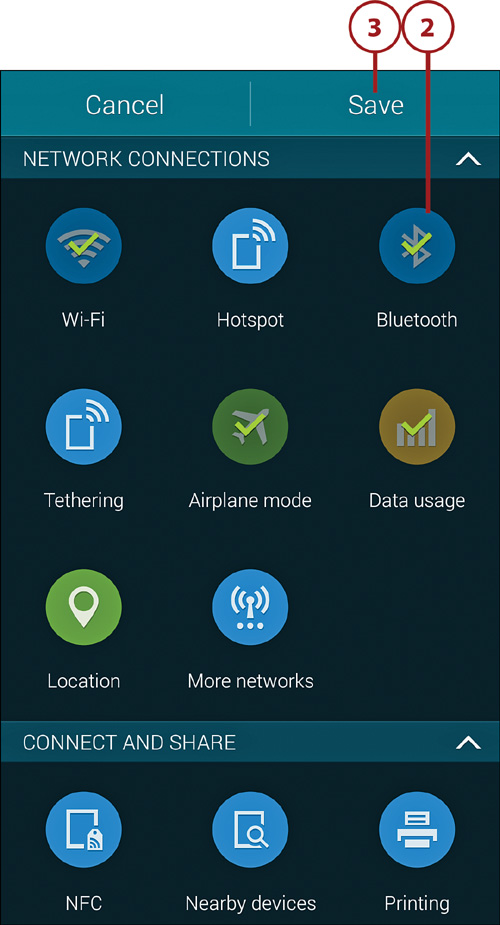
2. Quick Settings can contain only a dozen settings. To change the current settings, tap those you want to eliminate (removing their check marks) and then tap the settings icons that you want to use as replacements.
3. Tap Save when you’re done making changes.
Motions and Gestures Settings
You can selectively enable Motions and Gestures settings to control phone features by making special movements with the phone or gestures that are sensed by it. Many of these settings are very helpful; others... well, you be the judge.
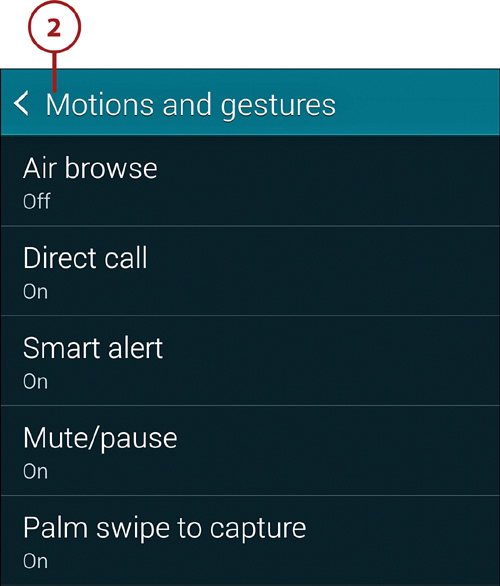
1. Open Settings, and tap the Motions and Gestures icon (in the Motion section).

2. Each of the Motions and Gestures settings operates as an on/off toggle. They work as follows:
• Air Browse. When enabled, you can wave your hand over the sensor at the top of the phone to instruct it to scroll in various apps, such as Gallery, Music, Email, and Internet.
• Direct Call. When viewing a person’s contact record, log entry, or message conversation, you can move the phone to your ear to automatically call the person.
• Smart Alert. When you pick up the phone, it vibrates to notify you of missed calls or messages.
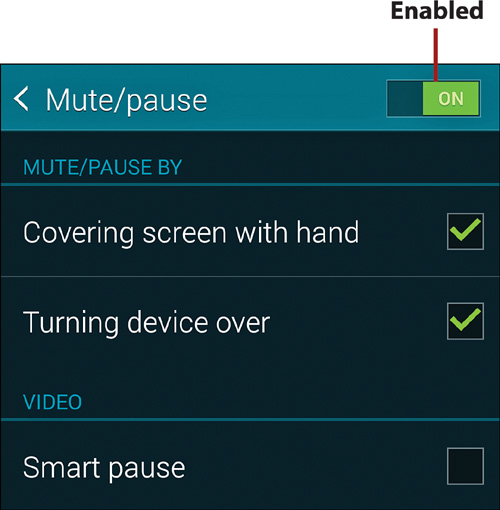
• Mute/Pause. When enabled, you can specify methods that can be used to pause media playback and mute alarms or incoming calls. Unlike the two natural motions for silencing the phone, Smart Pause relies on the front camera to detect when you’re looking at the screen. If it senses you’ve looked away, video playback is automatically paused. It restarts again when it detects that you’re looking at the screen.
• Palm Swipe to Capture. When enabled, you can create screen captures by placing the edge of your hand on the screen and dragging across it. Captured screens are saved in the Screenshots folder. (You can also create screen captures by simultaneously pressing the Home key and Power button.)
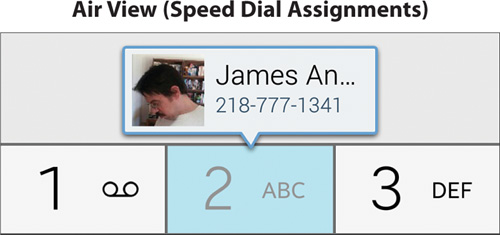
Air View
When enabled, Air View instructs certain apps to respond when they sense that your finger is hovering slightly above the screen. For example, Calendar can pop up an event’s details and Phone shows the person and number associated with a speed dial number. To enable or disable Air View, open Settings and tap the Air View icon (in the Motion section).
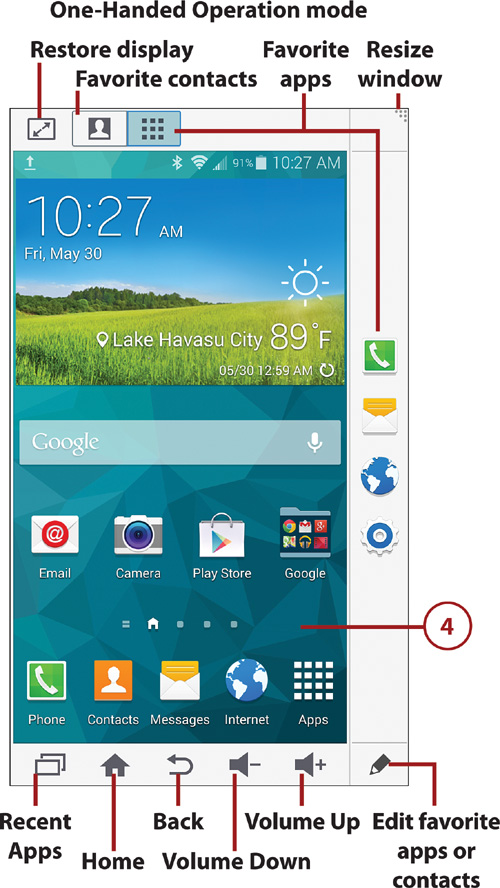
One-Handed Operation
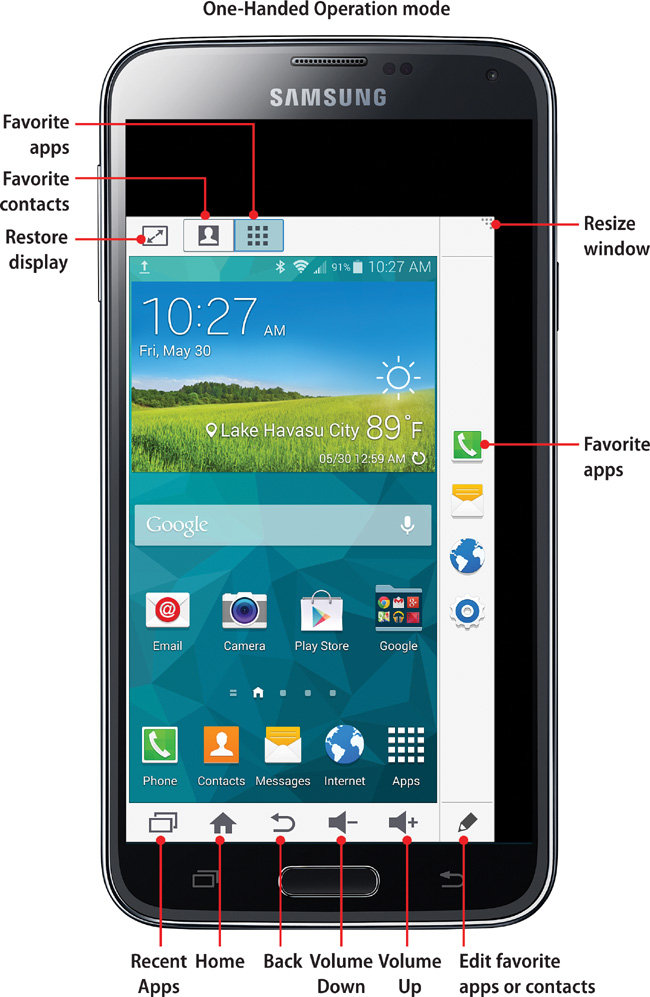
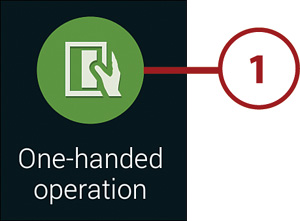
If you sometimes need to operate the phone entirely with one hand, you can enable One-Handed Operation. When enabled, the screen is reduced in size and shifted so it’s closest to the operating hand. To avoid the need to press the hardware buttons at the bottom of the phone and other essential controls, onscreen controls are added to the reduced display within reach of your thumb.
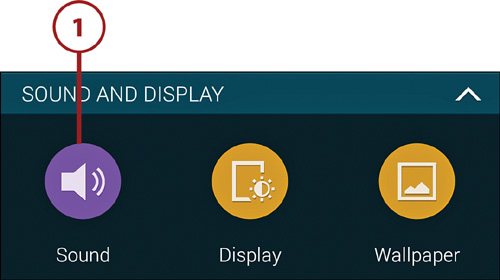
1. Open Settings and tap the One-Handed Operation icon (in the Sound and Display section).
2. Enable One-Handed Operation mode by moving the slider to the On position.
3. Follow the onscreen directions by sliding your thumb from the outer edge to the center and then back. When successful, the screen will reduce in size.

4. To configure and use the reduced screen, you can do any of the following:
• Drag the upper-right corner to adjust the display size.
• Tap icons at the bottom of the screen rather than trying to press the keys they represent.
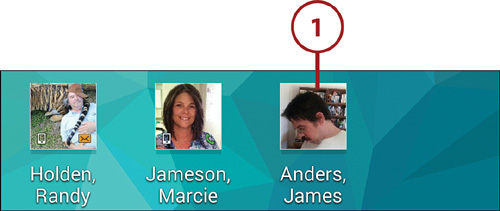
• Tap icons at the top of the screen to display your favorite contacts or favorite apps on the right edge of the window. With the contacts or apps icon selected (dark), you can tap the Edit icon to modify the listed contacts or apps. To hide the favorites, tap the same icon at the top of the screen again.
5. When you’re done using One-Handed Operation, repeat Steps 1 and 2 to disable it.
Ringtones
A ringtone is an audible event notification, such as a sound effect or snippet of music. You can specify default ringtones for incoming calls and text messages, as well as set person- or group-specific ringtones.
Set the Default Incoming Call Ringtone
Unless overridden by a personal or group ringtone, the default ringtone plays to notify you of an incoming call.
1. Open Settings and tap the Sound icon (in the Sound and Display section).
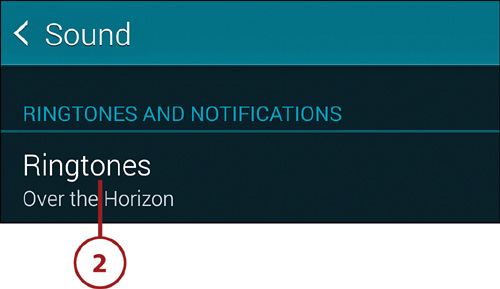
2. Tap Ringtones.
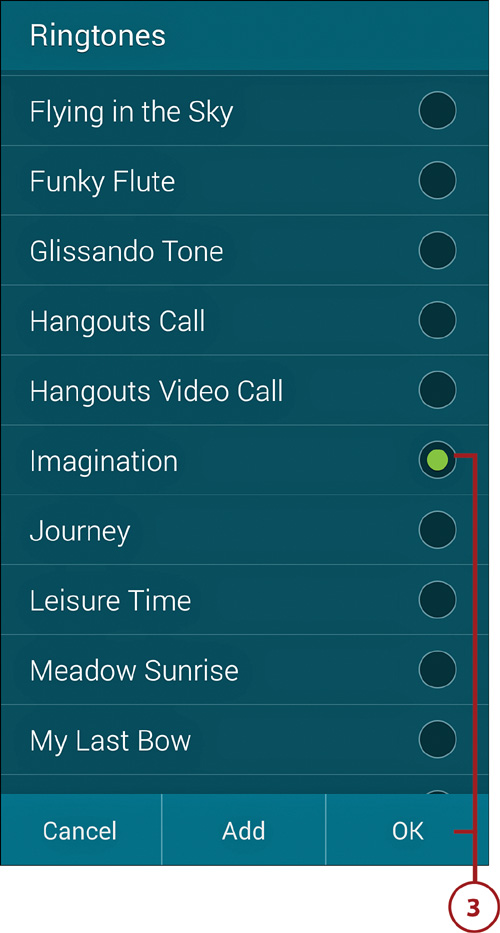
3. The Ringtones dialog box appears, showing a scrolling list of all built-in, created, and downloaded ringtones. Tap a ringtone to play it. When you’re satisfied with your choice, tap OK. (For an explanation of the Add button, see the note at the end of the “Assign a Ringtone to a Contact” task.)
Set the Default Notification Ringtone
Unless overridden by a personal or group ringtone, the default notification ringtone plays to signify a new email, new text message, missed call, waiting voicemail, or upcoming Calendar event. Unlike call ringtones, notification ringtones are brief and less intrusive.
1. Open Settings and tap the Sound icon (in the Sound and Display section).

2. Tap Notifications.
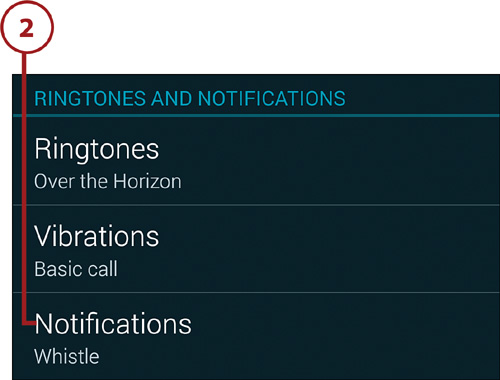
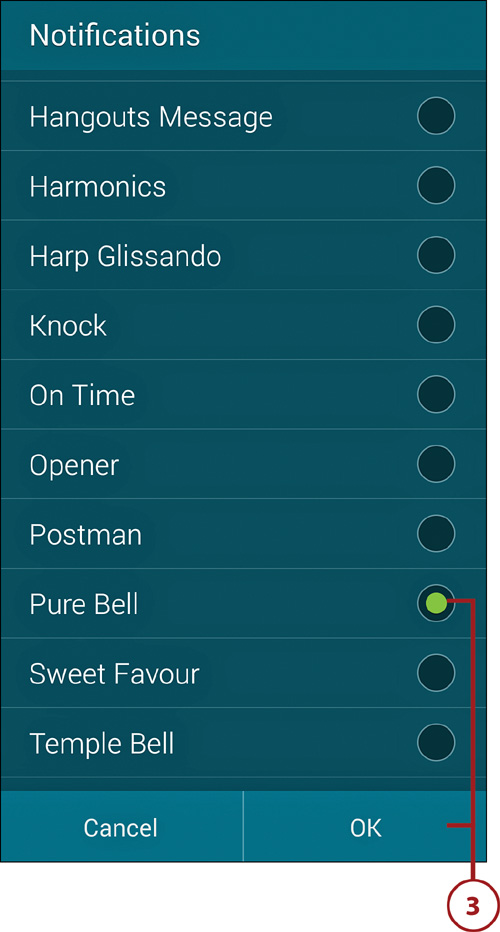
3. The Notifications dialog box appears, showing a scrolling list containing all the notification ringtones. Tap an entry to play it. When you’re satisfied with your choice, tap OK.
Assign a Ringtone to a Contact
To make it easy to quickly recognize an incoming call from a person, you can associate a distinctive ringtone with his or her record in Contacts.
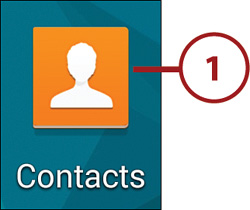
1. Open Contacts by tapping its Home screen icon or by tapping Apps, Contacts.
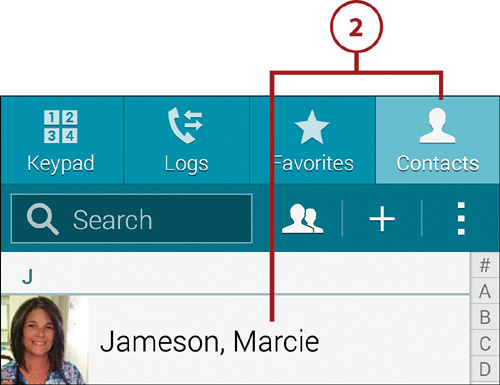
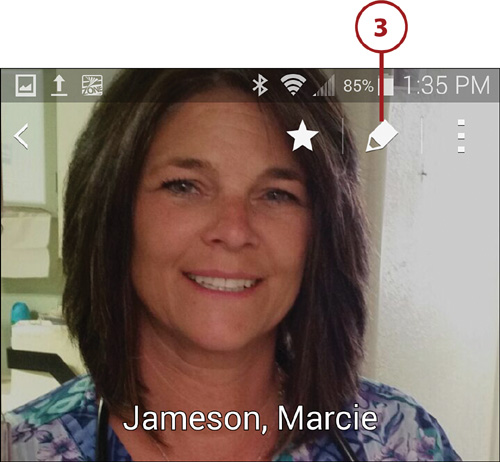
2. With the Contacts tab selected, find the person’s record by scrolling or searching. Tap the record to open it.
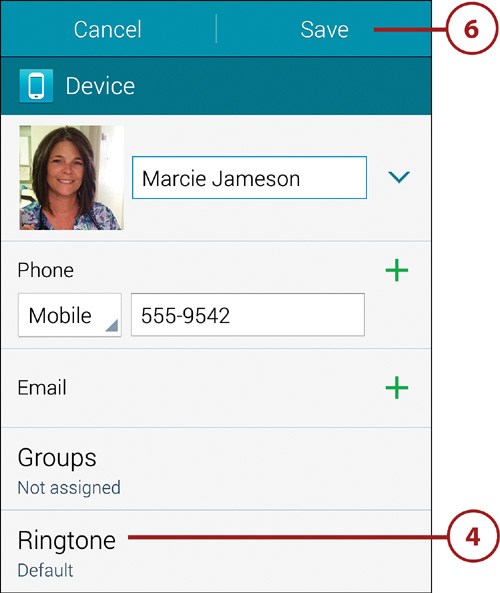
3. Tap the Edit icon.
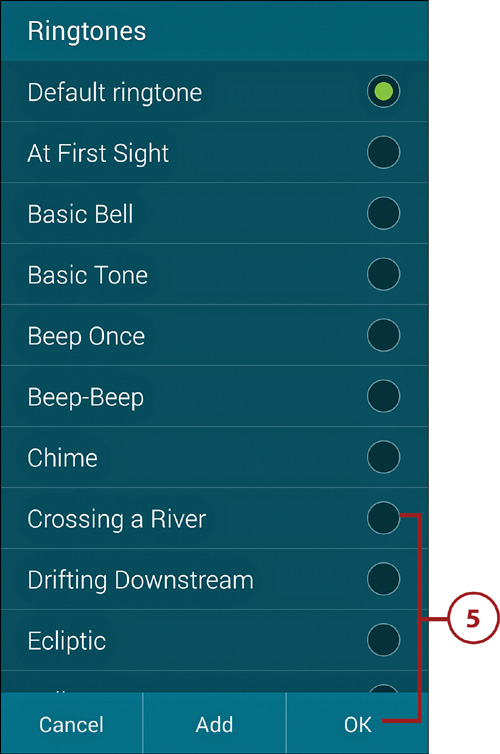
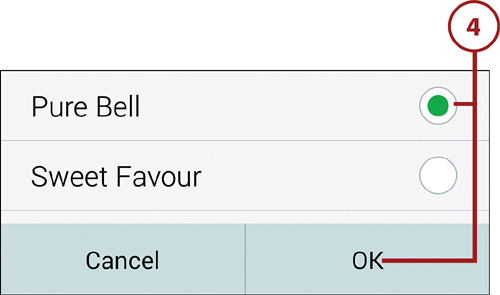
5. Select the ringtone that you want to use and tap OK. Select Default Ringtone (at the top of the list) if you prefer to use the default ringtone for this contact.
6. Tap the Save button.
7. The selected ringtone is associated with and displayed on the person’s contact record.
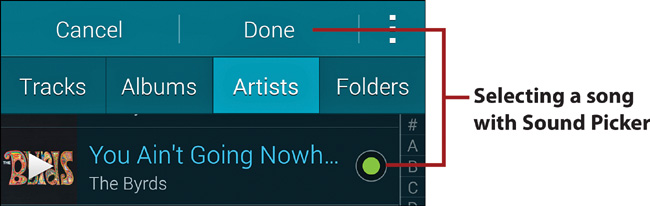
Using Sound Files and Songs as Ringtones
If the ringtone you want to use isn’t listed in the Ringtones dialog box, tap Add. If a Complete Action Using dialog box appears, select the app that you want to use to specify the ringtone (such as Sound Picker, for example) and tap Just Once. Navigate to the ringtone, sound, or music file; select it; and tap Done or OK.
Assign a Ringtone to a Contact Group
You can also assign a distinctive ringtone to all members of a contact group. (To learn about groups, see “Working with Contact Groups” in Chapter 5, “Managing Contacts.”)
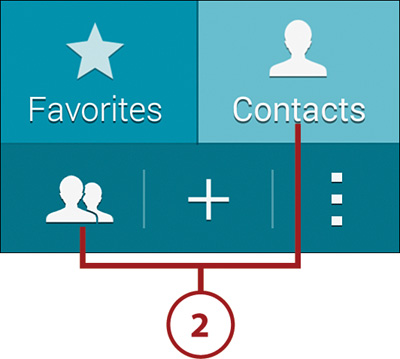
1. Open Contacts by tapping its Home screen icon or by tapping Apps, Contacts.
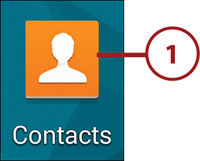
2. Select the Contacts tab, and then tap the Groups icon to display the list of defined groups.
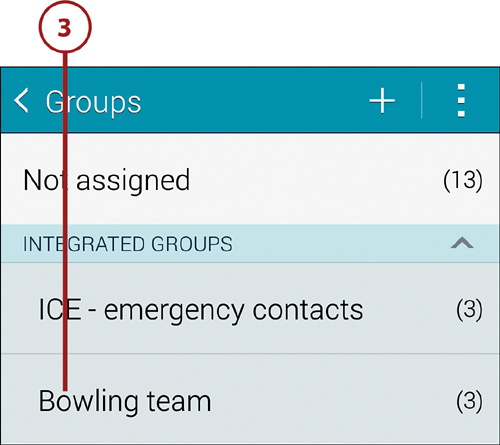
3. Open a group by tapping its name.
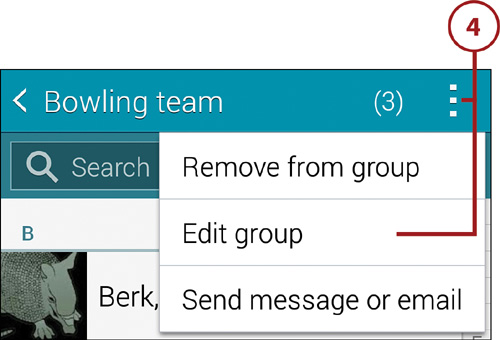
4. Tap the menu icon and choose Edit Group.
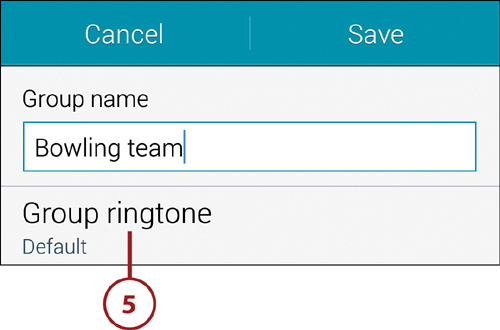
5. Tap Group Ringtone and select a ringtone as described in Steps 5–7 of the previous task (“Assign a Ringtone to a Contact”).
Assign a Message Notification Sound
In addition to selecting a sound to announce new text and multimedia messages from within the Messages app, you can set one in Sound settings. In this task, you learn to use this second approach. The technique can also be used to specify a sound or ringtone to announce incoming calls, new email, or calendar events.
1. Open Settings and tap the Sound icon (in the Sound and Display section).

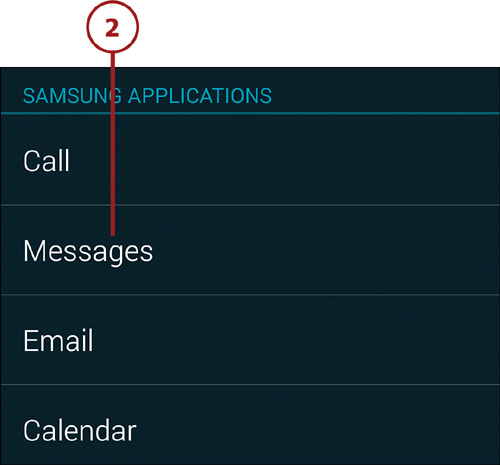
2. Scroll to the Samsung Applications section of Sound Settings and tap Messages. (Note the entries for other apps and features.)
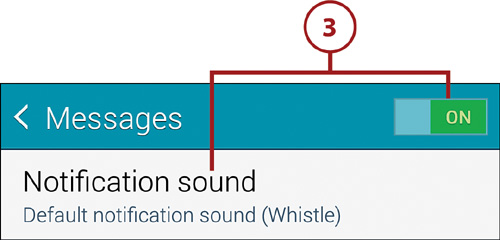
3. Ensure that Messages is On, and then tap Notification Sound.
4. Select a sound from the scrolling list and tap OK. (If you’d rather not have a messaging sound, select Silent.)
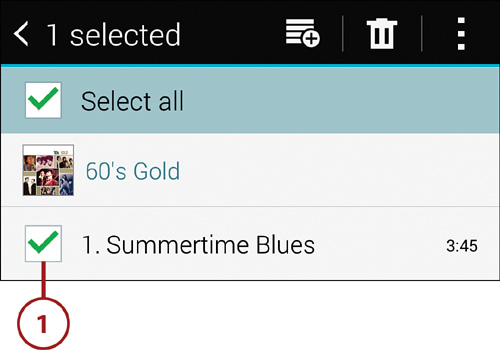
1. Launch Music, and select the song by pressing and holding its title.
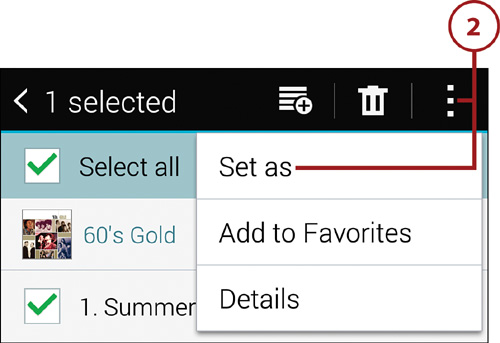
2. Open the menu and choose Set As.
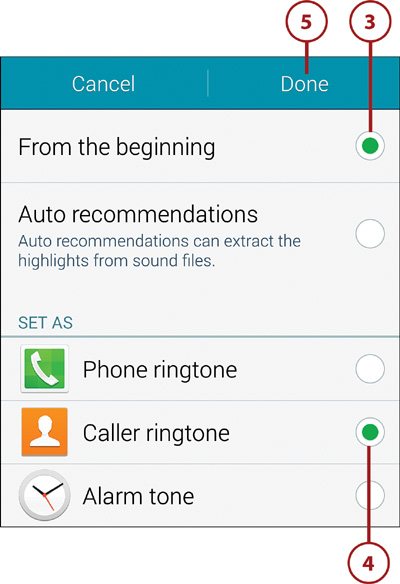
3. Tap From the Beginning or Auto Recommendations to specify the part of the song to use as the ringtone.
4. In the Set As section, tap Phone Ringtone to use the song as the default ringtone for incoming calls. Tap Caller Ringtone to play the song whenever you receive a call from a particular person. Tap Alarm Tone to use the song as the alarm tone for an alarm you’re about to create in the Clock app.
5. Tap Done.
6. If you selected Caller Ringtone or Alarm Tone in Step 4, select the person’s record in Contacts or create the alarm to which you want to link the song.

Blocking Mode
If you enable Blocking mode, you can elect to receive only certain types of notifications while blocking others. Blocking can be set for a period of time (to silence notifications during an important meeting, for example) or permanently enabled for certain features.
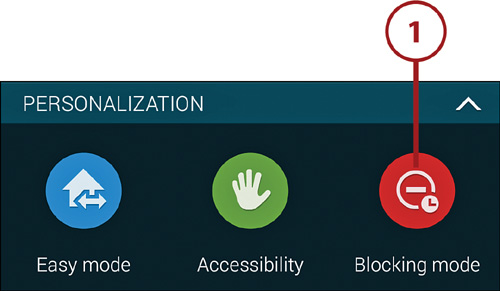
1. Open Settings and tap the Blocking Mode icon (in the Personalization section).
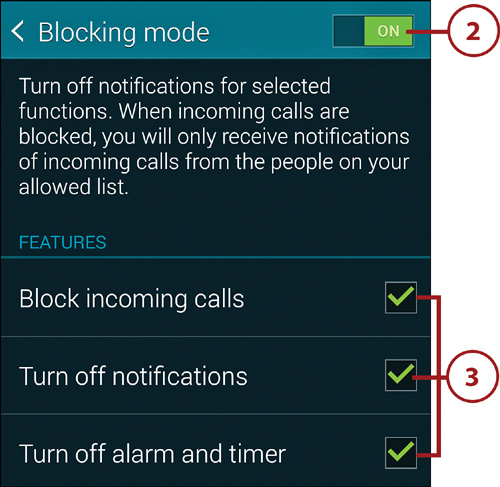
2. Enable Blocking mode by dragging its slider to the On position.
3. In the Features section, check each feature that you want to block.
4. In the Set Time section, do one of the following:
• Tap the Always check box to enable blocking of the selected features indefinitely—until it’s turned off.
• Tap the From and To time settings to set a specific period during which blocking will be active.
5. In the Allowed Contacts section, specify people you want to treat as exceptions; that is, those whose notifications will not be blocked. Tap Allowed Contacts and select an option: None (no exceptions), All Contacts (anyone with a Contacts record), Favorites (any person saved as a Contacts favorite), or Custom (create a custom list from selected Contacts records).

6. Blocking will be in—or go into—effect for the designated period, covering the specified features, and with the selected exceptions. When you’re ready to turn blocking off, perform Steps 1–2 and disable Blocking mode.
You can also disable Blocking mode by opening the Notification panel and then tapping its notification entry or its Quick Setting button. (If the button isn’t one of the primary buttons, tap the Grid View icon to access it.)
Safety Assistance Settings
When enabled, Safety Assistance settings provide a way for you to secretly summon help in an emergency situation—other than or in addition to placing a 911 call. After specifying 1–4 primary contacts, you quickly press the Power button three times to send them a text message that requests help and includes a URL to Google maps that shows your location. Pictures from both cameras and a sound recording can also be transmitted. (Note that this feature is best for temporary, short-term use due to its high battery consumption.)
Plan Ahead
Before designating someone as a primary contact, it’s a good idea to inform them, describe what will happen if you use the phone to request assistance, and discuss what they should do in response.
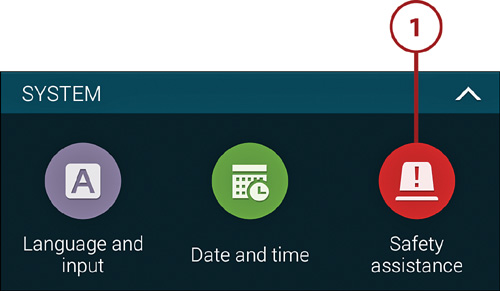
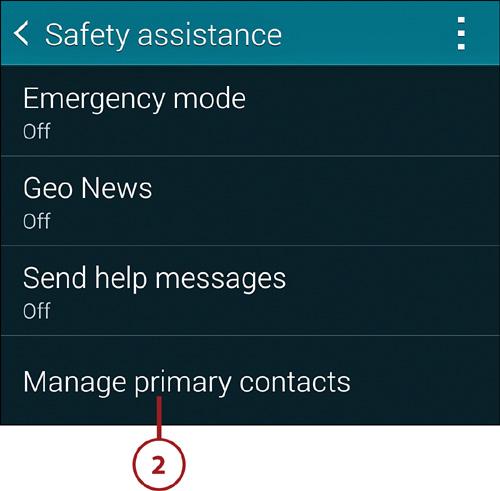
1. Open Settings and tap the Safety Assistance icon (in the System section).
2. If you haven’t designated at least one primary contact, tap Manage Primary Contacts; otherwise, go to Step 4.
3. Tap the plus (+) icon. Tap Create New Contact or Select from Contacts and then create or select an emergency contact. If desired, continue creating or specifying contacts up to the maximum of four. Press the Back key or tap the Back icon to return to the Safety Assistance screen.
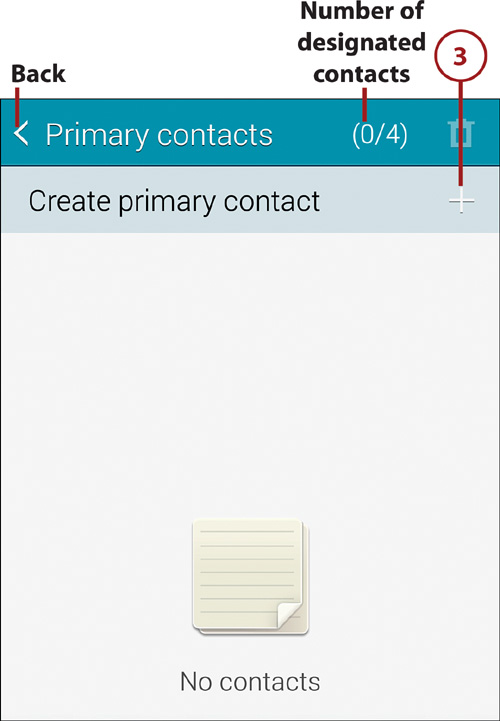
Check the Phone Number
Be sure to examine the phone number of each primary contact to ensure it’s the correct one. To be of use, the recipient’s phone needs to be able to receive text and multimedia messages. To change the number, tap the person’s entry on the Primary Contacts screen, edit the number, and tap Save.
4. When you think you might be entering or are already in a dangerous situation, tap Send Help Messages. Drag the slider to the On position, set options, and then press the Back key or tap the Back icon.
5. Optional: Enable Emergency mode (a special power-conserving mode) by tapping its text and moving its slider to On.
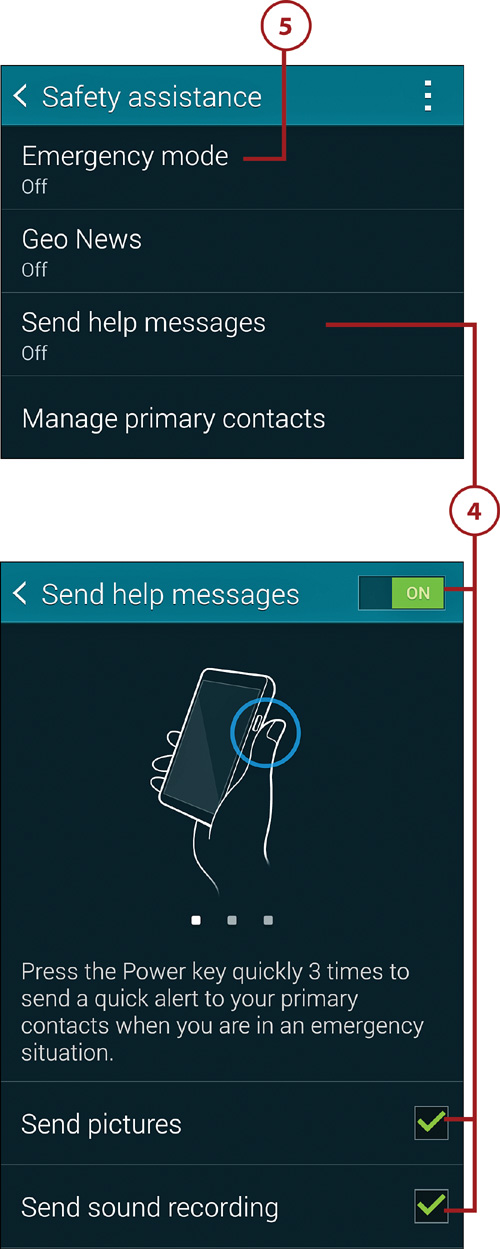
6. While Send Help Messages is On, you can request assistance and execute the options selected in Step 4 by quickly pressing the Power key three times in a row.
Clearing Emergency Declared Mode and Send Help Messages
After you request emergency assistance and determine that you’re safe, clear the Emergency Declared mode by tapping its entry in the Notification panel. Then return to the Safety Assistance screen and disable Send Help Messages.
You should disable Send Help Messages as soon as it’s convenient in order to avoid unnecessary battery drain.