10. Installing and Managing Applications and Extensions on Your Mac
In this chapter, you learn how to install applications on your Mac and keep Yosemite up-to-date, including:
![]() Browsing the Mac App Store
Browsing the Mac App Store
![]() Downloading and managing App Store applications
Downloading and managing App Store applications
![]() Downloading and installing non–App Store software
Downloading and installing non–App Store software
![]() Working with OS X software distribution formats
Working with OS X software distribution formats
![]() Setting Up Family Sharing of purchases
Setting Up Family Sharing of purchases
![]() Configuring software updates and auto downloads
Configuring software updates and auto downloads
Up to this point in the book, you’ve been looking at software that came as part of Yosemite. That’s a bit limiting, don’t you think? There is a wide world of software waiting to enhance your computing experience—including upgrades to Yosemite itself.
Through the use of the Mac App Store and its built-in update mechanism, you can install new applications, new extensions, and widgets, keep them up-to-date, and keep your Mac running smoothly and securely. When that isn’t enough, you can turn to thousands of other non-App Store apps that run natively on your Mac.
Mac App Store (New!)
Applications make a Mac a Mac. As intangible as it is, a certain “something” about using a Mac application is rarely replicated on a Windows computer.
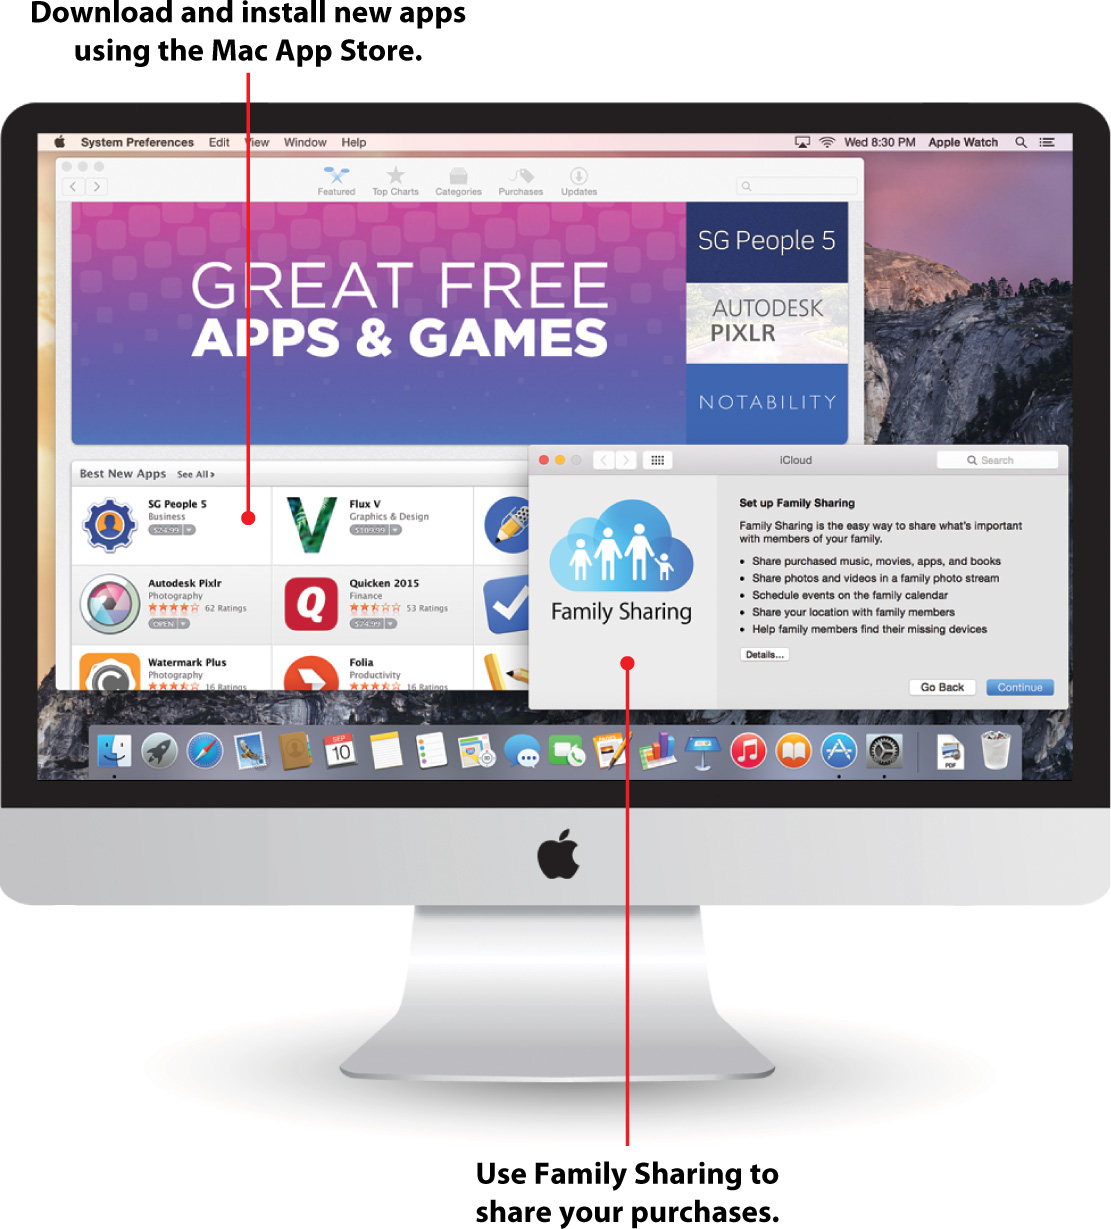
When you’ve become accustomed to the day-to-day operation of your Mac, you’ll likely want to begin installing third-party software. The easiest place to do this is through the Mac App Store. Like the popular App Store for iOS devices, the Mac App Store is a one-stop shop for thousands of applications and extensions that you can install with point-and-click ease.
Logging into the App Store
To use the Mac App Store, you need a registered Apple ID—the same account you used to access iCloud in Chapter 4, “Setting Up iCloud and Internet Accounts,” will work just fine. If you don’t have an ID, you can create one directly in the App Store. To log into the store, follow these steps:
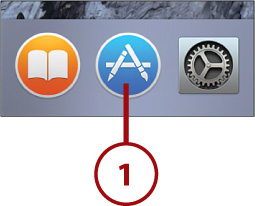
1. Open the App Store application from the Dock, Launchpad, or Applications folder.
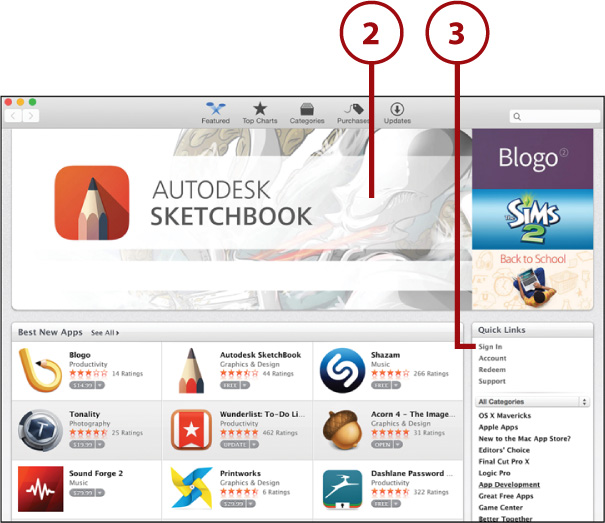
2. The App Store window opens.
3. Click Sign In from the Quick Links on the right side of the page.
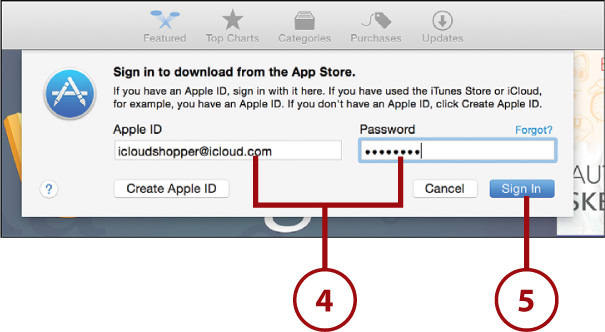
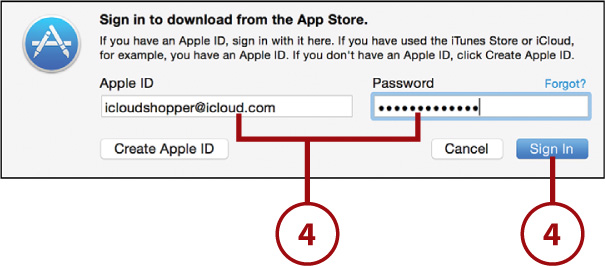
4. Provide your Apple ID and password in the form that appears.
5. Click Sign In.
Creating an ID
If you do not have an ID, click Create Apple ID and follow the onscreen prompts.
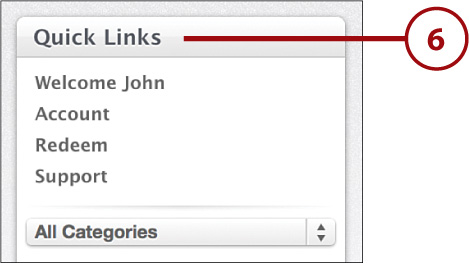
6. Your Login Status and links to your account information are shown in the Quick Links section.
Browsing for Software
Part of the joy of using the App Store is that browsing is simple and fun—and, like iTunes and iBooks, it works in the same manner as a web browser. As you encounter links (such as See All), click them to view more information. You can browse within a variety of categories that cover the gamut of what you can do on your Mac:
1. Follow steps 1–6 of the previous task, “Logging into the App Store.”
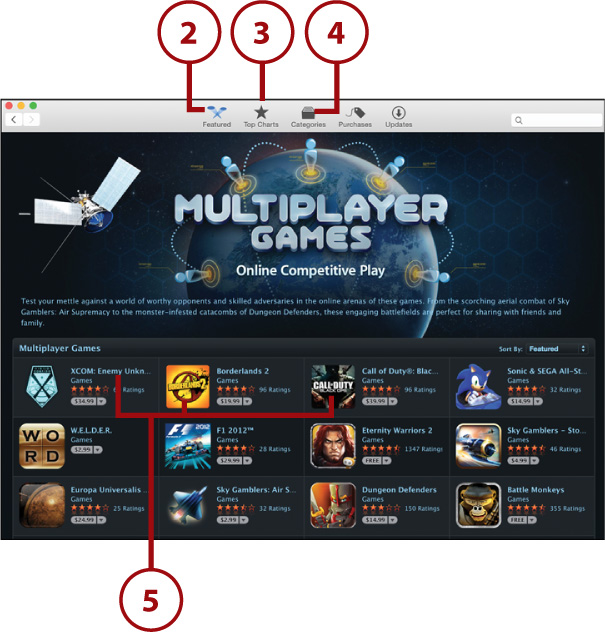
2. Click the Featured icon to browse apps tagged by Apple as New and Noteworthy or Hot.
3. Click Top Charts to see the apps that are currently selling the best or being downloaded the most.
4. Click Categories to browse by the different types of software (games, business, developer, and so on).
5. When you see something you’re interested in, click the icon or name.
6. A full page of information, including reviews, opens.
7. Use the Forward and Back buttons to move back and forth between pages, just like a web browser.

Quick Links for Faster Browsing
The featured page actually contains more than the new/hot apps. In the column on the right side of the page, you can quickly jump to specific app categories to see Top Paid apps, Top Free apps, Extensions, and more without leaving the page.
Searching for Software
Sometimes you might know the software title you want but do not know where it is located. In these cases, you can simply search the App Store:
1. Follow steps 1–6 of the earlier task, “Logging into the App Store.”
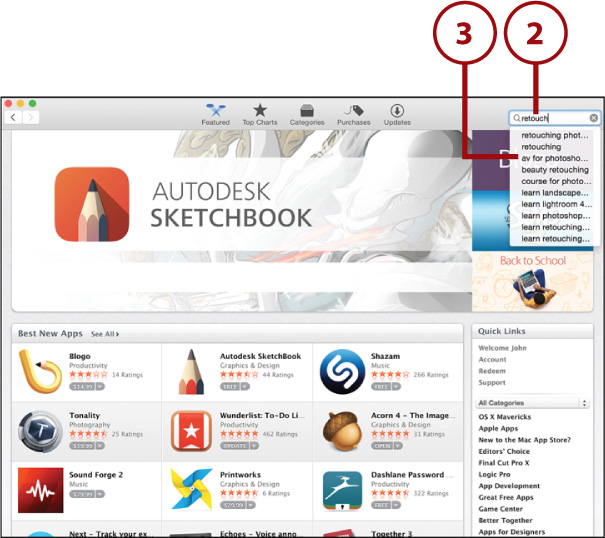
2. Type a search term or terms into the field in the upper-right corner. You can use application names, categories (news, for instance), and even author/publisher names.
3. As you type, a list of possible searches appears. Click one if you want to use it; otherwise, press Return to use the search term you’ve typed.
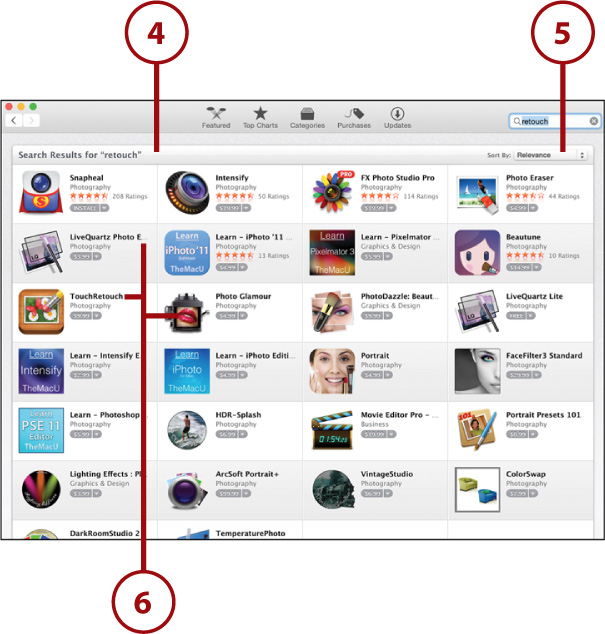
4. The Search results are displayed.
5. Use the Sort By menu to choose how the results are sorted within the window.
6. Click App Icons or Names to view more information.
Purchasing Software
When you’ve decided to purchase software, the process couldn’t be simpler. Follow these instructions to download and install software on your Mac:
1. Browse or search for a software title, as described in the previous tasks, “Browsing for Software” and “Searching for Software.”
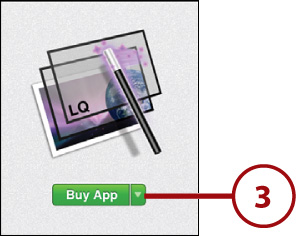
2. From within the search/browse results or the larger information page, click the Price button.

3. The Price button changes to read Buy App. If the title is free, it reads Install App. Click the Buy App (or Install App) button.
4. Provide your App Store Apple ID and password, if prompted, and then click Sign In.
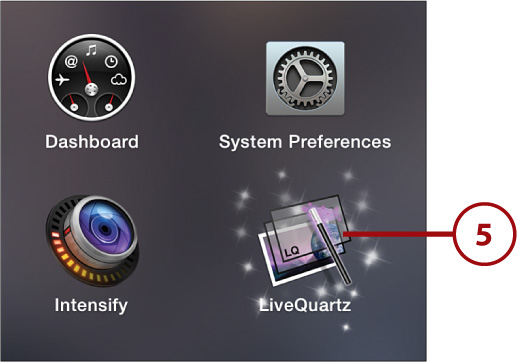
5. The application immediately downloads to your Applications folder and is visible in Launchpad.
Remember It on Payday!
The right side of the Price button for an app has a downward-pointing arrow. This is actually a separate button that opens a pop-up menu. Use this menu to copy a link to the app or to send an email message to someone (maybe yourself) about the app.
I Don’t Want It—Make It Go Away!
If the App Store makes it so easy to install things, it certainly makes it easy to delete them, right? Yes and no. The App Store is used for installing, but Launchpad is used to uninstall the apps. Learn about Launchpad in Chapter 2, “Making the Most of Your Screen Space.”
Apps That Aren’t Apps
You’ll notice that I frequently refer to “software” rather than apps. Starting with Yosemite, you can now purchase extensions in addition to apps. Although the process is the same, extensions don’t act as apps—they offer features in your existing applications, provide new ways of sharing, and give you simple utilities and controls in the Yosemite Notification Center. We look at how to manage extensions a bit later in this chapter.
Reinstalling Software and Installing Purchases on Other Macs
One of the best things about buying applications through the App Store is that you can install them on other Macs you own. No licensing hassles—just download and go. You can also reinstall software that you may have deleted in the past but want to start using again.
With Family Sharing in Yosemite, you can even set up a “family” of people who can share purchases among themselves. We explore this a bit later in the chapter.
To download a title that you (or possibly a family member) have purchased, but that isn’t installed, follow steps 1–6 of the “Logging into the App Store” task and then complete these steps:
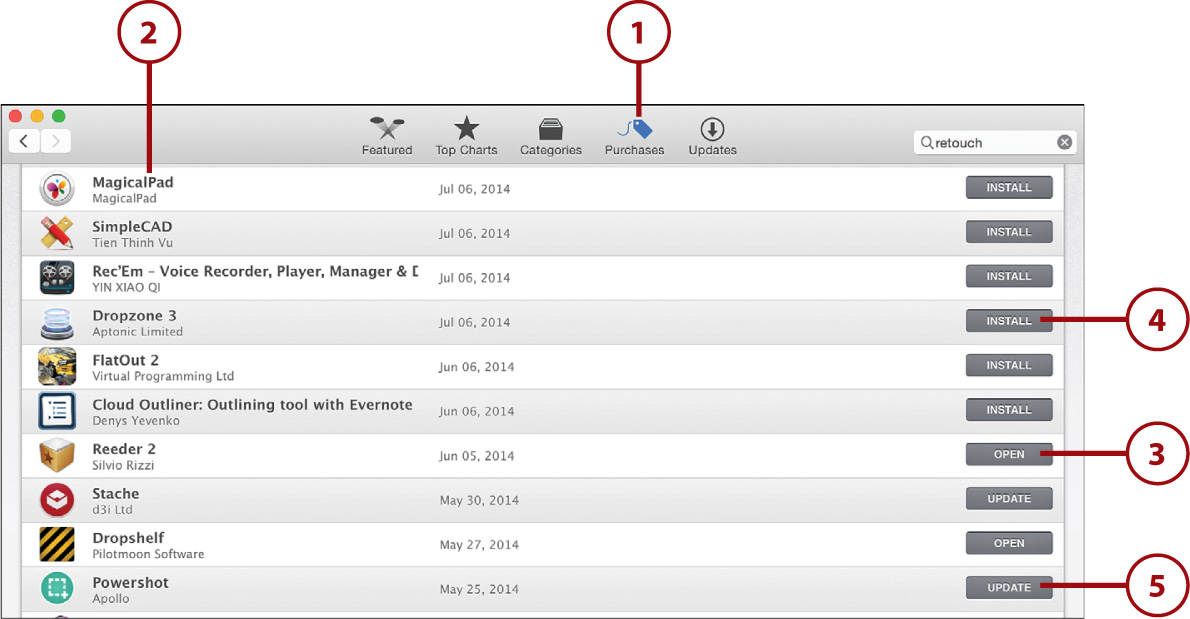
1. Click the Purchases icon at the top of the App Store window.
2. The Purchases list is displayed, along with a button/label showing the status of each app.
3. Apps labeled as Open are currently installed and up-to-date.
4. Click the Install button to install (or reinstall) an app that you already own.
5. Click the Update button to update a piece of software that is currently installed.
Yosemite prompts you to turn on automatic downloading of apps that you download on other machines. If you activate this feature, any software you download on one Mac will automatically be downloaded on any other Mac that is logged into the Mac App Store with your account. You can also control this via the App Store preference pane, which you learn about later in this chapter.
Hiding Apps You No Longer Want (New!)
I’ve downloaded a lot of apps; you probably will, too. Unfortunately, these won’t all be apps you want to keep updating (or even remember that you purchased). To hide an app from the update list, follow these steps after logging into the App Store.
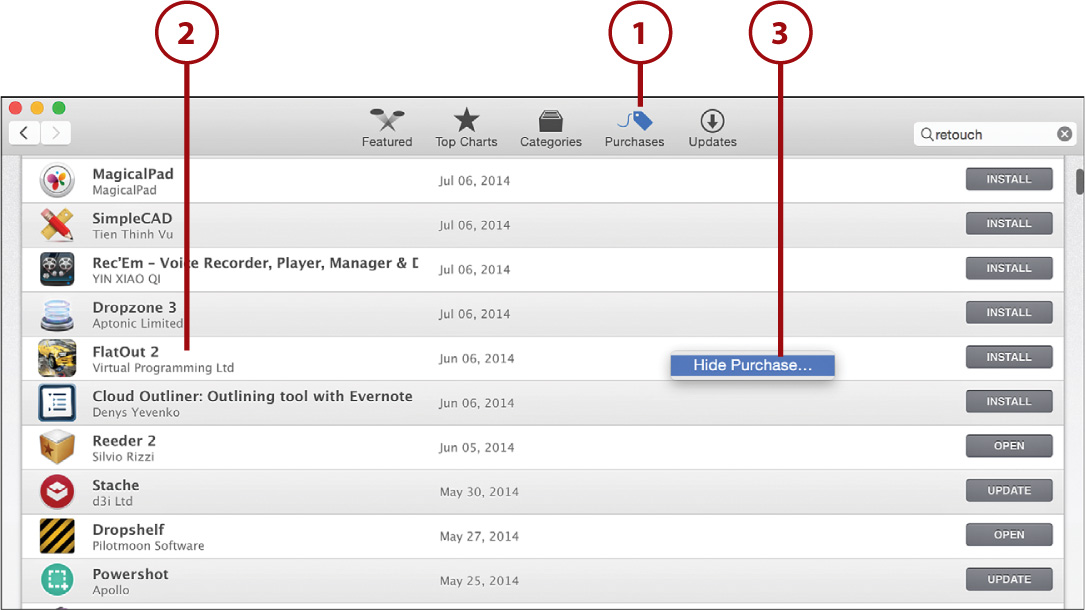
1. Click the Purchases icon at the top of the App Store window.
2. Right-click the item you want to hide.
3. Choose Hide Purchase to remove the item from the update list.
Find What’s Missing
To show the items that you’ve hidden, choose the Account quick link from the right side of the Mac App Store after following the instructions in the section “Logging into the App Store.” Use the Hidden Purchases options to show the hidden apps.
Installing Non–App Store Applications
The App Store is great, but that doesn’t mean that it defines the limits of what you can do on your Mac. There are certain restrictions in place on the App Store that make some pieces of software impossible to distribute through that site. There are also thousands of developers who want to sell and market their applications through their own websites.
By default, Yosemite enables you to install and run any software you want—but this can be disabled by an administrator. Read the section “Limiting Application Execution,” in Chapter 14, “Securing and Protecting Your Mac,” to learn how to adjust the controls to enable (or disable) software installations on your Mac.
Installing software from non–App Store sources is frequently a matter of browsing the Web in Safari, clicking a download link, and copying the application to your Applications folder.
Getting the Lowdown on the Download
Recall that Yosemite has a Downloads folder that is available in your Dock. Software archives that you download in Safari or most other Mac applications are stored in this location.
Unarchiving Zip Files
A decade ago, almost all Mac applications were distributed in a compressed archive format called SIT (StuffIt). Today the Mac has adopted a standard used on Windows and other platforms called zip files. A zip file can contain one or more compressed files.
To unarchive a zip file and access the contents, follow these steps:
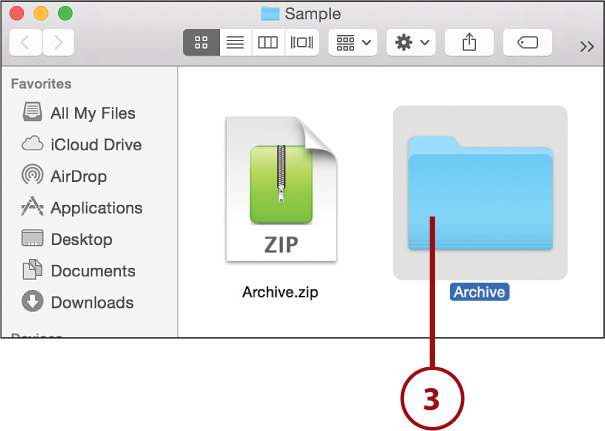
1. Find the file that you want to unarchive.
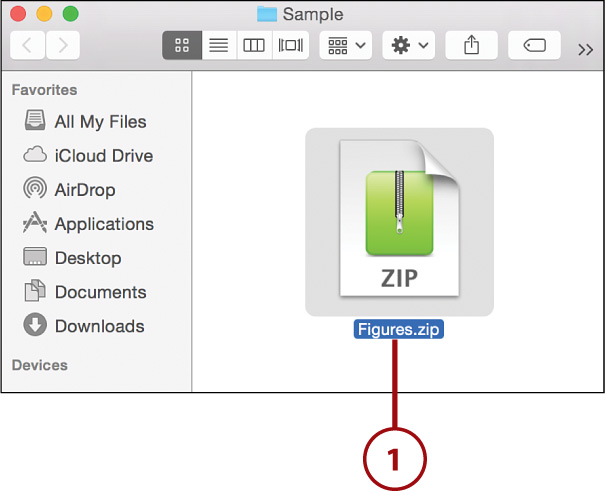
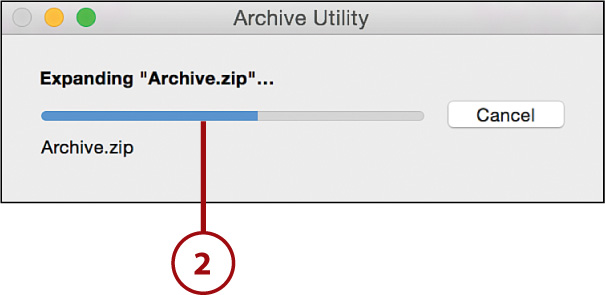
2. Double-click the file. Unarchiving can be virtually instantaneous or can take several seconds, depending on the archive size.
3. The contents of the archive are made available in the same folder where the zip file was located.
Just StuffIt
If you find that you need to deal with a StuffIt file, you can download StuffIt from http://www.stuffit.com. Despite the decreasing use of the format, it has been actively maintained over the years.
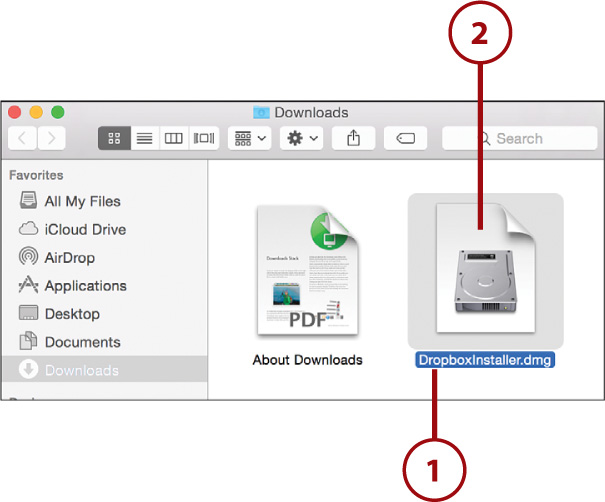
Accessing Disk Images
Sometimes applications are distributed on a disk image, or DMG file. When mounted on your system, DMGs act like a virtual disk drive. Files in a DMG must be copied off the disk image by way of an installer or a simple drag-and-drop process.
To mount and access the contents of a disk image, follow this process:
1. Find the disk image you want to access.
2. Double-click the DMG file. The disk image mounts and appears as a disk in the Finder.
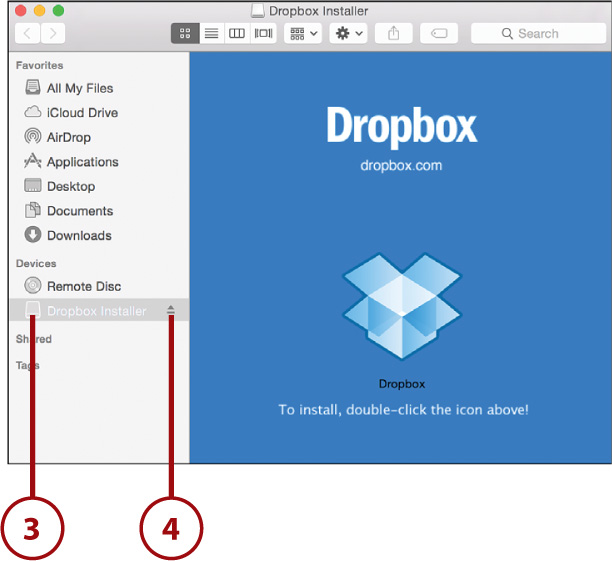
3. Access the files in the disk as you would any other storage device.
4. To eject the disk image, click the Eject icon beside the mounted disk in the Finder sidebar or drag it to the trash.
Sharing Purchases with Family Sharing (New!)
New in Yosemite is the ability to activate Family Sharing. Family Sharing makes it possible to share music, book, and app purchases between up to five additional accounts. These five individuals (presumably family and/or friends) will have access to your downloads and will be able to download and redownload content that you’ve purchased on the App Store, iTunes, or the iBook Store.
Each family will have an “organizer” who manages purchases. As the organizer, you are responsible for paying for the purchases made by your family.
Setting Up Family Sharing (Organizer)
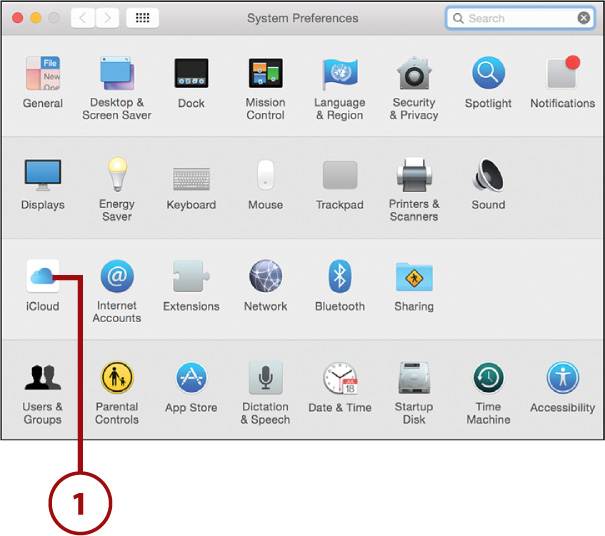
To set up a new Family Sharing account, open System Preferences and then follow these steps:
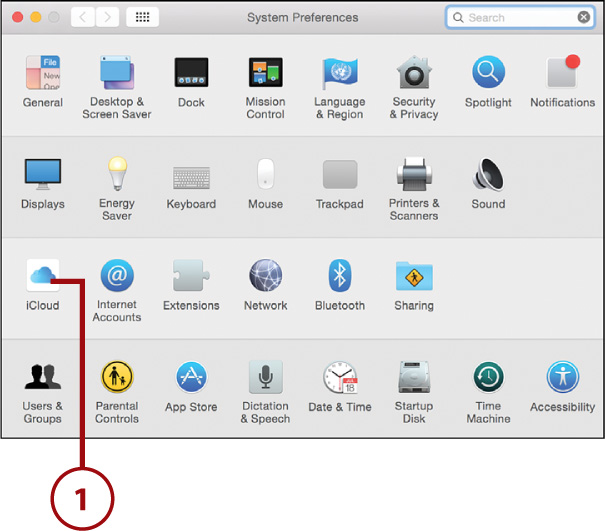
1. Open the iCloud Preferences panel.
2. Click the Set Up Family Button.

3. Click Continue on the Intro screen that appears (not shown).
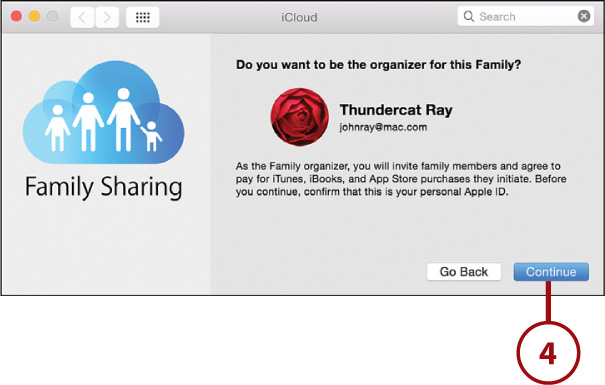
4. Click Continue to acknowledge that you want to be the organizer for your family.
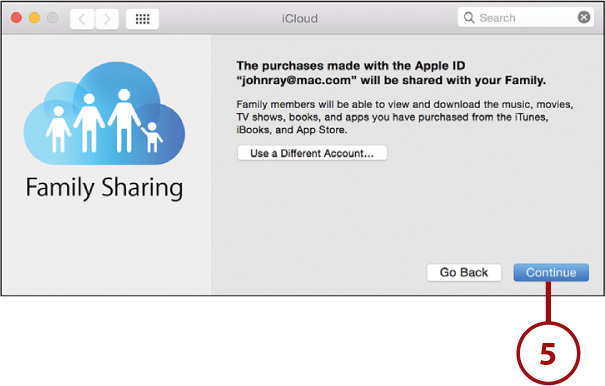
5. Family Sharing prompts for the account to use for purchases. Click Continue to move on or Use a Different Account to enter another Apple ID.
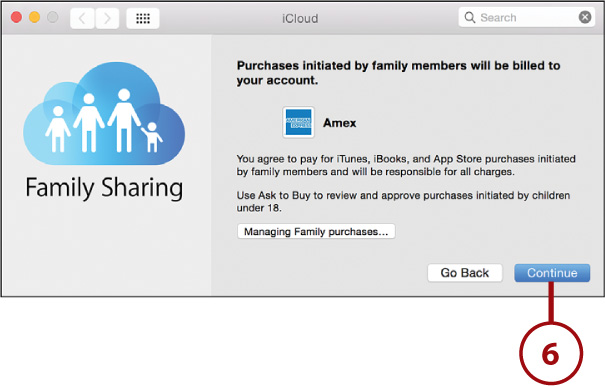
6. Click Continue to acknowledge the payment source you’ll be using for purchases.
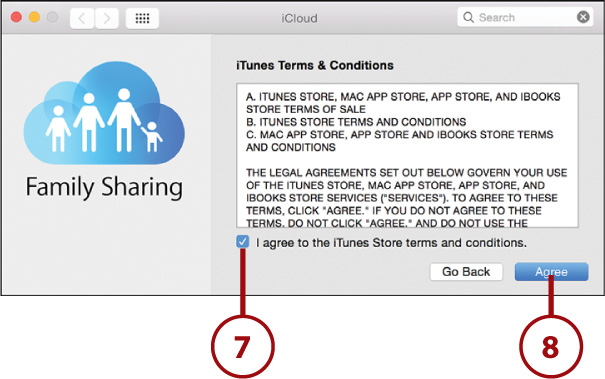
7. Click the checkbox next to I Agree to agree to the iTunes terms.
8. Click Agree to continue.
9. Click the checkbox next to I Have Read to accept the Terms and Conditions.
10. Click Continue to move forward.

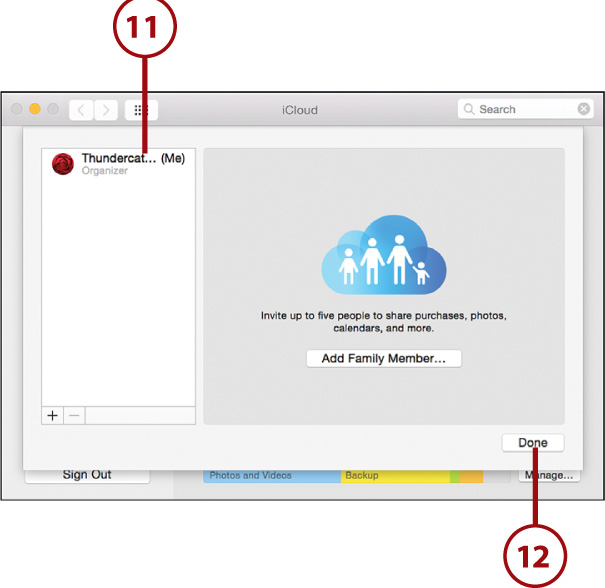
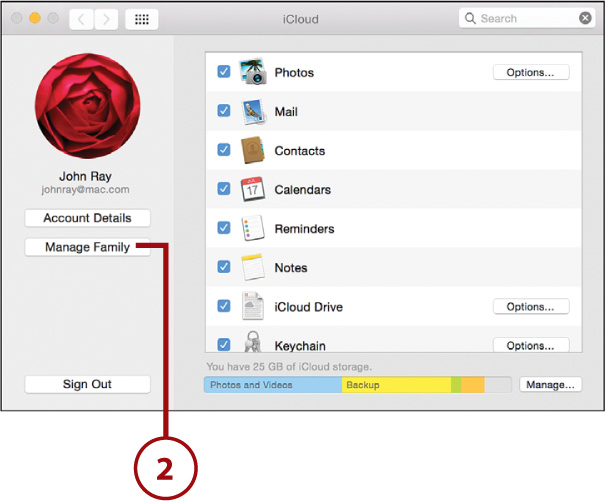
11. Click the Me line to edit your account information, disable sharing, or begin adding family members, as described in the next section.
12. Click Done to end Family Sharing Setup.
Adding a Family Member
To add a new member to Family Sharing (remember you can have up to five, including yourself), open System Preferences and then complete these steps:
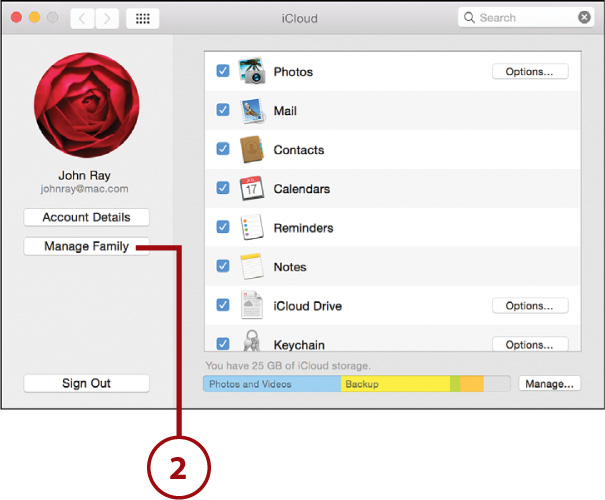
1. Open the iCloud Preferences panel.

2. Click the Manage Family button.
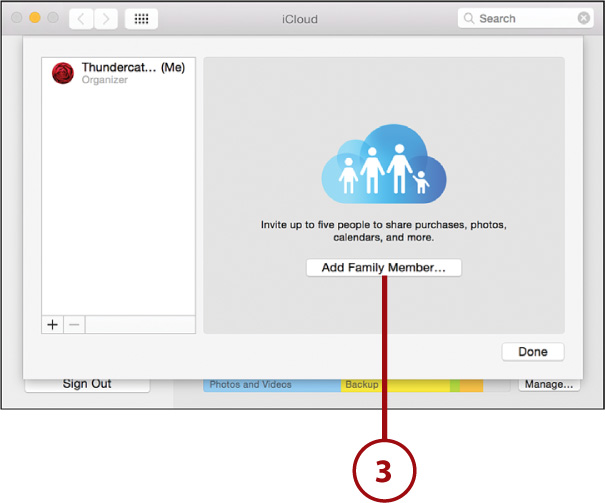
3. Click Add Family Member on the management screen, or click the + button.
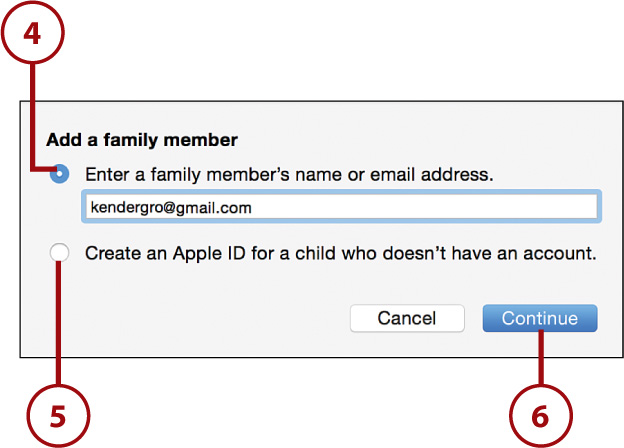
4. In the Add a Family Member dialog, use the first radio button and field to select and enter the email for a family member you want to invite.
5. If you’d like to make a new account for a child, click the second radio button to be guided through a new account wizard.
6. Click Continue.
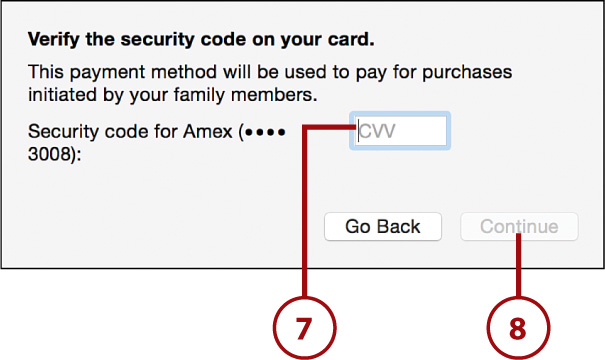
7. Enter the verification information requested.
8. Click Continue to move on.
9. When prompted, you can use the first radio button and field to ask the family member to enter his or her password (on your Mac) to immediately join the family.
10. If your family member would rather accept on his or her own device, select the radio box beside Send an Invitation. This delivers an email with a link for the invitee to join your family.
11. Click Continue to move on.

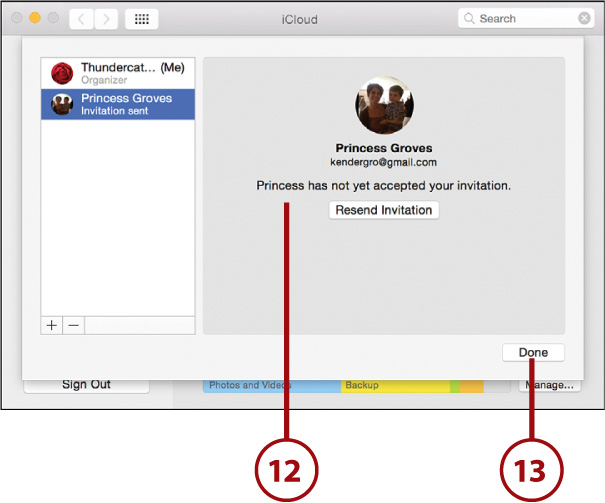
12. The invitation is sent, and OS X shows the status.
13. Click Done to exit family management.
Managing Family Members
To manage your family members and invitees, open System Preferences and then follow along:
1. Open the iCloud Preferences panel.
2. Click the Manage Family button.
3. In the list on the left, click the Me line to manage your personal settings.

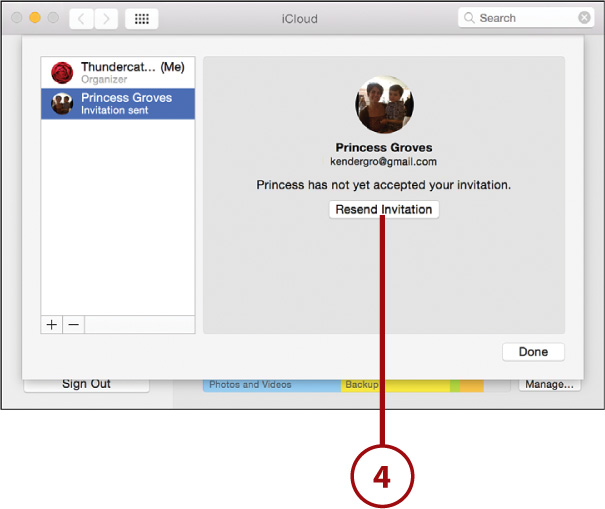
4. Click individuals whom you’ve previously invited to resend their invitation.
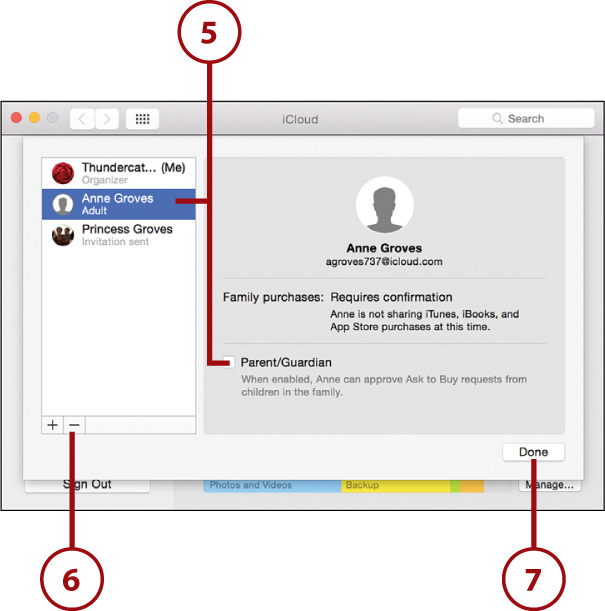
5. Click other members to configure their settings and to choose whether they can approve others’ purchases.
6. Click the – button to entirely remove a member. This eliminates his or her ability to use the purchased family content.
7. Click Done to finish managing your family.
Keeping Your Applications and Operating System Up-To-Date
Keeping your operating system and applications up-to-date is important both from the standpoint of maintaining your system security and providing the best possible user experience.
With Yosemite, you can activate an automatic update process that periodically checks and prompts you with available updates. You can even set all your Macs to automatically download applications that you’ve purchased through the App Store—ensuring a seamless computing experience moving from system to system.
How Will I be Notified of an Update?
All Yosemite software update notifications appear in the Notification Center. Using the controls on the notification, you can postpone its install or have it applied immediately. To learn more about the Notification Center, refer to Chapter 1, “Managing Your Desktop.”
Configuring Software Updates and Auto Downloads (New!)
To configure how your Mac handles software updates and new downloads from Apple, follow these steps:
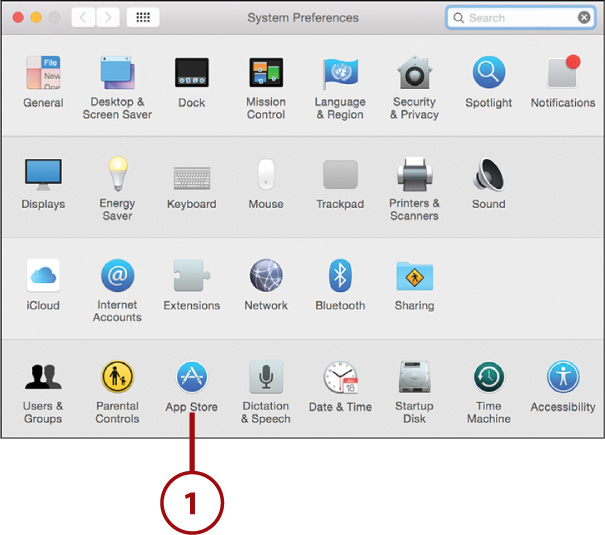
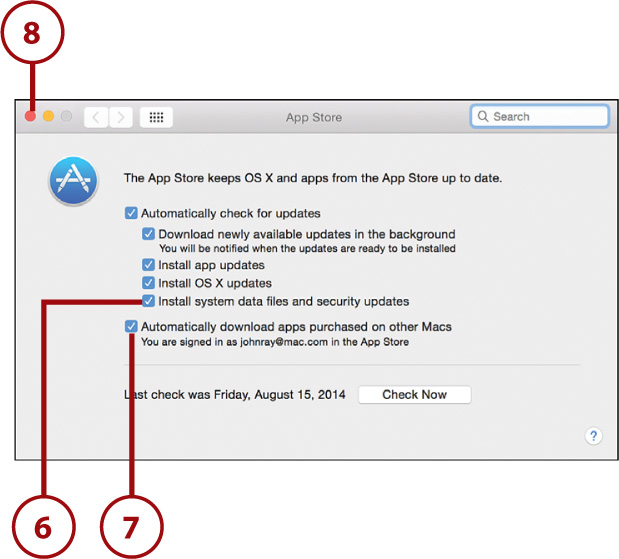
1. Open the App Store System Preferences panel.
2. Select the Automatically Check for Updates checkbox to have your system periodically look for new software downloads.
3. Check Download Newly Available Updates in the Background to have your system download the update packages while it is idle so that they are available to install when you are ready.
4. Check Install App Updates to keep all your App Store purchases automatically updated.
5. Check Install OS X Updates to ensure your operating system is always on the latest possible version.
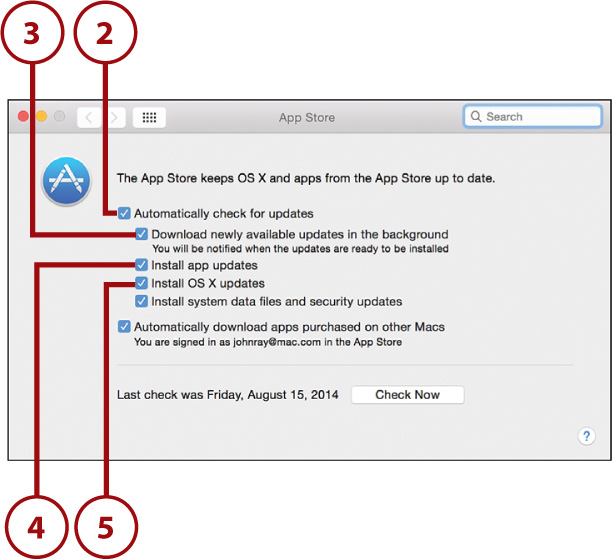
6. Choose Install System Data Files and Security Updates to keep many of the critical OS files automatically updated without any interaction required.
7. If you’d like all your App Store purchases to be downloaded automatically to your Mac, check Automatically Download Apps Purchased on Other Macs.
8. Close the System Preferences.
Manually Applying Software Updates
If you’re like many people (myself included), you want the latest and greatest without waiting. With the Mac App Store, you can manually update your system as soon as updates become available: Yosemite manages your applications and system updates in a single location.
To check and install application and OS updates, do the following:
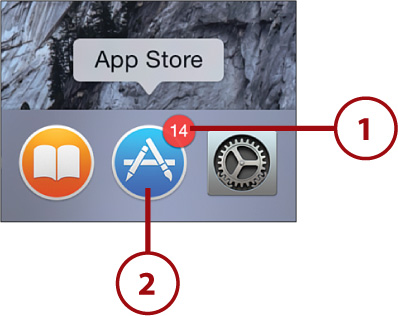
1. The App Store icon and App Store menu item under the Apple menu display a counter badge listing the number of updates available to you. Update notifications also appear in the Notification Center.
2. Open the App Store.
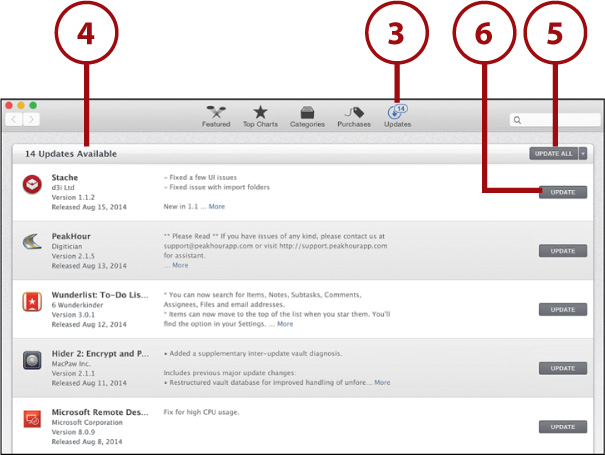
3. Click the Updates button in the App Store toolbar.
4. All your available app updates are listed.
5. Click the Update All button to update all software at once.
6. Click an individual Update button to update just a single app.
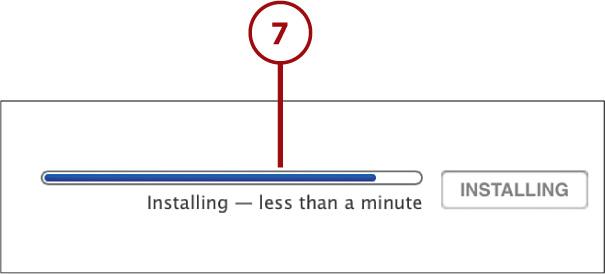
7. Update progress appears in the App Store window, but you don’t have to wait to continue using your computer. The updates are automatically installed in the background.
Software Update? Your Assistance May Be Required!
Depending on the type of update, you might be asked to give your password and accept any applicable software license agreements before an update is installed. You might also be required to quit running applications or even reboot your Mac for low-level OS updates.
Finding and Managing Extensions (New!)
Extensions enable you to customize how your Yosemite system looks and works—without compromising the security. This great new feature, however, isn’t front and center in the user interface. You’ve seen how to use built-in extensions in other chapters, but how do you add new ones to your system?
Finding New Extensions
Extensions are just pieces of software that you can find on the App Store and install—but, unlike applications, they have their own management utility, the Extensions System Preferences panel. We use this as our starting point. To find and install a new extension, follow these steps:
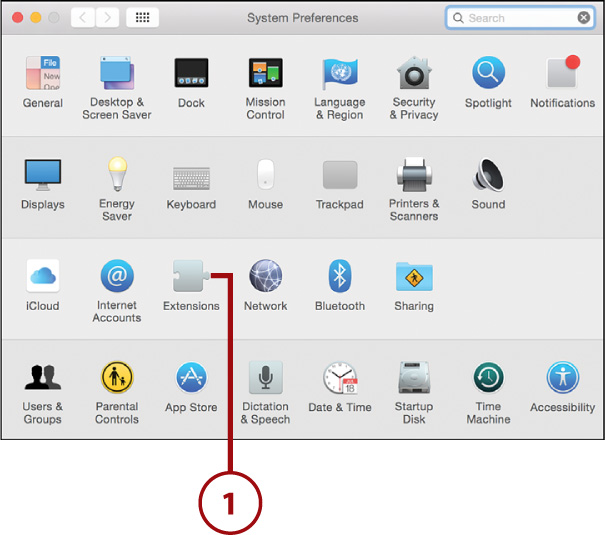
1. Open the Extensions System Preferences panel.
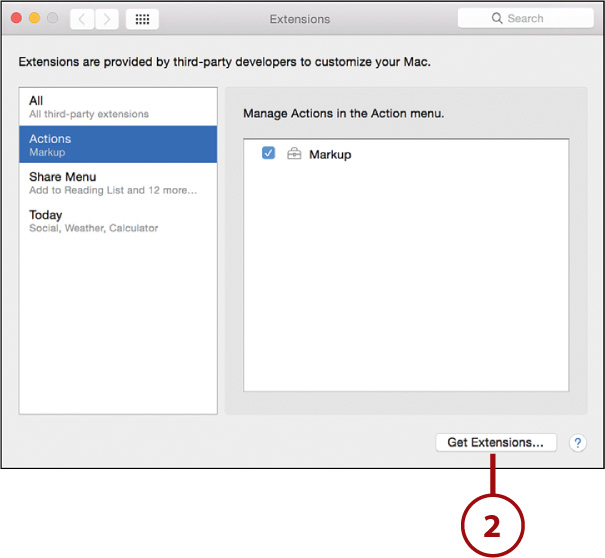
3. The App Store opens and displays available options. Follow the steps in the earlier “Purchasing Software” section to install extensions (not shown).
Extensions in Today
Another quick way to find widget extensions for your Notification Center is to open the Notification Center’s Today view, click Edit at the bottom, and then click the App Store button that appears.
Managing Installed Extensions
After you install an extension, you need a way to manage it. Again, the Extensions panel comes in handy. Follow these steps to keep your extension software in order:
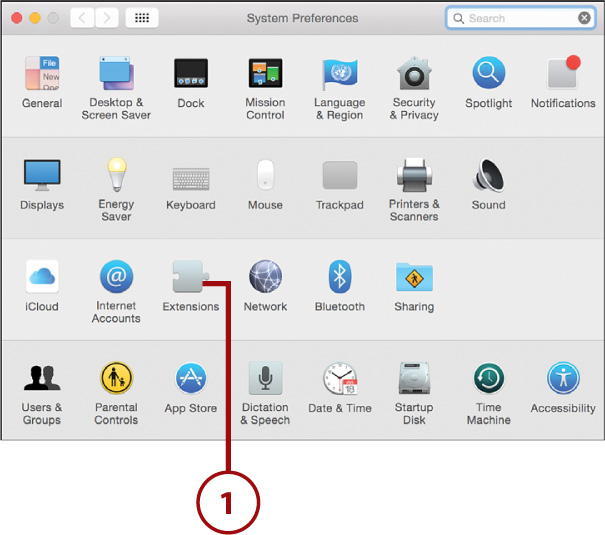
1. Open the Extensions System Preferences panel.
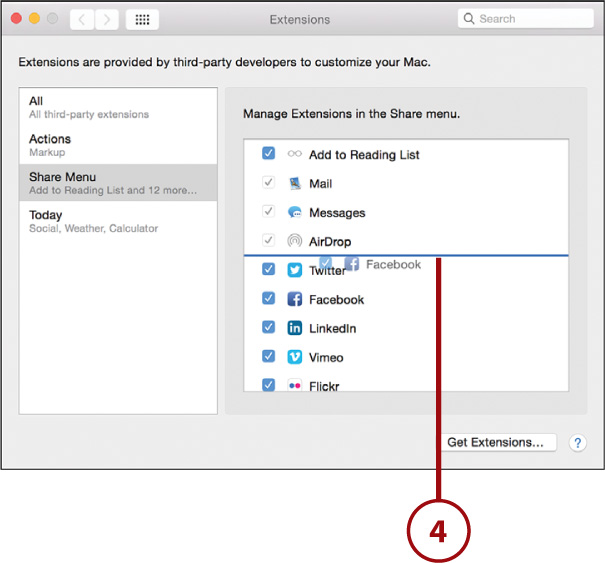
2. Choose a category on the left—from All, Actions, Share Menu, and Today widgets.
3. Within each category, use the checkboxes to enable or disable an extension. If an option is grayed out, you cannot modify it.
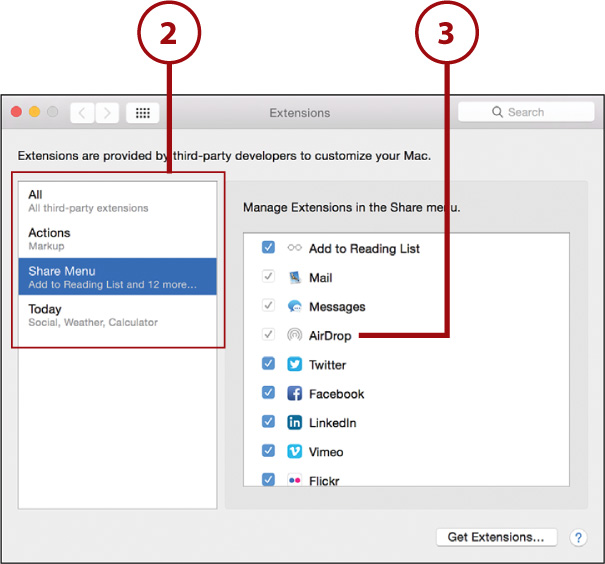
4. Some categories, such as the Share Menu, let you click and drag to reorder where the extensions appear.