
Chapter 7. Style Appropriate
There’s a common misconception in the creative community that you need a signature visual style to gain fame, fortune, and future work. There’s no such thing as one-style-fits-all design. In fact, forcing yourself to approach every design project with the same style will limit your opportunities and your growth as a creative professional.
As a designer, it’s important to study the intended audience for any project you take on and to choose a style that speaks authentically to that audience (FIGURE 7.1). Your design might be aesthetically pleasing, win numerous awards, and even be based on a clever concept, but if it doesn’t resonate with the people its intended for, it’s merely eye candy—delicious, perhaps, but not very good for you or your client’s business.

FIGURE 7.1 Shown clockwise from top left are a licensing image for Wayne Enterprises, an illustration for a T-shirt design, a design for a skate graphic, a brand character design and lettering for a microbrewery, a tribal illustration just for fun, and hand-lettering for an editorial article. The style of each is appropriate for its intended audience (opposite page).
Be creatively proactive and leverage diverse styles in order to produce work that not only meets your clients’ needs but exceeds them. It’s an effective way to stay relevant in an industry that becomes more competitive every year.
“Failure is not fatal, but failure to change might be.”
—JOHN WOODEN
Design Chameleons
I love expanding my creative horizons by exploring new styles. Being able to work in a variety of styles has brought me a broader range of projects and clientele. Over the years, I’ve become a design chameleon of sorts. Many art directors have hired me because I’m able to offer several directions to help them explore potential solutions.
With each new project, I decide early on which specific style or styles I’ll use so I can prepare any reference material I might need. If the style is a more complex one, I determine how long it will take to create and what vector build methods will work best to produce the final art. Having this information before I put pencil or pen to paper is invaluable.
Let’s walk through four real-world projects, each of which required me to leverage a different but appropriate style to produce the design the client needed.
Linear Line Style
The linear line style was first made popular by Pablo Picasso in his sketches and more recently has become a favorite concept within the design industry for marketing products as diverse as insurance, coffee, medical services, real estate, cars, and, as demonstrated in this project, banking (FIGURES 7.2–7.14). This style was appropriate for this client because it worked for print collateral and could easily be animated for TV spots.


FIGURE 7.3 I made refined sketches of all the linear line icons I’d be creating. Doing this helped me pin down exactly what I’d have to build in vector form and eliminated guesswork.

FIGURE 7.4 I created most of the linear icons using the Point-by-Point Method, but on this light bulb, I was able to use the Shape-Building Method as well.


FIGURE 7.6 Next, I chose a weight for the final stroke size that would look good whether the icon was used big or small.

FIGURE 7.7 I re-created the bank’s logo in the same style of the icons since it would appear in the same context as the icons and type.


FIGURE 7.9 These images show the revisions I made to satisfy the client’s request that the nose be rounded off.

FIGURE 7.10 The client also requested that the mouth span the whole face, so I edited my vector art as shown here.

FIGURE 7.11 The client didn’t like one of the eyes and asked that the loop in the nose be removed. Overall, the changes were reasonable, and I think they improved the final icon, which is the whole point of art direction.
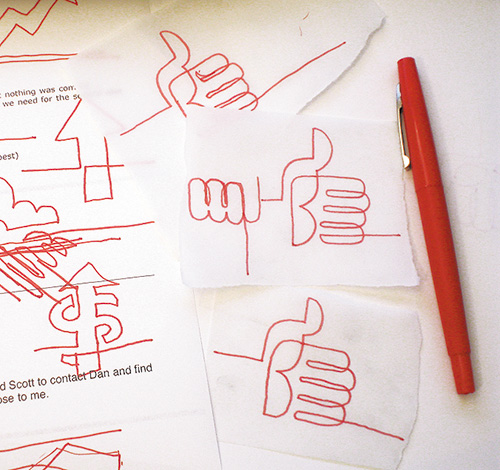
FIGURE 7.12 The client decided another icon of a hand was needed, so I quickly sketched out this concept.


FIGURE 7.14 This style lends itself to animation in which the line draws itself. The ad agency used my linear art in TV spots for the bank, as well as in print collateral and signage. For more information about this style, check out my “Drawing Vector Graphics: Linear Line Illustration” course at www.DrawingVectorGraphics.com.
Segmented Style
If I had a signature style, it would be this one, which was influenced by the work of Jim Flora, an art director at RCA Victor in the 1950s. I’ve used this segmented style on projects for Adobe, a national restaurant chain, a book publisher, several magazines, and, in this example, a self-promotional product called Keyboard Characters (FIGURES 7.15–7.26).
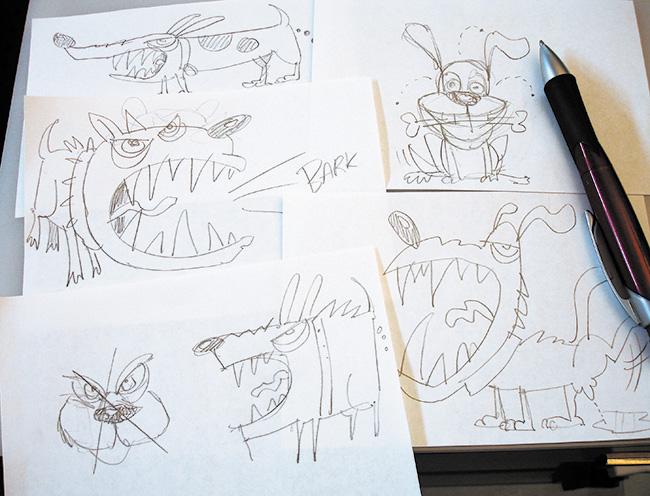

FIGURE 7.16 My refined sketch for Riled Rover. Sometimes I redraw a sketch and tape it on top of a previous iteration, as shown here.
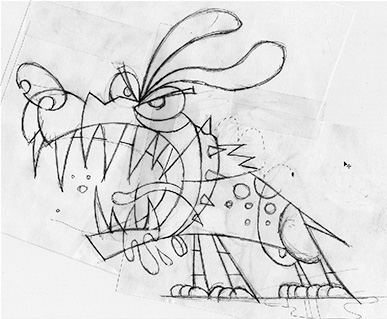
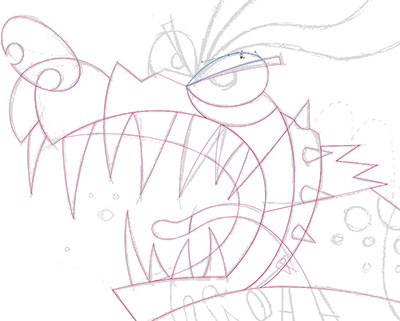
FIGURE 7.18 I built most of the vector paths using the Point-by-Point Method but kept The Clockwork Method in mind as I placed the anchor points. On the teeth, I used the Shape-Building Method via the Ellipse tool (L) and the Pathfinder panel (Command-Shift-F9 or Control-Shift-F9).

FIGURE 7.19 Notice how I built the vector art to match my drawing. I deviated from the drawing only in areas that were easier to build digitally, such as the spikes, dog tag, and toes, all of which I created using the shape-building tools in Illustrator.


FIGURE 7.23 These are three more Keyboard Characters: Pet Monster, DZGN-BOT, and Feed Your Imagination.
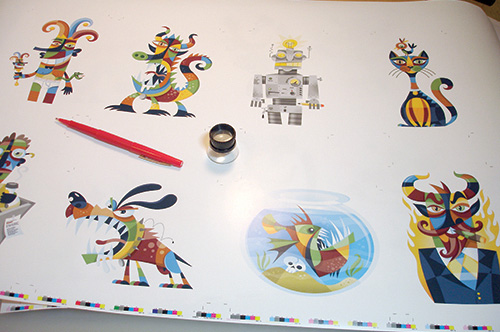
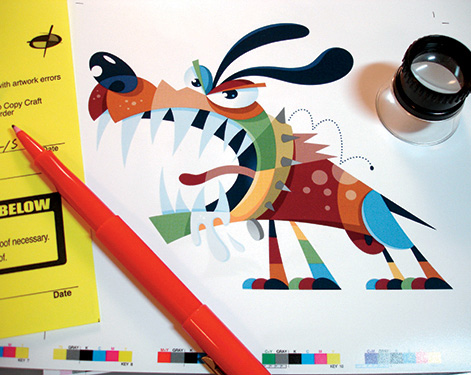
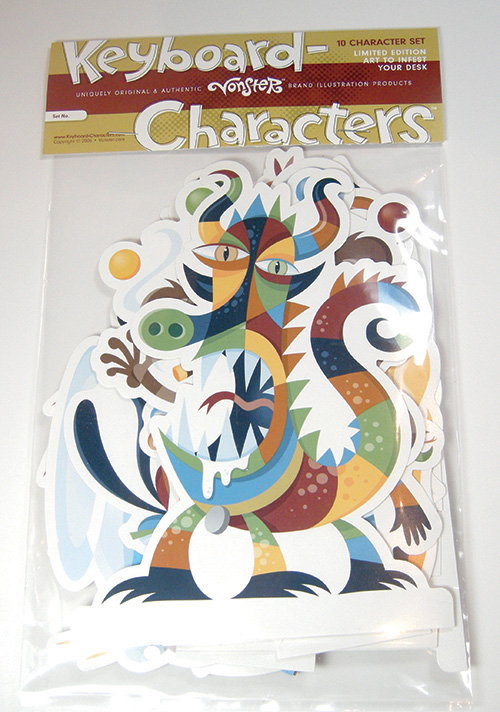
FIGURE 7.26 The finished Keyboard Characters self-promotional product. You can order your own set at www.GlitschkaStudios.com.
Tribal Tattoo Style
Years ago, I would meet with a group of other illustrators once a month and each of us would illustrate our own take on an agreed-upon topic. One month it was tattoos. I’ve always liked the graphic nature of tribal tattoos, so I decided to draw a face.
That simple creative experiment led to a style that I’ve used for book covers, custom tattoo designs, energy drinks, beer branding, stickers, and, as shown in FIGURES 7.27–7.34, a product design for a company called InkDot. The tribal tattoo style was appropriate for this client’s product line, which uses a range of artistic styles to cater to a wide range of people.

FIGURE 7.27 For this tribal design, I took my rough thumbnail sketch, scanned it in, and created a template layout to guide my refined drawing.
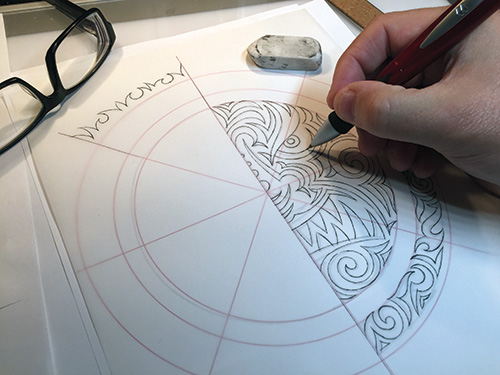
FIGURE 7.28 I placed vellum over the template layout and began drawing a refined sketch. This precise drawing guided my vector-building efforts and aligned with the template guides I set up previously. A mechanical pencil aided in this effort.

FIGURES 7.29 As I moved back to digital and started to build on top of the refined sketch, I used the Astute Graphics VectorScribe tool to form most of the vector shapes.
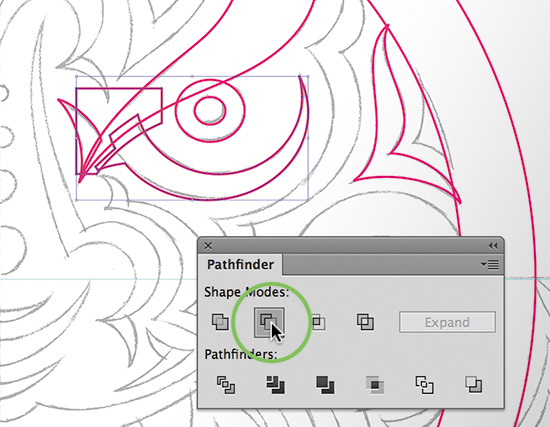
FIGURE 7.30 I used the Shape-Building Method to form the eye in this design. Pathfinder allows me to work fast and build precisely.
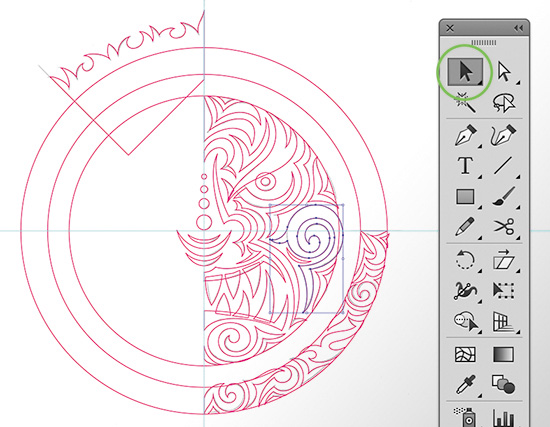
FIGURE 7.31 The final symmetric base vectors. You can see I built only half the design. I used the selection tool to select the shapes, clone them, and reflect them to form the whole design.

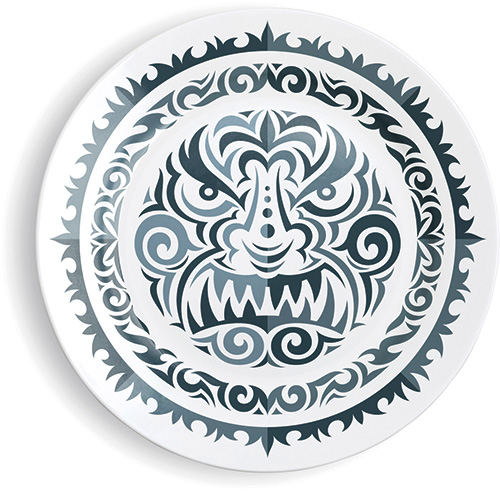
FIGURE 7.33 The final flat color application printed on a ceramic plate. I titled this design “Dark Matter.”

FIGURE 7.34 I also took the vector design into Photoshop and texturized it. I used this iteration for throw pillows, art prints, and wallpaper. For more information about textures, check out my “Creating and Using Textures in Design” course at www.DrawingVectorGraphics.com. ![]()
Graphic Style
Not all projects require an extensive illustrative approach. A simple and iconic style may be more appropriate for projects such as custom lettering, icons, and ornaments. I used it in a logo design for an Italian animation company (FIGURES 7.35–7.42). Keeping the style simple meant that the logo could be more easily adapted to a broad range of applications without running into readability problems.

FIGURE 7.35 To start, I roughed out a symmetrical thumbnail for the logo design, scanned it in, and mocked up the whole face so I could sketch out the type. (Bocca means “mouth” in Italian.) I used this rough version to draw my refined sketch.

FIGURE 7.36 The refined sketch. Since the design was symmetrical, I had to build only half of the character’s face.

FIGURE 7.37 The spacing between the elements was too tight in three places (circled in orange), which created visual tension, so I made myself a mental note to balance out those areas as I moved forward. (See Chapter 8, “Art Directing Yourself,” for more about visual tension.)

FIGURE 7.38 I created most of this design using the Point-by-Point Method, but I used the Shape-Building Method in a few spots, such as the nostril and the pupil of the eye.

FIGURES 7.39 Once I’d created all the symmetrical vectors, I selected all the shapes and flipped them using the Reflect tool (O) to form the final base vector artwork.

FIGURE 7.40 Next I worked out the color scheme for the logo. Notice how I purposely left out certain details like whiskers. Knowing what to leave out of a design is just as important as knowing what to include.

FIGURES 7.41 Small details can add a lot to a design. Just adding the small hot spots (white circles) to the eyes breathed life into this logo.

But the main reason I picked this stylistic direction was because it adhered to my design philosophy regarding logo identity: Simple is better.
A smart designer will leverage various styles to be a more effective visual communicator. If you find yourself stuck in the same old visual rut, then move in a new direction. Try a completely different style on your next project instead of creatively capitulating to the same tired routine.
 Field Notes: Create a Style Board
Design Drills: Use It or Lose It
A creative process in which you draw out an idea, refine it, and then build from it in vector form—making improvements along the way—will be successful only if you apply it consistently on every project.
In other words, if you don’t use the methods covered in this book routinely, as in every day, then you won’t see the benefits over time. Use it or lose it; it’s up to you.
FIGURES 7.43 and 7.44 use all the methods I’ve outlined in this book, but my analog work in the drawing phase improved my vector results.

FIGURE 7.43 Investing the time up front to draw, redraw, and refine your design until you have it all worked out will save you many hours of frustration when you move to digital and start building it. So, don’t cut corners; embrace the struggle.
