Premiere Pro has some very sophisticated effects capabilities. Effects for video and audio can be customized, combined, and changed over time. This chapter covers the basics to get you started working with transitions and effects.
To work with effects in Premiere Pro, you will need to work with the Effects window and the Effect Controls window. For purposes of screen space, I like to nest the Effects window in the Project window. The Effect Controls window can be nested in the Project window or the Source Monitor window. I prefer it in the Project window, because you can get more horizontal space to work the timeline there than in the Source Monitor window.
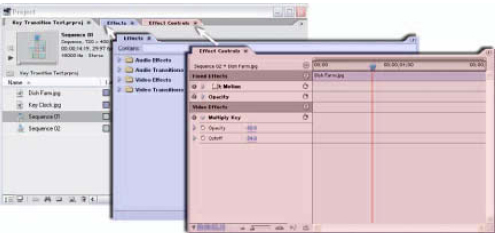
The Effects window and Effect Controls window can dock in the Project window.
The Effects Window
The Effects window is the storage area for effects and transitions. When you open it, you will see that it contains four folders, or bins:
• Audio Effects
• Audio Transitions
• Video Effects
• Video Effects
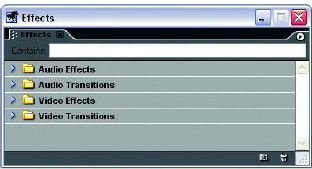
The Effects window.
Inside each bin are nested bins to group the effects and transitions logically. To open a bin, click on the triangle to the left of the bin icon.
Use the effects and transitions in these folders by opening the appropriate folder and dragging the filter or transition to the timeline. The effects are dropped on a clip, and the transitions must be dropped on an edit point, or the in or out point of a clip. You may notice that we’re dropping a cross dissolve transition on the in point of a title to fade it in. We could also place a transition on the in point of a clip to fade it up from black, etc.

Three scenarios for dragging and dropping from the Effects window. A.) The Brightness and Contrast Filter is dragged directly to a clip. B.) A Cross Dissolve is dragged to a cut point as a transition. C.) A Cross Dissolve is dragged to the edge of a title clip with no adjoining shot, to be used as a fade-in.
You can create your own additional bins and drag frequently used effects into them. Create a new bin by clicking on the New Custom Bin button next to the garbage can at the bottom of the Effects window, or choose New Custom Bin from the Effects window menu. You can create one or several custom bins to organize your favorite transitions and effects. You can delete a custom bin by selecting it and clicking the Delete Custom Items button (the trash can) or by choosing Delete Custom Items from the Effects window menu.
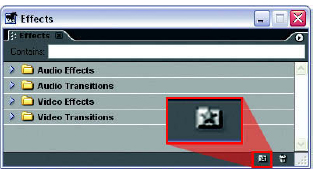
The New Custom Bin button.
The Effect Controls Window
The Effect Controls window is where you will customize how a filter or transition works over time.

The Effect Controls window when first opened. (You must have a clip on the timeline selected to see settings.)
When you open the Effect Controls window, you will notice that it isn’t empty. Motion, Opacity, and Volume effects are built in, or pre-applied, to the clip and are immediately available for adjustment when you open the Effect Controls window. These are called fixed effects.
The Motion and Opacity Fixed Effects
The Motion effect allows you rotate, move, and scale your clip to create animated effects. The Opacity effect controls the transparency of a clip for fading a clip in or out and for some types of compositing. If the selected clip has audio, you will see the Volume control under Audio Effects.
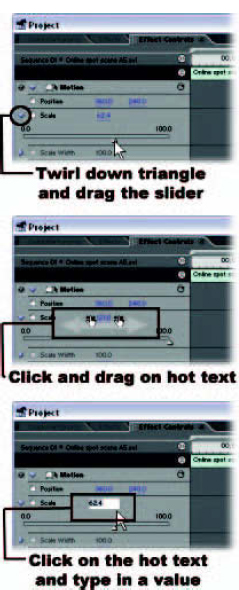
There are three different ways to change the value of an attribute for most Premiere Pro effects and filters, including the Motion and Opacity effects in the Effect Controls window:
• Many settings have their own triangles, which will reveal a value slider.
• Or you can make a value adjustment by clicking and dragging over the hot text value to the right of the attribute.
• Or you can click the text value directly and type in a new value.
In addition to the adjustments available in the Effect Controls window, video clip opacity and audio clip volume can be adjusted on the timeline.
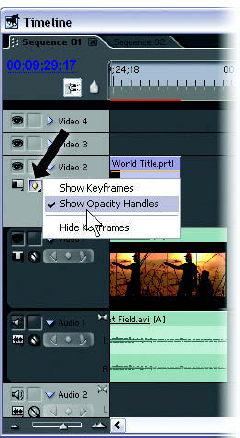
The Show Keyframes button is indicated. Choose Show Opacity Handles to work with opacity settings on the timeline.
1 On the track you wish to adjust, click on the Show Keyframes button and select Show Opacity Handles.
2 Choose the Pen tool from the Tool palette.
3 To adjust the overall volume or opacity of the clip, click and drag the handle up or down as appropriate.

The Pen tool in the Tool palette.
To add keyframe adjustment points to the opacity or volume handles in the timeline, follow these steps:
1 With the Pen tool selected, hold the Ctrl key and click on the spot where the new keyframe will be.
2 Release the Ctrl key.
3 Now, click and drag the keyframe node to move it up/down or right/left as necessary.
4 Or click and drag any line segment up or down as necessary.
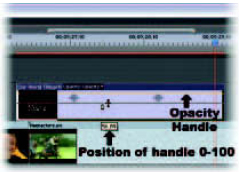
The Pen tool will automatically change to the Fade Adjustment tool when it’s over the opacity handles.
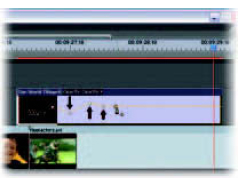
Hold the Ctrl key to create keyframes. Release the Ctrl key and the Pen tool will automatically switch between the Fade Adjustment tool, to move line segments, and the Keyframe Adjustment tool, to move keyframe points.
Note: You can move keyframe points with the Selection tool, but the Pen tool has more functionality overall to make opacity and volume handle adjustments.
The Motion effect also has alternate controls. When you click the small box with the arrow next to the Motion heading in the Effect Controls Window, you will see nodes, or handles, created around the corners and in the center of the Program view. This can be helpful when the video frame you are moving must be placed with consideration for another layer of video. The picture-in-a-picture seen over a newscaster’s shoulder is an example.
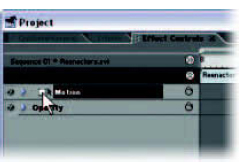
Click the box next to Motion in the Effect Controls window to send motion control to the Program view.
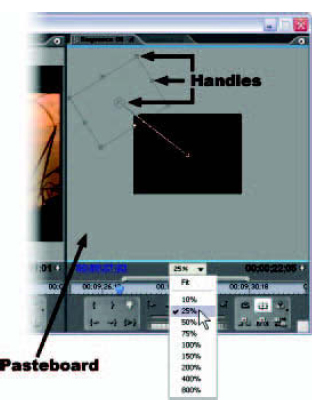
By adjusting the view magnification, you can see the pasteboard area to aid in setting up motion in the Program view.
• Clicking and dragging the corner nodes will scale the video picture.
• Turning off Uniform Scale in the Effect Controls window will allow you to scale the frame nonproportionately.
• Moving the middle handle (the circle with the X inside) will reposition the entire frame.
When adjusting Motion effects from the Sequence Monitor, it can be helpful to reduce the magnification in the monitor to view the area around the active video frame. This area is called the pasteboard, and it can be helpful to have it in view when you are moving clips on or off screen.
Applying Transitions
Video Transitions and Audio Transitions are available in the Effects window in specific bins. They are sorted into additional bins based on type and can be placed on any appropriate track (e.g., video transitions on video tracks, audio transitions on audio tracks).
To place a transition you’ll need two clips with a cut between them on the same track in the timeline (and preferably some trimmed handles on each):
1 Open the Video Transition (or Audio Transition) bin by clicking on the triangle.
2 Select and drag the transition of your choice to the cut on the timeline.
Transitions can also be used on a clip if another clip to transition to is not available. For example, transitions can be used to make a title on a track above another clip appear and disappear.
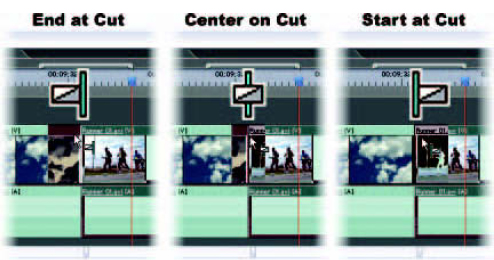
There are three ways the transition can be placed:
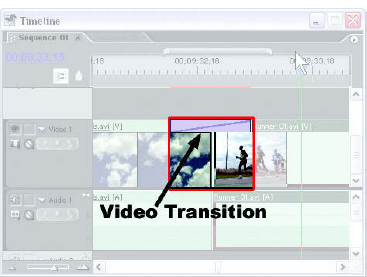
A placed transition will show up as a bar equal to the length of the transition on the top of the clip or clips.
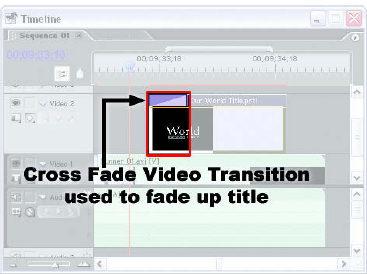
A transition can be used to fade in audio or video clips through placement along the leading or trailing edge of the clip.
• End at cut
• Center at cut
• Start at cut
The symbol next to the cursor when you are dropping a transition will indicate whether you are dropping it to start, center, or end on the cut.
The available handles, or trimmed frames beyond the in and out points of the clips on the timeline, will affect whether or not all three placement choices are available to you. If there are no trimmed frames on the second clip (i.e., the in point on the timeline is the actual first frame of the raw clip), then the only option Premiere Pro will make available to you will be to start at the cut. Centering a transition on the cut can also be affected by insufficient handles. If there is very little handle on one clip and significantly more on the other, the Center at Cut option may not actually be centered, even though it will stretch out in both directions from the cut.
Creating a Default Transition
The preset default transitions are indicated by a red outline around the icons. The default video transition for video is the crossfade, and the default transition for audio is the constant power crossfade. These two transitions are probably the most frequently used by most editors. If you would prefer different default transitions, you can set them by taking these steps:
1 Select the transition you want to be the new default.
2 Choose Set Default Transition from the Transition palette menu.
3 Set the default transition’s duration by choosing Default Transition Duration from the Effects palette menu.
4 The General Preferences dialogue will come up with separate choices for audio and video default durations.
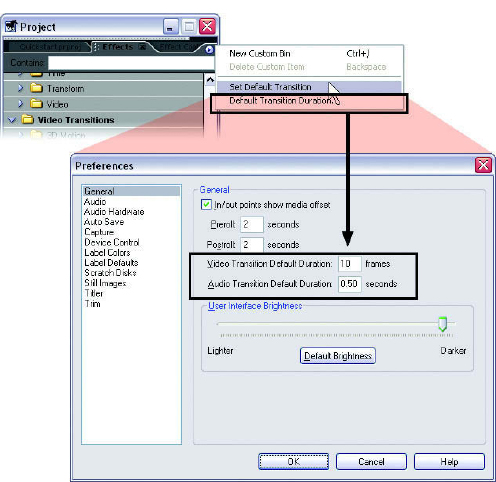
Choose a transition from the menu and select Set Default Transition to set it. By selecting Default Transition Duration, you will open a Preferences dialogue, where you can enter a value.
To set the default transition at an edit point without dragging and dropping it, you can position the CTI on the cut you wish to transition, and you can place the default transition by using the keyboard shortcuts. The default keyboard shortcuts are Ctrl + D for the video transition and Ctrl + Shift + D for the audio transition. You can also select Apply Video Transition or Apply Audio Transition from the Sequence pulldown menu. Use the Page Up and Page Down keys to position the CTI directly on a cut point. Be sure to target the track where you want the transition.
Applying and Removing Effects
Effects are available in the Video Effects and Audio Effects bins inside the Effects window. You can drag Audio or Video effects directly from their bin onto the clip you wish to apply them to. You can also drag them directly into the Effect Controls window (as long as the Effect Controls window and the Effects window are not both nested in the Project window) when your clip is selected.
To delete an effect from a clip, open the Effect Controls Window and select the effect you want to remove in the list. From there, you can do one of these:
• Right-click on the effect and select Cut or Clear from the context menu.
• Choose Delete Selected Effect from the Effect Controls menu.
• Simply press Delete or Backspace.
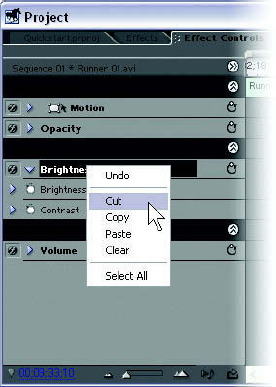
Click on the effect you want to remove and press Delete on the keyboard or right-click and select Cut from the context menu.
Working with Keyframes
Each effect can be adjusted through dialogues available from the Effect Controls window, and attributes can be changed over time through keyframing. Each keyframe is a setting in time. Each effect or attribute will change state from keyframe to keyframe, changing over time.
Here’s how to set a keyframe:
1 Find the attribute you would like to change over time and click on the small stopwatch symbol to the left of that setting or effect to enable keyframing.
2 Your first keyframe will automatically appear on the timeline where the CTI is parked.
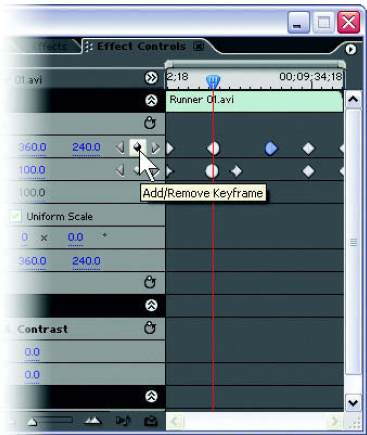
3 Reposition the CTI and add additional keyframes by changing a setting or by clicking on the Add/Remove Keyframe button between the arrows.
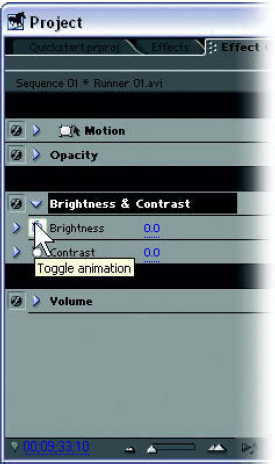
Click on the stopwatch to enable keyframing.
Note: You might want to make a habit of placing the CTI at the beginning of the clip when you activate the stopwatch, to set the starting keyframe automatically.
4 Use the arrows on either side of the Add/Remove Keyframe button to jump between keyframes.
The Add/Remove Keyframe button.
Customizing Keyframes
Keyframes are not only a way to assign certain values to certain instances in time; they can also control the rate and concentration of the change that happens between those instances. For this, we need to utilize keyframe interpolation.
Each keyframe is capable of having two different interpolation attributes: an In and an Out. The In attributes affect how we arrive at the keyframe: whether we ease into it or hit it fast. The Out attributes control how we depart from it, or move forward from there: easing out or starting fast.
The shape of each keyframe has two parts that indicate how both the in and the out interpolations are set up. Starting and ending keyframes have only one interpolation setting. Starting keyframes will only have an Out interpolation assignment, and ending keyframes will only have an In assignment.
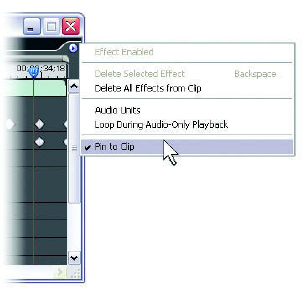
There may be times when you want to assign a keyframe value to a clip outside of its trims. Perhaps you want a type of motion that must begin three frames before the shot’s in point to look exactly right. Or you might want an audio clip to be fading up from silence, but you want to start the clip halfway through the “ramp.” To see beyond the trimmed edges of your clip in the Effect Controls window, access the window’s menu and make sure that Pin to Clip is not selected. This will allow you to scroll the timeline display beyond the physical trims of the clip on the timeline and create keyframes outside of the trims.
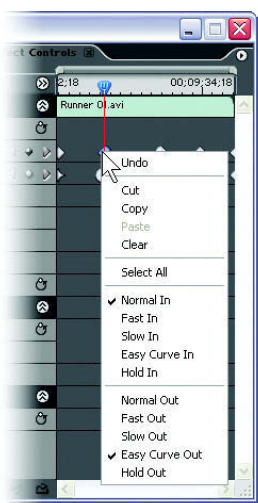
Right-click on a keyframe to open the keyframe context menu and change the interpolation.
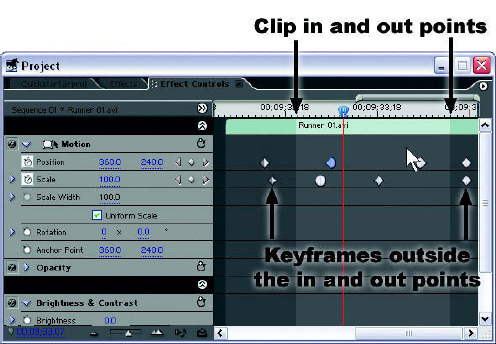
Uncheck Pin to Clip in the Effect Controls window menu to place keyframes outside the in and out points of a clip.

