One of the more significant concepts involved in working with the media inside Adobe Premiere Pro is that the Project window is not a directory, or a folder as you would see on your hard drive when you sort files and group them. The items you see in the Project window are links to the content you are using and to its original location. Editing, renaming, or even deleting a file from the Project window will have no effect on the original media file on disk.
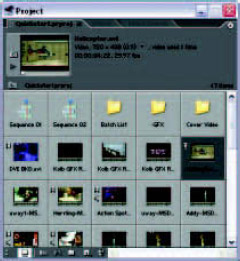
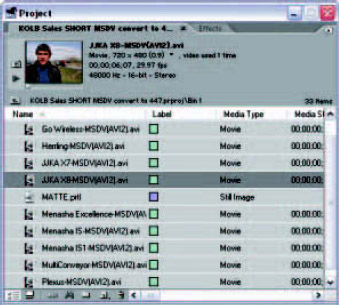
The Project window with sequences, bins, and source media.
On the other hand, if you move or delete a file from your hard drive that is involved in a Premiere Pro project, this will cause Premiere Pro to see it as missing, and you will be asked to find it the next time you open the project.
The Project window is not only a list of your clips, graphics, and audio, it’s also a tool to sort and organize those resources, so that you can find elements quickly and efficiently.
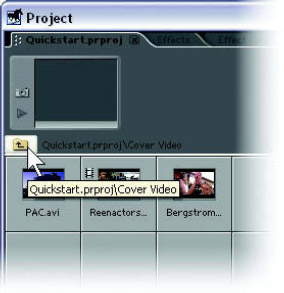
The Parent Bin button.
Media can be organized into groups through the use of bins. Bins appear in the Project window as folders. You can create a new bin by right-clicking in an empty spot in the Project window and selecting New Bin or by clicking on the folder icon at the bottom of the Project window. Delete a bin and its contents by selecting the bin and pressing the Delete key, or by selecting the bin and clicking the Delete icon (the trash can) at the bottom of the Project window.
These folders can contain any source clips or sequences, or even more bins. You can place existing media into a bin by dragging the item over the new target bin and dropping the clip onto it. You can also import into the bin you have open.
When you need to go back to a bin’s parent directory—the bin or the root directory that the bin is inside—use the Parent Bin button, which is just above the clip area of the Project window, on the left side.
Viewing Clips
As you select a clip in the Project window, the first frame of the clip will show up in the header portion of the window, called the thumbnail viewer. Information about the clip, such as the duration, audio sample rate, and frame size and pixel aspect ratio, will show up beside the video picture.
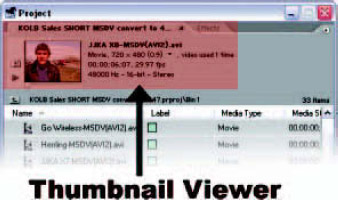
You may have cases where the first frame of the clip isn’t visually significant enough to help you recognize the clip. To select another frame to appear in the icon, you need to set a poster frame. To set a poster frame, follow these steps:
1 Select the clip in a Project window.
2 Drag the slider below the video frame in the thumbnail viewer to shuttle the clip, or click on the Play button to the left of the video frame.
3 When the frame you want is displayed, click on the Set Poster Frame button, which is above the Play/Stop button to the left of the video frame (it looks like a small camera).
Displaying and Sorting Items in the Project Window
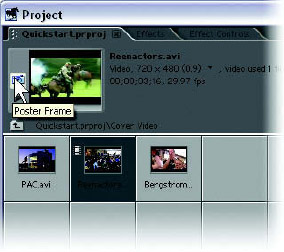
The Set Poster Frame button
The Project window has two basic options for layout: the Icon view and the List view.
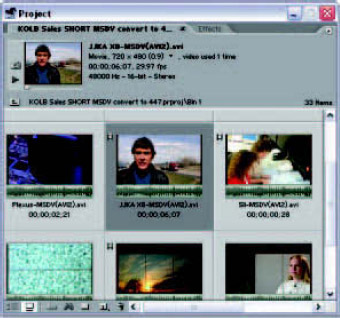
Project window Icon view.
Project window List view.
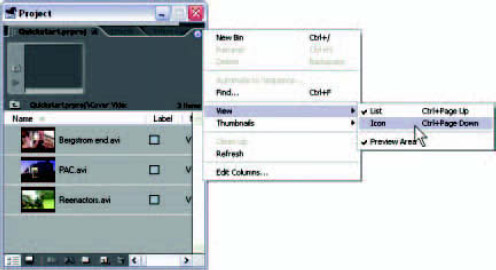
The views can be toggled in two ways. The first (and I think the easiest) way is to click on the Icon and List view buttons at the bottom of the Project window. The second way is to go into the Project wing menu and select View ![]() Icon or View
Icon or View ![]() List.
List.
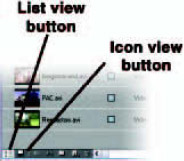
The advantage to the Icon view is that it’s very visual; the drawback can be that only a limited number of items fit into view at one time. The size of the thumbnails can be changed in the Project window wing menu by selecting Thumbnails ![]() (small/medium/large).
(small/medium/large).
The advantage to List view is that far more information is displayed and far more items are up in the Project window. The disadvantage is that you have to click on each clip to see a preview in the thumbnail viewer to get a visual idea of what the content might be.
Icon and List view options in the Project window menu.
Using the Project Window to Storyboard
The Icon view can be used to visually arrange, or storyboard, clips in preparation for editing them into a sequence. Moving clips, by dragging any clip to any square, will rearrange the clips. If there is already a clip in the destination position, you will need to watch the indicator to determine where you will be inserting the moved clip. Between the two clips, where the moved clip will be inserted, the border will turn thicker and black when you drag over it. It behaves a bit like a word processor: when you insert more material, it pushes the existing material out of the way to make room. After you’ve finished rearranging your clips, select Clean Up from the Project window wing menu to delete empty spaces.
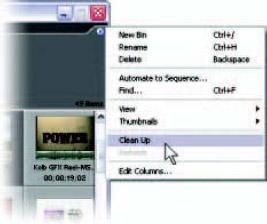
Select Clean Up from the Project window menu to eliminate empty space in the Icon view.
After rearranging clips in the Icon view (or just selecting a series of clips from the List view), you can automatically lay the series of clips onto the timeline with the Automate to Sequence feature.
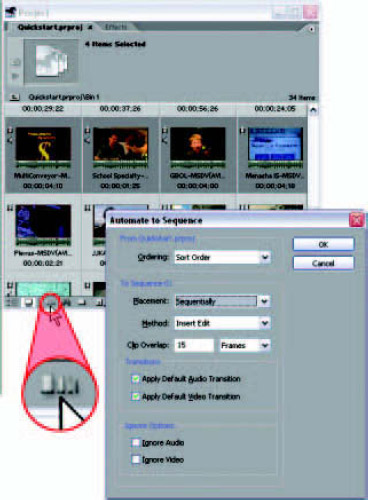
The Automate to Sequence button and dialogue.
1 Select a continuous series of clips by clicking on the first clip and Shift-clicking on the last, or select a noncontinuous series of clips by clicking on the first one and Control-clicking on each additional clip. Or simply use Edit ![]() Select All if you want to select all the clips in a bin.
Select All if you want to select all the clips in a bin.
2 Click the Automate to Sequence button at the bottom of the Project window.
3 Choose the proper options from the dialogue.
The dialogue will offer you the option of taking the clips in their order in the bin (sort order) or, in the case of a noncontinuous group, in the order in which you selected them.
You can also choose to lay them down sequentially end-to-end or to place them at unnumbered markers. After choosing whether to insert or overlay (insert and overlay are discussed in detail in Chapter 5 on page 66) and how much clip overlap you want, you can lay the series of clips down, with your default video and audio transitions already applied if you wish.
You have an extensive set of options for sorting your clips in the List view. The columns to the right of the clip name hold the information you need to rearrange your clips based on any of the headings.
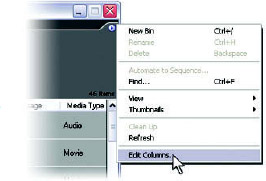
The first thing you will want to do is to determine which of these columns is really important to you, then turn the rest off. By selecting Edit Columns from the Project window wing menu, you will bring up a dialogue that will allow you to choose which columns to display and, through the use of Move Up or Move Down, to reorder them.
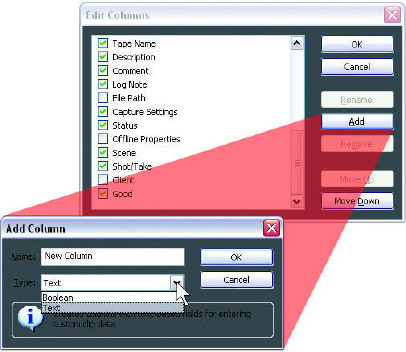
The Edit Columns and Add Column dialogues.
You can also create custom columns from the Edit Columns dialogue by clicking on Add. You will need to name your column and decide between Text and Boolean column types. Text will create a column that accepts text you key in, and Boolean creates a column with a checkbox.
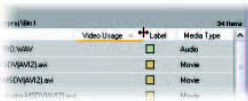
Click and drag the borders between columns to change their width.
You can also reorder the columns by dragging the headers to a new position in the Project window. You can change the width of the columns by dragging the borders between the headers.
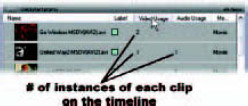
To sort clips via the List view, you can click on the header of the column that represents the criteria you would like to sort. If you want to see what clips are used in the timeline, click on the Video Usage column. If you want to see which clips aren’t used in the timeline, clicking the column header again reverses the order, bringing the unused clips to the top.
To rename a clip, do the following:
1 Click once on the clip name, then click again.
2 You’ll notice that the name becomes highlighted. Type the new name, and press Enter or Return.
As we discussed earlier, the name change in the Project window does not change the name of the media file on disk. If you change the names of your clips frequently, it may be a good idea to keep a record of the original filenames, in case you need to find a certain file on disk.
Deleting an Item
To delete an item from the Project window, select the clip and press the Delete key or right-click the item and select Clear from the context menu.
To clear unused clips in List view, you will want to have the Video Usage and Audio Usage columns active and in view, then do a sort by clicking the appropriate column header. Select and delete the clips that aren’t used in the timeline.
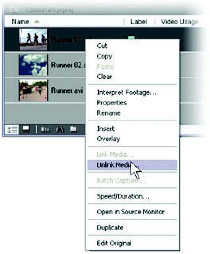
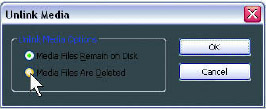
If you want to delete the clip from the project and its media file from your hard drive, you can right-click on a clip and select Unlink Media from the context menu. You will be given a choice of whether or not to delete the media file from the hard drive.
Search Function
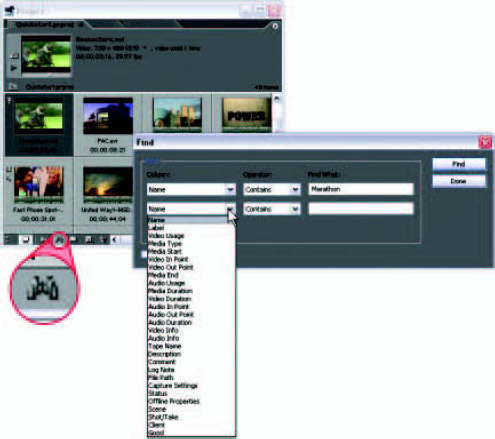
To find an item in the Project window, use the Find button (the binoculars symbol) at the bottom
of the window. The Find dialogue will come up. You can specify two parameters based on the column headings, specify the options, and click Find. If you need to search the entire project, make sure that you are currently in the root directory. Search will scan subfolders but targets its search based on the bin currently selected.
