
Chapter 21. Customizing
Working with computer software is a personal thing. I’m always impressed with how emotional my students are (maybe too emotional) about how their software should work. One student tells me she hates the way a certain feature works; yet another insists it’s his favorite thing in the entire program.
The InDesign team recognizes that some people want the program to work one way, and others want it exactly the opposite. That’s why there are many ways to customize the program.
You can change the keyboard shortcuts so that they are similar to other software you use. You can modify the settings for the display of images and onscreen elements. You can control how text wraps around other objects. You can even throw away all your own customized settings and start back at the out-of-the-box settings.
It’s all your choice.
Modifying Keyboard Shortcuts
Keyboard shortcuts are the fastest way to invoke program commands. However, if you are used to working with other programs, your fingers may be trained to use those other shortcuts. You may also want to assign a shortcut to a command that doesn’t have a shortcut. InDesign lets you change the keyboard shortcuts to keystrokes that match your preferences.
InDesign ships with three sets of shortcuts. The default set is the one that the Adobe engineers created. This set uses most of the shortcuts found in Adobe products such as Adobe Illustrator or Adobe Photoshop. The second set contains the shortcuts used in PageMaker 7.0. The third set contains the shortcuts used in QuarkXPress 4.0.
- Choose Edit > Keyboard Shortcuts. The Keyboard Shortcuts dialog box appears
 .
.
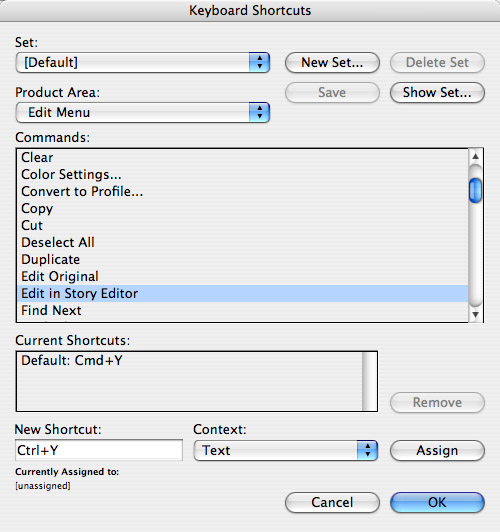 The Keyboard Shortcuts dialog box lets you change the shortcuts used for commands, tools, and panels.
 - Choose one of the shortcuts from the Set menu
 .
.
 The Set menu lets you choose a set of keyboard preferences.
 - Click OK. The new shortcuts appear in the menus
 .
.
 You can switch the InDesign default shortcuts to the set for other applications.
If you work with other programs such as Macromedia FreeHand, you may want to create your own shortcut set to match it.
- Choose Edit > Keyboard Shortcuts.
- Choose New Set. This opens the New Set dialog box
 .
.
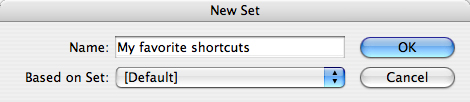 The New Set dialog box lets you name a new shortcut set and choose which set it should be based on.
 - Enter a name for the set.
- Choose a set that the new set will be based on.
- Click OK. You can now edit the set as described on the next page.
If you want a list of keyboard shortcuts to print out and post next to your computer, you can create a file with all the shortcuts.
To create a list of the keyboard shortcuts:
- Choose Edit > Keyboard Shortcuts.
- Use the menu to choose the set.
- Click the Show Set button. This opens the list of shortcuts in Notepad (Win) or TextEdit (Mac).
- Print the text file.
You can change the shortcut applied to a command. However, not all commands have shortcuts assigned to them. So you can also assign a shortcut to commands.
To change or assign a shortcut:
- Choose a shortcut set in the Keyboard Shortcuts dialog box.
or
Create a new set.
- Use the Product Area menu to choose the part of the program that contains the command to which you want to assign a shortcut
 .
.
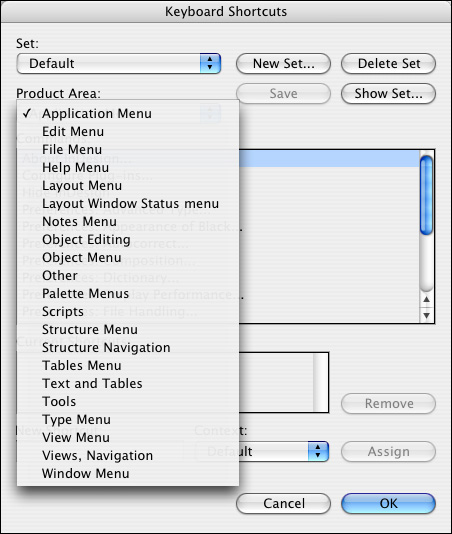 The Product Area menu lets you choose which parts of the program you want to change.
 - Choose a command from the list under the Product Area menu
 .
.
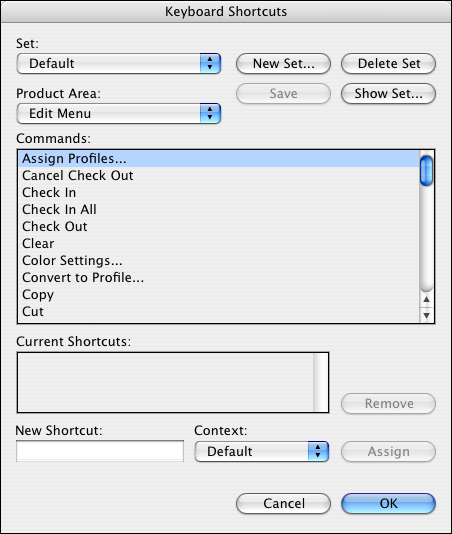 The Commands field contains a list of the commands available for a specific product area.
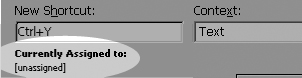
 - Use the Context menu to choose in what portion of the program the keystroke will work
 .
.
 The Context menu lets you choose in which context a keyboard shortcut is applied.
 - Click inside the New Shortcut field to make that field active.
- Press the keys on the keyboard that you want to assign to invoke the command.
- Change the keys if necessary by selecting them and typing a new combination.
or
Click Assign to apply the new shortcut.
- Click Save to save the set as modified.
- Use the Set menu to choose the set you want to delete.
- Click the Delete Set button.
Modifying the Menu Commands
You may feel that the menus in InDesign are too long for you to easily find the command you want to choose. Or you would like one menu command to stand out from the others. You can easily customize the menus to highlight or hide certain commands
- Choose Edit > Menus. This opens the Menu Customization dialog box
 .
.
 The Menu Customization dialog box lets you modify the appearance of menu commands.
 - Use the Category list to choose the Applications menus or the Context & Panel menus
 .
.
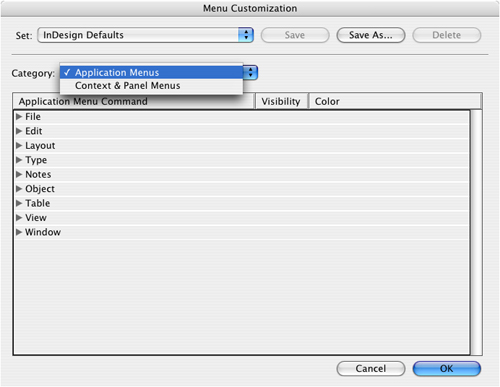 The Category list lets you choose between the Application menus or the Context & Panel menus.
 - Click the command you wish to customize.
- Click the visibility icon to cause the command to be hidden or visible in the menu
 .
.
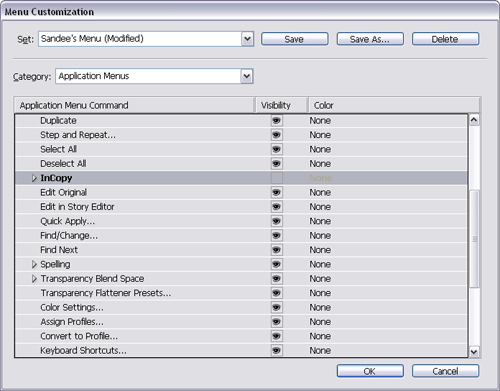 Click the Visibility icon to change the menu display. When the icon is hidden, the menu command does not show.
 - Use the Color menu to choose a background color to highlight the command in the menu
 .
.
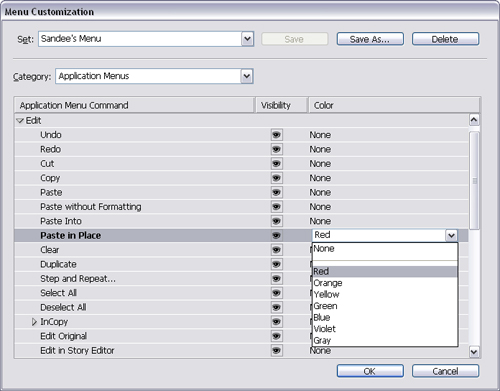 Use the Color menu to highlight a command with a color in the menu.
 - Use the Save or Save As buttons to save the custom set of menus.
As you are working, you may want to invoke a command that has been hidden. Rather than turn off the custom menu configuration, you can temporarily restore the command.
To restore a hidden command to a menu:
- Click the menu that ordinarily contains the command.
- Choose Show All Menu Items from the bottom of the menu. This temporarily restores all hidden commands to that menu.
Choosing the Preferences Categories
InDesign has 17 categories that let you customize how the program works.
To choose a preference category:
- Choose Edit > Preferences > [category] (Win). This opens the Preferences dialog box
 .
.
 The Preferences dialog box.
or
Choose InDesign > Preferences > [category] (Mac).
- Click the categories on the left side of the dialog box to open a new category.
General Preferences Controls
The General category lets you control several types of preferences ![]() .
.
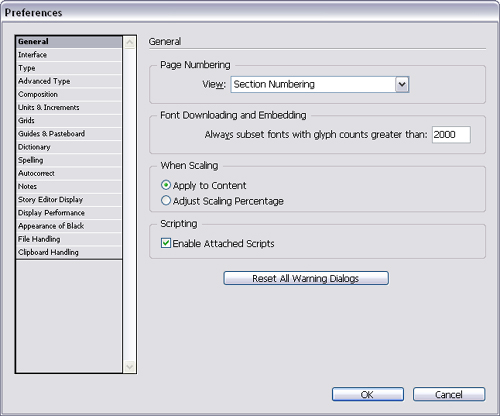
![]() The General settings of the Preferences dialog box.
The General settings of the Preferences dialog box.
If you have several sections in the same document, they could all have a page number of 1. The page numbering preferences change how the page numbers are displayed.
To set the page number preferences:
• Choose one of the following from the Page Numbering View menu ![]() :
:
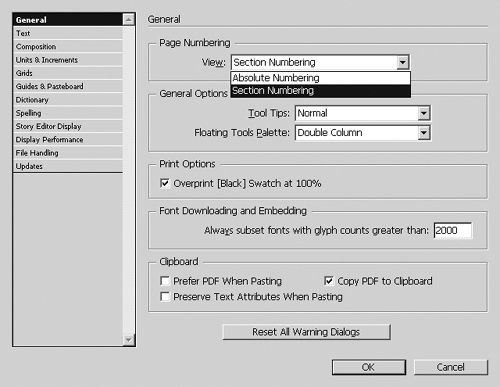
![]() The Page Numbering View menu lets you choose the section numbers or absolute numbers.
The Page Numbering View menu lets you choose the section numbers or absolute numbers.
• Absolute Numbering uses the physical placement number of the page in the document ![]() .
.

![]() The difference in the Pages panel between using absolute numbers and section numbers. The black triangles indicate the start of a new section.
The difference in the Pages panel between using absolute numbers and section numbers. The black triangles indicate the start of a new section.
• Section Numbering uses the numbers set from the section options ![]() .
.
To set the scaling preferences:
• Choose one of the following from the When Scaling area:
• Apply to Content scales text so that the point size changes.
• Adjust Scaling Percentage scales text so that the original point size is displayed with the new size in parenthesis.
To set the script preferences:
• Deselect Enable Attached Scripts to protect your computer from JavaScripts that are invoked from menu items.
The Font Downloading and Embedding section controls the threshold below which a font is subset.
To choose the threshold for font subsetting:
• Enter an amount in the Always Subset Fonts With Glyph Counts Greater Than field ![]() .
.

![]() The Font Downloading and Embedding lets you control if fonts are embedding or subset.
The Font Downloading and Embedding lets you control if fonts are embedding or subset.
Tip
A number such as 2000 ensures that fonts with large character sets are always subset, creating smaller files. But custom fonts with only one or two characters are set in their entirety.
Every once in a while you may see a dialog box that warns you about doing something. These alerts have boxes you can check so you never see the warning again. If you’ve turned them off, you can reset them all to turn back on.
To reset the warning dialog boxes:
• Click the Reset All Warning Dialogs button at the bottom of the General preferences ![]() . An alert box informs you that you will now see the warnings.
. An alert box informs you that you will now see the warnings.
![]() Click the Reset All Warning Dialogs to bring back those annoying alert messages when you perform certain actions.
Click the Reset All Warning Dialogs to bring back those annoying alert messages when you perform certain actions.
Interface Preferences
The Interface preferences control how some aspects of the program appear ![]() .
.
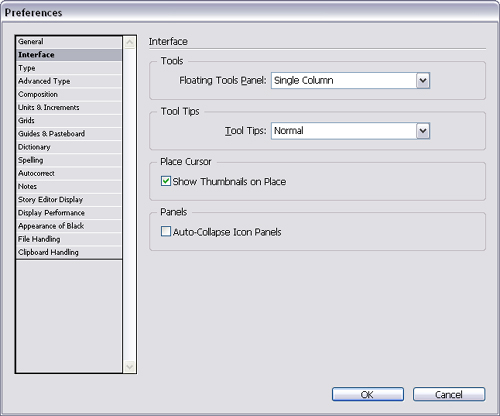
![]() The Interface settings of the Preferences dialog box.
The Interface settings of the Preferences dialog box.
To change the display of the Tools panel:
• Use the Floating Tools Panel menu to choose how the Tools panel is displayed ![]() :
:
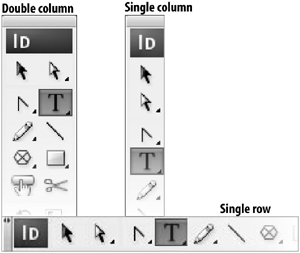
![]() The arrangements for the Tools panel.
The arrangements for the Tools panel.
Tip
You can also change the shape of the Tools panel by clicking the icon in the Tools panel title bar when it is not docked.
Tool Tips are notes that appear when you pause the cursor over an onscreen element ![]() .
.
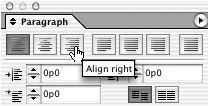
![]() An example of a tool tip that appears when you pause over an interface element.
An example of a tool tip that appears when you pause over an interface element.
To control the tool tips:
• Use the Tool Tips menu to choose one of the following:
• Normal waits a moment before displaying the tip.
• None turns off the display of the tips.
• Fast displays the tips almost immediately after the cursor pauses over the tool or feature.
To change the place cursor preview:
• Deselect the option to show Thumbnails on Place to see only the cursor, and not the preview, for placed text and images.
To change how docked panels collapse:
• Select Auto-Collapse Icon Panels to cause selected docked panels to close when you move back to the document.
Type Preferences
Use the Type Preferences controls for working with text ![]() .
.
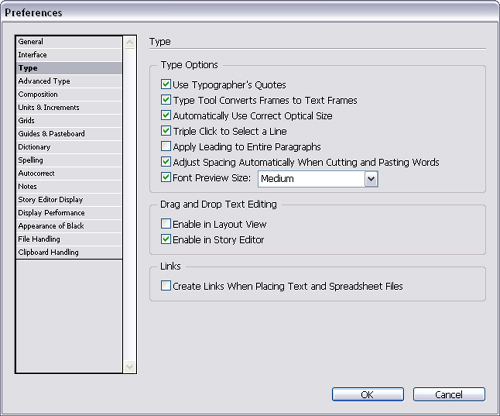
![]() The Type settings of the Preferences dialog box.
The Type settings of the Preferences dialog box.
To set the type options preferences:
- Use Typographer’s Quotes automatically changes typewriter quotes into the proper curly quote characters
 .
.
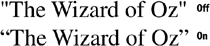 An example of using typographer’s quotes.
 - Type Tools Converts Frames to Text Frames lets you double-click inside a frame to change from the Selection tools to the Type tool.
- Automatically Use Correct Optical Size sets the correct value for the optical size of Multiple Master fonts.
- Triple Click to Select a Line does the following:
• Three clicks selects a line.
• Four clicks selects a paragraph.
• Five clicks selects the story.
- Apply Leading to Entire Paragraphs lets InDesign work more like QuarkXPress.
- Adjust Spacing Automatically When Cutting and Pasting Words avoids adding two spaces when pasting text from one position to another.
- Font Preview Size lets you choose the size of the preview of fonts in the Type menu. Larger previews take longer to display
 .
.
 An example of the different font preview sizes.
You can also control whether or not drag-and-drop text is activated.
To turn on drag-and-drop text:
- Select Enable in Layout View to have drag-and-drop text active when working within frames on the pages.
- Select Enable in Story Editor to have drag-and-drop text active when working within the Story Editor.
The early versions of InDesign automatically linked text and spreadsheet documents back to their original file. Now, a preference controls whether placed text files are automatically linked to their source.
To choose if text files are linked or embedded:
• Click the option Create Links When Placing Text and Spreadsheet Files to link those styles back to the original files ![]() . If you make changes to the word processor or spreadsheet file, those changes will automatically update in InDesign.
. If you make changes to the word processor or spreadsheet file, those changes will automatically update in InDesign.
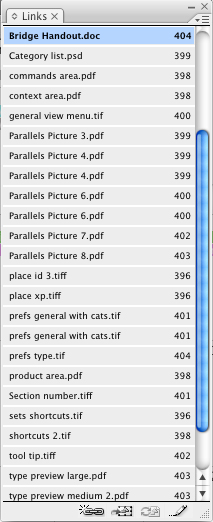
![]() A placed text file shows in the Links panel when the links to external files and spreadsheets is turned on.
A placed text file shows in the Links panel when the links to external files and spreadsheets is turned on.
Advanced Type Preferences
Don’t let the term “Advanced Type” throw you off. These are settings that you may want to change depending on the typefaces you work with.
The Character Settings control the size and position of superscript, subscript, and small cap characters ![]() .
.
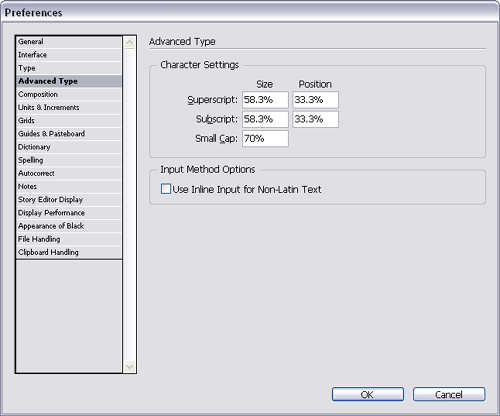
![]() The Advanced Type settings of the Preferences dialog box.
The Advanced Type settings of the Preferences dialog box.
To set the Character Settings preferences:
- Enter amounts in the Size fields to control the size of the characters.
- Enter amounts in the Position fields to control how far above or below the baseline the characters are positioned.
A non-Latin typeface is one that uses 2-byte and 4-byte characters. Japanese, Korean, and Chinese are examples of non-Latin typefaces. If you work with non-Latin typefaces, you may need to use features in the operating system to enter characters instead of the keyboard ![]() .
.
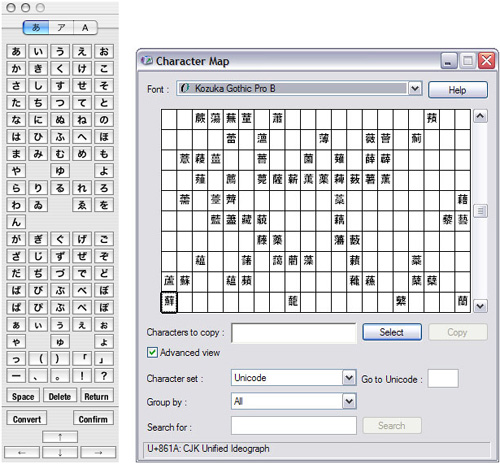
![]() The non-Latin input controls for the Macintosh and Windows operating systems.
The non-Latin input controls for the Macintosh and Windows operating systems.
To use the operating system to enter non-Latin text:
• Click the option Use Inline Input For Non-Latin Text to allow you to input text using the electronic keyboards built into the computer operating system.
Composition Preferences
The Highlight settings let you control which parts of the text are highlighted to indicate composition or typographic violations or substitutions ![]() .
.
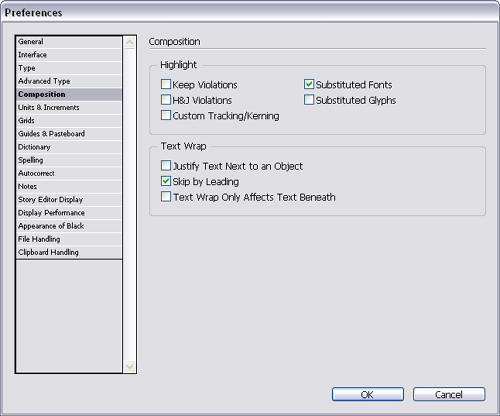
![]() The Composition settings of the Preferences dialog box.
The Composition settings of the Preferences dialog box.
To set the highlight options:
• Set the Highlight options as follows ![]() :
:

![]() An example of text with a highlight applied.
An example of text with a highlight applied.
• Keep Violations displays lines that have been broken in violation of the Keep With settings that you chose for the paragraph options.
• H&J Violations highlights those areas that violate the hyphenation or justification controls.
Tip
H&J Violations occur when InDesign has no other way to set the text except to break the H&J controls.
• Custom Tracking/Kerning highlights the text with tracking or kerning applied to it.
• Substituted Fonts highlights characters that are substituted for a font that is not installed in the computer system.
Tip
This is the famous pink highlight for a missing font that many people see when they import text or change typefaces.
Tip
If the shape of the uninstalled font exists in the Adobe Type Manager database, the shape of the font is approximated. If not, a default font is used.
• Substituted Glyphs highlights Open Type characters that have been substituted with alternate glyphs.
You can also control the effect of the Text Wrap settings and how text wraps around objects.
To set the text wrap options:
• Choose one of the following from the Text Wrap options:
• Justify Text Next to an Object forces text next to an object to be justified if it wraps around an object inside the frame ![]() .
.

![]() The effect of setting the Justify Text Next to an Object.
The effect of setting the Justify Text Next to an Object.
• Skip by Leading forces text that has wrapped around an object to move to the next available leading increment. This avoids problems where text may not line up across columns or frames ![]() .
.
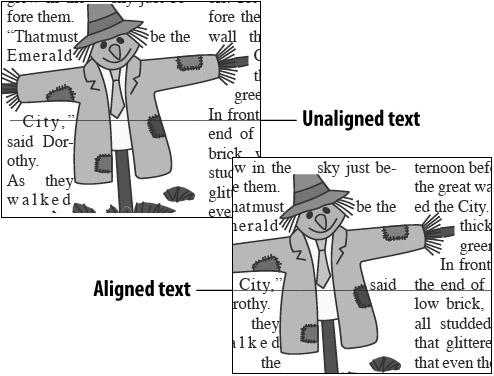
![]() When Skip By Leading is turned off, the text does not line up across columns. When it is turned on, the text does line up.
When Skip By Leading is turned off, the text does not line up across columns. When it is turned on, the text does line up.
• Text Wrap Only Affects Text Beneath causes InDesign text wrap to work only on text below the object, rather than text above and below the object.
Tip
Some designers turn this on because they want InDesign to work more similarly to QuarkXPress. Don’t do it! You’re only limiting yourself from some of the more interesting effects that InDesign offers.
Units & Increments Preferences
Units and Increments refer to the units of measurements and how much things change when you apply keyboard shortcuts ![]() .
.
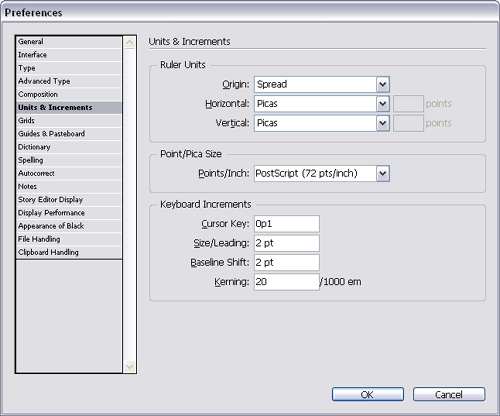
![]() The Units & Increments settings of the Preferences dialog box.
The Units & Increments settings of the Preferences dialog box.
- Use the Origin menu to select one of the following
 :
:
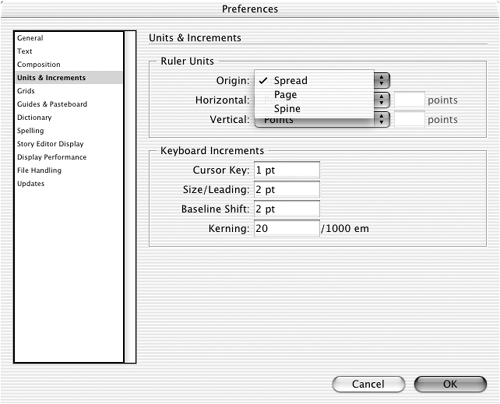 The Origin menu lets you choose how the rulers stretch across the page.
• Spread sets the horizontal ruler to stretch across the pages in a spread.
• Page sets the horizontal ruler to reset for each individual page in a spread.
• Spine sets the horizontal ruler to stretch across the spine of the document.
- Use the Horizontal and Vertical menus to select the unit of measurement for each of the rulers
 .
.
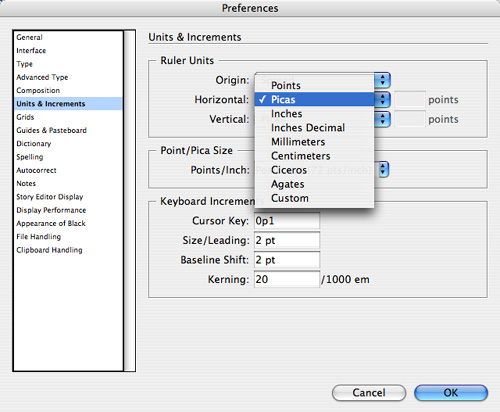 The units of measurement for the horizontal and vertical rulers.
or
Set an amount, in points, for a custom unit of measurement.
To set the number of points per inch:
• Use the Points/Inch field to choose between the PostScript or the Traditional numbers of points per inch ![]() .
.
![]() Use the Points/Inch field to choose between the PostScript measurement for points per inch or the Traditional measurement.
Use the Points/Inch field to choose between the PostScript measurement for points per inch or the Traditional measurement.
The keyboard increments control how much the objects move or the text changes.
To set the keyboard increments:
• Enter an amount in the fields as follows:
• Cursor Key lets you choose the amount that the arrow keys move objects.
• Size/Leading controls the amount that the type size and leading change.
• Baseline Shift lets you set the amount that the baseline shift changes.
• Kerning controls the amount that the kerning changes.
Grids Preferences
Designers just love to set up lines that stretch up and down and across their pages to help keep text and graphics lined up correctly. The Grids preferences control those lines ![]() .
.
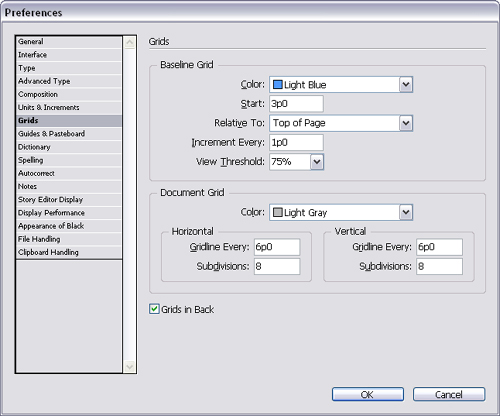
![]() The Grids settings of the Preferences dialog box.
The Grids settings of the Preferences dialog box.
To set the baseline grid options:
- Use the Color menu to choose a color for the baseline grid.
- Use the Start field to position where the grid should start on the page.
- Use the Relative To menu to position the start of the grid relative to the top of the page or the top margin.
- Use the Increment Every field to set the distance between the lines of the grid.
- Use the View Threshold field to set the lowest magnification at which the grid is visible.
To set the document grid preferences:
- Use the Color menu to choose a color for the document grid.
- Enter a value for the Horizontal and Vertical fields as follows:
• Gridline Every sets the distance between the major lines of the grid.
• Subdivisions sets the number of secondary lines of the grid.
To set the positioning of the grids:
• Check Grids in Back to position the grids behind graphics and text ![]() .
.

![]() An example of setting the Grids in Back option in the Grids category.
An example of setting the Grids in Back option in the Grids category.
Guides & Pasteboard Preferences
You can customize the appearance and size of your ruler guides and the pasteboard.
The Color area is a rainbow of choices for how to color onscreen guides and areas ![]() .
.
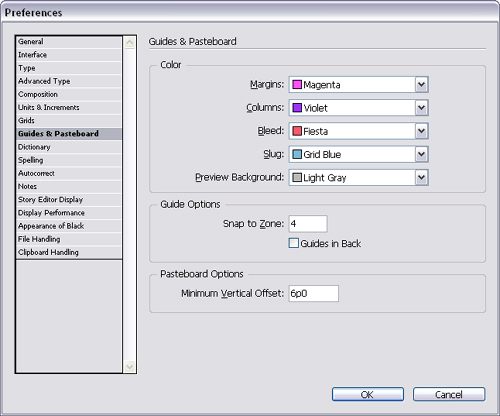
![]() The Guides & Pasteboard settings in the Preferences dialog box.
The Guides & Pasteboard settings in the Preferences dialog box.
To set the onscreen elements colors:
• Use the menus to set the colors for each of the following:
• Margins sets the color of the guides created by the margins settings.
• Columns sets the color of the guides created by the column setting.
• Bleed sets the color of the guide around the bleed area.
• Slug sets the color of the guide around the slug area.
• Preview Background sets the color of the area that surrounds the page in the preview mode.
- Use the Snap to Zone field to set how close the objects should be when they snap to guides. This amount is set in pixels.
- Check Guides in Back to hide the guides when they appear behind objects.
To set the Pasteboard Options:
• Enter an amount in the Minimum Vertical Offset field to increase or decrease the amount of pasteboard space above and below the page ![]() .
.
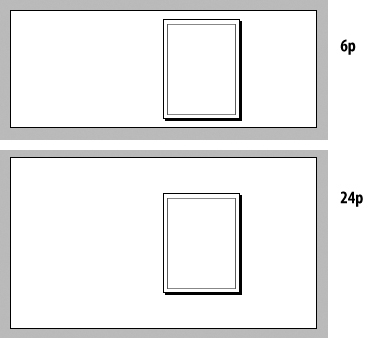
![]() The effect of increasing the minimum vertical offset.
The effect of increasing the minimum vertical offset.
Dictionary Preferences
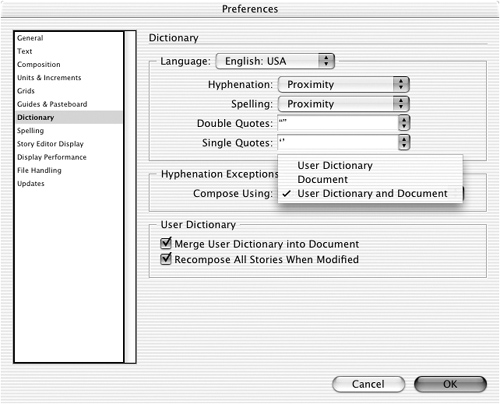
The Dictionary preferences work with whichever languages and dictionaries are used for InDesign documents ![]() .
.
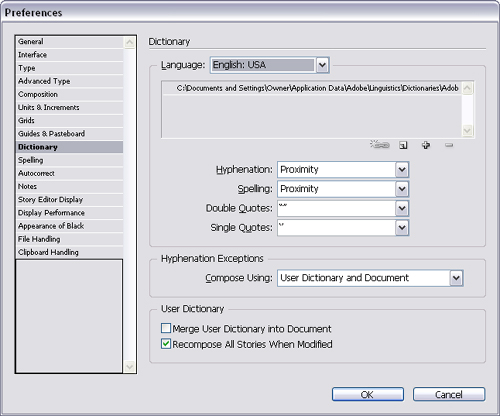
![]() The Dictionary settings in the Preferences dialog box.
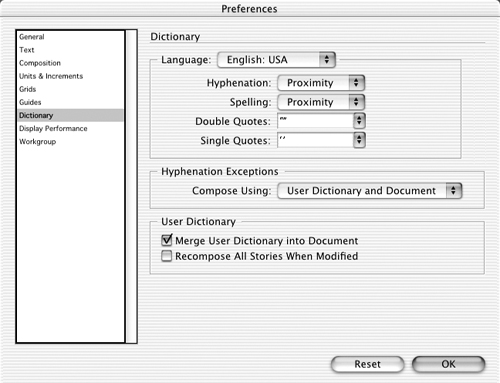
The Dictionary settings in the Preferences dialog box.
The Language setting is used to choose which language dictionary should be used to check whether words are correctly spelled. Consider that the word cinema is correctly spelled if English is the chosen language. However, the word is incorrectly spelled if French is chosen as the language. In that case the word should be cinéma.
- Use the Language menu to set the default language.
- If you have installed special hyphenation preferences, choose a preference from the Hyphenation menu.
- If you have installed special spelling preferences, choose a preference from the Spelling menu.
- Use the Double Quotes menu to choose the characters for double quotation marks
 .
.
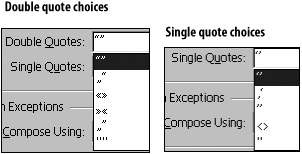 The Quote menus in the Dictionary preferences.
 - Use the Single Quotes menu to choose the characters for single quotation marks .
You use the dictionary management tools to create, link to, add, and delete new user dictionaries. This allows you to create several dictionaries for InDesign.
To create a new user dictionary:
- Click the New Dictionary button in the Dictionary preferences
 .
.
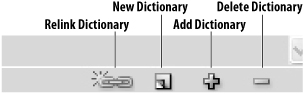 The Dictionary buttons in the Dictionary preferences.
 - Name and save the dictionary file (.udc) to a location. The new dictionary appears in the Dictionary list
 .
.
 The Dictionary list displays the list of dictionaries installed in the Dictionary preferences.
You don’t have to create your own new dictionary. You can use the dictionary management tools to add someone else’s dictionary to your version of InDesign.
- Click the Add Dictionary button in the Dictionary preferences.
- Navigate to select the new dictionary. The dictionary appears in the Dictionary list.
- Select the dictionary that you want to delete in the Dictionary list.
- Click the Delete Dictionary button in the Dictionary preferences.
- Select the dictionary that has a missing or modified icon next to its name in the Dictionary list
 .
.
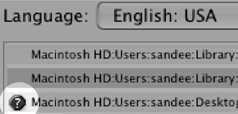 The Missing icon in the Dictionary list indicates that you need to relink to the dictionary.
 - Click the Relink Dictionary button in the Dictionary preferences.
- Navigate to find the missing dictionary.
The hyphenation exceptions let you choose to apply the hyphenations created by editing the Dictionary or those built into the application.
To set the hyphenation exceptions:
• Choose one of the following from the Compose Using menu ![]() :
:
![]() The Compose Using menu in the Dictionary category.
The Compose Using menu in the Dictionary category.
• User Dictionary uses only the hyphenation exceptions set by editing the Dictionary.
• Document uses the hyphenation exceptions list stored inside the document. (See the next exercise for how to add the user dictionary hyphenation exceptions to a document.)
• User Dictionary and Document merges the exceptions in both the document and the user dictionary. This is the default setting.
The User Dictionary options let you merge hyphenation exceptions into a document and create new hyphenation exceptions that affect the document ![]() .
.
![]() The User Dictionary options determine what happens to hyphenation exceptions.
The User Dictionary options determine what happens to hyphenation exceptions.
To set the user dictionary preferences:
- Merge User Dictionary into Document adds the hyphenation exceptions in the user dictionary to the document. This is on by default.
- Recompose All Stories When Modified applies the new exceptions in the user dictionary to all the stories in the document.
Spelling Preferences
The Find section of the Spelling preferences controls what types of problems the spelling checker flags during a spelling check ![]() .
.
![]() The Spelling settings in the Preferences dialog box.
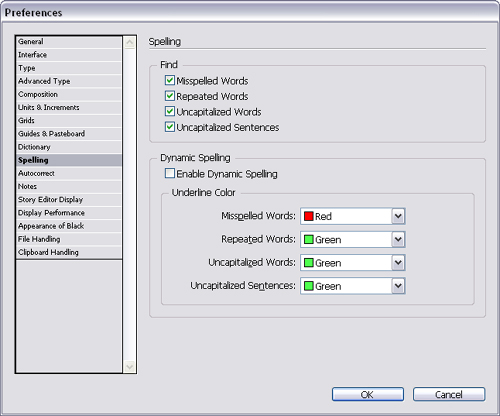
The Spelling settings in the Preferences dialog box.
To set the Find options for Spelling:
- Select Misspelled Words to find words that are not known in the spelling dictionary.
- Select Repeated Words to find instances of words that are repeated, such as “the the spelling checker.”
- Select Uncapitalized Words to find words that are listed in the dictionary as capitalized. For instance, proper names of countries are capitalized in the dictionary.
- Select Uncapitalized Sentences to flag uncapitalized words that begin sentences.
Dynamic spelling highlights errors right on your page. If you want to work with dynamic spelling, you have a choice as to which colors the errors are underlined with.
To set the Dynamic Spelling options:
- Select Enable Dynamic Spelling in the Spelling preferences
 .
.
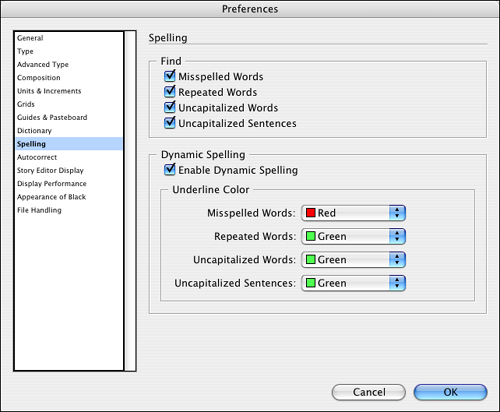 Use the Dynamic Spelling controls to turn on dynamic spelling and specify colors for each of the error categories.
 - Use the Underline Color menus to specify the color used to highlight misspelled words, repeated words, uncapitalized words, and uncapitalized sentences.
Autocorrect Preferences
The Autocorrect preferences not only turn on the Autocorrect feature, they allow you to add or remove those words that you want to have automatically corrected.
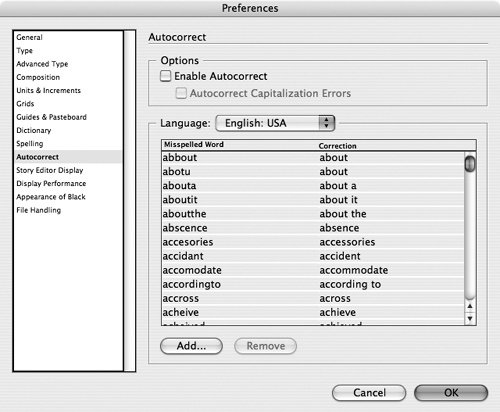
- Choose Enable Autocorrect to turn on the basic correction for words
 .
.
 The Autocorrect settings in the Preferences dialog box.
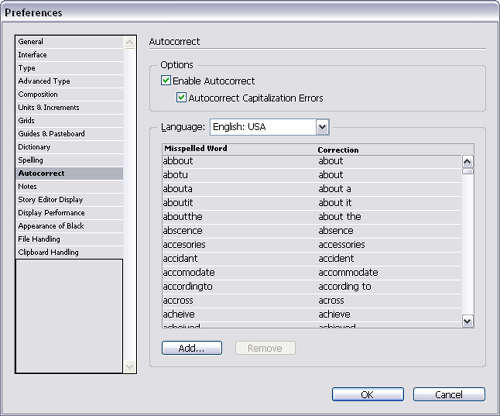
 - Choose Autocorrect Capitalization Errors to also automatically correct errors in uppercase and lowercase words.
The Autocorrect list contains the words that are commonly mistyped. In addition to the words the Adobe engineers felt you would mistype, you can easily add your own.
To add words to the Autocorrect list:
- Use the Language menu to choose the language for the autocorrection.
- Click the Add button at the bottom of the Autocorrect Preferences
 . This opens the Add to Autocorrect List dialog box
  .
.
 Use the Autocorrect Options controls to turn on autocorrection for word errors and for capitalization errors.
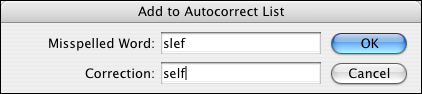 The Add to Autocorrect List dialog box lets you enter the mispelling for a word and its correction.
 - Type the typical misspelling in the Misspelled Word field.
- Type the correct spelling in the Correction field.
- Click OK to add the word to the list.
To delete words from the Autocorrect list:
- Select the word in the list that you want to delete.
- Click the Remove button.
Notes Preferences
Notes are primarily used in an InDesign/InCopy workflow. The Notes preferences control how the notes appear in the InDesign or InCopy stories ![]() .
.
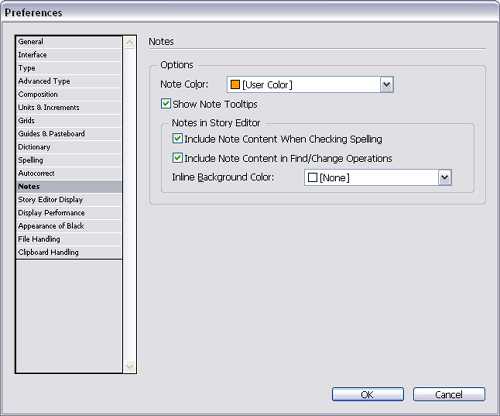
![]() The Notes settings in the Preferences dialog box.
The Notes settings in the Preferences dialog box.
- Use the Notes Color list to set a color for the user. This color should be unique.
- Select Show Note Tooltips to display the text for the note when the user hovers over the note display
 .
.
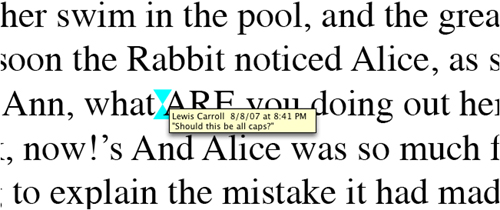 A note tooltip that is revealed when the cursor pauses over the note.
You can also set the preferences for how notes are handled when working in the Story Editor.
To set the options for notes in the Story Editor:
• Check the following as desired:
• Include Note Content when Checking Spelling to apply a spelling check to the note text.
• Include Note Content in Find/Change Operations to include the note text in the results of a Find/Change routine.
To set the background color for the note:
• Use the In Background Color list to choose a color for the area behind the note when viewed in the Story Editor ![]() .
.
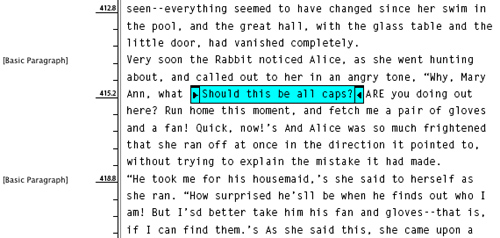
![]() The note background color as displayed in the Story Editor.
The note background color as displayed in the Story Editor.
Story Editor Display Preferences
If you work in the Story Editor, you can choose the preferences for its display ![]() .
.
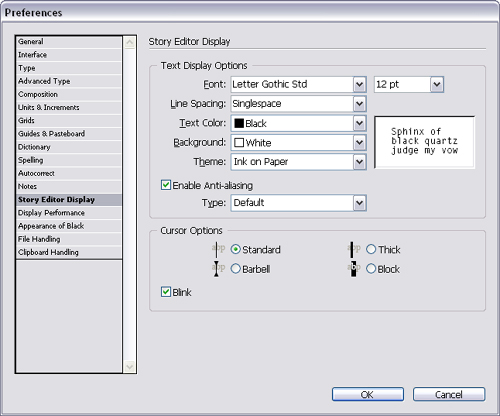
![]() The Story Editor Display settings of the Preferences dialog box.
The Story Editor Display settings of the Preferences dialog box.
To set the preferences for text display:
- Use the Font menu to set the typeface.
- Use the point size menu to set the size.
- Use the Line Spacing menu to choose the leading between the lines
 .
.
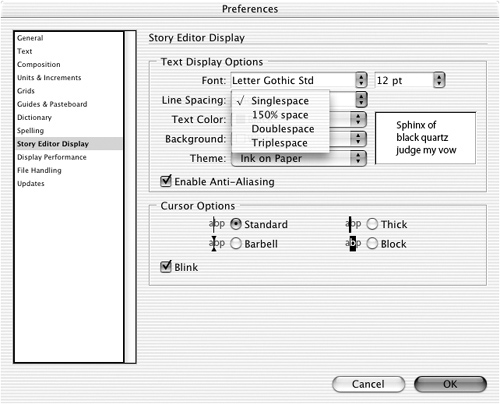
 The Line Spacing menu of the Story Editor preferences controls the space between the lines of text.
 - Use the Text Color menu to set the color of the text.
- Use the Background menu to set the color of the Story Editor window background.
or
Use the Theme menu to select a preset text and background color scheme
 .
.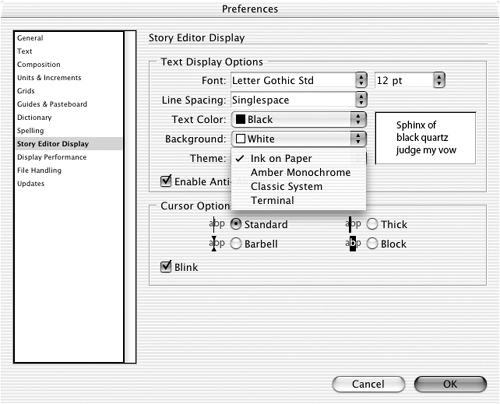 The Theme menu lets you quickly change the text and background colors.
 - Choose Enable Anti-Aliasing to soften the edges of the text.
- If you choose Enable Anti-Aliasing, choose an anti-aliasing Type option.
• Default is the typical anti-aliasing.
• LCD Optimized works best on light-colored backgrounds with black text.
• Soft produces a lighter, fuzzier appearance than Default.
You can also change how the cursor, or insertion point, is displayed within the Story Editor. This is helpful for those who are used to editing text on mainframe terminals.
To set the preferences for cursor display:
- Choose Edit > Preferences > Story Editor Display (Win) or InDesign > Preferences > Story Editor Display (Mac).
- Choose one of the Cursor Options
 .
.
 The Cursor Options change the display of the cursor within the text.
 - Select Blink to make the cursor turn on and off within the text.
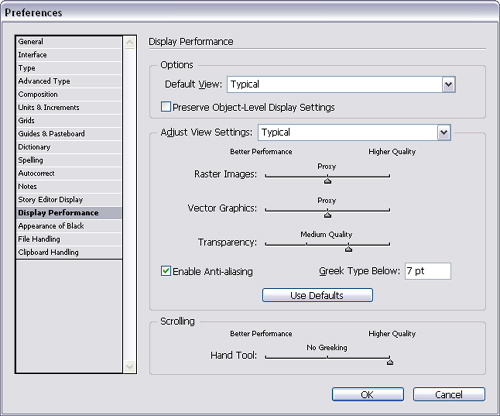
Display Performance Preferences
The default view is the view that is used when documents are first opened.
- Use the Default View settings menu to choose which of the display performance settings is automatically applied to new documents
 .
.
 The Display Performance settings in the Preferences dialog box.
 - Check Preserve Object-level Display Settings to maintain any individual settings applied to graphics.
The Adjust View Settings control how images appear onscreen for each of the three view choices.
To choose the options for Adjust View Settings:
- Choose one of the options from the Adjust View Settings menu.
- Drag the slider controls to set the quality for raster images, vector graphics, and the transparency effects.
- Repeat for the other two view settings.
Anti-aliasing is the term used to described the soft edge applied to either text or graphics.
To control the anti-aliasing of text and graphics:
• Check Enable Anti-Aliasing to add a soft edge to the type and graphics displayed on the monitor ![]() .
.

![]() The effect of applying anti-aliasing to type.
The effect of applying anti-aliasing to type.
Greeking is the term used to describe the gray band that is substituted for text characters ![]() .
.

![]() The effect of applying greeking to type.
The effect of applying greeking to type.
To set text to be greeked:
• Enter an amount in the Greek Type Below field. This sets the size below which the text characters will be replaced with gray bands onscreen.
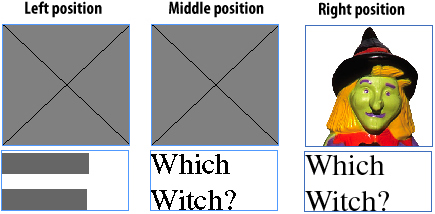
When you use the Hand tool to scroll around a document, InDesign needs to determine how text and images that were not originally in the window appear when you move them into view. You use the Hand Tool preferences to control how the images appear or how fast you can move while scrolling.
To set the scrolling preferences:
• Drag the Hand Tool slider to one of the following:
• The left position greeks both text and images. This is the fastest setting but it loses the appearance of the page as text and images come into view ![]() .
.
![]() The appearance of text and images for each of the Hand Tool slider settings.
The appearance of text and images for each of the Hand Tool slider settings.
• The middle position greeks images but maintains text visibility ![]() .
.
• The right position turns off all greeking of text and images. This is the slowest setting but it maintains the appearance of the page as text and images come into view ![]() .
.
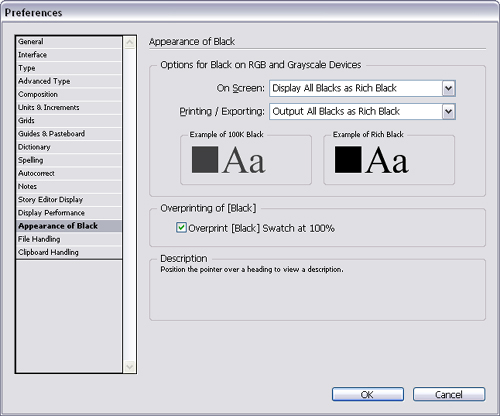
Appearance of Black Preferences
As many designers have discovered, when a color-corrected black is displayed on a computer screen, 100% black ink winds up looking very washed out. The Appearance of Black preferences allow you to choose how 100% black ink is displayed and printed ![]() .
.
![]() The Appearance of Black settings in the Preferences dialog box.
The Appearance of Black settings in the Preferences dialog box.
To control the appearance of black on screen:
• Choose one of the following from the On Screen menu:
• Display All Blacks Accurately displays 100%K as dark gray. This setting allows you to see the difference between pure black and rich black.
• Display All Blacks As Rich Black displays 100%K as jet black (RGB=000). This setting makes pure black and rich black appear the same on-screen.
You can also control how 100%K appears when printing to a non-PostScript desktop printer or exporting to an RGB format. This helps control the appearance of blacks in PDF and JPEG files.
To control the appearance of black when printing or exporting to an RGB format:
• Choose one of the following from the Printing/Exporting menu:
• Output All Blacks Accurately outputs 100%K using the color numbers in the document. This setting allows you to see the difference between pure black and rich black in the finished document.
• Output All Blacks As Rich Black outputs 100%K as jet black. This setting makes pure black and rich black appear the same.
File Handling Preferences
If InDesign crashes or the computer is shut down before you can save the InDesign documents, a file is created that contains the recovered document. The Document Recovery Data area lets you choose where that recovered document is located.
Tip
Although most people will use the same drive that contains the application, this option lets you specify a folder on a drive that has more space than the one that contains the InDesign application folder.
- Click the Browse (Win) or Choose (Mac) button in the Document Recovery Data area
 .
.
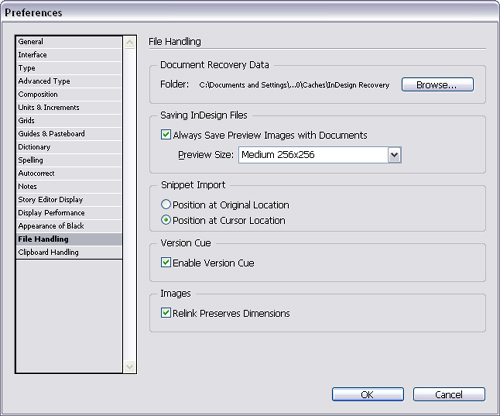 The File Handling settings in the Preferences dialog box.
 - Use the dialog box to choose the location of the recovered documents.
The Saving InDesign Files area lets you add a thumbnail preview to the file. You can also control the size of the preview.
Tip
Extra-large previews make it possible to read text in the document. Medium and small previews usually greek all text.
To create a preview with saved documents:
- In the Saving InDesign Files area, choose Always Save Preview Images with Documents.
- Choose one of the sizes from the Preview Size menu
 .
.
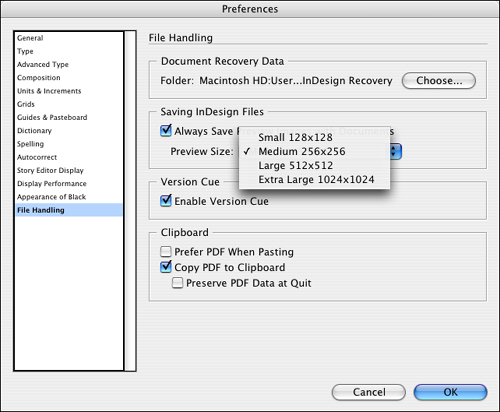 The Preview Size menu lets you choose the size for the preview image that is saved with the file.
You can control the position where snippets appear when you drag them onto a page.
To control the location of snippets:
• Check the Snippet Import options as follows:
• Position at Original Location places the snippet at its original coordinates. This may cause a snippet from a right-hand page to appear on the pasteboard of a left-hand page.
• Position at Cursor Location ignores the original coordinates and places the snippet where the mouse is released on the page.
If you work in a collaborative setting, you may want to use the Adobe Version Cue software to help coordinate the workflow.
To turn Version Cue on or off:
- Select or deselect Enable Version Cue in the Version Cue area.
- Restart InDesign.
Clipboard Handling
You may need to change the options for what type of information is included in the clipboard ![]() .
.
![]() The Clipboard Handling settings in the Preferences dialog box.
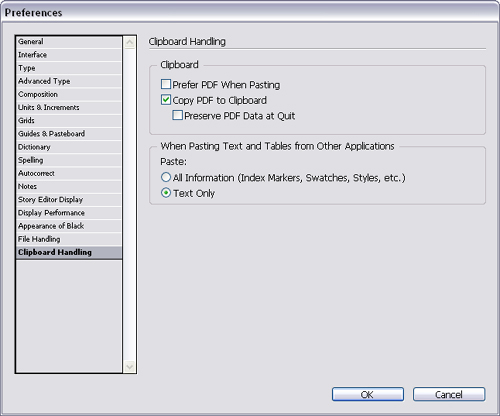
The Clipboard Handling settings in the Preferences dialog box.
To set the clipboard format:
• Check the Clipboard options as follows:
• Prefer PDF When Pasting adds graphics as self-contained PDF files that retain effects.
• Copy PDF to Clipboard copies data as PDF files. Select this in order to paste paths into Illustrator or Photoshop.
• Preserve PDF Data at Quit maintains any copied PDF information on the clipboard for use in other applications.
To set the attributes for pasting text:
• Check When Pasting Text and Tables from Other Applications as follows:
• All Information maintains formatting.
• Text Only strips out all formatting.
Trashing Preferences
Sometimes InDesign may start to act strangely. This may mean that the files that hold all your preferences and settings have become corrupt. In that case you need to trash those files and let InDesign start over with the factory settings.
To restore all preferences and default settings:
- As you launch InDesign, immediately press Ctrl-Alt-Shift (Win) or Cmd-Opt-Shift-Control (Mac).
- Click Yes when asked if you want to delete your preference files
 .
.
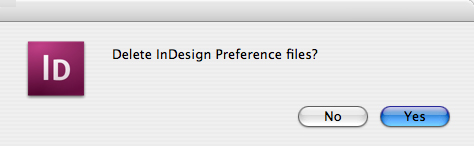 The Delete InDesign Preference dialog box lets you start from scratch with factory-fresh default settings.
Configuring Plug-Ins
InDesign uses a large set of plug-ins as its core set of commands and features. You may want to control which plug-ins are loaded each time you launch the program.
- Choose InDesign > Configure Plug-ins (Mac) or Help > Configure Plug-ins (Win) to open the Configure Plug-ins dialog box
 :
:
 The Configure Plug-ins dialog box is where you can control which plug-ins get loaded when you launch InDesign.
 - Choose a set from the Set menu
 .
.
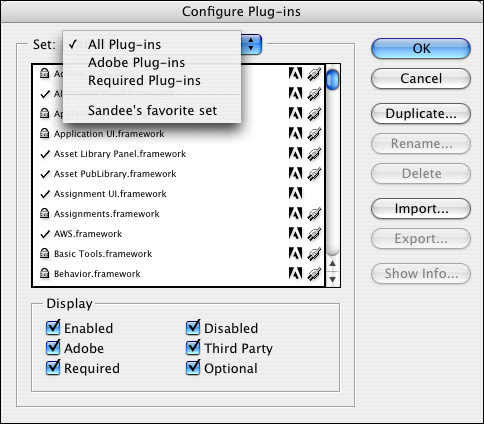 The three default plug-ins sets cannot be modified. Custom plug-ins sets are shown at the bottom of the Sets menu.
- Select the plug-in set.
- If the set is one of the default sets, choose Duplicate to make a copy of the set.
- Click the checkbox column to the left of the name to enable or disable the plug-in from the set.
- Use the Display checkboxes to see the types of plug-ins.
To see the information about a plug-in:
• Click the Show Info button in the Configure Plug-ins dialog box to open the Plug-in Information dialog box.