
Chapter 2. Document Setup
Billions of years ago, when dinosaurs ruled the earth—or about 22 years ago, before the start of desktop publishing—people prepared documents for printing using pieces of stiff board. They marked up the boards with special blue pencils to indicate the edges of the pages. They drew marks that specified where the margins and columns should be and how the pages should be trimmed. This board, called a mechanical, was used as the layout for the document.
Unlike the board mechanicals of the past, InDesign documents are electronic layouts. Just as with the board mechanicals, you need to set the page sizes, margins, and column widths. However, since you are not using a pencil but a computer, you have additional controls for how the document is laid out.
Of course, changing an electronic layout takes far less time than it did with the board mechanicals that old dinosaurs like me used to use.
The Welcome Screen
How nice of InDesign to welcome you when you first launch the application. Rather than just close the Welcome screen, take a look at its features as there are things that may be useful.
- The Welcome Screen automatically appears when you first launch InDesign.
- You can click the close button to hide the screen.
or
Click one of the Welcome Screen features.
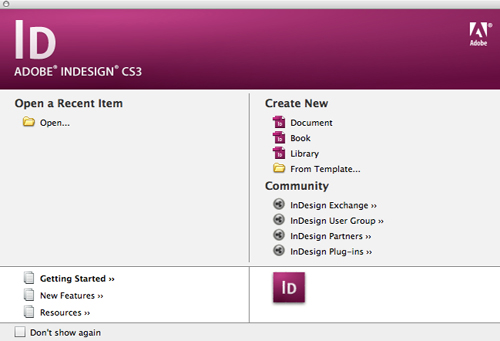
![]() The Welcome Screen appears when you first launch InDesign.
The Welcome Screen appears when you first launch InDesign.
Choosing the Welcome Screen commands:
• To create new documents or open sample templates, click one of the Create New commands ![]() .
.
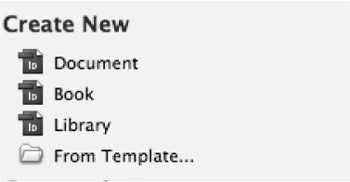
![]() The Create New commands in the Welcome Screen.
The Create New commands in the Welcome Screen.
or
Use the Recent Items area to open InDesign documents that you have recently opened and saved ![]() .
.

![]() The Open a Recent Item lists InDesign documents you have recently opened and saved.
The Open a Recent Item lists InDesign documents you have recently opened and saved.
or
Click one of the choices in the Community area to open a Web browser where you can get more information or support for working with InDesign ![]() .
.

![]() The Community area sends you to Web sites where you can get more information on InDesign.
The Community area sends you to Web sites where you can get more information on InDesign.
or
Click one of the Help area links to open tutorials, help files, and other resources for working with InDesign ![]() .
.
![]() The Help area opens the tutorials, help files, and other resources that are installed with InDesign.
The Help area opens the tutorials, help files, and other resources that are installed with InDesign.
Most people I know click the Don’t Show Again box and never look at the Welcome Screen again. However, one day you may decide that you would like to investigate the Welcome Screen resources. Here’s how to get the Welcome Screen back
To reopen the Welcome Screen:
• Choose Help > Welcome Screen. The Welcome Screen opens.
Setting up Documents
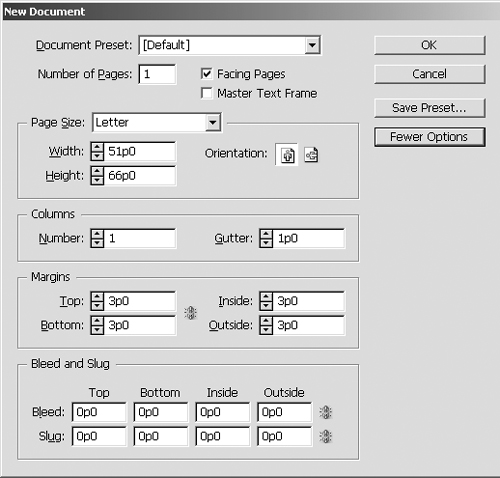
When you create a new document, you have the opportunity to set many options in the New Document dialog box.
To set the basic options for a new document:
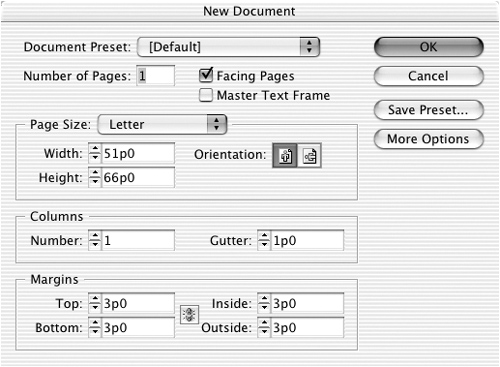
- Choose File > New > Document. This opens the New Document dialog box
 .
.
 The New Document dialog box set for the basic layout options.
 - Type the number of pages in your document in the Number of Pages field.
- Check Facing Pages to set your document with left-hand and right-hand pages.
- Check Master Text Frame to make it easy to flow text onto pages. (See Chapter 10, “Pages and Books,” for more information on master text frames.)
- Use the Page Size pop-up list to set the size of your page.
- Set the Orientation to portrait or landscape.
- Enter the size of the margins in the Margins fields.
- Set the number of columns and the gutter width in the Columns Number and Gutter fields.
- Click OK. The document appears in the window
 .
.
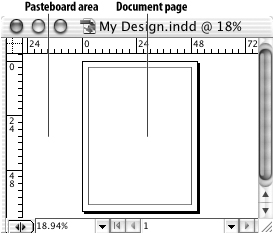 Each document page is surrounded by the non-printing pasteboard area where you can store objects for later use.
You can also set the advanced options for a document. The first is the area around the page, called a bleed. When you set a bleed, you define an area outside the trim of the page where objects will still print. The second area is called a slug. This is an area outside the page that may or may not print. Slugs are often used by advertising agencies to list insertion dates and the name of the product, manufacturer, and ad agency.
To set the advanced options for a new document:
- Click the More Options button in the New Document dialog box. The advanced options for Bleed and Slug dimensions appear at the bottom of the dialog box.
- Set the amounts for the size of the bleed area around the document
 .
.
 The New Document dialog box set for the advanced layout options.
 - Set the amounts for the size of the slug area around the document. The slug area is displayed outside the document trim
 .
.
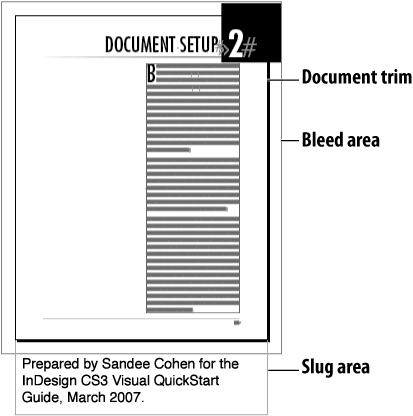 A document with bleed and slug areas.

Choosing Layout Options
Facing pages refers to documents such as a book where pages on one side of its spine face the pages on the other side. (This is also called a spread.) Single pages, such as advertisements, have facing pages turned off.
To set facing pages:
• With the Document Setup dialog box open, click Facing Pages. This changes the document from single page to facing pages ![]() and
and ![]() .
.
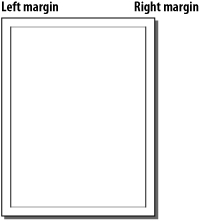
![]() The left and right margins on nonfacing pages.
The left and right margins on nonfacing pages.
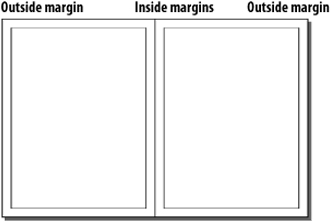
![]() The outside and inside margins on facing pages.
The outside and inside margins on facing pages.
Tip
When a document is set for facing pages, the names in the dialog box for the Left and Right margins change to Inside and Outside margins ![]() .
.
The page size is the size of the individual pages of the document.
To set the size of the page:
• Choose one of the following 11 choices from the Page Size menu ![]() :
:
• Letter, 8½ by 11 inches.
• Legal, 8½ by 14 inches.
• Tabloid, 11 by 17 inches.
• Letter–Half, 8½ by 5½ inches.
• Legal–Half, 8½ by 7 inches.
• A4, 21 by 29.7 centimeters.
• A3, 29.7 by 42 centimeters.
• A5, 14.8 by 21 centimeters.
• B5, 17.6 by 25 centimeters.
• Compact Disc, 4.7222 by 4.75 inches.
• Custom, which allows you to enter your own specific values.

![]() The Page Size menu offers standard U.S. and international paper sizes, as well as customization controls.
The Page Size menu offers standard U.S. and international paper sizes, as well as customization controls.
Tip
If you change the values in the Width or the Height field, the Page Size automatically switches to the Custom setting.
The term orientation refers to how the page is positioned, either up and down or sideways.
To set the orientation:
• Click the Portrait orientation to create a document where the width is always less than the height ![]() .
.
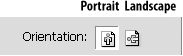
![]() The Orientation controls let you set the position of the page.
The Orientation controls let you set the position of the page.
or
Click the Landscape orientation to create a document where the width is always greater than the height ![]() .
.
- Click the field arrows or enter an amount for the Top and Bottom fields
 .
.
 The margin settings for a document with facing pages.
 - If the document is set for facing pages, click the field arrows or enter an amount for the Inside and Outside fields.
or
If the document is not set for facing pages, click the field arrows or enter an amount for the Left and Right margins
 .
.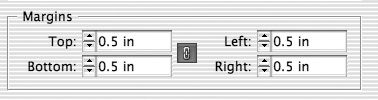 The margin settings for a document with nonfacing pages.
Tip
Click the Make Same Size icon in the Margins area to control how the margins are created
 . When the icon displays a link, all the margins will be the same size. (This saves you typing in the same number four times.) When the icon displays a broken link, you can enter different sizes for each margin.
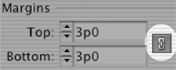 Click the Make Same Size icon to automatically enter the same amount for all four margins.
You can also set visible guides for columns and the gutters (or spaces) between the columns.
To set the columns and gutters:
- Click the field arrows or enter an amount for the number of columns
 .
.
 The column settings let you set the number of columns and the amount of space for the gutter between the columns.
 - Click the field arrows or enter an amount for the gutter.
Wouldn’t it be nice if the New Document dialog box remembered your favorite setup so you wouldn’t have to change the settings each time you start a new document? It can, and that’s called setting the defaults.
- Close all InDesign documents, leaving just the application open.
- Choose File > Document Setup. The Document Setup dialog box appears.
- Make whatever changes you want to the options in the Document Setup dialog box.
- Click OK. The settings you have chosen become the default for any new documents.
Changing Layout Options
You may discover that you need to change some of the settings of an existing document. When you start a new document, all the settings appear in one dialog box. However, after you begin working on the document you must use two separate controls to make changes to the document.
- Choose File > Document Setup to open the Document Setup dialog box
 .
.
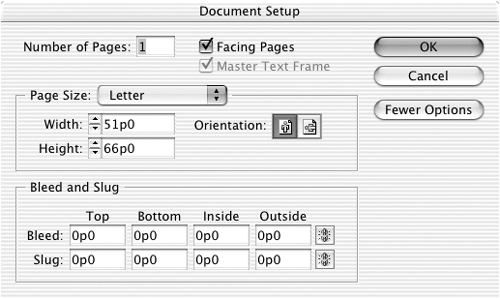 The Document Setup dialog box for an existing document.
 - Make whatever changes you want to the following settings:
• Number of Pages
• Facing Pages
• Page Size
• Orientation
• Bleed and Slug
- Click OK to apply the changes to the document.
To change the margins and columns:
- Choose Layout > Margins and Columns to open the Margins and Columns dialog box
 .
.
 The Margins and Columns dialog box for an existing document.
 - Make whatever changes you want to the following settings:
• Margins
• Number of columns
• Gutter (the width of the space between the columns)
- Click OK to apply the changes to the document.
Tip
Changing the margins and columns while on a page or spread changes the settings only for that page or spread. To change the settings for all the pages, you need to work with the Master Page. (See Chapter 10, “Pages and Books,” for more information on master pages.)
Using the Document Presets
You may want to save all the settings for certain types of documents so they can easily be applied when you start new documents. For instance, my Visual QuickStart books require different settings than the handouts I use when teaching. Document presets make it easy to apply the different settings when I create new documents.
To save the document settings as document preset:
- Choose File > New > Document and set the options in the New Document dialog box.
- Click the Save Preset button
 . This opens the Save Preset dialog box
  .
.
 Click the Save Preset button in the New Document dialog box to save the current settings as a preset.
 Enter a name for a document preset in the Save Preset As field.
 - Enter a name for the preset in the Save Preset As field and Click OK. This adds the preset to the Document Preset menu in the New Document dialog box.
To apply a document preset:
• Choose the document preset from the Document Preset menu in the New Document dialog box ![]() .
.
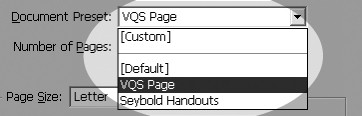
![]() You can apply presets using the Document Preset menu in the New Document dialog box.
You can apply presets using the Document Preset menu in the New Document dialog box.
or
Choose File > Document Presets and then choose one of the presets listed in the menu. This opens the New Document dialog box with that preset chosen.
- Choose File > Document Presets > Define. This opens the Document Presets dialog box.
- Choose the document preset in the Document Presets dialog box, and click the Edit button
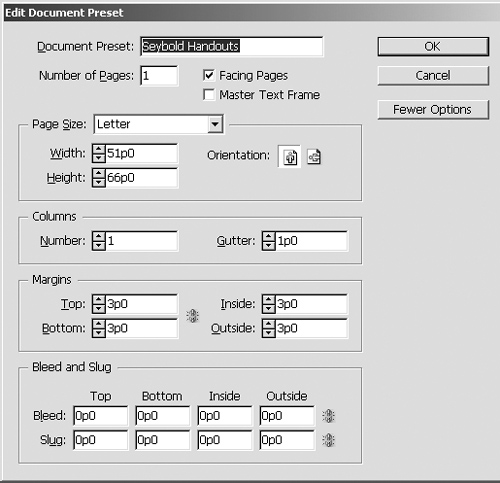
 . This opens the Edit Document Preset dialog box
  .
.
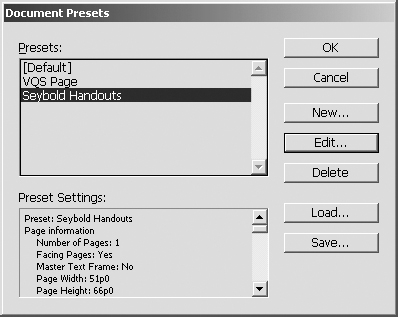 The Document Presets dialog box lets you edit, delete, and create new document presets. Use the Edit Document Preset dialog box to make changes to existing document presets.
 - Make whatever changes you want. Click OK to save the changes in the preset.
You can also use the Document Presets dialog box to create document presets without going through the New Document dialog box.
To create a new document preset:
- Choose File > Document Presets > Define. This opens the Document Presets dialog box.
- Click the New button to open the New Document Presets dialog box.
- Use the dialog box to name and set the options for the new preset.
- Click OK to save the preset.
To delete a document preset:
• Choose the document preset, and click the Delete button.
You can also export document presets into a file that can be shared with others.
- Click the Save button in the Document Presets dialog box.
- Name and save the document preset file.
You can also import document presets from others.
- Click the Load button in the Document Presets dialog box.
- Navigate to find the document preset file.
- Click the Open button. The document presets are imported into InDesign.
Using Document Rulers
Designers need to measure things on pages. Rather than hold a ruler up to your monitor, you can use InDesign’s electronic rulers.
To show and hide the document rulers:
• To see the rulers along the top and left edges of the document window, choose View > Show Rulers ![]() .
.
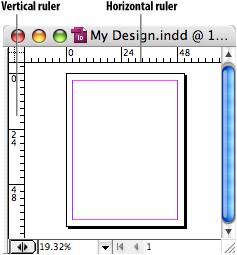
![]() The horizontal and vertical rulers.
The horizontal and vertical rulers.
or
To hide the rulers, choose View > Hide Rulers.
You can change the rulers to display different units of measurement. This is helpful if you receive instructions written in measurements with which you are not familiar.
To change the unit of measurement:
- Choose Edit > Preferences > Units & Increments (Win) or InDesign > Preferences > Units & Increments (Mac). This opens the Units & Increments dialog box.
- For the Horizontal and Vertical settings, choose one of the measurements from the pop-up lists
 .
.
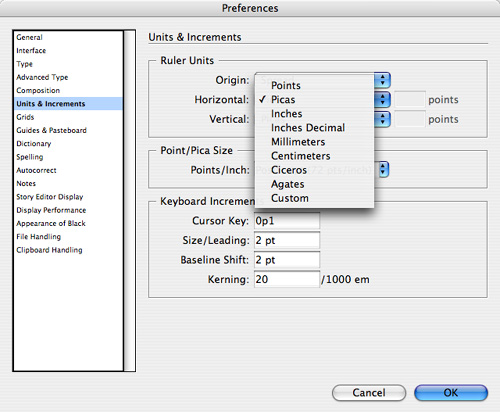 The choices for the ruler’s units of measurement.
 - If you choose Custom, enter the number of points for each unit on the ruler.
Tip
You can also change the units with the ruler contextual menus
 .
.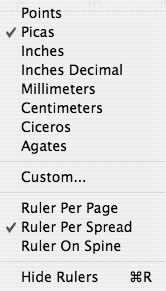 The contextual menu when you click over a ruler.
The rulers start numbering at the top-left corner of the page. You may want to move this point, called a zero point, to a different position. This can help you judge how much space you have from one spot of the page to another.
- Position the cursor over the zero point crosshairs at the upper-left corner of the rulers
 .
.
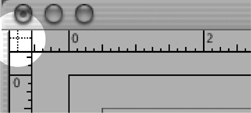 The zero point indicator of the rulers.
 - Drag the zero point to the new position on the page
 .
.
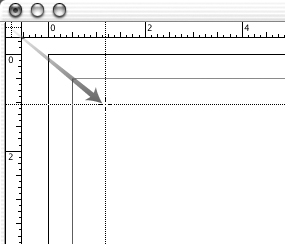 You set the ruler’s zero point by dragging the zero point indicator to a new position on the page.
 - Release the mouse button to position the zero point.
If you are working on a project such as an advertising spread, it may be easier to position objects if the rulers continue across the spine of the pages. (The spine is where the pages of a book, magazine, or other multipage document are bound together.) InDesign lets you customize the origin of the rulers.
To set the origin of the rulers:
- Choose Edit > Preferences > Units & Increments (Win) or InDesign > Preferences > Units & Increments (Mac).
- Set the Ruler Units Origin menu to Page, Spread, or Spine
 .
.
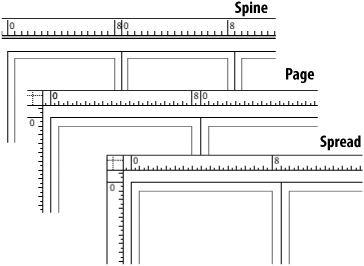 You can control whether the rulers reset for each spine or each page. They can also be set to stay across a spread.
or
Choose a setting from the ruler contextual menu
.
Working with Guides
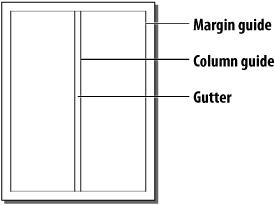
Guides are nonprinting lines that help you position objects. InDesign has many different types of guides that you can work with ![]() .
.
• Ruler guides can be positioned anywhere on the page or pasteboard.
• Margin guides show the settings of the margins for the document.
• Column guides show the column settings for a page or master page.
• Bleed guides show the bleed area for the document.
• Slug guides show the slug area for the document.

![]() Examples of the various types of guides on a page.
Examples of the various types of guides on a page.
InDesign gives you options for how to work with guides.
To change the guide preferences:
- Choose Edit > Preferences > Guides & Pasteboard (Win) or InDesign > Preferences > Guides & Pasteboard (Mac) to open the Guides & Pasteboard Preferences
 .
.
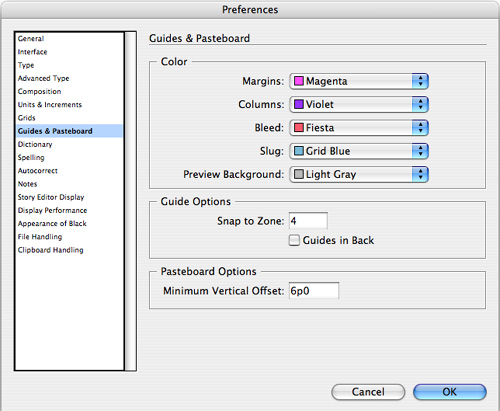 The dialog box for the guides preferences.
 - Use each of the menus to set the colors of the guides.
- Check Guides in Back to position the guides behind text and graphics on the page
 .
.
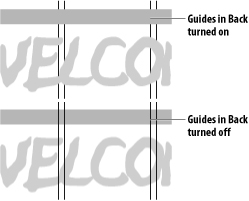 The Guides in Back command changes how guides are displayed as they pass through text and artwork.
 - Enter an amount in the Snap to Zone field. This is the distance, in pixels, for how close an object must be before it will snap or jump to align with a guide.
To show or hide guides:
• To see the margin, column, and ruler guides, choose View > Grids & Guides > Show Guides.
or
To hide the guides, choose View > Grids & Guides > Hide Guides.
Objects can be set to automatically snap to guides as you move them. This makes it easier to align objects to guides.
To make objects snap to guides:
• Choose View > Grids & Guides > Snap to Guides.
There may be times when you want to move a column guide manually. This results in a custom guide setting.
To unlock and move column guides:
- If View > Grids & Guides > Lock Column Guides is checked, choose the command to unlock the column guides.
- Position the cursor over the guide you want to move.
- Press the mouse button. The cursor turns into a two-headed arrow that indicates that the column has been selected
 .
.
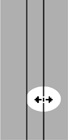 The two-headed arrow indicates that a column guide can be moved.
 - Drag the column guide to the new position.
Ruler guides are more flexible than margin or column guides and can be positioned anywhere on the page to help with object placement.
- Position the cursor over the horizontal or vertical ruler.
- Press the mouse button. The cursor turns into a two-headed arrow.
- Drag to pull the guide out onto the page
 .
.
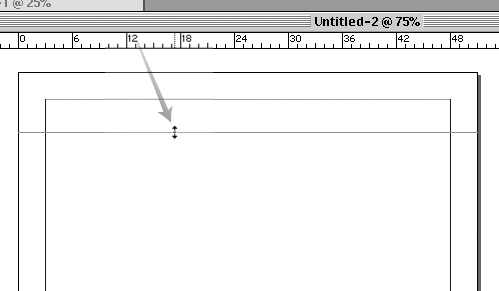 You can drag ruler guides out from the horizontal ruler or vertical ruler.
Rather than pulling guides out one at a time, you can also create a series of ruler guides in rows and columns.
To create rows and columns using guides:
- Choose Layout > Create Guides. This opens the Create Guides dialog box
 .
.
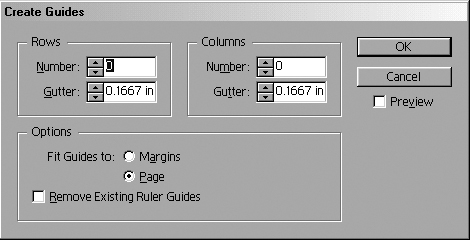 The Create Guides dialog box lets you automatically add many guides on a page.
 - Enter the number of rows (horizontal guides) in the Rows Number field.
- Enter the amount for the space between the rows in the Rows Gutter field.
- Enter the number of columns (vertical guides) in the Columns Number field.
- Enter the amount for the space between the columns in the Columns Gutter field.
- Choose between Fit Guides to Margins or Fit Guides to Page
 .
.
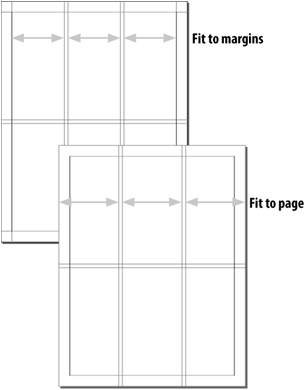 Fit Guides to Margin spaces the guides equally inside the page margins. Fit Guides to Page spaces the guides equally inside the page trim.
 - Check Remove Existing Ruler Guides to delete all the ruler guides that were previously on the page. This includes ruler guides that were manually added to the page.
- Click OK to apply the guides.
Tip
Check Preview to see the guides on the page change as you enter the values within the dialog box.
- Position the cursor over the guide you want to move.
- Press the mouse button. The cursor turns into a two-headed arrow and the guide changes color. This indicates that the guide has been selected.
- Drag the ruler guide to a new position.
You can also manually move or delete ruler guides.
To move existing ruler guides:
• Use either of the Selection tools to drag the ruler guide to a new position ![]() .
.

![]() Use either of the Selection tools to select a ruler guide.
Use either of the Selection tools to select a ruler guide.
- Click the ruler guide with one of the Selection tools. The ruler guide turns a darker color, indicating it is selected.
- Press the Delete/Backspace key. This deletes the ruler guide.
You may want to lock your ruler guides so they don’t move inadvertently.
To lock guides:
• Choose View > Grids & Guides > Lock Guides.
You can change the color of ruler guides. You can also set the magnification at which the guides are not visible.
To change the appearance of ruler guides:
- Choose Layout > Ruler Guides to open the dialog box
 .
.
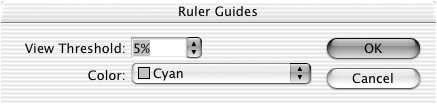 Use the Ruler Guides dialog box to change the color of the ruler guides. You can also set the threshold to determine at what magnification the guides are visible.
 - Use the Color pop-up list to pick the color for the ruler guides.
- Set a percentage for the View Threshold. This sets the amount of magnification below which the ruler guides are not displayed
 .
.
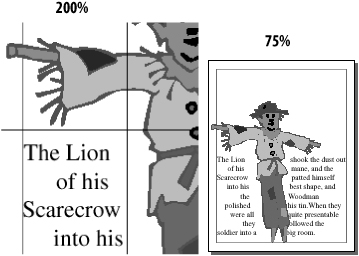 A view threshold of 200% means the guides are visible only when the magnification is 200% or higher.
Working with Document Grids
Ruler guides aren’t the only way to align objects. The document grid can also be used as a structure for designing pages. The baseline grid is used to keep lines of text even.
To display the grids:
• Choose View > Grids & Guides > Show Document Grid ![]() or View > Grids & Guides > Show Baseline Grid.
or View > Grids & Guides > Show Baseline Grid.
![]() Choose Show Document Grid to see the horizontal and vertical gridlines.
Choose Show Document Grid to see the horizontal and vertical gridlines.
To hide the grids:
• Choose View > Grids & Guides > Hide Document Grid or > Hide Baseline Grid.
To change the grid appearance:
- Choose Edit > Preferences > Grids (Win) or InDesign > Preferences > Grids (Mac) to open the preferences dialog box
 .
.
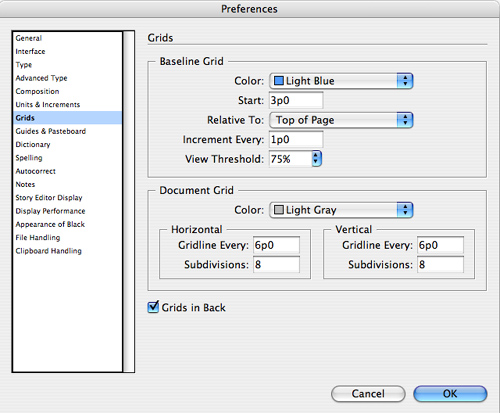 The Grids Preferences dialog box lets you control the display and arrangement of the document grid.
 - Use the Color list to change the grid color.
- Enter an amount in the Horizontal and Vertical Gridline Every fields to set the distance between the main gridlines.
- Enter an amount in the Subdivisions field to create lighter gridlines between the main gridlines.
- Enter an amount in the Start field to set where the baseline grid should start.
- Use the Relative To list to position the start of the grid relative to the top of the page or the top margin.
- Enter a percentage in the View Threshold field. This sets the lowest magnification at which the grid is visible.
- Check Grids in Back to position the gridlines behind objects on the page.
To turn on Snap to Grid:
• Choose View > Grids & Guides > Snap to Document Grid. If Snap to Document Grid is checked, the feature is already turned on.
Changing the Magnification
Magnification refers to the size of the document as it appears on your screen. InDesign gives you many ways to change the magnification setting. Some of the quickest and easiest ways to change the magnification settings are to use View commands.
To zoom with the View commands:
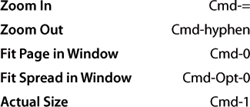
- To increase the magnification, choose View > Zoom In.
- To decrease the magnification, choose View > Zoom Out.
- To see all of the current page, choose View > Fit Page In Window. This changes the magnification setting to whatever amount is necessary to see the entire page.
- To see all of the current spread, choose View > Fit Spread in Window.
- To see the document at 100% magnification, choose View > Actual Size.
- To see the entire pasteboard area, choose View > Entire Pasteboard
 .
.
 The Entire Pasteboard command shows the page as well as the pasteboard.
InDesign lets you view the page with a wide range of magnification settings. You can select a specific magnification amount from the magnification list.
To use the magnification list:
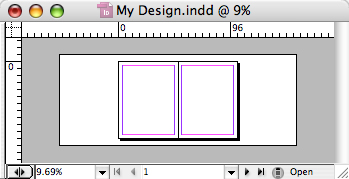
- Click the control at the bottom-left corner of the document window to display the magnification list
 .
.
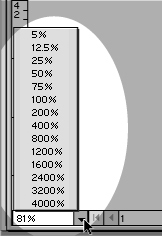 The magnification list at the bottom of the document window.
 - Choose one of the magnifications in the list.
You can also view specific magnifications not in the list.
To enter a specific magnification amount:
- Double-click or drag across the magnification shown in the bottom-left corner of the document window.
- Type a number between 5 and 4000.
- Press Return or Enter to apply the setting.
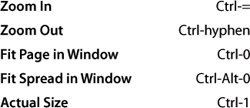
Because the View commands are used so often, the keyboard shortcuts are listed here. You can also find these shortcuts displayed on the View menu.
View and Pasteboard Controls
As you work, you may want to view your document in different ways. The four View modes provide different ways of looking at your document.
To choose the four View modes:
• Click the Normal View Mode icon at the bottom of the Toolbox ![]() .
.

![]() Click the Normal View Mode icon to see all the elements of the document.
Click the Normal View Mode icon to see all the elements of the document.
• Normal View Mode is the default view and shows you all the guides in the document as well as the pasteboard, bleed, and slug areas ![]() .
.
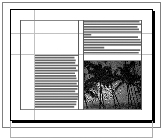
![]() The Normal View Mode shows all the elements of the document.
The Normal View Mode shows all the elements of the document.
or
Choose one of the view modes from the fly-out panel at the bottom of the Toolbox ![]() .
.
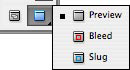
![]() Choose one of the view modes to see specific areas in a Preview Mode.
Choose one of the view modes to see specific areas in a Preview Mode.
• Preview Mode shows only the area inside the page boundaries. All guides are automatically hidden ![]() .
.
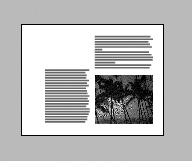
![]() The Preview Mode shows only the printing elements and hides the pasteboard.
The Preview Mode shows only the printing elements and hides the pasteboard.
• Bleed Mode adds the area inside the bleed to the Preview Mode ![]() .
.
![]() The Bleed Mode shows only the printing elements and the bleed area.
The Bleed Mode shows only the printing elements and the bleed area.
• Slug Mode adds the area inside the slug to the Preview Mode ![]() .
.
![]() The Slug Mode shows only the printing elements and the slug area.
The Slug Mode shows only the printing elements and the slug area.
When you switch to the Preview Mode the pasteboard is replaced by a colored background. The default color is gray; but you can change that to any color you like.
To change the Preview Background color:
- Choose Edit > Preferences > Guides & Pasteboard (Win) or InDesign > Preferences > Guides & Pasteboard (Mac) to open the Guides & Pasteboard Preferences.
- Use the Preview Background list to set the color for the background
 . This changes the color shown in the Preview Mode
  .
.
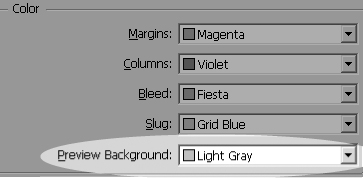 Use the Preview Background List to change the color of the pasteboard area shown in the Preview Mode.
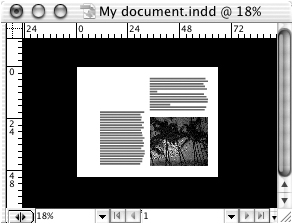 A black background in the pasteboard area presents your work with a more dramatic appearance.
The area above and below the document is controlled by the Minimum Vertical Offset. You can make that area larger.
To change the Minimum Vertical Offset:
- Choose Edit > Preferences > Guides & Pasteboard (Win) or InDesign > Preferences > Guides & Pasteboard (Mac) to open the Guides & Pasteboard Preferences.
- Enter an amount in the Minimum Vertical Offset field
 . This increases the pasteboard above and below the page
  .
.
 Use the Minimum Vertical Offset field to increase the size of the pasteboard above and below the document.
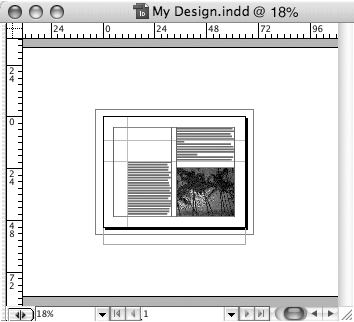 The effects of increasing the size of the Minimum Vertical Offset.
Using the Zoom and Hand Tools
The Zoom tool lets you jump to a specific magnification and position on the page. The Hand tool moves the view to a new position.
- Click the Zoom tool in the Toolbox
 . The cursor turns into a magnifying glass.
 Use the Zoom tool to change the magnification of the page.
 - Click the Zoom tool on the area you want to zoom in on. Click as many times as is necessary to change the magnification.
Tip
Press Cmd/Ctrl and Spacebar to access the Zoom tool without leaving the tool that is currently selected.
Tip
Each click of the Zoom tool changes the magnification to the next setting in the magnification list.
Tip
Press the Opt/Alt key while in the Zoom tool to decrease magnification. The icon changes from a plus sign (+) to a minus sign (–).
A marquee zoom allows you to zoom quickly to a certain magnification and position.
To create a marquee zoom:
• Drag the Zoom tool diagonally across the area you want to see. Release the mouse button to zoom in ![]() and
and ![]() .
.
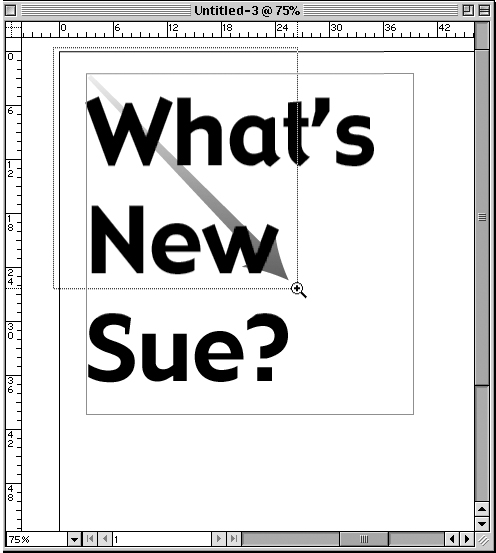
![]() Drag the Zoom tool diagonally to magnify a specific area. The marquee indicates the area to be selected.
Drag the Zoom tool diagonally to magnify a specific area. The marquee indicates the area to be selected.
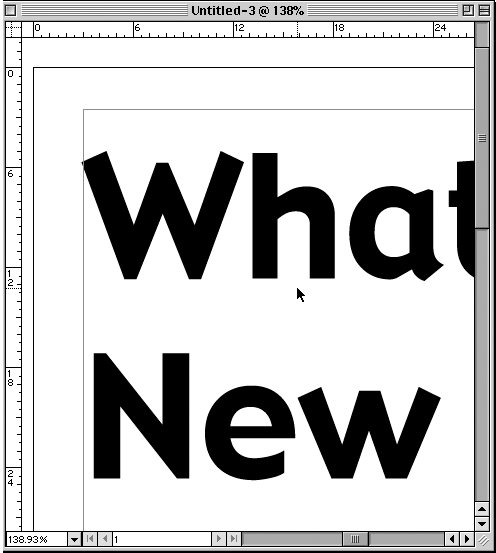
![]() The selected area fills the window after you release the mouse button.
The selected area fills the window after you release the mouse button.
You can also use the Hand tool (sometimes called the Grabber tool) to move around within the area of the document. This is more flexible than using the scrollbars, which only go up and down or left and right.
- Click the Hand tool in the Toolbox
 .
.
 Use the Hand tool to move the page around the window.
 - Drag the Hand tool to move around the page.
If you want to become a true InDesign power user, you need to use keyboard shortcuts. One of the primary shortcuts you should learn is how to temporarily access the Hand tool without leaving the current tool. This lets you scroll around a document very quickly.
To temporarily access the Hand tool:
• Press the Opt/Alt plus Spacebar keys. This gives you the Hand tool in all situations.
Tip
You can also access the Hand tool by pressing just the Opt/Alt key if you are working in a text frame.
Using the Navigator Panel
The Navigator panel combines the functions of both the Zoom and Hand tools. As you change the views in the Navigator, you change the views in your document.
To use the Navigator zoom buttons:
- If the Navigator panel is not already open, choose Window > Object & Layout > Navigator. This opens the Navigator panel
 .
.
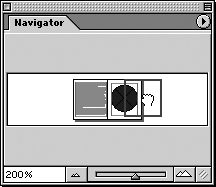
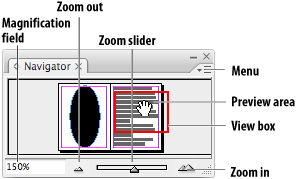 The elements of the Navigator panel.
 - Click the Zoom In button to increase the magnification.
- Click the Zoom Out button to decrease the magnification.
To set a specific magnification:
- Highlight the value in the Magnification field and enter the specific magnification.
- Press Return or Enter.
To use the Zoom slider:
• Drag the Zoom slider to the right to increase the magnification.
or
Drag the slider to the left to decrease the magnification.
To change the view spread options:
• Choose View All Spreads from the Navigator panel menu. This displays all the spreads in the document ![]() .
.

![]() When View All Spreads is chosen, the Navigator displays all the spreads in the document.
When View All Spreads is chosen, the Navigator displays all the spreads in the document.
Tip
When you choose View All Spreads, the menu choice changes to View Active Spread. This displays only the currently selected spread.
The Preview area within the Navigator panel can also be used to move around the document window.
To move using the Navigator Preview area:
- Position the cursor inside the Preview area of the Navigator panel. The cursor changes into a hand
 .
.
 The Hand cursor inside the Preview area of the Navigator panel.
 - Drag the Hand cursor around the Preview area. The Preview Box moves to change the area displayed within the document window.
The View Box is the rectangle that shows the size of the area displayed in the document window. You can change the color of that rectangle so that it is more easily seen against the color of your document pages.
To change the color of the View Box:
- Choose Panel Options from the Navigator menu. This opens the Panel Options dialog box
 .
.
 The Panel Options let you change the color of the View Box inside the Navigator panel.
 - Use the Color list to pick a new color.
Controlling Windows
The window commands let you view one document in two windows and control the display of multiple windows.
To see a document in two windows:
- Choose Window > Arrange > New Window. This creates a second window containing the document.
- Choose Window > Arrange > Tile Vertically
 or Window > Arrange > Tile Horizontally
  . This changes the size of the windows and positions them so that all the documents are visible.
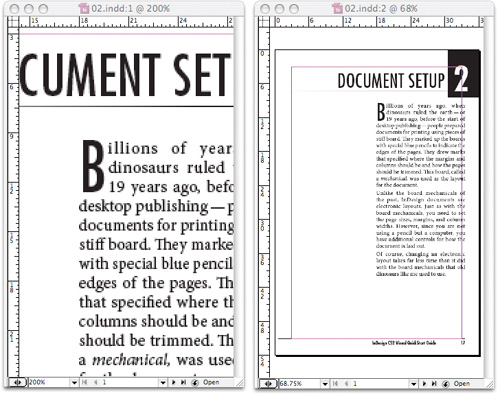 Two views of the same document set to Tile Vertically.
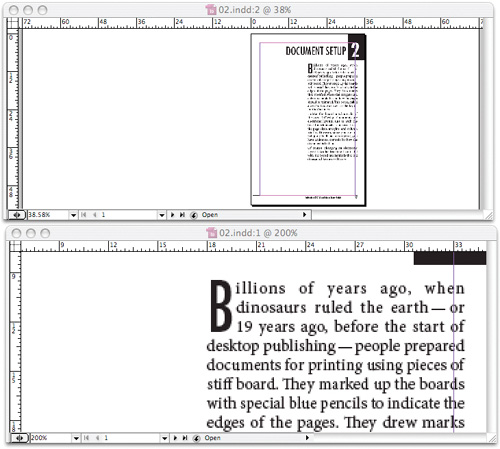 Two views of the same document set to Tile Horizontally.
or
Choose Window > Arrange > Cascade. This stacks all the open windows so that their title bars are visible.
In the Macintosh OS X operating system, some of the windows for InDesign documents may be obscured by other application windows. Fortunately there is a command that lets you move all the InDesign windows to be seen at the front of the screen.
To control the order of documents (Mac):
• Choose Window > Arrange > Bring All To Front. This moves all the InDesign documents to the front of the stacking order of all other applications.
File Maintenance
After you work on a document for even a little while, you must save your work to a hard drive or disk. This is vital so that you don’t lose important information should your computer crash in a power blackout or you do something stupid.
Tip
You have a choice to save files as an InDesign document (.indd) or template (indt). The template format saves the file so that each time it is opened, it opens as an untitled document. This protects the document from inadvertent changes.
To save and name a file (Win):
- Choose File > Save or File > Save As. This opens the Save As dialog box
 .
.
 The Save As dialog box (Win).
 - Use the Save In field to choose a destination disk and folder for the file.
- Use the File Name field to name the file.
- Use the Save As Type field to choose between an InDesign document and an InDesign template.
- Click Save to save the file and close the dialog box.
To save and name a file (Mac):
- Choose File > Save or File > Save As. This opens the Save As dialog box
 .
.
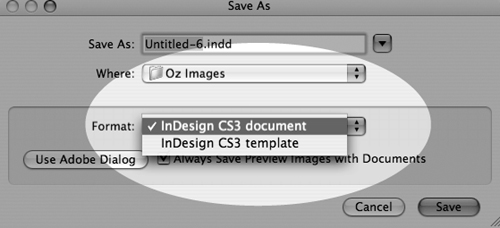 The Save As dialog box (Mac).
 - Use the Macintosh navigational elements to choose a destination disk and folder for the file.
- Use the Name field to name the file.
- Use the Format pop-up list to choose between an InDesign document and an InDesign template.
- Click Save to save the file and close the dialog box.
As you work, you may want to spin off a copy of your document under another name. The Save a Copy command makes this easy to do.
To create a copy of a document:
- Choose File > Save a Copy. This opens the Save As dialog box.
- Use the same steps as described in the two previous exercises to save the file.
- Click Save. The copy of the document is saved while you can continue to work on your current file.
There may be times when you want to revert to the previously saved version of a document without saving any changes.
To go back to the saved version of a document:
• Choose File > Revert. The file closes and then reopens to where it was when last saved.
To undo the steps you have done:
• Choose Edit > Undo [Action].
To redo the steps you have done:
• Choose Edit > Redo [Action].
To close a document:
• Choose File > Close.
or
Click the Close box or button in the document window.
It happens—someday, somehow your computer will crash, a blackout will hit your city, or you will be forced to restart the computer without saving your work. Fortunately, InDesign has an automatic recovery option that can save your work.
- Restart the computer after the crash or data loss.
- Start InDesign. Any files that were open when the crash occurred will be automatically opened.
- Choose File > Save As to save the file with a new name and destination.
InDesign gives you options for opening and closing files.
To open a file within InDesign:
- Choose File > Open.
- Use the navigation controls to select the file you want to open.
To open recently saved documents:
• Choose File > Open Recent and then choose one of the files listed in the submenu.