
JavaScript's primary role in web development is to interact with the user, to add some kind of behavior to your web page. You've seen this in previous chapters, especially Chapter 7 and Chapter 8 when you were scripting forms, frames, and windows. User interaction doesn't stop there, though. In fact, JavaScript gives you the ability to completely change all aspects of a web page after it's loaded in the browser, a technique called Dynamic HTML (DHTML). What gives JavaScript this power over a web page is the Document Object Model (DOM), a tree-like representation of the web page.
The DOM is one of the most misunderstood standards set forth by the World Wide Web Consortium (W3C), a body of developers who recommend standards for browser makers and web developers to follow. The DOM gives developers a way of representing everything on a web page so that it is accessible via a common set of properties and methods in JavaScript. By everything, I mean everything. You can literally change anything on the page: the graphics, tables, forms, and even text itself by altering a relevant DOM property with JavaScript.
The DOM should not be confused with the Browser Object Model (BOM) that was introduced in Chapter 6. You'll see the differences between the two in detail shortly. For now, though, think of the BOM as a browser-dependent representation of every feature of the browser, from the browser buttons, URL address line, and title bar to the browser window controls, as well as parts of the web page, too. The DOM, however, deals only with the contents of the browser window or web page (in other words, the HTML document). It makes the document available in such a way that any browser can use exactly the same code to access and manipulate the content of the document. To summarize, the BOM gives you access to the browser and some of the document, whereas the DOM gives you access to all of the document, but only the document.
The great thing about the DOM is that it is browser- and platform-independent. This means that developers can finally consider the possibility of writing a piece of JavaScript code that dynamically updates the page, and that will work on any DOM-compliant browser without any tweaking. You should not need to code for different browsers or take excessive care when coding.
The DOM achieves this independence by representing the contents of the page as a generic tree structure. Whereas in the BOM you might expect to access something by looking up a property relevant to that part of the browser and adjusting it, the DOM requires navigation through its representation of the page through nodes and properties that are not specific to the browser. You'll explore this structure a little later.
However, to use the DOM standard, ultimately developers require browsers that completely implement the standard, something that no browser does 100 percent efficiently, unfortunately. To make matters worse, no one browser implements the exact same DOM features that other browsers support, but don't be scared off yet. All modern browsers support many of the same features outlined by the DOM standard.
To provide a true perspective on how the DOM fits in, I need to take a brief look at its relationship with some of the other currently existing web standards. I should also talk about why there is more than one version of the DOM standard, and why there are different sections within the standard itself. (Microsoft, in particular, added a number of extensions to the W3C DOM.) After understanding the relationships, you can look at using JavaScript to navigate the DOM and to dynamically change content on web pages in more than one browser, in a way that used to be impossible with pure DHTML. The following items are on your agenda:
The (X)HTML, ECMAScript, and XML Web standards
The DOM standards
Manipulating the DOM
Writing cross-browser DHTML
Remember that the examples within this chapter are targeted only at the DOM (with very few exceptions) and will be supported only by IE 8+, Firefox 1+, Opera, Safari 3+, and Chrome.
When Tim Berners-Lee created HTML in 1991, he probably had little idea that this technology for marking up scientific papers via a set of tags for his own global hypertext project, known as the World Wide Web, would within a matter of years become a battleground between the two giants of the software business of the mid-1990s. HTML was a simple derivation from the meta-language Standard Generalized Markup Language (SGML) that had been kicking around academic institutions for decades. Its purpose was to preserve the structure of the documents created with it. HTML depends on a protocol, HyperText Transfer Protocol (HTTP), to transmit documents back and forth between the resource and the viewer (for example, the server and the client computer). These two technologies formed the foundation of the Web, and it quickly became obvious in the early 1990s that there needed to be some sort of policing of both specifications to ensure a common implementation of HTML and HTTP so that communications could be conducted worldwide.
In 1994, Tim founded the World Wide Web Consortium (W3C), a body that set out to oversee the technical evolution of the Web. It has three main aims:
To provide universal access, so that anybody can use the Web
To develop a software environment to allow users to make use of the Web
To guide the development of the Web, taking into consideration the legal, social, and commercial issues that arise
Each new version of a specification of a web technology has to be carefully vetted by W3C before it can become a standard. The HTML and HTTP specifications are subject to this process, and each new set of updates to these specifications yields a new version of the standard. Each standard has to go through a working draft, a candidate recommendation, and a proposed recommendation stage before it can be considered a fully operational standard. At each stage of the process, members of the W3C consortium vote on which amendments to make, or even on whether to cancel the standard completely and send it back to square one.
It sounds like a very painful and laborious method of creating a standard format, and not something you'd think of as spearheading the cutting edge of technical revolution. Indeed, the software companies of the mid-1990s found the processes involved too slow, so they set the tone by implementing new innovations themselves and then submitting them to the standards body for approval. Netscape started by introducing new elements in its browser, such as the <font /> element, to add presentational content to the web pages. This proved popular, so Netscape added a whole raft of elements that enabled users to alter aspects of presentation and style on web pages. Indeed, JavaScript itself was such an innovation from Netscape.
When Microsoft entered the fray, it was playing catch up for the first two iterations of its Internet Explorer browser. However, with Internet Explorer 3 in 1996, they established a roughly equal set of features to compete with Netscape and so were able to add their own browser-specific elements. Very quickly, the Web polarized between these two browsers, and pages viewable on one browser quite often wouldn't appear on another. One problem was that Microsoft had used its much stronger position in the market to give away its browser for free, whereas Netscape still needed to sell its own browser because it couldn't afford to freely distribute its flagship product. To maintain a competitive position, Netscape needed to offer new features to make the user want to purchase its browser rather than use the free Microsoft browser.
Things came to a head with both companies' version 4 browsers, which introduced dynamic page functionality. Unfortunately, Netscape did this by the means of a <layer /> element, whereas Microsoft chose to implement it via scripting language properties and methods. The W3C needed to take a firm stand here, because one of its three principal aims had been compromised: that of universal access. How could access be universal if users needed a specific vendor's browser to view a particular set of pages? They decided on a solution that used existing standard HTML elements and Cascading Style Sheets, both of which had been adopted as part of the Microsoft solution. As a result, Microsoft gained a dominant position in the browser war. It hasn't relinquished this position; the Netscape Navigator browser never had a counter to Internet Explorer's constant updates, and its replacement, Firefox, was slow to expand its user base. Other browsers, such as Opera, Safari, and Chrome, along with Firefox continue to chip away at Microsoft's dominance in the market. However, Microsoft's Internet Explorer is still the most widely used browser today.
With a relatively stable version of the HTML standard in place with version 4.01, which boasts a set of features that will take any browser manufacturer a long time to implement completely, attention was turned to other areas of the Web. A new set of standards was introduced in the late 1990s to govern the means of presenting HTML (style sheets) and the representation of the HTML document in script (the Document Object Model or DOM). Other standards emerged, such as Extensible Markup Language (XML), which offers a common format for representing data in a way that preserves its structure.
The W3C web site (www.w3.org) has a huge number of standards in varying stages of creation. Not all of these standards concern us, and not all of the ones that concern us can be found at this web site. However, the vast majority of standards that do concern us can be found there.
You're going to take a brief look now at the technologies and standards that have an impact on JavaScript and find out a little background information about each. Some of the technologies may be unfamiliar, but you need to be aware of their existence at the very least.
The HTML standard is maintained by W3C. This standard might seem fairly straightforward, given that each version should have introduced just a few new elements, but in reality the life of the standards body was vastly complicated by the browser wars. The versions 1.0 and 2.0 of HTML were simple, small documents, but when W3C came to debate HTML version 3.0, they found that much of the new functionality it was discussing had already been superseded by new additions, such as the <applet /> and <style /> elements, to the version 3.0 browser's appletstyle. Version 3.0 was discarded, and a new version, 3.2, became the standard.
However, a lot of the features that went into HTML 3.2 had been introduced at the behest of the browser manufacturers and ran contrary to the spirit of HTML, which was intended solely to define structure. The new features, stemming from the <font /> element, just confused the issue and added unnecessary presentational features to HTML. These features really became redundant with the introduction of style sheets. So suddenly, in the version 3 browsers, there were three distinct ways to define the style of an item of text. Which was the correct way? And if all three ways were used, which style did the text ultimately assume? Version 4.0 of the HTML standard was left with the job of unmuddling this chaotic mess and designated a lot of elements for deprecation (removal) in the next version of the standards. It was the largest version of the standard so far and included features that linked it to style sheets and the Document Object Model, and also added facilities for the visually impaired and other unfairly neglected minority interest areas. The current version of the HTML standard is 4.01.
Extensible Markup Language, or XML, is a standard for creating markup languages (such as HTML). XML itself has been designed to look as much like HTML as possible, but that's where the similarities end.
HTML is actually an application of the meta-language SGML, which is also a standard for generating markup languages. SGML has been used to create many markup languages, but HTML is the only one that enjoys universal familiarity and popularity. XML, on the other hand, is a direct subset of SGML. SGML is generally considered to be too complex for people to be able to accurately represent it on a computer, so XML is a simplified subset of SGML. XML is also much easier to read than SGML.
XML's main use is for the creation of customized markup languages that are very similar in look and structure to HTML. One main use of XML is in the representation of data. Whereas a normal database can store information, databases don't allow individual stored items to contain information about their structure. XML can use the element structure of markup languages to represent any kind of data in which information contained in the structure might otherwise be lost, from mathematical and chemical notations to the entire works of Shakespeare. For instance, an XML document could be used to record that Mark Antony doesn't appear until Scene II Act I of Shakespeare's play Julius Caesar, whereas a relational database would struggle to do this without a lot of extra fields, as the following example shows:
<play>
    <act1>
<scene1>
. . .
</scene1>
<scene2>
<mark_anthony>
Caesar, my lord?
</mark_anthony>
</scene2>
<scene3>
. . .
</scene3>
</act1>
<act2>
. . .
</act2>
<act3>
. . .
</act3>
<act4>
. . .
</act4>
<act5>
. . .
</act5>
</play>XML is also completely cross-platform, because it contains just text. This means that an application on Windows can package up the data in this format, and a completely different application on Unix should be able to unravel and read that data.
XHTML 1.0 is where the XML and HTML standards meet. XHTML is just a respecification of the HTML 4.01 standard as an XML application. The advantages of this allow XHTML to get around some of the problems caused by a browser's particular interpretation of HTML, and more importantly to provide a specification that allows the Web to be used by clients other than browsers, such as those provided on handheld computers, mobile phones, or any software device that might be connected to the Internet (perhaps even your refrigerator!).
XHTML also offers a common method for specifying your own elements, instead of just adding them randomly. You can specify new elements via a common method using an XML Document Type Declaration and an XML name-space. (A namespace is a means of identifying one set of elements uniquely from any other set of elements.) This is particularly useful for the new markup languages, such as Wireless Markup Language (WML), which are geared toward mobile technology and require a different set of elements to be able to display on the reduced interfaces.
That said, anyone familiar with HTML should be able to look at an XHTML page and understand what's going on. There are differences, but not ones that add new elements or attributes.
The following is a list of the main differences between XHTML and HTML:
XHTML recommends an XML declaration to be placed at the top of the file in the following form:
<?xml version='1.0'?>.You also have to provide a DTD declaration at the top of the file, referencing the version of the DTD standard you are using.
You have to include a reference to the XML namespace within the HTML element.
You need to supply all XHTML element names in lowercase, because XML is case-sensitive.
The
<head/>and<body/>elements must always be included in an XHTML document.Tags must always be closed and nested correctly. When only one tag is required, such as with line breaks, the tag is closed with a slash (for example,
<br/>).Attribute values must always be denoted by quotation marks.
This set of rules makes it possible to keep a strict hierarchical structure to the elements, which in turn makes it possible for the Document Object Model to work correctly. This also makes it possible to standardize markup languages across all device types, so that the next version of WML (the markup language of mobile devices) will also be compliant with the XHTML standard. You should now be creating your HTML documents according to the previously specified rules. If you do so, you will find it much, much easier to write JavaScript that manipulates the page via the DOM and works in the way it was intended.
JavaScript itself followed a trajectory similar to that of HTML. It was first used in Netscape Navigator and then added to Internet Explorer. The Internet Explorer version of JavaScript was christened Jscript and wasn't far removed from the version of JavaScript found in Netscape Navigator. However, once again, there were differences between the two implementations and a lot of care had to be taken in writing script for both browsers.
Oddly enough, it was left to the European Computer Manufacturers Association (ECMA) to propose a standard specification for JavaScript. This didn't appear until a few versions of JavaScript had already been released. Unlike HTML, which had been developed from the start with the W3C consortium, JavaScript was a proprietary creation. This is the reason that it is governed by a different standards body. Microsoft and Netscape both agreed to use ECMA as the standards vehicle/debating forum, because of its reputation for fast-tracking standards and perhaps also because of its perceived neutrality. The name ECMAScript was chosen so as not to be biased toward either vendor's creation and also because the "Java" part of JavaScript was a trademark of Sun licensed to Netscape. The standard, named ECMA-262, laid down a specification that was roughly equivalent to the JavaScript 1.1 specification.
That said, the ECMAScript standard covers only core JavaScript features, such as the primitive data types of numbers, strings, and Booleans, native objects like the Date, Array, and Math objects, and the procedural statements like for and while loops, and if and else conditionals. It makes no reference to client-side objects or collections, such as window, document, forms, links, and images. So, although the standard helps to make core programming tasks compatible when both JavaScript and JScript comply with it, it is of no use in making the scripting of client-side objects compatible between the main browsers. Some incompatibilities remain.
All current implementations of JavaScript are expected to conform to the current ECMAScript standard, which is ECMAScript edition 3, published in December 1999. As of November 2006, ECMAScript edition 4 is under development.
Although there used to be quite a few irregularities between the Microsoft and Netscape dialects of JavaScript, they're now similar enough to be considered the same language. The Opera and Safari browsers also support and offer the same kind of support for the standard. This is a good example of how standards have provided a uniform language across browser implementations, although a feature was similar to the one that took place over HTML still rages to a lesser degree over JavaScript.
It's now time for you to consider the Document Object Model itself.
The Document Object Model (DOM) is, as previously mentioned, a way of representing the document independent of browser type. It allows a developer to access the document via a common set of objects, properties, methods, and events, and to alter the contents of the web page dynamically using scripts.
Several types of script languages, such as JavaScript and VBScript, are available. Each requires a different syntax and therefore a different approach when you're programming. Even when you're using a language common to all browsers, such as JavaScript, you should be aware that some small variations are usually added to the language by the browser vendor. So, to guarantee that you don't fall afoul of a particular implementation, the W3C has provided a generic set of objects, properties, and methods that should be available in all scripting languages, in the form of the DOM standard.
We haven't talked about the DOM standard so far, and for a particular reason: It's not the easiest standard to follow. Supporting a generic set of properties and methods has proved to be a very complex task, and the DOM standard has been broken down into separate levels and sections to deal with the different areas. The different levels of the standard are all at differing stages of completion.
Level 0 is a bit of a misnomer, as there wasn't really a level 0 of the standard. This term in fact refers to the "old way" of doing things — the methods implemented by the browser vendors before the DOM standard. Someone mentioning level 0 properties is referring to a more linear notation of accessing properties and methods. For example, typically you'd reference items on a form with the following code:
document.forms[0].elements[1].value = "button1";
We're not going to cover such properties and methods in this chapter, because they have been superseded by newer methods.
Level 1 is the first version of the standard. It is split into two sections: one is defined as core (objects, properties, and methods that can apply to both XML and HTML) and the other as HTML (HTML-specific objects, properties, and methods). The first section deals with how to go about navigating and manipulating the structure of the document. The objects, properties, and methods in this section are very abstract. The second section deals with HTML only and offers a set of objects corresponding to all the HTML elements. This chapter mainly deals with the second section — level 1 of the standard.
In 2000, level 1 was revamped and corrected, though it only made it to a working draft and not to a full W3C recommendation.
Level 2 is complete and many of the properties, methods, and events have been implemented by today's browsers. It has sections that add specifications for events and style sheets to the specifications for core and HTML-specific properties and events. (It also provides sections on views and traversal ranges, neither of which will be covered in this book; you can find more information at www.w3.org/TR/2000/PR-DOM-Level-2-Views-20000927/ and www.w3.org/TR/2000/PR-DOM-Level-2-Traversal-Range-20000927/.) You will be making use of some of the features of the event and style sections of this level of the DOM later in this chapter because they have been implemented in the latest versions of both browsers.
Level 3 achieved recommendation status in 2004. It is intended to resolve a lot of the complications that still exist in the event model in level 2 of the standard, and adds support for XML features, such as contents models and being able to save the DOM as an XML document. Only a few browsers support some features of Level 3.
Almost no browser has 100 percent compliance with any standard, although some, such as Firefox, Opera, and Safari/Chrome, come pretty close with the DOM. Therefore, there is no guarantee that all the objects, properties, and methods of the DOM standard will be available in a given version of a browser, although a few level 1 and level 2 objects, properties, and methods have been available in all the browsers for some time.
Much of the material in the DOM standards has only recently been clarified, and a lot of DOM features and support have been added to only the latest browser versions. For this reason, examples in this chapter will be guaranteed to work on only the latest versions of IE, Firefox, Opera, Safari, and Chrome. Although cross-browser scripting is a realistic goal, backwards compatible support isn't at all.
Although the standards might still not be fully implemented, they do give you an idea as to how a particular property or method should be implemented, and provide a guideline for all browser manufacturers to agree to work toward in later versions of their browsers. The DOM doesn't introduce any new HTML elements or style sheet properties to achieve its ends. The idea of the DOM is to make use of the existing technologies, and quite often the existing properties and methods of one or other of the browsers.
As mentioned earlier, there are two main differences between the Document Object Model and the Browser Object Model. However, complicating the issue is the fact that a BOM is sometimes referred to under the name DOM. Look out for this in any literature on the subject.
First, the DOM covers only the document of the web page, whereas the BOM offers scripting access to all areas of the browsers, from the buttons to the title bar, including some parts of the page.
Second, the BOM is unique to a particular browser. This makes sense if you think about it: You can't expect to standardize browsers, because they have to offer competitive features. Therefore, you need a different set of properties and methods and even objects to be able to manipulate them with JavaScript.
Because HTML is standardized so that web pages can contain only the standard features supported in the language, such as forms, tables, images, and the like, a common method of accessing these features is needed. This is where the DOM comes in. It provides a uniform representation of the HTML document, and it does this by representing the entire HTML document/web page as a tree structure.
In fact, it is possible to represent any HTML document (or any XML document for that matter) as a tree structure. The only precondition is that the HTML document should be well formed. Different browsers might be tolerant, to a greater or lesser extent, of quirks such as unclosed tags, or HTML form controls not being enclosed within a <form/> element; however, for the structure of the HTML document to be accurately depicted, you need to be able to always predict the structure of the document. Abuses of the structure, such as unclosed tags, stop you from depicting the structure as a true hierarchy, and therefore cannot be allowed. The ability to access elements via the DOM depends on the ability to represent the page as a hierarchy.
If you're not familiar with the concept of trees, don't worry. They're just a diagrammatic means of representing a hierarchical structure.
Let's consider the example of a book with several chapters. If instructed to, you could find the third line on page 543 after a little searching. If an updated edition of the book were printed with extra chapters, more likely than not you'd fail to find the same text if you followed those same instructions. However, if the instructions were changed to, say, "Find the chapter on still-life painting, the section on using watercolors, and the paragraph on positioning light sources," you'd be able to find that even in a reprinted edition with extra pages and chapters, albeit with perhaps a little more effort than the first request required.
Books aren't particularly dynamic examples, but given something like a web page, where the information could be changed daily, or even hourly, can you see why it would be of more use to give the second set of directions than the first? The same principle applies with the DOM. Navigating the DOM in a hierarchical fashion, rather than in a strictly linear way, makes much more sense. When you treat the DOM as a tree, it becomes easy to navigate the page in this fashion. Consider how you locate files on Windows using Windows Explorer, which creates a tree view of folders through which you can drill down. Instead of looking for a file alphabetically, you locate it by going into a particular folder.
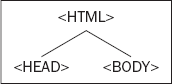
The rules for creating trees are simple. You start at the top of the tree with the document and the element that contains all other elements in the page. The document is the root node. A node is just a point on the tree representing a particular element or attribute of an element, or even the text that an element contains. The root node contains all other nodes, such as the DTD declaration, the XML declaration if applicable, and the root element (the HTML or XML element that contains all other elements). The root element should always be the <html/> element in an HTML document. Underneath the root element are the HTML elements that the root element contains. Typically an HTML page will have <head/> and <body/> elements inside the <html/> element. These elements are represented as nodes underneath the root element's node, which itself is underneath the root node at the top of the tree (see Figure 12-1).
The two nodes representing the <head/> and <body/> elements are examples of child nodes, and the <html/> element's node above them is a parent node. Since the <head/> and <body/> elements are both child nodes of the <html/> element, they both go on the same level underneath the parent node <html/> element. The <head/> and <body/> elements in turn contain other child nodes/HTML elements, which will appear at a level underneath their nodes. So child nodes can also be parent nodes. Each time you encounter a set of HTML elements within another element, they each form a separate node at the same level on the tree. The easiest way of explaining this clearly is with an example.
Let's consider a basic HTML page such as this:
<!DOCTYPE html PUBLIC "-//W3C//DTD XHTML 1.0 Transitional//EN"
"http://www.w3.org/TR/xhtml1/DTD/xhtml1-transitional.dtd">
<html xmlns="http://www.w3.org/1999/xhtml">
<head>
</head>
<body>
<h1>My Heading</h1>
<p>This is some text in a paragraph.</p>
</body>
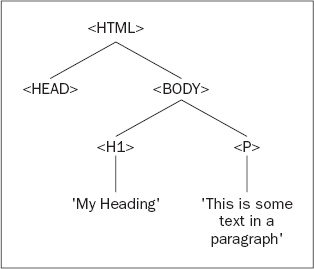
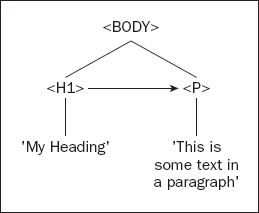
</html>The <html/> element contains <head/> and <body/> elements. Only the <body/> element actually contains anything. It contains an <h1/> element and a <p/> element. The <h1/> element contains the text My Heading. When you reach an item, such as text, an image, or an element, that contains no others, the tree structure will terminate at that node. Such a node is termed a leaf node. You then continue to the <p/> node, which contains some text, which is also a node in the document. You can depict this with the tree structure shown in Figure 12-2.
Simple, eh? This example is almost too straightforward, so let's move on to a slightly more complex one that involves a table as well.
<!DOCTYPE html PUBLIC "-//W3C//DTD XHTML 1.0 Transitional//EN"
    "http://www.w3.org/TR/xhtml1/DTD/xhtml1-transitional.dtd">

<html xmlns="http://www.w3.org/1999/xhtml">
<head>
    <title>This is a test page</title>
</head>
<body>
    <span>Below is a table. . .</span>
    <table border="1">
        <tr>
           <td>Row 1 Cell 1</td>
           <td>Row 1 Cell 2</td>
        </tr>
        <tr>
           <td>Row 2 Cell 1</td>
           <td>Row 2 Cell 2</td>
        </tr>
    </table>
</body>
</html>
There is nothing out of the ordinary here; the document contains a table with two rows with two cells in each row. You can once again represent the hierarchical structure of your page (for example, the fact that the <html/> element contains a <head/> and a <body/> element, and that the <head/> element contains a <title/> element, and so on) using your tree structure, as shown in Figure 12-3.
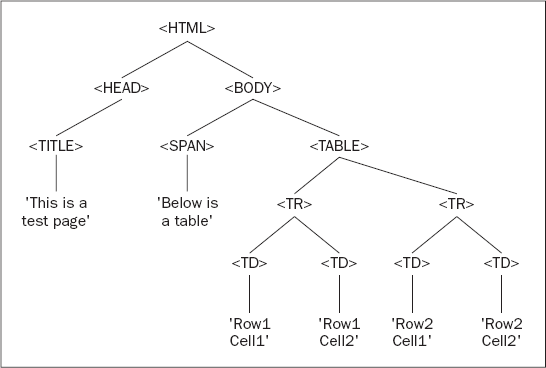
The top level of the tree is simple enough; the <html/> element contains <head/> and <body/> elements. The <head/> element in turn contains a <title/> element and the <title/> element contains some text. This text node is a child node that terminates the branch (a leaf node). You can then go back to the next node, the <body/> element node, and go down that branch. Here you have two elements contained within the <body/> element, the <span/> and <table/> elements. Although the <span/> element contains only text and terminates there, the <table/> element contains two rows (<tr/>), and the two <tr/> elements contain two table cell (<td/>) elements. Only then do you get to the bottom of the tree with the text contained in each table cell. Your tree is now a complete representation of your HTML code.
What you have seen so far has been highly theoretical, so let's get a little more practical now.
The DOM provides you with a concrete set of objects, properties, and methods that you can access through JavaScript to navigate the tree structure of the DOM. Let's start with the set of objects, within the DOM, that is used to represent the nodes (elements, attributes, or text) on your tree.
Three objects, shown in the following table, are known as the base DOM objects.
Object | Description |
|---|---|
| Each node in the document has its own Node object |
This is a list of | |
This provides access by name rather than by index to all the |
This is where the DOM differs from the BOM quite extensively. The BOM objects have names that relate to a specific part of the browser, such as the window object, or the forms and images collections. As mentioned earlier, to be able to navigate in the web page as though it were a tree, you have to do it abstractly. You can have no prior knowledge of the structure of the page; everything ultimately is just a node. To move around from HTML element to HTML element, or element to attribute, you have to go from node to node. This also means you can add, replace, or remove parts of your web page without affecting the structure as a whole, as you're just changing nodes. This is why you have three rather obscure-sounding objects that represent your tree structure.
I've already mentioned that the top of your tree structure is the root node, and that the root node contains the XML declaration, the DTD, and the root element. Therefore you need more than just these three objects to represent your document. In fact there are different objects to represent the different types of nodes on the tree.
Since everything in the DOM is a node, it's no wonder that nodes come in a variety of types. Is the node an element, an attribute, or just plain text? The Node object has different objects to represent each possible type of node. The following is a complete list of all the different node type objects that can be accessed via the DOM. A lot of them won't concern you in this book, because they're better suited for XML documents and not HTML documents, but you should notice that your three main types of nodes, namely element, attribute, and text, are all covered.
Object | Description |
|---|---|
| The root node of the document |
The DTD or schema type of the XML document | |
A temporary storage space for parts of the document | |
A reference to an entity in the XML document | |
| An element in the document |
| An attribute of an element in the document |
A processing instruction | |
A comment in an XML document or HTML document | |
| |
A CDATA section within the XML document | |
| An unparsed entity in the DTD |
A notation declared within a DTD |
We won't go over most of these objects in this chapter, but if you need to navigate the DOM of an XML document, you will have to use them.
Each of these objects inherits all the properties and methods of the Node object, but also has some properties and methods of its own. You will be looking at some examples in the next section.
If you tried to look at the properties and methods of all the objects in the DOM, it would take up half the book. Instead you're going to actively consider only three of the objects, namely the Node object, the Element object, and the Document object. This is all you'll need to be able to create, amend, and navigate your tree structure. Also, you're not going to spend ages trawling through each of the properties and methods of these objects, but rather look only at some of the most useful properties and methods and use them to achieve specific ends.
Appendix C contains a relatively complete reference to the DOM, its objects, and their properties.
The Document reference type exposes various properties and methods that are very helpful to someone scripting the DOM. Its methods allow you to find individual or groups of elements and create new elements, attributes, and text nodes. Any DOM scripter should know these methods and properties, as they're used quite frequently.
The Document object's methods are probably the most important methods you'll learn. While many tools are at your disposal, the Document object's methods let you find, create, and delete elements in your page.
Let's say you have an HTML web page — how do you go about getting back a particular element on the page in script? The Document reference type exposes the follow methods to perform this task:
Methods of the Document Object | Description |
|---|---|
| Returns a reference (a node) to an element, when supplied with the value of the |
| Returns a reference (a node list) to a set of elements that have the same tag as the one supplied in the argument |
The first of the two methods, getElementById(), requires you to ensure that every element you want to quickly access in the page uses an id attribute, otherwise a null value (a word indicating a missing or unknown value) will be returned by your method. Let's go back to the first example and add some id attributes to the elements.
<!DOCTYPE html PUBLIC "-//W3C//DTD XHTML 1.0 Transitional//EN"
    "http://www.w3.org/TR/xhtml1/DTD/xhtml1-transitional.dtd">

<html xmlns="http://www.w3.org/1999/xhtml"><head>
    <title>example</title>
</head>
<body>
<h1 id="heading1">My Heading</h1>
<p id="paragraph1">This is some text in a paragraph</para>
</body>
</html>Now you can use the getElementById() method to return a reference to any of the HTML elements with id attributes on your page. For example, if you add the following code in the shaded section, you can find and reference the <h1/> element:
<!DOCTYPE html PUBLIC "-//W3C//DTD XHTML 1.0 Transitional//EN"
"http://www.w3.org/TR/xhtml1/DTD/xhtml1-transitional.dtd">
<html xmlns="http://www.w3.org/1999/xhtml">
<title>example</title>
</head>
<body>
<h1 id="heading1">My Heading</h1>
<p id="paragraph1">This is some text in a paragraph</para>
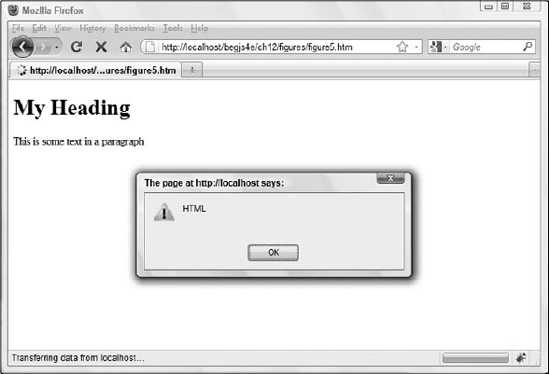
<script type="text/javascript">
alert(document.getElementById("heading1"));
</script>
</body>
</html>Figure 12-4 shows the result of this code in Firefox.
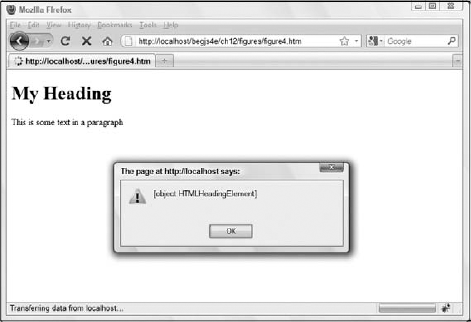
HTMLHeadingElementis an object of the HTML DOM. All HTML elements have a corresponding reference type in the DOM. See Appendix C for more objects of the HTML DOM.
You might have been expecting it to return something along the lines of <h1/> or <h1 id="heading1">, but all it's actually returning is a reference to the <h1/> element. This reference to the <h1/> element is more useful though, as you can use it to alter attributes of the element, such as by changing the color or size. You can do this via the style object.
<!DOCTYPE html PUBLIC "-//W3C//DTD XHTML 1.0 Transitional//EN"
    "http://www.w3.org/TR/xhtml1/DTD/xhtml1-transitional.dtd">

<html xmlns="http://www.w3.org/1999/xhtml">
<head>
    <title>example</title>
</head>
<body>
    <h1 id="heading1">My Heading</h1>
    <p id="paragraph1">This is some text in a paragraph</para>
    <script type="text/javascript">
        var h1Element = document.getElementById("heading1");
        h1Element.style.color = "red";
    </script>
</body>
</html>
If you display this in the browser, you see that you can directly influence the attributes of the <h1/> element in script, as you have done here by changing its text color to red.
The
styleobject points to the style attribute of an element; it allows you to change the CSS style assigned to an element. The style object will be covered later in the chapter.
The second of the two methods, getElementsByTagName(), works in the same way, but, as its name implies, it can return more than one element. If you were to go back to the example HTML document with the table and use this method to return the table cells (<td/>) in your code, you would get a node list containing a total of four table. You'd still have only one object returned, but this object would be a collection of elements. Remember that collections are array-like structures, so specify the index number for the specific element you want from the collection. You can use the square brackets if you wish; another alternative is to use the item() method of the NodeList object, like this:
<!DOCTYPE html PUBLIC "-//W3C//DTD XHTML 1.0 Transitional//EN"
    "http://www.w3.org/TR/xhtml1/DTD/xhtml1-transitional.dtd">

<html xmlns="http://www.w3.org/1999/xhtml">
<head>
    <title>This is a test page</title>
</head>
<body>
    <span>Below is a table. . .   </span>
    <table border="1">
        <tr>
            <td>Row 1 Cell 1</td>
            <td>Row 1 Cell 2</td>
        </tr>
        <tr>
            <td>Row 2 Cell 1</td>
            <td>Row 2 Cell 2</td>
        </tr>
    </table>
<script type="text/javascript">
var tdElement = document.getElementsByTagName("td").item(0);
tdElement.style.color = "red";
</script>
</body>
</html>If you ran this example, once again using the style object, it would alter the style of the contents of the first cell in the table. If you wanted to change the color of all the cells in this way, you could loop through the node list, like this:
<script type="text/javascript">
    var tdElements = document.getElementsByTagName("td");
    var length = tdElements.length;

    for (var i = 0; i < length; i++)
    {
        tdElements[i].style.color = "red";
    }
</script>
One thing to note about the getElementsByTagName() method is that it takes the element names within quotation marks and without the angle brackets <> that normally surround tags.
The Document object also boasts some methods for creating elements and text, shown in the following table.
Methods of the Document Object | Description |
|---|---|
| Creates an element node with the specified tag name. Returns the created element. |
| Creates and returns a text node with the supplied text. |
The following code demonstrates the use of these methods:
var pElement = document.createElement("p");
var text = document.createTextNode("This is some text.");
This code creates a <p/> element and stores its reference in the pElement variable. It then creates a text node containing the text This is some text. and stores its reference in the text variable.
It's not enough to create nodes, however; you have to add them to the document. We'll discuss how to do this in just a bit.
You've now got a reference to individual elements on the page, but what about the tree structure mentioned earlier? The tree structure encompasses all the elements and nodes on the page and gives them a hierarchical structure. If you want to reference that structure, you need a particular property of the document object that returns the outermost element of your document. In HTML, this should always be the <html/> element. The property that returns this element is documentElement, as shown in the following table.
Property of the Document Object | Description |
|---|---|
Returns a reference to the outermost element of the document (the root element, for example |
You can use documentElement as follows. If you go back to the simple HTML page, you can transfer your entire DOM into one variable like this:
<!DOCTYPE html PUBLIC "-//W3C//DTD XHTML 1.0 Transitional//EN"
    "http://www.w3.org/TR/xhtml1/DTD/xhtml1-transitional.dtd">

<html xmlns="http://www.w3.org/1999/xhtml">
<head>
    <title>example</title>
</head>
<body>
    <h1 id="heading1">My Heading</h1>
    <p id="paragraph1">This is some text in a paragraph</p>
    <script type="text/javascript">
        var container = document.documentElement;
    </script>
</body>
</html>
The variable container now contains the root element, which is <html/>. The documentElement property returned a reference to this element in the form of an object, an Element object to be precise. The Element object has its own set of properties and methods. If you want to use them, you can refer to them by using the variable name, followed by the method or property name.
container.elementObjectProperty
Fortunately, the Element object has only one property.
The Element object is quite simple, especially compared to the Node object (which you'll be introduced to later). It exposes only a handful of members (properties and methods).
Member Name | Description |
|---|---|
Gets the element's tag name | |
| Gets the value of an attribute |
| Sets an attribute with a specified value |
| Removes a specific attribute and its value from the element |
The sole property of the Element object is a reference to the tag name of the element: the tagName property.
In the previous example, the variable container contained the <html/> element. Add the following highlighted line, which makes use of the tagName property.
<!DOCTYPE html PUBLIC "-//W3C//DTD XHTML 1.0 Transitional//EN"
    "http://www.w3.org/TR/xhtml1/DTD/xhtml1-transitional.dtd">

<html xmlns="http://www.w3.org/1999/xhtml">
<head>
    <title>example</title>
</head>
<body>
    <h1 id="heading1">My Heading</h1>
    <p id="paragraph1">This is some text in a paragraph</p>
    <script type="text/javascript">
        var container = document.documentElement;
        alert(container.tagName);
    </script>
</body>
</html>
This code will now return proof that your variable container holds the outermost element, and by implication all other elements within it (see Figure 12-5).
If you want to set any element attributes, other than the style attribute, you should use the DOM-specific methods of the Element object.
The three methods you can use to return and alter the contents of an HTML element's attributes are getAttribute(), setAttribute(), and removeAttribute(), as shown in the following table.
Methods of the Element Object | Description |
|---|---|
| Returns the value of the supplied attribute. Returns |
| Sets the value of an attribute. |
| Removes the value of an attribute and replaces it with the default value. |
Let's take a quick look at how these methods work now.
Try It Out: Playing with Attributes
Open your text editor and type the following code.
<!DOCTYPE html PUBLIC "-//W3C//DTD XHTML 1.0 Transitional//EN"
    "http://www.w3.org/TR/xhtml1/DTD/xhtml1-transitional.dtd">

<html xmlns="http://www.w3.org/1999/xhtml">
<head>
    <title>Chapter 12: Example 1</title>
</head>
<body>
    <p id="paragraph1">This is some text.</p>
    <script type="text/javascript">
        var pElement = document.getElementById("paragraph1");
        pElement.setAttribute("align", "center");

        alert(pElement.getAttribute("align"));

        pElement.removeAttribute("align");
    </script>
</body>
</html>
Save this as ch12_examp1.htm and open it in a browser. You'll see the text of the <p/> element in the center of the screen and an alert box displaying the text center (Figure 12-6).

When you click the OK button, you'll see the text become left-aligned (Figure 12-7).
This HTML page contains one <p/> element with an id value of paragraph1. You use this value in the JavaScript code to find the element node and store its reference in the pElement variable with the getElementById() method.
var pElement = document.getElementById("paragraph1");Now that you have a reference to the element, you use the setAttribute() method to set the align attribute to center.
pElement.setAttribute("align", "center");The result of this code moves the text to the center of the browser's window.
You then use the getAttribute() method to get the align attribute's value and display it in an alert box:
alert(pElement.getAttribute("align"));This code displays the value "center" in the alert box.
Finally, you remove the align attribute with the removeAttribute() method, effectively making the text left-aligned.
Strictly speaking, the
alignattribute is deprecated under HTML 4.0, but you used it because it works and because it has one of the most easily demonstrable visual effects on a web page.
You now have your element or elements from the web page, but what happens if you want to move through your page systematically, from element to element or from attribute to attribute? This is where you need to step back to a lower level. To move among elements, attributes, and text, you have to move among nodes in your tree structure. It doesn't matter what is contained within the node, or rather, what sort of node it is. This is why you need to go back to one of the objects of the core DOM specification. Your whole tree structure is made up of these base-level Node objects.
The following table lists some common properties of the Node object that provide information about the node, whether it is an element, attribute, or text, and enable you to move from one node to another.
Properties of the Node Object | Description of Property |
|---|---|
| Returns the first child node of an element |
| Returns the last child node of an element |
| Returns the previous child node of an element at the same level as the current child node |
| Returns the next child node of an element at the same level as the current child node |
Returns the root node of the document that contains the node (note this is not available in IE 5 or 5.5) | |
| Returns the element that contains the current node in the tree structure |
| Returns the name of the node |
| Returns the type of the node as a number |
| Gets or sets the value of the node in plain text format |
Let's take a quick look at how some of these properties work. Consider this familiar example:
<!DOCTYPE html PUBLIC "-//W3C//DTD XHTML 1.0 Transitional//EN"
    "http://www.w3.org/TR/xhtml1/DTD/xhtml1-transitional.dtd">

<html xmlns="http://www.w3.org/1999/xhtml">
<head>
    <title>example</title>
</head>
<body>
    <h1 id="heading1">My Heading</h1>
    <p id="paragraph1">This is some text in a paragraph</p>
    <script type="text/javascript">
        var h1Element = document.getElementById("heading1");
        h1Element.style.color = "red";
    </script>
</body>
</html>
You can now use h1Element to navigate your tree structure and make whatever changes you desire. The following code uses h1Element as a starting point to find the <p/> element and change its text color:
<!DOCTYPE html PUBLIC "-//W3C//DTD XHTML 1.0 Transitional//EN"
    "http://www.w3.org/TR/xhtml1/DTD/xhtml1-transitional.dtd">

<html xmlns="http://www.w3.org/1999/xhtml">
<head>
    <title>example</title>
</head>
<body>
    <h1 id="heading1">My Heading</h1>
    <p id="paragraph1">This is some text in a paragraph</p>
    <script type="text/javascript">
        var h1Element = document.getElementById("heading1");
        h1Element.style.color = "red";

        var pElement;
        if (h1Element.nextSibling.nodeType == 1)
        {
pElement = h1Element.nextSibling;
}
else
{
pElement = h1Element.nextSibling.nextSibling;
}
pElement.style.color = "red";
</script>
</body>
</html>This code demonstrates a fundamental difference between IE's DOM and the DOM present in other browsers. Firefox's, Safari's, Chrome's, and Opera's DOM treat everything as a node in the DOM tree, including the whitespace between elements. On the other hand, IE strips out this unnecessary whitespace. So to locate the <p/> element in the previous example, a sibling to the <h1/> element, it is required to check the next sibling's nodeType property. An element's node type is 1 (text nodes are 3). If the nextSibling's nodeType is 1, then you assign that sibling's reference to pElement. If not, you get the next sibling (the <p/> element) of h1Element's sibling (the whitespace text node).
In effect, you are navigating through the tree structure as shown in Figure 12-8.
The same principles also work in reverse. You can go back and change the code to navigate from the <p/> element to the <h1/> element.
<!DOCTYPE html PUBLIC "-//W3C//DTD XHTML 1.0 Transitional//EN"
    "http://www.w3.org/TR/xhtml1/DTD/xhtml1-transitional.dtd">

<html xmlns="http://www.w3.org/1999/xhtml">
<head>
    <title>example</title>
</head>
<body>
    <h1 id="heading1">My Heading</h1>
    <p id="paragraph1">This is some text in a paragraph</p>
    <script type="text/javascript">
        var pElement = document.getElementById("paragraph1");
pElement.style.color = "red";
var h1Element;
if (pElement.previousSibling.nodeType == 1)
{
h1Element = pElement.previousSibling;
}
else
{
h1Element = pElement.previousSibling.previousSibling;
}
h1Element.style.color = "red";
</script>
</body>
</html>What you're doing here is the exact opposite; you find the <p/> by passing the value of its id attribute to the getElementById() method and storing the returned element reference to the pElement variable. You then find the correct previous sibling so that your code works in all browsers, and you change its text color to red.
Try It Out: Navigating Your HTML Document Using the DOM
Up until now, you've been cheating, because you haven't truly navigated your HTML document. You've just used document.getElementById() to return an element and navigated to different nodes from there. Now let's use the documentElement property of the document object and do this properly. You'll start at the top of your tree and move down through the child nodes to get at those elements; then you'll navigate through your child nodes and change the properties in the same way as before.
Type the following into your text editor:
<!DOCTYPE html PUBLIC "-//W3C//DTD XHTML 1.0 Transitional//EN"
    "http://www.w3.org/TR/xhtml1/DTD/xhtml1-transitional.dtd">

<html xmlns="http://www.w3.org/1999/xhtml">
<head>
    <title>Chapter 12: Example 2</title>
</head>
<body>
    <h1 id="heading1">My Heading</h1>
    <p id="paragraph1">This is some text in a paragraph</p>

    <script type="text/javascript">
    var htmlElement; // htmlElement stores reference to <html>
    var headElement; // headingElement stores reference to <head>
    var bodyElement; // bodyElement stores reference to <body>
    var h1Element; // h1Element stores reference to <h1>
    var pElement; // pElement stores reference to <para>

    htmlElement = document.documentElement;
    headElement = htmlElement.firstChild;

    alert(headElement.tagName);

    if (headElement.nextSibling.nodeType == 3)
{
bodyElement = headElement.nextSibling.nextSibling;
}
else
{
bodyElement = headElement.nextSibling;
}
alert(bodyElement.tagName);
if (bodyElement.firstChild.nodeType == 3)
{
h1Element = bodyElement.firstChild.nextSibling;
}
else
{
h1Element = bodyElement.firstChild;
}
alert(h1Element.tagName);
h1Element.style.fontFamily = "Arial";
if (h1Element.nextSibling.nodeType == 3)
{
pElement = h1Element.nextSibling.nextSibling;
}
else
{
pElement = h1Element.nextSibling;
}
alert(pElement.tagName);
pElement.style.fontFamily = "Arial";
if (pElement.previousSibling.nodeType==3)
{
h1Element = pElement.previousSibling.previousSibling
}
else
{
h1Element = pElement.previousSibling
}
h1Element.style.fontFamily = "Courier"
</script>
</body>
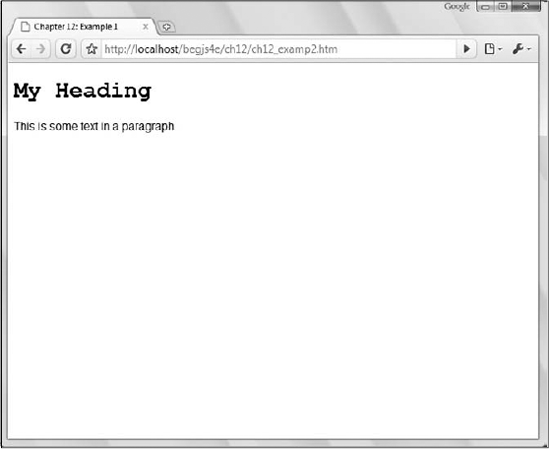
</html>Save this as ch12_examp2.htm. Then open the page in your browser, clicking OK in each of the message boxes until you see the page shown in Figure 12-9 (unfortunately, IE does not render the style changes until all alert boxes have been opened and closed).
You've hopefully made this example very transparent by adding several alerts to demonstrate where you are along each section of the tree. You've also named the variables with their various elements, to give a clearer idea of what is stored in each variable. (You could just as easily have named them a, b, c, d, and e, so don't think you need to be bound by this naming convention.)
You start at the top of the script block by retrieving the whole document using the documentElement property.
var htmlElement = document.documentElement;
The root element is the <html/> element, hence the name of your first variable. Now if you refer to your tree, you'll see that the HTML element must have two child nodes: one containing the <head/> element and the other containing the <body/> element. You start by moving to the <head/> element. You get there using the firstChild property of the Node object, which contains your <html/> element. You use your first alert to demonstrate that this is true.
alert(headingElement.tagName);
Your <body/> element is your next sibling across from the <head/> element, so you navigate across by creating a variable that is the next sibling from the <head/> element.
if (headingElement.nextSibling.nodeType == 3)
{
    bodyElement = headingElement.nextSibling.nextSibling;
}
else
{
bodyElement = headingElement.nextSibling;
}
alert(bodyElement.tagName);Here you check to see what the nodeType of the nextSibling of headingElement is. If it returns 3, (remember that nodeType 3 is a text node), you set bodyElement to be the nextSibling of the nextSibling of headingElement; otherwise you just set it to be the nextSibling of headingElement.
You use an alert to prove that you are now at the <body/> element.
alert(bodyElement.tagName);
The <body/> element in this page also has two children, the <h1/> and <p/> elements. Using the firstChild property, you move down to the <h1/> element. Again you check whether the child node is whitespace for non-IE browsers. You use an alert again to show that you have arrived at <h1/>.
if (bodyElement.firstChild.nodeType == 3)
{
    h1Element = bodyElement.firstChild.nextSibling;
}
else
{
    h1Element = bodyElement.firstChild;
}

alert(h1Element.tagName);
After the third alert, the style will be altered on your first element, changing the font to Arial.
h1Element.style.fontFamily = "Arial";
You then navigate across to the <p/> element using the nextSibling property, again checking for whitespace.
if (h1Element.nextSibling.nodeType == 3)
{
    pElement = h1Element.nextSibling.nextSibling;
}
else
{
    pElement = h1Element.nextSibling;
}

alert(pElement.tagName);
You change the <p/> element's font to Arial also.
pElement.style.fontFamily = "Arial";
Finally, you use the previousSibling property to move back in your tree to the <h1/> element and this time change the font to Courier.
if (pElement.previousSibling.nodeType==3)
{
    h1Element = pElement.previousSibling.previousSibling
}
else
{
    h1Element = pElement.previousSibling
}

h1Element.style.fontFamily = "Courier";
This is a fairly easy example to follow because you're using the same tree structure you created with diagrams, but it does show how the DOM effectively creates this hierarchy and that you can move around within it using script.
While the Node object's properties enable you to navigate the DOM, its methods provide the completely different ability to add and remove nodes from the DOM, thus fundamentally altering the structure of the HTML document. The following table lists these methods.
Try It Out: Creating HTML Elements and Text with DOM Methods
You'll create a web page with just paragraph <p/> and heading <h1/> elements, but instead of HTML you'll use the DOM properties and methods to place these elements on the web page. Start up your preferred text editor and type the following:
<!DOCTYPE html PUBLIC "-//W3C//DTD XHTML 1.0 Transitional//EN"
    "http://www.w3.org/TR/xhtml1/DTD/xhtml1-transitional.dtd">

<html xmlns="http://www.w3.org/1999/xhtml">
<head>
    <title>Chapter 12: Example 3</title>
</head>
<body>
    <script type="text/javascript">
        var newText = document.createTextNode("My Heading");
        var newElem = document.createElement("h1");

        newElem.appendChild(newText);
        document.body.appendChild(newElem);

        newText = document.createTextNode("This is some text in a paragraph");
        newElem = document.createElement("p");

        newElem.appendChild(newText);
        document.body.appendChild(newElem);
    </script>
</body>
</html>
Save this page as ch12_examp3.htm and open it in a browser (Figure 12-10).
It all looks a bit dull and tedious, doesn't it? And yes, you could have done this much more simply with HTML. That isn't the point, though. The idea is that you use DOM properties and methods, accessed with JavaScript, to insert these features. The first two lines of the script block are used to define the variables in your script, which are initialized to hold the text you want to insert into the page and the HTML element you wish to insert.
var newText = document.createTextNode("My Heading");
var newElem = document.createElement("h1");
You start at the bottom of your tree first, by creating a text node with the createTextNode() method. Then use the createElement() method to create an HTML heading.
At this point, the two variables are entirely separate from each other. You have a text node, and you have an <h1/> element, but they're not connected. The next line enables you to attach the text node to your HTML element. You reference the HTML element you have created with the variable name newElem, use the appendChild() method of your node, and supply the contents of the newText variable you created earlier as a parameter.
newElem.appendChild(newText);
Let's recap. You created a text node and stored it in the newText variable. You created an <h1/> element and stored it in the newElem variable. Then you appended the text node as a child node to the <h1/> element. That still leaves you with a problem: You've created an element with a value, but the element isn't part of your document. You need to attach the entirety of what you've created so far to the document body. Again, you can do this with the appendChild() method, but this time supply it to the document.body object (which, too, is a Node).
document.body.appendChild(newElem);
This completes the first part of your code. Now all you have to do is repeat the process for the <p/> element.
newText = document.createTextNode("This is some text in a paragraph");
newElem = document.createElement("p");

newElem.appendChild(newText);
document.body.appendChild(newElem);
You create a text node first; then you create an element. You attach the text to the element, and finally you attach the element and text to the body of the document.
It's important to note that the order in which you create nodes does not matter. This example had you create the text nodes before the element nodes; if you wanted, you could have created the elements first and the text nodes second.
However, the order in which you append nodes is very important for performance reasons. Updating the DOM can be an expensive process, and performance can suffer if you make many changes to the DOM. For example, this example updated the DOM only two times by appending the completed elements to the document's body. It would require four updates if you appended the element to the document's body and then appended the text node to the element. As a rule of thumb, only append completed element nodes (that is, the element, its attributes, and any text) to the document whenever you can.
Now that you can navigate and make changes to the DOM, let's look further into manipulating DOM nodes.
As mentioned at the very beginning of this chapter, Dynamic HTML is the manipulation of an HTML page after it's loaded into the browser. Up to this point, you've examined the properties and methods of the basic DOM objects and learned how to traverse the DOM through JavaScript.
Throughout the previous section, you saw some examples of manipulating the DOM; more specifically, you saw that you can change the color and font family of text contained within an element. In this section, you'll expand on that knowledge.
As you saw in the previous section, the DOM holds the tools you need to find and access HTML elements; you used the getElementById() method quite frequently, and through examples you saw how easy it was to find specific elements in the page.
When scripting the DOM, chances are you have a pretty good idea of what elements you want to manipulate. The easiest way to find those elements is to use the id attribute and thus the getElementById() method. Don't be afraid to assign id attributes to your HTML elements; it is by far the easiest and most efficient way to find elements within the page.
Probably the most common DOM manipulation is to change the way an element looks. Such a change can create an interactive experience for visitors to your web site and can even be used to alert them to important information or that an action is required by them. Changing the way an element looks consists almost exclusively of changing CSS properties for an HTML element. You can do this two ways through JavaScript:
Change each CSS property with the
styleproperty.Change the value of the element's
classattribute.
In order to change specific CSS properties, you must look to the style property. All modern browsers implement this object, which maps directly to the element's style attribute. This object contains CSS properties, and by using it you can change any CSS property that the browser supports. You've already seen the style property in use, but here's a quick refresher:
element.style.cssProperty = value;
The CSS property names generally match those used in a CSS style sheet; therefore, changing the text color of an element requires the use of the color property, like this:
var divAdvert = document.getElementById("divAdvert");  //Get the desired element

divAdvert.style.color = "blue";  //Change the text color to blue
There are some cases, however, in which the property name is a little different from the one seen in a CSS file. CSS properties that contain a hyphen (-) are a perfect example of this exception. In the case of these properties, you remove the hyphen and capitalize the first letter of the word that follows the hyphen. The following code shows the incorrect and correct ways to do this:
divAdvert.style.background-color = "gray";  //Wrong

divAdvert.style.backgroundColor = "gray";  //Correct
You can also use the style object to retrieve styles that have previously been declared. However, if the style property you try to retrieve has not been set with the style attribute (inline styles) or with the style object, you will not retrieve the property's value. Consider the following HTML containing a style sheet and <div/> element:
<style type="text/css">
#divAdvert
{
    background-color: gray;
}
</style>

<div id="divAdvert" style="color: green">I am an advertisement.</div>
When the browser renders this element, it will have green text on a gray background. If you had used the style object to retrieve the value of both the background-color and color properties, you'd get the following mixed results:
var divAdvert = document.getElementById("divAdvert");  // Get the desired element
alert(divAdvert.style.backgroundColor);  // Alerts an empty string
alert(divAdvert.style.color);  // Alerts green
You get these results because the style object maps directly to the style attribute of the element. If the style declaration is set in the <style/> block, you cannot retrieve that property's value with the style object.
Try It Out: Using the style Object
Let's look at a simple example of changing the appearance of some text by using the style object.
<!DOCTYPE html PUBLIC "-//W3C//DTD XHTML 1.0 Transitional//EN"
    "http://www.w3.org/TR/xhtml1/DTD/xhtml1-transitional.dtd">

<html xmlns="http://www.w3.org/1999/xhtml">
<head>
    <title>Chapter 12: Example 4</title>
    <style type="text/css">
    #divAdvert
    {
        font: 12pt arial;
    }
    </style>
    <script type="text/javascript">
    function divAdvert_onMouseOver()
    {
        var divAdvert = document.getElementById("divAdvert");
        divAdvert.style.fontStyle = "italic";
        divAdvert.style.textDecoration = "underline";
    }

    function divAdvert_onMouseOut()
    {
        var divAdvert = document.getElementById("divAdvert");
        divAdvert.style.fontStyle = "normal";
        divAdvert.style.textDecoration = "none";
    }
    </script>
</head>
<body>
    <div id="divAdvert" onmouseover="divAdvert_onMouseOver()"
        onmouseout="divAdvert_onMouseOut()">
        Here is an advertisement.
    </div>
</body>
</html>
Save this as ch12_examp4.htm. When you run this in your browser, you should see a single line of text, as shown in Figure 12-11.
Roll your mouse over the text, and you'll see it become italicized and underlined, as shown in Figure 12-12.

And when you move your mouse off of the text, it returns to normal.
In the page's body, a <div/> element is defined with an id of divAdvert. Hook up the mouseover and mouseout events to the divAdvert_onMouseOver() and divAdvert_onMouseOut() functions, respectively, which are defined in the <script/> block in the head of the page.
When the mouse pointer enters the <div/> element, the divAdvert_onMouseOver() function is called.
function divAdvert_onMouseOver()
{
    var divAdvert = document.getElementById("divAdvert");
    divAdvert.style.fontStyle = "italic";
    divAdvert.style.textDecoration = "underline";
}
Before you can do anything to the <div/> element, you must first retrieve it. You do this simply by using the getElementById() method. Now that you have the element, you manipulate its style by first italicizing the text with the fontStyle property. Next, you underline the text by using the textDecoration property and assigning its value to underline.
Naturally, you do not want to keep the text italicized and underlined; so the mouseout event allows you to change the text back to its original state. When this event fires, the divAdvert_onMouseOut() function is called.
function divAdvert_onMouseOut()
{
    var divAdvert = document.getElementById("divAdvert");
    divAdvert.style.fontStyle = "normal";
    divAdvert.style.textDecoration = "none";
}
The code for this function resembles the code for the divAdvert_onMouseOver() function. First, you retrieve the divAdvert element and then set the fontStyle property to normal, thus removing the italics. Then you set the textDecoration to none, which removes the underline from the text.
You can assign a CSS class to elements by using the element's class attribute. This attribute is exposed in the DOM by the className property and can be changed through JavaScript to associate a different style rule with the element.
element.className = sNewClassName;
Using the className property to change an element's style is advantageous in two ways:
It reduces the amount of JavaScript you have to write, which no one is likely to complain about.
It keeps style information out of the JavaScript file and puts it into the CSS file where it belongs. Making any type of changes to the style rules is easier because you do not have to have several files open in order to change them.
Changing the appearance of an element is an important pattern in DHTML, and it finds its place in many DHTML scripts. However, there is more to DHTML than just changing the way content appears on the page; you can also change the position of an element with JavaScript.
Moving content with JavaScript is just as easy as using the style object. You use the position property to change the type of position desired, and by using the left and top properties, you can position the element.
var divAdvert = document.getElementById("divAdvert");

divAdvert.style.position = "absolute";
divAdvert.style.left = "100px"; //Set the left position
divAdvert.style.top = "100px";  //Set the right position
This code first retrieves the divAdvert element. Then it sets the element's position to absolute and moves the element 100 pixels from the left and top edges. Notice the addition of px to the value assigned to the positions. Many browsers require you to specify a unit when assigning a positional value; otherwise, the browser will not position the element.
Note that positioning elements requires the position of absolute or relative.
Try It Out: Moving an Element Around
Moving an element around on the page, as you've seen, is quite similar to changing other styles with the style object. However, the ability to move an element on the page is used quite often, and you will definitely see it later in the chapter. Therefore, you are going to build a page that enables you to specify the location of an element through form fields.
<!DOCTYPE html PUBLIC "-//W3C//DTD XHTML 1.0 Transitional//EN"
    "http://www.w3.org/TR/xhtml1/DTD/xhtml1-transitional.dtd">

<html xmlns="http://www.w3.org/1999/xhtml">
<head>
    <title>Chapter 12: Example 6</title>
    <style type="text/css">
    #divBox
    {
        position: absolute;
        background-color: silver;
        width: 150px;
        height: 150px;
    }
    input
    {
        width: 100px;
    }
    </style>
    <script type="text/javascript">
    function moveBox() {
        var divBox = document.getElementById("divBox");
        var inputLeft = document.getElementById("inputLeft");
var inputTop = document.getElementById("inputTop");
divBox.style.left = parseInt(inputLeft.value) + "px";
divBox.style.top = parseInt(inputTop.value) + "px";
}
</script>
</head>
<body>
<div id="divBox">
<form id="formBoxController" onsubmit="moveBox(); return false;"
action="">
<para>
Left:
<input type="text" id="inputLeft" />
</para>
<para>
Top:
<input type="text" id="inputTop" />
</para>
<para>
<input type="submit" value="Move The Box" />
</para>
</form>
</div>
</body>
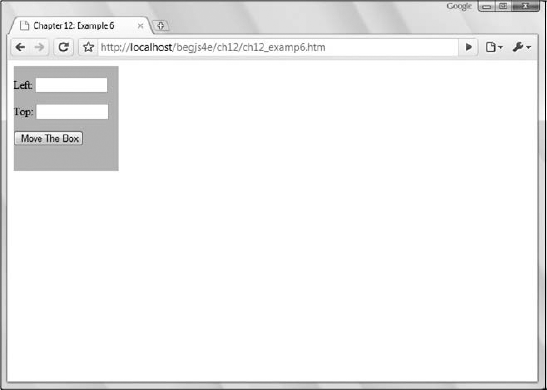
</html>Save this file as ch12_examp6.htm. When you load the page into your browser, you should see a silver box in the upper-left corner of the screen. Inside this box, you'll see a form with two fields and a button, as shown in Figure 12-13.
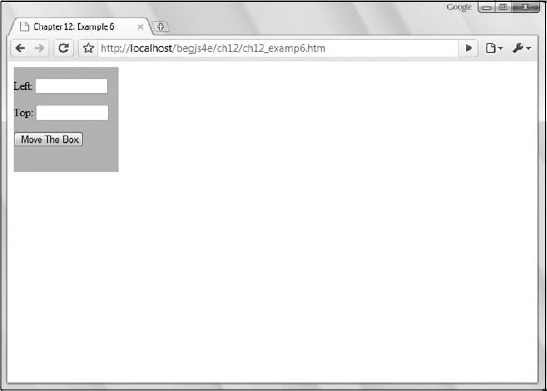
When you enter numerical values in the text fields and click the button, the box will move to the coordinates you specified. Figure 12-14 shows the box moved to 100,100.
In the body of the page, you define a <div/> tag with an id of divBox.
<div id="divBox"></div>
Inside this element is a form consisting of three <input/> elements. Two of these are text boxes in which you can input the left and top positions to move the <div/> to, and these have ids of inputLeft and inputTop, respectively. The third <input/> is a Submit button.
<div id="divBox">
    <form id="formBoxController" onsubmit="moveBox(); return false;" action="">
        <p>Left: <input type="text" value="0" id="inputLeft" /></p>
        <p>Top: <input type="text" value="0" id="inputTop" /></p>
        <p><input type="submit" value="Move The Box" /></p>
    </form>
</div>
When you click the Submit button, the browser fires the submit event for the form. When a submit button is pressed, the browser attempts to send data to the web server. This attempt at communication causes the browser to reload the page, making any change you made through DHTML reset itself. Therefore, you must force the browser to not reload the page. You do this by setting the submit event to return a value of false.
In order for the <div/> element to be moved around on the page, it needs to be positioned. This example positions the element absolutely, although it would be possible to position it relatively as well.
#divBox
{
    position: absolute;
background-color: silver;
width: 150px;
height: 150px;
}Aside from the position, you also specify the box to have a background color of silver, and set the height and width to be 150 pixels each, to make it a square. At this size, however, the text boxes in the form actually extend past the box's borders. In order to fix this, set a rule for the <input/> element as well.
input
{
    width: 100px;
}
By setting the <input/> elements to be 100 pixels wide, you can fit everything nicely into the box. So at this point, the HTML is primarily finished and it's styled. All that remains is to write the JavaScript to retrieve the values from the form fields and move the box to the coordinates provided by the form.
The function responsible for this is called moveBox(), and it is the only function on this page.
function moveBox() {
    var divBox = document.getElementById("divBox");  //Get the box
    var inputLeft = document.getElementById("inputLeft");  //Get one form field
    var inputTop = document.getElementById("inputTop");  //Get the other one
The function starts by retrieving the HTML elements needed to move the box. First it gets the <div/> element itself, followed by the text boxes for the left and top positions, and stores them in the inputLeft and inputTop variables, respectively. With the needed elements selected, you can now move the box.
divBox.style.left = parseInt(inputLeft.value) + "px";
    divBox.style.top = parseInt(inputTop.value) + "px";
}
These two new lines to moveBox() do just that. In the first line, you use the value property to retrieve the value of the text box for the left position. You pass that value to the parseInt() function because you want to make sure that value is an integer. Then append px to the number, making sure that all browsers will position the box correctly. Now do the same thing for positioning the top: get the value from the inputTop text box, pass it to parseInt(), and append px to it.
As you can see, moving an element around the page is quite simple and is a building block toward another effect: animation.
Changing the appearance and position of an element are important patterns in DHTML, and they find their places in many DHTML scripts. Perhaps the most creative use of DHTML is in animating content on the page. You can perform a variety of animations with DHTML. You can fade text elements or images in and out, give them a swipe animation (making it look like as if they are wiped onto the page), and animate them to move around on the page.
Animation can give important information the flair it needs to be easily recognized by your reader, as well as adding a "that's cool" factor. Performing animation with DHTML follows the same principles of any other type of animation: You make seemingly insignificant changes one at a time in a sequential order until you reach the end of the animation. Essentially, with any animation, you have the following requisites:
The starting state
The movement towards the final goal
The end state; stopping the animation
Animating an absolutely positioned element, as you're going to do in this section, is no different. First, with CSS, position the element at the start location. Then perform the animation up until you reach the end point, which signals the end of the animation.
In this section, you'll learn how to animate content to bounce back and forth between two points. To do this, you need one important piece of information: the content's current location.
The DOM in modern browsers exposes the offsetTop and offsetLeft properties of an HTML element object. These two properties return the calculated position relative to the element's parent element: offsetTop tells you the top location, and offsetLeft tells you the left position. The values returned by these properties are numerical values, so you can easily check to see where your element currently is in the animation. For example:
var endPointX = 394;

if (element.offsetLeft < endPointX)
{
    // Continue animation
}
The preceding code specifies the end point (in this case, 394) and assigns it to the endPointX variable. You can then check to see if the element's offsetLeft value is currently less than that of the end point. If it is, you can continue the animation. This example brings us to the next topic in content movement: performing the animation.
In order to perform an animation, you need to modify the top and left properties of the style object incrementally and quickly. In DHTML, you do this with periodic function execution until it's time to end the animation. To do this, use one of two methods of the window object: setTimeout() or setInterval(). This example uses the setInterval() method to periodically move an element.
What have you seen so far? Well, you've seen the DOM hierarchy and how it represents the HTML document as a tree-like structure. You navigated through the different parts of it via DOM objects (the Node objects) and their properties, and you changed the properties of objects, thus altering the content of the web page. This leaves just one area of the DOM to cover: the event model.
The two major browsers in the late 1990s were Internet Explorer 4 and Netscape 4 — the first browser war. Not surprising, both browser vendors implemented vastly different DOMs and event models, fragmenting the web into two groups: websites that catered to Netscape only, and websites that catered to IE only. Very few developers chose the frustrating task of cross-browser development.
Obviously, a need for a standard grew from this fragmentation and frustration. So the W3C introduced the DOM standard, which grew into DOM level 2, which included a standard event model.
The DOM event model is a way of handling events and providing information about these events to the script. It provides a set of guidelines for a standard way of determining what generated an event, what type of event it was, and when and where the event occurred. It introduces a basic set of objects, properties, and methods, and makes some important distinctions.
Despite this attempt at standardization, developers still have to work with multiple event models. While browsers like Firefox, Chrome, Safari, and Opera implement the standard event model, Internet Explorer does not, and extra effort is required to build cross-browser event-driven applications. Don't fret, though; despite the different implementations, the DOM and IE event models share some common properties, and many non-shared properties are easily translated to other properties.
In this section, you'll learn about the two models. Later in the chapter, you'll put this information to use in writing cross-browser DHTML.
The DOM standard describes an Event object, which provides information about the element that has generated an event and enables you to retrieve it in script. If you want to make it available in script, it must be passed as a parameter to the function connected to the event handler.
Internet Explorer does not implement the DOM event model. The code in this section will not work in IE because of this.
You learned in Chapter 6 how to handle events using HTML attributes. However, you did not learn how to access an Event object, something that proves very useful a majority of the time. It's very simple to do so, and all you have to do is query the event object created by the individual element that raised the event. For example, in the following code the <p/> element will raise a dblclick event:
<p ondblclick="handle(event)">Paragraph</p>

<script type="text/javascript">
function handle(e)
{
    alert(e.type);
}
</script>
Notice that event is passed to the handle() function in the ondblclick attribute. This event variable is special in that it is not defined anywhere; instead, it is an argument used only with event handlers that are connected through HTML attributes. It passes a reference to the current event object when the event fires.
If you ran the previous example, it would just tell you what kind of event raised your event-handling function. This might seem self-evident in the preceding example, but if you had included the following extra lines of code, any one of three elements could have raised the function:
<p ondblclick="handle(event)">Paragraph</p>
<h1 onclick="handle(event)">Heading 1</h1>
<span onmouseover="handle(event)">Special Text</span>

<script type="text/javascript">
function handle(e)
{
    alert(e.type);
}
</script>
This makes the code much more useful. In general, you will use relatively few event handlers to deal with any number of events, and you can use the event properties as a filter to determine what type of event happened and what HTML element triggered it, so that you can treat each event differently.
In the following example, you see that you can take different courses of action depending on what type of event is returned:
<p ondblclick="handle(event)">Paragraph</p>
<h1 onclick="handle(event)">Heading 1</h1>
<span onmouseover="handle(event)">Special Text</span>

<script type="text/javascript">
function handle(e)
{
    if (e.type == "mouseover")
    {
        alert("You moved over the Special Text");
    }
}
</script<
This code uses the type property to determine what type of event occurred. If the user moused over the <span/> element, then an alert box tells them so.
Accessing event information is relatively straightforward if you're using HTML attributes to assign event handlers. Thankfully, accessing event data when assigning event handlers using JavaScript objects' properties are even more straightforward: the browser automatically passes the event object to the handling function when the event fires. Consider the following code:
<p id="p">Paragraph</p>
<h1 id="h1">Heading 1</h1>
<span id="span">Special Text</span>

<script type="text/javascript">
function handle(e)
{
    if (e.type == "mouseover")
{
alert("You moved over the Special Text");
}
}
document.getElementById("p").ondblclick = handle;
document.getElementById("h1").onclick = handle;
document.getElementById("span").onmouseover = handle;
</script<This code is slightly different from the last example using HTML attributes. The elements are given id attributes to allow easy access to their objects in the DOM with the getElementById() method. Each element is assigned an event handler, which calls handle() when their respective events fire. The result is the same as before; the user sees an alert box telling them they moved their mouse pointer over the Special Text.
The standard outlines several properties of the Event object that offer information about that event: what element it happened at, what type of event took place, and what time it occurred? These are all pieces of data offered by the Event object. The following table lists the properties outlined in the specification.
Properties of the Event Object | Description |
|---|---|
| Indicates whether an event can bubble — passing control from one element to another starting from the event target and bubbling up the hierarchy. |
| Indicates whether an event can have its default action canceled. |
| Indicates which the event target whose event handlers are currently being processed. |
| Indicates which phase of the event flow an event is in. |
| Indicates which element caused the event; in the DOM event model, text nodes are a possible target of an event. |
| Indicates at what time the event occurred. |
| Indicates the name of the event. |
Secondly, the DOM event model introduces a MouseEvent object, which deals with events generated specifically by the mouse. This is useful because you might need more specific information about the event, such as the position in pixels of the cursor, or the element the mouse has come from.
Properties of the MouseEvent Object | Description |
|---|---|
| Indicates whether the Alt key was pressed when the event was generated. |
| Indicates which button on the mouse was pressed. |
Indicates where in the browser window, in horizontal coordinates, the mouse pointer was when the event was generated. | |
| Indicates where in the browser window, in vertical coordinates, the mouse pointer was when the event was generated. |
| Indicates whether the Ctrl key was pressed when the event was generated. |
| Indicates whether the meta key was pressed when the event was generated. |
| Used to identify a secondary event target. For |
| Indicates the horizontal coordinates relative to the origin in the screen coordinates, the mouse pointer was when the event was generated. |
| Indicates the vertical coordinates relative to the origin in the screen coordinates, the mouse pointer was when the event was generated. |
| Indicates whether the Shift key was pressed when the event was generated. |
Although any event might create an Event object, only a select set of events can generate a MouseEvent object. On the occurrence of a MouseEvent event, you'd be able to access properties from the Event object and the MouseEvent object. With a non-mouse event, none of the MouseEvent object properties in the preceding table would be available. The following mouse events can create a MouseEvent event object:
clickoccurs when a mouse button is clicked (pressed and released) with the pointer over an element or text.mousedownoccurs when a mouse button is pressed with the pointer over an element or text.mouseupoccurs when a mouse button is released with the pointer over an element or text.mouseoveroccurs when a mouse button is moved onto an element or text.mousemoveoccurs when a mouse button is moved and it is already on top of an element or text.mouseoutoccurs when a mouse button is moved out and away from an element or text.
Try It Out: Using the DOM Event Model
Take a quick look at an example that uses some properties of the MouseEvent object.
Open a text editor and type the following:
<!DOCTYPE html PUBLIC "-//W3C//DTD XHTML 1.0 Transitional//EN"
    "http://www.w3.org/TR/xhtml1/DTD/xhtml1-transitional.dtd">

<html xmlns="http://www.w3.org/1999/xhtml">
<head>
    <title>Chapter 12: Example 8</title>
    <style type="text/css">
    .underline
    {
        color: red;
        text-decoration: underline;
    }
    </style>
    <script type="text/javascript">
    function handleEvent(e)
    {
        if (e.target.tagName == "P")
        {
            if (e.type == "mouseover")
            {
                e.target.className = "underline";
            }

            if (e.type == "mouseout")
            {
                e.target.className = "";
            }
        }

        if (e.type == "click")
        {
            alert("You clicked the mouse button at the X:"
                + e.clientX + " and Y:" + e.clientY + " coordinates");
        }
    }

    document.onmouseover = handleEvent;
    document.onmouseout = handleEvent;
    document.onclick = handleEvent;
    </script>
</head>
<body>
<p>This is paragraph 1.</p>
<p>This is paragraph 2.</p>
<p>This is paragraph 3.</p>
</body>
</html>
Save this as ch12_examp8.htm and run it in your browser. When you move your mouse over one of the paragraphs, you'll notice its text changes color to red and it becomes underlined. Click anywhere in the page, and you'll see an alert box like Figure 12-15.

Now click OK, move the pointer in the browser window, and click again. A different result appears.
This example is consistent with the event-handling behavior: The browser waits for an event, and every time that event occurs it raises the corresponding function. It will continue to wait for the event until you exit the browser or that particular web page. In this example, you assign event handlers for the mouseover, mouseout, and click events on the document object.
document.onmouseover = handleEvent;
document.onmouseout = handleEvent;
document.onclick = handleEvent;
One function, handleEvent() handles all three of these events.
Whenever any of these events fire, the handleClick() function is raised and a new MouseEvent object is generated. Remember that MouseEvent objects give you access to Event object properties as well as MouseEvent object properties, and you use some of them in this example.
The function accepts the MouseEvent event object and assigns it the reference e.
function handleEvent(e)
{
    if (e.target.tagName == "P")
    {
Inside the function, the first thing you do is check if the event target (the element that caused the event) has a tagName of P. If the target is a paragraph element, then the next bit of information you need to find is what kind of event took place by using the type property.
if (e.type == "mouseover")
        {
            e.target.className = "underline";
}
if (e.type == "mouseout")
{
e.target.className = "";
}
}If the event is a mouseover, then the paragraph's CSS class is assigned the underline class defined in the page's style sheet. If the event type is mouseout, then the element's className property is cleared, which returns the text to its original style. This style-changing code runs only if the element that caused the event is a paragraph element.
Next, the function determines if the user clicked their mouse by again checking the type property.
if (e.type == "click")
    {
        alert("You clicked the mouse button at the X:"
            + e.clientX + " and Y:" + e.clientY + " coordinates");
    }
}
If the user did indeed click somewhere in the page, then you use the alert() method to display the contents of the clientX and clientY properties of the mouse event object on the screen.
The MouseEvent object supplied to this function is overwritten and re-created every time you generate an event, so the next time you click the mouse or move the pointer it creates a new MouseEvent object containing the coordinates for the x and y positions and the information on the element that caused the event to fire. One problem that precludes greater discussion of the DOM event model is the fact that not all browsers support it in any detail. Specifically, IE, the most popular browser, doesn't fully support it. Despite the lack of support for the DOM standard, you can still acquire the same useful information on a given event with IE's event model.
IE's event model remains relatively unchanged since the introduction of IE4 in 1997. It incorporates the use of a global event object (it is a property of the window object), and one such object exists for each open browser window. The browser updates the event object every time the user causes an event to occur, and it provides information similar to that of the standard DOM Event object.
Because the event object is a property of window, it is very simple to access.
<p ondblclick="handle()">Paragraph</p>

<script type="text/javascript">
function handle()
{
    alert(window.event.type);
}
</script>
This code assigns the handle() function to handle the <p/> element's dblclick event. When the function executes, it gets the type of event that caused the handle() function's execution. Because the event object is global, there is no need to pass the object to the handling function like the DOM event model. Also note that like other properties of the window object, it's not required that you precede the event object with window.
The same holds true when you assign event handlers through JavaScript using object properties.
<p id="p">Paragraph</p>
<h1 id="h1">Heading 1</h1>
<span id="span">Special Text</span>

<script type="text/javascript">
function handle()
{
    if (event.type == "mouseover")
    {
        alert("You moved over the Special Text");
    }
}

document.getElementById("p").ondblclick = handle;
document.getElementById("h1").onclick = handle;
document.getElementById("span").onmouseover = handle;
</script>As you can see, IE's event object is straightforward and simple to use; however, it does provide different properties from the DOM standard's Event and MouseEvent objects, although they typically provide you with similar data.
The following table lists some of the properties of IE's event object.
Properties of the event Object | Description |
|---|---|
| Indicates whether the Alt key was pressed when the event was generated. |
| Indicates which button on the mouse was pressed. |
| Gets or sets whether the current event should bubble up the hierarchy of event handlers. |
| Indicates where in the browser window, in horizontal coordinates, the mouse pointer was when the event was generated. |
| Indicates where in the browser window, in vertical coordinates, the mouse pointer was when the event was generated. |
| Indicates whether the Ctrl key was pressed when the event was generated. |
| Gets the element object the mouse pointer is exiting. |
Gets the Unicode keycode associated with the key that caused the event. | |
| Indicates where in the browser window, in horizontal coordinates relative to the origin in the screen coordinates, the mouse pointer was when the event was generated. |
| Indicates where in the browser window, in vertical coordinates relative to the origin in the screen coordinates, the mouse pointer was when the event was generated. |
| Indicates whether the Shift key was pressed when the event was generated. |
| Gets the element object that caused the event. |
| Gets the element object that the mouse pointer is entering. |
| Retrieves the event's name. |
Let's revisit Example eight where you wrote a page to take advantage of the DOM event model and change it to work in IE.
By now you've written two versions of the same DHTML script: one for IE and one for browsers that support the standard DOM event model (Firefox, Safari, Chrome, and Opera). In the real world, creating separate versions of web sites is rarely considered best practice, and it's much, much easier to write a cross-browser version of the web page. In this section, you'll use the knowledge you've gained of the DOM, the standard DOM event model, and IE's event model to write a cross-browser DHTML script.This script will consist of a tab strip containing three tabs. Clicking any tab dynamically adds content to the web page. It is a very crude and incomplete tab strip. You'll have the opportunity to add more functionality to it for one of this chapter's questions.
JavaScript's usefulness doesn't end with HTML; there are times when you may want or need to open an XML file and read it with JavaScript. Because of the similarities between (X)HTML and XML (namely that they are structured documents), it's not surprising that you use the DOM to load and read XML documents, too.
The W3C developed XML for the purpose of describing data rather than to actually display information in any particular format, which is the purpose of HTML. There is nothing overly special about XML. It is just plain text with the addition of some XML tags enclosed in angle brackets. You can use any software that can handle plain text to create and edit XML.
XML is a data-centric language. It not only contains data, but it describes those data by using semantic element names. The document's structure also plays a part in the description. Unlike HTML, XML is not a formatting language; in fact, a properly structured XML document is devoid of any formatting elements. This concept is often referred to as the separation of content and style, and is part of XML's success, as it makes the language simple and easy to use.
For example, you can use XML as a data store like a database. In fact, XML is well suited for large and complex documents because the data are structured; you design the structure and implement it using your own elements to describe the data enclosed in the element. The ability to define the structure and elements used in an XML document is what makes XML a self-describing language. That is, the elements describe the data they contain, and the structure describes how data are related to each other.
Another method in which XML has become useful is in retrieving data from remote servers. Probably the most widely known applications of this method are the RSS and Atom formats for web syndication. These XML documents, and others like them, contain information readily available to anyone. Web sites or programs can connect to the remote server, download a copy of the XML document, and use the information however needed.
A third and extremely helpful application of XML is the ability to transfer data between incompatible systems. An XML document is a plain text document; therefore, all operating systems can read and write to XML files. The only major requirement is an application that understands the XML language and the document structure. For example, Microsoft recently released details on Microsoft Office Open XML, the file format used in Microsoft Office 2007. The files themselves are actually Zip files. However, any program written to read the XML files contained in the Zip file can display the data with no problem; it doesn't matter whether they were written under Windows, Mac OS X, any flavor of Linux, or any other operating system.
As previously mentioned, you use the DOM to load, read, and manipulate XML data; so you learned most of what you need to manipulate XML within the web browser from the previous sections in the chapter.
The first task is to read the XML document. This is where most cross-browser problems are located because IE, you guessed it, doesn't follow the DOM standard, whereas Firefox, Safari, Chrome, and Opera do. The good news is that once the XML document is loaded, the differences between the browsers are smaller, although Microsoft has added a lot of useful (but nonstandard) extensions to its implementation.
Internet Explorer relies upon the ActiveXObject() object and the MSXML library to fetch and open XML documents. A variety of ActiveX objects are available for scripting; to create an ActiveX object, simply call the ActiveXObject() constructor and pass a string containing the version of the ActiveX object you wish to create.
var xmlDoc = new ActiveXObject("Microsoft.XMLDOM");
xmlDoc.load("myfile.xml");
This code creates an XML DOM object that enables you to load and manipulate XML documents by using the version string "Microsoft.XMLDOM". When the XML DOM object is created, load an XML document by using the load() method. This code loads a fictitious file called myfile.xml.
There are multiple versions of the Microsoft MSXML library, with each newer version offering more features and better performance than the one before. However, the user's computer must have these versions installed before you can use them, and the version selection code can become complex. Thankfully, Microsoft recommends checking for only two versions of MSXML. Their version strings are as follows:
Msxml2.DOMDocument.6.0Msxml2.DOMDocument.3.0
You want to use the latest version possible when creating an XML DOM, and the following function does this:
function createDocument()
{
    var xmlDoc;

    if (window.ActiveXObject)
    {
        var versions =
        [
            "Msxml2.DOMDocument.6.0",
            "Msxml2.DOMDocument.3.0"
        ];

        for (var i = 0; i < versions.length; i++)
        {
            try
            {
                xmlDoc = new ActiveXObject(versions[i]);
                return xmlDoc;
            }
            catch (error)
            {
                //do nothing here
            }
        }
    }

    return null;
}
This code defines the createDocument() function. Its first line creates the xmlDoc variable. This is a temporary variable used in the creation of an XML DOM. The next line of code is an if statement, and it checks to see if the browser is IE by seeing if window.ActiveXObject exists. If the condition is true, then an array called versions is created, and the two MSXML versions are added as elements to the array.
var versions =
[
    "Msxml2.DOMDocument.6.0",
    "Msxml2.DOMDocument.3.0"
];
The order in which they're added is important; you want to always check for the latest version first, so the version strings are added with the newest at index 0.
Next is a for loop to loop through the elements of the versions array. Inside the loop is a try. . .catch statement.
for (var i = 0; i < versions.length; i++)
{
    try
    {
        xmlDoc = new ActiveXObject(versions[i]);
        return xmlDoc;
    }
    catch (error)
    {
        //do nothing here
    }
}
If the ActiveXObject object creation fails in the try block, then code execution drops to the catch block. Nothing happens at this point: The loop iterates to the next index in versions and attempts to create another ActiveXObject object with the other MSXML version strings. If every attempt fails, then the loop exits and returns null. Use the createDocument() function like this:
var xmlDoc = createDocument();
By using this function, you can create the latest MSXML XML DOM object easily.
Before you actually attempt to manipulate the XML file, make sure it has completely loaded into the client's browser cache. Otherwise, you're rolling the dice each time the page is viewed and running the risk of a JavaScript error being thrown whenever the execution of your script precedes the complete downloading of the XML file in question. Fortunately, there are ways to detect the current download state of an XML file.
The async property denotes whether the browser should wait for the specified XML file to fully load before proceeding with the download of the rest of the page. This property, whose name stands for asynchronous, is set by default to true, meaning the browser will not wait on the XML file before rendering everything else that follows. Setting this property to false instructs the browser to load the file first and then, and only then, to load the rest of the page.
var xmlDoc = createDocument();
xmlDoc.async = false; //Download XML file first, then load rest of page.
xmlDoc.load("myfile.xml");
The simplicity of the async property is not without its flaws. When you set this property to false, IE will stall the page until it makes contact and has fully received the specified XML file. When the browser is having trouble connecting and/or downloading the file, the page is left hanging like a monkey on a branch. This is where the onreadystatechange event handler and readyState property can help (as long as the async property is true).
The readyState property of IE exists for XML objects and many HTML objects, and returns the current loading status of the object. The following table shows the four possible return values.
Return Values for the readyState Property | Description |
|---|---|
| The object is initializing, but no data are being read (loading). |
| Data are being loaded into the object and parsed (loaded). |
| Parts of the object's data have been read and parsed, so the object model is available. However, the complete object data are not yet ready (interactive). |
| The object has been loaded and its content parsed (completed). |
The value you're interested in here is the last one, 4, which indicates the object has fully loaded. To use the readyState property, assign a function to handle the readystatechange event, which fires every time the readyState changes.
function xmlDoc_readyStateChange()
{
    //Check for the readyState. If it's 4, it's loaded!
    if (xmlDoc.readyState == 4)
    {
        alert("XML file loaded!");
    }
}

var xmlDoc = createDocument();
xmlDoc.onreadystatechange = xmlDoc_readyStateChange;

xmlDoc.load("myfile.xml");
This code first creates a function called xmlDoc_readyStateChange(). Use this function to handle the readystatechange event. Inside the function, check the readyState property to see if its value is equal to 4. If it is, then the XML file is completely loaded and the alert text "XML file loaded!" is displayed. Next, create the XML DOM object and assign the xmlDoc_readyStateChange() function to the onreadystatechange event handler. The last line of code initiates the loading of myfile.xml.
Loading an XML document in Firefox and Opera is a little different from doing the same thing in IE, as these browsers use a more standards-centric approach. Creating an XML DOM doesn't require the use of an add-on as it does in IE; the DOM is a part of the browser and JavaScript implementation.
var xmlDoc = document.implementation.createDocument("","",null);
xmlDoc.load("myfile.xml");
Safari and Chrome do not support loading XML files into a DOM object in the way covered in this section. Instead, you must use the
XMLHttpRequestobject to request the XML document from the server. This object is covered in Chapter 14.
This code creates an empty DOM object by using the createDocument() method of the document.implementation object. After the DOM object is created, use the load() method to load an XML document; it is supported by Firefox and Opera as well.
Safari and Chrome support the
createDocument()method, but they do not support theload()method.
Much like IE, Firefox and Opera support the async property, which allows the file to be loaded asynchronously or synchronously. The behavior of loading synchronously is the same in these browsers as in IE. However, things change when you want to load a file asynchronously.
Not surprising, Firefox and Opera use a different implementation from IE when it comes to checking the load status of an XML file. In fact, these browsers do not enable you to check the status with something like the readyState property. Instead, they expose an onload event handler that executes when the file is loaded and the DOM object is ready to use.
function xmlDoc_load()
{
    alert("XML is loaded!");
}

var xmlDoc = document.implementation.createDocument("","",null);
xmlDoc.onload = xmlDoc_load;
xmlDoc.load("myfile.xml");
This code loads the fictitious file myfile.xml in asynchronous mode. When the load process completes, the load event fires and calls xmlDoc_load(), which then shows the text XML is loaded! to the user.
As you can see, the different ways of creating XML DOM objects require you to seek a cross-browser solution. You can easily do this with object detection to determine which browser is in use. In fact, you can easily edit the createDocument() function to include Firefox and Opera support. Look at the following code:
function createDocument()
{
    var xmlDoc;

    if (window.ActiveXObject)
    {
        var versions =
        [
            "Msxml2.DOMDocument.6.0",
            "Msxml2.DOMDocument.3.0"
        ];
for (var i = 0; i < versions.length; i++)
{
try
{
xmlDoc = new ActiveXObject(versions[i]);
return xmlDoc;
}
catch (error)
{
//do nothing here
}
}
}
else if (document.implementation && document.implementation.createDocument)
{
xmlDoc = document.implementation.createDocument("","",null);
return xmlDoc;
}
return null;
}The code highlighted in gray is the only new code added to the function. It first checks if the implementation object and implementation.createDocument method exist, and, if so, it creates an XML DOM for DOM supporting browsers with document.implementation.createDocument() and returns the DOM object to the caller. Using the function is exactly as you saw earlier, but now it works across IE, Firefox, and Opera.
var xmlDoc = createDocument();
xmlDoc.async = false;
xmlDoc.load("myfile.xml");Now that you know how to load XML documents, let's jump right into building your first XML-enabled JavaScript application, a message-of-the-day display.
To begin, use the following simple XML file. You'll retrieve the file and then display the daily message using DHTML. Following is the XML file called motd.xml:
<?xml version="1.0"?>
<messages>
<daily>Today is Sunday.</daily>
<daily>Today is Monday.</daily>
<daily>Today is Tuesday.</daily>
<daily>Today is Wednesday.</daily>
<daily>Today is Thursday.</daily>
<daily>Today is Friday.</daily>
<daily>Today is Saturday.</daily>
</messages>As you can see, this basic XML file is populated with a different message for each day of the week.
Next is the HTML page, with the createDocument() function added in the script block.
<html>
<head>
<title>Message of the Day</title>
<script type="text/javascript">
function createDocument()
{
var xmlDoc;
if (window.ActiveXObject)
{
var versions =
[
"Msxml2.DOMDocument.6.0",
"Msxml2.DOMDocument.3.0"
];
for (var i = 0; i < versions.length; i++)
        {
            try
            {
                xmlDoc = new ActiveXObject(versions[i]);
                return xmlDoc;
            }
            catch (error)
            {
                //do nothing here
            }
        }
    }
    else if (document.implementation && document.implementation.createDocument)
    {
        xmlDoc = document.implementation.createDocument("","",null);
        return xmlDoc;
    }
    return null;
}
//More code to come
</script>
</head>Before you dig into the body of the page, there's one more function to add to the head of the page. This function is called getDailyMessage(), which retrieves and returns the message of the day. Add it below the createDocument() function definition.
function getDailyMessage()
    {
var messages = xmlDoc.getElementsByTagName("daily");
var dateobj = new Date();
var today = dateobj.getDay();
return messages[today].firstChild.nodeValue;
}First, use the getElementsByTagName() method to retrieve the <daily/> elements. As you already know, this will return a node list of all the <daily/> elements. The next task is to find a numerical representation of the day of the week. Do this by first creating a Date object and using its getDay() method. This gives you a digit between 0 and 6, with 0 being Sunday, 1 being Monday, and so on; the digit is assigned to the today variable. Finally, use that variable as an index of the messages node list to select the correct <daily/> element and retrieve its text.
You may have noticed that xmlDoc in getDailyMessage() isn't declared anywhere in the head of the HTML document. It is used in createDocument(), but that variable is declared within the context of the function. You actually declare the global xmlDoc in the body of the HTML page.
<body>
<div id="messageContainer"></div>

<script type="text/javascript">
    var xmlDoc = createDocument();
    xmlDoc.async = false;
    xmlDoc.load("motd.xml");

    document.getElementById("messageContainer").innerHTML = getDailyMessage();
</script>
</body>
</html>
The first HTML element found in the body is a <div/> element with an id of messageContainer. Use this <div/> to display the message of the day.
Following the <div/> is the last <script/> element in the page. In this code block, you create a DOM document and assign it to the global xmlDoc variable. Then load the motd.xml file synchronously and set the message container's innerHTML to the message of the day by calling getDailyMessage().
Try It Out: Tabulating Doggie Data
In this example, you will write an application that uses an XML document containing data about one of your author's dogs. Open your text editor and type the following:
<html>
<head>
    <title>Chapter 12: Example 11</title>
    <script type="text/javascript">
    function createDocument()
    {
        var xmlDoc;

        if (window.ActiveXObject)
        {
            var versions =
[
"Msxml2.DOMDocument.6.0",
"Msxml2.DOMDocument.3.0"
];
for (var i = 0; i < versions.length; i++)
{
try
{
xmlDoc = new ActiveXObject(versions[i]);
return xmlDoc;
}
catch (error)
{
//do nothing here
}
}
}
else if (document.implementation &&
document.implementation.createDocument)
{
xmlDoc = document.implementation.createDocument("","",null);
return xmlDoc;
}
return null;
}
var xmlDocument = createDocument();
xmlDocument.load("ch12_examp11.xml");
function displayDogs()
{
var dogNodes = xmlDocument.getElementsByTagName("dog");
var table = document.createElement("table");
table.setAttribute("cellPadding",5); //Give the table some cell padding.
table.setAttribute("width", "100%");
table.setAttribute("border", "1");
var tableHeader = document.createElement("thead");
var tableRow = document.createElement("tr");
for (var i = 0; i < dogNodes[0].childNodes.length; i++)
{
var currentNode = dogNodes[0].childNodes[i];
if (currentNode.nodeType == 1)
{
var tableHeaderCell = document.createElement("th");
var textData = document.createTextNode(currentNode.nodeName);
tableHeaderCell.appendChild(textData);tableRow.appendChild(tableHeaderCell);
}
}
tableHeader.appendChild(tableRow);
table.appendChild(tableHeader);
var tableBody = document.createElement("tbody");
for (var i = 0; i < dogNodes.length; i++)
{
var tableRow = document.createElement("tr");
for (var j = 0; j < dogNodes[i].childNodes.length; j++)
{
var currentNode = dogNodes[i].childNodes[j];
if (currentNode.nodeType == 1)
{
var tableDataCell = document.createElement("td");
var textData = document.createTextNode
(
currentNode.firstChild.nodeValue
);
tableDataCell.appendChild(textData);
tableRow.appendChild(tableDataCell);
}
}
tableBody.appendChild(tableRow);
}
table.appendChild(tableBody);
document.body.appendChild(table);
}
</script>
</head>
<body>
<a href="javascript: displayDogs();">Display Dogs</a>
</body>
</html>Save this as ch12_examp11.htm. Now type the following XML into another file and save it as ch12_examp11.xml.
<?xml version="1.0" encoding="iso-8859-1"?>

<myDogs>
    <dog>
        <name>Morgan</name>
        <breed>Labrador Retriever</breed>
<age>4 years</age>
<fullBlood>yes</fullBlood>
<color>chocolate</color>
</dog>
<dog>
<name>Molly</name>
<breed>Labrador Retriever</breed>
<age>12 years</age>
<fullBlood>yes</fullBlood>
<color>yellow</color>
</dog>
<dog>
<name>Madison</name>
<breed>Labrador Retriever</breed>
<age>10 years</age>
<fullBlood>yes</fullBlood>
<color>chocolate</color>
</dog>
</myDogs>When you open the HTML page in your browser, you'll see a web page with only a link visible. When you click the link, you should see something like what is shown in Figure 12-16.
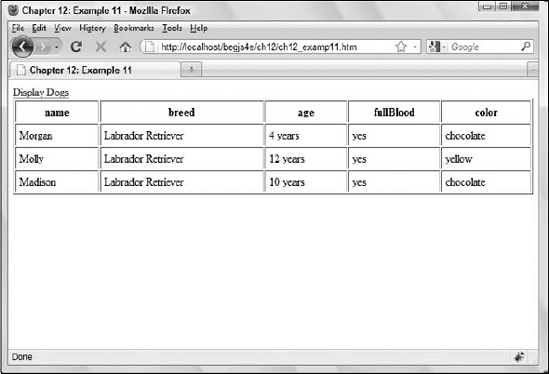
The first thing you do is create a DOM object and load an XML document into it.
var xmlDocument = createDocument();
xmlDocument.load("ch12_examp11.xml");The workhorse of this page is the next function, displayDogs(). Its job is to build a table and populate it with the information from the XML file.
function displayDogs()
{
        var dogNodes = xmlDocument.getElementsByTagName("dog");
        var table = document.createElement("table");
        table.setAttribute("cellPadding",5); //Give the table some cell padding.
        table.setAttribute("width", "100%");
        table.setAttribute("border", "1");
The first thing this function does is use the getElementsByTagName() method to retrieve the <dog/> elements and assign the resulting node list to dogNodes. Next, create a <table/> element by using the document.createElement() method, and set its cellPadding, width, and border attributes using setAttribute().
Next, create the table header and heading cells. For the column headers, use the element names of the <dog/> element's children (name, breed, age, and so on).
var tableHeader = document.createElement("thead");
        var tableRow = document.createElement("tr");

        for (var i = 0; i < dogNodes[0].childNodes.length; i++)
        {
            var currentNode = dogNodes[0].childNodes[i];

            //Loop code here.
        }

        tableHeader.appendChild(tableRow);
        table.appendChild(tableHeader);
The first few lines of this code create <thead/> and <tr/> elements. Then the code loops through the first <dog/> element's child nodes (more on this later). After the loop, append the <tr/> element to the table header and add the header to the table. Now let's look at the loop.
for (var i = 0; i < dogNodes[0].childNodes.length; i++)
        {
            var currentNode = dogNodes[0].childNodes[i];
            if (currentNode.nodeType == 1)
            {
                var tableHeaderCell = document.createElement("th");
                var textData = document.createTextNode(currentNode.nodeName);

                tableHeaderCell.appendChild(textData);
                tableRow.appendChild(tableHeaderCell);
            }
        }
The goal is to use the element names as headers for the column. However, you're looping through every child node of a <dog/> element, so any instance of whitespace between elements is counted as a child node in DOM supported browsers. To solve this problem, check the current node's type with the nodeType property. If it's equal to 1, then the child node is an element. Next, create a <th/> element, and a text node containing the current node's nodeName, which you append to the header cell. And finally, append the <th/> element to the row.
The second part of displayDogs() builds the body of the table and populates it with data. It is similar in look and function to the header-generation code.
var tableBody = document.createElement("tbody");

        for (var i = 0; i < dogNodes.length; i++)
        {
            var tableRow = document.createElement("tr");

            //Inner loop code here

            tableBody.appendChild(tableRow);
        }

        table.appendChild(tableBody);
First, create the <tbody/> element, and then loop through the dogNodes node list, cycling through the <dog/> elements. Inside this loop, create a <tr/> element and append it to the table's body. When the loop exits, append the <tbody/> element to the table. Now look at the inner loop, which adds data cells to the row.
for (var j = 0; j < dogNodes[i].childNodes.length; j++)
            {
                var currentNode = dogNodes[i].childNodes[j];

                if (currentNode.nodeType == 1)
                {
                    var tableDataCell = document.createElement("td");
                    var textData = document.createTextNode(
                        currentNode.firstChild.nodeValue
                    );

                    tableDataCell.appendChild(textData);

                    tableRow.appendChild(tableDataCell);
                }

                tableBody.appendChild(tableRow);
            }
This inner loop cycles through the child elements of <dog/>. First, assign the currentNode variable to reference the current node. This enables you to access this node a little more easily (much less typing!). Next, check the node's type. Again, DOM-based browsers count whitespace as child nodes, so you need to make sure the current node is an element. When it's confirmed that the current node is an element, create a <td/> element and a text node containing the text of currentNode. Append the text node to the data cell, and append the data cell to the table row created in the outer for loop.
At this point, the table is completed, so add it to the HTML page. You do this with the following:
document.body.appendChild(table);
}
Now all you have to do is invoke the displayDogs() function. To do this, place a hyperlink in the page's body to call the function when clicked.
<a href="javascript: displayDogs();">Display Dogs</a>
This chapter has featured quite a few diversions and digressions, but these were necessary to demonstrate the position and importance of the Document Object Model in JavaScript.
This chapter covered the following points:
You started by outlining four of the main standards — HTML, ECMAScript, XML, and XHTML — and examined the relationships among them. You saw that a common aim emerging from these standards was to provide guidelines for coding HTML web pages. Those guidelines in turn benefited the Document Object Model, making it possible to access and manipulate any item on the web page using script if web pages were coded according to these guidelines.
You examined the Document Object Model and saw that it offered a browser- and language-independent means of accessing the items on a web page, and that it resolved some of the problems that dogged older browsers. You saw how the DOM represents the HTML document as a tree structure and how it is possible for you to navigate through the tree to different elements and use the properties and methods it exposes in order to access the different parts of the web page.
Although sticking to the standards provides the best method for manipulating the contents of the web page, none of the main browsers yet implements it in its entirety. You looked at the most up-to-date examples and saw how they provided a strong basis for the creation of dynamic, interoperable web pages because of their support of the DOM.
Despite leaps and bounds by browser makers, some discrepancies still exist. You learned how to cope with two different event objects by branching your code to consolidate two different APIs into one.
DHTML enables you to change a page after it is loaded into the browser, and you can perform a variety of user interface tricks to add some flair to your page.
You learned how to change a tag's style by using the
styleandclassNameproperties.You also learned the basics of animation in DHTML and made text bounce back and forth between two points.
Finally, you learned how to load an XML file and then manipulate its document with JavaScript.
Suggested solutions to these questions can be found in Appendix A.
Here's some HTML code that creates a table. Re-create this table using only JavaScript and the core DOM objects to generate the HTML. Test your code in all browsers available to you to make sure it works in them. Hint: Comment each line as you write it to keep track of where you are in the tree structure, and create a new variable for every element on the page (for example, not just one for each of the TD cells but nine variables).
<table>
    <thead>
        <tr>
            <td>Car</td>
            <td>Top Speed</td>
            <td>Price</td>
        </tr>
    </thead>
    <tbody>
        <tr>
            <td>Chevrolet</td>
            <td>120mph</td>
            <td>$10,000</td>
        </tr>
        <tr>
            <td>Pontiac</td>
            <td>140mph</td>
            <td>$20,000</td>
        </tr>
    </tbody>
</table>
It was mentioned that Example 10 is an incomplete tab strip DHTML script. Make it not so incomplete by making the following changes:
Only one tab should be active at a time.
Only the active tab's description should be visible.