
WHAT YOU WILL LEARN IN THIS CHAPTER
In the past, the primary way to integrate with SharePoint externally was to use one of the many ASMX web services it provides. Using these web services, you could read and update items and documents, manage sites, lists and libraries, and configure permissions from any external application. Unfortunately, these web services were not easy to use and only supported Windows Authentication. Additionally, any knowledge you had in extending SharePoint by writing server code using the built-in object model did not help much in trying to use the web services.
Over time, adding additional functionality to these web services has become more and more expensive in terms of complexity and effort. To resolve the problems of using the non-intuitive web services and yet extend the available functionality, SharePoint has introduced the Client Object Model.
The Client Object Model is a set of technology-specific libraries that function similarly to the way the built-in object model does. These libraries support accessing SharePoint using JavaScript, Silverlight, or .NET. Using the Client Object Model, you can automate many of the tasks that you would otherwise have to perform manually using the browser or SharePoint Designer.
Some of these capabilities include creating and manipulating lists, accessing data and documents, and managing workflows. One of the more impressive features of the Client Object Model is the similarities among the classes inside the libraries, although the technologies they support are very different. Because SharePoint Designer only supports code written in JavaScript and Silverlight, the .NET version of the Client Object Model will not be covered.
Note
If you search the Internet regarding the Client Object Model, you find many references to ECMAScript, including the documentation on Microsoft's website. ECMAScript is essentially the standard upon which JavaScript and JScript are based. JScript is Microsoft's implementation of the standard within Internet Explorer. The JavaScript code in this chapter works with Microsoft Internet Explorer, Mozilla Firefox, and possibly other browsers. The use of the word "JavaScript" in this chapter is meant to refer to JavaScript, JScript, and ECMAScript.
Note
You can use the activities in this chapter with either JavaScript or Silverlight.
The JavaScript Client Object Model is the easiest of the three object models to begin using because it requires the least amount of software and is already familiar to most web designers and developers. You only need SharePoint Designer to add JavaScript to web pages and web parts. Though you could add a web part, such as the HTML Form Web Part, to a web part page using the browser, you would not get any of the design-time support offered by SharePoint Designer, and writing code in this manner would be much more difficult.
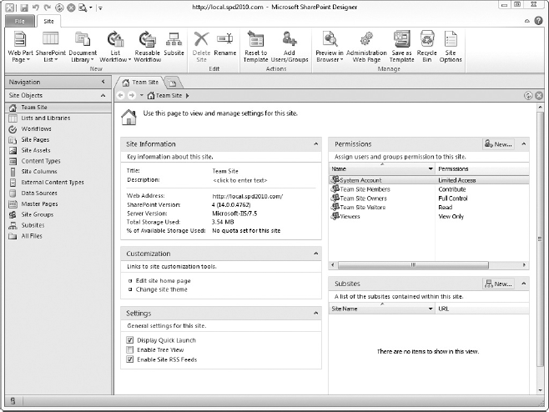
The easiest way to start using the JavaScript Client Object Model is to open SharePoint Designer, open your site, and select Site Pages from the Navigation bar, as shown in Figure 13-1. After the list of pages appears, create a new page by selecting Page
Note
You must edit your files in Advanced Mode rather than Normal Mode in order to add JavaScript code directly to them. The side effect of this is your file will be customized. Customized files run slower since they must be read from the content database rather than the file system.
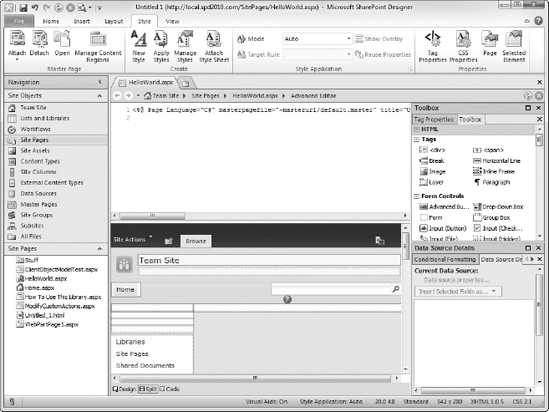
After the page is open for editing, attach the site's master page by selecting Attach from the Style tab of the ribbon and selecting the default master page of the site. Then, click the Split button at the bottom of the screen. This changes the editor to display both the Design view and Code view at the same time. You will see a screen similar to the one shown in Figure 13-2.
The markup of the new page looks like the following:
<%@ Page Language="C#" masterpagefile="~masterurl/default.master"
    title="Untitled 1"
    inherits="Microsoft.SharePoint.WebPartPages.WebPartPage, Microsoft.SharePoint,
    Version=14.0.0.0, Culture=neutral, PublicKeyToken=71e9bce111e9429c"
    meta:webpartpageexpansion="full"
    meta:progid="SharePoint.WebPartPage.Document" %>

<asp:Content id="Content1" runat="Server" contentplaceholderid="PlaceHolderMain">
</asp:Content>
Essentially, this markup is just a shell that will contain the controls and JavaScript code you will add later. To add code to the page, add a script block inside the asp:Content tag. The following snippet shows the script block you need to add:
<script type="text/javascript">
</script>
Inside this script block, you can add all of your JavaScript code. If you find that you are using the same code over and over again, you can save those JavaScript functions in a text file and store it in a document library. Then, you would only need to add a script tag that refers to your file. Here is an example of referring to a JavaScript file:
<script type="text/javascript" src="../SiteAssets/MyFunctions.js"></script>
Notice the additional attribute src that specifies the location of the file. The snippet also has an ending script tag. This ending tag is required, but do not add code inside the script block.
After you have added a script block, you need to create three functions to use the JavaScript Client Object Model. The first function will contain the code you write to request information from SharePoint. The second function will contain the code you write to process that information if the first function is successful. The third function will contain the code you write to handle any errors from communicating with SharePoint. Ensure you add the JavaScript functions inside the script tags. The following snippet shows an example of these functions:
function callSharePoint() {
    var context = new SP.ClientContext.get_current();

    this.site = context.get_web();
context.load(this.site);
context.executeQueryAsync(Function.createDelegate(this, this.onSuccess),
Function.createDelegate(this, this.onFailure));
}
function onSuccess(sender, args) {
var output = "Site Properties:
";
output += "Title : " + this.site.get_title();
output += "
"
output += "URL : " + this.site.get_serverRelativeUrl();
output += "
"
output += "Created : " + this.site.get_created();
output += "
"
alert(output);
}
function onFailure(sender, args) {
var output = "Call to SharePoint failed:
";
output += "Error Code: " + args.get_errorCode() + "
";
output += "Error Details: " + args.get_errorDetails() + "
";
output += "Error Type: " + args.get_errorTypeName() + "
";
output += "Error Value: " + args.get_errorValue() + "
";
output += "Error Message: " + args.get_message() + "
";
output += "Stack Trace: " + args.get_stackTrace() + "
";
alert(output);
}Note
The names of these functions are not important but you should follow a standard convention when naming them. This best practice will reduce any confusion between yourself and others who may be customizing your site.
The next few paragraphs will dissect and explain the previous code snippet. In the callSharePoint function, the first line gets an instance of the ClientContext class. The ClientContext class contains methods to get an instance of the objects that represent a site and its site collection in SharePoint. Two ways exist to get an instance of the ClientContext class. The first way is to use the following snippet:
var context = new SP.ClientContext.get_current();
Calling the get_current method will return an instance of the ClientContext class for the current site and site collection. To get an instance for a different site and site collection, use the following code snippet:
var context = new SP.ClientContext("relativeurlIn the code snippet, you would replace relativeurlClientContext class, you can use these methods to get the site and site collection:
NAME | DESCRIPTION |
|---|---|
Gets a | |
Gets a |
Note
You may be confused with the object model using the Site class for site collections and the Web class for sites. This is due to maintaining backward compatibility with previous versions of SharePoint. Though the JavaScript Client Object Model is new, it really does represent the true SharePoint object model running behind the pages in a SharePoint site.
Before you can read any properties of the Site or Web objects returned by the ClientContext class, you must call the load method on the ClientContext class passing a variable that refers to the Site or Web object. This following snippet shows this in action:
this.site = context.get_web();
context.load(this.site);
In the code snippet, this represents the window object in the browser. Because JavaScript is a dynamic language, setting this.site to the value of the Web object from the ClientContext object will automatically create a new property on the window object. Afterwards, you can refer to this.site in any script block on the page. After you set this.site to the value of the SharePoint site, you pass it to the load method of the ClientContext object.
Note
If any of the properties and methods of the classes in the JavaScript Client Object Model return objects instead of primitive types like integer or string, you will have to call the load method on your ClientContext object for those objects, too. If you wanted to access the lists in a site, you would have to call load on the Site object and its lists method, too, as shown in the following snippet:
this.site = context.get_web();
this.lists = this.site.get_lists();
context.load(this.site);
context.load(this.lists);
After you have called the load method on the ClientContext object for each of the objects that you want to retrieve from SharePoint, you must call the executeQueryAsync method on the ClientContext object. The executeQueryAsync method takes two parameters. The first parameter is the JavaScript function to execute when the call to SharePoint succeeds. The second parameter is the JavaScript function to execute when the call to SharePoint fails. Both of the JavaScript functions need to have two parameters, sender and args, which are supplied by the JavaScript Client Object Model when the JavaScript functions are executed after the call to SharePoint is made. More about these parameters is covered later in the chapter.
The following code snippet shows how to call the executeQueryAsync method:
context.executeQueryAsync(Function.createDelegate(this, this.onSuccess),
   Function.createDelegate(this, this.onFailure));
In the snippet, the JavaScript functions passed to the executeQueryAsync method are this.onSuccess and this.onFailure. They are passed to the executeQueryAsync method by creating a delegate using the Function.createDelegate method. If your JavaScript functions are a part of a class, you would pass in parameters in this manner:
context.executeQueryAsync(Function.createDelegate(myobject, myobject.onSuccess),
    Function.createDelegate(myobject, myobject.onFailure));
In the snippet, myobject is an instance of your class. After this method executes, the JavaScript Client Object Model calls SharePoint and retrieves the objects you passed to the load method of the ClientContext class. If the call to SharePoint is successful, the first JavaScript function is called as shown in the following code snippet:
function onSuccess(sender, args) {
    var output = "Site Properties:";

    output += "Title : " + this.site.get_title();
    output += "
"
    output += "URL : " + this.site.get_serverRelativeUrl();
    output += "
"
    output += "Created : " + this.site.get_created();
    output += "
"

    alert(output);
}
In the snippet, the sender and args parameters are supplied by the JavaScript Client Object Model. The sender parameter is an instance of the ClientRequest class. You can use the get_webRequest method of the ClientRequest class to get the object used to call SharePoint. The object has a property named _body that returns the XML sent to SharePoint during the request. This XML may be helpful for troubleshooting if you encounter problems with the request. The args parameter is an instance of the ClientRequestEventArgs class. The ClientRequestEventArgs class has a get_request method that returns the same object returned by the get_webRequest method of the ClientRequest class.
The code in the snippet reads the site's title, server-relative URL, and creation date and displays that information in a dialog box using the JavaScript alert function. Notice that the code using the this.site property, which at this point has been populated with data from SharePoint. If the call to SharePoint fails, the second function you passed to the executeQueryAsync method of the ClientContext class executes:
function onFailure(sender, args) {
    var output = "Call to SharePoint failed:
";
output += "Error Code: " + args.get_errorCode() + "
";
output += "Error Details: " + args.get_errorDetails() + "
";
output += "Error Type: " + args.get_errorTypeName() + "
";
output += "Error Value: " + args.get_errorValue() + "
";
output += "Error Message: " + args.get_message() + "
";
output += "Stack Trace: " + args.get_stackTrace() + "
";
alert(output);
}This function has the same parameters as the first function, but its args parameter is an instance of the ClientRequestFailedEventArgs class. The ClientRequestFailedEventArgs class has the following methods you can use to troubleshoot the failed request:
NAME | DESCRIPTION |
|---|---|
get_errorCode() | The code for the error |
get_errorDetails() | Additional information about the error |
get_errorTypeName() | The type of error |
get_errorValue() | The value indicating the error |
get_message() | The actual error message |
get_stackTrace() | The stack trace of the code executed before the error occurred |
The final step in using the JavaScript Client Object Model is to add controls to the page to execute your JavaScript functions. Normally, you add a control similar to the one in the following code snippet:
<input name="Button1" type="button" value="Go" onclick="callSharePoint();" />
In the snippet, a button is added to the page that calls a JavaScript function named callSharePoint when the button is clicked. The problem is that the code in the JavaScript function may fail if the user clicks the button to run your code before the browser is finished downloading the JavaScript files for the Client Object Model. If that occurs, you get an error message similar to this one:
"Message: 'SP.ClientContext.get_current' is null or not an object"
To avoid this problem, you can use a special function in the Client Object Model to ensure the appropriate script files have been download before it executes your JavaScript function. The special function is the executeOrDelayUntilScriptLoaded function on the SP.SOD class. To call this function, use the following code snippet:
SP.SOD.executeOrDelayUntilScriptLoaded(functionToExecute, 'sp.js'),In the snippet, functionToExecute is the function you want to execute. The second parameter is the JavaScript file that must be downloaded before your code is executed. Usually, you need only download the sp.js file which contains the JavaScript version of the Client Object Model. The SOD class will download any dependencies for the JavaScript file automatically. To call this function when a button is clicked, you use this modified code:
<input name="Button1" type="button" value="Go"
    onclick="SP.SOD.executeOrDelayUntilScriptLoaded(callSharePoint, 'sp.js')," />
Display the Properties for the Current Site and Site Collection
In this activity, you create a page that will display information about the current site and site collection.
Open SharePoint Designer from your Start menu.
Click the Open Site button.
When the Open Site dialog appears, enter the URL to your site in the Site name textbox and click the OK button.
If a Windows Security dialog appears, enter your username and password for the SharePoint site and click the OK button.
After the site opens, select Site Pages from the Navigation bar on the left.
Select Page

You can double-click the icon to open the file, but clicking the filename will open the properties of the page, at which point you can click the Edit button in the Ribbon or on the properties page.
If you are prompted to open the page in Advanced mode, choose Yes.
After the page is open, select Attach from the Style tab of the ribbon. Select a master page from the drop-down list under the Attach button.
Click the Split tab at the bottom of the page.
In the code window, type the following code at the bottom of the page:
<asp:Content id="Content1" runat="server"
     contentplaceholderid="PlaceHolderMain">
</asp:Content>
Select SharePoint
Position the mouse cursor inside the
asp:Contenttag.Double-click Input (Button) in the HTML/Form Controls section of the Toolbox.
In the Code view, modify the new button and configure the following properties (you must add the onclick property yourself):
PROPERTY
VALUE
value
Show Site Properties
onclick
SP.SOD.executeOrDelayUntilScriptLoaded(callSharePoint, 'sp.js'),
Place the cursor below the newly created button and double-click
divin the HTML/Tags section of the Toolbox.Add the
IDattribute to thedivtag and set its value todivResults.Insert the following code snippet just above the closing
asp:Contenttag:<script type="text/javascript"> </script>
Insert the following code snippet inside the
scripttag:function callSharePoint() { } function onSuccess(sender, args) { } function onFailure(sender, args) { }In the
callSharePointfunction, insert the following code between the {} braces:var context = new SP.ClientContext.get_current(); this.site = context.get_web(); context.load(this.site); context.executeQueryAsync(Function.createDelegate(this, this.onSuccess), Function.createDelegate(this, this.onFailure));In the
onSuccessfunction, insert the following code between the {} braces:var output = "Site Properties:<br/>"; output += "Title : " + this.site.get_title(); output += "<br/>" output += "URL : " + this.site.get_serverRelativeUrl(); output += "<br/>" output += "Created : " + this.site.get_created(); output += "<br/>" document.getElementById("divResults").innerHTML = output;In the
onFailurefunction, insert the following code between the {} braces:var output = "Call to SharePoint failed:<br/>"; output += "Error Code: " + args.get_errorCode() + "<br/>"; output += "Error Details: " + args.get_errorDetails() + "<br/>"; output += "Error Type: " + args.get_errorTypeName() + "<br/>"; output += "Error Value: " + args.get_errorValue() + "<br/>"; output += "Error Message: " + args.get_message() + "<br/>"; output += "Stack Trace: " + args.get_stackTrace() + "<br/>"; document.getElementById("divResults").innerHTML = output;Save the page by clicking the Save button in the Quick Access Toolbar at the top of the screen.
Select Preview in Browser from the Home tab on the ribbon.
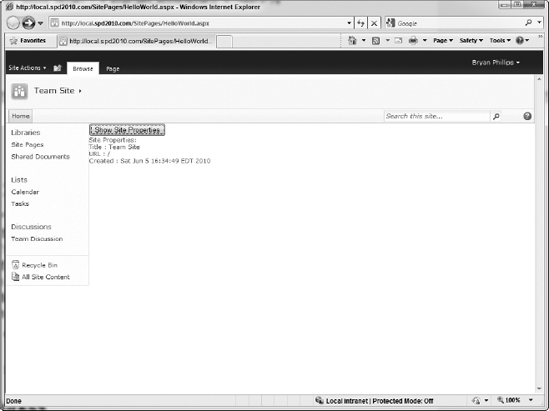
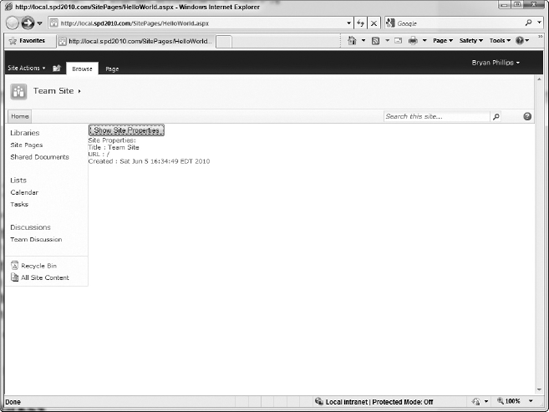
After the page loads in the browser, click the Show Site Properties button to test your code. You should see the site's title, URL, and creation date appear on the page, as shown in Figure 13-3.
Note that the URL is relative to the server name. Don't be surprised if URL is a single slash if your code is running in the root site collection of your SharePoint web application.
How It Works
When you click the Show Site Properties button, the executeOrDelayUntilScriptLoaded function executes. If the sp.js file or any of its dependencies have not been downloaded, execution of the callSharePoint function is delayed until the JavaScript has been downloaded.
When the callSharePoint function executes, the current ClientContext object is retrieved and stored in the context variable. The get_web function on the context variable is called to get the current site, which is stored in the site property on the browser's window object. Because the site property is not defined on the window object, it is dynamically created by the JavaScript engine.
Next, this.web is passed to the load function on the context variable so that the properties for the site are retrieved. Then, the executeQueryAsync function is called to retrieve the objects passed to the load function from SharePoint.
After the data is returned from SharePoint, the onSuccess function executes. Finally, the output variable is populated with a string representing a few properties of the site, and its contents are displayed in the divResults div tag.
You can retrieve data from lists and libraries by using a query language called CAML, which stands for Collaborative Application Markup Language. It is used for many things inside SharePoint, but in this case, it can be used to filter data returned by a list. In a word, it is XML that looks like the Where clause of a SQL statement. Here is an example of a CAML query:
<View>
    <ViewFields>
        <FieldRef Name='Title'/>
    </ViewFields>
    <Query>
        <Where>
            <And>
                <Neq>
                    <FieldRef Name='Status' />
                    <Value Type='Choice'>Completed</Value>
                </Neq>
                <Eq>
                    <FieldRef Name='AssignedTo' />
                    <Value Type='User'>John Public</Value>
                </Eq>
            </And>
        </Where>
        <OrderBy>
            <FieldRef Name='Title' Ascending='True' />
        </OrderBy>
    </Query>
    <RowLimit>2</RowLimit>
</View>
The CAML query in the snippet is for a Tasks list. It returns only the Title field and only the first two items matching the Where clause. The Where clause only returns the items where Status is not Completed and the item is assigned to John Public. Additionally, it sorts the results by the Title field in ascending order.
Warning
CAML is case-sensitive and SharePoint will not throw any errors if you build your CAML query incorrectly. In fact, it may not filter the results at all. For those reasons, you should use a tool to build your CAML. You can download a tool at www.u2u.net/res/Tools/CamlQueryBuilder.aspx. Download the 2007 version of the tool. It will work on SharePoint 2007 and 2010.
The following table lists the components of a CAML query and their usage:
NAME | DESCRIPTION |
|---|---|
The outermost element in the query. | |
Contains the fields to return in the results. | |
A reference to a field in the list. The | |
| |
| Represents the |
| Represents the |
Represents the | |
Represents the | |
| |
Represents the | |
Filters on a field having a value. | |
Filters where the field value begins with the specified string. | |
| Filters where the field value contains the specified string. |
Used to filter recurring items, such as recurring events in a Calendar list. | |
| Used in combination with |
| Contains the fields to order by. The |
Specifies the maximum number of items to return that match the |
Now that you have been introduced to the CAML query syntax, you can start using the JavaScript Client Object Model to get data from your SharePoint site. You use the CamlQuery class to specify the query to use against a List object. To use the CamlQuery class, you need to write code similar to the following snippet:
var caml = "<View>" +
    "    <ViewFields>" +
    "        <FieldRef Name='Title'/>" +
    "    </ViewFields>" +
    "    <Query>" +
    "        <Where>" +
    "            <Eq>" +
    "                <FieldRef Name='AssignedTo'/>" +
    "                <Value Type='User'>John Public</Value>" +
    "            </Eq>" +
    "        </Where>" +
    "    </Query>" +
    "    <RowLimit>2</RowLimit>" +
    "</View>";

var query = new SP.CamlQuery();
query.set_viewXml(caml);
In the snippet, the query variable is set to a new instance of the CamlQuery class. Afterwards, you specify the CAML query by passing a string containing the query to the set_viewXml method on the query object. After you have the CamlQuery object configured, you need to get an instance of the list to query against. To get the list instance, you can call the getByTitle method on the Site object's get_lists method as shown in the following snippet:
var tasks = context.get_web().get_lists().getByTitle("Tasks");
this.results = tasks.getItems(query);

context.load(this.results);

context.executeQueryAsync(Function.createDelegate(this, this.onSuccess),
    Function.createDelegate(this, this.onFail));
In the snippet, the get_lists method returns a ListCollection object containing the lists and libraries in the site. The ListCollection object has a getByTitle method, which you use to get an instance of your list by passing in the display name of the list. The List class has a getItems method that you pass the CamlQuery object in order to get an instance of a ListItemCollection class. Like all other SharePoint objects returned in the JavaScript Client Object Model, you must store it in a property or variable and pass the property or variable to the load method of the ClientContext object. Finally, you call the executeQueryAsync method of the ClientContext object to call SharePoint and return the results of your query.
After the query executes, your code can call the getEnumerator method on the ListItemCollection class to get an object to use in a while loop to read each ListItem object in the ListItemCollection. The enumerator object has a moveNext method, which returns False when all the ListItem objects have been read from the ListItemCollection. Inside the loop, you can call the get_current method on the enumerator to get the current ListItem in the ListItemCollection. The following snippet shows these objects and methods in action:
var output = "Results:<br/>";

var enumerator = this.results.getEnumerator();

while (enumerator.moveNext()) {
    var item = enumerator.get_current();

    output += "ID : " + item.get_id();
    output += "<br/>"
    output += "Title : " + item.get_item("Title");
    output += "<br/>"
    output += "Status : " + item.get_item("Status");
    output += "<br/>"
    output += "Assigned To : " + item.get_item("AssignedTo").get_lookupValue();
    output += "<br/>"
}

document.getElementById("divResults").innerHTML = output;
In the snippet, an enumerator for the results of the CAML query is assigned to the enumerator variable. The enumerator and its moveNext method are used in the condition for the while statement. Every time the while loop runs, the ListItem returned from the get_current method is changed to the next ListItem in the result set. When the last ListItem in the result set is reached, the move-Next method returns False, which causes the while loop to exit. Inside the while loop, the current ListItem is retrieved from the get_current method and stored in the item variable. Using the item variable, you call the get_id method to get the ID of the ListItem and the get_item method to get the values of other fields in the ListItem. In the get_item method, you need to pass in the original name of the field. That means if you renamed the Title column of a list, you must still pass in "Title" instead of your new name for the column.
Some values for the fields in a list might be more complex than numbers, strings, or dates. In the code snippet, the AssignedTo field is actually a Person column in the list, which is a special lookup column that refers to the hidden UserInformationList list that contains the users in the site. The following table lists the column types that are more complex and the methods you can use to display their data:
TYPE | METHOD | DESCRIPTION |
|---|---|---|
Date and Time |
| Formats the date using the invariant culture. Valid values for |
| Formats the date using the user's current culture. Valid values for | |
Choice (Allow Multiple Values) | Returns a string array of selected values. | |
Hyperlink or Picture |
| Returns the description of the hyperlink or picture. |
| Returns the URL of the hyperlink or picture. | |
Lookup |
| Returns the ID value of the selected |
| Returns the display value of the selected | |
Lookup (Allow Multiple Values) | Returns an array of Lookup values. | |
Person or Group |
| Returns the ID of the selected user or group from the UserInformationList list. |
| Returns the display name of the selected user or group from the UserInformationList list. |
The following table contains the valid formats you can pass to the format and localeFormat functions of Date and Time values returned from SharePoint.
FORMAT | DESCRIPTION | EXAMPLES |
|---|---|---|
| Short date format | 6/1/2010 |
| Long date format | Tuesday, June 1, 2010 |
| Long date time format | Tuesday, June 1, 2010 11:00:00 AM |
| Month day format | June 1 |
| Sortable date time format | 2010-06-01T11:00:00 |
| Short time format | 11:00 AM |
| Long time format | 11:00:00 AM |
| Year month | June, 2010 |
Prep Work for Querying a SharePoint List
In this activity, you create a Task list and populate it with data in preparation for the next activity.
Open SharePoint Designer from your Start menu.
Click the Open Site button.
When the Open Site dialog appears, enter the URL to your site in the Site name textbox and click the OK button.
If a Windows Security dialog appears, enter your username and password for the SharePoint site and click the OK button.
When the site opens, select Lists and Libraries from the Navigation bar on the left.
Select SharePoint List
Enter MyTasks in the Name textbox and click the OK button. After the list is created, a new tab with the name of the newly created list appears.
If the new tab in Step 7 does not appear, click your list and select List Settings from the ribbon.
Select Preview in Browser from the ribbon.
After the browser opens and navigates to the new list, add the following items to the list
TITLE
PRIORITY
STATUS
Upgrade to Exchange 2010
(1) High
In Progress
Migrate intranet to SharePoint 2010
(2) Normal
Not Started
Create marketing presentation
(2) Normal
Completed
How It Works
Since this is preparation for the next Try It Out, please read the How It Works at the conclusion of the next activity for the full explanation.
Query a SharePoint List
In this activity, you query the items in a Task list and display them on a page.
Open SharePoint Designer from your Start menu.
Click the Open Site button.
When the Open Site dialog appears, enter the URL to your site in the Site name textbox and click the OK button.
If a Windows Security dialog appears, enter your username and password for the SharePoint site and click the OK button.
After the site opens, select Site Pages from the Navigation bar on the left.
Select Page
You can double-click the icon to open the file, but clicking the filename will open the properties of the page, at which point you can click the Edit button in the Ribbon or on the properties page.
If you are prompted to open the page in Advanced mode, choose Yes.
After the page is open, select Attach from the Style tab of the ribbon. Select a master page from the drop-down list under the Attach button.
Click the Split tab at the bottom of the page.
In the code window, type the following code at the bottom of the page:
<asp:Content id="Content1" runat="server"
   contentplaceholderid="PlaceHolderMain">
</asp:Content>
Select SharePoint
Position the mouse cursor inside the
asp:Contenttag.Double-click Input (Button) in the HTML/Form Controls section of the Toolbox.
In the Code view, modify the new button and configure the following properties (you must add the onclick property yourself):
PROPERTY
VALUE
value
Show Tasksonclick
SP.SOD.executeOrDelayUntilScriptLoaded(callSharePoint, 'sp.js'),Place the cursor below the newly created button and double-click
divin the HTML/Tags section of the Toolbox.Add the
IDattribute to thedivtag and set its value todivResults.Insert the following code snippet just above the closing
asp:Contenttag:<script type="text/javascript"> </script>
Insert the following code snippet inside the
scripttag:function callSharePoint() { } function onSuccess(sender, args) { } function onFailure(sender, args) { }In the
callSharePointfunction, insert the following code between the {} braces:var context = new SP.ClientContext.get_current(); var tasks = context.get_web().get_lists().getByTitle("MyTasks"); var caml = "<View>" + " <Query>" + " <Where>" + " <Neq>" + " <FieldRef Name='Status'/>" + " <Value Type='Choice'>Completed</Value>" + " </Neq>" + " </Where>" + " <OrderBy>" + " <FieldRef Name='Title' Ascending='True'/>" + " </OrderBy>" + " </Query>" + "</View>"; var query = new SP.CamlQuery(); query.set_viewXml(caml); this.results = tasks.getItems(query); context.load(this.results); context.executeQueryAsync(Function.createDelegate(this, this.onSuccess), Function.createDelegate(this, this.onFailure));In the
onSuccessfunction, insert the following code between the {} braces:var output = "Results:<br/>"; output += "<table>" var enumerator = this.results.getEnumerator(); output += "<tr>"; output += "<th>ID</th>"; output += "<th>Title</th>"; output += "<th>Priority</th>"; output += "<th>Status</th>"; output += "</tr>"; while (enumerator.moveNext()) { var item = enumerator.get_current(); output += "<tr>" output += "<td>" + item.get_id() + "</td>"; output += "<td>" + item.get_item("Title") + "</td>"; output += "<td>" + item.get_item("Priority") + "</td>"; output += "<td>" + item.get_item("Status") + "</td>"; output += "</tr>" }output += "</table>" document.getElementById("divResults").innerHTML = output;In the
onFailurefunction, insert the following code between the {} braces:var output = "Call to SharePoint failed:<br/>"; output += "Error Code: " + args.get_errorCode() + "<br/>"; output += "Error Details: " + args.get_errorDetails() + "<br/>"; output += "Error Type: " + args.get_errorTypeName() + "<br/>"; output += "Error Value: " + args.get_errorValue() + "<br/>"; output += "Error Message: " + args.get_message() + "<br/>"; output += "Stack Trace: " + args.get_stackTrace() + "<br/>"; document.getElementById("divResults").innerHTML = output;Save the page by clicking the Save button in the Quick Access Toolbar at the top of the screen.
Select Preview in Browser from the Home tab on the ribbon.
After the page loads in the browser, click the Show Tasks button to test your code. You should see the site's title, URL, and creation date appear on the page, as shown in Figure 13-4.
Using the context variable, you can get a reference to the current site and its collection of lists. Calling the getByTitle method of the ListCollection returns the List object representing the MyTasks list in SharePoint. Afterwards, you create a CamlQuery object specifying a CAML query that returns only the tasks from the list that are not complete and sorts the results by the Title column in ascending order.
Using the getItems method on the List object, you pass in the CamlQuery object and call the load method on the ClientContext object to request the results of the query from SharePoint. Finally, the executeQueryAsync method is called to initiate the call to SharePoint.
After the call to SharePoint succeeds, it populates the this.results property you used to store the return value of the getItems method, and the onSuccess method executes. Inside the onSuccess method, you obtain an enumerator from the getEnumerator method on the ListItemCollection class and use it to loop through the items returned by the CAML query. Looping through the items, you build an HTML table to display the results using the get_id and get_item methods on the ListItem class to retrieve the values of the fields in each item.
You can use the same techniques on document libraries as for lists. The list items for the documents in a document library have additional fields that you can use. Here is a list of these fields:
NAME | DESCRIPTION |
|---|---|
The name of the file | |
The server-relative URL of the file | |
The file extension of the file | |
The size of the file in bytes |
Prep Work for Querying a Document Library
In this activity, you create a document library and upload documents to it in preparation for the next activity.
Open SharePoint Designer from your Start menu.
Click the Open Site button.
When the Open Site dialog appears, enter the URL to your site in the Site name textbox and click the OK button.
If a Windows Security dialog appears, enter your username and password for the SharePoint site and click the OK button.
When the site opens, select Lists and Libraries from the Navigation bar on the left.
Select Document Library
Enter MyDocuments in the Name textbox and click the OK button. After the list is created, a new tab with the name of the newly created list appears.
If the new tab in Step 7 does not appear, click your list and select List Settings from the ribbon.
Select Edit Columns from the ribbon.
Select Add New Column
Type in the following choices in the Choices textbox:
Project 1
Project 2
Project 3
Type in Project 1 in the Default value textbox and click the OK button.
Right-click the new column and select Rename.
Type in Project as the name of the new column and press the Enter key.
Save the list by clicking the Save button in the Quick Access Toolbar at the top of the screen.
Select List Settings from the ribbon.
Select Preview in Browser from the ribbon.
After the browser opens and navigates to the new library, upload a few documents and choose a value for the Project column.
How It Works
Since this is preparation for the next Try It Out, please read the How It Works at the conclusion of the next activity for the full explanation.
Query a SharePoint Document Library
In this activity, you query the documents in a document library and display them on a page.
Open SharePoint Designer from your Start menu.
Click the Open Site button.
When the Open Site dialog appears, enter the URL to your site in the Site name textbox and click the OK button.
If a Windows Security dialog appears, enter your username and password for the SharePoint site and click the OK button.
When the site opens, select Site Pages from the Navigation bar on the left.
Select Page
You can double-click the icon to open the file, but clicking the filename will open the properties of the page, at which point you can click the Edit button in the Ribbon or on the properties page.
If you are prompted to open the page in Advanced mode, choose Yes.
After the page is open, select Attach from the Style tab of the ribbon. Select a master page from the drop-down list under the Attach button.
Click the Split tab at the bottom of the page.
In the code window, type the following code at the bottom of the page:
<asp:Content id="Content1" runat="server"
    contentplaceholderid="PlaceHolderMain">
</asp:Content>
Select SharePoint
Position the mouse cursor inside the
asp:Contenttag.Double-click Input (Button) in the HTML/Form Controls section of the Toolbox.
In the Code view, modify the new button and configure the following properties (you must add the onclick property yourself):
PROPERTY
VALUE
value
Show Documentsonclick
SP.SOD.executeOrDelayUntilScriptLoaded(callSharePoint, 'sp.js'),Place the cursor below the newly created button and double-click
divin the HTML/Tags section of the Toolbox.Add the
IDattribute to thedivtag and set its value todivResults.Insert the following code snippet just above the closing
asp:Contenttag:<script type="text/javascript"> </script>
Insert the following code snippet inside the
scripttag:function callSharePoint() { } function onSuccess(sender, args) { } function onFailure(sender, args) { }In the
callSharePointfunction, insert the following code between the {} braces:var context = new SP.ClientContext.get_current();
var docs = context.get_web().get_lists().getByTitle("MyDocuments");

var caml = "<View>" +
    "    <Query>" +
    "        <Where>" +
    "            <Eq>" +
    "                <FieldRef Name='Project'/>" +
    "                <Value Type='Choice'>Project 1</Value>" +
    "            </Eq>" +
    "        </Where>" +
    "    </Query>" +
    " </View>";

var query = new SP.CamlQuery();
query.set_viewXml(caml);

this.results = docs.getItems(query);

context.load(this.results);

context.executeQueryAsync(Function.createDelegate(this, this.onSuccess),
    Function.createDelegate(this, this.onFailure));
In the
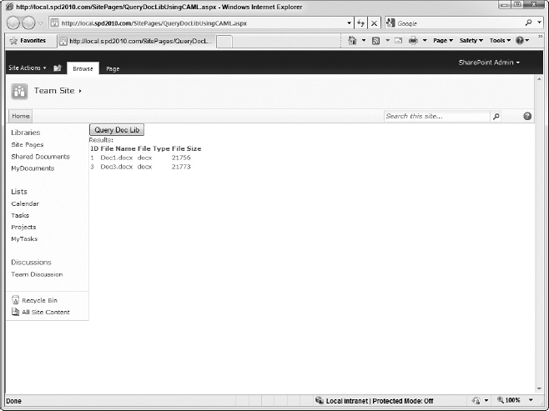
onSuccessfunction, insert the following code between the {} braces:var output = "Results:<br/>"; output += "<table>" var enumerator = this.results.getEnumerator(); output += "<tr>"; output += "<th>ID</th>"; output += "<th>File Name</th>"; output += "<th>File Type</th>"; output += "<th>File Size</th>"; output += "</tr>"; while (enumerator.moveNext()) { var item = enumerator.get_current(); output += "<tr>" var id = item.get_id(); output += "<td>" + id + "</td>"; output += "<td><a target='_blank' href='" + item.get_item("FileRef") + "'>" + item.get_item("FileLeafRef") + "</a></td>"; output += "<td>" + item.get_item("File_x0020_Type") + "</td>"; output += "<td>" + item.get_item("File_x0020_Size") + "</td>"; output += "</tr>" } output += "</table>" document.getElementById("divResults").innerHTML = output;In the
onFailurefunction, insert the following code between the {} braces:var output = "Call to SharePoint failed:<br/>"; output += "Error Code: " + args.get_errorCode() + "<br/>"; output += "Error Details: " + args.get_errorDetails() + "<br/>"; output += "Error Type: " + args.get_errorTypeName() + "<br/>"; output += "Error Value: " + args.get_errorValue() + "<br/>"; output += "Error Message: " + args.get_message() + "<br/>"; output += "Stack Trace: " + args.get_stackTrace() + "<br/>"; document.getElementById("divResults").innerHTML = output;Save the page by clicking the Save button in the Quick Access Toolbar at the top of the screen.
Select Preview in Browser from the Home tab on the ribbon.
After the page loads in the browser, click the Query Doc Lib button to test your code. You should see the documents appear on the page, as shown in Figure 13-5.
How It Works
Although document libraries store documents, they are still lists and documents are still list items. You can use the same code to query and manipulate a document library that you would use for a list. The difference is that the list item that represents the document has additional file-specific fields for the file's name, path, type, and size. In the activity, you used the values of these fields to build a table on the page that included hyperlinks linking to the documents themselves.
Previously in the chapter, you learned how to query lists and libraries. Next, you will learn how to create, update, and delete list items. To create a list item, you need to create an instance of the ListItemCreationInformation class and use it to call the addItem method on the List object. The following code snippet shows this in action:
var itemInfo = new SP.ListItemCreationInformation();
this.newListItem = tasks.addItem(itemInfo);
In the snippet, the addItem method returns an instance of the ListItem class, which is stored in the newListItem variable. Using the set_item method of the ListItem class, you pass in the name and the value of the field to set as shown in the following code snippet:
this.newListItem.set_item("Title", "My New Task");
this.newListItem.set_item("Priority", "(3) Low");
this.newListItem.set_item("Status", "In Progress");

this.newListItem.update();
In the snippet, the Title, Priority, and Status fields are set to the value of the second parameter. Afterwards, you call the update method on the ListItem class to save your changes. Just like before, you still must call the executeQueryAsync method to submit your new item to SharePoint. If you want to get the value of the new item's ID field, you would need to call the load method of the ClientContext class passing in the newListItem variable before the call to the executeQueryAsync method.
To update an existing list item, you use perform the same steps as for creating a list item except that you call getItemById on the List class to get an instance of the list item. You can also use a CAML query to get the list item. To delete an existing item, you call the recycle method on the list item, which sends the item to the Recycle Bin. To delete the item permanently, call the deleteObject method instead.
Insert, Update, and Delete Items in a SharePoint List
In this activity, you insert, update, and delete tasks from a SharePoint list.
Open SharePoint Designer from your Start menu.
Click the Open Site button.
When the Open Site dialog appears, enter the URL to your site in the Site name textbox and click the OK button.
If a Windows Security dialog appears, enter your username and password for the SharePoint site and click the OK button.
After the site opens, select Site Pages from the Navigation bar on the left.
Select Page
You can double-click the icon to open the file, but clicking the filename will open the properties of the page, at which point you can click the Edit button in the Ribbon or on the properties page.
If you are prompted to open the page in Advanced mode, choose Yes.
After the page is open, select Attach from the Style tab of the ribbon. Select a master page from the drop-down list under the Attach button.
Click the Split tab at the bottom of the page.
In the code window, type the following code at the bottom of the page:
<asp:Content id="Content1" runat="server"
    contentplaceholderid="PlaceHolderMain">
</asp:Content>
Select SharePoint
Position the mouse cursor inside the
asp:Contenttag.Double-click Input (Button) in the HTML/Form Controls section of the Toolbox.
In the Code view, modify the new button and configure the following properties (you must add the onclick property yourself):
PROPERTY
VALUE
value
Show Grocery Listonclick
SP.SOD.executeOrDelayUntilScriptLoaded(populateItems, 'sp.js'),Double-click Input (Button) in the HTML/Form Controls section of the Toolbox.
Click the new button and configure the following properties:
PROPERTY
VALUE
value
Add Itemonclick
SP.SOD.executeOrDelayUntilScriptLoaded(showAddItem, 'sp.js'),Place the cursor below the newly created button and double-click
divin the HTML/Tags section of the Toolbox.Add the
IDattribute to thedivtag and set its value todivItem.Add the
styleattribute to thedivtag and set its value todisplay:none.Position the mouse cursor inside the
divtag.Double-click
spanin the HTML/Tags section of the Toolbox.Add text to the
spanso that it looks like this:<span>Item:</span>
Double-click Input (Text) in the HTML/Form Controls section of the Toolbox.
Add the
IDattribute to theinputtag and set its value totitleText.Double-click Input (Button) in the HTML/Form Controls section of the Toolbox.
Click the new button and configure the following properties:
PROPERTY
VALUE
value
Saveonclick
SP.SOD.executeOrDelayUntilScriptLoaded(addItem, 'sp.js'),Place the cursor below the newly created button and double-click
divin the HTML/Tags section of the Toolbox.Add the
IDattribute to thedivtag and set its value todivResults.Insert the following code snippet just above the closing
asp:Contenttag:<script type="text/javascript"> </script>
Insert the following code snippet inside the
scripttag:function populateItems() { } function onSuccess(sender, args) { } function onFailure(sender, args) { } function showAddItem() { } function addItem() { } function updateItem(id){ } function deleteItem(id){ }In the
populateItemsfunction, insert the following code between the {} braces:document.getElementById("divItem").style.display = "none"; document.getElementById("divResults").innerHTML = "Loading..."; var context = new SP.ClientContext.get_current(); var items = context.get_web().get_lists().getByTitle("MyGroceryList");var caml = "<View><RowLimit>100</RowLimit></View>"; var query = new SP.CamlQuery(); query.set_viewXml(caml); this.results = items.getItems(query); context.load(this.results); context.executeQueryAsync(Function.createDelegate(this, this.onSuccess), Function.createDelegate(this, this.onFailure));In the
onSuccessfunction, insert the following code between the {} braces:var output = "Results:<br/>"; output += "<table>"; var enumerator = this.results.getEnumerator(); output += "<tr>"; output += "<th>ID</th>"; output += "<th>Title</th>"; output += "<th></th>" output += "<th></th>" output += "</tr>"; while (enumerator.moveNext()) { var item = enumerator.get_current(); var id = item.get_id(); output += "<tr id='row" + id + "'>"; output += "<td>" + id + "</td>"; output += "<td>"; output += "<input id='titleText" + id + "' type='text' value='" + item.get_item("Title") + "'/>"; output += "</td>"; output += "<td>"; output += "<input type='button' value='Update' onclick='updateItem(" + id + ");' />"; output += "</td>"; output += "<td>"; output += "<input type='button' value='Delete' onclick='deleteItem(" + id + ");' />"; output += "</td>"; output += "</tr>" } output += "</table>" document.getElementById("divResults").innerHTML = output;In the
onFailurefunction, insert the following code between the {} braces:var output = "Call to SharePoint failed:<br/>"; output += "Error Code: " + args.get_errorCode() + "<br/>"; output += "Error Details: " + args.get_errorDetails() + "<br/>"; output += "Error Type: " + args.get_errorTypeName() + "<br/>"; output += "Error Value: " + args.get_errorValue() + "<br/>"; output += "Error Message: " + args.get_message() + "<br/>"; output += "Stack Trace: " + args.get_stackTrace() + "<br/>"; document.getElementById("divResults").innerHTML = output;In the
showAddItemfunction, insert the following code between the {} braces:document.getElementById("divItem").style.display = "";In the
addItemfunction, insert the following code between the {} braces:var context = new SP.ClientContext.get_current(); var items = context.get_web().get_lists().getByTitle("MyGroceryList"); var itemInfo = new SP.ListItemCreationInformation(); var item = items.addItem(itemInfo); item.set_item("Title", document.getElementById("titleText").value); item.update(); context.executeQueryAsync(Function.createDelegate(this, this.populateItems), Function.createDelegate(this, this.onFailure));In the
updateItemfunction, insert the following code between the {} braces:var context = new SP.ClientContext.get_current(); var items = context.get_web().get_lists().getByTitle("MyGroceryList"); var item = items.getItemById(id); item.set_item("Title", document.getElementById("titleText" + id).value); item.update(); context.executeQueryAsync(Function.createDelegate(this, this.populateItems), Function.createDelegate(this, this.onFailure));In the
deleteItemfunction, insert the following code between the {} braces:var context = new SP.ClientContext.get_current(); var items = context.get_web().get_lists().getByTitle("MyGroceryList"); items.getItemById(id).recycle(); context.executeQueryAsync(Function.createDelegate(this, this.populateItems), Function.createDelegate(this, this.onFailure));Save the page by clicking the Save button in the Quick Access Toolbar at the top of the screen.
Select Preview in Browser from the Home tab on the ribbon.
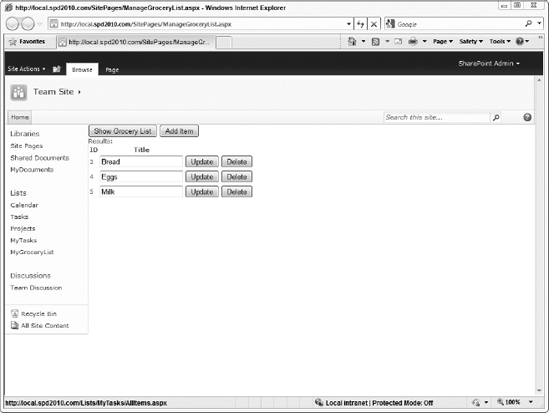
After the page loads in the browser, click the Show Grocery List button to test your code. You should see a screen similar to the one shown in Figure 13-6.
Click the Add Item button.
Enter Cereal in the textbox and click the Save button.
Repeat Steps 42–43 for the following items:
Bacon
Bagels
Ham
Switch to the browser window you used in step 11 of the previous activity "Prep Work for Inserting, Updating, and Deleting Items in a SharePoint List" to add items to the MyGroceryList list.
Refresh the page and you should see the new items, as shown in Figure 13-7.
Switch back to the browser window you were using to test your page.
Click the Delete button beside Bacon and Ham.
Change Milk to read Soy Milk and click the Update button.
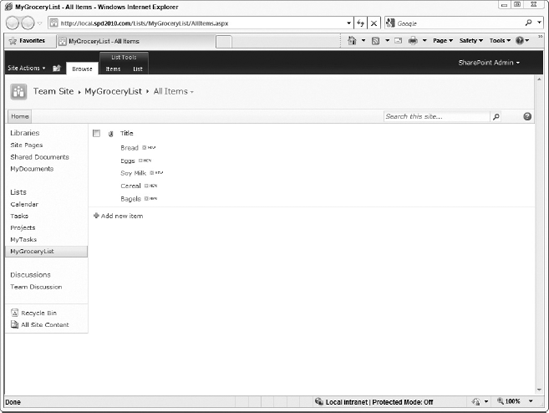
Switch to the browser you used in the previous activity to add items to the MyGroceryList list.
Refresh the page and you should see the new items, as shown in Figure 13-8.

How It Works
When you clicked the Show Grocery List button, the populateItems function executed, which set the contents of divResults to "Loading..." and called SharePoint to get the first 100 items from the MyGroceryList list. After the data was returned from the server, the onSuccess function was called to build a table out of the data and place it inside divResults.
The table was constructed with columns for the items' ID and Title fields and buttons for updating and deleting the items. When you clicked the Add Item button, the showAddItem function was called and divItem was made visible by setting its CSS display value to blank. After you entered a new item in the textbox and clicked the Save button, the addItem function was called.
In the addItem function, a new ListItem object was created and subsequently populated with data using the set_item function. Afterwards, calling the update function on the ListItem object queued the new item for insertion when the executeQueryAsync method was called.
You also changed one of the items and clicked its Update button. This, in turn, called the updateItem function, passing in the ID of the item. Using the item's ID, you were able to get a reference to the item by calling the getItemById function of the List class. Just like the addItem function, you used the set_item and update functions on the ListItem class to save and queue the change to be sent to SharePoint.
Deleting an item works the same way as updating the item when you use the getItemById function of the List class to get a reference to the item. Calling the recycle function on the ListItem class sends the item to the Recycle Bin.
Finally, whether you insert, update, or delete an item, the onSuccess function refreshes divResults with the current contents of the MyGroceryList list.
Custom actions are the links that appear on menus, toolbars, the ribbon, the edit control block for items and documents, and practically everywhere else in SharePoint. You can use the Client Object Model to modify these custom actions or create your own.
To get a list of the user custom actions in a site, you call the get_userCustomActions function on the Web class, which returns a collection that you populate using the load function on the ClientContext class. By default, there are no user custom actions.
To create a new user custom action, you call the get_userCustomActions function on the Web class to get the collection of existing user custom actions and then call the add function on the UserCustomActionCollection to get a reference to a new UserCustomAction object. You must call several functions on the UserCustomAction class before you can add it to SharePoint:
NAME | DESCRIPTION |
|---|---|
The place where the custom action should appear. See the following table for a list of common locations. | |
Some locations subdivide their custom actions into groups. Depending on the location you choose, you may need to specify this value, too. For example, adding a custom action to the Site Actions menu requires this. See the following table for a list of common locations and groups. | |
The order in which the custom action should appear. Actions in the same location are sorted in ascending order based on their value for sequence. | |
The actual text to display in the custom action. | |
The URL for navigating the browser when the custom action is clicked. You can use a URL token as a part of the URL automatically to replace it with an actual value when the page is rendered. A table later in the chapter provides a list of tokens. | |
The icon to display next to the custom action. This is not required but adds a lot toward a good user experience. | |
The description to display with the custom action. This is not required but adds a lot toward a good user experience. |
The following table contains the valid locations you can pass to the set_location function of the UserCustomAction class:
LOCATION | GROUP | DESCRIPTION |
|---|---|---|
N/A | The drop-down list when hovering the mouse over a list item or document | |
The Site Actions menu | ||
Microsoft.SharePoint.StandardMenu | ActionsMenu | The ribbon on a list view page |
The following table contains the valid tokens you can use in the URLs you pass to the set_url function of the UserCustomAction class:
NAME | DESCRIPTION |
|---|---|
| The relative URL to the current site. Use at the beginning of the URL. |
The relative URL to the current site collection. Use at the beginning of the URL. | |
| The ID of the list item or document. Useful for actions in an edit control block. |
| The URL of the list item or document. Useful for actions in an edit control block. |
| The ID of the current list. |
| The URL of the current site. |
| The ID of an instance of a recurring item. Given a recurring meeting in a calendar list, the recurrence ID would be for one of the meetings on the calendar. |
Note
You can use the set_url method of the UserCustomAction class to specify a snippet of JavaScript to run instead of an actual URL. Clicking the custom action executes the JavaScript . Here is an example:
customAction.set_url("javascript:alert('Hello world!'),");Clicking the custom action calls the JavaScript alert function, which displays a message box with the text "Hello world!".
Adding custom actions to the ribbon and edit control block requires two more functions to be called: set_registrationType and set_registrationId. Combined, these two functions determine which types of lists, content types, or even file types should display the custom action. For example, you could have a custom action appear in the edit control block for only .docx files. The following code snippet shows this in action:
customAction.set_registrationType(SP.UserCustomActionRegistrationType.fileType);
customAction.set_registrationId("docx");
In the snippet, you specify SP.UserCustomActionRegistrationType.fileType for the registration type, and pass in the file extension to the set_registrationId function. The following table lists the most common values for the set_registrationType function:
The following table contains the valid list template types you can pass to the set_registrationId function of the UserCustomAction class when you set the set_registrationType function to SP.UserCustomActionRegistrationType.list:
NAME | DESCRIPTION |
|---|---|
Custom lists | |
Normal document libraries | |
Surveys | |
Link lists | |
Announcement lists | |
Contact lists | |
Calendar lists | |
Task lists | |
Discussion lists | |
Picture libraries | |
Form libraries | |
Project task lists | |
External lists |
The following table contains the valid list template types you can pass to the set_registrationId function of the UserCustomAction class when you set the set_registrationType function to SP.UserCustomActionRegistrationType.contentType:
NAME | ID |
|---|---|
| 0x01 |
| 0x0101 |
| 0x010101 |
| 0x010102 |
| 0x0104 |
| 0x0106 |
| 0x0102 |
0x0103 | |
0x0105 | |
0x0108 |
After you have configured your UserCustomAction object, you must call its update method to queue it for the next call to the executeQueryAsync method of the ClientContext class. After your code runs, you won't immediately see your new custom action if your code is on the same page on which the custom action should appear. Simply reload the page and your new custom action will appear in the right place.
If you want to remove a custom action, get a reference to its UserCustomAction object and call its deleteObject method. You can also remove all of your custom actions at once by calling the clear method on the UserCustomActionCollection class. As always, you must call the executeQueryAsync method on the ClientContext class to submit your changes to SharePoint.
Manipulate User Custom Actions
In this activity, you create custom actions that will appear in various places in your site.
Open SharePoint Designer from your Start menu.
Click the Open Site button.
When the Open Site dialog appears, enter the URL to your site in the Site name textbox and click the OK button.
If a Windows Security dialog appears, enter your username and password for the SharePoint site and click the OK button.
After the site opens, select Site Pages from the Navigation bar on the left.
Select Page
You can double-click the icon to open the file, but clicking the filename will open the properties of the page, at which point you can click the Edit button in the Ribbon or on the properties page.
If you are prompted to open the page in Advanced mode, choose Yes.
After the page is open, select Attach from the Style tab of the ribbon. Select a master page from the drop-down list under the Attach button.
Click the Split tab at the bottom of the page.
In the code window, type the following code at the bottom of the page:
<asp:Content id="Content1" runat="server"
    contentplaceholderid="PlaceHolderMain">
</asp:Content>
Select SharePoint
Double-click Input (Button) in the HTML/Form Controls section of the Toolbox.
In the Code view, modify the new button and configure the following properties (you must add the onclick property yourself):
PROPERTY
VALUE
value
Show Custom Actionsonclick
SP.SOD.executeOrDelayUntilScriptLoaded(showCustomActions, 'sp.js'),Repeat Step 15 using the following information to create six additional buttons:
VALUE
ONCLICK
Clear All
Add to Site Actions Menu (URL)
SP.SOD.executeOrDelayUntilScriptLoaded(addToSiteActionsMenu, 'sp.js'),Add to Site Actions Menu (JavaScript)
SP.SOD.executeOrDelayUntilScriptLoaded(addToSiteActionsMenuJavaScript, 'sp.js'),Add to Edit Control Block (File Extension)
SP.SOD.executeOrDelayUntilScriptLoaded(addToEditControlBlockFileExtension, 'sp.js'),Add to Edit Control Block (Content Type)
SP.SOD.executeOrDelayUntilScriptLoaded(addToEditControlBlockContentType, 'sp.js'),Add to Ribbon
SP.SOD.executeOrDelayUntilScriptLoaded(addToRibbon, 'sp.js'),Place the cursor below the newly created buttons and double-click
divin the HTML/Tags section of the Toolbox.Add the
IDattribute to thedivtag and set its value todivResults.Insert the following code snippet just above the closing
asp:Contenttag:<script type="text/javascript"> </script>
Insert the following code snippet inside the
scripttag:function showCustomActions() { } function clearAll(){ }function onSuccess(sender, args) { } function onFailure(sender, args) { } function addToSiteActionsMenu() { } function addToSiteActionsMenuJavaScript() { } function addToEditControlBlockFileExtension() { } function addToEditControlBlockContentType() { } function addToRibbon() { }Inside the
showCustomActionsmethod, type the following code to request the list of user custom actions from SharePoint:var context = new SP.ClientContext.get_current(); this.site = context.get_web(); context.load(this.site, 'UserCustomActions'), context.executeQueryAsync(Function.createDelegate(this, this.onSuccess), Function.createDelegate(this, this.onFailure));Inside the
clearAllmethod, type the following code to remove all of your user custom actions:document.getElementById("divResults").innerText = ""; var context = new SP.ClientContext.get_current(); this.site = context.get_web(); this.site.get_userCustomActions().clear(); context.load(this.site, 'UserCustomActions'), context.executeQueryAsync(Function.createDelegate(this, this.onSuccess), Function.createDelegate(this, this.onFailure));Inside the
onSuccessmethod, type the following code to display the list of user custom actions on the screen:var output = "Custom Actions:<br/>"; var enumerator = this.site.get_userCustomActions().getEnumerator(); while (enumerator.moveNext()) { var item = enumerator.get_current();output += item.get_title() + " " + item.get_location() + "<br/>"; } document.getElementById("divResults").innerHTML = output;Inside the
onFailuremethod, type the following code to display any errors that occur during the calls to SharePoint:var output = "Call to SharePoint failed:<br/>"; output += "Error Code: " + args.get_errorCode() + "<br/>"; output += "Error Details: " + args.get_errorDetails() + "<br/>"; output += "Error Type: " + args.get_errorTypeName() + "<br/>"; output += "Error Value: " + args.get_errorValue() + "<br/>"; output += "Error Message: " + args.get_message() + "<br/>"; output += "Stack Trace: " + args.get_stackTrace() + "<br/>"; document.getElementById("divResults").innerHTML = output;Inside the
addToSiteActionsMenumethod, type the following code to add a custom action to the Site Actions menu:var context = new SP.ClientContext.get_current(); this.site = context.get_web(); var customAction = this.site.get_userCustomActions().add(); customAction.set_location("Microsoft.SharePoint.StandardMenu"); customAction.set_group("SiteActions"); customAction.set_sequence(100); customAction.set_title("End User SharePoint.com"); customAction.set_description("Navigate to EndUserSharePoint.com."); customAction.set_url("http://www.endusersharepoint.com"); customAction.update(); context.load(this.site, 'UserCustomActions'), context.executeQueryAsync(Function.createDelegate(this, this.onSuccess), Function.createDelegate(this, this.onFailure));Inside the
addToSiteActionsMenuJavaScriptmethod, type the following code to add a custom action to the Site Actions menu that executes JavaScript:var context = new SP.ClientContext.get_current(); this.site = context.get_web(); var customAction = this.site.get_userCustomActions().add(); customAction.set_location("Microsoft.SharePoint.StandardMenu"); customAction.set_group("SiteActions"); customAction.set_sequence(100); customAction.set_title("Hello World"); customAction.set_description("Runs JavaScript."); customAction.set_url("javascript:alert('Hello world!'),");customAction.update(); context.load(this.site, 'UserCustomActions'), context.executeQueryAsync(Function.createDelegate(this, this.onSuccess), Function.createDelegate(this, this.onFailure));Inside the
addToEditControlBlockFileExtensionmethod, type the following code to add a custom action to all Word documents in the site:var context = new SP.ClientContext.get_current(); this.site = context.get_web(); var customAction = this.site.get_userCustomActions().add(); customAction.set_location("EditControlBlock"); customAction.set_sequence(100); customAction.set_title("Wrox"); customAction.set_description("Navigate to the Wrox Publishing web site."); customAction.set_url("http://www.wrox.com"); customAction.set_registrationId("docx"); customAction.set_registrationType( SP.UserCustomActionRegistrationType.fileType); customAction.update(); context.load(this.site, 'UserCustomActions'), context.executeQueryAsync(Function.createDelegate(this, this.onSuccess), Function.createDelegate(this, this.onFailure));Inside the
addToEditControlBlockContentTypemethod, type the following code to add a custom action to all Task items in the site:var context = new SP.ClientContext.get_current(); this.site = context.get_web(); var customAction = this.site.get_userCustomActions().add(); customAction.set_location("EditControlBlock"); customAction.set_sequence(100); customAction.set_title("The Sanity Point"); customAction.set_description("Navigate to Woody's blog."); customAction.set_url("http://www.thesanitypoint.com"); customAction.set_registrationId("0x0108"); customAction.set_registrationType( SP.UserCustomActionRegistrationType.contentType); customAction.update(); context.load(this.site, 'UserCustomActions'), context.executeQueryAsync(Function.createDelegate(this, this.onSuccess), Function.createDelegate(this, this.onFailure));Inside the
addToRibbonmethod, type the following code to add a custom action to the ribbon of a list:var context = new SP.ClientContext.get_current(); this.site = context.get_web(); var customAction = this.site.get_userCustomActions().add(); customAction.set_location("Microsoft.SharePoint.StandardMenu"); customAction.set_group("ActionsMenu"); customAction.set_sequence(100); customAction.set_title("SharePoint eLearning"); customAction.set_description("Navigate to Asif's blog."); customAction.set_url("http://blog.sharepointelearning.com/"); customAction.update(); context.load(this.site, 'UserCustomActions'), context.executeQueryAsync(Function.createDelegate(this, this.onSuccess), Function.createDelegate(this, this.onFailure));Save the page by clicking the Save button on the Quick Access Toolbar at the top of the screen.
Select Preview in Browser from the Home tab on the ribbon.
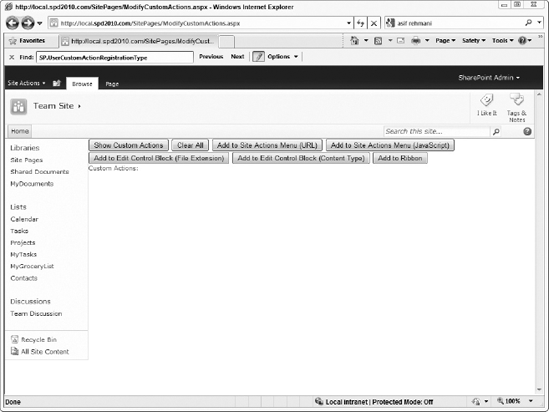
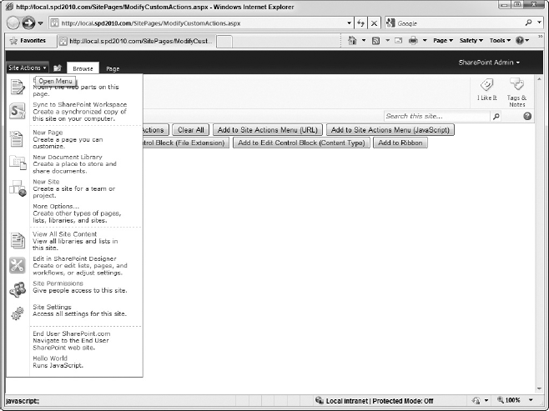
When the page loads in the browser, it should be similar to the one shown in Figure 13-9.
Click the Show Custom Actions button. If you have any user custom actions, they will be listed under the buttons.
Click the Add to Site Actions Menu (URL) button. After the custom action is created, it will be listed on the page.
Click the Add to Site Actions Menu (JavaScript) button. After the custom action is created, it will be listed on the page.
Refresh the page and click the Site Actions menu. Notice the new custom actions as shown in Figure 13-10.
Select Hello World from the Site Actions menu. When the dialog box appears, click OK to close it.
Click the Edit Control Block (File Extension) button. Open a new browser window and navigate to a document library that contains Word documents whose file extension is .docx.
Display the document's edit control block by click the document's drop down menu and notice the new custom action.
Click the Edit Control Block (Content Type) button. Open a new browser window and navigate to a Task list.
Display the task's edit control block by click the document's drop down menu and notice the new custom action.
Navigate to other lists and libraries and notice that the new custom actions are not visible on their edit control blocks.
Click the Add to Ribbon button.
Navigate to any list and notice the new Custom Commands tab on the ribbon.
Click the Custom Commands tab on the ribbon. Notice the new custom action.
Click the Clear All button.
Navigate to the pages in the previous steps and notice that all the custom actions are now gone.
How It Works
In the showCustomActions method, calling the load method of the ClientContext class with the string parameter 'UserCustomActions' causes the site properties and the UserCustomActions collections to be requested from SharePoint. After the data is received, the onSuccess method is called and the custom actions are listed on the page.
When you click one of the buttons to add a custom action, the add method of the UserCustomActionsCollection class is called to create a new UserCustomAction object. Using the various methods of the UserCustomAction object, you configure the custom action to appear on the Site Actions menu, the edit control block, or the ribbon. In the case of the edit control block, setting the registration ID and registration type of the custom action control causes the configured items and documents to display the new custom action on their edit control blocks.
Finally, clicking the Clear All button removes all the user custom actions by calling the clear method of the UserCustomActionsCollection class.
In this chapter, you have seen how to extend your SharePoint sites using JavaScript. Using the Client Object Model, you can manipulate lists, libraries, and practically everything else in your sites. The best feature of the Client Object Model is that the classes and methods are similar in both JavaScript and Silverlight. In the next chapter, you will learn more about the capabilities of the Client Object Model and how you can use Silverlight to take advantage of them.