This section will show you how to use images within your application, whether you want to reuse images provided with Mojo or create your own. There is a summary of the types of images provided with Mojo, and general guidelines on how to incorporate them into your application. You will need to refer to the SDK to see the individual images referenced here; there are too many to include here, and new ones are added with each SDK release.
You will also find design and technical guidelines here that will help you create your own custom images.
There are dozens of images provided with the Mojo framework. Look in the framework/images directory and you’ll see a long list of PNG images, which are used as backgrounds, widget components, icons, and in various parts of the System UI. You are free to use any of the images in your application, but you should use them in a manner that is consistent with their use in the System UI or Palm applications.
Note
A key UI principle is that consistency enhances ease of use. If your application uses visual images differently than what the user expects, your application will be perceived as harder to use.
Images are structured according to the intended use case:
- Standard image
A single image within a single file for conventional image use with
imgtags or similar cases.- Multistate image
Multiple images within a single file used to combine multiple button states (e.g., pressed and unpressed states) or in a filmstrip animation sequence for activity indicators or similar cases.
- 9-tile image
Using
webkit-border-image, you can specify an image as the border of a div to create visually rich containers, buttons, dividers, and other dynamic images.
For any image, you should use a 24-bit per pixel RGB png with 8-bit transparency and 1-bit alpha channel whenever possible. Size the images according to how they will be rendered in the application. Image scaling is always a performance risk and will impact the user experience; avoid scaling images if you can.
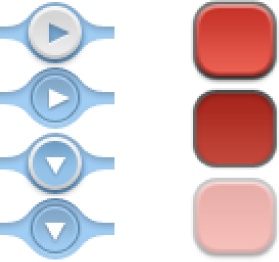
When displaying an animation or multistate button as the background of a div, combine your multiple states into a single image and change the background position to display the appropriate frame as desired. This negates the need to preload, eliminates flicker between the states, and conveniently keeps the assets together. Some examples of multistate images are shown in Figure 7-5.
Multistate images are used for Push buttons, Menu buttons, Indicators, Toggle buttons, and Check Boxes, among other elements. It will be used anywhere you have a single image that needs to reflect state changes (e.g., unselected/highlighted/selected) or is part of an animation sequence.
Create single styles (with small, optimized images) that can accommodate
variable length content and stretch horizontally to support any
orientation or screen width using webkit-border-image.
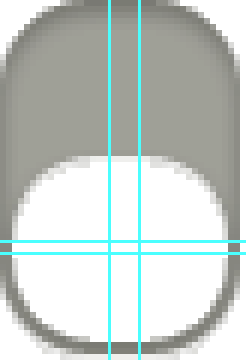
You would use this selector to divide an image into nine components (as
shown in Figure 7-6) and use these
components to render the border of the box. You can stretch or repeat
the images to fill the space required with your image.
There are numerous examples of 9-tile images in the Mojo
framework, including headers, borders, dividers, buttons, gradients,
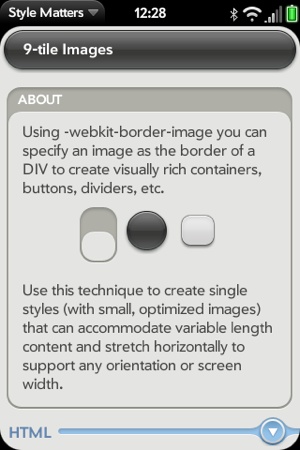
indicators, backgrounds, and icons. In the example shown in Figure 7-7, the palm-group is enclosed with a 9-tile
image.
This particular image is handled within the framework with the following CSS:
.palm-group {
  margin: 7px 7px 0 7px;
  border-width: 40px 18px 18px 18px;
  -webkit-border-image: url(../images/palm-group.png) 40 18 18 18 repeat repeat;
}
The image bounds are set as top (40px), right (18px), bottom
(18px) and left (18px), followed by x- and y-transforms, usually
repeat or stretch. It’s important to set the border-width and the webkit-border-image bounds the same so that
the image draws within the div bounds instead of outside them. webkit-border-image is based on the CSS 3
border-image standard, and you can find many resources for further
information on this standard on the Web, but you can start with www.css3.info/preview/border-image/.
A 3-tile image is a 9-tile image with a zero border in one vector. You use a 3-tile image when you need an image that scales in one dimension only. Some examples are: radio button strips, dashboard containers, view menus, and page headers.
Create a 3-tile image by creating a 9-tile image and setting one
dimension to 0, as shown below with the palm-slider-background:
.palm-slider-background {
  width: 250px;
  height: 7px;
  border-width: 0px 4px 0px 4px;
/** These next two lines are wrapped for book formatting only **/
  -webkit-border-image:
    url(../images/slider-background-3tile.png) 0 4 0 4 repeat repeat;
  margin: 6px 0px 0px 20px;
}There are some properties common to Webkit that are not supported by Mojo, but there are some ways that you can work around those exclusions.


