
Chapter at a Glance
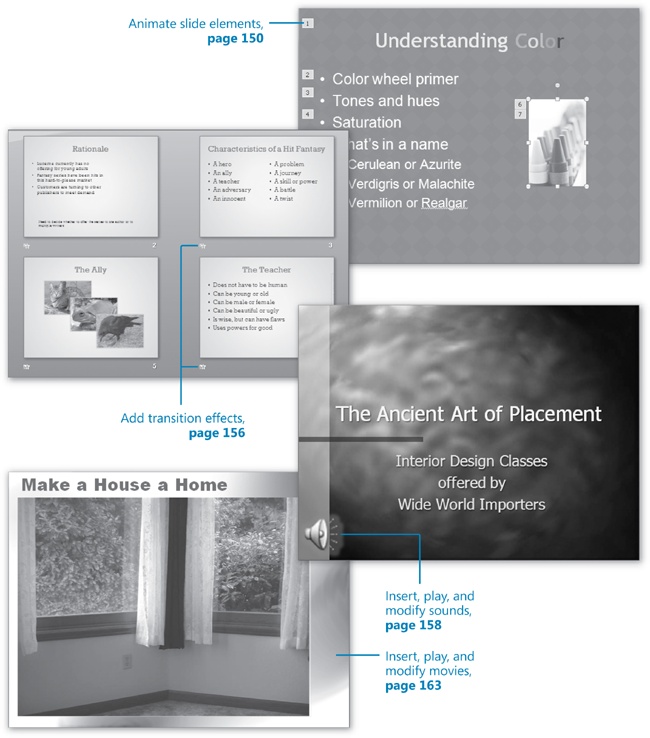
The difference between an adequate presentation and a great presentation often lies in the judicious use of multimedia. By incorporating animation, sound, and movie clips, you can grab and keep the attention of your audience. You can emphasize key points, control the focus of the discussion, and entertain in ways that will make your message memorable.
With Microsoft Office PowerPoint 2007, you have so many opportunities to add pizzazz to your slides that it is easy to end up with a presentation that looks more like an amateur experiment than a professional slide show. When you first start adding multimedia to your slides, it is best to err on the conservative side, especially where animation is concerned. As you gain more experience, you will learn how to mix and match effects to get the results you want for a particular audience.
In this chapter, you will apply predefined animations to the title, bullet points, and a picture on a slide, see how to change some of the animation settings, and then change the way slides move on and off the screen during a slide show. You will insert a sound clip and a sound file and make various adjustments to their settings. Finally, you will insert a movie file, preview the movie, and modify its behavior.
Note
See Also Do you need only a quick refresher on the topics in this chapter? See the Quick Reference section at the beginning of this book.
Warning
Important Before you can use the practice files in this chapter, you need to install them from the book’s companion CD to their default location. See Using the Book’s CD at the beginning of this book for more information.
Note
Troubleshooting Graphics and operating system–related instructions in this book reflect the Windows Vista user interface. If your computer is running Windows XP and you experience trouble following the instructions as written, please refer to the Information for Readers Running Windows XP section at the beginning of this book.
With all the options available for creating engaging and lively presentations in PowerPoint 2007, you no longer have to settle for static presentations, especially if you are delivering the presentation from a computer. By applying various types of animations to the text and graphics on your slides, you can keep your audience focused and reinforce the message of your presentation. For example, you can animate text so that it appears on the screen one paragraph, word, or letter at a time; or you can animate objects, such as shapes or pictures.
To apply one of three common animation effects (Wipe, Fade, or Fly In) to text or an object on a slide, you click the element you want to animate and then select the effect from the Animate list in the Animations group on the Animations tab. In the case of bullet points, you can specify whether they should be animated as a set or one by one. To help you decide which effect to use, you can point to each in turn to see a live preview.
If you would rather create your own animation scheme, you can select the text or object you want to animate and click the Custom Animation button in the Animations group to display the Custom Animation task pane. In this task pane, you can quickly apply the following types of effects:
Entrance. You can animate the way that the element appears on the slide.
Emphasis. You can increase or decrease the importance of the element by changing its font, size, or style; by making it grow or shrink; or by making it spin.
Exit. You can animate the way that the element leaves the slide.
Motion Path. You can move the element around on the slide in various ways, such as diagonally to the upper-right corner or in a circular motion.
If none of the lists of predefined effects meets your needs, you can click More Effects at the bottom of each list to display galleries of professionally designed animations in four categories: Basic, Subtle, Moderate, and Exciting. You can see a live preview of each animation by pointing to it.
After you apply an animation effect, you can fine-tune its action. For example:
You can specify whether the animation should be accompanied by a sound.
You can dim or hide the element after the animation, or you can have it change to a specific color.
If the animation is applied to text, you can animate all the text at once or animate it word by word or letter by letter.
You can set the exact timing of the animation.
If a slide has more than one level of bullet points, you can animate different levels separately.
If an object has text, you can animate the object and the text together (the default) or separately, or you can animate one but not the other.
You can specify the order of appearance of text or objects.
In this exercise, you will apply predefined animations to the title, bullet points, and a picture on a slide. You will then change some of the animation settings.
Note
USE the Animation presentation. This practice file is located in the DocumentsMicrosoft PressPowerPoint2007SBSMedia folder.
BE SURE TO start PowerPoint before beginning this exercise.
OPEN the Animation presentation.
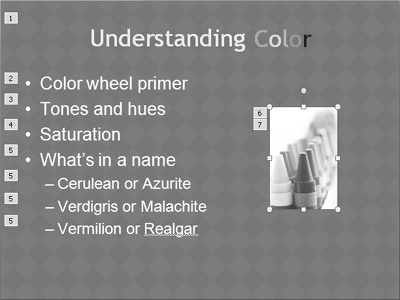
Display Slide 3 in Normal view, and then click the slide title.
On the Animations tab, in the Animations group, click the Animate arrow, and in the list, point in turn to the Fade, Wipe, and Fly In options to see a live preview of each effect.
In the list, click Fly In, and then if the Custom Animation task pane is not open on the right side of the program window, click the Custom Animation button.
A square box containing the number 1 appears to the left of the title, indicating that this element will be the first one animated on this slide. On the Slides tab to the left, an animation icon (a shooting star) appears below the slide number to indicate the presence of some form of animation on the slide. To the right, the Custom Animation task pane provides option you can use to make adjustments to the animation.
In the Custom Animation task pane, click Play.
The title flies up from the bottom of the slide.
On the slide, click anywhere in the bulleted list. Then in the Custom Animation task pane, click Add Effect, point to Entrance, and then click Checkerboard.
PowerPoint applies the animation to the bulleted list and demonstrates the effect. Adjacent to each bullet point, a number in a box indicates the order in which the animations will take effect. Notice that the subpoints will appear at the same time as their “parent” bullet point. Corresponding numbers appear in the Custom Animation task pane next to icons indicating the animation trigger, the effect, and the affected text. You can display the full description of an animation by pointing to it in the list.
On the slide, click the picture. Then in the Custom Animation task pane, click Add Effect, point to Entrance, and then click Fly In.
With the picture still selected, in the Custom Animation task pane, click Add Effect, point to Emphasis, and then click More Effects.
Move the dialog box to one side so that you can see the picture, and then click each option in turn, observing the effect on the picture. Finish by clicking Teeter under Moderate, and then clicking OK.
On the slide, the numbers 6 and 7 now appear to the left of the picture.
With animation 7 (the second animation of Picture 1) selected in the Custom Animation task pane, click the Re-Order Up button twice to place this animation in position 2.
The original animation of Picture 1 now appears in position 7.
Click animation 7 (the original animation of Picture 1), and then click the Re-Order Up button once to place the animation in position 3.
On the slide, the numbers adjacent to the bullet points indicate that their animations will now occur after those of the picture.
In the Custom Animation task pane, click the Expand Contents bar below the four animations.
The animation list expands to show the other bullet points and subpoints in the list. (These were hidden because they have the same animation applied to them as the first bullet point.)
In the animation list, click What’s in a name, click the arrow that appears, and then click Effect Options.
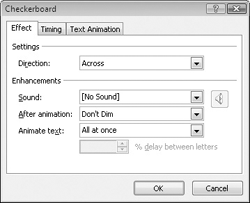
The Checkerboard dialog box opens because you applied the Checkerboard effect to the bulleted list in step 6.
In the Checkerboard dialog box, click the Text Animation tab.
You can use the options on this tab to change the order of the animation.
In the dialog box, click the Group text arrow, and in the list, click By 2nd level paragraphs. Then click OK.
Both on the slide and in the Custom Animation task pane, the subpoints under What’s in a name now have consecutive numbers, indicating that they will appear one after the other.
In the task pane, click Play, and watch as PowerPoint builds the slide.
In the task pane, click animation 1, click Change, point to Entrance, and then click Checkerboard.
In the task pane, with animation 1 still selected, under Modify: Checkerboard, click the Speed arrow, and then in the list, click Medium.
PowerPoint demonstrates the new speed on the slide.
With animation 1 still selected, click its arrow, and then click Effect Options.
On the Effect tab, under Enhancements, click the Sound arrow, and in the list, click Voltage.
Click the After animation arrow, and in the palette, click the orange box.
Click the Animate text arrow, and in the list, click By letter. Then click OK.
PowerPoint demonstrates the effects of your changes on the slide.
At the bottom of the Custom Animation task pane, click Slide Show, and then click the mouse button after each element of Slide 3 appears, until all the elements are visible.
Press the
 key to return to Normal view, and then close the Custom Animation task pane.


Tip
As an alternative to clicking the mouse button to build slides, you can have PowerPoint build the slide for you. For each animation, under Modify in the Custom Animation task pane, set Start to After Previous. PowerPoint will then implement each animation in turn. To control the speed of the implementation of each animation, click Effect Options, and then on the Timing tab of the dialog box that opens, you can set Delay, Speed, and Repeat options.
As you work your way through the slides in an electronic presentation, you can avoid the abrupt break between one slide and the next by employing transitions that control the way successive slides move into view. Transitions include such effects as sliding in, dissolving in from the outer edges or the center, and opening like a vertical blind.
Each slide can have only one transition. You set transitions in Normal view or Slide Sorter view, for one slide at a time, for a group of slides, or for an entire presentation. In addition to selecting the type of transition, you can specify the following:
The sound
The speed
When the transition occurs
In this exercise, you will apply a transition to a single slide, apply the same transition to all the slides in the presentation, add sound to the transition, and then set the transition speed.
Note
USE the Transition presentation. This practice file is located in the DocumentsMicrosoft PressPowerPoint2007SBSMedia folder.
OPEN the Transition presentation.
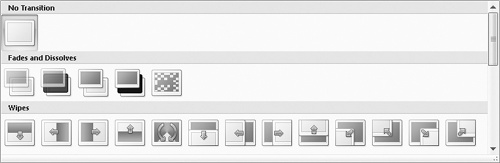
Display Slide 2 in Normal view. Then on the Animations tab, in the Transition to This Slide group, click the More button.
In the lower-right corner of the gallery, point to the dotted handle, and when the pointer changes to a two-headed arrow, drag up until you can see a single row of the Wipes thumbnails that stretches almost to the right edge of the screen.
By changing the shape of the gallery, you will have a better view of transition live previews on the slide.
In the gallery, point to various thumbnails to see the live preview of the transition, scrolling the gallery as necessary.
Under Push and Cover, click the third thumbnail from the end (Cover Left-Up).
PowerPoint demonstrates the Cover Left-Up transition effect on Slide 2 and indicates that the transition has been applied by placing an animation symbol below the slide number on the Slides tab of the Overview pane. (There is no indication on the slide itself.)
In the Transition to This Slide group, click the Apply To All button.
An animation symbol appears below each slide number.
On the Slides tab, click the animation symbol below Slide 4.
The Slide pane turns black, and then PowerPoint demonstrates the Cover Left-Up transition to Slide 4, followed by the Fly In animation effect that was already applied to the picture on the slide.
Display Slide 1. In the Transition to This Slide group, click the More button, and then in the gallery, click the No Transition thumbnail.
On the View toolbar at the right end of the status bar, click the Slide Show button.
PowerPoint switches to Slide Show view and displays Slide 1.
Click the mouse button or press
 to see the transitions of the first few slides of the presentation, and then press to end the slide show.
On the View toolbar, click the Slide Sorter button, and then change the Zoom percentage to 60%.
In Slide Sorter view, click Slide 2, hold down the
 key, and then click Slide 16 to select all the slides that have transitions.
In the Transition to This Slide group, click the Transition Sound arrow, and then click Wind.
In the Transition to This Slide group, click the Transition Speed arrow, and then click Slow.
PowerPoint demonstrates the transition of each selected slide with the sound specified in step 12.
On the View toolbar, click the Slide Show button, and then click the mouse button to advance through the presentation, pressing
when you have finished viewing the transition effects.
A PowerPoint presentation is usually created to convey a lot of information in a short time. That information can be in the form of text, graphics, charts, and tables, but it might also consist of audio content. In the previous topic, you added sound to a slide transition. You can also insert the following types of sounds:
Audio files. You can insert an audio file—for example, a speech or interview—by clicking the Sound button in the Media Clips group on the Insert tab, and then selecting the file.
Sound clips. The sound clips that ship with PowerPoint include applause and a phone ring. You insert a sound clip by clicking the Sound arrow in the Media Clips group on the Insert tab, and then clicking Sound From Clip Organizer to display the Clip Art task pane, where you can select the sound you want. If you are connected to the Internet, clicking the Clip Art On Office Online link in the task pane takes you to the Microsoft Office Online Clip Art and Media Web site, from which you can download hundreds of clip art images, photos, sounds, and movies.
Note
See Also For information about using the Clip Art task pane, see Inserting and Modifying Clip Art Images in Chapter 6.
CD audio tracks. You can insert music tracks or other audio tracks from a CD into a slide. After inserting the CD in your CD-ROM drive, you click the Sound arrow in the Media Clips group and then click Play CD Audio Track to display the Insert CD Audio dialog box. You then enter the starting and ending track numbers. You can specify that the selection be repeated, and you can set the volume. To play the tracks during a slide show, the CD must be in the CD-ROM drive.
Recorded sounds. You can record a sound or narration and attach it to a slide, all from within PowerPoint.
Note
See Also For information about recording sounds, see the sidebar Recording a Narration later in this chapter.
While inserting a sound, you can specify whether it should play automatically when the slide containing it appears or only when you click its icon. The sound object appears on the slide represented by an icon indicating the type of sound. You can change the appearance and size of the icon and move it to meet your needs.
When the sound object is selected, PowerPoint adds Format and Options contextual tabs to the Ribbon. You can format the icon representing the sound in much the same way that you would format a picture. You can adjust its size and position, as well as its volume, specify whether it is displayed on the slide, and how the sound is activated.
To play a sound, you must have a sound card and speakers installed. In Normal view, you can test the sound associated with a particular slide by double-clicking the sound icon, or by selecting the icon and clicking the Preview button in the Play group on the Options contextual tab. In Slide Show view, the sound plays either automatically or when you click its icon, depending on your specifications.
In this exercise, you will insert a sound clip and an audio file into a slide. You will adjust the position of the sound objects and make various other adjustments to their settings.
Note
USE the Sounds presentation and the Introduction sound file. These practice files are located in the DocumentsMicrosoft PressPowerPoint2007SBSMedia folder.
BE SURE TO have a sound card and speakers installed on your computer for this exercise. (If you do not have this hardware, you can still follow the steps, but you won’t be able to hear the sound.)
OPEN the Sounds presentation.
Display Slide 7 in Normal view. Then on the Insert tab, in the Media Clips group, click the Sound arrow, and then click Sound from Clip Organizer.
Note
Troubleshooting If this is the first time you’ve used the Clip Organizer, a message box appears. You can include the media available from Microsoft Office Online in your searches by clicking Yes, or restrict searches to your own computer by clicking No.
If you included Office Online, your task pane will display many more sound clips.
In the Clip Art task pane, click Claps Cheers. Then when a message box asks how you want to start the sound in the slide show, click Automatically.
A small speaker icon representing the sound object appears in the middle of the slide, surrounded by handles. It is hard to see the icon because it is on top of the picture.
Close the Clip Art task pane.
Drag the sound object to the lower-right corner of the slide. Then drag its upper-left handle up and to the left until the object is about an inch square.
Double-click the sound object to hear the sound.
The sound plays. Suppose you don’t want the speaker icon to be visible during the presentation.
On the Options contextual tab, in the Sound Options group, select the Hide During Show check box.
On the Slides tab in the Overview pane, click Slide 6. Then on the View toolbar, click the Slide Show button.
When Slide 6 appears, click the mouse button to move to the next slide.
PowerPoint plays the Claps Cheers sound clip as it displays Slide 7.
Press
to end the slide show, and then display Slide 1 in Normal view.On the Insert tab, in the Media Clips group, click the Sound button (not its arrow).
The Insert Sound dialog box opens. This dialog box is very similar to other boxes you have already worked in.
Browse to your DocumentsMicrosoft PressPowerPoint2007SBSMedia folder, and double-click the Introduction sound file. Then when a message box asks how you want to start the sound in the slide show, click When Clicked.
A sound object appears in the center of the slide.
Drag the object to the lower-left corner, and increase its size to about 1 inch square.
On the Format contextual tab, in the Picture Styles group, click the Picture Effects button. Then point to Glow, and in the gallery, under Glow Variations, click the second thumbnail in the fourth row (Accent color 2, 18 pt glow).
Click away from the object to see the effect.
The object is surrounded by a fuzzy colored halo.
With Slide 1 active, click the Slide Show button on the View toolbar.
On the first slide that appears, click the sound object to play the sound.


Sometimes the best way to ensure that your audience understands your message is to show a movie, also known as a video. For example, if your company has developed a short advertising video, it makes more sense to include the video in a presentation about marketing plans than to try and describe it with bullet points or even still pictures. You can insert the following types of movies in slides:
Video clips. You can insert a digital video that has been saved as a file in one of two ways: If a slide’s layout includes a content placeholder, you can click the Insert Movie button in the placeholder. You can also click the Movie button in the Media Clips group on the Insert tab. Either way, the Insert Movie dialog box opens so that you can select the file. Before PowerPoint inserts the file, you specify whether the video should play automatically when the slide containing it appears or whether it should play only when you click it.
Animated clips. PowerPoint comes with several animated clips, also known as animated GIFs. (GIF stands for Graphics Interchange Format.) You insert these animated objects by clicking the Movie arrow in the Media Clips group on the Insert tab, and then clicking Movie From Clip Organizer to display the Clip Art task pane, where you can select the clip you want. If you are connected to the Internet, clicking the Clip Art On Office Online link in the task pane takes you to the Microsoft Office Online Clip Art and Media Web site, from which you can download hundreds of clip art images, photos, sounds, and animated clips.
Note
See Also For information about using the Clip Art task pane, see Inserting and Modifying Clip Art Images in Chapter 6.
Both videos and animated clips appear on the slide as objects represented by icons that you can size and move to meet your needs. When you select an animated clip object, PowerPoint adds a Format contextual tab to the Ribbon so that you can adjust the way it looks on the slide. When you select a movie object, PowerPoint also adds an Options contextual tab so that you can adjust the object’s size and position, its volume, how it is displayed on the slide, and how it is activated.
In Normal view, you can preview a video by double-clicking its icon or by clicking the Preview button in the Play group on the Options contextual tab. You can preview the action of an animated clip by clicking the arrow that appears when you select it in the Clip Art task pane and then clicking Preview/Properties. In Slide Show view, a video plays either automatically or when you click its icon, depending on your specifications, whereas an animated clip always plays automatically.
Tip
You can find out the total playing time of a video in the Movie Options dialog box, which you display by clicking the Movie Options dialog box launcher on the Options tab.
In this exercise, you will insert a video file as an object on a slide, preview the video, and then modify its settings.
Note
USE the Movies presentation and the HouseHome movie file. These practice files are located in the DocumentsMicrosoft PressPowerPoint2007SBSMedia folder.
Display Slide 3 in Normal view. Then in the content placeholder, click the Insert Media Clip button.
In the Insert Movie dialog box, browse to your DocumentsMicrosoft PressPowerPoint2007SBSMedia folder, and double-click the HouseHome file. Then when a message box asks how you want the video to start, click When Clicked.
The video is inserted as an object in the middle of Slide 3.
Resize the video object until it occupies most of the area below the slide title and is aligned with the left end of the title.
On the Options contextual tab, in the Play group, click the Preview button to play the video in Normal view.
Switch to Slide Show view, and then in the displayed slide, click the video object.
The video starts to play.
Click the video object once to pause the video, and again to resume playing the video. When the video finishes, press the
key to return to Normal view.With the video object still selected, in the Movie Options group on the Options contextual tab, select the Loop Until Stopped check box.
Now the movie will play repeatedly until you stop it.
Double-click the video object. After the video starts a second time, click the video object to stop the movie.
In the Movie Options group, click the Play Movie arrow, and then in the list, click Automatically.
The video will now begin playing as soon as Slide 3 is displayed.
Preview the movie in both Normal view and Slide Show view to see the effects of your changes.

Animated text and graphics add interest to your slides. You decide how and when the animation occurs.
Avoid abrupt transitions by having one slide smoothly replace another. You can control the transition type, its speed, and when it takes place.
Audio and video clips can convey information or simply add interest. Use sounds and animated clips that come with PowerPoint, or supply your own audio and video files.
After you insert an audio or video object, you can change the way it plays by modifying the animation or action settings.