
Chapter at a Glance
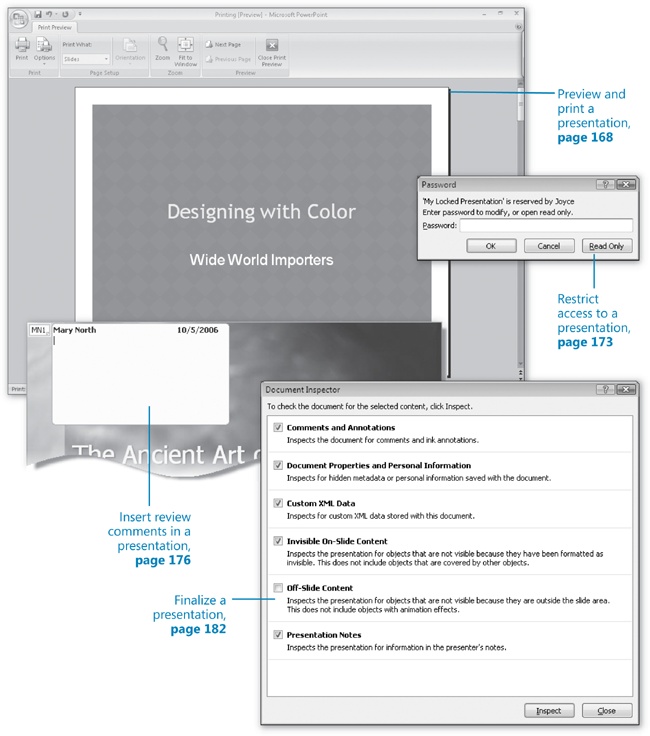
After you create a presentation, you might want to review a printed version or make the file available electronically for review by your colleagues. You can make the file available either by sending it as an e-mail attachment or, if your organization uses a collaboration site built with Microsoft SharePoint products and technologies, by adding it to a document library or creating a document workspace. If you protect the file with a password, only people who know the password can open and change the document.
When you send a presentation to multiple people, each recipient can add comments and make changes in his or her version; however, you then have to incorporate all the changes into one presentation. When you work with a shared presentation in a document workspace, everyone makes changes to a single version of the presentation. Regardless of which review method you use, when the presentation is complete, you can remove extraneous information and then declare the presentation final.
In this chapter, you will preview a presentation, print a selection of slides, and then assign a password that people must enter in order to modify a presentation. You will insert, edit, hide, and display review comments. You will publish a presentation to a document workspace. Finally, you will remove the properties attached to a presentation and prevent other people from making further changes.
Note
See Also Do you need only a quick refresher on the topics in this chapter? See the Quick Reference section at the beginning of this book.
Warning
Important Before you can use the practice files in this chapter, you need to install them from the book’s companion CD to their default location. See Using the Book’s CD at the beginning of this book for more information.
Note
Troubleshooting Graphics and operating system–related instructions in this book reflect the Windows Vista user interface. If your computer is running Windows XP and you experience trouble following the instructions as written, please refer to the Information for Readers Running Windows XP section at the beginning of this book.
If you will deliver a presentation by using transparencies on an overhead projector, you will need to print your presentation on special sheets of acetate. Even if you plan to deliver your presentation electronically, you might want to print your presentation to proof it for typographical errors and stylistic inconsistencies.
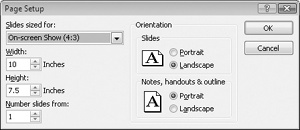
Before printing a presentation, you can set the size and orientation of your slides to fit the paper. By default, slides are sized for an on-screen slide show (10 x 7.5 inches), oriented horizontally, with slides numbered starting at 1. If you want to change these settings, you click the Page Setup button in the Page Setup group on the Design tab and then set the slide size, starting number, and orientation, as well as the orientation for any associated notes and handouts. You can select from the following slide sizes:
On-screen Show. For an electronic slide show on screens of various aspects (4:3, 16:9, or 16:10)
Letter Paper. For a presentation printed on 8.5 x 11 inch U.S. letter-size paper
Ledger Paper. For a presentation printed on 11 x 17 inch legal-size paper
A3 Paper, A4 Paper, B4 (ISO) Paper, B5 (ISO) Paper. For a presentation printed on paper of various international sizes
35mm Slides. For 35mm slides to be used in a carousel with a projector
Overhead. For transparencies for an overhead projector
Banner. For a banner for a Web page
Custom. For slides that are a non-standard size
After you set the slide size and orientation, you might want to preview your presentation to see how the slides will look when printed. If you will be printing a color presentation on a monochrome (usually black ink) printer, preview in pure black and white or grayscale (shades of gray) to verify that the text is legible against the background. To preview a presentation, click the Microsoft Office Button, point to Print, and click Print Preview.
Tip
In Normal view, you can see how your slides will look when printed on a monochrome printer by clicking either the Grayscale or the Pure Black And White button in the Color/Grayscale group on the View tab.
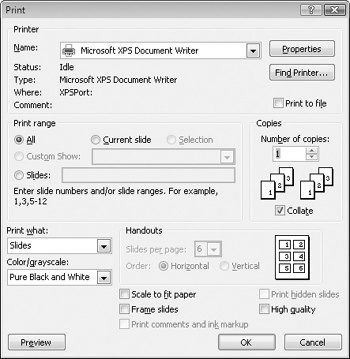
When you are ready to print, you can click the Microsoft Office Button, point to Print, and then click Quick Print to print one copy of each slide on the default printer. If you want to adjust any print settings, click the Microsoft Office Button and then click Print to display the Print dialog box, in which you can make the following changes:
Switch printers. You can specify the printer you want to use and set its properties (such as paper source and image compression).
Tip
If Microsoft Office OneNote 2007 is installed on your computer, Send To OneNote 2007 appears in the list of installed printers. Printing a presentation to OneNote creates a page in the Unfiled Notes section containing the presentation’s slides. From there, you can move the slides to your notebook.
Print to a file. Instead of printing a physical copy a the presentation, you can output a file containing the presentation content and all the necessary instructions for displaying the content.
Specify which slides to print. You can print all the slides, the current slide, or a selected element of a slide. You can print only specific slides by clicking Slides and entering slide numbers and ranges separated by commas (no spaces). For example, enter 1,5,10-12 to print Slides 1, 5, 10, 11, and 12.
Print and collate multiple copies. If you want to print multiple copies of a presentation, you can specify whether complete copies should be printed one at a time.
Specify what to print. You can print slides (one per page), handouts (multiple slides per page), notes pages (one half-size slide per page with space for notes), or an outline. When printing handouts, you can specify the number of slides that print on each page (1, 2, 3, 4, 6, or 9) and the order in which the slides appear on the page.
Note
See Also For information about printing handouts and notes pages, see Preparing Speaker Notes and Handouts in Chapter 10.
Specify the color range. You can print your presentation in color (color on a color printer and grayscale on a monochrome printer), grayscale (on either a color or a monochrome printer), or pure black and white (no gray on either a color or a monochrome printer).
Scale slides to fit the paper. If you haven’t set the size of the slides to match the size of the paper in the printer, PowerPoint can automatically reduce or increase the size of the slides to fit the paper when you print them.
Put a frame around slides. You can print a frame around the slides on the printed page.
Print comments and ink markup. You can print any electronic or handwritten notes attached to the presentation so that you can review them along with the slides.
Print hidden slides. You can include slides in the printed version that will be hidden in the electronic presentation.
Print in high quality. For final output, you can specify that the slides be printed in the printer’s highest quality.
In this exercise, you will change the slide size for printing, preview a presentation in grayscale, select a printer, and print a selection of slides.
Note
USE the Printing presentation. This practice file is located in the DocumentsMicrosoft PressPowerPoint2007SBSReviewing folder.
BE SURE TO start PowerPoint before beginning this exercise.
OPEN the Printing presentation.
On the Design tab, in the Page Setup group, click the Page Setup button.
Click the Slides sized for arrow, and in the list, click Letter Paper (8.5x11 in). Then click OK.
The slide size changes to fit standard U.S. letter paper.
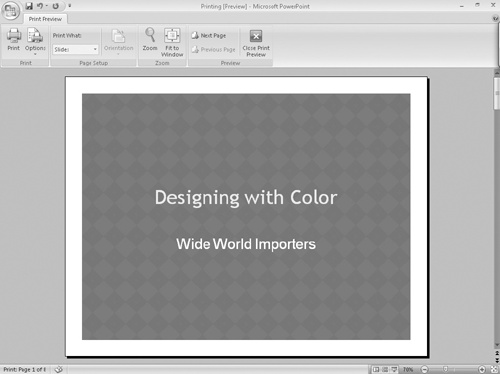
Click the Microsoft Office Button, point to Print, and then in the Preview and print the document pane, click Print Preview.
The screen displays the first slide as it will print with the current settings. In this view, only the Print Preview tab appears on the Ribbon.
On the Print Preview tab, in the Print group, click the Options button, point to Color/Grayscale, and then click Pure Black and White.
The preview shows the slide with black text on a white background.
In the Preview group, click the Next Page button to move through the slides, until you reach the last slide.
Move the pointer over one of the shapes on the slide, and when the pointer changes to a magnifying glass with a plus sign, click the shape.
The zoom level increases to display a magnified view of the slide.
Click the shape again to return to the original zoom level.
In the Preview group, click the Close Print Preview button.
The current slide appears in Normal view.
Under Printer in the dialog box, click the Name arrow.
A list displays the names of all the printers installed on your computer.
In the Name list, click the printer you want to use.
Tip
After choosing a printer, you can customize its settings for this particular print operation by clicking Properties to display the Properties dialog box. For example, if the printer you have selected has duplex capabilities, you might want to specify that it should print slides on both sides of the page.
Under Print range, click Slides, and in the adjacent box, type 1-3,5.
Click the Color/grayscale arrow, and in the list, click Grayscale.
At the bottom of the dialog box, select the Frame slides check box. Then click OK.
PowerPoint prints Slides 1, 2, 3, and 5 with frames in shades of gray on the selected printer.

Tip
If you want the same identifying information to appear at the bottom of every slide, you can insert it in a footer. Footer information is stored on the presentation’s master slides, but you don’t have to know anything about master slides to set up the footer. Display the Header And Footer dialog box by clicking the Header & Footer button in the Text group of the Insert tab. Then indicate whether you want to include the date and time, the slide number, and custom text. PowerPoint indicates in the Preview box where the specified items will appear on the slide.
Sometimes you might want only specified people to be able to view a presentation. Or you might want some people to only be able to view it and others to be able to change it. In both cases, you can control who has access to the presentation and what they can do by assigning one or more passwords to the presentation.
You can assign two types of passwords to a presentation:
Password to open. When you assign a password that must be entered to open the presentation, the presentation is encrypted so that only people with the password can view the presentation.
Password to modify. When you assign a password that must be entered to modify the presentation, people who don’t have the password can open a read-only version but they cannot make changes or save a copy with a different name.
You can also remove any personal information (such as the name of the person who created the file) saved with the file properties so that this information is not publicly available, and you can set the security level of a presentation that contains macros. (Macros are mini-programs that perform specific tasks.)
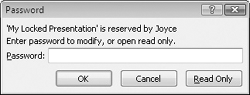
When you try to open a presentation to which a password has been assigned, the Password dialog box opens. If the password must be entered to open the presentation, you must enter the exact password—including capitalization, numbers, spaces, and symbols. if the password must be entered to modify the presentation, you can either enter the exact password to open it or click Read-Only to open a version that you can view but not modify.
In this exercise, you will assign a password that people must type in order to modify a presentation. You will open a read-only version of the password-protected presentation and then use the password to open a version that you can edit.
Note
USE the Password presentation. This practice file is located in the DocumentsMicrosoft PressPowerPoint2007SBSReviewing folder.
OPEN the Password presentation.
At the bottom of the dialog box, click Tools, and then in the list, click General Options.
In the Password to modify box, type P@ssword.
To keep your password confidential, black dots appear in place of the characters you type.
Warning
Important In this exercise, we use a common password that is easy to type. For maximum protection, use a password of at least eight characters that includes a combination of uppercase and lowercase letters, digits, and punctuation symbols. Write it down and keep it in a safe place. Otherwise, if you forget the password, you will not be able to open the presentation.
Click OK.
In the Reenter password to modify box, type P@ssword, and then click OK.
With the contents of the Reviewing folder displayed in the Save As dialog box, replace the name in the File name box with My Locked Presentation, and then click Save.
PowerPoint saves a new version of the presentation with the password in place. To test the password protection, you need to close the presentation and open it again.
Click the Microsoft Office Button, and then click Close.
Click the Microsoft Office Button, and then in the Recent Documents list, click My Locked Presentation.
The Password dialog box opens.
In the Password box, type password, and then click OK.
A message box tells you that the password you have typed is incorrect.
Click OK in the message box, and then in the Password dialog box, click Read Only.
A read-only version of the Protected Password presentation opens, displaying Slide 1 in Normal view. In the title bar at the top of the screen, the presentation is designated as (Read-Only).
On the slide, double-click The in the presentation title, and then press
 .
.Pressing the Delete key has no effect, because you cannot modify the presentation.
Close the presentation, and then reopen it.
In the Password dialog box, type P@ssword in the Password box, and then click OK.
The presentation opens, displaying Slide 1 in Normal view. There is no Read-Only designation in the title bar, indicating that you can modify and save changes to the presentation.

Tip
To remove the password from a password-protected presentation, open it using the password, display the Save As dialog box, click Tools, and then click General Options. In the General Options dialog box, remove the password from the password box(es), and click OK. Then click Save to overwrite the password-protected version.
The development of a presentation, especially one that will be delivered to clients, shareholders, or other important people, is often a collaborative effort, with several people contributing ideas and feedback. Even if you are developing a presentation for your own purposes, you might want to ask other people to review and comment on it before declaring a presentation final.
If you are asked to review a presentation, you can give feedback about a slide without disrupting its text and layout by inserting a comment. Clicking away from a comment box hides the comment but leaves a small comment icon with your initials and a number. If you add a comment without first selecting an object on the slide, the comment icon appears in the upper-left corner of the slide. If you select an object such as the title or a graphic before adding the comment, the comment icon appears in the upper-right corner of the object. In either case, pointing to the icon displays the comment temporarily and clicking the icon displays the comment until you click somewhere else.
You can manage and review comments by clicking these buttons in the Comments group on the Review tab:
Show Markup. Clicking this button hides all the comment icons so that you can view the presentation without extraneous clutter.
Edit Comment. Clicking this button displays the comment box associated with the active comment icon and places an insertion point at the end of the comment text so that you can make additions or changes.
Delete. Clicking this button deletes the active comment icon and its comment box. To delete all the comments on the current slide or all the comments in the entire presentation, select that option in the Delete list.
Previous and Next. Clicking these buttons moves backward or forward through the comments, displaying the comment box of each one in turn.
Note
See Also For information about circling or underlining important points and drawing arrows and diagrams on slides while reviewing a presentation, see Showing a Presentation in Chapter 10.
In this exercise, you will add and edit comments in a presentation, move among the comments, delete a comment, and hide and display comments. Then you will remove all comments from the presentation.
Note
USE the Comments presentation. This practice file is located in the DocumentsMicrosoft PressPowerPoint2007SBSReviewing folder.
OPEN the Comments presentation.
With nothing selected on Slide 1, on the Review tab, in the Comments group, click the New Comment button.
PowerPoint adds a comment icon containing your initials and the number 1 to the upper-left corner of the slide, and opens a comment box containing your user name and today’s date.
Tip
Comment boxes include the user name and initials you specified the first time you started any program in the 2007 Microsoft Office system. To change this information, click the Microsoft Office Button, and then click PowerPoint Options. On the Popular page of the PowerPoint Options window, under Personalize Your Copy Of Microsoft Office, change the entries in the User Name and Initials boxes, and click OK.
In the comment box, type Feng shui not mentioned. Good or bad?
Click away from the comment box to close it.
Point to the comment icon to display the comment, and then move the pointer away from the icon to close the box again.
Move to Slide 2, click anywhere in the bulleted list, and in the Comments group, click the New Comment button.
In the comment box, type A graphic would add interest here, and then click away from the comment box.
Because this comment is attached to the bulleted list, its icon appears in that placeholder. This is the second comment in the presentation, so the comment icon shows your initials and the number 2.
With the comment icon on Slide 2 selected, in the Comments group, click the Edit Comment button.
The comment box opens so that you can edit the comment.
Click to the left of the word graphic, type tasteful, press
 , and then click away from the comment box to close it.
Move back to Slide 1, click anywhere in the title, and add a comment that says Do we need the word “Ancient”?
At the top of the slide, click comment icon 1 to open its comment box, and then in the Comments group, click the Next button.
PowerPoint closes the first comment box and displays the next comment.
In the Comments group, click the Previous button to move back to the first comment.
With the first comment displayed, in the Comments group, click the Delete button.
The comment is deleted from the slide.
In the Comments group, click the Show Markup button to turn it off.
The comment icon attached to the title on Slide 1 disappears.
Move to Slide 2 to verify that the comment icon is hidden there also.
In the Comments group, click the Show Markup button to redisplay the comment icons, and then click the comment icon on the active slide.
In the Comments group, click the Delete arrow, and then in the list, click Delete All Markup in this Presentation.
When asked to confirm that you want to delete all the comments, click Yes.
Both the remaining comments are removed.


If your organization is running a collaboration site built with SharePoint products and technologies, you and your colleagues can develop a presentation from within a document workspace. The document workspace provides a forum in which multiple people in different locations can work on a single presentation. The presentation can be checked out by any site member. While the presentation is checked out, other people can view it but they cannot edit it. After the presentation is declared final, you can move it to a more permanent storage location, and delete the document workspace.
You can publish the presentation to a document workspace from within PowerPoint. The process of publishing creates the workspace and stores a copy of the presentation there so that other people can work on it. When you open the presentation stored on your computer, PowerPoint asks whether you want to download updates from the document workspace and provides a Document Management task pane with tools that enable you to keep your copy synchronized with the copy stored in the document workspace.
Tip
You can upload the presentation to a document library on the SharePoint site. You and your colleagues can then work with the presentation in its workspace and publish the final version back to the original copy in the document library. Working with presentations from within a SharePoint site is beyond the scope of this book. For information, refer to Microsoft Windows SharePoint Services Step by Step by Olga Londer, Todd Bleeker, Penelope Coventry, and James Edelen (Microsoft Press, 2005).
In this exercise, we demonstrate how to publish a presentation to a document workspace, explore the Document Management task pane, view the document workspace, and then delete it. There are no practice files for this exercise.
Warning
Important This exercise is provided for demonstration purposes. To follow the steps, you need access to a SharePoint site, and you need to have the user name and password for the SharePoint site available. The steps assume that you have access to a site created with Microsoft Office SharePoint Server 2007. If you have access to a site created with a different version of SharePoint, the steps will be different.
Open the presentation for which you want to create a document workspace.
Click the Microsoft Office Button, point to Publish, and then in the Distribute the document to other people pane, click Create Document Workspace.
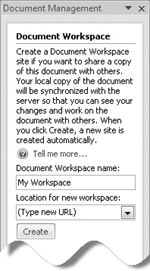
The Document Management task pane opens, with the name of the presentation in the Document Workspace Name box.
In the Location for new workspace box, type the URL of the site where you want to create the document workspace (or if you’ve previously connected to the site, select it from the list). Then click Create.
Note
Troubleshooting A message might appear saying that the URL you have typed is a restricted or non-trusted site. If you trust the site, open your Web browser and add the URL to your list of trusted sites. Then click Create again.
PowerPoint displays a couple of message boxes to report its progress.
If you are asked to supply your user name and password to connect to the site, enter your SharePoint site credentials in the User name and Password boxes, and then click OK.
When the document workspace is created and the presentation has been saved in the space, the Document Management task pane reappears with the name of the workspace at the top and five tabs that show information from the workspace. From this task pane, you can do the following:
You can download changes that have been made to the copy of the presentation stored in the workspace by clicking Get Updates at the bottom of the task pane.
You can set options associated with the site by clicking Options.
You can click the Members tab to display the members of this workspace (currently just you). To add a new member, click Add New Members below the list box, and then complete the Add New Member dialog box. You can also send an e-mail message directly to members from the task pane.
You can click the Tasks tab to display a list of outstanding tasks associated with the presentation. To add a new task, click Add New Task below the list box. If you click Alert Me About Tasks, you are taken to the New Alert page of the document workspace, where you can specify that you want to be alerted when the tasks associated with the presentation change.
You can click the Documents tab to display a list of all presentations in this workspace (currently just the active presentation). To add a new presentation, click Add New Document below the list box. To create a new folder in which to store presentations, click Add New Folder. To be alerted when presentations are added or changed, click Alert Me About Documents.
You can click the Links tab to display a list of links to auxiliary materials associated with the presentation. To add a new link, click Add New Link below the list box, and to be alerted when links are added or changed, click Alert Me About Links.
You can open the document workspace in your Web browser by clicking Open Site In Browser below the workspace name at the top of the task pane. (You might have to enter your site credentials.) Any members, tasks, presentations, and links you add while the workspace is displayed in your Web browser will be reflected in the Document Management task pane in PowerPoint.
To delete a document workspace:
At the top of the Document Management task pane, point to the name of the workspace, and then click the arrow that appears.
A list of workspace commands appears.
In the list, click Delete Workspace, and then click Yes to confirm the deletion.
These days, most presentations are delivered electronically, either in person, by e-mail, or from a Web site. As you develop a presentation, PowerPoint attaches identifying and tracking information to it as properties. If your presentation will never leave your computer, you don’t have to worry that these properties might contain something that you would rather other people did not see. However, if the presentation file is going to be shared with other people, you will want to remove this identifying and tracking information before you distribute the presentation. This is known as “scrubbing” a file. The scrubbing process is carried out by the Document Inspector, a PowerPoint 2007 feature that checks a presentation for various types of behind-the-scenes information, reports what it finds, and removes the types you specify.
Tip
The properties attached to the file by PowerPoint include the name of the author, the title, when the file was created and updated, and so on. You might want to enter other properties, such as keywords, to help you easily find the presentation or to keep track of its status. You enter properties in the Properties pane, which you will open in the following exercise.
Another thing you might want to do before distributing a presentation is to mark it as final. This feature (new in PowerPoint 2007) saves the file, deactivates most PowerPoint tools, and displays an icon in the status bar to indicate that no further changes should be made to the presentation. This process does not lock the document, however; if you want to make additional changes to the presentation, you can turn off the final status.
In this exercise, you will examine the properties attached to a presentation, remove personal information from the file, and then mark the presentation as final.
Note
USE the Finalizing presentation. This practice file is located in the DocumentsMicrosoft PressPowerPoint2007SBSReviewing folder.
OPEN the Finalizing presentation.
Save a copy of the presentation in the Reviewing practice files folder with the name My Final.
By working on a copy of the file, you ensure that the original practice file is available if you or someone else needs to repeat this exercise in the future.
Click the Microsoft Office Button, point to Prepare, and then in the Prepare the document for distribution pane, click Properties.
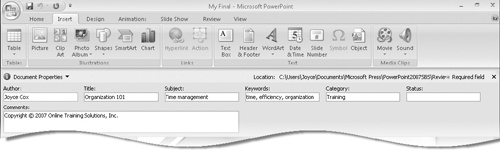
The Document Information Panel opens below the Ribbon, displaying the standard properties associated with this presentation.
Some of these properties, including the name of the author, are automatically attached to the file by PowerPoint. You can enter other properties either in the Document Information Panel or in the Properties dialog box that opens when you right-click the document in a Windows folder window and then click Properties.
In the Document Information Panel, click Document Properties, and then click Advanced Properties.
The Properties dialog box opens.
Click each tab in the dialog box, and notice what information is stored with the file. Then close the dialog box.
In the upper-right corner of the Document Information Panel, click the Close button.
Click the Microsoft Office Button, point to Prepare, and then click Inspect Document.
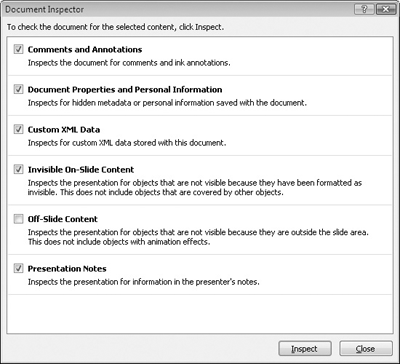
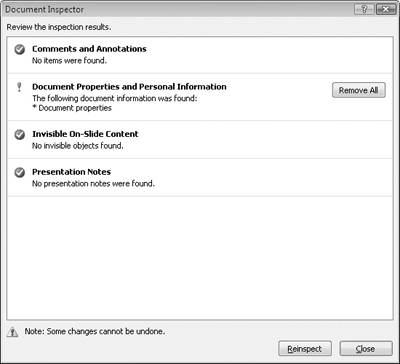
The Document Inspector starts. You can inspect for six types of content.
Clear the Custom XML Data check box. Then with the Comments and Annotations, Document Properties and Personal Information, Invisible On-Slide Content, and Presentation Notes check boxes selected, click Inspect.
The Document Inspector reports its findings, including the presence of document properties that you might not want others to be able to view.
To the right of Document Properties and Personal Information, click Remove All.
PowerPoint removes the author name and other saved properties.
Close the Document Inspector dialog box, and redisplay the Document Information Panel to confirm that all the properties have been cleared. Then close the Document Information Panel.
Click the Microsoft Office Button, point to Prepare, and then click Mark as Final.
A message tells you the presentation will be marked as final and then saved.
Click OK in the message box, and then click OK in the confirmation box that appears after the document is marked as final.
The Marked As Final icon appears on the status bar.
Click each of the tabs on the Ribbon.
Most of the buttons other than those controlling the display of the presentation are inactive.
Click different areas of the current slide, and try to make changes.
You cannot change any of the objects on the slide.

If you do a better job of proofing on paper than on-screen, you can print a presentation in color, grayscale, or monochrome (black and white), depending on the capabilities of your printer.
You can assign a password that must be entered before someone can open or modify a presentation.
When you review a presentation created by someone else, you can add comments to give feedback. You can also use comments in your own presentations to remind yourself of outstanding issues and tasks, make a note about an information source, and so on.
You can easily share a presentation with colleagues by sending it as an e-mail attachment.
If your organization uses a collaboration site, you and your colleagues can develop a presentation in a document workspace. You can work with the presentation from PowerPoint, so you don’t need to be a SharePoint expert to take advantage of this collaboration technology.
Before distributing a presentation, you can remove identifying information from the presentation file and prevent people from making further changes.