
Chapter at a Glance

In Chapter 3, you looked at ways to work with the text on your slides. In this chapter, you will step back and focus on big-picture issues that can affect the success of a Microsoft Office PowerPoint 2007 presentation.
For each slide to accomplish its purpose, it needs to present its content in the most effective way. The layout of individual slides and the order of slides in the presentation contribute significantly to the logical development of your message. And an overall consistent look, punctuated by variations that add weight exactly where it is needed, can enhance the likelihood that your message will be well received and absorbed by your intended audience.
In this chapter, you will change the layout of a slide, rearrange slides in a presentation, and apply a theme to a presentation. You will also switch to a different color scheme and use colors that are not part of the scheme. Finally, you will add shading and texture to the background of a slide.
Note
See Also Do you need only a quick refresher on the topics in this chapter? See the Quick Reference section at the beginning of this book.
Warning
Important Before you can use the practice files in this chapter, you need to install them from the book’s companion CD to their default location. See Using the Book’s CD at the beginning of this book for more information.
Note
Troubleshooting Graphics and operating system–related instructions in this book reflect the Windows Vista user interface. If your computer is running Windows XP and you experience trouble following the instructions as written, please refer to the Information for Readers Running Windows XP section at the beginning of this book.
When you add a new slide to a presentation, you can specify which of several predefined layouts you want to use, or you can add a blank slide and create a custom layout. If you decide after you create a slide that you want it to have a different predefined layout, you can change the layout by displaying the slide, clicking the Layout button in the Slides group on the Home tab, and then making a selection.
Note
See Also For information about adding slides, see Creating a Presentation Based on a Ready-Made Design in Chapter 2.
If the slide already contains content, you can add the elements of a different layout to the existing layout without disturbing the existing content. For example, if you decide to add a chart to a slide that already contains a title and a bulleted list, clicking the Layout button and then clicking the Two Content layout adds a content placeholder to the right of the bulleted list placeholder.
If you make changes to the layout of a slide—for example, by sizing or moving a placeholder—but then decide you want to revert to the original layout, you can reapply the layout (without losing text you have already entered) by clicking the Reset button in the Slides group on the Home tab.
Note
See Also For information about saving a custom slide layout for use with other slides, see Creating a Slide Layout in Chapter 9.
In this exercise, you will change the layout of a slide, change the size of the layout’s placeholders, and then restore the layout.
Note
USE the Layout presentation. This practice file is located in the DocumentsMicrosoft PressPowerPoint2007SBSAdjusting folder.
BE SURE TO start PowerPoint before beginning this exercise.
Display Slide 3, and then on the Home tab, in the Slides group, click the Layout button.
The Layout gallery includes the same layouts that are available for new slides.
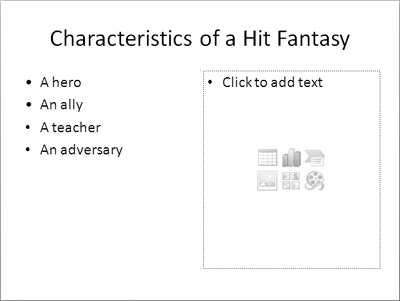
Click the Two Content layout.
PowerPoint adds a placeholder to the right of the bulleted list.
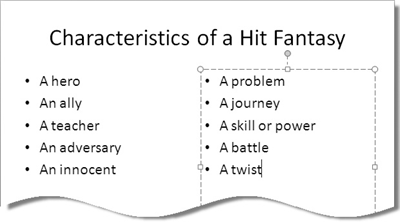
Click the bullet in the placeholder on the right side of the slide, and then type the following bullet points, pressing
 after each one except the last:
A problem
A journey
A skill or power
A battle
On the Outline tab, the bullet points are grouped to indicate that they appear in different placeholders.
Drag the bottom middle handle of the right placeholder upward until the placeholder is big enough only for its bullet points.
Repeat step 4 for the left placeholder.
Now suppose you want to add more bullet points to each placeholder. You could manually enlarge the placeholders, but here’s a quicker way.
On the Home tab, in the Slides group, click the Reset button.
The placeholders expand to their original size.
Click to the right of adversary in the left placeholder, press
, and then type An innocent.Click to the right of battle in the right placeholder, press
, and then type A twist.

After you have created several slides, whether by adding them and entering text or by importing them from another presentation, you might want to rearrange the order of the slides so that they effectively communicate your message. You can rearrange a presentation in two ways:
On the Slides tab, you can drag slides up and down to change their order.
To see more of the presentation at the same time, you can switch to Slide Sorter view. You can then drag slide thumbnails into the correct order.
In this exercise, you will use the Slides tab and Slide Sorter view to logically arrange the slides in a presentation, and add a slide to a presentation.
Note
USE the Rearranging presentation. This practice file is located in the DocumentsMicrosoft PressPowerPoint2007SBSAdjusting folder.
OPEN the Rearranging presentation.
On the Outline tab, move to Slide 3, and notice the order of the bullet points.
This summary slide lists all the main players in the series on the left, and the main plot requirements on the right.
On the Outline tab of the Overview pane, scroll through the presentation, noticing that the slide order is different than that of the bullet points on Slide 3.
Tip
On the Outline tab, you can collapse bullet points under slide titles so that you can see more of the presentation at one time. Double-click the icon of the slide whose bullet points you want to hide. Double-click again to redisplay the bullet points. To expand or collapse the entire outline at once, right-click the title of a slide, point to Expand or Collapse, and then click Expand All or Collapse All.
In the Overview pane, click the Slides tab, and then scroll so that you can see both Slide 5 and Slide 8.
Drag the thumbnail for Slide 8 (The Teacher) upward to the space above the thumbnail for Slide 6 (The Problem), but don’t release the mouse button yet.
The thumbnail itself remains in place, but a bar indicates where the slide will move to when you release the mouse button.
Release the mouse button.
PowerPoint moves the slide to its new location and renumbers the subsequent slides.
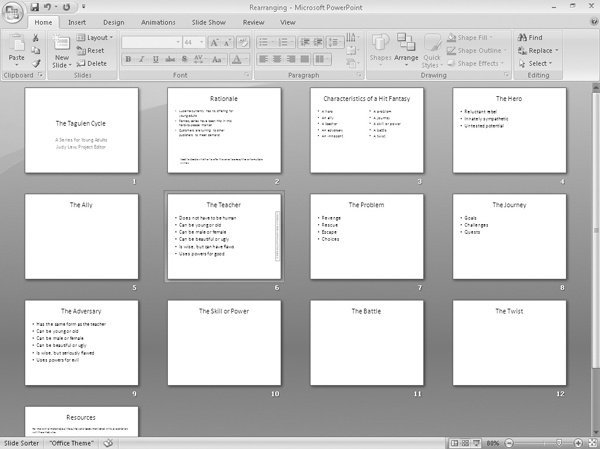
At the right end of the status bar, on the View toolbar, click the Slide Sorter button.
PowerPoint displays the presentation as a set of thumbnails. Because you have only 13 slides in this presentation, there is room to make the thumbnails bigger so that they are easier to read.
On the slider at the right end of the status bar, click the Zoom In button twice to change the Zoom percentage to 80%.
Drag Slide 9 (The Adversary) to the left of Slide 7 (The Problem).
Slide 9 moves to its new location, and again PowerPoint repositions and renumbers the subsequent slides in the presentation.
Tip
You can move slides from one open presentation to another in Slide Sorter view. Display both presentations in Slide Sorter view, and then on the View tab, in the Window group, click the Arrange All button. You can then drag slides from one presentation window to another.
If you check the results against Slide 3, you will see that the slide for The Innocent is missing. You can add a slide in Slide Sorter view, but you cannot enter or edit text in this view.
With Slide 7 (The Adversary) still selected, add a Title and Content slide to the presentation.
PowerPoint inserts the new slide after the selected slide.
Double-click Slide 8.
PowerPoint returns to the previous view—in this case, Normal view—with Slide 8 active.
On the slide, click the title placeholder, and then type The Innocent.
When you create a presentation based on a template or a ready-made design, the presentation includes a theme—a combination of colors, fonts, formatting, graphics, and other elements that gives the presentation a coherent look. Even a presentation developed from scratch has a theme, albeit one that consists of only a white background and a very basic set of font styles and sizes.
If you want to change the theme applied to a presentation, you can choose a new one from the Themes group on the Design tab. With the Live Preview feature, you can easily try different effects until you find the one you want.
Note
See Also For information about creating your own themes, see Creating Theme Colors and Fonts in Chapter 9.
In this exercise, you will change the theme applied to a presentation that was created from a template. You will also apply a theme to a presentation that was created from scratch.
Note
USE the Theme1 and Theme2 presentations. These practice files are located in the DocumentsMicrosoft PressPowerPoint2007SBSAdjusting folder.
OPEN the Theme1 and Theme2 presentations.
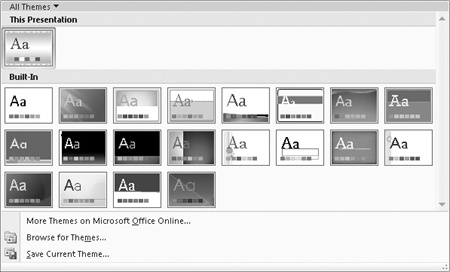
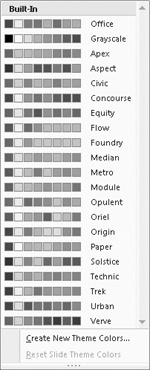
With Theme1 active, on the Design tab, in the Themes group, click the More button to the right of the thumbnails.
The Themes gallery opens, displaying all the available themes.
Point to each theme thumbnail in turn to see a live preview of what the presentation will look like with that theme applied.
Click the Technic thumbnail to apply that theme to the entire presentation.
Instead of a blue background with text in the Times New Roman font, the presentation now has a tan striped background with text in the Franklin Gothic font.
Switch to the Theme2 presentation, display the Themes gallery, and then click the Apex thumbnail.
Instead of a white background with text in the Calibri font, the presentation now has a gray watermarked background with text in the Lucida and Book Antiqua fonts.

Every presentation you create with PowerPoint 2007, even a blank one, has a set of colors associated with it. This color scheme consists of 12 complementary colors designed to be used for the following elements of a slide:
Use the four Text/Background colors for dark or light text on a dark or light background.
Use Accent 1 through Accent 6 for the colors of objects other than text.
Use Hyperlink to draw attention to hyperlinks.
Use Followed Hyperlink to indicate visited hyperlinks.
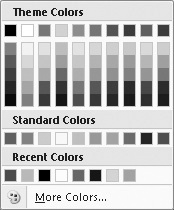
In the palette displayed in color galleries such as the Font Color gallery in the Font group on the Home tab, 10 of the 12 colors appear with light to dark gradients. (The two background colors are not represented in these palettes.)
Understanding color schemes can help you create professional-looking presentations that use an appropriate balance of color. You are not limited to using the colors in a presentation’s color scheme, but because they have been selected by professional designers based on good design principles, using them ensures that your slides will be pleasing to the eye.
Note
See Also For information about how colors are allocated, see Creating Theme Colors and Fonts in Chapter 9.
To view the color schemes you can apply to a presentation, you click the Colors button in the Themes group on the Design tab to display a Colors gallery with Live Preview capabilities. When you find the color scheme you want, click it to change the color scheme of the presentation.
If none of the color schemes is exactly what you are looking for, you can create your own by clicking Create New Theme Colors at the bottom of the Colors gallery and assembling colors in the Create New Theme Colors dialog box. After you save the scheme, you can apply it to one or all of the slides in a presentation.
In this exercise, you will examine the color scheme of a presentation, apply a different color scheme to an entire presentation, create your own scheme, and change the color scheme of only one slide.
Note
USE the ColorScheme presentation. This practice file is located in the DocumentsMicrosoft PressPowerPoint2007SBSAdjusting folder.
OPEN the ColorScheme presentation.
On the Design tab, in the Themes group, click the Colors button.
In the gallery, point to a few color schemes and watch the Live Preview effect on the active slide.
Click Verve to switch the color scheme of the theme applied to the presentation.
Notice that the theme retains all its other characteristics, such as the font and background graphic; only the colors change. This color scheme is a good starting point.
In the Themes group on the Design tab, click the Colors button.
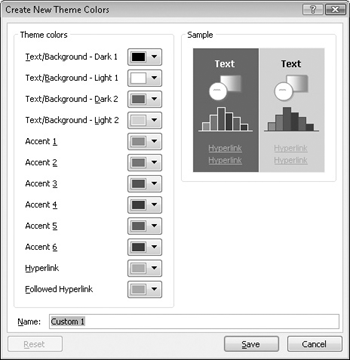
At the bottom of the Colors gallery, click Create New Theme Colors.
The Create New Theme Colors dialog box opens, displaying the Verve theme colors.
In the Theme colors area, click the Text/Background – Dark 2 button.
A gallery of colors related to the Verve theme colors opens.
In the Theme Colors palette, click the box in the third row of the range below the dark blue box.
When you are pointing to the correct box, the ScreenTip that appears is labeled Dark Blue, Accent 6, Lighter 40%.
At the bottom of the dialog box, click Save.
The dialog box closes and PowerPoint applies the new color scheme to the presentation, changing the background color of all the slides to bright blue.
Display Slide 2, and in the Themes group, click the Colors button.
Notice that your new custom color scheme appears in the Custom area at the top of the Colors gallery.
Right-click the Opulent color scheme, and then click Apply to Selected Slides.
PowerPoint applies the Opulent color scheme to only the selected slide, changing its background color to purple.
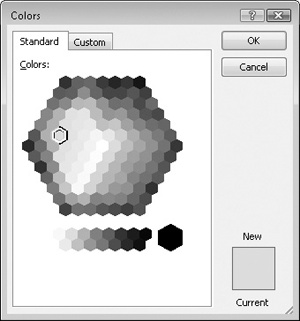
Although working with the 12 colors of a harmonious color scheme enables you to create presentations with a pleasing design impact, you might want to use a wider palette. You can add colors that are not part of the color scheme by selecting the element whose color you want to change and then choosing a standard color from the Colors palette or from the almost infinite spectrum of colors available in the Colors dialog box.
After you add a color, it becomes available on all the palettes that appear when you click a button that applies color—for example, the Font Color button in the Font group on the Home tab. The color remains on the palettes even if you change the theme applied to the presentation.
In this exercise, you will change the color of a slide title and will then apply the same color to other elements of the presentation.
Note
USE the OtherColors presentation. This practice file is located in the DocumentsMicrosoft PressPowerPoint2007SBSAdjusting folder.
OPEN the OtherColors presentation.
On Slide 1, select the title of the presentation, and then on the Home tab, in the Font group, click the Font Color arrow.
A color palette appears.
In the Colors spectrum, click in the brightest green shade.
Click OK.
The title changes to the selected shade of green, outlined in red.
Display Slide 5, select the text following the third bullet point, and then click the Font Color arrow.
The color that you just applied appears at the left end of the Recent Colors palette and is now available for use throughout the presentation.
Below Recent Colors, click the Green box.
On the Design tab, in the Themes group, click the More button to display the Themes gallery, and then click Median.
The third bullet point retains the color you just applied even though you have switched themes.
In PowerPoint, you can customize the background of a slide by adding a solid color, a color gradient, a texture, or even a picture.
A color gradient is a visual effect in which a solid color gradually changes from light to dark or dark to light. PowerPoint offers several gradient patterns, each with several variations. You can also choose a preset arrangement of colors from professionally designed backgrounds in which the different colors gradually merge.
If you want something fancier than a gradient, you can give the slide background a texture, or you can use a picture. PowerPoint comes with several preset textures that you can easily apply to the background of slides.
In this exercise, you will add a shade to a slide background and then change the background from shaded to textured.
Note
USE the Background presentation. This practice file is located in the DocumentsMicrosoft PressPowerPoint2007SBSAdjusting folder.
OPEN the Background presentation.
On the Design tab, in the Background group, click the Background Styles button.
In the Background gallery, point to each style in turn to see a live preview of its effects.
Click the last thumbnail in the second row (Style 8).
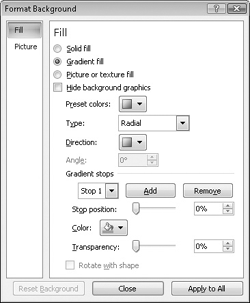
Click the Background Styles button again, and then click Format Background at the bottom of the gallery.
Click the Type arrow, and then in the list, click Rectangular.
Click the Direction button, and at the right end of the gallery, click the From Corner effect.
In the Gradient stops area, drag the Stop position slider to the right until the adjacent setting is 80%.
Click the Color button, and then in the Theme Colors palette, click the green color in the top row.
Click Close.
PowerPoint applies the shaded background only to the current slide.
Click the Background Styles button again, and then click Format Background.
In the Format Background dialog box, click Picture or texture fill.
Click the Texture button, and then in the gallery, click Denim.
Click the Apply to All button, and then click Close.
PowerPoint applies the textured background to the current slide and all the other slides in the presentation.


After you create a slide, you can easily modify its layout.
If you manually change the layout of a slide, you can restore the default layout.
You can change the order of slides by rearranging them on the Slides tab or in Slide Sorter view.
You can easily change the look and feel of a presentation by switching from one predefined theme to another. If you like all the elements of a theme except its colors, you can apply a different color scheme.
You can apply a color scheme to one or all the slides in a presentation.
You can create your own color schemes, and you can add colors that aren’t part of the current scheme to selected parts of a slide.
To dress up the background of one slide or of all the slides in a presentation, you can apply a solid color, a color gradient, a texture, or a picture.