
Chapter at a Glance
If you use Microsoft Office PowerPoint 2007 only occasionally, you might be perfectly happy with the default environment options and behind-the-scenes settings. However, if you create presentations frequently, you might find yourself wishing that you could change aspects of the program to customize it for the way you work or the kinds of presentations you create.
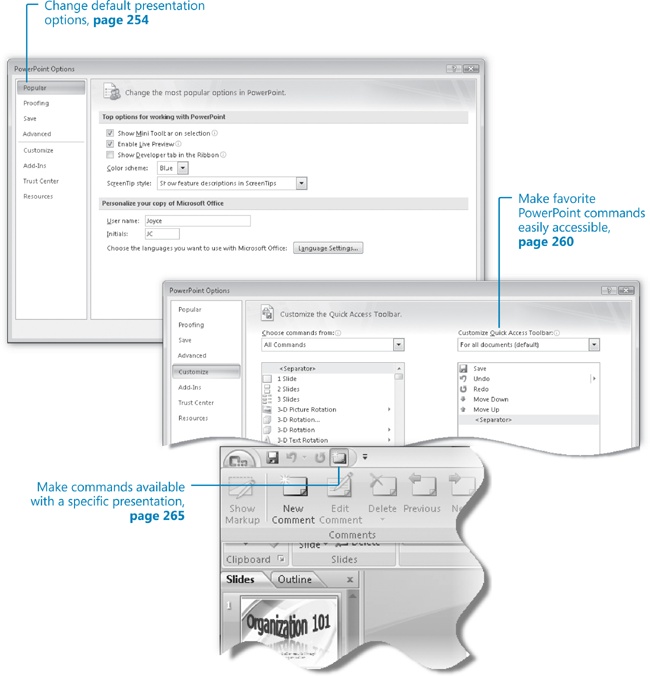
In this chapter, you will explore the eight pages of the PowerPoint Options window, in which you can customize the way PowerPoint presents and handles various program elements. Then you will add buttons to the default PowerPoint 2007 Quick Access Toolbar, and add a button to a custom toolbar that is specific to a presentation.
Note
See Also Do you need only a quick refresher on the topics in this chapter? See the Quick Reference section at the beginning of this book.
Warning
Important Before you can use the practice files in this chapter, you need to install them from the book’s companion CD to their default location. See Using the Book’s CD at the beginning of this book for more information.
Note
Troubleshooting Graphics and operating system–related instructions in this book reflect the Windows Vista user interface. If your computer is running Windows XP and you experience trouble following the instructions as written, please refer to the Information for Readers Running Windows XP section at the beginning of this book.
In earlier chapters, we mentioned that you can change settings in the PowerPoint Options window to customize the PowerPoint environment in various ways. For example, you can add AutoCorrect entries, change how frequently PowerPoint saves recovery files, and specify whether a slide show should end with a black slide.
While becoming familiar with PowerPoint, you might be quite content to work with the default presentation options, but as you become more experienced, you might want to adjust some of the options to tailor the PowerPoint environment to the way you work. Knowing where to look for these options in the PowerPoint Options window will make this tailoring process more efficient.
In this exercise, you will open the PowerPoint Options window and explore several of the available pages. There are no practice files for this exercise.
On the Home tab, in the Font group, point to the Bold button.
PowerPoint displays a ScreenTip that includes the button name, its keyboard shortcut, and a description of its purpose.
Click the Microsoft Office Button and then, at the bottom of the Office menu, click PowerPoint Options.
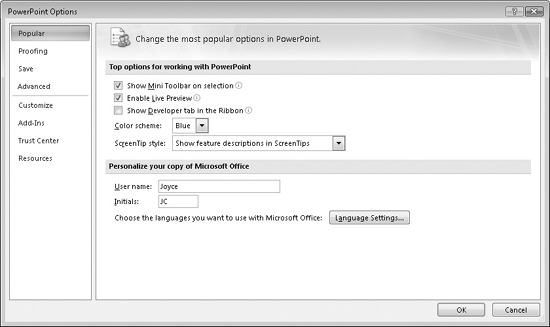
The PowerPoint Options window opens, displaying the Popular page. This page contains the most common personalization options.
Tip
If having the Mini toolbar appear when you select text is more of a hindrance than a help, you can disable that feature by clearing the Show Mini Toolbar On Selection check box. Similarly, you could disable the live preview of styles and formatting by clearing the Enable Live Preview check box. If you create presentations for international audiences, you can make additional editing languages available by clicking Language Settings, choosing the languages you want to have available, and then clicking OK.
Under Top options for working with PowerPoint, click the Color scheme arrow, and then in the list, click Silver.
Click the ScreenTip style arrow, and then in the list, click Don’t show feature descriptions in ScreenTips.
Under Personalize your copy of Microsoft Office, verify that the User Name and Initials that identify your comments in a presentation are correct, or change them to the way you want them to appear.
Click OK.
The PowerPoint Options window closes. The program window elements, including the title bar, Ribbon, scroll bars, and status bar are now silver.
In the Font group, point to the Bold button.
The ScreenTip now includes only the button name and keyboard shortcut.
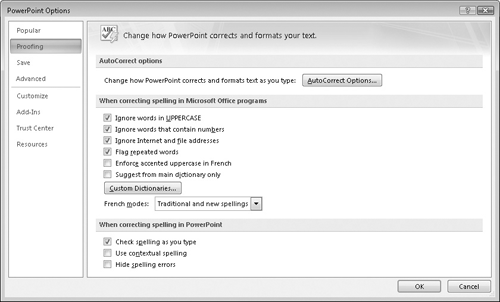
Display the PowerPoint Options window, and then in the page list in the left pane, click Proofing.
This page provides options for adjusting the AutoCorrect settings and for refining the spell-checking process.
Note
See Also For information about AutoCorrect, see Correcting and Sizing Text While Typing, and for information about checking spelling, see Checking Spelling and Choosing the Best Words both in Chapter 3.
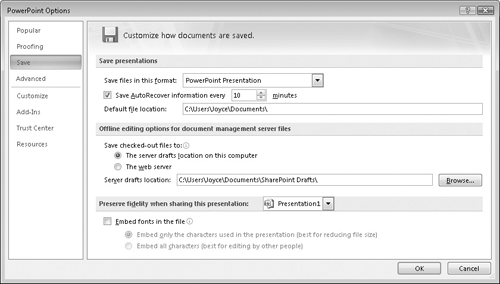
On this page, you can change the default presentation format; the AutoRecover save rate; the default save location for new files you create; and the default save location for files you check out from documents management servers (such as Microsoft Office SharePoint Server 2007). You can also specify whether you want the fonts used within the current presentation to be embedded in the presentation, in the event that someone who opens the presentation doesn’t have those fonts on his or her computer.
Under Save presentations, click the Save files in this format arrow.
In the list, notice that one of the formats in which you can save files is the PowerPoint Presentation 97-2003 format that creates .ppt files compatible with earlier versions of PowerPoint. If you have upgraded to PowerPoint 2007 but your colleagues are still working in an earlier version of the program, you might want to select this option so that they will be able to view and work with any presentation you create.
Tip
If you want to save just one presentation in a format that is compatible with earlier versions of the program, you can point to Save As on the Office menu, and then click PowerPoint 97-2003 Presentation to display the Save As dialog box with this format already selected as the Save As Type setting.
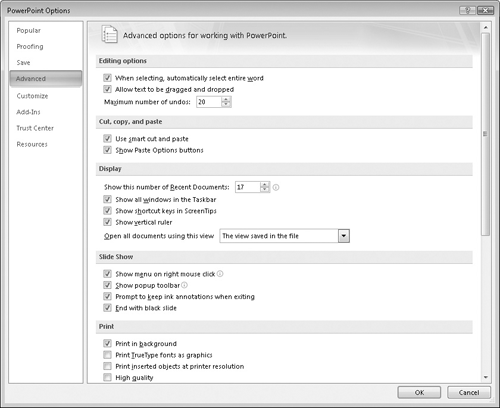
Click away from the list to close it, and then display the Advanced page.
This page includes options related to editing presentation content; displaying pres-entations on-screen; printing, saving, and showing presentations; and a variety of other options.
Take a few minutes to explore all the options on this page.
Although these options are classified as “advanced,” they are the ones you are most likely to want to adjust to fit the way you work. At the bottom of the page are the following buttons:
Note
See Also For information about converting a PowerPoint presentation to a Web page, see Saving a Presentation for the Web in Chapter 11. For information about using a SharePoint site, see Using a Document Workspace in Chapter 8.
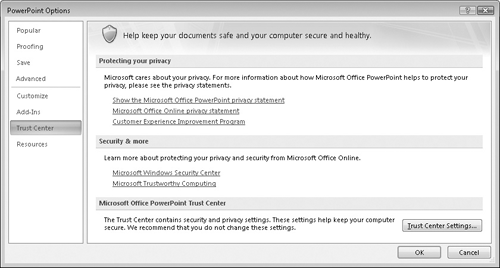
Display the Trust Center page.
This page provides links to information about privacy and security. It also provides links to the Trust Center settings that control the actions PowerPoint takes in response to presentations that are provided by certain people or companies, that are saved in certain locations, or that contain ActiveX controls or macros.
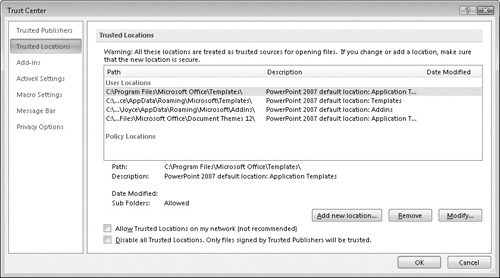
Under Microsoft Office PowerPoint Trust Center, click Trust Center Settings, and then in the page list in the Trust Center window, click Trusted Locations.
On this page, you can specify locations from which content will not be blocked.
Explore the other pages of the Trust Center window, and then click Cancel to return to the PowerPoint Options window.
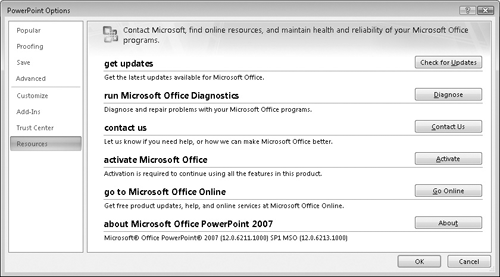
On this page are links for activating, updating, and maintaining your Office programs. Most of these links require that you have Internet access.
Note
BE SURE TO reverse any changes you don’t want to keep before moving on.
CLOSE the Word Options window.
Tip
Add-ins are utilities that add specialized functionality to a program (but aren’t full-fledged programs themselves). To use some add-ins, you must first install them on your computer and then load them into your computer’s memory. You do this on the Add-Ins page of the PowerPoint Options window. At the bottom of the page, click the Manage arrow, click the type of add-in, and then click Go. Then use the dialog box that opens to install and load the add-in.
If PowerPoint 2007 is the first version of the program you have ever worked with, you will by now have become accustomed to working with commands represented as buttons on the Ribbon. However, if you have upgraded from an earlier version, you might have identified a few commands that no longer seem to be available.
Tip
You can find out where a favorite PowerPoint 2003 command is located by clicking the Help button at the right end of the Ribbon, searching on 2003 commands, and then clicking Reference: Locations Of PowerPoint 2003 Commands In PowerPoint 2007. Scroll to the bottom of the topic, and click the Ribbon Mapping Workbook link under New Locations Of Familiar Commands.
You can find a list of all the commands that do not appear on the Ribbon but are still available in PowerPoint by displaying the Customize page of the PowerPoint Options window and then clicking Commands Not In The Ribbon in the Choose Commands From list.
For the 2007 Microsoft Office release, Microsoft conducted extensive research to find out how people actually use the programs in the Office suite. As a result, a few PowerPoint features that seemed superfluous have been abandoned, and a few others that were used very rarely have been pushed off to one side. If you sorely miss one of these sidetracked features, you can make it a part of your PowerPoint environment by adding it to the Quick Access Toolbar.
You might also want to customize the Quick Access Toolbar if you regularly use buttons that are scattered on various tabs of the Ribbon and don’t want to switch between tabs to access the buttons. If you use only a few buttons, you can add them to the Quick Access Toolbar and then hide the Ribbon by double-clicking the active tab. The tab names and Quick Access Toolbar remain visible. (You can temporarily redisplay the Ribbon by clicking the tab you want to view, or permanently redisplay it by double-clicking any tab.)
Tip
As you add buttons to the Quick Access Toolbar, it expands to accommodate them. If you add many buttons, it might become difficult to view the text in the title bar, or all the buttons might not be visible. To resolve this problem, you can move the Quick Access Toolbar below the Ribbon by clicking the Customize Quick Access Toolbar button and then clicking Show Below The Ribbon.
In this exercise, you will add a button to the PowerPoint 2007 Quick Access Toolbar.
Note
USE the Commands presentation. This practice file is located in the DocumentsMicrosoft PressPowerPoint2007SBSCustomizing folder.
OPEN the Commands presentation.
Display Slide 8.
Suppose you want to be able to quickly reorganize the bullet points on a slide by adding Move Up and Move Down buttons to the Quick Access Toolbar.
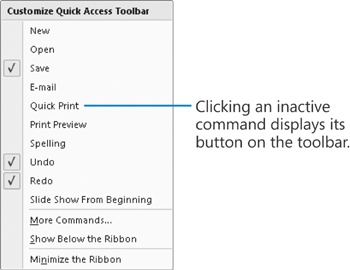
At the right end of the Quick Access Toolbar, click the Customize Quick Access Toolbar button.
By default, the Save, Undo, and Redo buttons appear on the Quick Access Toolbar. You can add a button to the toolbar for any of the common commands that appear in the Customize Quick Access Toolbar list by clicking the command in the list.
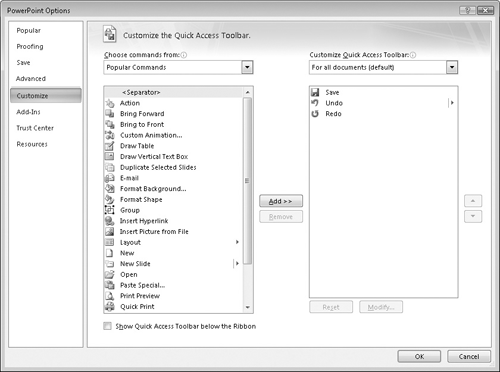
In the Customize Quick Access Toolbar list, click More Commands.
The PowerPoint Options window opens, displaying the Customize page.
You can add a less common command to the Quick Access Toolbar by selecting it in the list of available commands on the left side of the page, and then clicking Add (or double-clicking the command) to copy it to the list of toolbar commands on the right side of the page.
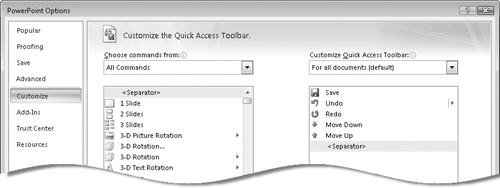
Click the Choose commands from arrow, and then in the list, click All Commands.
The available commands list changes to include all the commands available in PowerPoint 2007.
In the available commands list, click Move Down, and then click Add to copy the command to the toolbar commands list.
Repeat step 5 to add the Move Up command to the toolbar commands list.
At the top of the available commands list, click <Separator>, and then click Add.
The separator—a horizontal line indicating the beginning or end of a group of commands—appears at the bottom of the toolbar commands list.
In the toolbar commands list, click <Separator>, and then click the Move Up button to the right until the separator sits below Redo in the toolbar commands list.
In the PowerPoint Options window, click OK.
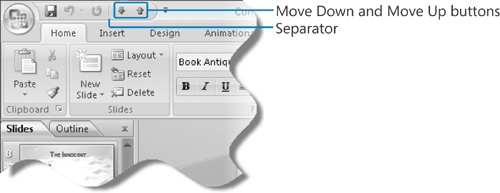
The Quick Access Toolbar expands to accommodate the separator bar and buttons you added.
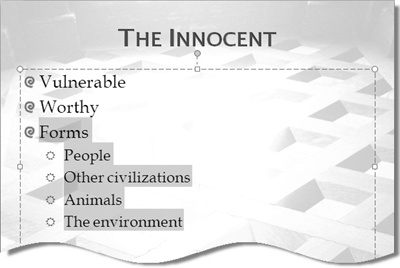
On Slide 8 in the Slide pane, click the bullet to the left of Forms.
The bullet point and its subpoints are selected.
On the Quick Access Toolbar, click the Move Up button twice.
The Forms bullet point and its subpoints move to the top of the bulleted list.
Display the Customize Quick Access Toolbar list, and then click More Commands.
In the PowerPoint Options window, click Reset. Then in the message box asking you to confirm that you want to restore the Quick Access Toolbar to its default command set, click Yes.
Click OK to close the PowerPoint Options window.
The buttons and separator you added earlier in this exercise no longer appear on the Quick Access Toolbar.

In addition to customizing the global Quick Access Toolbar to make a set of buttons available for all presentations, you can customize the Quick Access Toolbar for a specific presentation. For example, to work with a presentation that contains slides with graphically complex designs, you might want to increase your efficiency by providing one-click access to commands that allow you to turn the rulers and gridlines on or off without switching to the View tab.
In this exercise, you will add a button to a document-specific Quick Access Toolbar. Then after testing the button, you will remove it from the toolbar.
Note
USE the Toolbar presentation. This practice file is located in the DocumentsMicrosoft PressPowerPoint2007SBSCustomizing folder.
OPEN the Toolbar presentation.
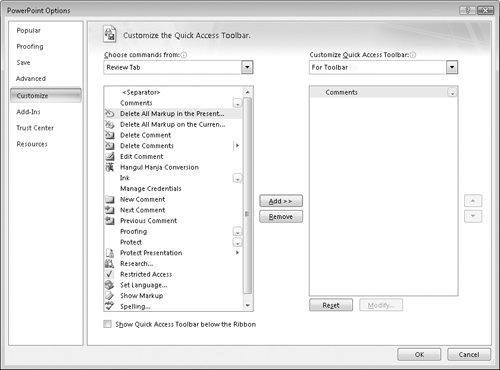
At the right end of the Quick Access Toolbar, click the Customize Quick Access Toolbar button, and then in the list, click More Commands.
The PowerPoint Options window opens, displaying the Customize page. A list of available commands appears on the left side of the page, and a list of the commands available from the global Quick Access Toolbar appears on the right.
On the right, click the Customize Quick Access Toolbar arrow, and then in the list, click For Toolbar.
Note
Troubleshooting If the current document is read-only, the only option available in the list is For All Documents (Default). You cannot customize the Quick Access Toolbar for a read-only document.
The toolbar command list is now empty, ready for you to specify which commands should appear on this presentation-specific toolbar.
Click the Choose commands from arrow, and then in the list, click Review Tab.
The list box now contains all the commands that are available from the Review tab on the Ribbon, including several that are related to adding, editing, and deleting comments.
In the available commands list, click Comments. Then click Add.
The Comments command appears in the toolbar commands list. The arrow button to the right of the command indicates that clicking this button on the Quick Access Toolbar will display a menu of options.
Click OK.
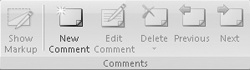
The Quick Access Toolbar now shows the Save, Undo, and Redo buttons from the default toolbar and the Comments button from the custom toolbar. The custom toolbar appears in a separate box on the Quick Access Toolbar.
On the Quick Access Toolbar, click the Comments button.
Although no arrow appears next to the button, a group of comment options appears.
Press
 to close the Comments group without making a selection.
Display the Customize Quick Access Toolbar list, and then click More Commands.
On the Customize page of the PowerPoint Options window, click For Toolbar in the Customize Quick Access Toolbar list to display the list of buttons on the custom toolbar. Then click Reset.
In the Reset Customizations message box, click Yes to return the document-specific toolbar to its default contents (empty). Then click OK.
Now only the buttons assigned to the default Quick Access Toolbar are visible.
The PowerPoint environment is flexible and can be customized to meet your needs.
Most of the environment settings are gathered on the pages of the PowerPoint Options window.
You can provide one-click access to any PowerPoint 2007 command by adding a button for it to the Quick Access Toolbar, either for all presentations or for a single presentation.