Chapter at a Glance
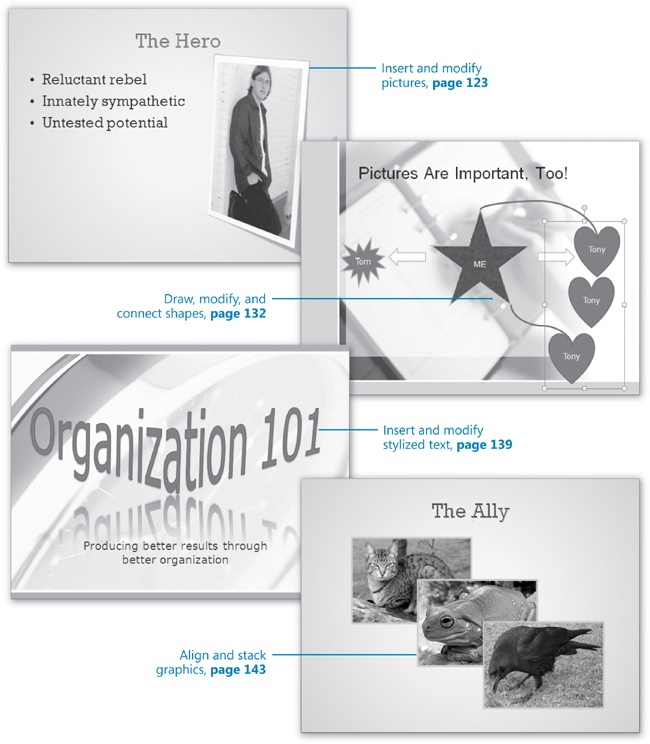
With the ready availability of professionally designed templates, presentations have become more visually sophisticated and appealing. For better or worse, the importance of your message and the persuasiveness of the words you use are no longer enough to guarantee the success of a presentation. Many types of presentations can benefit from the addition of graphic elements as visual reinforcement or merely for decoration.
The general term graphics applies to several kinds of visual enhancements. For the purposes of this chapter’s discussion, graphics include clip art, illustrations, photographs, shapes, and fancy text. All these types of graphics are inserted as objects on a slide and can then be sized, moved, copied, and formatted in a variety of ways.
In this chapter, you will work with clip art images, other types of pictures, and stylized text. You will create a photo album and draw a simple illustration using predefined shapes. Finally, you will see how to work with multiple graphics on a single slide.
Note
See Also Do you need only a quick refresher on the topics in this chapter? See the Quick Reference section at the beginning of this book.
Warning
Important Before you can use the practice files in this chapter, you need to install them from the book’s companion CD to their default location. See Using the Book’s CD at the beginning of this book for more information.
Note
Troubleshooting Graphics and operating system–related instructions in this book reflect the Windows Vista user interface. If your computer is running Windows XP and you experience trouble following the instructions as written, please refer to the Information for Readers Running Windows XP section at the beginning of this book.
Microsoft Office PowerPoint 2007 includes hundreds of professionally designed pieces of clip art—license-free graphics that often take the form of cartoons, sketches, or symbolic images, but can also include photographs, videos, and audio clips. In a PowerPoint presentation, you can use clip art to illustrate a point you are making, as interesting bullet characters, or to mark pauses in a presentation. For example, you might display a question mark image on a slide to signal a time in which you answer questions from the audience.
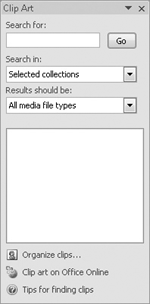
To add clip art to a slide, you can click the Insert Clip Art button in the content placeholder, or click the Clip Art button in the Illustrations group on the Insert tab. Either way, the Clip Art task pane opens. From this task pane, you can locate and insert the clip art image you want. You can search for clip art by keyword, search a specific Microsoft Clip Organizer collection, or search for specific files or media types, such as movies.
Note
See Also For information about the Clip Organizer, see the sidebar Using the Clip Organizer later in this chapter.
If you can’t locate a suitable image from those on your computer, you can search for additional images on the Microsoft Office Online Web site. You can visit Office Online either by clicking the Clip Art On Office Online link at the bottom of the Clip Art task pane, or by visiting office.microsoft.com.
You can access thousands of free clip art images (as well as many other useful resources) from Office Online.
Selecting a clip art image on a slide displays the Format contextual tab. You can use the buttons on this tab to modify the selected image. For instance:
You can change the color brightness and contrast of the image by using the commands in the Picture Tools group.
You can change the border, angle, and aspect of the image, apply effects such as a shadow, a glow, or a fuzzy border, and change the color and style of the border around the image by using the commands in the Picture Styles group.
You can size graphics to specific dimensions and crop the image by using the commands in the Size group.
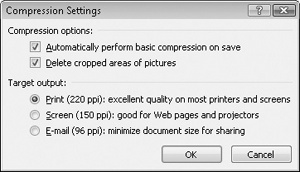
The file size of a presentation that contains graphics can become quite large. You can shrink the size of a graphic file (without affecting the displayed graphic) by using the Compress Pictures button. And if you decide you don’t like all the changes you have made to an image, you can restore the original settings by using the Reset Picture button.
In this exercise, you will first add clip art images to slides. You will then change the size and color of one of them, and apply special effects to it.
Note
USE the ClipArt presentation. This practice file is located in the DocumentsMicrosoft PressPowerPoint2007SBSEnhancing folder.
BE SURE TO start PowerPoint before beginning this exercise. Also be sure that you have an Internet connection so that you can connect to Microsoft Office Online.
OPEN the ClipArt presentation.
On Slide 7, in the content placeholder, click the Clip Art button.
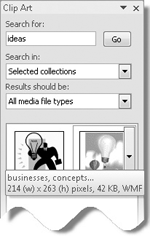
In the Search for box at the top of the task pane, type ideas, and then click Go.
Tip
If you see a Microsoft Clip Organizer message asking whether you want to include clip art from Office Online, click No to speed up the search.
Thumbnails of any clip art, photographs, movies, and sounds stored on your computer within your clip art collection or the Office clip art collection and associated with the keyword ideas appear in the task pane.
Point to the light bulb that floats in the sky like a balloon.
A ScreenTip displays the beginning of the list of keywords associated with the image, its dimensions and file size, and its format—in this case, Windows Metafile (WMF).
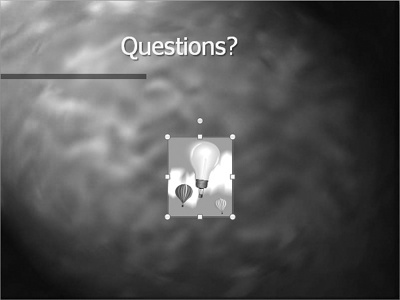
Click the thumbnail of the light bulb image.
PowerPoint inserts the image into the slide. At its larger size, you can see that the light bulb is meant to look like a hot air balloon.
Close the Clip Art task pane, and then display Slide 5.
On the Insert tab, in the Illustrations group, click the Clip Art button.
At the bottom of the task pane, click the Clip art on Office Online link.
Your default Web browser opens and displays the Office Online Clip Art resource page. The following steps are for Windows Internet Explorer 7; if you are using a different Web browser, the steps might be slightly different but you should be able to follow along.
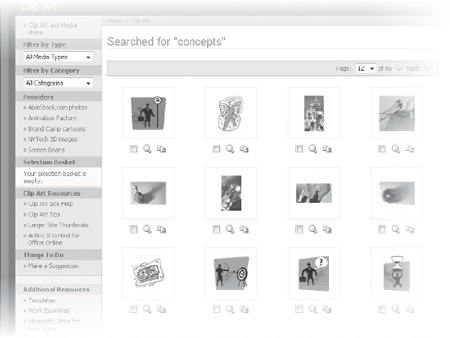
In the Search box on the Clip Art tab, type concepts, and then click the Search button.
Office Online displays hundreds of clip art images associated with the word concepts.
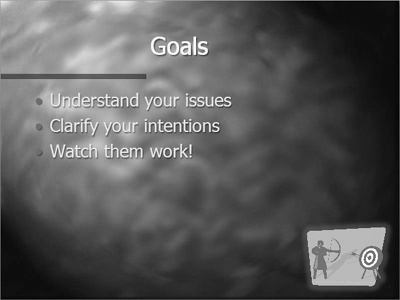
Move through the pages by clicking the Next arrow, until you locate the stylized drawing of an archer shooting an arrow at a target.
Click the Copy button under the image to copy the image to the clipboard.
Note
Troubleshooting A page might appear notifying you that this action requires a specific ActiveX control. It then checks your system for the control and displays the results. If the control is already installed, the page closes in a few seconds. If the control is not installed, follow the instructions to install it now.
Switch to PowerPoint. Then on the Home tab, in the Clipboard group, click the Paste button (not its arrow).
PowerPoint inserts the selected image in the center of the slide.
Close the Clip Art task pane, and ensure that the clip art image is still selected.
On the Format contextual tab, in the Size group, set the Shape Height to 1.5" (by clicking the arrows or replacing the numbers).
The setting in the Width box changes to maintain the image’s original aspect ratio.
Drag the resized image to the lower-right corner of the slide.
In the Adjust group, click the Recolor button, and under Light Variations, click the second thumbnail (Accent color 1 Light).
In the Picture Styles group, click the Picture Effects button, point to Glow, and then click the thumbnail in the lower-right corner of the gallery (Accent color 6, 18 pt glow).
In the Picture Styles group, click the Picture Effects button, point to Shadow, and under Perspective in the gallery, click the first thumbnail (Perspective Diagonal Upper Left).
Click toward the edge of the slide to see the results.
You can add illustrations created and saved in other programs or scanned photographs and illustrations to your slides. Collectively, these types of graphics are known as pictures. Like clip art, pictures can be used to make your slides more attractive and visually interesting. However, pictures can also convey information in a way that words cannot. For example, you might display photographs of your company’s new products in a presentation to salespeople.
Tip
You can save a PowerPoint slide as a picture that you can insert in other types of documents. Display the presentation or slide you want to save for reuse, click the Microsoft Office Button, and then click Save As. In the Save As dialog box, click the Save As Type arrow, and then in the list, click Windows Metafile. Change the file name or save location if you want, and then click Save. In the Microsoft Office PowerPoint message box, click Every Slide to create a separate WMF file of each slide, or Current Slide Only to create a file of only the selected slide.
You can insert a picture on a slide by clicking the Insert Picture From File button in the content placeholder, if there is one, or by clicking the Picture button in the Illustrations group on the Insert tab. Either way, the Insert Picture dialog box opens so that you can locate and insert the picture you want.
After you insert any picture into your presentation, you can modify it by using the buttons on the Format contextual tab. For example, you can:
Enhance the picture’s color, brightness, and contrast.
Rotate the picture to any angle.
Apply special effects such as shadows, reflections, and borders.
Crop away the parts of the picture that you don’t want to show on the slide. (The picture itself is not altered—parts of it are simply covered up.)
Compress the image to minimize the file size.
Tip
Depending on the resolution setting, you might lose some visual quality when you compress a picture. You choose the resolution you want for the pictures based on where or how the presentation will be viewed—for example, on the Web or printed. You can also set other options, such as deleting cropped areas of a picture, to achieve the best balance between quality and file size.
In this exercise, you will add pictures to slides. You will modify the style, size, border, and location of the pictures, and then you will decrease their file sizes by compressing them.
Note
USE the Pictures1 presentation and the Pictures2, Pictures3, Pictures4 and Pictures5 pictures. These practice files are located in the DocumentsMicrosoft PressPowerPoint2007SBSEnhancing folder.
OPEN the Pictures1 presentation.
Display Slide 5, and then in the left content placeholder, click the Insert Picture from File button.
The Insert Picture dialog box opens and displays the contents of your Pictures folder.
Navigate to the DocumentsMicrosoft PressPowerPoint2007SBSEnhancing folder, click the Pictures2 image, and then click Insert.
Tip
If the picture might change, you can ensure that the picture on the slide is always up to date by clicking the Insert arrow and then clicking Link To File to insert a link to the picture, or by clicking Insert And Link to both insert the picture and link it to its graphic file.
PowerPoint inserts the picture in the middle of the content pane.
Insert the Pictures3 image in the right content pane.
You can add pictures or other images to a slide without an available content placeholder, and regardless of the slide layout.
Click the edge of the slide to release the selection, and then on the Insert tab, in the Illustrations group, click the Picture button.
In the Insert Picture dialog box, double-click the Pictures4 image.
Because you did not insert the picture from a content placeholder, it takes up nearly the entire slide.
Drag the lower-right handle up and to the left until the picture is about the size of the other two.
Now you need to work with the pictures to make them all the same size.
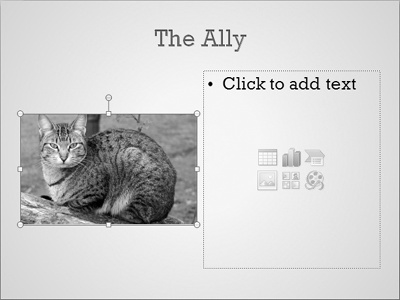
Click the cat picture, drag it down so that you can see it all, and on the Format contextual tab, in the Size group, click the Crop button.
Cropping handles appear in the corners and on the sides of the picture.
Drag the middle cropping handle at the top of the picture down to the top of the cat’s ear, and drag the middle cropping handle at the bottom to remove about the same amount of the picture. Then click the Crop button to turn it off.
In the Size group, the Shape Height should be about 3" and the Shape Width should be about 4.5".
Drag the upper-left handle of the cat picture down and to the right until the Shape Height is about 2.5".
Crop and adjust the size of the frog and bird pictures until each Shape Height setting is about 2.5".
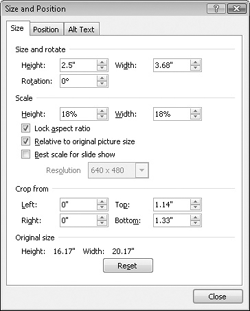
When the images are approximately the right size, you can fine-tune their size in the Size And Position dialog box.
Click the cat picture, and then click the Size dialog box launcher.
Under Scale, clear the Lock aspect ratio check box. Under Size and rotate, set the Height to 2.5" and the Width to 3.5". Then click Close.
Repeat steps 11 and 12 for the other two pictures. Then drag the pictures into a pleasing arrangement on the slide.
Select all the pictures by holding down the
 key as you click each one in turn.
With the picture selected, on the Format tab, in the Picture Styles group, click the Picture Border button, and then under Standard Colors, click the Orange box.
With the pictures still selected, click the Picture Border button again, point to Weight, click 3 pt, and then click at the edge of the slide to see the results.
Display Slide 4. Then on the Insert tab, in the Illustrations group, click the Picture button, and in the Insert Picture dialog box, double-click the Pictures5 image.
With the picture selected, on the Format contextual tab, in the Picture Styles group, click the More button.
In the Picture Styles gallery, click the fifth thumbnail in the third row (Rotated, White).
In the Picture Styles group, click the Picture Effects button, point to 3-D Rotation, and under Perspective, click the last thumbnail in the second row (Perspective Contrasting Left).
In the Size group, set the Shape Height to 5", and then click the picture.
The height and width change proportionally.
Move the picture down and to the right so that the title and bulleted list are visible.
You have one important task left. Any time you use a picture that you have not created yourself, it is wise to add an attribution to acknowledge the source.
On the Insert tab, in the Text group, click the Text Box button, and then drag to insert a text box at the bottom of the slide. Type Nic Meiner, used with permission. Change the font size to 12 and the color to Green, Accent 1. Rotate the text box, drag it to the left of the picture, and then click the lower-right corner of the slide to see the results.
Click the picture, and then on the Format tab, in the Adjust group, click the Compress Pictures button.
The Compress Pictures dialog box opens.
Notice that unless you choose the Apply To Selected Pictures Only check box, PowerPoint will compress all the pictures in the presentation, not only the selected picture.
Click Options.
Under Target Output, click Screen, and then click OK.
In the Compress Pictures dialog box, click OK.
PowerPoint compresses the pictures to 150 pixels per inch and deletes the parts of the pictures that you cropped earlier. If you were to save the file now, the compressed pictures would result in a smaller file size.
Creating a photo album in PowerPoint from pictures on your hard disk or other storage media is a great way to share photographs or other illustrations. You can customize the album by using layout options such as frames of different shapes, and you can add captions to each picture.
In this exercise, you will create a photo album displaying pictures of various items being offered for sale.
Note
USE the PhotoAlbum1 through PhotoAlbum4 photographs. These practice files are located in the DocumentsMicrosoft PressPowerPoint2007SBSEnhancing folder.
OPEN a new blank presentation.
On the Insert tab, in the Illustrations group, click the Photo Album button.
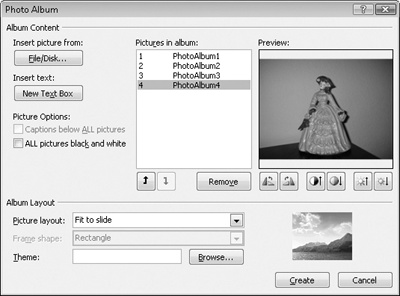
Click the File/Disk button. In the Insert New Pictures dialog box, navigate to your DocumentsMicrosoft PressPowerPoint2007SBSEnhancing folder.
Select the PhotoAlbum1, PhotoAlbum2, PhotoAlbum3, and PhotoAlbum4 images, and then click Insert.
The Photo Album dialog box now has four graphics files listed in the Pictures In Album list. You can select each picture in turn to view them. If you decide to change the order in which they will appear in the album, you can click a picture and then click the Move Up or Move Down button. You can also adjust the rotation, contrast, and brightness of each picture.
Under Album Layout, click the Picture layout arrow, and then in the list, click 4 pictures with title.
Click the Frame shape arrow, and in the list, click Rounded Rectangle. Then click Create.
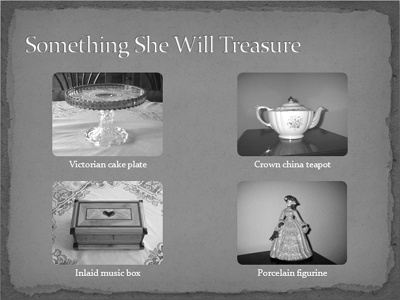
PowerPoint creates a presentation called Photo Album that contains a title slide and a slide containing the four pictures.
On Slide 1, select the words Photo Album, and then type Favorite Things. Then replace the subtitle (by followed by your user name) with Unique Gifts.
Display Slide 2, click the title placeholder, and then type Something She Will Treasure.
In turn, select each picture, and on the Format contextual tab, click the Size dialog box launcher, and on the Size tab of the Size and Position dialog box, clear the Lock aspect ratio check box, set the Height to 2.5" and the Width to 3.3", and then click Close.
Adjust the positions of the pictures as necessary.
On the Insert tab, in the Illustrations group, click the Photo Album arrow, and then click Edit Photo Album.
In the Edit Photo Album dialog box, under Picture Options, select the Captions below ALL pictures check box, and then click Update.
Replace the file names below each photograph with suitable captions, and then click a blank area of the slide.
On the Design tab, in the Themes group, display the Themes gallery, and select a theme that showcases the pictures.
We chose the Paper theme.
To emphasize the key points in your presentation, you might want to include shapes in addition to text. PowerPoint provides tools for creating several types of shapes, including stars, banners, boxes, lines, circles, and squares. With a little imagination, you will soon discover endless ways to create drawings by combining shapes.
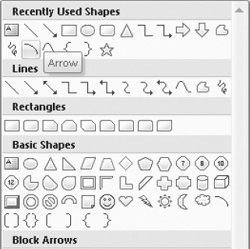
To create a shape in PowerPoint, you click the Shapes button in the Illustrations group on the Insert tab, click the shape you want to insert, and then drag the crosshair pointer across the slide.
Tip
To draw a circle or a square, click the Oval or a Rectangle shape, and hold down the Shift key while you drag.
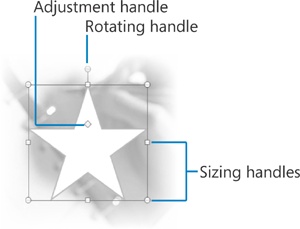
After you draw the shape, it is surrounded by a set of handles, indicating that it is selected. (You can select a shape at any time by simply clicking it.) The handles around a selected shape serve the following purposes:
You can drag the pale blue sizing handles to change the size of a shape.
If a shape has a yellow diamond-shaped adjustment handle next to one of the sizing handles, the shape is adjustable. You can use this handle to alter the appearance of the shape without changing its size.
You can drag the green rotating handle to adjust the angle of rotation of a shape.
Tip
After you create a shape, you can change its orientation on the slide by rotating or flipping it. (You can rotate and flip any type of image.) Rotating turns a shape 90 degrees to the right or left; flipping turns a shape 180 degrees horizontally or vertically. To rotate or flip a selected shape, click the Rotate button in the Arrange group on the Format contextual tab, and then choose the option you want. You can also rotate a shape to any degree by dragging the green rotating handle.
You can copy or cut a selected shape or multiple shapes and then paste the shapes elsewhere in the same presentation, in another presentation, or in any Microsoft Office program. To move a shape from one location to another on the same slide, you simply drag it. You can create a copy of a selected shape by dragging it while holding down the Ctrl key or by clicking Duplicate in the Paste list in the Clipboard group on the Home tab.
After drawing a shape, you can modify it by using the buttons on the Format contextual tab that appears when a shape is selected. For example, you can:
You might want to experiment with the Shape Outline and Shape Effects options, as well as the styles available in the Shape Styles gallery, to get an idea of what is available.
Having made changes to one shape, you can easily apply the same attributes to another shape by clicking the shape that has the desired attributes, clicking the Format Painter button in the Clipboard group on the Home tab, and then clicking the shape to which you want to copy the attributes. If you want to apply the attributes of a shape to all shapes in the active presentation, right-click the shape and then click Set As Default Shape. From then on, all the shapes you draw in the active presentation will have the new default attributes.
If you want to show a relationship between two shapes, you can connect them with a line by joining special handles called connection points. Moving a connected shape also moves the line, maintaining the relationship between the connected shapes.
When you have multiple shapes on a slide, you can group them so that you can edit, copy, and move them as a unit. You can change the attributes of an individual shape—for example, its color, size, or location—without ungrouping the shapes. If you do ungroup the graphics, you can regroup the same shapes by selecting one of them and then clicking Regroup in the Group list.
In this exercise, you will draw several shapes, add text to them, and change their colors. You will duplicate and copy a shape and change the shape of another. Then you will connect shapes and format the connection lines. Finally you will group and ungroup the shapes.
Note
USE the Shapes presentation. This practice file is located in the DocumentsMicrosoft PressPowerPoint2007SBSEnhancing folder.
OPEN the Shapes presentation.
Display Slide 5, and on the Insert tab, in the Illustrations group, click the Shapes button.
The Shapes gallery opens.
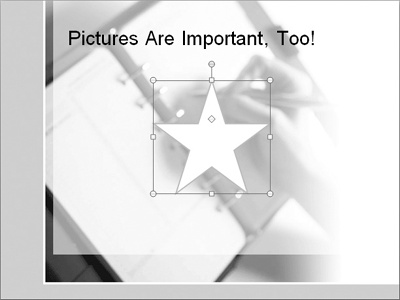
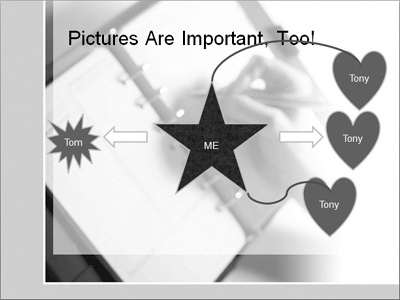
Under Stars and Banners in the gallery, click the 5-Point Star shape, and then drag the crosshair pointer in the middle of the slide to draw a star shape that spans the shadow of the hand in the background graphic.
The pale blue handles around the shape indicate that it is selected.
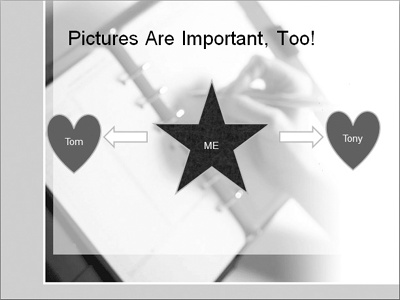
On the Format contextual tab, in the Shape Styles group, click the Shape Fill arrow, point to Texture, and then in the gallery, click the Purple mesh texture.
In the Insert Shapes group, click the Text Box button, click the center of the star, and then type ME.
Note
See Also For information about working with text boxes, see Adding and Manipulating Text Boxes in Chapter 3.
In the Insert Shapes group, click the More button to display the complete Shapes gallery. Then under Block Arrows, click the Right Arrow shape, and draw an arrow to the right of the star.
With the arrow still selected, hold down the
 key, and drag a copy of the arrow to the left of the star.
With the shape still selected, in the Arrange group, click the Rotate button, and then click Flip Horizontal.
You could have drawn a Left Arrow shape, but this technique ensures that the two arrows have the same proportions.
Adjacent to each arrow, add a heart shape, and then fill the shapes with the colors and text of your choosing.
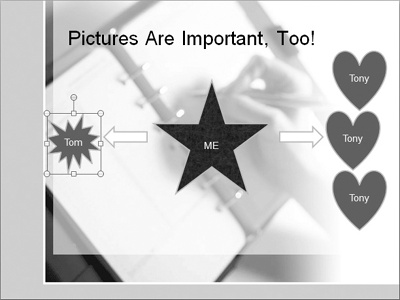
Click the heart on the right. Then on the Home tab, in the Clipboard group, click the Paste arrow, and then in the list, click Duplicate.
PowerPoint pastes a copy of the shape on top of the original.
Point to the new shape’s border, hold down the
 key, and drag the shape down so that both shapes are visible.
While you are holding down the Shift key you can move the shape only horizontally or vertically in a straight line.
Point to the border of the second shape, hold down the
 key, and drag another copy of the shape above the original one.
Click the heart on the left side of the star. Then on the Format contextual tab, in the Insert Shapes group, click the Edit Shape button, point to Change Shape, and under Stars and Banners, click the first shape (Explosion 1).
The heart changes to the selected shape, with all formatting and text intact.
Click the bottom heart shape. Then on the Format tab, in the Insert Shapes group, display the Shapes gallery, and under Lines, click the Curved Connector shape.
Point to the selected shape.
Red connection points appear, and the pointer changes to a crosshair.
Point to the top connection point in the heart, and then drag over to the star (don’t release the mouse button).
When connection points appear on the star, point to the lower-right connection point, and release the mouse button.
Red handles appear at each end of the line, indicating that the shapes are connected.
With the line still selected, in the Shape Styles group, click the Shape Outline arrow, and under Standard Colors, click the Purple box. Then click the Shape Outline arrow again, and change the Weight to 3 pt.
Right-click the line, and click Set as Default Line.
Draw another connection line between the top heart and top point of the star.
Click the bottom heart, point to its frame, drag it down and to the right, and then click a blank area of the slide to release the selection.
The connection line moves with the shape.
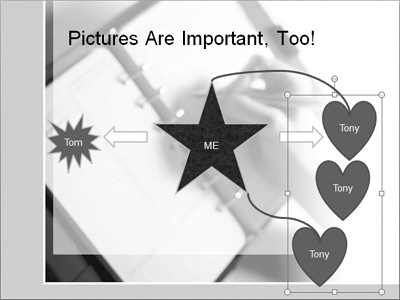
Select all the hearts by holding down the
 key as you click each on in turn.
Notice that each picture has its own set of handles.
On the Format contextual tab, in the Arrange group, click the Group button, and then in the list, click Group.
The shapes are grouped together as one object with one set of handles around the edge of the entire group.
In the Shape Styles group, click the Shape Outline arrow, and then under Standard Colors, click the last color (Purple).
The outlines around the three shapes change to purple.
Point to any shape in the group, and when the pointer changes to a four-headed arrow, drag down and slightly to the left.
The entire group moves, and the two connection lines adjust their positions accordingly.
On the Format tab, in the Arrange group, click the Group button, and then click Ungroup.
The object is ungrouped into individual pictures, which are all selected.
If you want to add a fancy title to a slide, and you can’t achieve the effect you want with regular text formatting, you can using WordArt. With WordArt, you can visually enhance text in ways that go far beyond changing a font or font size. But you don’t have to be an artist to create stylized text, because WordArt now includes a gallery of awesome choices that stretch your words horizontally, vertically, or diagonally to shape them in fantastic ways.
Tip
For the best results, use WordArt to emphasize short phrases, such as Our Customers Come First, or a single word, such as Welcome.
You add stylized text to a slide by clicking the WordArt button in the Text group on the Insert tab. You then select a style from the WordArt gallery, enter your text, and apply any additional formatting from the Format contextual tab, shown earlier in the chapter.
In this exercise, you will add stylized text to a slide and then modify the appearance of the text.
Note
USE the WordArt presentation. This practice file is located in the DocumentsMicrosoft PressPowerPoint2007SBSEnhancing folder.
OPEN the WordArt presentation.
Display Slide 1. Then on the Insert tab, in the Text group, click the WordArt button.
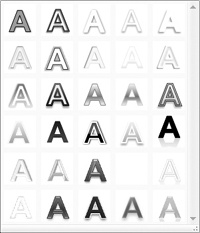
The WordArt gallery opens, displaying a list of styles.
Click the last thumbnail in the third row (Fill – Accent 2, Double Outline – Accent 2).
PowerPoint inserts a WordArt object in the slide with placeholder text formatted according to the style you selected.
With the placeholder text selected, type Organization 101.
The replacement text has the same style as the placeholder text.
Move and resize the WordArt object so its frame spans the middle of the top half of the slide.
On the Format contextual tab, in the WordArt Styles group, click the More button, and then in the WordArt Styles gallery, click the fourth thumbnail in the first row (Fill – White, Outline – Accent 1).
In the WordArt Styles group, click the Text Fill arrow, and then under Standard Colors, click the first red color (Dark Red).
In the WordArt Styles group, click the Text Outline arrow, and then under Theme Colors, click the last box in the first row (Indigo, Accent 6).
In the WordArt Styles group, click the Text Effects button, point to Transform, and then under Warp, click the last thumbnail in the first row (Triangle Down).
Click the Text Effects button again, point to Reflection, and then under Reflection Variations, click the second thumbnail in the second row (Half Reflection, 4 pt offset).
The reflections vary by the amount of reflection shown and the starting point below the text.
Drag the pale blue handle in the middle of the bottom of the frame down until the reflection sits just above the subtitle.
The letters in the middle of the WordArt object stretch so that the triangle effect is more exaggerated.
Click an edge of the slide to release the selection and see the results.
After inserting graphics or drawing shapes in approximately the locations you want them on a slide, you can align them and change their stacking order by using the buttons in the Arrange group on the Format contextual tab.
Clicking the Align button in the Arrange group gives you access to commands for aligning individual or multiple graphics in several ways. For example, you can:
Align graphics vertically by the left or right edges or centerline, or horizontally by the top or bottom edges or centerline.
Distribute graphics evenly within their current space, either horizontally or vertically.
Align graphics relative to the slide that contains them or to other selected objects.
Align graphics relative to a position on the slide.
Align graphics against adjustable horizontal and vertical guidelines.
Tip
If you added pictures to a slide by clicking the Picture button in the Illustrations group on the Insert tab, you can group them and then align and position them as a group. However, if you have added them by clicking the Insert Picture From File button in a content placeholder, you cannot group them.
When graphics overlap each other, they are stacked. The stacking order is determined by the order in which you inserted the graphic. You can change the stacking order by selecting a graphic and then clicking the Bring To Front or Send To Back button, to move the graphic to the top or bottom of the stack. To move the selected graphic forward in the stack one graphic at a time, click Bring Forward in the Bring To Front list; to move it backward, click Send Backward in the Send To Back list.
Tip
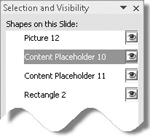
If you can’t select a graphic because it is covered by others in the stack, click the Selection Pane button to display the Selection And Visibility task pane, and then select the graphic you want from the Shapes On This Slide list.
In this exercise, you will align graphics in various ways, change their stacking order, and position them with the help of a grid and guidelines.
Note
USE the Aligning presentation. This practice file is located in the DocumentsMicrosoft PressPowerPoint2007SBSEnhancing folder.
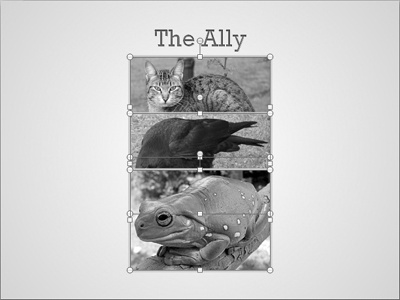
Display Slide 5, and then select all the pictures.
On the Format contextual tab, in the Arrange group, click the Align button, and then in the list, click Distribute Vertically.
The middle picture moves down so that it is the same distance below the left picture as it is above the right picture.
In the Arrange group, in the Align list, click Align Center.
Click away from the stack, and then click the top picture.
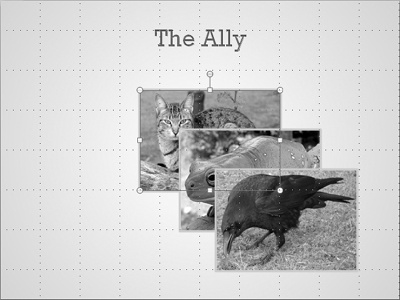
In the Arrange group, click the Bring to Front arrow, and then in the list, click Bring Forward.
The top picture moves forward in the stack, obscuring the middle picture.
In the task pane, under Shapes on this Slide, click Content Placeholder 11.
(The top and middle pictures are designated as content placeholders because that was the method used to insert them.) On the slide, the selection rectangle indicates that the middle picture is selected.
Close the Selection and Visibility task pane.
In the Arrange group, in the Align list, click View Gridlines.
A faint dotted grid appears on the slide.
Drag the selected crow picture to the right and down, so that its right and bottom borders align with the first gridlines from the right and bottom edges of the slide.
Drag the frog picture so that its right and bottom borders align with the second gridlines from the right and bottom edges of the slide.
Drag the cat picture so that its right and bottom borders align with the third gridline from the right and bottom edges of the slide.
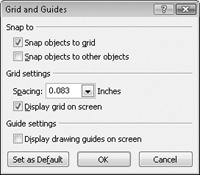
In the Arrange group, in the Align list, click Grid Settings.
In the dialog box, under Grid settings, clear the Display grid on screen check box.
Under Guide settings, select the Display drawing guidelines on screen check box, and then click OK.
The grid disappears, and vertical and horizontal guidelines span the slide.
Point to the vertical guideline away from any text or objects, and drag it to the left, releasing it when the accompanying ScreenTip reads 3.50. Then drag the horizontal guideline down until its ScreenTip reads 0.50.
The ScreenTips show in inches how far each guideline is from the center of the slide. As you drag, numbers are skipped because the Snap Objects To Grid check box is selected in the Grid And Guides dialog box. Selecting this option snaps guidelines and graphics to an invisible grid. You can set the spacing of the grid in the dialog box.
Point to the selected cat picture, and drag it to the left until its left and bottom borders align with the guidelines.
Select all the pictures. Then on the Format tab, in the Arrange group, click the Align button, and in the list, click Distribute Horizontally.
Repeat step 19 to distribute the pictures vertically.
In the Arrange group, in the Align list, click Grid settings, and in the Grid and Guides dialog box, clear the Display drawing guides on screen check box. Then click OK, and click an edge of the slide to see the results.
Thousands of clip art images are available to help you add visual interest to your slides. Look for them on the Microsoft Office Online Web site or search for clip art offered through other Web sites.
When you add pictures or photographs to a slide, keep in mind that using pictures you don’t own without permission, especially for business purposes, can breach the copyright of the owner. Limited use for non-commercial purposes is usually allowed as long as you acknowledge the source.
You can reduce the size of a presentation containing multiple pictures, by compressing the pictures.
Shapes can add interest to a slide and draw attention to key concepts. However, they can become tiresome and produce an amateurish effect if they are overused.
Fancy titles created with WordArt can have much more impact than regular text.
Knowing how to manipulate graphics on a slide will help you position, align, and stack them to get the effect you want.

