In this chapter, you learn how to stock your iPod touch with audio, video, and photos. The topics include the following:
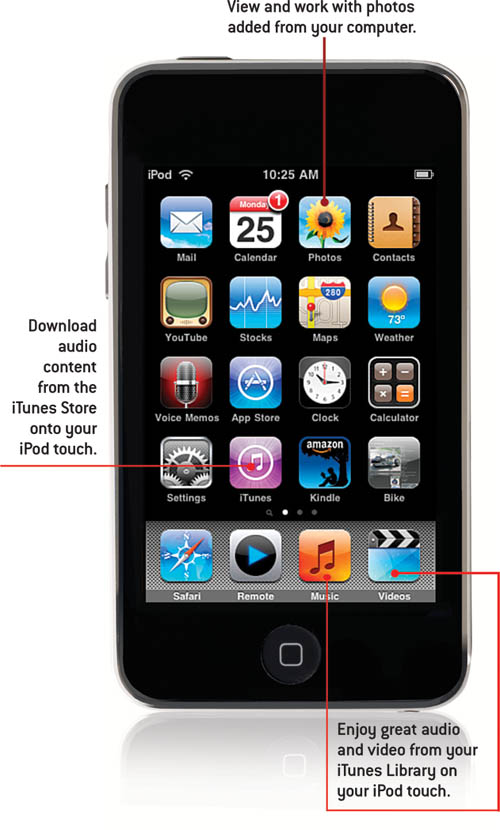
</feature>One of the best things about an iPod touch is that you can use it to listen to audio content of various types (see Chapter 5, “Listening to Music, Podcasts, and Other Audio”). You can also watch video on the iPod touch’s high-resolution screen (see Chapter 6, “Watching Movies, TV Shows, and other Video”). You can view and work with photos stored on it, too (see Chapter 11, “Storing, Viewing, and Sharing Photos”).
However, before you can do all of these things, you must move content with which you’ll work onto your iPod touch. There are two basic ways to do this. One is to move content from your iTunes Library onto the iPod touch; you can also use iTunes to move photos from a photo application onto your iPod touch. The second method is to move audio content directly from the iTunes Store onto your iPod touch.
iTunes is a great application that you can use to store, organize, and enjoy all sorts of audio and video. It’s also the primary way (and the only way in the case of video) to move audio and video content onto your iPod touch. You first add the content to your iTunes Library and then move that content onto the iPod touch through the sync process.
The most common ways to add content to the iTunes Library are by importing audio CDs or purchasing content from, renting movies from, and subscribing to podcasts in the iTunes Store.
After you have stocked your iTunes Library, you can create playlists to organize that content to move it onto your iPod touch.
When your content is ready, sync the iPod touch with the iTunes Library so that the content you want to be available is moved from your Library onto the iPod touch.
Importing audio CDs is one of the most useful ways to get music and other audio content into your iTunes Library.
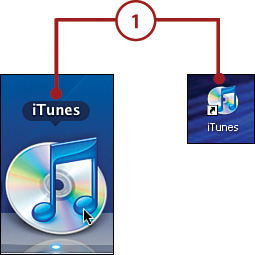
Launch iTunes by double-clicking its application icon, choosing it on the Windows Start menu, or clicking it on the Mac’s Dock.
Choose Edit, Preferences (Windows) or iTunes, Preferences (Mac). The Preferences dialog appears.
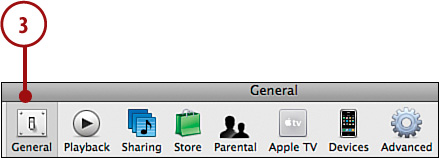
Click the General tab.
On the When you insert a CD menu, choose Import CD and Eject.
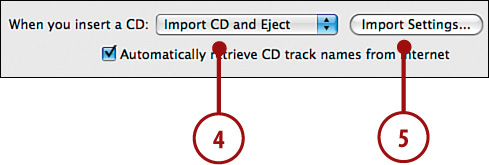
Click Import Settings.
On the Import Using drop-down menu, choose AAC Encoder.
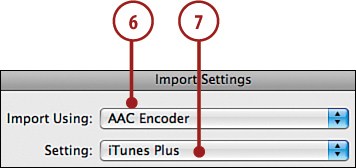
On the Setting drop-down menu, choose iTunes Plus.
Click OK.
Check Automatically retrieve CD track names from Internet.
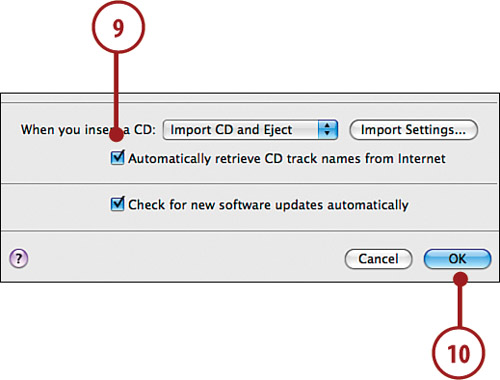
Click OK.
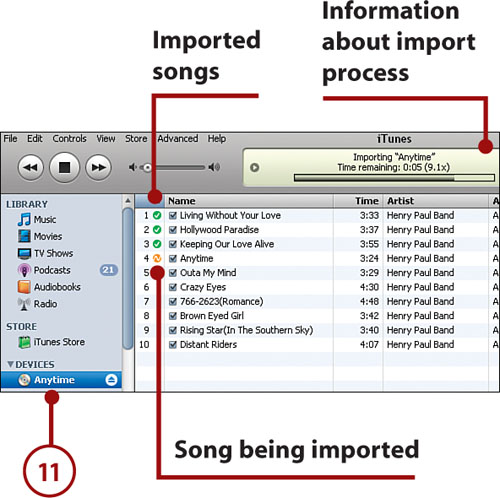
Insert a CD into the computer. iTunes connects to the Internet and identifies the CD. When that’s done, the import process starts. You don’t have to do anything else because iTunes manages the import process for you. When the process finishes, iTunes plays an alert sound and ejects the disc.
Insert the next CD you want to import. After it has been ejected, insert the next CD and so on until you’ve added all the CDs that you want to be able to listen to on your iPod touch to your iTunes Library.
The iTunes Store has a very large selection of music, movies, TV shows, and other content that you can preview, purchase, and download to your iTunes Library. To do this, you must have an Apple Store account, also known as an Apple ID. (You can preview content without an Apple ID.) If you have an AIM/AOL screen name, you can also use that to sign into the store. (You have to provide credit card information to use an AIM/AOL account to make purchases.) For the steps to obtain an Apple ID and log into the iTunes Store, see Chapter 1, “Getting Started with Your iPod touch.”
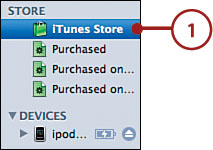
Click iTunes Store on the Source list. iTunes connects to the iTunes Store, and you see the Home page.
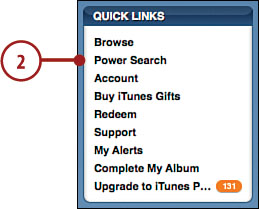
Click the Power Search link in the QUICK LINKS section located along the right side of the Home page. You move to the Search screen.
To limit your search to a specific kind of content, choose it on the pop-up menu. For example, choose Music Videos to search for music videos.

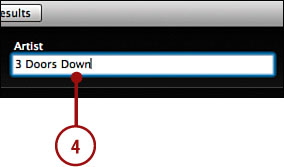
Enter the information for which you want to search, such as Artist, Song, Genre, and such
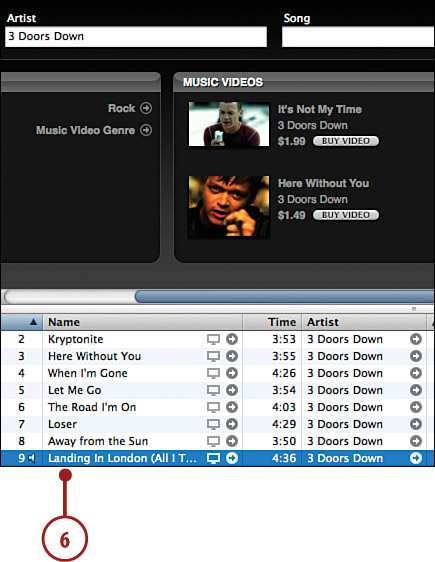
Click Search. Items that meet your search are shown in the lower parts of the window. The center pane is a summary view while the lower pane shows the details.

To preview content, double-click it. A 30-second preview plays.
If you selected video, watch the video in the iTunes window.

Continue previewing content.
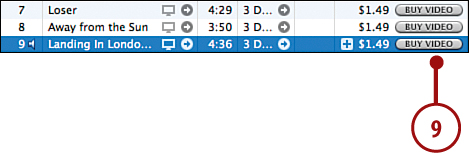
When you want to purchase and download content, click the BUY button. For example, when you are viewing music, this is the BUY SONG or BUY ALBUM button. When you are viewing TV shows, it is the BUY EPISODE or BUY SEASON button. In other cases, it might be BUY VIDEO.
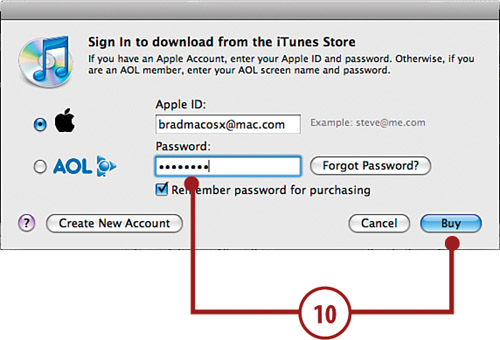
If prompted, enter your account’s password and click Buy. The content you purchase is downloaded to your computer and added to your iTunes Library.
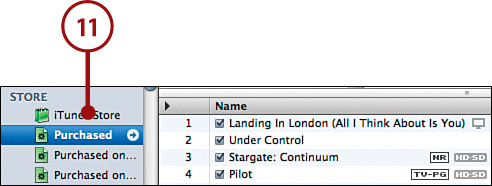
Click the Purchased playlist on the iTunes Source list to see content you’ve downloaded from the iTunes Store.
You can also rent movies from the iTunes Store. When you rent a movie, you can watch it as many times as you’d like within a 24-hour period (starting when you play the rented content the first time) within a 30-day rental window. After either the 24-hour viewing or 30-day rental period expires (whichever comes first), the rented movie is removed from iTunes (or from your iPod touch) automatically. To rent a movie, follow these steps.
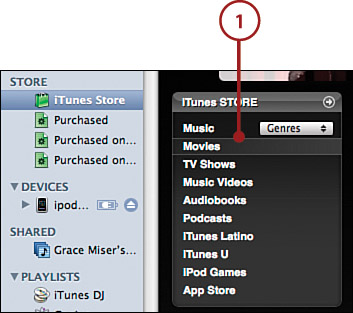
Move into the iTunes Store and click the Movies link.
Browse or search for movies in which you might be interested.
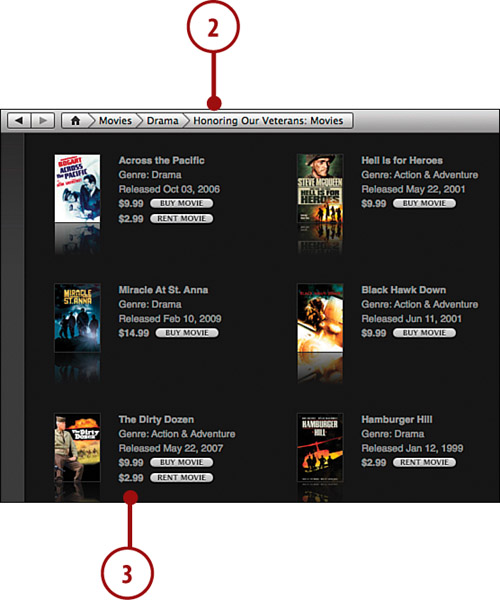
Click a movie’s link to see detailed information about it, including the cost to rent it.
To watch the movie’s trailer, click the VIEW TRAILER button.
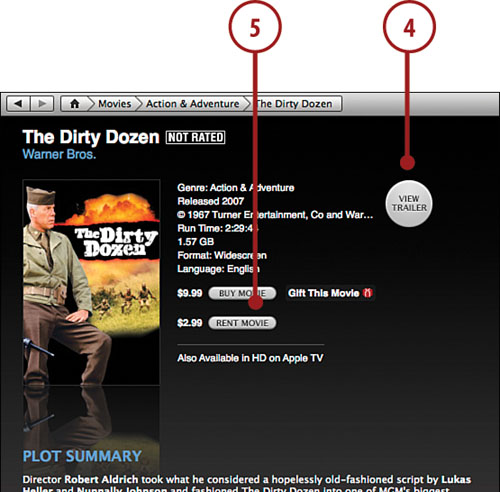
To rent the movie, click the RENT MOVIE button. If you’ve configured your account to remember your password for purchasing, you see a dialog warning you that you are about to rent a movie. If not, you are prompted to provide your password.
Click Rent or enter your Apple ID password and click Rent. The movie is downloaded to your iTunes Library.

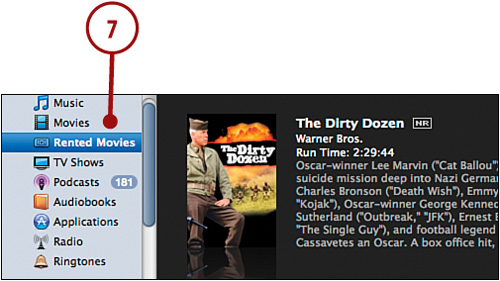
To access movies you’ve rented, click the Rented Movies source. (Be sure not to play a rented movie until you’re sure you will be able to watch all of it within 24 hours because the viewing period starts as soon as you play it.)
Podcasts are radio-like audio or video episodes that you can subscribe and listen to or watch. Even better, most podcasts are free.
Click iTunes Store. The iTunes Store fills the Content pane.
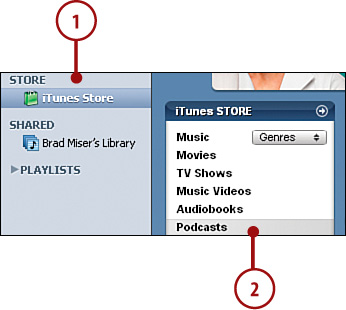
Click Podcasts. The Podcasts Home page appears.
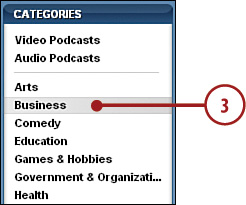
Click a category you are interested in, such as Business.
Browse the results.
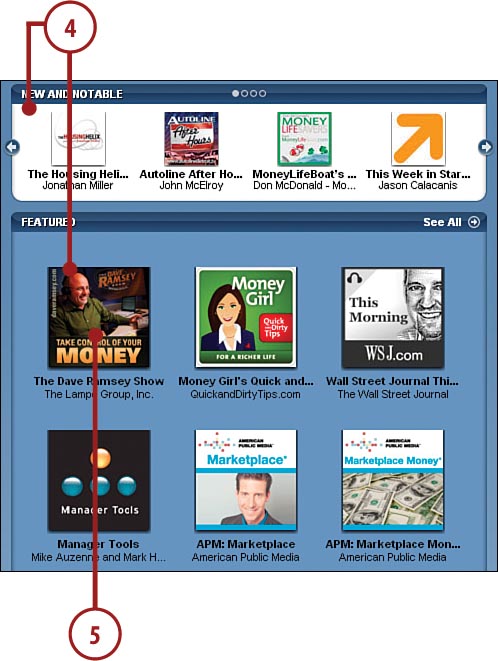
Click a podcast to get more information about it.
Read about the podcast.
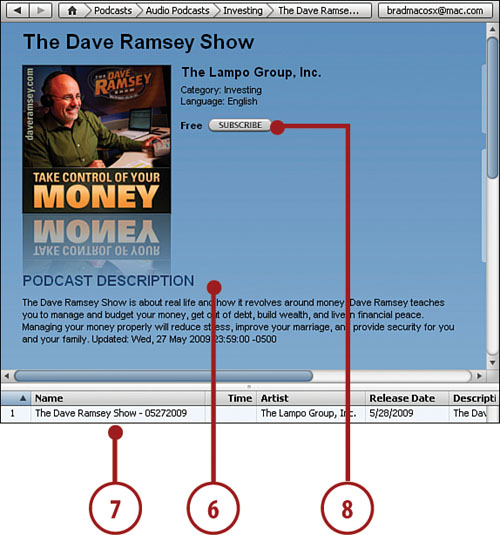
Double-click an episode to preview it.
Click SUBSCRIBE.
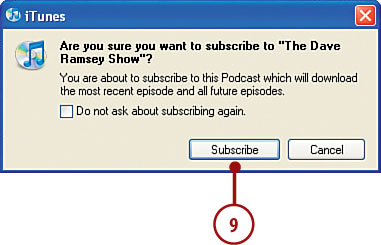
Click Subscribe again at the prompt. Under the iTunes Store source, you see the Downloads icon that displays the progress of file downloads, including the number of episodes being downloaded.
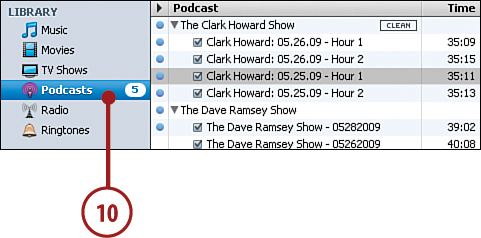
Click the Podcasts source in the Source list. (The number you see indicates how many episodes of all the podcasts to which you’ve subscribed have been downloaded, but not yet listened to.) You see all the podcasts to which you’ve subscribed. Under each podcast, you see the episodes that have been downloaded. The blue dot next to episodes indicates you haven’t listened to them yet.
One of the best ways to collect content that you want to place on your iPod touch is to create a playlist and manually place content onto it.
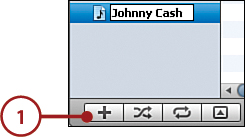
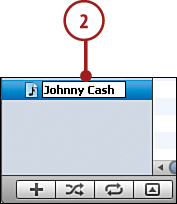
Click the New Playlist button. A new playlist is created with its default name selected for you to change.
Rename the new playlist and press Enter (Windows) or Return (Mac).
Select Music on the iTunes Source list.
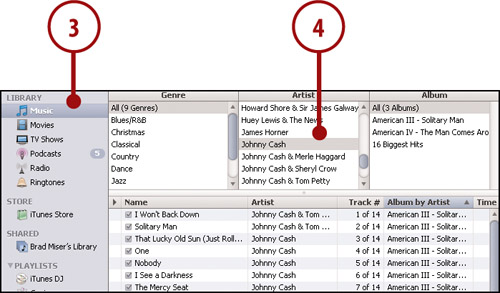
Browse or search for songs you want to add to the playlist.
Drag songs from the Content pane onto the playlist you created.
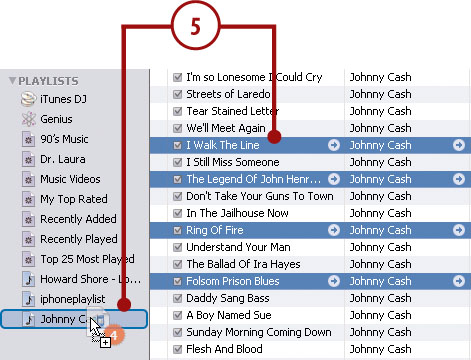
Repeat steps 3–5 until you place in the playlist all the songs that you want it to contain. You can place any combination of songs in a single playlist.
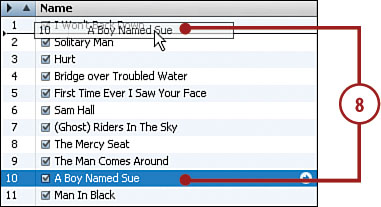
Select the playlist. Its contents appear in the Content pane.

Drag songs up and down the playlist until they are in the order in which you want them to play.
A smart playlist does the same basic thing as a playlist, which is to collect content that you want to listen to or watch and to move onto your iPod touch. Instead of placing content in a playlist manually, a smart playlist adds content automatically based on criteria you define.
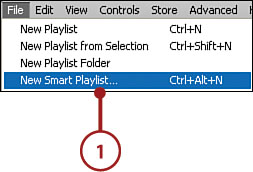
Select File, New Smart Playlist. The Smart Playlist dialog box appears.
Select the first tag on which you want the smart playlist to be based on the Tag menu. For example, you can select Artist, Genre, My Rating, or Year tag, among many others.
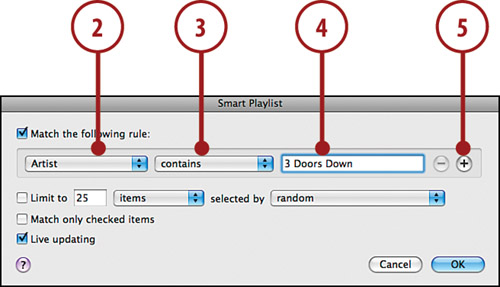
Select the operand you want to use on the Operand menu. For example, if you want to match data exactly, select is. If you want the condition to be looser, select contains.
Type the condition you want to match in the Condition box. The more you type, the more specific the condition is.
To add another condition to the smart playlist, click the Add Condition button. A new, empty condition appears. At the top of the dialog box, the All or Any menu appears.
Select the second tag on which you want the smart playlist to be based in the second condition’s Tag menu.
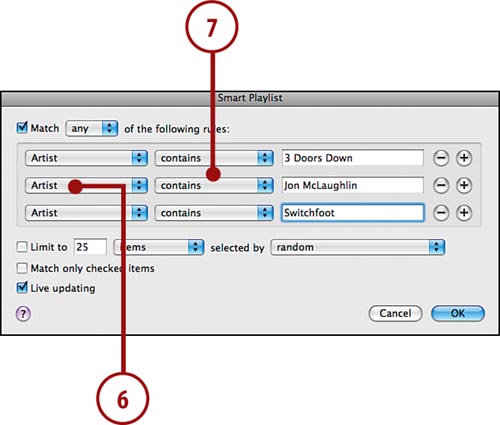
Select the operand you want to use in the Operand menu.
Type the condition you want to match from the Condition box.

Repeat steps 5–8 to add more conditions to the playlist until you have all the conditions you want to include.
Choose all on the menu at the top of the dialog if all the conditions must be met for a track to be included in the smart playlist or choose any if only one of them must be met.
If you want to limit the playlist, check the Limit to Check box.
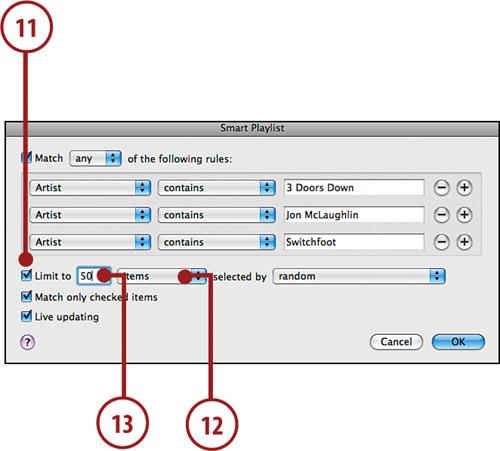
Select the parameter by which you want to limit the playlist in the first menu; this menu defaults to Items. Your choices include the number of items, the time the playlist will play (in minutes or hours), or the size of the files the playlist contains (in MB or GB).
Type the data appropriate for the limit you selected in the Limit to box. For example, if you selected minutes in the menu, type the maximum length of the playlist in minutes in the box.
Select how you want iTunes to choose the songs it includes based on the limit you selected by using the selected by menu. For example, to have iTunes include tracks you’ve added to the Library most recently, select Most Recently Added.
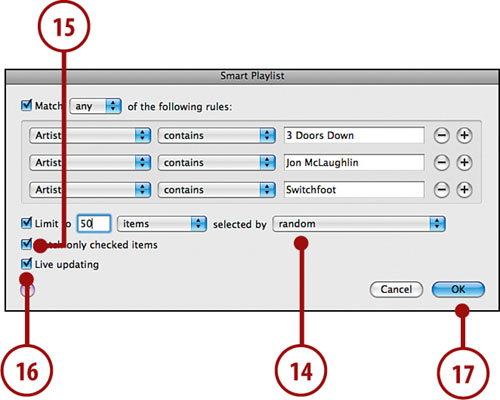
If you want the playlist to include only songs whose check boxes in the Content pane are checked, check the Match only checked items check box.
If you want the playlist to be dynamic, meaning that iTunes updates its contents over time, check the Live updating check box. If you uncheck this check box, the playlist includes only those songs that meet the playlist’s conditions when you create it.
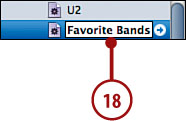
Click OK. You move to the Source list; the smart playlist is added and selected, and its name is ready for you to edit. Also the songs in your Library that match the criteria in the playlist are added to it, and the current contents of the playlist are shown.
Type the playlist’s name and press Enter (Windows) or Return (Mac).
To move audio and video content onto an iPod touch, you need to choose the content you want to move there and then synchronize the iPod touch. You can set up the iPod touch so that content is moved automatically or manually.
Connect the iPod touch to your computer using its USB cable. The iPod touch is mounted on your computer and appears in the iTunes Source list.
Click the iPod touch icon. The iPod touch synchronization screen appears.
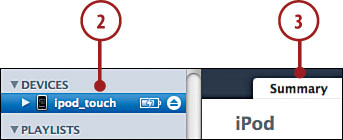
Click the Summary tab.
Check Open iTunes when this iPod touch is attached.
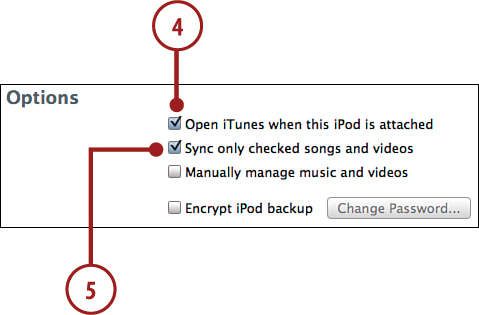
To prevent items you’ve unchecked from being moved to the iPod touch, check Sync only checked songs and videos.
Click the Music tab.
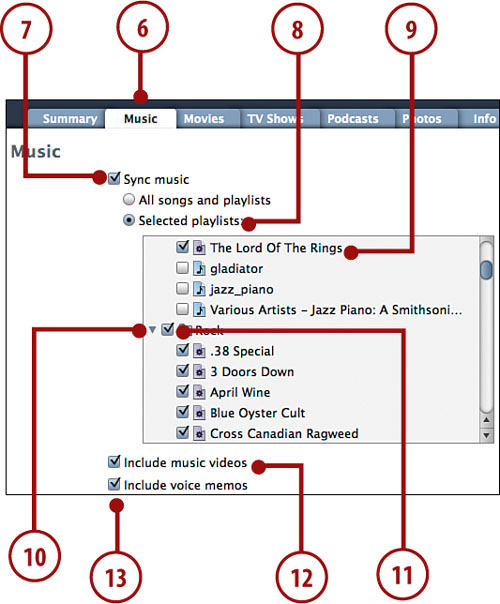
Check the Sync music check box.
Select Selected playlists.
Check the check box next to each playlist that you want to move to the iPod touch.
To expand or collapse a folder to see or hide the playlists it contains, click its triangle.
To move an entire folder of playlists onto the iPod touch, check its check box.
Check Include music videos if you want music videos in your collection to be moved onto the iPod touch.
Check Include voice memos if you use the Voice Memos application to record audio notes and want those memos to be moved from the iPod touch into your iTunes Library.
Click the Movies tab. In the Rented Movies section, you see the movies you are currently renting.
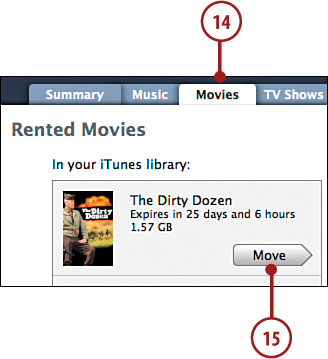
Click a rented movie’s right-facing Move button to move it from the iTunes Library onto the iPod touch. The movie’s icon moves to the right pane of the window, which indicates it will be moved onto the iPod touch during the next sync.
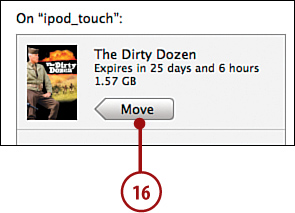
To move a rented movie from the iPod touch back into the iTunes Library, click the left-facing Move button next to the movie you want to move. During the next sync, it is removed from the iPod touch and placed back into the iTunes Library.
Scroll down until you see the Movies section.
Check the Sync movies check box.
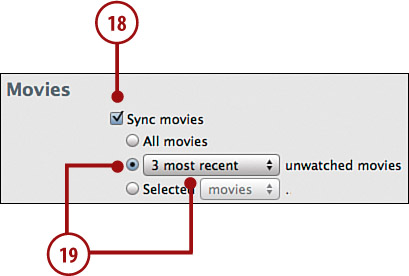
To move unwatched movies onto the iPod touch, select the radio button next to the text unwatched movie and choose the number of unwatched movies you want to move onto the iPod touch. Choose All movies to move all unwatched movies or 3 most recent to move the three movies you most recently added to your library but haven’t watched yet.
To move specific movies onto the iPod touch, choose the Selected radio button and select movies or playlists on the menu.
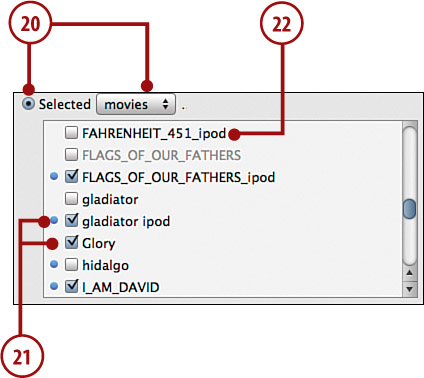
Check the check box next to each movie or playlist containing movies you want to add to the iPod touch.
To remove a movie from the iPod touch, uncheck its check box.
Click the TV Shows tab.
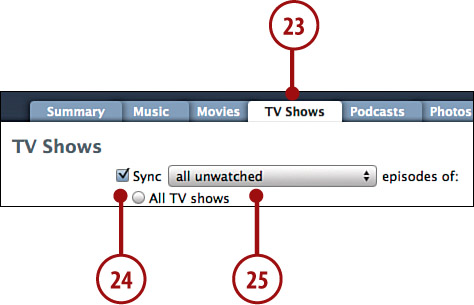
Check the Sync check box to move TV shows onto the iPod touch.
Choose the number of episodes that should be moved on the pop-up menu. One useful option here is all unwatched, which moves all episodes that you haven’t yet watched onto the iPod touch. You can also choose a specific number of unwatched episodes or number of shows you’ve recently added to the library, whether you’ve watched them.
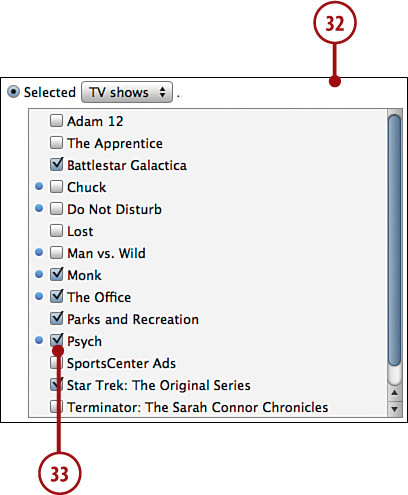
Choose the Selected radio button.
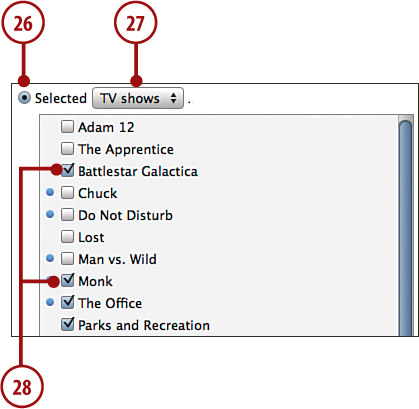
On the pop-up menu, choose Playlists to choose content by playlist or TV shows to choose content by TV series.
Check the check box next to each playlist or TV show you want to move onto the iPod touch.
Click the Podcasts tab.
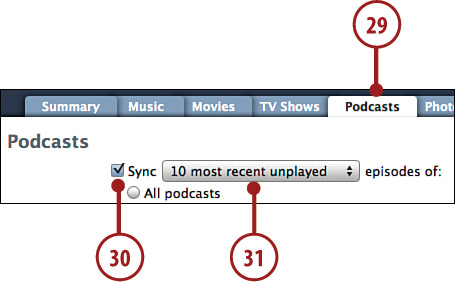
Check the Sync check box.
Choose how many and what type of episodes you want to move onto the iPod touch. For example, to move 10 episodes you downloaded recently, but haven’t yet listened to, select 10 most recent unplayed. You can choose other numbers of unplayed, numbers of recently downloaded, or numbers of new episodes.
Choose Selected podcasts.
Check the check box next to each podcast that you want to move onto the iPod touch.
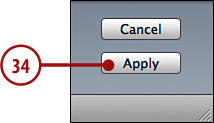
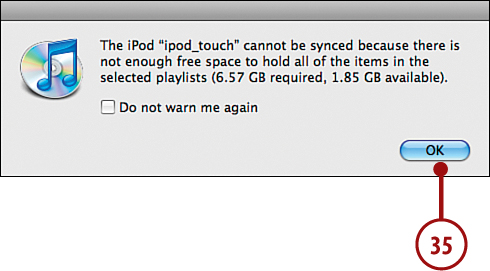
Click Apply. iTunes starts the sync process and moves the selected content from the Library to the iPod touch. You see the progress of the sync in the Information area at the top of the iTunes window. If there’s enough space on the iPod touch, then the process continues until all the content has been moved, and you can skip steps 35 and 36. If you’ve selected more content than there is room for on the iPod touch, you see a warning dialog explaining how much content you selected versus how much is available.
Click OK. The dialog closes.
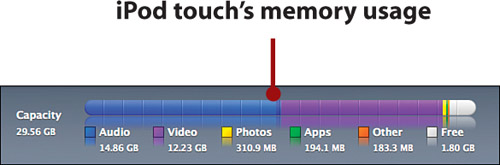
Use the information in steps 6–33 to decrease the amount of content you are moving from the library to the iPod touch, such as by including fewer movies, and perform the sync again by clicking Apply. When the sync is complete, you see the The iPod touch sync is complete message in the Information area. At the bottom of the window, you see how the iPod touch’s memory is being used. The Apply button becomes the Sync button; it becomes Apply again whenever you make changes to the content you’ve selected to sync.
As you learn in Chapter 11, “Storing, Viewing, and Sharing Photos,” your iPod touch is a great way to view your photos while you are on the go. You can move photos from a computer onto iPod touch so that you can view them individually and as slideshows. The steps to move photos from a computer to iPod touch are slightly different between Windows PCs and Macs. See the section that applies to your computer.
You can use iTunes to move photos you’re storing on your PC using Adobe Photoshop Album 2.0 or later or Adobe Photoshop Elements 3.0 or later.
Connect the iPod touch to your computer and open iTunes (if it doesn’t open automatically).

Click the Photos tab.
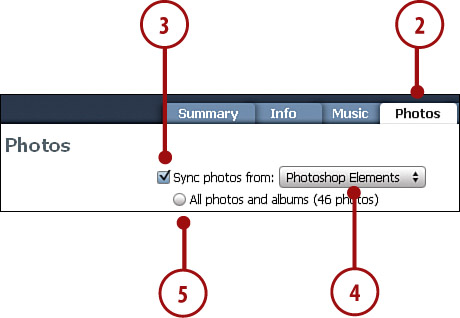
Check the Sync photos from check box.
On the pop-up menu, choose the application containing the photos you want to move onto iPod touch, such as Photoshop Elements.
If you want all the photos in the selected source to be moved onto iPod touch, click the All photos and albums radio button and skip to step 8.
If you want only selected albums to be moved onto iPod touch, click the Selected albums radio button.
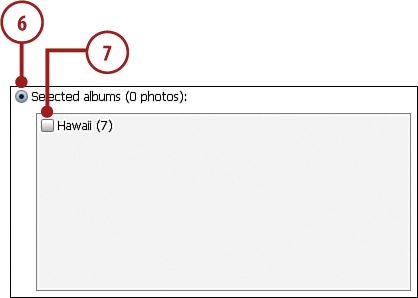
Check the check box next to each photo album that you want to sync with iPod touch.
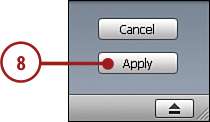
Click Apply. The photos you selected move onto iPod touch. If you make changes to the photo albums or to the photos you selected, the updates move onto iPod touch the next time you sync it.
iTunes is designed to work seamlessly with iPhoto. You can move all your photos or selected photo albums from iPhoto to iPod touch by using iTunes’ syncing. You can also move photos you’ve stored in a folder on your Mac almost as easily.
Connect the iPod touch to your computer and open iTunes (if it doesn’t open automatically).
Click the Photos tab.
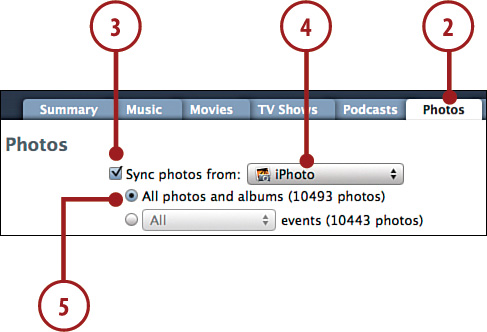
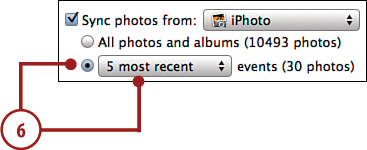
Check the Sync photos from check box.
On the pop-up menu, choose iPhoto.
If you want all the photos in iPhoto to be moved onto iPod touch, click the All photos and albums radio button and skip to step 9.
If you want to move specific events (which are collections of photos based on when those photos were taken), click the middle radio button and choose All on the pop-up menu to move all events onto iPod touch or choose the number of recent events you want to move, such as 5 most recent to move the most recent five events onto iPod touch; skip to step 9.
If you want only selected albums to move onto the iPod touch, click the Selected albums radio button.
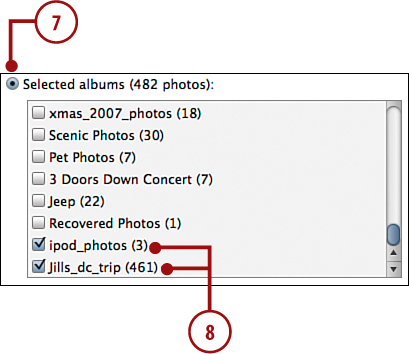
Check the check box next to each photo album that you want to sync on iPod touch.
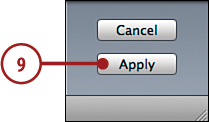
Click Apply. The photos you selected move onto iPod touch. If there’s not enough memory to store the photos you selected, you’re warned; you’ll need to remove some of the photos from the sync or remove other kinds of content to make more room.
You can use the iTunes Store application to download audio and video content from the iTunes Store directly onto your iPod touch, where you can play it just like content you’ve moved onto the iPod touch using iTunes.
In the iTunes application on your iPod touch, you can use the following options that appear at the bottom of the app’s screen:
Music enables you to browse for music.
Videos provides tools you can use to find and download movies, TV shows, and music videos.
Podcasts enables you to find and download episodes of audio and video podcasts.
Search makes it possible for you to search the iTunes Store for any type of content.
More presents other tools to you: Audiobooks provides tools you use to find audiobook content, iTunes U takes you to tutorials, Download moves you to the Downloads screen where you see the progress of your downloads, and Redeem enables you to redeem codes for iTunes content.
The next time you sync the iPod touch after downloading content from the iTunes Store, the content you downloaded is moved into your iTunes Library so you can enjoy it on a computer, too. (This also backs up the content you purchase on the computer.)
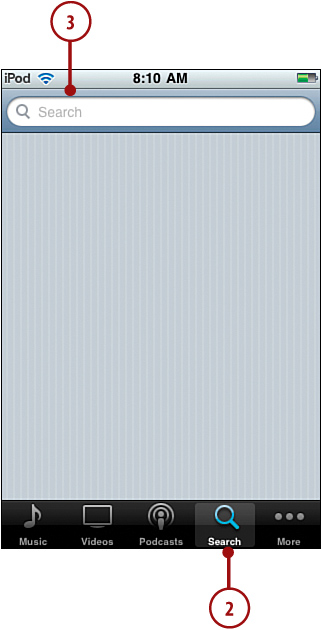
On the iPod touch’s Home screen, tap iTunes. You move to the iTunes Store application. At the bottom of the screen, you choose how you want to look for content by tapping one of the buttons. The rest of these steps explain how to use the Search tool, however, using the other options is similar.

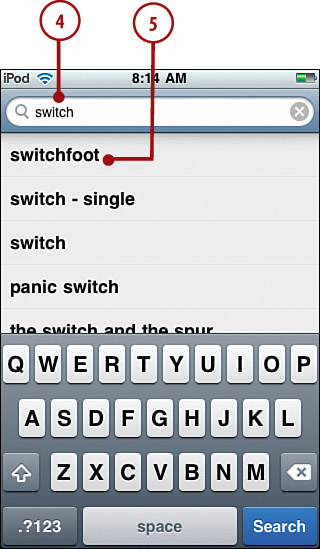
Tap Search. The Search tool appears.
Tap in the Search box. The keyboard appears.
Type search criteria, such as an artist’s name or movie title. As you type, content that matches your search appears under the Search bar.
When you see something of interest on the results list, tap it. For example, tap an artist’s name. You see a list of content related to your search, organized by albums or songs. You see different results and options when you select movies or other types of content, but the general process you use to preview and purchase content is the same.
Drag your finger up or down the screen to browse the search results, which are organized into categories, such as Top Results, Songs, Albums, Music Videos, and so on.
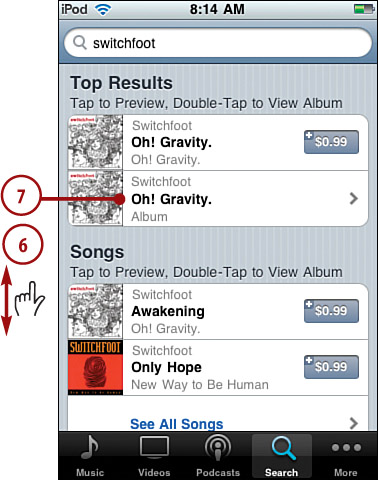
To explore the contents of an album or category, tap it. When you tap an album, at the top of the screen, you see the album’s general information, such as when it was released and how many songs it contains. In the lower part of the window, you see the tracks on that album. If you tap different kind of content, such as a music video, you see options that are appropriate for that type. The rest of these steps focus on an album, but you can download other types of content using similar steps.
If you tapped an album, drag your finger up or down the screen to browse the entire list of tracks.
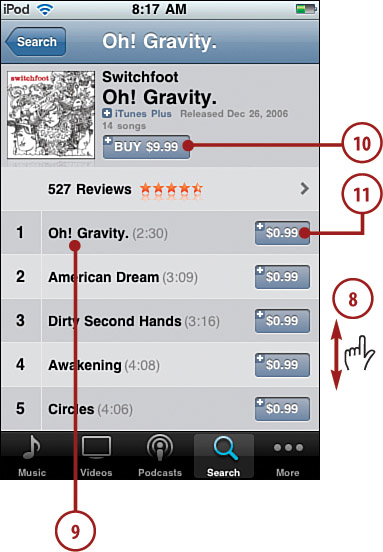
To preview a track, tap it. A 30-second preview plays. While it’s playing, the track’s number is replaced by the Stop button, which you can tap to stop the preview.
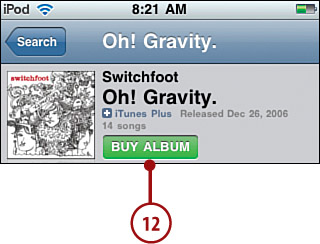
To buy an album, tap its BUY button, which also shows the price of the album. The button becomes the BUY ALBUM button.
To buy a song, tap its Buy button, which shows the price of the song. The button becomes the BUY NOW button.
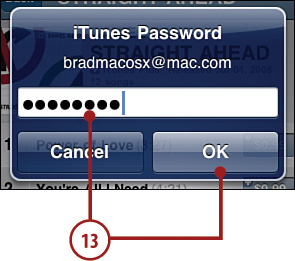
Tap the BUY ALBUM or BUY NOW button. You see the iTunes Password prompt.
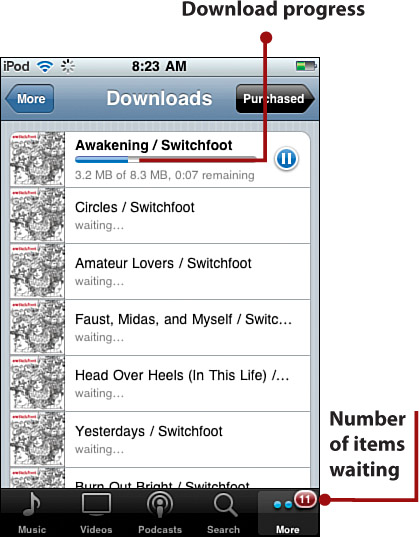
Enter the password for your iTunes Store account and tap OK. A flashing red indicator appears over the More button to show you how many tracks are being downloaded to the iPod touch.
Tap More. (If you’ve moved the Downloads button onto the toolbar, you can skip this step.)
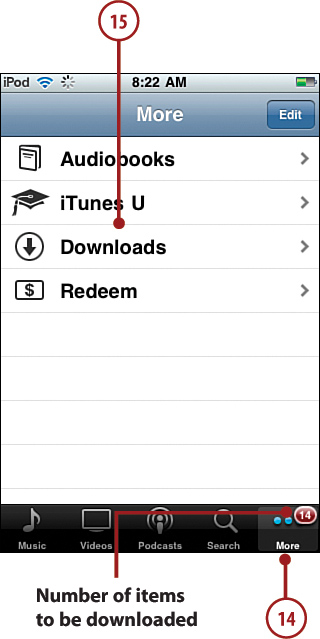
Tap Downloads. You move to the Downloads screen where you see the details about the tracks you are purchasing, including the amount of time the downloads will take to finish.
When the process is complete, the Downloads screen becomes empty. This indicates that the content you purchased has been added to the iPod touch and is ready for you to listen or watch.