Flickr contains many items we haven’t talked about yet, such as Flickr Favorites, Flickr Mail, content filtering, licensing, and printing.
Flickr Favorites lets you group your favorite photos together for easy access. You can mark photos as favorites, and they’ll be ready for you to click on them to view.
Flickr Mail lets you communicate with other Flickr members. In fact, when you signed up, you already got your first piece of Flickr mail. In this lesson, we take a look at how it works—and how to send some yourself.
Licensing can be a tricky thing with photos, and we’ll take a look at the topic here, including getting your photos licensed by Getty Images.
Finally, we’ll take a look at how to print your photos from Flickr. There are plenty of companies ready to provide you with this service, and you’ll see how they work here.
With all this coming up in this lesson, let’s dig in immediately, starting with Flickr Favorites.
How do you add a photo to your favorites? It’s not hard: Just navigate to the photo’s page and click the Add to Faves button at the upper left above the photo, as you can see in Figure 8.1.
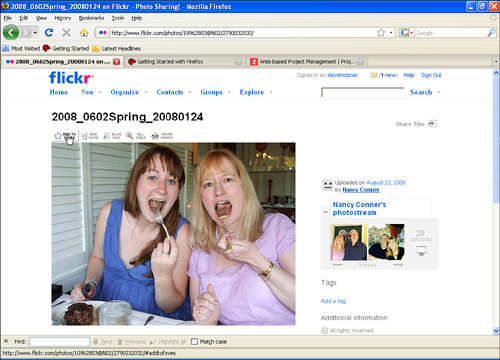
When you click the Add to Faves button, the star in the button becomes solid gold in color and the caption changes to A Fave.
If you click the button again, the star becomes an outline again, and the photo is removed from your favorites.
Tip
Can you add your own photos to your favorites? Surprisingly, no. You can only add other peoples’ photos as your favorites, not your own. This might seem odd, but that’s the way Flickr is. Want to collect your own photos as favorites? Make a set instead.
How do you get a look at your favorites? There are two ways. Here’s the first way:
- Navigate to your home page at Flickr.com and sign in if you’re not already signed in.
- Click the down arrow next to the You menu.
- Select the Favorites menu item.
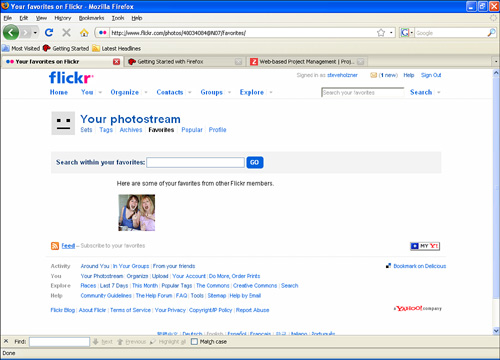
This opens the Favorites page, as you can see in Figure 8.2.
Tip
Note that you can search through your favorites using the Favorites search box that appears in the Favorites page.
You can also reach the Favorites page this way:
- Navigate to your home page at Flickr.com and sign in if you’re not already signed in.
- Click the Your Photostream link.
- Click the Favorites link in the photostream page.
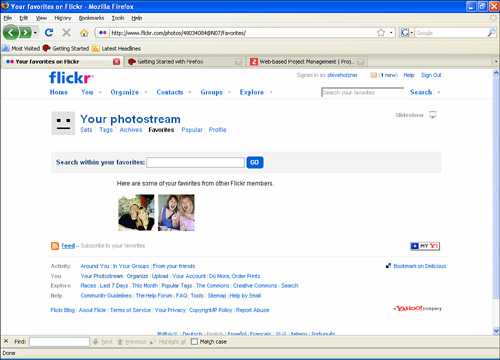
Want to see the full version of one of the thumbnails in your Favorites page? Just click the thumbnail to open the photo’s page.
Want to delete a photo from your Favorites? Click the photo’s thumbnail to open the photo’s page, and then click the A Fave button to convert the gold star back to a simple outline. Easy.
That’s about all there is to handling favorites. If you want to group together other peoples’ photos together with your own, create a set; don’t try to use Favorites.
Is there a way to communicate with other Flickr members?
Yes, there is. You can use Flickr Mail.
Flickr Mail is an email system for Flickr members. In fact, you already have some Flickr Mail waiting for you.
When you signed up for your Flickr account, Flickr automatically sent you some Flickr Mail. Let’s see if we can’t take a look at that.
At the top of any logged-in Flickr page, you can see a link to Flickr Mail at the upper right, as you can see in Figure 8.3.
If you’re a new user, your link to Flickr Mail will look like an envelope with the text (“1 new”) following it. As you can guess, that “1 new” text indicates you have one new Flickr Mail message waiting.
To see your Flickr Mail message, click the Flickr Mail link, opening the Flickr Mail page shown in Figure 8.4.
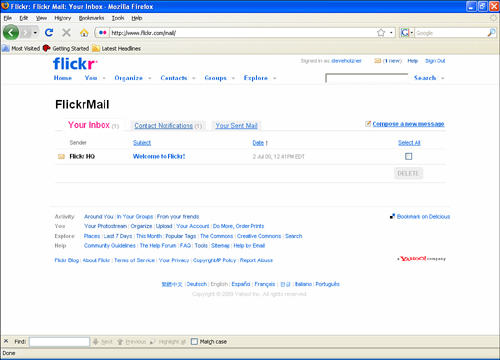
Welcome to the Flickr Mail page. By default, your Flickr Mail inbox is showing, and these columns are visible to display your new mail:
• Sender
• Subject
• Date
• Select All (Click this link to select all messages; otherwise, select individual messages with the check box in this column.)
Notice that our first Flickr Mail message is from Flicker HQ with the subject Welcome to Flickr! To read that mail message, click the subject link to open the message in its own page, as shown in Figure 8.5.
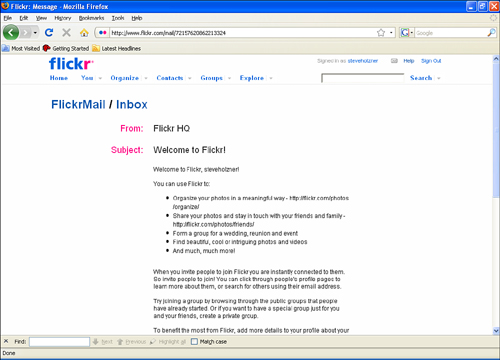
As you can see, this message is just a generic Welcome to Flickr message from the Flickr staff. If you want to delete it, click the Delete button that appears at the bottom of the message; otherwise, click the Or, Return to Your Message List link.
In this way, you can look at your Flickr Mail messages, deleting them as you like or saving them.
Tip
You can also delete messages by checking the check box at the end of the message’s line in the Inbox and then clicking the Delete link at the bottom of the Select All column. Clicking the Select All link at the head of the Select All column selects all the messages, marking them for deletion if you click the Delete link.
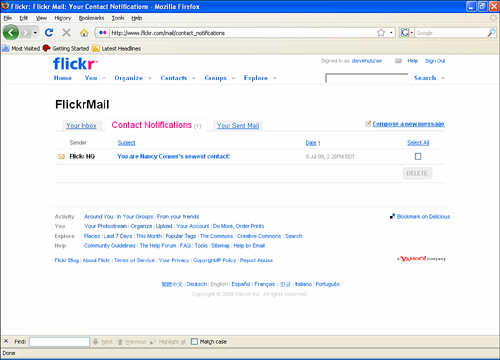
You also get notified through Flickr Mail when someone adds you as a contact.
You can see the contact notifications you’ve received by clicking the Contact Notifications tab in the Flickr Mail page, displaying the contact notifications, as shown in Figure 8.6.
When you open a contact notification, you’ll see something like that in Figure 8.7.
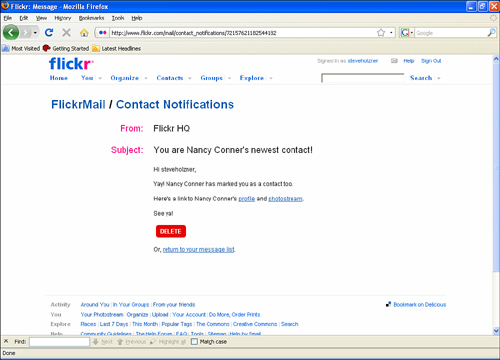
In the contact notification message, you’ll get a message something like this:
Hi steveholzner,
Yay! Nancy Conner has marked you as a contact too.
Here’s a link to Nancy Conner’s profile and photostream.
See ya!
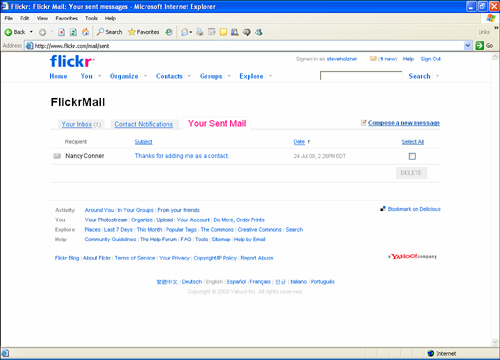
Want to take a look at the Flickr Mail you’ve already sent? Just click your Sent Mail tab in the Flickr Mail page, as shown in Figure 8.8.

Unfortunately, there’s nothing here, because we haven’t sent any Flickr Mail yet; all we get is the message, “You need to send a Flickr Mail before it gets displayed here.”
How about sending some Flickr Mail and giving ourselves something to look at in the Your Sent Mail tab?
We’ll do that next.
Want to send a Flickr member some mail? Just follow these steps:
- Navigate to your home page at Flickr.com and sign in if you’re not already signed in.
- Click the Contacts link.
- Click the Contact List link.
- Find the person you want to send a message to in the Contact list and click the down arrow next to his or her buddy icon.
- Click the Send Flickr Mail menu item, opening the page you see in Figure 8.9.
- Enter the subject of the message.
- Enter the message itself.
- Click the Preview button to get a preview of your message, or the Send This button to send your message. Alternately, click the Or, Return to Your Message List link to cancel sending the message at all.

When you send Flickr Mail, the sent messages appear in the Your Sent Mail tab, as you can see in Figure 8.10.
As you can see in Figure 8.10, the Sent Mail page has these column headers:
• Recipient
• Subject
• Date
• Select All (Click this link to select all messages; otherwise, select individual messages with the check box in this column.)
To see a message you’ve sent, click its subject link.
And that’s it for Flickr Mail. As you can see, it can provide a nice way for members to keep in contact.
The Internet is a wild-and-wooly place these days, and Flickr comes to the rescue with content filters.
You’ve already seen that when you upload content; you’re expected to list what safety level that content is. Flickr gives these three safety levels:
• Safe: Content suitable for a global, public audience.
• Moderate: If you’re not sure whether your content is suitable for a global, public audience but you think that it doesn’t need to be restricted per se, this category is for you.
• Restricted: This is content you probably wouldn’t show to your mom and definitely shouldn’t be seen by kids.
You’re also expected to set the content’s type to one of these:
• Photos/Videos
• Illustration/Art/Animation/CGI or Other Non-Photographic Images
• Screencasts/Screenshots
It turns out that you can also restrict your searches to these various settings.
How does content filtering work? It works through a mechanism called SafeSearch, which is on for everyone by default.
SafeSearch, by default, restricts you to safe content.
You can also set your own SafeSearch settings by going to www.flickr.com/account/prefs/safesearch/, as shown in Figure 8.11.
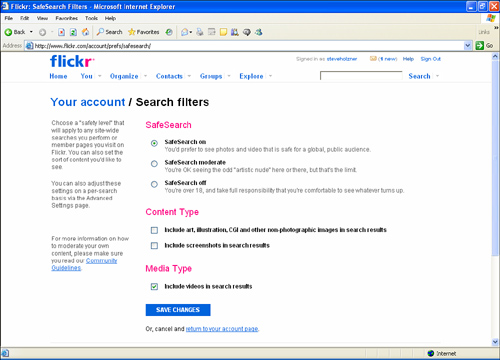
You can set the SafeSearch settings to these options, as given by Flickr:
• SafeSearch On: You’d prefer to see photos and video that is safe for a global, public audience.
• SafeSearch Moderate: You’re okay seeing the odd “artistic nude” here or there, but that’s the limit.
• SafeSearch Off: You’re over 18 and take full responsibility that you’re comfortable to see whatever turns up.
And you can set the content type possibilities to:
• Include Art, Illustration, CGI and Other Non-Photographic Images in Search Results
• Include Screenshots in Search Results
And you can include or exclude videos from search results:
• Include Videos in Search Results
If you can leave SafeSearch on, then by default when you do a search, it’ll be in force and its rules will apply.
When you upload content, you’re asked to indicate what type of content it is and how safe. You can also set the default safety level settings for your account at www.flickr.com/account/prefs/filters/?from=privacy, as shown in Figure 8.12.
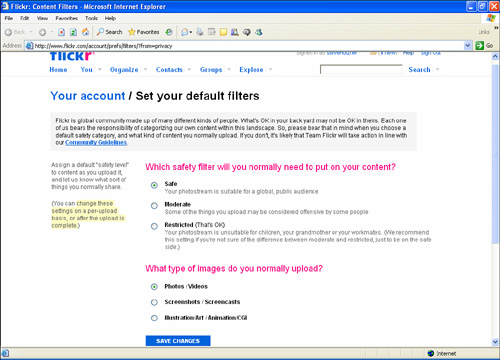
On this page, you can set the default safety level of the content you normally upload:
• Safe: Your photostream is suitable for a global, public audience.
• Moderate: Some of the things you upload might be considered offensive by some people.
• Restricted (That’s OK): Your photostream is unsuitable for children, your grandmother, or your workmates. (We recommend this setting if you’re not sure of the difference between moderate and restricted, just to be on the safe side.)
And the default type of content:
• Photos/Videos
• Screenshots/Screencasts
• Illustration/Art/Animation/CGI
When you’re done, click the Save Changes button.
You can moderate your own content, even after it’s uploaded. Just follow these steps:
- Go to your home page at Flickr.com and log in if you’re not logged in automatically.
- Click Organize to go to the Organizr.
- Load all images (public, private, and friends/family) that need to be marked as Restricted.
- Click Permissions and then click Set Safety Filter to set them as Restricted.
- If you have images that should be marked as Moderate, repeat steps 3 and 4 for those also.
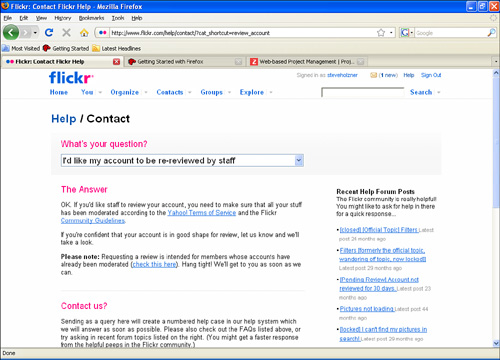
Sooner or later, your account will be reviewed by Flickr. If you’re account is reviewed as safe, that means that you’ve moderated your content well. If your account is reviewed as unsafe, that means that Flickr thinks you’ve moderated poorly, and you account’s content is excluded from searches.
How do you get your account re-reviewed? Go to this URL, which appears in Figure 8.13 www.flickr.com/help/contact/?cat_shortcut=review_account
Printing from Flickr? Just how do you print from a website?
It turns out that Flickr partners with several printing services, which print the photos and mail them to you.
So how do you print a photo? You click the Order Photos link above any photo on that photo’s page. Doing so opens the menu you see in Figure 8.14.
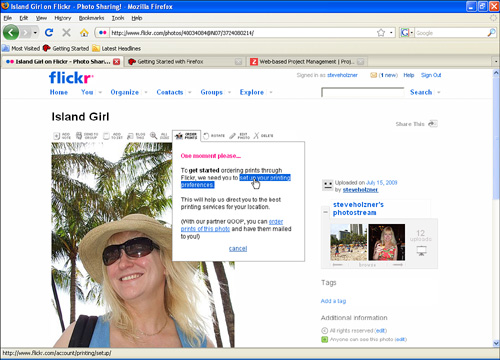
When you click Order Prints, the menu that appears asks you to click another link, set up your printing preferences, and when you click that link, you get a new page, as shown in Figure 8.15.
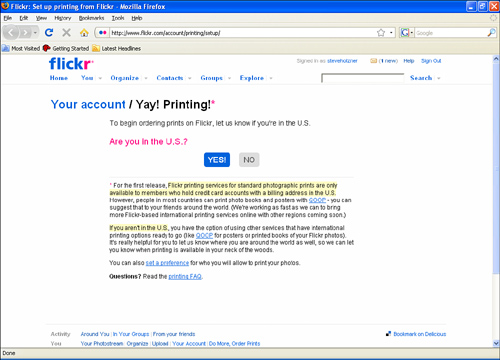
On this page, click Yes if you live in the United States. Otherwise, click No.
On the next page, as shown in Figure 8.16, select who can print your photos.
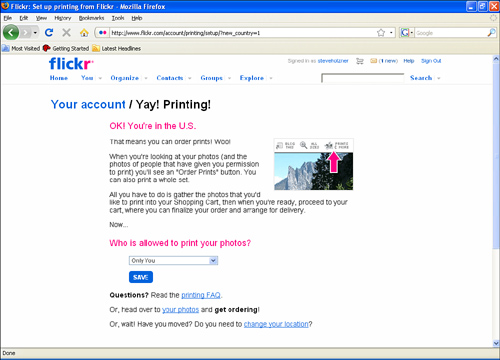
• Only You
• You and Your Family
• You and Your Friends
• You, Your Family, and Friends
• You and Any of Your Contacts
• Any Flickr Member
Now click the Save button.
Then, close and reopen the photo’s page, and click Order Prints again. You’ll see a menu open, as shown in Figure 8.17.
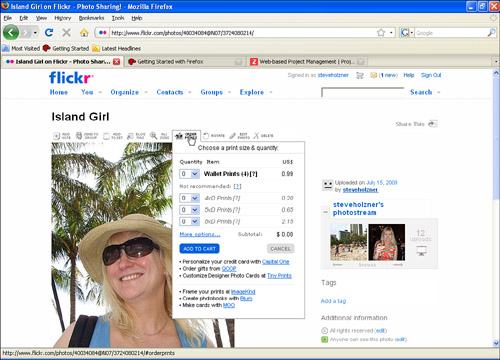
Note that Flickr recommends minimum resolutions for each photo’s size to make sure your photo comes out okay:
• 4×6″ 900×600
• 5×7″ 1050×750
• 8×10″ 1500×1200
• 20×30″ 1600×1200
• 5×5 square 750×750
• 4×D (digital aspect) 900×600
• 5×D (digital aspect) 1050×750
• 8×D (digital aspect) 1500×1200
After making your choice, click the Add to Cart button, which displays a dialog box with two buttons: Continue Browsing and Proceed to Checkout. If you want to print other photos, too, click the first button. If you’re ready to check out, click the second.
When you’re ready to check out, click the Proceed to Check Out button, opening the page you see in Figure 8.18.
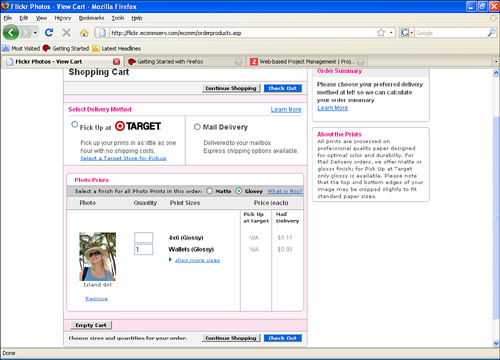
You can pick up your photos at Target or have them mailed to you. Select which option you want, and then confirm the quantity of each photo and click the Check Out button, opening the page you see in Figure 8.19.
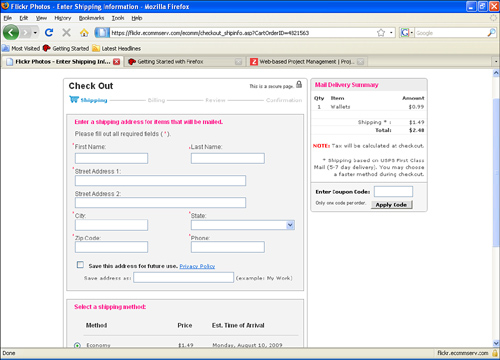
When you’re done, click the Continue button and keep following the instructions to select a printing service, enter credit card information, and so on.
Getty Images, the photo repository, scans people’s Flickr accounts, and extends invitations to some Flickr members to list their photos on Getty Images.
If you get an invitation to join the Flickr collection on Getty Images, you’ll be asked to create an account with them, so you can become a Getty Contributor. What’s involved in the sign-up process? Here are the main steps, according to Flickr:
• Specify Your Profile: Your name, email address, mailing address, whether you’re signing up as an individual or a business.
• Specify Your Payments: Getty Images can pay Contributors almost anywhere in the world. So, you’ll need to tell them where in the world you’d like to be paid and details about how to pay you, like your PayPal account or bank account information.
• Specify Your Taxes: Getty Images will be generating the relevant tax documentation expected by the country where you will be paid, so you will need to know your taxation number.
• Specify Your Agreement: You’ll be signing a contract with Getty Images because they’re helping to sell your work on your behalf. At this step, you’ll be able to review the agreement based on the information you’ve entered. You’ll have 90 days to digitally sign the agreement before it expires and you’ll need to start again.
• Specify Your Confirmation: The final step is your chance to review everything you’ve entered against your (nearly) new Getty Images Contributor account. It’s here that you’ll actually agree to the agreement you reviewed in the previous step, and after you do, your new account will be opened.
If you’re picked by Getty Images, congratulations; it’s a chance to make some money.
This lesson took a look at many topics: Flickr Favorites, Flickr Mail, content levels, printing, and Getty Images.
Flickr Favorites lets you organize other people’s photos into a Favorites folder of your own; Flickr Mail lets you keep in touch with your contacts via specialize email on Flickr; Flickr content levels let you set what kind of safety level the material you search for has. Flickr has partnered with various printing services to let you print your photos, and Getty Images lets you list your images for sale.