
Getting Started with Raspberry Pi
To set up your Raspberry Pi, you must choose essential extras and connect them to your Pi. You can then power up your Pi for the first time and begin setting it up.
Introducing Raspberry Pi
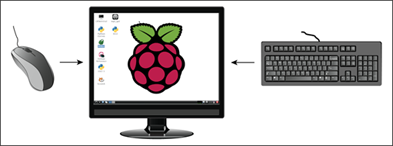
The Raspberry Pi is a tiny computer designed in the United Kingdom and sold around the world at a very low price. The Pi ships as a bare circuit board with standard connections for a keyboard, mouse, monitor, and power supply. You must add these extras yourself. To keep costs down, the Pi uses an SD card, a small memory card, as a hard drive.
The Pi also includes extra connections you can use in your own electronic projects, and two software applications, Python and Scratch, for learning programming.
Compare the Pi and a PC/Mac
The Pi is much less powerful than a PC or Mac. You cannot run Microsoft Office on it. However, you can use it as a small media center and for programming games. You can also create network-based projects such as a web server, file server, or even a home automation system.
Understanding the Linux OS
As of summer 2013, some Pi kits ship with a tool called NOOBS (New Out of the Box Operating System) which gives users a choice of operating systems. This book describes the most popular and best-supported operating system — Raspbian Wheezy, a version of the popular free Linux operating system, often represented by a penguin mascot known as Tux. Linux is more challenging and hands-on than Windows and OS X, but is ideal for customization and for building hardware and software projects around the Pi. For information about getting started with NOOBS, see Chapter 2, and return to Chapter 1 after you use NOOBS to install Raspbian.

You can choose two models of the Pi board. The Model A has half the memory of the Model B (256MB versus 512MB), lacks the B's Ethernet network connector, and has a single USB socket instead of the B's stacked pair. It consumes a third less power. Many users develop a project with a Model B and build the finished version around a Model A.
Take a Tour of Raspberry Pi
This tour shows the main connections and components of a Model B board.
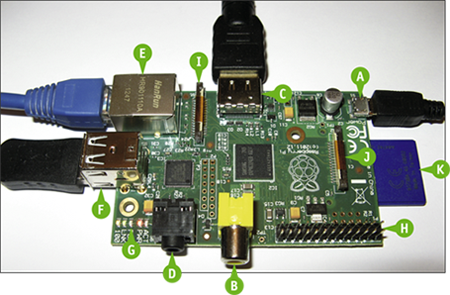
Connects your RPi to an external 5V power supply.
B Composite Video Jack
Connects your RPi to an old TV using a legacy composite video signal.
C HDMI Socket
Connects your RPi to a monitor or TV using a modern HDMI signal.
D 3.5mm Audio Jack
Connects your RPi to headphones, ear buds, or external speakers.
E Ethernet Socket
Connects your RPi to a network.
F Dual USB Socket
Two stacked sockets connect the RPi to a keyboard, mouse, or other accessories.
G Status LEDs
Light up to display the RPi's power, network, and disk status.
H GPIO Pins
Pins for general-purpose external connections, including optional add-ons and your own custom electronics.
I Camera Connector
Connects the RPi to an optional camera board.
J Display Connector
Connects the RPi to an optional external LCD display.
K SD Card Socket
The socket for the SD card, shown here in blue, is under the board at the right.
Choose Accessories
You must add a power supply, a keyboard, and a monitor or TV to your Pi. You can also add a mouse, a camera, a case, and Wi-Fi and/or Bluetooth dongles — small plastic USB aerials. With accessories, the total price of an RPi system is $50 to $105 (£35 to £80), excluding a monitor. You may be able to use an existing spare USB keyboard and mouse. But not all USB accessories are compatible. Check http://elinux.org/RPi_VerifiedPeripherals for user reports.
Select a Power Supply
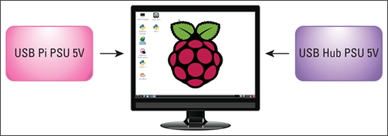
Power your system with two 5V power supplies — one for the Pi, and one for an external USB hub. The Pi uses a special micro-USB connector for power, which is typically supplied by a power adapter plugged into a wall socket. A few phone chargers have compatible plugs, but most do not produce enough power. Do not power your Pi from a computer's spare USB socket.
Add a USB Hub
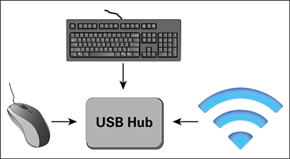
Most accessories, including a keyboard, mouse, and Wi-Fi dongle, can connect directly to the Pi. But accessories sometimes draw so much power the Pi stops working. For reliable results, connect accessories through a USB hub — a box of extra USB sockets. Its power supply should be rated 2A or more.
Most USB PC mice and keyboards work with the RPi. Wireless makes, such as Logitech, are likely to work. You can use a Bluetooth keyboard and mouse if you add a Bluetooth dongle, but you cannot set up Bluetooth without a working keyboard.
Select a Monitor

Although the RPi can connect to an old TV through its composite video jack, the HDMI (High-Definition Multimedia Interface) connector produces a cleaner and sharper digital signal. For good results, connect the HDMI output to any monitor or TV with an HDMI input. You can also use a monitor with a DVI-D or DVI-I input via an HDMI-DVI adapter cable. Older VGA sockets are not directly compatible.
Buy an SD Card
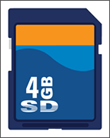
The Pi is designed to work with an SD card — a small plastic memory card — instead of a hard drive. The card holds the Pi's operating system (OS) and software. Beginners should buy a card with the OS preinstalled. More experienced users can buy a blank card, which you can choose from the list at http://elinux.org/RPi_VerifiedPeripherals, and install the software using the instructions in Chapter 2.
Buy a Bundle
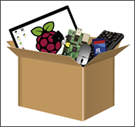
You can save time and money by buying an accessory bundle for your Pi. In the United States, Newark (www.newark.com) supplies a range of Model A and Model B bundles with prices from $45 to $105. In the United Kingdom, Maplin (www.maplin.co.uk) supplies a Pi with a set of guaranteed extras for £79.99.
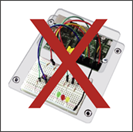
Some Pi kits are collections of optional electronic components. Select a kit or bundle with the items listed on these pages. Ignore kits with breakout boxes, breadboards, jumper leads, switches, and LEDs. You can add these extras when you have more experience with your Pi.
Choose and Use a Case
You can enclose your Pi in a case to protect it from accidents and improve its looks. A case for your Pi is optional, but recommended. You can choose a case based on design and color, but for electronic projects pick a case with easy access to all connectors, including the GPIO pins. Standard cases are plastic boxes with connector holes. A more sophisticated option is a VESA mount case, with four screws and a plate for mounting your Pi on the back of a TV or monitor with prefitted VESA (Video Electronics Standards Organization) screw holes.
Choose and Use a Case
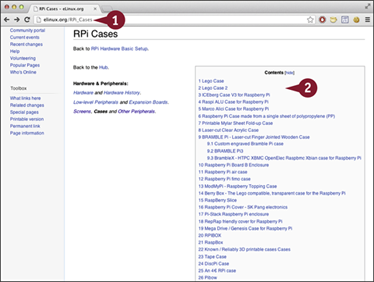
![]() Open a web browser and visit http://elinux.org/RPi_Cases to view more than 50 case options.
Open a web browser and visit http://elinux.org/RPi_Cases to view more than 50 case options.
![]() Review the cases.
Review the cases.
You can either build a case by following the linked instructions, or buy one from an online vendor.
Note: If you choose a prebuilt case, the elinux page includes links to vendors. You may have to search again to find vendors for a specific case in your country.
Note: This example uses a budget case with a VESA mount bought from Amazon.
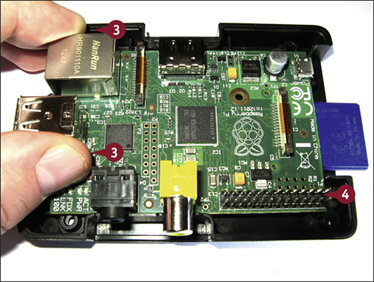
![]() Hold your Pi without touching the circuit board.
Hold your Pi without touching the circuit board.
Note: You can avoid touching the board by holding the USB and Ethernet connectors, or the sides of the board. Do not squeeze too hard.
![]() Slot your Pi into the case.
Slot your Pi into the case.
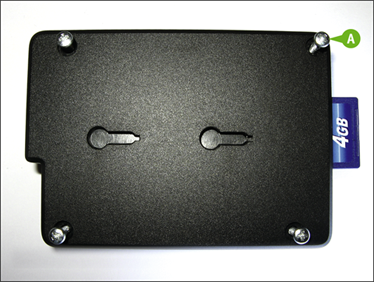
A If you do not have a VESA case, position and tighten the rear screws to close the case.
Note: Some cases clip together from a number of plastic layers and do not use screws.
![]() If you have a VESA case, secure the mounting plate to the rear of the case using the screws.
If you have a VESA case, secure the mounting plate to the rear of the case using the screws.
Note: The screw heads are behind the case in this photo. They fit between the VESA plate and the back of the monitor.
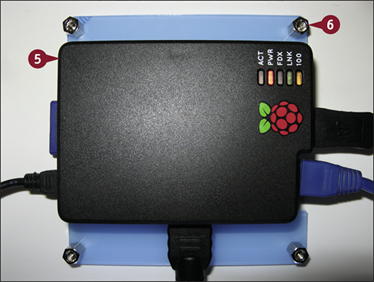
![]() Position and tighten the four finger nuts to mount the case on the back of a monitor with a VESA mount.
Position and tighten the four finger nuts to mount the case on the back of a monitor with a VESA mount.
Note: You can also use a VESA case to mount your Pi on a wall or fix it permanently to furniture.
The Pi is now enclosed in a case. If you used a VESA mount case, it is also mounted on the back of a monitor.
Connect a Monitor
Although the Pi includes a composite video connector compatible with an old analog TV, this is a nostalgic option and gives poor output. For best results, use a modern monitor or TV with an HDMI connector. Most 19-inch or larger monitors capable of displaying a 1080p signal are compatible.
You can also use a slightly older monitor with a digital DVI connector if you use an optional cheap converter or special cable. Both are easy to find on Amazon or eBay by searching for “HDMI to DVI.” Note that cheap converter cables are usually identical to much more expensive ones.
Connect a Monitor

![]() If you are using an HDMI to HDMI cable, plug one end into the HDMI socket on the Pi.
If you are using an HDMI to HDMI cable, plug one end into the HDMI socket on the Pi.
![]() Plug the other end into the HDMI socket on the rear of your monitor or TV.
Plug the other end into the HDMI socket on the rear of your monitor or TV.
Note: When you apply power to the Pi you may need to use the OSD, or on-screen display, on the monitor to select the HDMI input. See your monitor's manual for details.
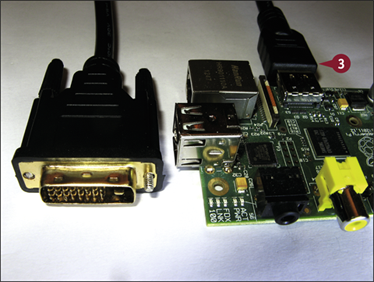
![]() If you are using an HDMI-to-DVI cable, plug the HDMI connector into the HDMI socket on your Pi.
If you are using an HDMI-to-DVI cable, plug the HDMI connector into the HDMI socket on your Pi.

![]() Plug the DVI connector into the DVI socket on the rear of your monitor.
Plug the DVI connector into the DVI socket on the rear of your monitor.
![]() Tighten the thumb screws to secure the connection.
Tighten the thumb screws to secure the connection.
Your Pi is connected to a monitor, but is not yet powered up.
Note: When you apply power to the Pi you may need to use the OSD, or on-screen display, on the monitor to select the DVI input. See your monitor's manual for details.
Connect USB Accessories
You can connect USB accessories in two ways. On a Model B, you can plug a keyboard and mouse into the two main USB connectors. This uses both free USB sockets, so you cannot connect other items. It may also make your Pi less reliable.
For better results, connect all accessories to a USB hub with an independent power supply, and then connect the hub to the main USB socket on your Pi. You can do this with both A and B models. Note that the micro-USB socket on the Pi is for power only; you cannot connect a hub to it.
Connect USB Accessories
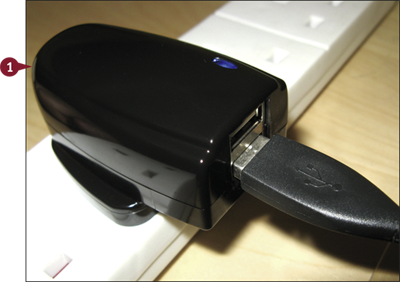
![]() Plug the hub's power adapter into a wall socket (mains socket).
Plug the hub's power adapter into a wall socket (mains socket).
Note: You may want to use a power strip with an optional surge protector for reliability.
Note: Do not connect the power from the adaptor to the hub yet.
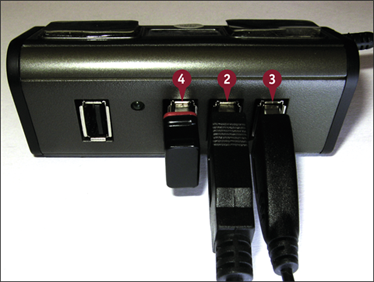
![]() Connect the keyboard to your hub.
Connect the keyboard to your hub.
![]() Connect the mouse to your hub.
Connect the mouse to your hub.
![]() Plug the Wi-Fi dongle into the hub, if you have one.
Plug the Wi-Fi dongle into the hub, if you have one.
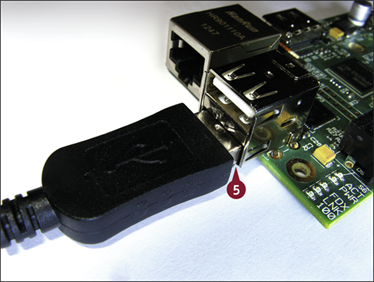
![]() Connect the hub to the USB socket on the Pi.
Connect the hub to the USB socket on the Pi.
Note: Hubs typically have a cable that ends in a flat, or A type, USB connector. Plug this into the Pi's USB socket.
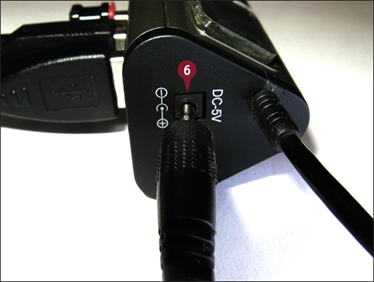
![]() Connect the hub to its power supply to turn it on.
Connect the hub to its power supply to turn it on.
Note: The power connector and socket on your hub may look different.
The USB hub is powered up, but the Pi is not yet running.
Connect Power and Boot
The Pi does not have a power switch. You can power it up by turning on the power to its power supply and plugging the micro-USB cable into the corresponding socket on the Pi.
The Pi boots, or sets itself up so it is ready to work, within 30 seconds. It displays a stream of text on the screen as it works through its boot sequence, which is a list of steps it works through as it gets ready.
Connect Power and Boot
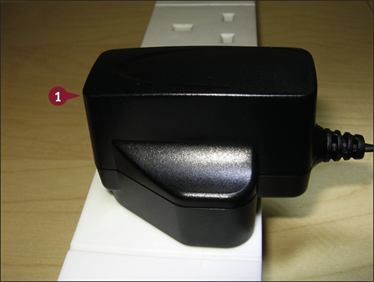
![]() Plug the Pi's USB power supply into the wall socket (mains socket) or a power strip if you are using one.
Plug the Pi's USB power supply into the wall socket (mains socket) or a power strip if you are using one.
Note: Some supplies include a built-in light to show that power is on.
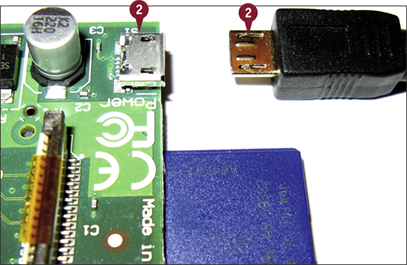
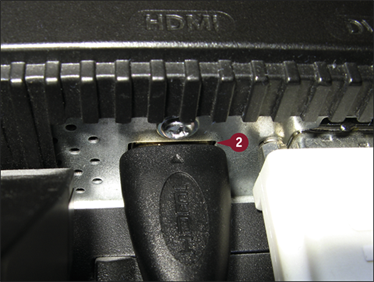
![]() Plug the other end of the power cable into the micro-USB socket on the Pi.
Plug the other end of the power cable into the micro-USB socket on the Pi.
Note: The socket is tiny and slightly stiff. Insert the plug carefully, without forcing it.
Note: The Pi does not have a power switch. The micro-USB connector can be fragile. For extra reliability, choose a power supply with an A-type USB socket. You can then use a micro-USB to A-type cable to plug and unplug power at the socket, or via an optional A to A extender.
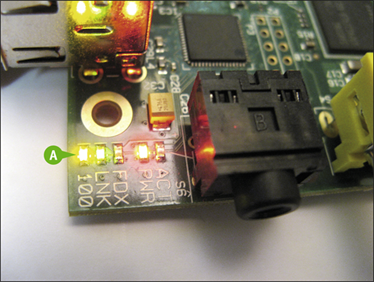
A The Pi's power LED lights. The other LEDs may flash.
Note: For more information about the LEDs, open a web browser and visit www.raspberrypi.org/phpBB3/viewtopic.php?f=24&t=6952.
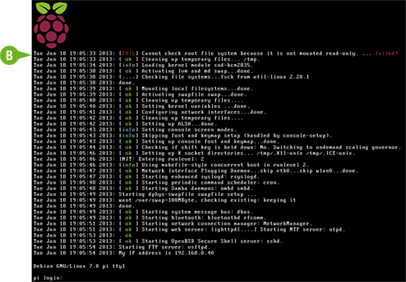
B If you connected a monitor, it shows the Pi's boot sequence, a long list of messages displayed by the Pi as it launches its operating system.