
A P P E N D I X H
![]()
Mac OSX Installation
To set up a Drupal environment on a Mac platform using MAMP, start by downloading the free version of MAMP at mamp.info (left icon, see Figure H-1). Once the file has downloaded, unzip it, and click on the unzipped file to launch the installer.
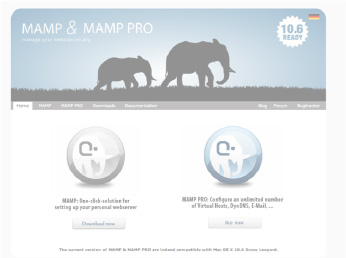
Figure H-1. Screenshot of mamp.info. You want the icon on the left.
MAMP basically turns a folder in your computer into a miniature development server; as a result, all sites that you develop locally will essentially be subfolders of that main folder. It's important to make sure you set the location of the main folder to something that makes sense for your file system and to back up that folder regularly.
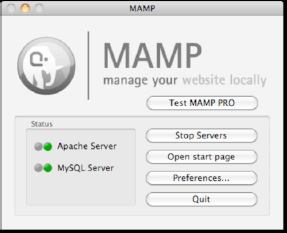
To start up MAMP, perform the following steps:
- Press the MAMP icon in your dock. This will start up the MySQL server and PHP.
- Ignore the browser window that it opens up and press back to the MAMP screen (see Figure H-2).
- Press the Preferences button, and go to the Apache Tab. Set the document root (referred to as the “web root” going forward) to something that makes sense for your file system.
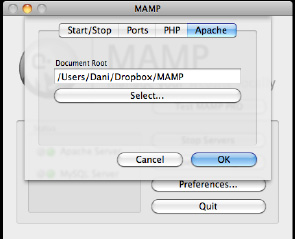
Figure H-3. Setting up a default document root for MAMP
As you can see from Figure H-3, I set my main folder inside a Dropbox. Dropbox, available at getdropbox.com, allows you to store up to 2GB of data for free, and all data is synced over the Web with every change. If you don't have a ton of large files to store, Dropbox is an easy way to keep your data available to you no matter what machine you're on.
Downloading Drupal Core File
Next, download the Drupal core installation file from http://drupal.org/project/drupal (or drupal.org/start). Extract the file into the document root that you set up earlier in MAMP and change the name of the extracted folder to DGD7 or something similar.
Command-line Fu
Here are the command-line steps to download Drupal and prepare it for running the web installer. Change drupal-7.0 in the code to the number of the current stable release of Drupal 7, which you can find at http://drupal.org/project/drupal. Better yet, copy the link from the site before starting!
![]() Note Do this from your web root. Comments surrounded by ** describe what's actually happening.
Note Do this from your web root. Comments surrounded by ** describe what's actually happening.
wget http://ftp.drupal.org/files/projects/drupal-7.0.tar.gz
**downloads the file fromthe provided link**
tar -xzf drupal-7.0.tar.gz
**extracts it from the compressed file**
mkdir ~/dgd7
**makes a new directory called dgd7**
mv drupal-7.0 ~/dgd7/web
**moves the Drupal folder into the dgd7 directory**
cd ~/dgd7/web
**navigates to the new directory**
Creating the Database
In order to install Drupal, you need to create a database on your local MySQL server. You can create a database using phpMyAdmin, which is free and available at phpmyadmin.net. Alternately, Navicat, a paid software available at navicat.com, is one of the easiest ways I've found to deal with databases. Although the premium software is on the pricey side (and you'll need it for copying or syncing databases on multiple servers—important when it's time to launch), you can download a free version called Navicat Lite at navicat.com/en/download/download.html that's available for both Windows and Mac. You can also download Navicat as a free trial for 30 days.
For the purposes of this demonstration, I'll use Navicat Premium, but the process in Navicat Lite is basically the same.
- Open Navicat and select Connection
 New Connection MySQL.
 - Create your settings as follows: Your hostname is localhost, and your username and password will both be root. The port, if you've left your MAMP default as is, will likely be 8888. In mine, it's been changed to 8889 (see Figure H-4).
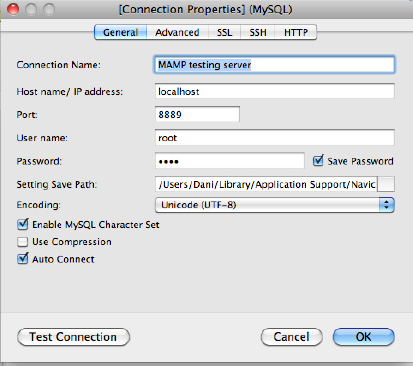
- Once you've created the connection, open the connection by double-clicking its name in the left column. Right-click on the connection name and select Create New Database from the menu. Name the database dgd7.
That's it. Done. See how easy it was?
Command-line Steps for Creating the Database
Here are the command-line instructions to create a MySQL database. Comments surrounded by ** explain what is happening. Remember that you're going to do this in the web root using Terminal.
$ mysql -u root -p

        **logs into the web root**

mysql> CREATE DATABASE dgd7;

        **creates a database called “dgd7”**

mysql> GRANT ALL PRIVILEGES ON database.* TO "username"@"localhost" IDENTIFIED BYÉ

  "password";

        **does exactly what it says it's doing**

mysql> FLUSH PRIVILEGES;

        **so does this**

mysql> EXIT;

        **and this**
You will need to fill in your own values for the parts in italics. For root, use your database's admin username (typically, root). (In some setups, the root password will be blank by default.) For the database name, you can keep it simple and call it dgd7. To keep things really easy, call your database user dgd7, too. The hostname in this case will be localhost and because security is not an issue on your own computer, go ahead and make the password dgd7, too.
Starting the Install: Now the Fun Starts
Now that you've created your database, go to localhost:8888/dgd7 in your browser. This should take you to localhost:8888/dgd7/install.php. Choose the standard installation profile for now; it will take care of some basic configurations for you (see Figure H-5). On the next page, select English as the installation language. If you need to install it in another language, there's a handy link on that screen that will show you how to do so.
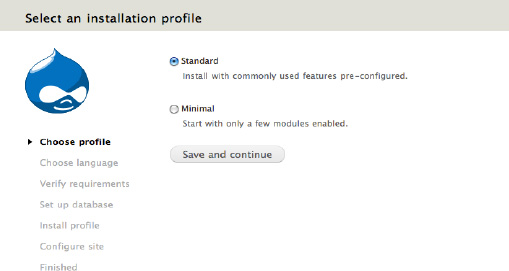
Figure H-5. The Drupal install screen
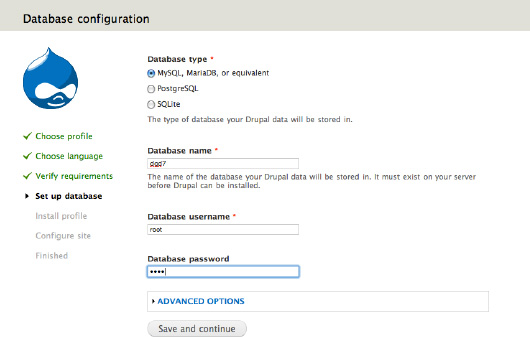
Now it's time to use the database information you just created. On the screen that follows, enter the values that you provided when you created the database.
Submit the form. Drupal will install itself within a couple of minutes. When the installer finishes, you'll be able to fill in some basic site details along with a username and e-mail address for the administrative user account (see Figures H–6 and H–7).
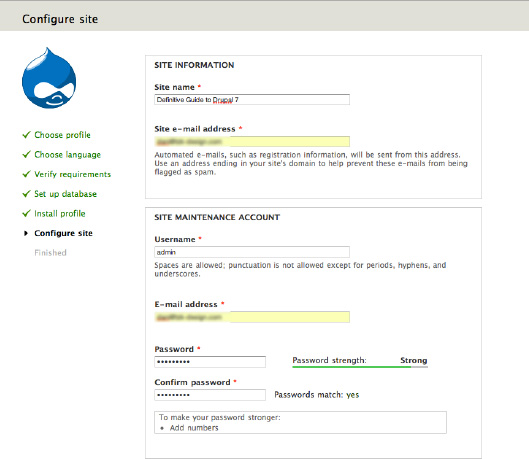
Figure H-6. Setting up site defaults
![]() Caution The first user created in the installation process is given permission to do everything on the site—forever. Therefore, it is strongly advised to never use this user as your own personal account. Rather, use it as a “superuser” or administrator account and give it a strong password. The site might be just on your computer now, but when you move it online, you'll need to preserve the user accounts. Drupal requires all e-mail addresses for site users to be unique, so if you only have one e-mail address, it makes sense to create a second e-mail account, like [email protected], that you use specifically for the superuser account.
Caution The first user created in the installation process is given permission to do everything on the site—forever. Therefore, it is strongly advised to never use this user as your own personal account. Rather, use it as a “superuser” or administrator account and give it a strong password. The site might be just on your computer now, but when you move it online, you'll need to preserve the user accounts. Drupal requires all e-mail addresses for site users to be unique, so if you only have one e-mail address, it makes sense to create a second e-mail account, like [email protected], that you use specifically for the superuser account.

Figure H-8. Your new home page, including the Drupal administration menu
Congratulations! You now have an empty Drupal site, ready for content (see Figure H-8). Head to Chapter 1 to build out a new site.
![]() Tip For reader notes about installing Drupal on Mac OS X, visit
Tip For reader notes about installing Drupal on Mac OS X, visit dgd7.org/mac.