C H A P T E R 7
Creating HTML Documents
In this chapter, you are going to look at the most fundamental elements defined by HTML5: the document and metadata elements. These are the elements that you use to create an HTML document and to describe its contents.
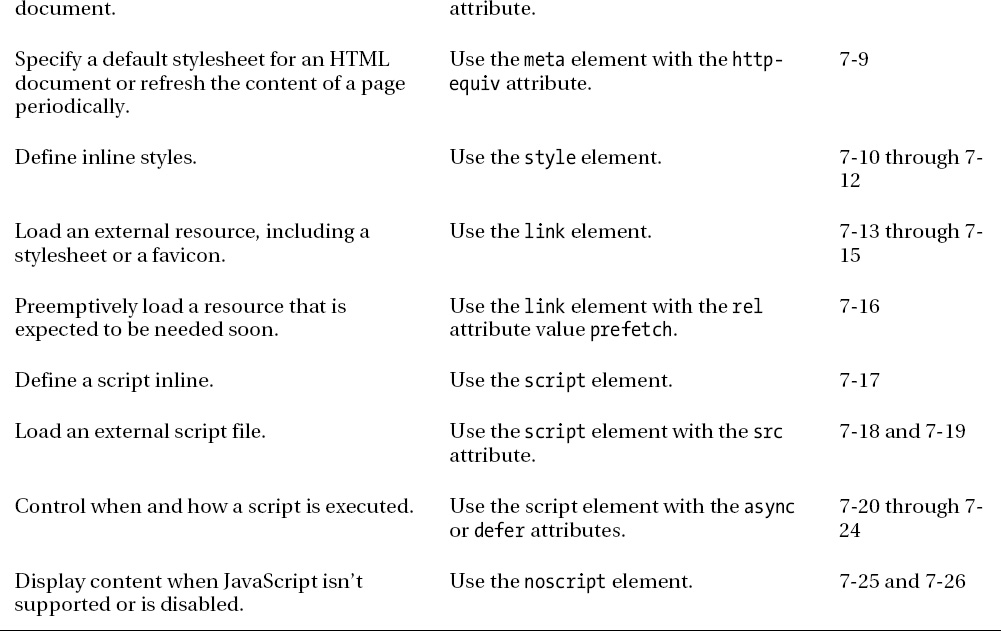
These are the least interesting elements that HTML defines, and yet they are critically important. By all means, feel free to skip over this chapter and come back later—but please do come back. Every HTML document uses at least some of these elements (and often all of them) and knowing how to use them properly is essential to creating standards-compliant HTML5 documents. Table 7-1 provides the summary for this chapter.

Setting Up the Basic Document Structure
Let's begin with the document elements. These are the building blocks that define the shape of your HTML document and set the initial context for the browser. There are only four document elements, but they are always required in any HTML document.
The doctype Element
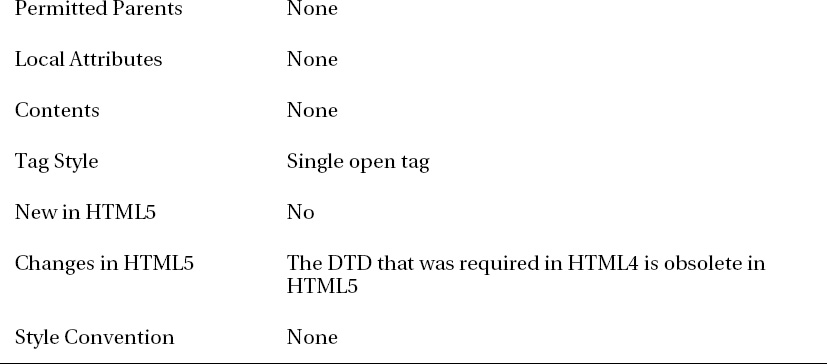
The doctype element is unique and in a category of its own. You are required to begin every HTML document that you create with a doctype element; this is the element that tells the browser that it will be dealing with HTML. Most browsers will still display your content correctly if you omit the doctype element, but it is bad practice to rely on browsers to behave in this way. Table 7-2 summarizes the doctype element.

There is only one way to use the doctype element in HTML5, and that is shown in Listing 7-1. As you work through this chapter, you'll apply each element to create a simple, but complete, HTML5 document. Listing 7-1 shows the first line.
Listing 7-1. Using the doctype Element
<!DOCTYPE HTML>
This element tells the browser two things: it is dealing with HTML, and which version of the HTML specification the content has been annotated with. You don't have to supply a version number. The browser will automatically detect that you are using HTML5 (this is because this element has a slightly different form in HTML5 than in earlier HTML versions). There is no end tag for this element. You simply put a single tag at the start of the document.
The html Element
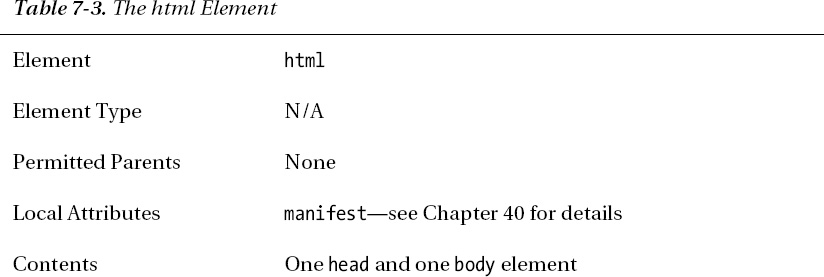
The html element, which is more properly called the root element, indicates the start of the HTML inside of your document. Table 7-3 summarizes the html element.

The html element indicates the start of the HTML markup in the document. Listing 7-2 shows the html element in use.
Listing 7-2. Using the html Element
<!DOCTYPE HTML>

<html>

   …content and elements omitted…

</html>
The head Element
The head element contains the metadata for the document. In HTML, metadata provides the browser with information about the content and markup in the document, but can also include scripts and references to external resources (such as CSS stylesheets). You will see the metadata elements later in this chapter. Table 7-4 summarizes the head element.
Listing 7-3 shows the head element in use. Every HTML document should contain a head element and it, in turn, must contain a title element, as shown in the listing. The full details of the title element are shown later in this chapter.
Listing 7-3. Using the head Element
<!DOCTYPE HTML>

<html>

    <head>

        <title>Hello</title>

    </head>

</html>
The body Element
The body element encapsulates the content of an HTML document, as opposed to the head element, which encapsulates metadata and document information. The body element always follows the head element so that it is the second child of the html element. Table 7-5 describes the body element.
Listing 7-4 shows the body element in use.
Listing 7-4. Using the body Element
<!DOCTYPE HTML>

<html>

    <head>

        <title>Example</title>

    </head>

    <body>

        <p>

            I like <code id="applecode">apples</code> and oranges.

        </p>

        <a href="http://apress.com">Visit Apress.com</a>

    </body>

</html>
I have added some simple content to the body element. The individual elements that I used (p, code, and a) are described in Chapters 8 and 9. You have reached the point where you have a simple, but complete, HTML document. You can see how the browser displays this document in Figure 7-1.
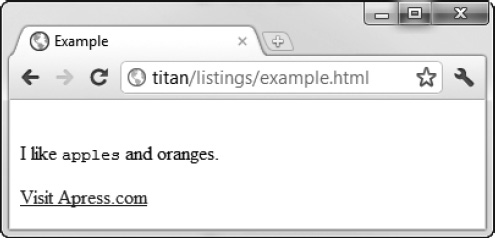
Figure 7-1. Displaying a simple HTML document in the browser
Describing Documents with the Metadata Elements
The metadata elements let you provide information about the HTML document. They are not content themselves, but they provide information about the content that follows. Metadata elements are added to the head element.
Setting the Document Title
The title element sets the document's title or name. Browsers usually display the contents of this element at the top of the browser window or tab. Table 7-6 describes the title element.
Every HTML document should have exactly one title element, and the text enclosed by the start and end tags should be meaningful to the user. At the very least, it should allow the user to differentiate between browser tabs or windows and recognize which of them belong to your web application. Listing 7-5 shows the head element in use.
Listing 7-5. Using the head Element
<!DOCTYPE HTML>

<html>

    <head>

        <title>Example</title>

    </head>

    <body>

        <p>

            I like <code id="applecode">apples</code> and oranges.

        </p>

        <a href="http://apress.com">Visit Apress.com</a>

    </body>

</html>
You can see the way that a browser handles the head element in Figure 7-2. The figure shows Google Chrome, but other browsers do something broadly similar.
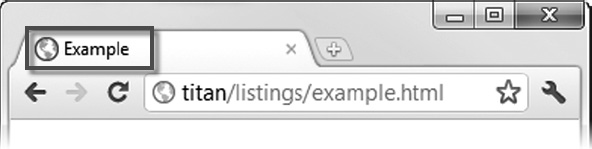
Figure 7-2. The effect of using the title element
Setting the Base for Relative URLs
The base element sets a base URL against which relative links, contained in the HTML document, will be resolved. A relative link is one that omits the protocol, host, and port parts of the URL and is evaluated against some other URL—either one specified by the base element or the URL used to load the current document. The base element also specifies how links are opened when a user clicks them, and how the browser acts after a form has been submitted (I explain HTML5 forms in Chapter 12). Table 7-7 summarizes the base element.
An HTML document should contain, at most, one base element. It is typically one of the first elements you place inside of the head element. This ensures that the base URL is applied to the relative URLs used in subsequent metadata elements.
Using the href Attribute
The href attribute specifies the base URL against which relative URLs in the rest of the document will be resolved. Listing 7-6 shows the base element in use.
Listing 7-6. Using the href Attribute in the base Element
<!DOCTYPE HTML>

<html>

    <head>

        <title>Example</title>

        <base href="http://titan/listings/"/>

    </head>

    <body>

        <p>

            I like <code id="applecode">apples</code> and oranges.

        </p>

        <a href="http://apress.com">Visit Apress.com</a>

        <a  href="page2.html>Page 2</a>

    </body>

</html>
In this example, I have set the base URL to http://titan/listings/. Titan is the name of my development server, and listings is the directory on the server that contains the examples for this book.
Later in the document, I have added an a element to create a hyperlink using the relative URL page2.html (I explain how to use the a element in Chapter 8). When the user clicks the hyperlink, the browser combines the base URL and the relative URL to create the combined URL http://titan/listings/page2.html.
![]() Tip If you do not use the
Tip If you do not use the base element, or specify a base URL using the href attribute, then the browser will assume that it should resolve any relative links against the URL of the current document. So, for example, if you load a document from the URL http://myserver.com/app/mypage.html and it contains a hyperlink with a relative URL of myotherpage.html, then the browser will attempt to load the second page from the fully qualified URL http://myserver.com/app/myotherpage.html.
Using the target Attribute
The target attribute tells the browser how to open URLs. The values you specify for this attribute represent a browsing context. You'll see some examples of these contexts and how to use them in Chapters 8 and 15, when you look at the a and iframe elements.
Using Metadata to Describe the Document
The meta element allows you to define different kinds of metadata in your document. You can use this element in a number of different ways, and an HTML document can contain multiple meta elements. Table 7-8 provides the summary for the meta element.
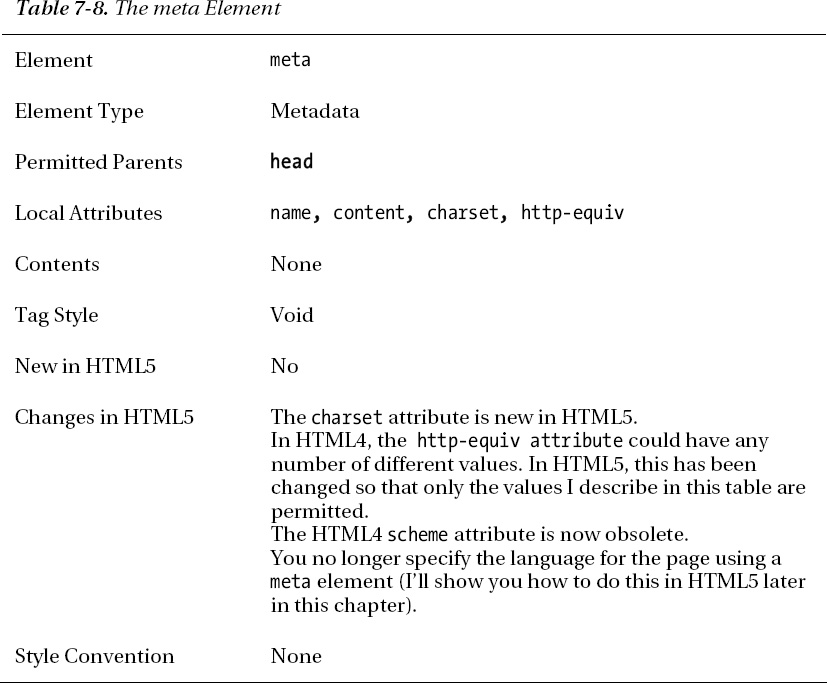
In the sections that follow, I'll show you the different ways that you can use the meta element. Note that each instance of the meta element can be used for only one of these purposes. If you want to take advantage of more than one of these features, you must add multiple meta elements to the head element.
Specifying Name/Value Metadata Pairs
The first use for the meta element is to define metadata in name/value pairs, for which you use the name and content attributes. Listing 7-7 provides a demonstration.
Listing 7-7. Using the meta Element to Define Metadata in Name/Value Pairs
<!DOCTYPE HTML>

<html>

    <head>

        <title>Example</title>

        <base href="http://titan/listings/"/>

        <meta name="author" content="Adam Freeman"/>

        <meta name="description" content="A simple example"/>
</head>
<body>
<p>
I like <code id="applecode">apples</code> and oranges.
</p>
<a href="http://apress.com">Visit Apress.com</a>
<a href="page2.html">Page 2</a>
</body>
</html>
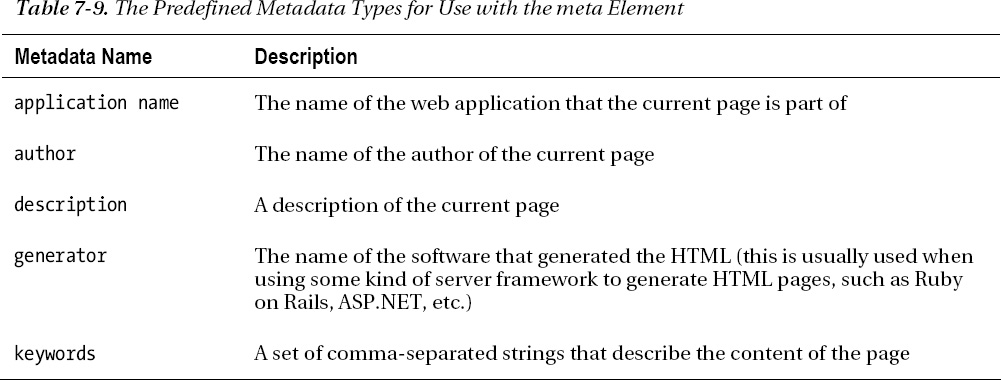
You use the name attribute to specify which type of metadata the element refers to, and the content attribute to provide a value. Table 7-9 lists the predefined metadata types that you can use with the meta element.
In addition to the five predefined metadata names, you can also use metadata extensions. Go to http://wiki.whatwg.org/wiki/MetaExtensions to see a list of these extensions, which change over time. Some of the extensions are widely used, while others are fairly specialized and hardly used at all. The robots metadata type is an example of an extension that is very widely used. It allows the author of an HTML document to specify how the document should be treated by search engines. For example:
<meta name="robots" content="noindex">
The three values that most search engines will recognize are noindex (don't index this page), noarchive (don't create archives or cached versions of this page), and nofollow (don't follow links from this page). There are many more metadata extensions available, and I recommend you read through the online list to see what is suitable for your project.
![]() Tip In the past, the
Tip In the past, the keywords metadata was the main way to tell a search engine how it should categorize and rank your content. These days, search engines pay far less attention to the keywords metadata because it can be abused to give a false impression of the relevance and contents of a page. The best way to improve the way that search engines consider your content is to take the advice of the search engines themselves—most of them provide guidance for optimizing your pages or entire site. You can find Google's guide at http://google.com/support/webmasters/bin/topic.py?topic=15260.
Declaring a Character Encoding
Another use for the meta element is to declare the character encoding that the HTML document content uses. An example of this is shown in Listing 7-8.
Listing 7-8. Using the meta Element to Declare a Character Encoding
<!DOCTYPE HTML>
<html>
<head>
<title>Example</title>
<base href="http://titan/listings/"/>
<meta name="author" content="Adam Freeman"/>
<meta name="description" content="A simple example"/>
<meta charset="utf-8"/>
    </head>

    <body>

        <p>

            I like <code id="applecode">apples</code> and oranges.

        </p>

        <a href="http://apress.com">Visit Apress.com</a>

        <a href="page2.html">Page 2</a>

    </body>

</html>
In this case, I have specified that my page uses the UTF-8 encoding. UTF-8 is a common character encoding because it can represent all of the Unicode characters in the smallest number of bytes. (As I write this, around 50 percent of all web pages use UTF-8 encoding.)
Simulate an HTTP Header
The final use for the meta element is to override the value of one of the HTTP (Hypertext Transfer Protocol) headers. HTTP is what you usually use to transport HTML data between the server and the browser. I am not going to describe HTTP any further, other than to say that each response from the server contains a series of headers that describe the content to the browser, and that you can use the meta element to simulate or replace three of those headers. Listing 7-9 shows the general form of this use of the meta element.
Listing 7-9. Using the meta Element to Simulate an HTTP Header
<!DOCTYPE HTML>

<html>

    <head>
<title>Example</title>
<base href="http://titan/listings/"/>
<meta name="author" content="Adam Freeman"/>
<meta name="description" content="A simple example"/>
<meta charset="utf-8"/>
<meta http-equiv="refresh" content="5"/>
</head>
<body>
<p>
I like <code id="applecode">apples</code> and oranges.
</p>
<a href="http://apress.com">Visit Apress.com</a>
<a href="page2.html">Page 2</a>
</body>
</html>
You use the http-equiv attribute to specify which header you want to simulate, and the content attribute to provide the value you want to use. In this case, I have specified the refresh header and a value of 5, which has the effect of asking the browser to reload the page every five seconds.
![]() Tip If you follow the refresh interval with a semicolon and a URL, the browser will load the specified URL after the interval has passed. See the section “The noscript Element” for an example.
Tip If you follow the refresh interval with a semicolon and a URL, the browser will load the specified URL after the interval has passed. See the section “The noscript Element” for an example.
There are three permitted values for the http-equiv attribute, which I describe in Table 7-10.

Defining CSS Styles
The style element lets you define CSS styles inline in your HTML document (as opposed to the link element, which lets you import styles from an external stylesheet). Table 7-11 summarizes the style element.

Listing 7-10 gives an example of the style element in use.
Listing 7-10. Using the style Element
<!DOCTYPE HTML>

<html>

    <head>

        <title>Example</title>

        <base href="http://titan/listings/"/>

        <meta name="author" content="Adam Freeman"/>

        <meta name="description" content="A simple example"/>

        <meta charset="utf-8"/>

        <style type="text/css">

            a {

                background-color: grey;

                color: white;

                padding: 0.5em;

            }

        </style>

    </head>

    <body>
<p>
I like <code id="applecode">apples</code> and oranges.
</p>
<a href="http://apress.com">Visit Apress.com</a>
<a href="page2.html">Page 2</a>
</body>
</html>
In this example, I have created a new style for the a element. It displays the link with a grey background, white text, and some padding. (If you are new to CSS, you can get a quick primer in Chapter 4, and full coverage begins in Chapter 16.) You can see the effect of this style in Figure 7-3.
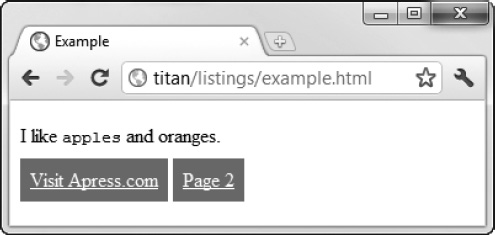
Figure 7-3. Using the style element to create an inline style
You can use the style element throughout an HTML document, and a single document can contain multiple style elements. This means that you don't have to define all of your styles in the head section. This can be useful if you are generating your pages through a template engine because it means you can supplement the styles defined by the template with styles that are specific to a particular page.
Specifying the Style Type
The type attribute lets you tell the browser what kind of style you are going to define; however, the only style mechanism that browsers support is CSS, so the value of this attribute will always be text/css.
Specifying the Scope of the Style
If the scoped attribute is present in a style element, then the styles are applied to only the element's parent and the parent's child elements. Without the scoped attribute, a style defined anywhere in an HTML document is applied to all elements in the document.
![]() Caution As I write this, none of the major browsers support the
Caution As I write this, none of the major browsers support the scoped attributes for styles.
Specifying the Media for a Style
The media attributes lets you specify when a style should be applied to the document. Listing 7-11 gives an example of how you can use this attribute.
Listing 7-11. Using the media Attribute of the style Element
<!DOCTYPE HTML>
<html>
<head>
<title>Example</title>
<base href="http://titan/listings/"/>
<meta name="author" content="Adam Freeman"/>
<meta name="description" content="A simple example"/>
<meta charset="utf-8"/>
<style media="screen" type="text/css">
a {
background-color: grey;
color: white;
padding: 0.5em;
}
</style>
<style media="print">
a{
color:Red;
font-weight:bold;
font-style:italic
}
</style>
</head>
<body>
        <p>

            I like <code id="applecode">apples</code> and oranges.

        </p>

        <a href="http://apress.com">Visit Apress.com</a>

        <a href="page2.html">Page 2</a>

    </body>

</html>
In the listing, I have defined two style elements that have different values for the media attribute. The browser will apply the first style when the HTML is displayed onscreen, and the second style when the page is printed.
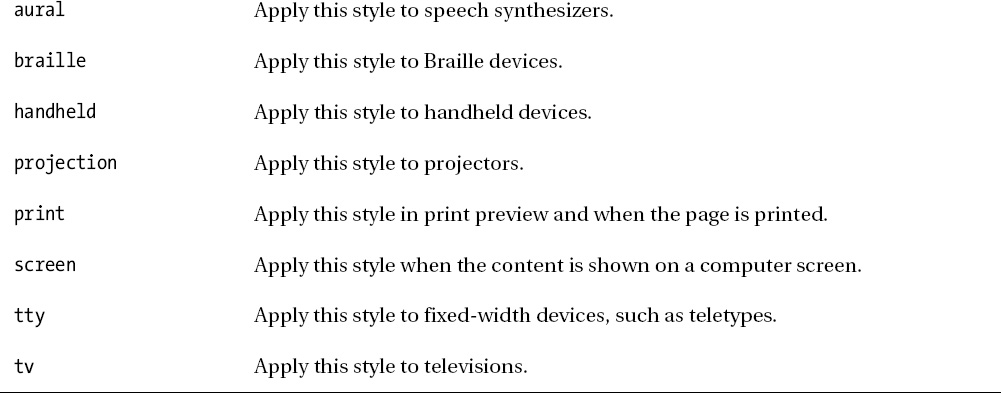
You can create very specific conditions in which to use a style. First, you can specify the device that you are interested in. I have summarized the supported values in Table 7-12.

The browser interprets which category a device falls into. Browsers handle some device types (such as screen and print) consistently, but other devices (such as the handheld device type) may get a more liberal interpretation. It is worth checking that your target browsers have the same interpretation of specific devices that you do. Using the media features allows you to be even more specific. Listing 7-12 provides an example.
Listing 7-12. Adding Specificity to a style Element
<!DOCTYPE HTML>

<html>

    <head>

        <title>Example</title>

        <base href="http://titan/listings/"/>

        <meta name="author" content="Adam Freeman"/>

        <meta name="description" content="A simple example"/>

        <meta charset="utf-8"/>

        <style media="screen AND (max-width:500px)" type="text/css">

            a {

                background-color: grey;

                color: white;

                padding: 0.5em;

            }

        </style>

        <style media="screen AND (min-width:500px)" type="text/css">

            a {color:Red; font-style:italic}

        </style>

    </head>

    <body>

        <p>

            I like <code id="applecode">apples</code> and oranges.

        </p>

        <a href="http://apress.com">Visit Apress.com</a>
<a href="page2.html">Page 2</a>
</body>
</html>
In this listing, I have used the width feature to differentiate between two styles. The first will be used when the browser window is narrower than 500 pixels, and the second when the window is wider than 500 pixels. If you display the HTML from Listing 7-12 in a browser, and then drag the window to change its size, you can see the effect of this feature, as shown in Figure 7-4.
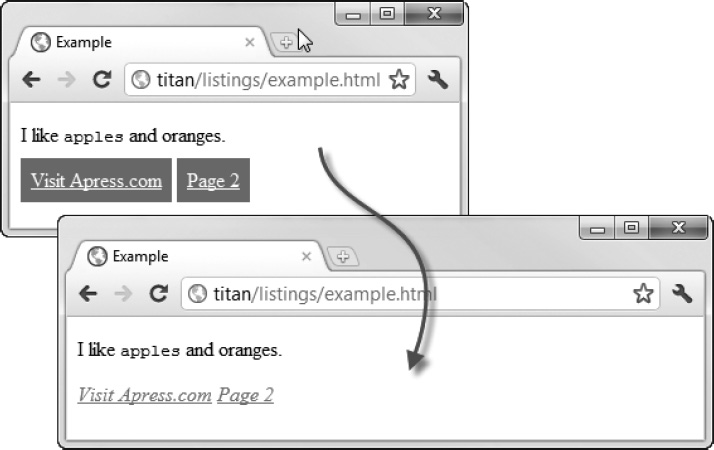
Figure 7-4. Different styles applied, based on browser window width
Notice how I have used AND to combine a device with a feature. In addition to AND, you can also use NOT, or a comma (,) to represent OR. This allows you to create complex and quite specific conditions in which to apply a style.
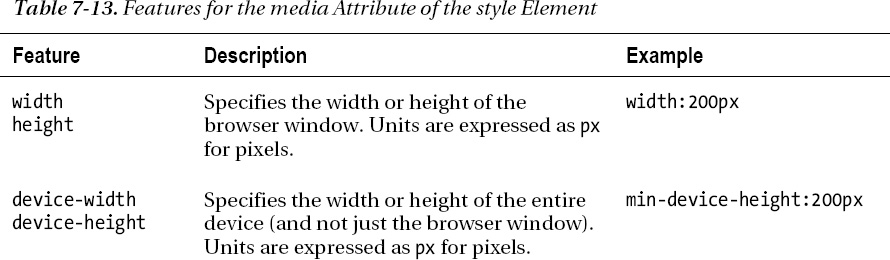
You usually use features such as width with the min and max modifiers to make them more flexible; although you can apply styles based on very specific window conditions by omitting them. I have listed and described the available features, along with their modifiers, in Table 7-13. Unless otherwise noted, you can modify these features with min- or max- to create thresholds rather than specific values.
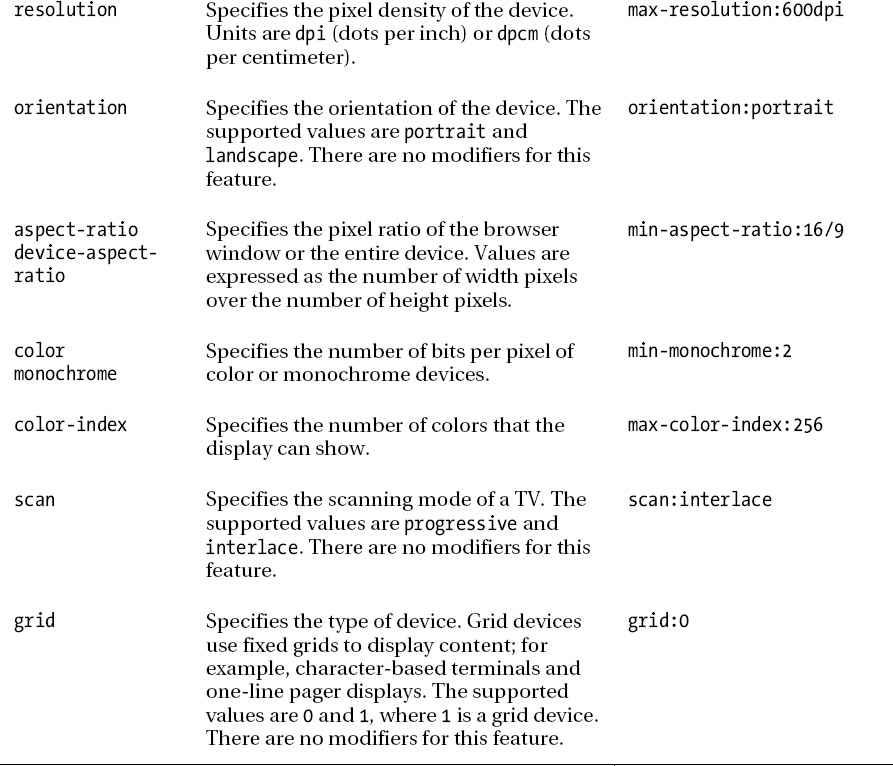
As with the devices, the interpretation of each of the features is left to the browser, and there can be variations in which features are recognized and when they are considered to be present and available. If you rely on the features to apply styles, you should test thoroughly and define a fall-back style that will be applied if your expected features are not available.
Denoting External Resources
The link element creates a relationship between an HTML document and an external resource, most typically a CSS stylesheet. Table 7-14 summarizes the link element.


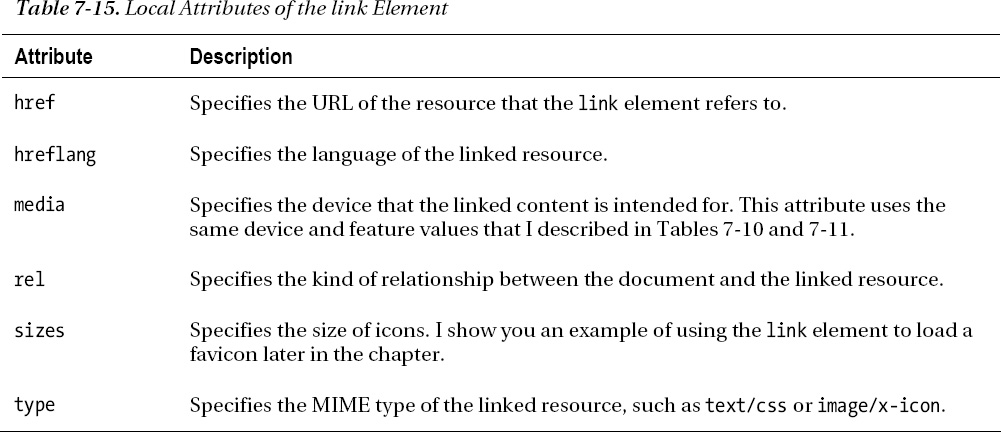
The link element defines six local attributes, which I summarize in Table 7-15. The most important of these attributes is rel, which defines the nature of the relationship between the HTML page and the resource that the link items relates to. I'll show you some of the most common types of relationships shortly.
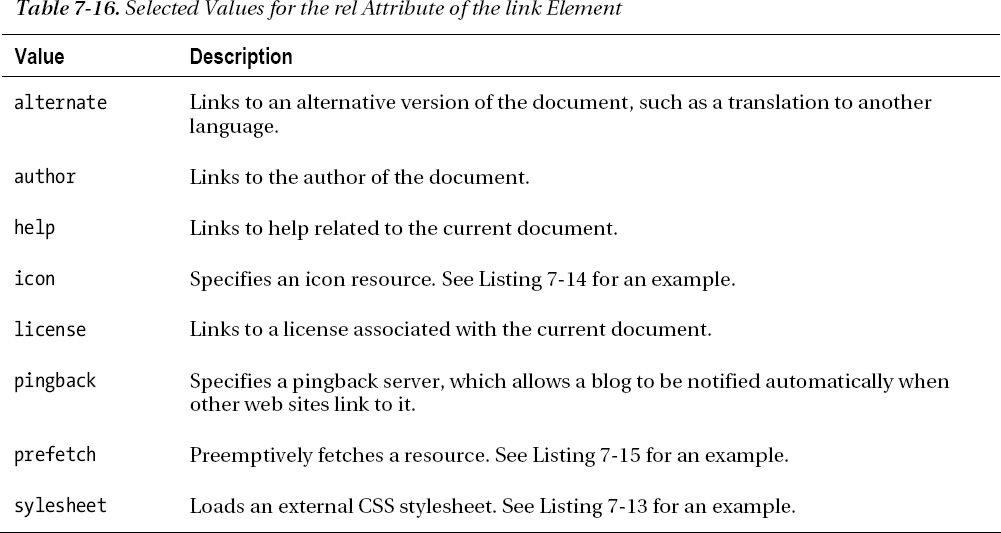
The value assigned to the rel attribute determines how the browser deals with the link element. Table 7-16 shows some of the more common values for the rel attribute and describes each of them. There are additional rel values defined, but this is still a volatile area of HTML5. You can find the most complete definition of rel values at http://iana.org/assignments/link-relations/link-relations.xml.
Loading a Stylesheet
To demonstrate the link element in this way, I have created a stylesheet called styles.css, the contents of which are shown in Listing 7-13.
Listing 7-13. The styles.css File
a {
background-color: grey;
color: white;
padding: 0.5em;
}
This is the CSS style previously applied using a style element, but placed into an external stylesheet. To take advantage of this stylesheet, use the link element, as shown in Listing 7-14.
Listing 7-14. Using the link Element for an External Stylesheet
<!DOCTYPE HTML>
<html>
<head>
<title>Example</title>
<base href="http://titan/listings/"/>
<meta name="author" content="Adam Freeman"/>
<meta name="description" content="A simple example"/> <meta charset="utf-8"/>
<link rel="stylesheet" type="text/css" href="styles.css"/>
</head>
<body>
<p>
I like <code id="applecode">apples</code> and oranges.
</p>
<a href="http://apress.com">Visit Apress.com</a>
        <a href="page2.html">Page 2</a>

    </body>

</html>
You can use multiple link elements to load multiple external resources. The advantage of using an external stylesheet is that you can use one set of styles in multiple documents without having to duplicate the styles. The browser loads and applies the styles just as if you had set the CSS properties in a style element, as shown in Figure 7-5.

Figure 7-5. Applying styles obtained through an external stylesheet
Defining a Favicon for Your Page
After CSS stylesheets, the most common use for the link element is to define an icon that will be associated with your page. Different browsers handle the icon in different ways, but typically the icon appears on a page tab, and when the user adds your page to the favorites list. To demonstrate this, I have taken the favicon that Apress uses at www.apress.com. This is a 32-pixel by 32-pixel image file in the .ico format. Browsers universally support this format. You can see how the image appears in Figure 7-6. The image file is favicon.ico.

Figure 7-6. The Apress favicon
You can then use this favicon by adding a link element to your page, as shown in Listing 7-15.
Listing 7-15. Adding a Favicon Using a link Element
<!DOCTYPE HTML>

<html>

    <head>

        <title>Example</title>

        <base href="http://titan/listings/"/>

        <meta name="author" content="Adam Freeman"/>

        <meta name="description" content="A simple example"/>
<link rel="stylesheet" type="text/css" href="styles.css"/>
<link rel="shortcut icon" href="favicon.ico" type="image/x-icon" />
</head>
<body>
<p>
I like <code id="applecode">apples</code> and oranges.
</p>
<a href="http://apress.com">Visit Apress.com</a>
<a href="page2.html">Page 2</a>
</body>
</html>
When the HTML page is loaded, the browser will load and display the favicon, as shown in Figure 7-7. The figure shows Google Chrome, which displays the favicon at the top of the page tab.
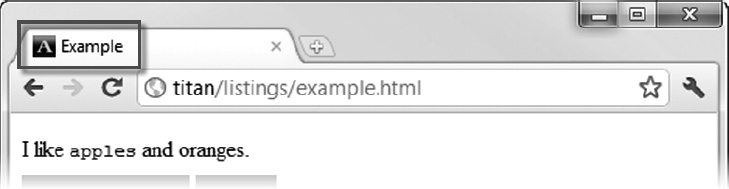
Figure 7-7. The favicon displayed at the top of the browser tab
![]() Tip You don't have to use the link element if the favicon is located at
Tip You don't have to use the link element if the favicon is located at /favicon.ico (i.e., in the root directory of the web server). Most browsers will automatically request this file when a page is loaded, even without the link element being present.
Preemptively Fetching a Resource
You can ask the browser to preemptively fetch a resource that you expect to be needed soon. Listing 7-16 shows the use of the link element to specify prefetching.
Listing 7-16. Prefetching a Linked Resource
<!DOCTYPE HTML>

<html>

    <head>

        <title>Example</title>

        <base href="http://titan/listings/"/>

        <meta name="author" content="Adam Freeman"/>

        <meta name="description" content="A simple example"/>

        <link rel="stylesheet" type="text/css" href="styles.css"/>

        <link rel="shortcut icon" href="favicon.ico" type="image/x-icon" />

        <link rel="prefetch" href="/page2.html"/>

    </head>

    <body>

        <p>

            I like <code id="applecode">apples</code> and oranges.

        </p>

        <a href="http://apress.com">Visit Apress.com</a>

        <a href="page2.html">Page 2</a>

    </body>

</html>
I have set the rel attribute to prefetch and specified that an HTML page, page2.html, be loaded in the expectation that the user will click a link to perform some other action that requires this page.
![]() Note At the time of writing, only Firefox supports
Note At the time of writing, only Firefox supports link prefetching.
Using the Scripting Elements
There are two scripting elements. The first, script, allows you to define scripts and control their execution. The second, noscript, allows you to define what happens when a browser doesn't support scripting or has it disabled.
![]() Tip You usually use the
Tip You usually use the script element inside the head element, but you may use it anywhere in an HTML document. I recommend putting all of your script elements together in the head section of a document because it makes them easier to track and because that's where most people expect to find script definitions.
The script Element
The script element lets you include scripting in your pages, either defined inline in the document or referenced to an external file. The most commonly used type of script is JavaScript—and that's the type I'll be focusing on—but browsers do support other scripting languages, including some remnants from the browser wars that I described in Chapter 1 Table 7-17 describes the script element. You use one script element for each script that you need to define or import.
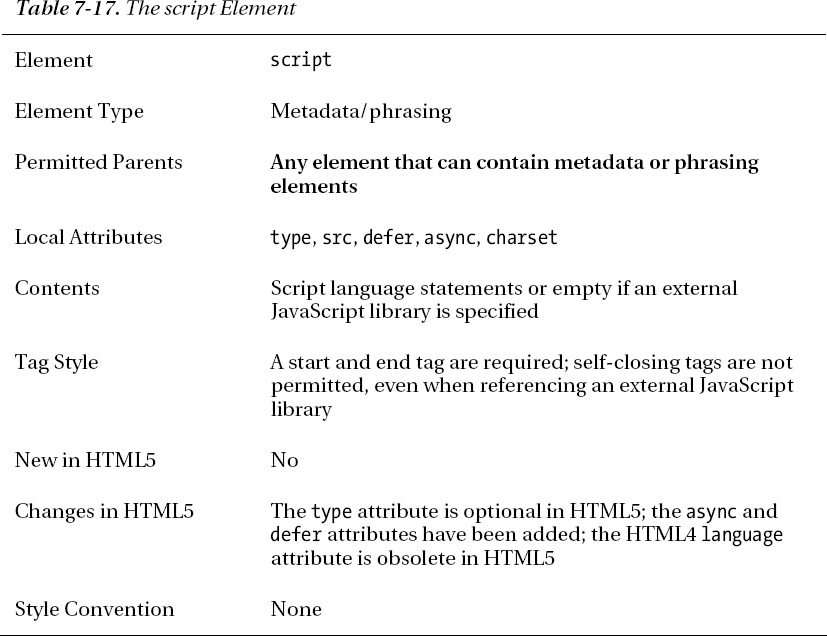
The type of this element varies based on where it is used. script elements defined within the head element are metadata, but script elements defined in other elements (such as body or section) are phrasing elements.
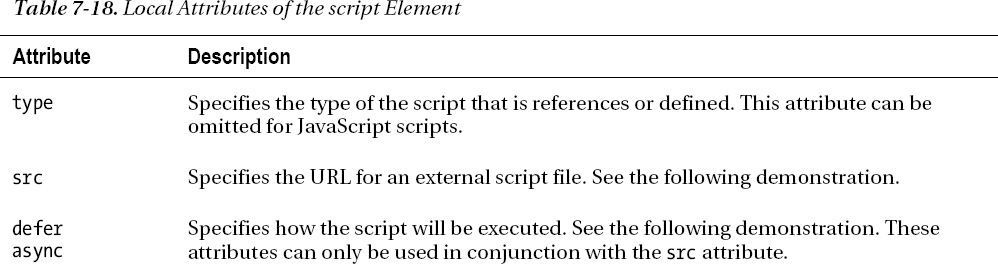
In the following sections, I'll show you how to use the script element to achieve different effects. Table 7-18 describes the attributes that the script element defines.

Defining an Inline Script
The simplest way to define a script is to do so inline. This means that you include the JavaScript statements in the HTML page. Listing 7-17 provides a demonstration.
Listing 7-17. Defining a Script Inline
<!DOCTYPE HTML>

<html>

    <head>

        <title>Example</title>

        <base href="http://titan/listings/"/>

        <meta name="author" content="Adam Freeman"/>

        <meta name="description" content="A simple example"/>

        <link rel="stylesheet" type="text/css" href="styles.css"/>

        <link rel="shortcut icon" href="favicon.ico" type="image/x-icon" />

        <script>

            document.write("This is from the script");

        </script>

    </head>

    <body>

        <p>

            I like <code id="applecode">apples</code> and oranges.

        </p>

        <a href="http://apress.com">Visit Apress.com</a>

        <a href="page2.html">Page 2</a>

    </body>

</html>
If you don't use the type attribute, the browser will assume that you are using JavaScript. This simple script adds some text to the HTML document. By default, scripts are executed as soon as they are encountered in the page. You can see the effect of this in Figure 7-8 where the text from the script appears in the browser window before the p element contained in the body.
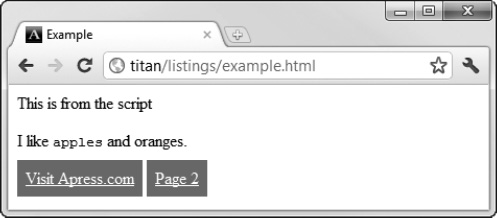
Figure 7-8. The effect of a simple script
Loading an External Scripting Library
You can separate scripts into separate files and load them using the script element. These files can be as simple (such as the demonstration that follows) or as complex (such as sophisticated libraries such as jQuery) as you like. To demonstrate an external script, I have created a file called simple.js, the contents of which are shown in Listing 7-18.
Listing 7-18. Contents of the simple.js Script File
document.write("This is from the external script");
The file contains a single statement, similar to the one that I used in the inline script. Listing 7-19 shows how you can use the src attribute in the script element to reference this file.
![]() Tip A script element must be empty if it uses the
Tip A script element must be empty if it uses the src attribute. You can't use the same script element to define an inline script and an external script.
Listing 7-19. Loading an External Script Using the src Attribute
<!DOCTYPE HTML>

<html>

    <head>

        <title>Example</title>

        <base href="http://titan/listings/"/>

        <meta name="author" content="Adam Freeman"/>

        <meta name="description" content="A simple example"/>

        <link rel="stylesheet" type="text/css" href="styles.css"/>

        <link rel="shortcut icon" href="favicon.ico" type="image/x-icon" />

        <script src="simple.js"></script>

    </head>

    <body>

        <p>

            I like <code id="applecode">apples</code> and oranges.

        </p>

        <a href="http://apress.com">Visit Apress.com</a>

        <a href="page2.html">Page 2</a>

    </body>

</html>
The value for the src attribute is the URL of the script file that you want to load. I created the simple.js file in the same directory as the HTML file, so I am able to use a relative URL in this example. You can see the effect of the script in Figure 7-9.

Figure 7-9. The effect of an external script
![]() Tip Notice that I have included an end tag for the
Tip Notice that I have included an end tag for the script element, even though the element has no content. If you use a self-closing tag when referencing an external script, the browsers will ignore the element and not load the file.
Deferring Execution of a Script
You can exert some control over the execution of a script by using the async and defer attributes. The defer attribute tells the browser not to execute the script until the page has been loaded and parsed. To understand the benefit that the defer attribute can offer, you need to look at the problem that it solves. Listing 7-20 shows the contents of the simple2.js script file, which contains a single statement.
Listing 7-20. The Statement Contained in the simple2.js Script File
document.getElementById("applecode").innerText = "cherries";
I'll break down the various parts of this statement in Part IV of this book, but for now it is enough to know that when this script runs, it will find an element with an id attribute value of applecode and change the inner text of that element to cherries. Listing 7-21 shows an HTML document that references the script file using a script element.
Listing 7-21. Referencing a Script File
<!DOCTYPE HTML>

<html>

    <head>

        <title>Example</title>

        <base href="http://titan/listings/"/>

        <meta name="author" content="Adam Freeman"/>

        <meta name="description" content="A simple example"/>

        <link rel="stylesheet" type="text/css" href="styles.css"/>

        <link rel="shortcut icon" href="favicon.ico" type="image/x-icon" />

        <script src="simple2.js"></script>

    </head>
<body>
<p>
I like <code id="applecode">apples</code> and oranges.
</p>
<a href="http://apress.com">Visit Apress.com</a>
<a href="page2.html">Page 2</a>
</body>
</html>
When you load the preceding HTML page, you don't get the desired result, as shown in Figure 7-10.
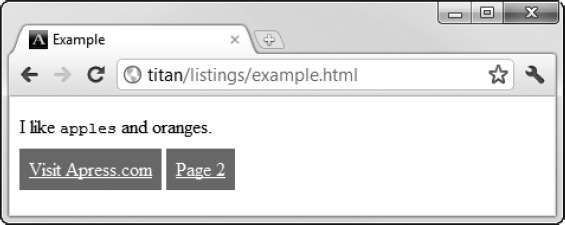
Figure 7-10. A script timing issue
The default behavior for a browser when it encounters a script element is to stop processing the HTML document, load the script file, and execute its contents. It is only after the script execution completes that the browser resumes parsing the HTML. This means that the browser loads and executes the statement in simple2.js before it has parsed the rest of the HTML, and discovered the code element. The script doesn't find the element it is looking for, and so no changes are applied. After the script completes, the browser continues parsing the HTML, and finds the code element. However, by then it is too late for the script, which isn't executed again. One obvious way of solving this problem is to put the script element at the end of the document, as shown in Listing 7-22.
Listing 7-22. Solving the Script Timing Issue by Moving the script Element
<!DOCTYPE HTML>
<html>
<head>
<title>Example</title>
<base href="http://titan/listings/"/>
<meta name="author" content="Adam Freeman"/>
<meta name="description" content="A simple example"/>
<link rel="stylesheet" type="text/css" href="styles.css"/>
<link rel="shortcut icon" href="favicon.ico" type="image/x-icon" />
</head>
<body>
<p>
I like <code id="applecode">apples</code> and oranges.
</p>
<a href="http://apress.com">Visit Apress.com</a>
<a href="page2.html">Page 2</a>
<script src="simple2.js"></script> </body>
</html>
This approach takes the way in which the browser responds to script elements into account, ensuring that the script isn't loaded and executed until the elements that the script is interested in have been parsed. As you can see in Figure7-11, you get the result that you want from the script.

Figure 7-11. The effect of the script, applied to an a element
This approach is perfectly valid, but in HTML5 you can achieve the same effect by using the defer attribute. When a browser encounters a script element in which the defer attribute is present, it holds off loading and executing the script until all of the elements in the HTML document have been parsed. Listing 7-23 shows a script element that uses the defer element.
Listing 7-23. Using a script Element with the defer Attribute
<!DOCTYPE HTML>
<html>
<head>
<title>Example</title>
<base href="http://titan/listings/"/>
<meta name="author" content="Adam Freeman"/>
<meta name="description" content="A simple example"/>
<link rel="stylesheet" type="text/css" href="styles.css"/>
<link rel="shortcut icon" href="favicon.ico" type="image/x-icon" />
<script defer src="simple2.js"></script>
</head>
    <body>

        <p>

            I like <code id="applecode">apples</code> and oranges.

        </p>

        <a href="http://apress.com">Visit Apress.com</a>

        <a href="page2.html">Page 2</a>

    </body>

</html>
Loading this page into the browser gives the same effect as moving the script element to the end of the page. The script is able to locate the code element and change the text contents, producing the same effect as you saw in Figure 7-11.
![]() Tip You can use the
Tip You can use the defer attribute on external script files only. It doesn't work for inline scripts.
Executing a Script Asynchronously
You can solve a different problem using the async attribute. As I mentioned earlier, the default browser behavior when it encounters a script element is to stop processing the page while it loads and executes the script. Each script element is executed synchronously (i.e., nothing else happens when the script is loading and running) and in turn (i.e., in the order in which they are defined).
Synchronous and sequential execution makes sense as a default way of handling scripts, but there are some scripts for which this isn't required and you can improve performance by using the async attribute. A good example is a tracking script. This type of script could, for example, report which sites you visit so that advertisers could profile and target you based on your browsing habits, or it could gather visitor statistics for site analytics. Such scripts are self-contained and tend not to interact with the elements in the HTML document. Delaying the rendering of the page while you wait for this kind of script to load and then report back to its server doesn't make any sense at all.
When you use the async attribute, the browser loads and executes the script asynchronously while it continues to parse the other elements in the HTML, including other script elements. For the right kind of script, this can improve overall load performance significantly. Listing 7-24 shows the async attribute applied to a script element.
Listing 7-24. Using the async Element
<!DOCTYPE HTML>
<html>
<head>
<title>Example</title>
<base href="http://titan/listings/"/>
<meta name="author" content="Adam Freeman"/>
<meta name="description" content="A simple example"/>
<link rel="stylesheet" type="text/css" href="styles.css"/>
<link rel="shortcut icon" href="favicon.ico" type="image/x-icon" />
<script async src="simple2.js"></script>
</head>
<body>
<p>
I like <code id="applecode">apples</code> and oranges.
</p>
<a href="http://apress.com">Visit Apress.com</a>
<a href="page2.html">Page 2</a>
    </body>

</html>
One important effect of using the async attribute is that the scripts in a page might not be executed in the order in which they are defined. This makes the async feature unsuitable for scripts that depend on functions or values defined by other scripts.
The noscript Element
The noscript element allows you to display content to users who have disabled JavaScript or who are using a browser that doesn't support it. Table 7-19 summarizes the noscript element.
As with the script element, the type of the noscript element depends on where it is placed in the document.
Although JavaScript support is widespread these days, there are still some specialized browsers that don't support it. Even when the browser does implement JavaScript, the user could have disabled it—many large corporations enforce a no-JavaScript rule on their computer users. The noscript element lets you deal with these users by displaying content that doesn't require JavaScript to operate or, at the very least, explains that they can't use your site or page unless they enable JavaScript. Listing 7-25 shows the noscript element set up to display a simple message.
Listing 7-25. Using the noscript Element
<!DOCTYPE HTML>

<html>

    <head>

        <title>Example</title>

        <base href="http://titan/listings/"/>

        <meta name="author" content="Adam Freeman"/>

        <meta name="description" content="A simple example"/>

        <link rel="stylesheet" type="text/css" href="styles.css"/>

        <link rel="shortcut icon" href="favicon.ico" type="image/x-icon" />

        <script defer src="simple2.js"></script>

        <noscript>
<h1>Javascript is required!</h1>
<p>You cannot use this page without Javascript</p>
</noscript>
</head>
<body>
<p>
I like <code id="applecode">apples</code> and oranges.
</p>
<a href="http://apress.com">Visit Apress.com</a>
<a href="page2.html">Page 2</a>
</body>
</html>
You can see the effect of the noscript element in Figure 7-12. To achieve this effect, I disabled JavaScript support in Google Chrome and loaded the HTML in the listing.
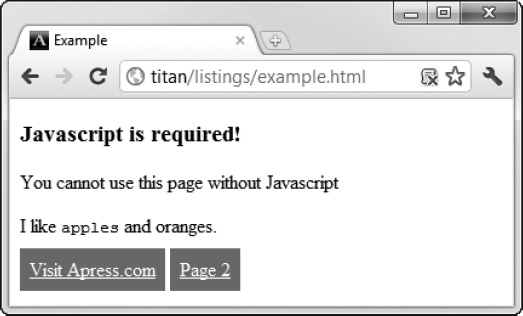
Figure 7-12. The effect of the noscript element
Notice that the remainder of the page is processed as normal, and the content elements are still displayed.
![]() Tip You can add multiple
Tip You can add multiple noscript elements to a page so that they correspond to individual areas of functionality that require scripting. This approach is most useful for providing fallback markup that doesn't rely on JavaScript.
An alternative approach is to redirect the user's browser to a different URL if it doesn't support JavaScript. You do this by placing a meta element inside the noscript element, as shown in Listing 7-26.
Listing 7-26. Using the noscript Element to Redirect the User's Browser
<!DOCTYPE HTML>

<html>

    <head>

        <title>Example</title>

        <base href="http://titan/listings/"/>

        <meta name="author" content="Adam Freeman"/>

        <meta name="description" content="A simple example"/>

        <link rel="stylesheet" type="text/css" href="styles.css"/>

        <link rel="shortcut icon" href="favicon.ico" type="image/x-icon" />

        <script defer src="simple2.js"></script>

        <noscript>

            <meta http-equiv="refresh" content="0; http://www.apress.com"/>

        </noscript>

    </head>

    <body>

        <p>

            I like <code id="applecode">apples</code> and oranges.

        </p>

        <a href="http://apress.com">Visit Apress.com</a>

        <a href="page2.html">Page 2</a>

    </body>

</html>
This will redirect the user to the www.apress.com site when a browser that doesn't support JavaScript, or that has JavaScript disabled, tries to load this page.
Summary
In this chapter, I have introduced you to the document and metadata elements. These are not the most dynamic and exciting of elements defined by HTML5, but they are incredibly important. Understanding how to define the core building blocks of an HTML document is essential to getting the best result—especially when it comes to aspects such as controlling script execution with the script element and managing styles with the style and link elements.