
So far, you’ve tested your code by typing in the Rails console and clicking links in the web browser. As you add more features to your application, however, this won’t scale. And even with more effective test methods, you’ll still have to remember to retest everything in the application after you add each feature. Otherwise you might miss a regression.
Rather than manually testing your application, you can write automated tests in Ruby to ensure your code is correct and meets all of your requirements. Once you have a set of automated tests in place, you can run an entire suite of tests to catch regressions, helping you to refactor your code with confidence.
Several different test frameworks are available for Ruby. In this chapter, we focus on the default test framework used by Rails: MiniTest.
Basic test skeletons are automatically created in the test directory when you generate Rails models and controllers. These are just starting points: They don’t really test anything, but having the framework in place makes adding your own tests much easier.
In this chapter, I’ll discuss testing models and controllers. You’ll learn how to test individual components and the interactions between components. But first, let’s prepare your environment for testing.
So far you’ve been working in the Rails development
environment while building the application. The Rails test
environment is preconfigured for testing, but you still must do a few things before
running your tests.
The test environment uses a separate database just for running
tests. First, make sure your application’s db/schema.rb is up
to date by running database migrations:
$ bin/rake db:migrateThe test database is automatically re-created before each test run to ensure that tests don’t depend on data already in the database.
Now that the test database is set up, you’re ready to run your tests. Rails provides several different rake tasks for running the various types of tests you’ll create.
The bin/rake test command runs all tests by default. If you
include the name of a test file on the command line, it only runs the tests in that
file. While working on a particular model or controller, running the tests associated
with that class is faster.
This command runs all of the tests in the file test/models/user_test.rb:
$ bin/rake test test/models/user_test.rbAfter a short pause, you should see output like this:
Run options: --seed 46676

# Running:

Finished in 0.001716s, 0.0000 runs/s, 0.0000 assertions/s.

0 runs, 0 assertions, 0 failures, 0 errors, 0 skips
As the last line indicates, no tests have been defined yet. Open test/models/user_test.rb in your editor and let’s add some tests.
➊ require 'test_helper'

➋ class UserTest < ActiveSupport::TestCase
➌   # test "the truth" do
    # assert true
    # end
  end
This test file first requires the file
test/test_helper.rb ➊, which holds the configuration for
all tests. The test helper also loads all fixtures, or sample data,
and can include helper methods for tests. Next, the test file defines a test
case named UserTest by inheriting from
ActiveSupport::TestCase ➋. A test case is a set of tests
related to a class. Inside the test case, a simple example test ➌ is provided in
the comments.
The commented-out test doesn’t really test anything even if you uncomment it, so you could remove it. But these lines do show the basic structure of all tests, so let’s examine them before moving forward:
➊ test "the truth" do
➋   assert true
  end
The test method ➊ accepts a test name and a block of code
to execute. This block contains one or more assertions ➋. An
assertion tests a line of code for an expected result. The
assert method shown here expects its argument to evaluate to a true
value. If the assertion is true, the test passes and a single dot is printed. Otherwise,
the test fails and an F is printed along with a message identifying
the failing test.
Now let’s follow this basic test structure to add a real test to this file. I
find it helpful to open the model I’m testing, in this case,
app/models/user.rb, and the test file at the same time. I usually
add tests for any custom methods I’ve added to a model and verify that the
model’s validations are working as expected. Looking at the
user model, you see several has_many
associations, followed by the Rails has_secure_password method, a
validation, and the methods you’ve written.
First, let’s make sure you can create a valid user. Remember, the
has_secure_password method adds validations for attributes named
password and password_confirmation. Users are
also required to have a unique email address, so to create a valid user, you must
provide email, password, and
password_confirmation.
  test "saves with valid attributes" do
➊   user = User.new(
      email: "[email protected]",
      password: "password",
      password_confirmation: "password"
     )
➋    assert user.save
   end
Here, you instantiate a new User object with valid
attributes ➊ and assert that it saves ➋.
Run the tests in this file again:
  $ bin/rake test test/models/user_test.rb
  Run options: --seed 40521

  # Running:
➊.

  Finished in 0.067091s, 14.9051 tests/s, 14.9051 assertions/s.

➋ 1 runs, 1 assertions, 0 failures, 0 errors, 0 skips
The single dot ➊ represents the single test. The last line of output ➋ tells you that you ran one test with one assertion and had zero failures.
You could continue adding tests at this point, but manually creating users for all of your tests will get tedious. Luckily, Rails includes the fixtures I mentioned earlier, which can automatically create as many model objects with sample data as you need.
Fixtures provide sample data for tests, and they are written in
a format called YAML. YAML originally stood for Yet
Another Markup Language, but is now a recursive acronym for YAML
Ain’t Markup Language. Fixtures are automatically loaded into the
test database by the file tests/test_helper.rb
and are available to all test cases.
Open the file test/fixtures/users.yml, remove its contents, and create two sample users:
➊ user1:
➋   email: [email protected]
➌   password_digest: <%= BCrypt::Password.create "password" %>

  user2:
     email: [email protected]
     password_digest: <%= BCrypt::Password.create "password" %>
This code adds sample data for two users. The YAML file begins with the name of
the first fixture followed by a colon ➊. In this case, the fixture is named
user1. The indented lines under the name specify attributes. The
first user has an email address of [email protected]
➋.
You can even use ERB to help add data to fixtures. Rather than precompute the
values for the password_digest field, use the
BCrypt::Password.create method to create the
password_digest ➌ dynamically. This method is part of the
bcrypt gem you installed in Chapter 9.
Refer to one of these users in your tests by calling the
users method and passing the name of the user you want. For
example, users(:user1) returns the first user just defined.
Go back to the user tests in test/models/user_test.rb and let’s try the new fixtures:
    test "validates email presence" do
➊     @user1 = users(:user1)
➋     @user1.email = nila

➌     assert_not @user1.valid?
    end
This test uses a fixture to initialize a user ➊, sets the user’s
email to nil ➋, and ensures the user is
not valid with the assert_not method ➌. The
assert_not method only passes if its condition is a false
value.
This test proves that an email is required; now you’ll add a test for email uniqueness.
    test "validates email uniqueness" do
➊     @user1 = users(:user1)
      @user2 = users(:user2)

➋     @user1.email = @user2.email

➌     asseart_not @user1.valid?
    end
This test uses fixtures to initialize two users ➊, sets the first
user’s email equal to the second user’s
email ➋, and asserts ➌ that the first user is no
longer valid. The second user is still valid because the first user can’t be
saved with invalid data. You can look at the test log in
log/test.log to see the queries being run for each test.
Fixtures have id values based on a hash of the fixture name,
and those values are always the same. For example, the id for
@user1 is 206669143. This value never changes. Associations
between fixtures are created by name because the id of each fixture
is based on its name. The Post fixtures discussed next include
associations with the User fixtures you created earlier.
Rails automatically created fixture files for the TextPost and
ImagePost types. You’ll include both types of fixtures in
the Post file. The fixture files for the other types will cause an
error, so delete the files test/fixtures/text_posts.yml and
test/fixtures/image_posts.yml before moving on.
Now open the file test/fixtures/posts.yml and create some sample posts:
post1:
  title: Title One
  body: Body One
  type: TextPost
  user: user1

post2:
  title: Title Two
  url: http://i.imgur.com/Y7syDEa.jpg
  type: ImagePost
  user: user1

post3:
  title: Title Three
  body: Body Three
  type: TextPost
  user: user2
Here, you have three posts. The first two belong to the
User named user1 and the third belongs to
user2. You’ll put these to good use a little later when
you add tests for the Post model.
Assertions are the building blocks of tests. You’ve already seen a few
assertions, such as assert and assert_not, in the
tests you’ve written so far. The MiniTest library contains more, and Rails adds a
few of its own. Here are some of the most commonly used assertions:
asserttestPasses if the
testexpression evaluates to trueassert_emptyobjPasses if
obj.empty?is trueassert_equalexpected, actualPasses if the
expectedvalue equals theactualvalueassert_includescollection, objPasses if
collection.includes?(obj)returns trueassert_instance_ofclass, objPasses if
obj.instance_of?(class)is trueassert_matchregexp, stringPasses if the given
stringmatches the regular expressionregexpassert_nilobjPasses if
obj.nil?is true
Each of these assertions also comes in a “not” form. For example,
assert_not passes if the expression being tested is false and
assert_not_equal passes if the expected value is not equal to the
actual value. Assertions also accept an optional message parameter, which is a string
that prints if the assertion fails.
Let’s put our knowledge of assertions to work and add a few more tests
to the user model. Here’s the first one:
   test "should follow leader" do
➊    @user1 = users(:user1)
     @user2 = users(:user2)

➋    @user1.follow!(@user2)

➌    assert_equal 1, @user1.leaders.count
     assert_equal 1, @user2.followers.count
   end
This test creates two users using fixtures ➊ and then calls the
follow! method on @user1 with
@user2 as an argument ➋. It then ensures that
@user1 has one leader and @user2 has one
follower ➌.
This next test verifies the following? method works
correctly:
test "following? should be true" do
  @user1 = users(:user1)
  @user2 = users(:user2)

  @user1.follow!(@user2)

  assert @user1.following?(@user2)
end
It again uses fixtures to create two users and then calls the
follow! method on @user1 with
@user2 as an argument and finally ensures that
@user1.following?(@user2) is true.
The tests you’ve made should all work correctly, but I’ve introduced some duplication in the code. Almost every test uses fixtures to create users. Remember, don’t repeat yourself. Luckily, test cases include two callbacks that can help eliminate this duplication. Callbacks are methods that are called automatically before and after each test.
The setup method is called before each test, and the
teardown method is called after each test. These methods are
commonly used to initialize objects that are employed in multiple tests. You can use the
setup method to initialize the values of @user1
and @user2 automatically.
  class UserTest < ActiveSupport::TestCase
➊   def setup
      @user1 = users(:user1)
      @user2 = users(:user2)
    end

    --snip--
➋   test "following? should be true" do
      @user1.follow!(@user2)

      assert @user1.following?(@user2)
    end
  end
Now that @user1 and @user2 are being
initialized ➊ in the setup method, you can remove the duplication from each of
the tests, as shown in the rewritten test for following?
➋.
The tests you’ve seen so far are model tests. Model tests verify the behavior of your application’s models. These types of tests were previously called unit tests. I typically add tests for validations and for any custom methods I’ve written.
I’ve covered both of these for the User model, so now
let’s add tests for the Post model. You may also want to refer to
the Post model in app/models/post.rb as you write
tests.
class Post < ActiveRecord::Base
  belongs_to :user
  has_many :comments, dependent: :destroy

  validates :user_id, presence: true
  validates :type, presence: true
end
The Post model is still pretty simple. A post belongs to a user and
can have many comments. It also validates the presence of a user_id and
a type. Let’s add a test to verify that a Post
has a user_id. Open the file
test/models/post_test.rb in your editor:
  require 'test_helper'

  class PostTest < ActiveSupport::TestCase
➊   def setup
      @post1 = posts(:post1)
      @post2 = posts(:post2)
    end

➋   test "validates user_id presence" do
      @post1.user_id = nil

      assert_not @post1.valid?
   end
end
The setup method ➊ initializes two posts that you
can refer to in your tests. The first test ➋ verifies that a
Post without a user_id is not valid.
Since you have model tests for the users and posts now, you can use the
bin/rake test:models command to run all model tests:
$ bin/rake test:models
Run options: --seed 47072

# Running:

......

Finished in 0.234202s, 25.6189 runs/s, 29.8887 assertions/s.

6 runs, 7 assertions, 0 failures, 0 errors, 0 skips
If this command results in an error, delete the unused fixture files for the
TextPost and ImagePost models as mentioned
earlier. Delete test/fixtures/text_posts.yml and
test/fixtures/image_posts.yml.
The other post types have validations of their own. For example, the
TextPost validates the presence of a body, and the
ImagePost validates the presence of a url. Since
we already have TextPost and ImagePost fixtures,
let’s add tests for both of those validations:
  test "TextPost requires body" do
➊   assert_instance_of TextPost, @post1

➋   @post1.body = nil

➌   assert_not @post1.valid?
  end

  test "ImagePost requires url" do
    assert_instance_of ImagePost, @post2

    @post2.url = nil

    assert_not @post2.valid?
  end
Both of these tests follow the same pattern. First, verify that
@post1 is an instance of TextPost ➊. Next,
set the body of @post1 to nil
➋. Finally, verify that @post1 is no longer valid ➌. The
ImagePost assertions do the same, but for
@post2.
Controller tests verify the actions of a single controller by simulating requests to your application and validating the responses. Controller tests ensure that a controller action responds successfully to valid requests, and that it renders the correct view or redirects to the correct location. These types of tests were previously called functional tests.
Rails includes several helper methods and variables that make controller tests easier to write.
The methods get, post, put,
patch, head, and delete
simulate a request to a controller action. These methods can take two optional hashes:
one representing request parameters and another representing the current session.
After a request has been made with one of those six methods, the following four hashes become available:
| Contains the instance variables assigned in the controller action |
| Contains any cookie values set in the action |
| Holds the flash values set in the action |
| Contains any session values set by the action |
Your tests also have access to three instance variables:
@controller contains the controller processing the request;
@request is the request being processed; and
@response is the controller’s response to the request.
Rails adds several assertions specifically for controller tests in addition to those you’ve already seen. Controller actions always either render a response or redirect to a different URL.
assert_responsetypePasses if the HTTP response matches a specific status code. Use a status code or one of the symbols
:success,:redirect,:missing, or:errorfortype.assert_redirected_tooptionsPasses if the request causes a redirect to the path given in
options.assert_templateexpectedPasses if the request renders the
expectedtemplate.
These assertions verify that a controller action correctly responds to a request.
For a simple GET request, assert_response :success might be the only
test needed. If the controller action assigns an instance variable, you should also
verify that assignment.
Let’s add controller tests for the new and
create actions in UsersController. First, test
that the new action successfully renders the sign-up form with a
newly created instance of the User model. Open the file
test/controllers/users_controller_test.rb to add the following
test:
   test "should get new with new user" do
➊    get :new

➋    user = assigns(:user)

➌   assert user.new_record?
    assert_response :success
  end
This test issues a GET request for the new user page ➊, gets a copy of the
value assigned to the instance variable @user ➋ in the
controller, and verifies that user is a new record ➌ and the
response was successful.
The next test checks the ability to create new users given valid data:
   test "should create user" do
➊    params = {
       user: {
         email: "[email protected]",
         password: "password",
         password_confirmation: "password"
       }
      }

➋     post :create, params
➌     assert_redirected_to root_url
    end
This test is a bit more complex because the create action expects
a hash of values for the new user ➊. This test issues a POST request to the
create action using the params hash ➋ and
then verifies that the action redirects to the root_url
➌.
The previous test checks what happens when a User is successfully
saved. You should test the other path through the controller action, that is, when the
User can’t be saved. You could add a test that attempts to
create a user with invalid attributes and verifies the new user template is rendered
again.
Run the new controller tests with the bin/rake test:controllers
command:
$ bin/rake test:controllersThe UsersController tests should pass successfully, so
let’s move on to the PostsController. Verify that the
before_action method authenticate_user! is
working correctly so your application won’t show posts to unauthenticated
users.
Open the file test/controllers/posts_controller_test.rb in your editor and add the following tests:
    test "redirects anonymous users to login" do
➊     get :index
➋     assert_redirected_to login_url
    end

    test "get index for authenticated users" do
➌     user1 = users(:user1)

➍     get :index, {}, { user_id: user1.id }
      assert_response :success
    end
The first test attempts to GET the post index page ➊ and
verifies the action redirects to the login page ➋. The second test initializes a
user using a fixture ➌ then issues the GET request for the
index page with a user_id in the session
➍. Simulating a logged-in user by including a valid user_id in
the session should result in a successful response.
Integration tests verify the interaction between several different controllers. These are commonly used to test the flow between several pages of your application. An example of a flow would be logging in to the application, viewing a page, and then performing some other action. Each of these actions could be covered by controller tests. An integration test ensures that they all work together.
Because integration tests generally involve moving between pages in the application,
your tests need not only to make requests to actions but also to follow any redirects.
The helper methods redirect? and follow_redirect!
check to see if the last request resulted in a redirect and follow a redirect response,
respectively.
If you know that a request results in a redirect, more specific methods are
available. You can use get_via_redirect,
post_via_redirect, put_via_redirect,
patch_via_redirect, or delete_via_redirect to
make the appropriate request and also follow the redirect.
Rails doesn’t create integration tests automatically like model and controller tests because Rails has no way of knowing which flows you want to test. Although they are not created automatically, Rails does include a generator you can use to create integration tests.
Let’s add an integration test to verify that a user can log in to the
application, see the home page, and then log out. First, use the bin/rails
generate command to create a new integration test:
$ bin/rails g integration_test user_flowThis command creates a new file named test/integration/user_flow_test.rb. Open that file in your editor and let’s add a test:
  require 'test_helper'

  class UserFlowTest < ActionDispatch::IntegrationTest

    test "user login, browse, and logout" do
      user = users(:user1)

➊     get "/login"
a
      assert_response :success

➋     post_via_redirect "/sessions",
        email: user.email,
        password: "password"

      assert_equal "/", path

➌     get_via_redirect "/logout"

      assert_equal "/login", path
    end
 end
This test looks like an extended controller test. The test requests a page with
get ➊ and then verifies a successful response. You know that
a user logs in to the application with a POST request to the sessions path and is then
redirected to the home page, so you use the post_via_redirect method
to submit the user’s email address and password and then follow the redirect
automatically ➋. Finally, the test issues a GET request for the logout page
➌ and is redirected back to the login page.
Enter the following command to run the integration test:
$ bin/rake test test/integration/user_flow_test.rb
Run options: --seed 51886

# Running:

.

Finished in 1.049118s, 0.9532 runs/s, 2.8595 assertions/s.

1 runs, 3 assertions, 0 failures, 0 errors, 0 skips
This test confirms that a user can log in to the application, view the home page, and then log out successfully.
This path is basically the only one a user can take through the application at this time. As you add more actions to the application, you can create integration tests to verify that other flows work correctly.
The tests written so far have all verified existing functionality, but some Rails developers use tests to define features before implementing them, a practice called test-driven development (TDD). In TDD, you write a test first and then add code to make the test pass. Once the test passes, you can refactor the code if necessary. If you follow TDD, you won’t have to worry about parsing your code later to figure out what functionality to verify.
TDD is usually a three-step process known as red-green-refactor:
Write a failing test (red).
Write code to make the test pass (green).
Refactor as needed (refactor).
By following this process, you can be confident that new functionality meets the requirements specified in the test and that it did not introduce any regressions.
Let’s use TDD to add features to our social application. Although many features are still missing, let’s focus on these:
Add a user
showpage showing a user’s posts and a Follow button.Give users the ability to create new posts.
For each of these features, you’ll first write a failing test and then write code to make the test pass.
The user show page displays the user’s name and posts. It
should also include a button to allow other users to follow this user. To add the user
show page, you need to add a show method to the
user controller and create a corresponding view. You know the controller should assign
an instance variable named @user for the view to use and respond with
success, so let’s add a test for that.
Open the file test/controllers/users_controller_test.rb and add this test:
test "should show user" do
  user = users(:user1)

  get :show, id: user.id
  assert assigns(:user)
  assert_response :success
end
Now, run the test and make sure it fails:
$ bin/rake test test/controllers/users_controller_test.rbRunning this test should result in an error. The action show
could not be found for UsersController because you haven’t
created it yet. So let’s add the show action to
app/controllers/users_controller.rb:
class UsersController < ApplicationController

def show
  @user = User.find(params[:id])
  @posts = @user.posts.order("created_at DESC")
  end

--snip--
Save the file and run the tests again. This time you should see a different error. The template is missing. Create a new file named app/views/users/show.html.erb, and add that template now:
<div class="page-header">
  <h1>User</h1>
</div>

<p class="lead"><%= @user.name %></p>

<h2>Posts</h2>

<%= render @posts %>

<%= link_to "Home", root_path,
      class: "btn btn-default" %>
Save this file and run the tests again. All tests should now pass, but you still have one problem. This page shows the user’s email address and the user’s posts, but no one can follow the user!
Following a user creates a record in the subscriptions table in the database. Because this has to happen on the server, adding the Follow button requires a controller action and a new route to that action.
Add another controller test to test/controllers/users_controller_test.rb to describe this action:
   test "should follow user" do
➊    user1 = users(:user1)
     user2 = users(:user2)

➋    get :follow, { id: user2.id }, { user_id: user1.id }
➌    assert user1.following? user2
     assert_redirected_to user_url(user2)
   end
This test first creates two users using fixtures ➊. Next, it issues a
GET request for the follow action with the second user’s
id as a parameter and the first user’s id
in the session ➋. This simulates user1 following
user2. Finally, it verifies that user1 is now
following user2 and that the request redirects back to the
show page for user2 ➌.
Now open the file app/controllers/users_controller.rb, and add
the follow action after the other actions, but before the
private methods:
   class UsersController < ApplicationController
     --snip--

     def follow
➊    @user = User.find(params[:id])
➋    if current_user.follow!(@user)
➌      redirect_to @user, notice: "Follow successful!"
     else
       redirect_to @user, alert: "Error following."
     end
   end

   private
   --snip--
This method finds the correct user using the id parameter ➊, calls the follow! method on current_user ➋, and then redirects to @user ➌.
Now open config/routes.rb and add a route to the new
follow action:
Rails.application.routes.draw do
  --snip-

  get 'signup', to: 'users#new', as: 'signup'
  get 'follow/:id', to: 'users#follow', as: 'follow_user'

  --snip-
end
I added this under the signup route because these actions are
both in the user controller. Now, back in
app/views/users/show.html.erb, you can add the Follow
button:
--snip-
<p class="lead"><%= @user.name %></p>

<%= link_to "Follow", follow_user_path(@user),
      class: "btn btn-default" %>

<h2>Posts</h2>
--snip--
The Follow button is similar to the Home button; it’s actually a link
with Bootstrap’s btn and btn-default styles
applied to make it look like a button.
You can now run the controller tests again and verify that they all pass. You can
also start the Rails server if it isn’t already running and go to
http://localhost:3000/users/1 in your web browser to see the
show page for the first user, as shown in Figure 10-1.
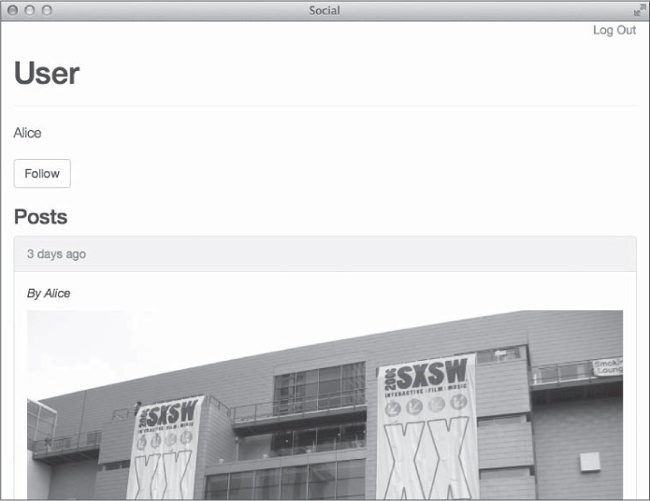
Figure 10-1 is the show page with the
user’s name, a button for following this user, and the user’s posts.
Now let’s give users the ability to add posts. Adding posts requires two
controller actions: new and create. The
new action also requires a matching view. The
create action should redirect to the newly created post, so a view
isn’t needed.
Your application has two different types of posts. Start by adding the ability to
create posts of type TextPost. The new action in
TextPostsController should instantiate a new
TextPost object and render a form for that object. Add a failing
test to test/controllers/text_posts_controller_test.rb and then get
to work:
   test "get new with new post" do
➊    user1 = users(:user1)

➋    get :new, {}, { user_id: user1.id }
     text_post = assigns(:text_post)

     assert text_post.new_record?
     assert_response :success
   end
The test first creates a new user using a fixture ➊ and then issues a
GET request for the new action with user_id set in
the session ➋. This step is necessary because the
TextPostsController requires an authenticated user. The test then
gets the text_post instance variable, verifies it’s a new
record, and verifies a successful response. Run the tests and watch this one
fail:
$ bin/rake test test/controllers/text_posts_controller_test.rbThe error message should indicate that the new action is missing
from TextPostsController. Open
app/controllers/text_posts_controller.rb, and add the new
action:
class TextPostsController < ApplicationController
  def new
    @text_post = TextPost.new
  end
end
You almost have enough to get the test to pass. The last step is to add the corresponding view. Create the file app/views/text_posts/new.html.erb, and add the following content:
<div class="page-header">
  <h1>New Text Post</h1>
</div>

<%= render 'form' %>
This view is a page header followed by a render command for the
form partial. Let’s add the partial now. First, create the file
app/views/text_posts/_form.html.erb, and add this form:
<%= form_for @text_post do |f| %> ➊
  <div class="form-group">
    <%= f.label :title %>
    <%= f.text_field :title, class: "form-control" %> ➋
  </div>
  <div class="form-group">
    <%= f.label :body %>
    <%= f.text_area :body, class: "form-control" %> ➌
  </div>

  <%= f.submit class: "btn btn-primary" %> ➍
  <%= link_to 'Cancel', :back, class: "btn btn-default" %>
<% end %>
This partial creates a form for the new TextPost assigned
to @text_post ➊. The form includes a text field for the post
title ➋, a text area for the post body ➌, and buttons to submit the form
or cancel and go back ➍.
While you’re editing views, add a button for creating a new text post on the home page. Open app/views/posts/index.html.erb, and then add this link under the page header:
<p>
  <%= link_to "New Text Post", new_text_post_path,
        class: "btn btn-default" %>
</p>
You should now be able to run the TextPostController tests
successfully. Now add another controller test to describe creating a
TextPost to
test/controllers/text_posts_controller_test.rb:
    test "should create post" do

➊     user = users(:user1)
➋     params = {
        text_post: {
          title: "Test Title",
          body: "Test Body"
        }
      }

➌     post :create, params, { user_id: user.id }

      text_post = assigns(:text_post)

➍     assert text_post.persisted?

      assert_redirected_to post_url(text_post)
    end
As with the previous controller test for the TextPostsController,
this test first initializes a new user ➊ from a fixture. Next, it sets up the
necessary parameters ➋ for a new TextPost, and then issues a
POST request ➌ to the create action with the
params hash and the user.id in the session.
Finally, it ensures ➍ the new text post was persisted to the database and that
the request redirects to the new post’s URL.
The first step to making this test pass is to add a create action
to the TextPostsController. Open the file
app/controllers/text_posts_controller.rb, and add the following
method:
   class TextPostsController < ApplicationController
   --snip--

   def create

     @text_post =
➊      current_user.text_posts.build(text_post_params)
       if @text_post.save
➋       redirect_to post_path(@text_post),
                       notice: "Post created!"
        else
➌         render :new, alert: "Error creating post."
        end
      end
    end
The create method builds a new text post ➊ for the
current user using the params from the form. If it is able to save
this new post, it redirects the user ➋ to the newly created post. Otherwise, it
renders the new text post form ➌ again with an error message.
Finally, add the text_post_params method for Rails strong
params. This method is called in the create
action to get the permitted parameters for the new TextPost. Add this
private method near the bottom of the TextPostsController
class:
    class TextPostsController < ApplicationController
    --snip--
    private

    def text_post_params
➊     params.require(:text_post).permit(:title, :body)
    end
  end
This method ensures ➊ that the params hash contains the
:text_post key and permits key-value pairs for
:title and :body under the
:text_post key. With this change, all of your tests should pass
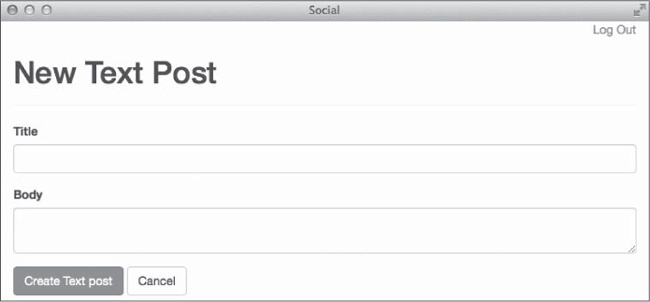
again. Click the New Text Post button on the home
page, as shown in Figure 10-2, to see the form for creating a
TextPost.
The process for creating a new ImagePost is similar. Exercise 3
at the end of this chapter walks through the necessary steps.
These new features bring our application much closer to being a fully functioning social network.
We covered a lot of ground in this chapter. You learned about the MiniTest framework. You wrote model, controller, and integration tests. We discussed test-driven development and then you used it to add features to your social network.
You can write the tests either before or after the code, and you can use any test framework—what matters is that you write tests. The ability to type a single command and verify your application is working correctly is worth the small investment of your time. Over the life of an application, the benefits of a comprehensive set of tests for your application are immeasurable.
Add the following controller tests to
test/controllers/image_posts_controller_test.rb. Both tests should
pass after you add the actions to ImagePostsController and create the
associated views.
test "get new with new post" do
  user1 = users(:user1)

  get :new, {}, { user_id: user1.id }

  image_post = assigns(:image_post)

  assert image_post.new_record?
  assert_response :success
end

test "should create post" do
  user = users(:user1)
  params = {
    image_post: {
      title: "Test Title",
      url: "http://i.imgur.com/Y7syDEa.jpg"
    }
  }

  post :create, params, { user_id: user.id }

  image_post = assigns(:image_post)

  assert image_post.persisted?
  assert_redirected_to post_url(image_post)
end
Your implementation of these actions and views should be similar to the TextPost new and create actions and views. If you would like to practice TDD, feel free to add these tests and confirm they fail before you start implementing the actions.