Use the Dropbox Web Site
Most of your day-to-day interactions with Dropbox will probably take place in the Dropbox folder on your computer(s) or in the Dropbox app installed on your devices. However, a few activities in Dropbox require a trip to dropbox.com in a Web browser, and there are many additional tasks you can do on the Dropbox site should the need arise—for example, if you’re accessing your Dropbox account using a public or borrowed computer.
Every Dropbox user should be familiar with the ins and outs of dropbox.com. It’s easy to navigate for the most part (and online help is readily available—just click the Help link at the bottom of any page), but in this chapter I want to provide a quick overview of what you can (and must) do on the site and point out a few less-than-obvious things. Because I discuss some of these topics in greater detail elsewhere in the book, I include links to that material as appropriate.
Learn about Web-only Tasks
If you want to do any of the following, you’ll need to go to dropbox.com (and sign in with your username and password, if you haven’t already done so):
- Share folders: Although you can initiate sharing of a folder from any device with a Dropbox app, doing so on a computer opens a Web page where you can send invitations via email. See Share Files and Folders for more details. (You can copy the link to an individual file or folder without going to the Web site, but even then, you might need to use your browser for additional tasks, such as those in the next two bullet points.)
- Change links’ permissions, passwords, and expiration: Whether you’ve shared a file or a folder, you may want to control who may access it, add a password, and decide when (if at all) the link expires. See Manage Permissions and Expiration.
- Remove links: To stop sharing a file or folder, see Unshare a Link or Folder.
- Use collaboration features: Managing a team, commenting on files, requesting files from other users, and working on group documents with Dropbox Paper all require using a browser. See Collaborate with Others.
- Work with older or deleted files: To recover an older version of a file, restore a deleted file, or permanently delete a file, see Recover Older and Deleted Files.
- Manage your account: If you want to change your password, upgrade to a higher storage quota, or change other account-wide options, you must go to the Dropbox Web site. To learn more, flip ahead to Manage Your Account.
- Create photo albums: The photo album feature lets you group pictures together for more convenient sharing and display. I say more about this in Create a Photo Album.
Perform Common Web Tasks
Most of the Dropbox Web site is straightforward, and most people should have no trouble finding their way around. However, I do want to call your attention to a few noteworthy items.
Use the Sidebar
Once you’ve logged in to your account at dropbox.com, the upper-left corner of each page has a list of links called the sidebar (Figure 10). Your sidebar may contain a slightly different set of links, depending on which features you’ve enabled. Click a link to go to the corresponding feature. If in doubt, click Files, which displays the top level of your Dropbox folder; you can navigate elsewhere from there.

Although some of these links have been around for quite some time, a few are new. For example, the Recents link shows you the files most recently added or changed; Events shows you a timeline view of all recent file changes; and Team, Paper, and File Requests (all covered later in this book) refer to newish collaboration features.
Select and Manage Files
When it comes to selecting files and then acting on them, the Dropbox file list (Figure 11) works a bit differently from the OS X Finder or Windows Explorer, and it may be initially confusing.

If you click a document’s icon or its name, you’ll either display a preview of the document or download it (depending on the document type and your settings). However, if you want to do other things with a document (share it, delete it, look at previous versions, and so on), you must first select it. To do this, click anywhere in the document’s row except the name or the title—for example, click the white space just to the right of the document’s name. When you do this, additional controls appear at the top of the page (such as Share Link, Download, and Delete—the exact options vary depending on the context), replacing the column headers (such as Name, Kind, and Modified).
Upload Files
Uploading files to your Dropbox with a browser couldn’t be easier: while logged in, drag one or more files into your browser window. If you want to put them in a particular folder, drag them onto that folder; otherwise, Dropbox puts them at the top level of the current folder.
Alternatively, you can upload files the old-fashioned way. Click the Upload ![]() icon followed by Choose Files, select one or more files in a standard Open dialog box, and click Choose.
icon followed by Choose Files, select one or more files in a standard Open dialog box, and click Choose.
Create a Folder
To create a new folder in the Web interface, click the New Folder ![]() icon, type a name, and press Return.
icon, type a name, and press Return.
Find a File
To find a file anywhere in your Dropbox, type a search term into the search field in the upper-right corner of the window. Matching files and folders appear immediately in a pop-up menu. Note that searches on the Dropbox Web site match only file names, not file contents.
Preview a File
Dropbox has built-in support for displaying many common file types right in your browser window. That includes Microsoft Office files (.doc, .docx, .xls, .xlsx, .ppt, and .pptx); PDF documents; and most graphics file formats (such as .ai, .bmp, .eps, .jpeg, .png, .psd, .svg, and .tiff).
To preview a file, click its filename or double-click anywhere in the document’s row. For most of the graphics formats, you can click on the image to enlarge it; then, use the controls at the bottom of the screen to change the magnification, or drag the image (if it’s larger than your browser window) to pan it. When you’re done, click the X icon in the upper-right corner of the window to return to the file list.
Edit Microsoft Office Documents
Thanks to a partnership with Microsoft, Dropbox users can edit Microsoft Office (Word, Excel, and PowerPoint) documents right in a browser window. You don’t need to have any of the Office apps installed on your Mac or PC, and you don’t even need a subscription to Office 365.
That’s a pretty sweet deal, but it comes with a few qualifications:
- The documents you edit must be stored somewhere in your Dropbox folder.
- You must have the latest version of Dropbox (for Mac or PC) installed and be logged in to the same account you’re using on the Web site.
- You must be using an up-to-date version of Google Chrome, Firefox, Internet Explorer, or Safari.
- You can edit only .docx, .xlsx, and .pptx files (files that use the older .doc, .xls, or .ppt formats can be previewed but not edited).
- For some features, you’ll also need to have Adobe’s Flash Player installed. (This is built into Google Chrome; for other browsers, it’s an optional download.)
Assuming you meet all those criteria, here’s how to edit Office documents:
- On the Dropbox Web site, preview a compatible Office document by clicking its icon or file name.
- Look for the Open button near the upper-right corner of the window (Figure 12). Click the downward triangle on its right side and choose App Name Online from the pop-up menu.

Figure 12: When an Office document (.docx, .xlsx, or .pptx only) is synced to your computer, the Open button gives you the choice of opening the document locally in your own Office app, or opening it in the online version of the app. - The first time you do this, you’ll have to authorize Office Online to access your Dropbox (Figure 13): click Allow.

Figure 13: Click Allow to authorize Office Online to access documents in your Dropbox.
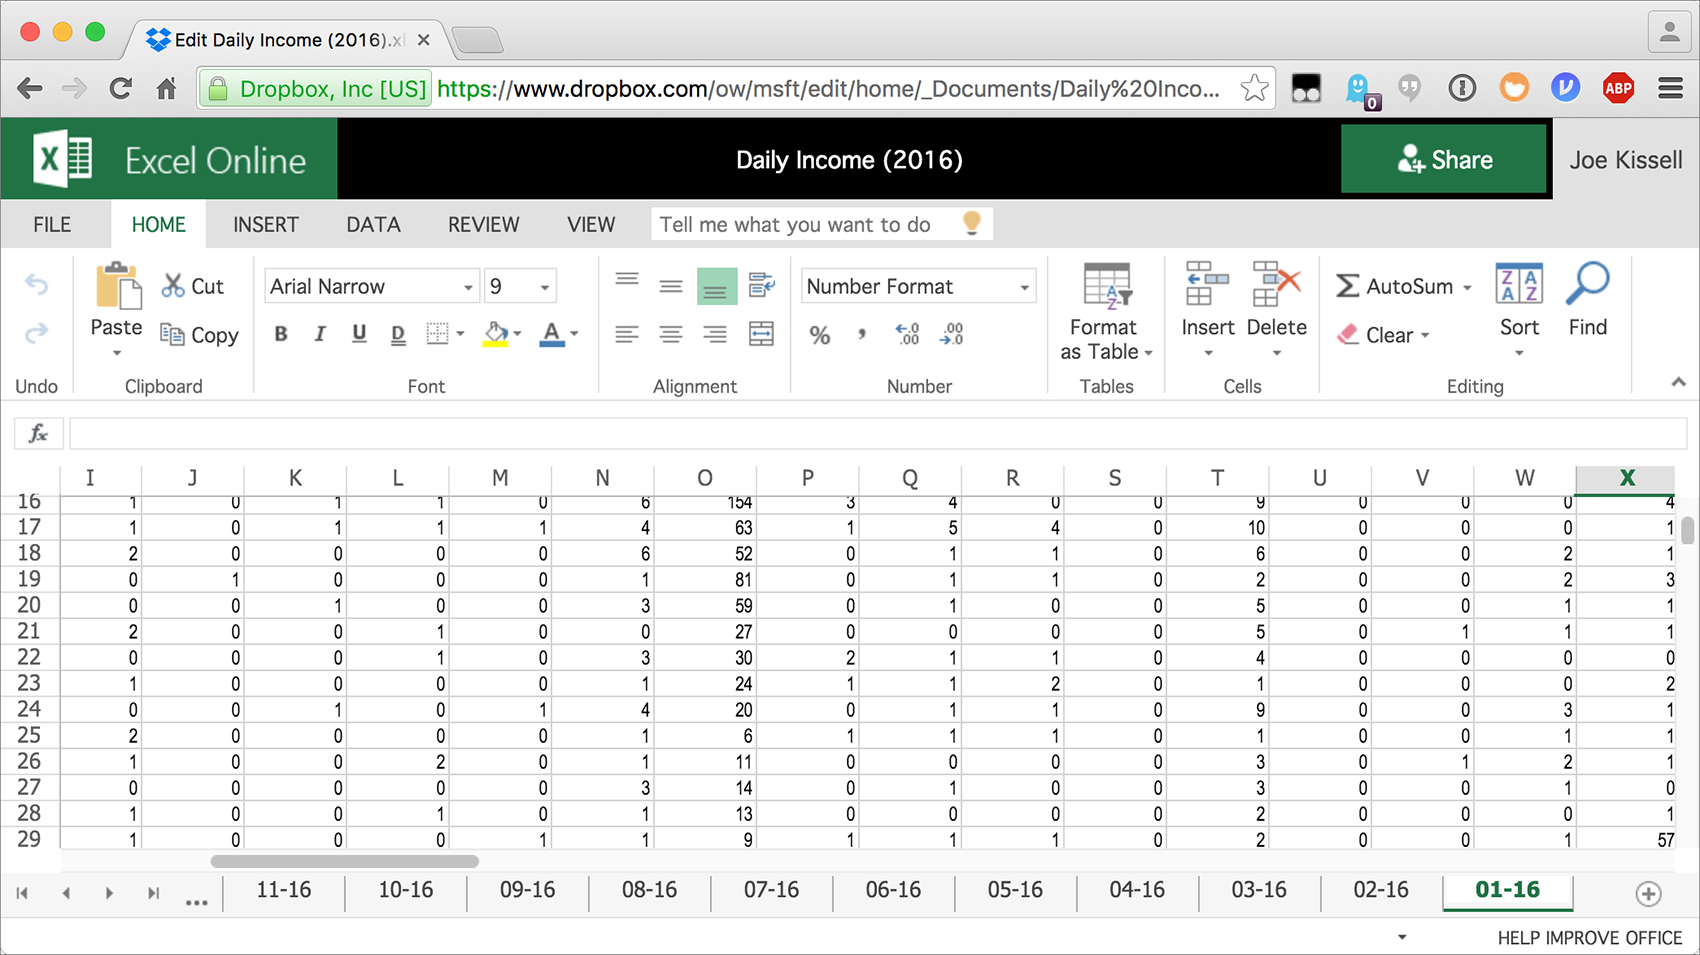
The file opens in the appropriate Office Online app (Figure 14). Any changes you make to your Office documents are saved automatically to your Dropbox. Furthermore, if you’re editing a document in a shared Dropbox folder, anyone else with access to the document can follow the same steps, and you can all edit the document at the same time; Dropbox calls this co-authoring or co-editing. When you co-edit, the names of other people working on the file at the same time appear in the upper-right corner of the window.

If you’re an Office 365 subscriber, you’ll be happy to know that the partnership with Dropbox works in both directions: while logged in to Office Online, you can access files in your Dropbox directly.
Use Dropbox with Gmail
If you use Gmail and access your account using Google Chrome, you can take advantage of integration between Gmail and Dropbox to send links to documents stored in your Dropbox (without having to attach any files), or save incoming attachments to your Dropbox.
To use Dropbox with Gmail:
- Download and install the free Dropbox for Gmail extension.
- Compose a new message in Gmail as usual.
- To include a file link, click the Dropbox
 icon at the bottom of the New Message window (Figure 15).

Figure 15: The Dropbox for Gmail extension puts a Dropbox icon at the bottom of Gmail’s New Message window. - In the dialog box that appears (Figure 16), navigate to the file(s) you want to attach, select one or more of them, and click Insert Link. You can then send the message as usual.

Figure 16: Select one or more files and click Insert Link. - To save an attachment from an incoming message to your Dropbox, hover over the attachment, click the Save to Dropbox
 icon, navigate to the location where you want the file to be saved, and click Save.
