Make Quick Photo Fixes
Photos has a bunch of simple tools that can improve your images quickly and without a lot of fuss. A few don’t even require you to enter image-editing mode. In this chapter, I focus on these “quick-fix” options. For more advanced editing, see the next chapter, Make Edits to Your Photos. If you’re working in iOS, see Process Photos in iOS, at the end of this chapter.
Edit Without Editing
Two of the quick-editing features in Photos are so quick, they don’t even require you to enter editing mode. These items appear on the toolbar in the top right of the Photos window. Rotation is accessible at all times, and Auto Enhance is accessible after you double-click on any photo.
Use Auto Enhance
While Photos gives you lots of tools to tweak your images very carefully, it also offers a sophisticated auto-enhance feature, which you can activate by pressing ⌘-E or (after having double-clicked the photo) clicking the Enhance ![]() icon in the toolbar. When you Enhance an image, Photos analyzes it and makes its best guess about the proper levels, color, and more.
icon in the toolbar. When you Enhance an image, Photos analyzes it and makes its best guess about the proper levels, color, and more.
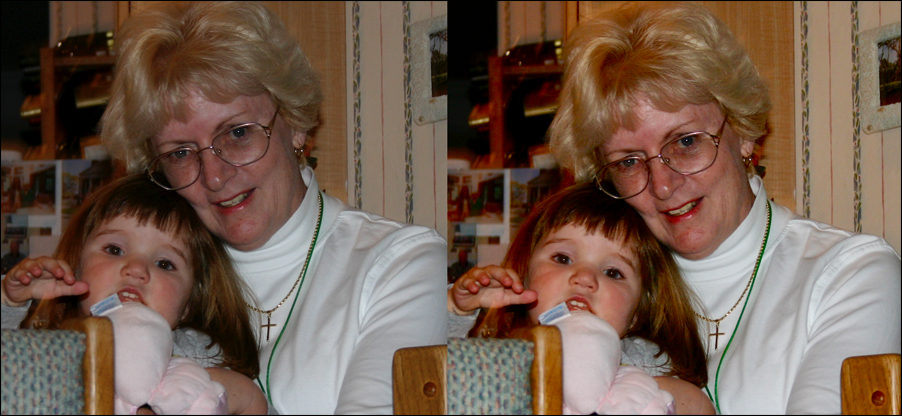
Since it’s operated by a computer and not a human, the Enhance icon won’t solve every problem. Sometimes it will make your photo look worse, and other times it can be a bit too timid (Figure 67). But it’s always worth a try if you’re not confident using the more advanced features under the Adjust ![]() icon.
icon.
Rotate Photos
Sometimes photos are oriented in the wrong direction—usually because they were taken with an older camera without an accelerometer or because you held the camera in such a way that it got confused about which end was up. The Rotate ![]() icon lets you quickly fix this by rotating your image in 90º increments (counterclockwise by default, clockwise if you hold down the Option key). You can also rotate counterclockwise by pressing ⌘-R, or ⌘-Option-R for clockwise).
icon lets you quickly fix this by rotating your image in 90º increments (counterclockwise by default, clockwise if you hold down the Option key). You can also rotate counterclockwise by pressing ⌘-R, or ⌘-Option-R for clockwise).
For a finer increment of rotation, try the Crop feature’s Auto button, described next.
Make Quick Fixes in Edit Mode
Some other quick-fix features require you to enter Edit mode, which provides you with dozens of tools to modify your images. To enter Edit mode, select an image and press ⌘-Return. (If you’re already viewing a single image, you can either press ⌘-Return or click the Edit button in the top right.) You can move between photos with the arrow keys, and click Done to exit the view.
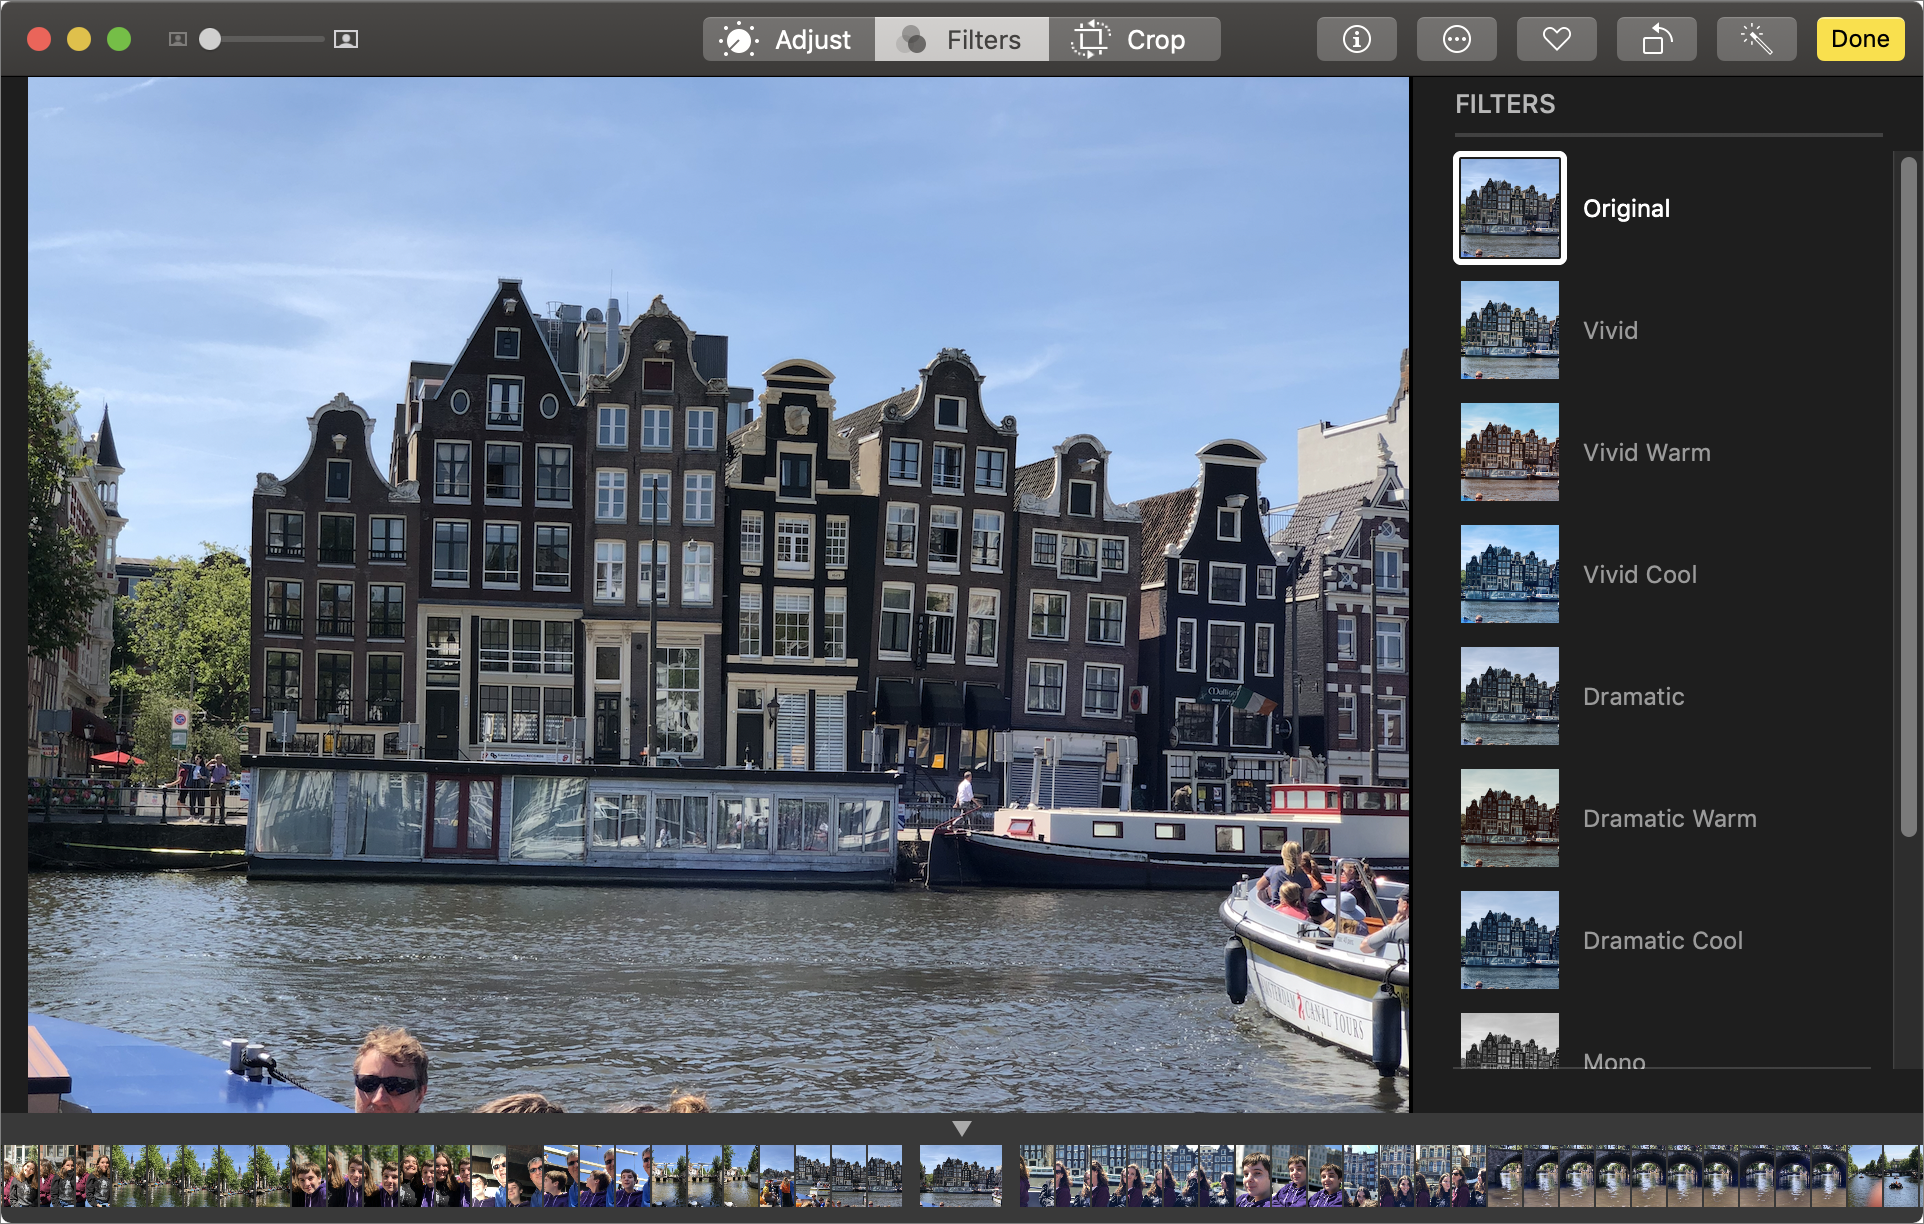
When you’re in Edit mode, at the very top of the Photos window you’ll find three tabs: Adjust, Filters, and Crop (Figure 68). In this section, we’ll use features in each of these three tabs.
Straighten Crooked Photos
When you click the Crop ![]() tab, Photos shows several options. If you click the Auto button, Photos makes its best guess at aligning your photo so that horizontal surfaces are truly horizontal (Figure 69). When you click the Crop tab, Photos automatically applies an auto-alignment if it senses that your photo is not quite straight. You can click the Reset button to belay that order.
tab, Photos shows several options. If you click the Auto button, Photos makes its best guess at aligning your photo so that horizontal surfaces are truly horizontal (Figure 69). When you click the Crop tab, Photos automatically applies an auto-alignment if it senses that your photo is not quite straight. You can click the Reset button to belay that order.
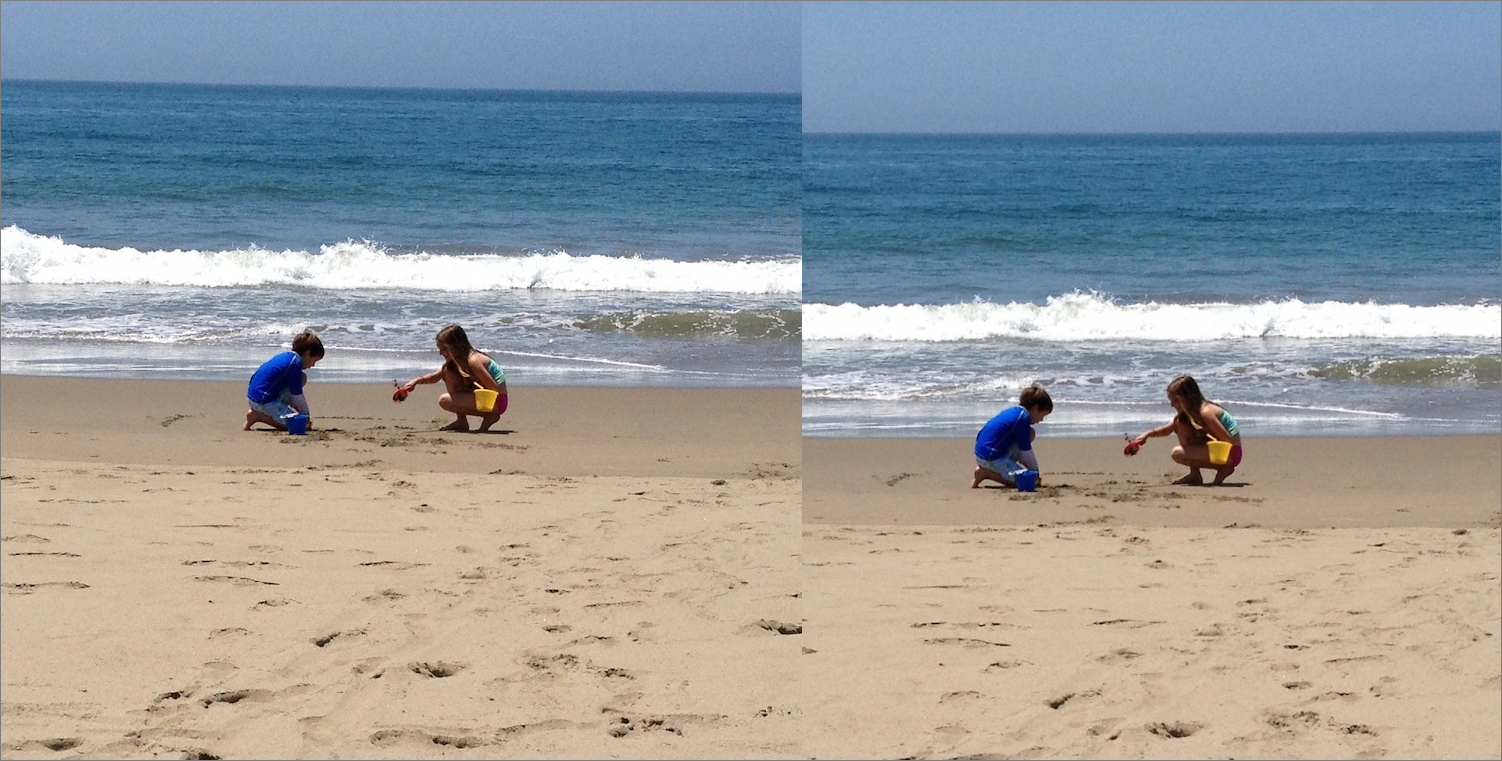
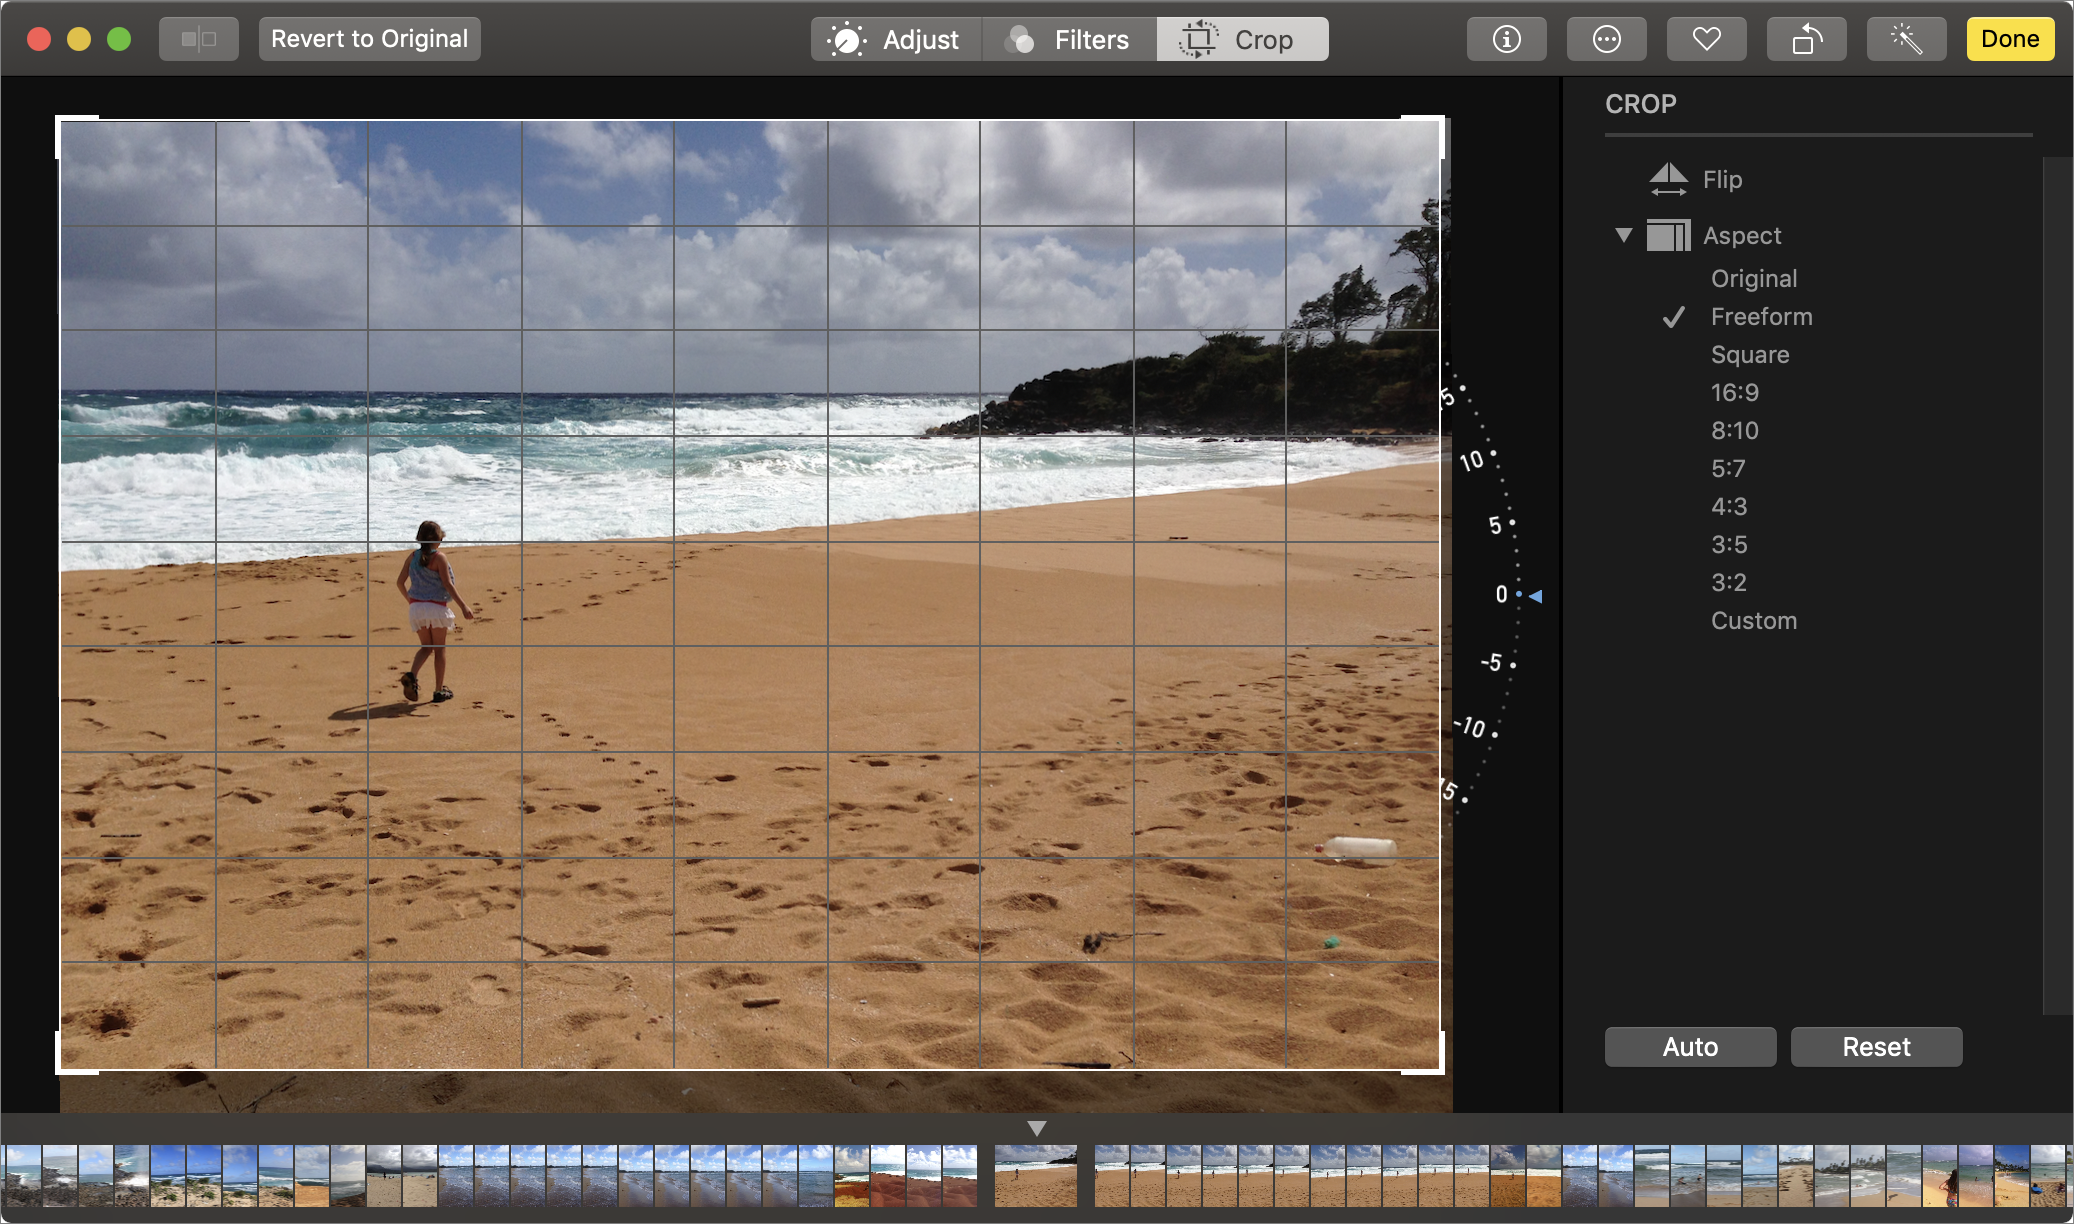
If you prefer to align your image manually, just drag the wheel to turn your image. You can use the grid overlay to help with alignment (Figure 70).
Change the Composition
To better focus attention on your subject, Photos can help to crop out extraneous parts of the image. You can crop the image by clicking and dragging from any corner. As you move the box, a grid appears. This can help you crop according to the photographic rule of thirds, for more attractive compositions.
If you’re unsatisfied with the crop you’re making, you can always click the Reset button to go back to the uncropped version of your image.
If you’re satisfied, press Return or click the Done button to save your crop and return to your library.
Flip or Change Aspect Ratio
Sometimes a photo works better when it’s flipped horizontally or vertically. When in the Crop tab, click the Flip ![]() icon to flip your image horizontally (or vertically if you Option-click). Be sure to take a careful look at the photo to see if there’s something that will be recognizably backward, like writing, before you flip it!
icon to flip your image horizontally (or vertically if you Option-click). Be sure to take a careful look at the photo to see if there’s something that will be recognizably backward, like writing, before you flip it!
If you’re planning to make prints, posters, or anything else that requires a specific shape, click the Aspect ![]() icon to constrain the crop tool to common aspect ratios, such as square or 16x9 or 3x5.
icon to constrain the crop tool to common aspect ratios, such as square or 16x9 or 3x5.
Give Your Photos a Filtered Look
If you’ve ever used Instagram, you know the appeal of filters—effects that add a distinct look to your images by adjusting the color, contrast, and more. Not to be outdone, Photos comes with nine custom filters, all accessible by clicking the Filters ![]() tab.
tab.
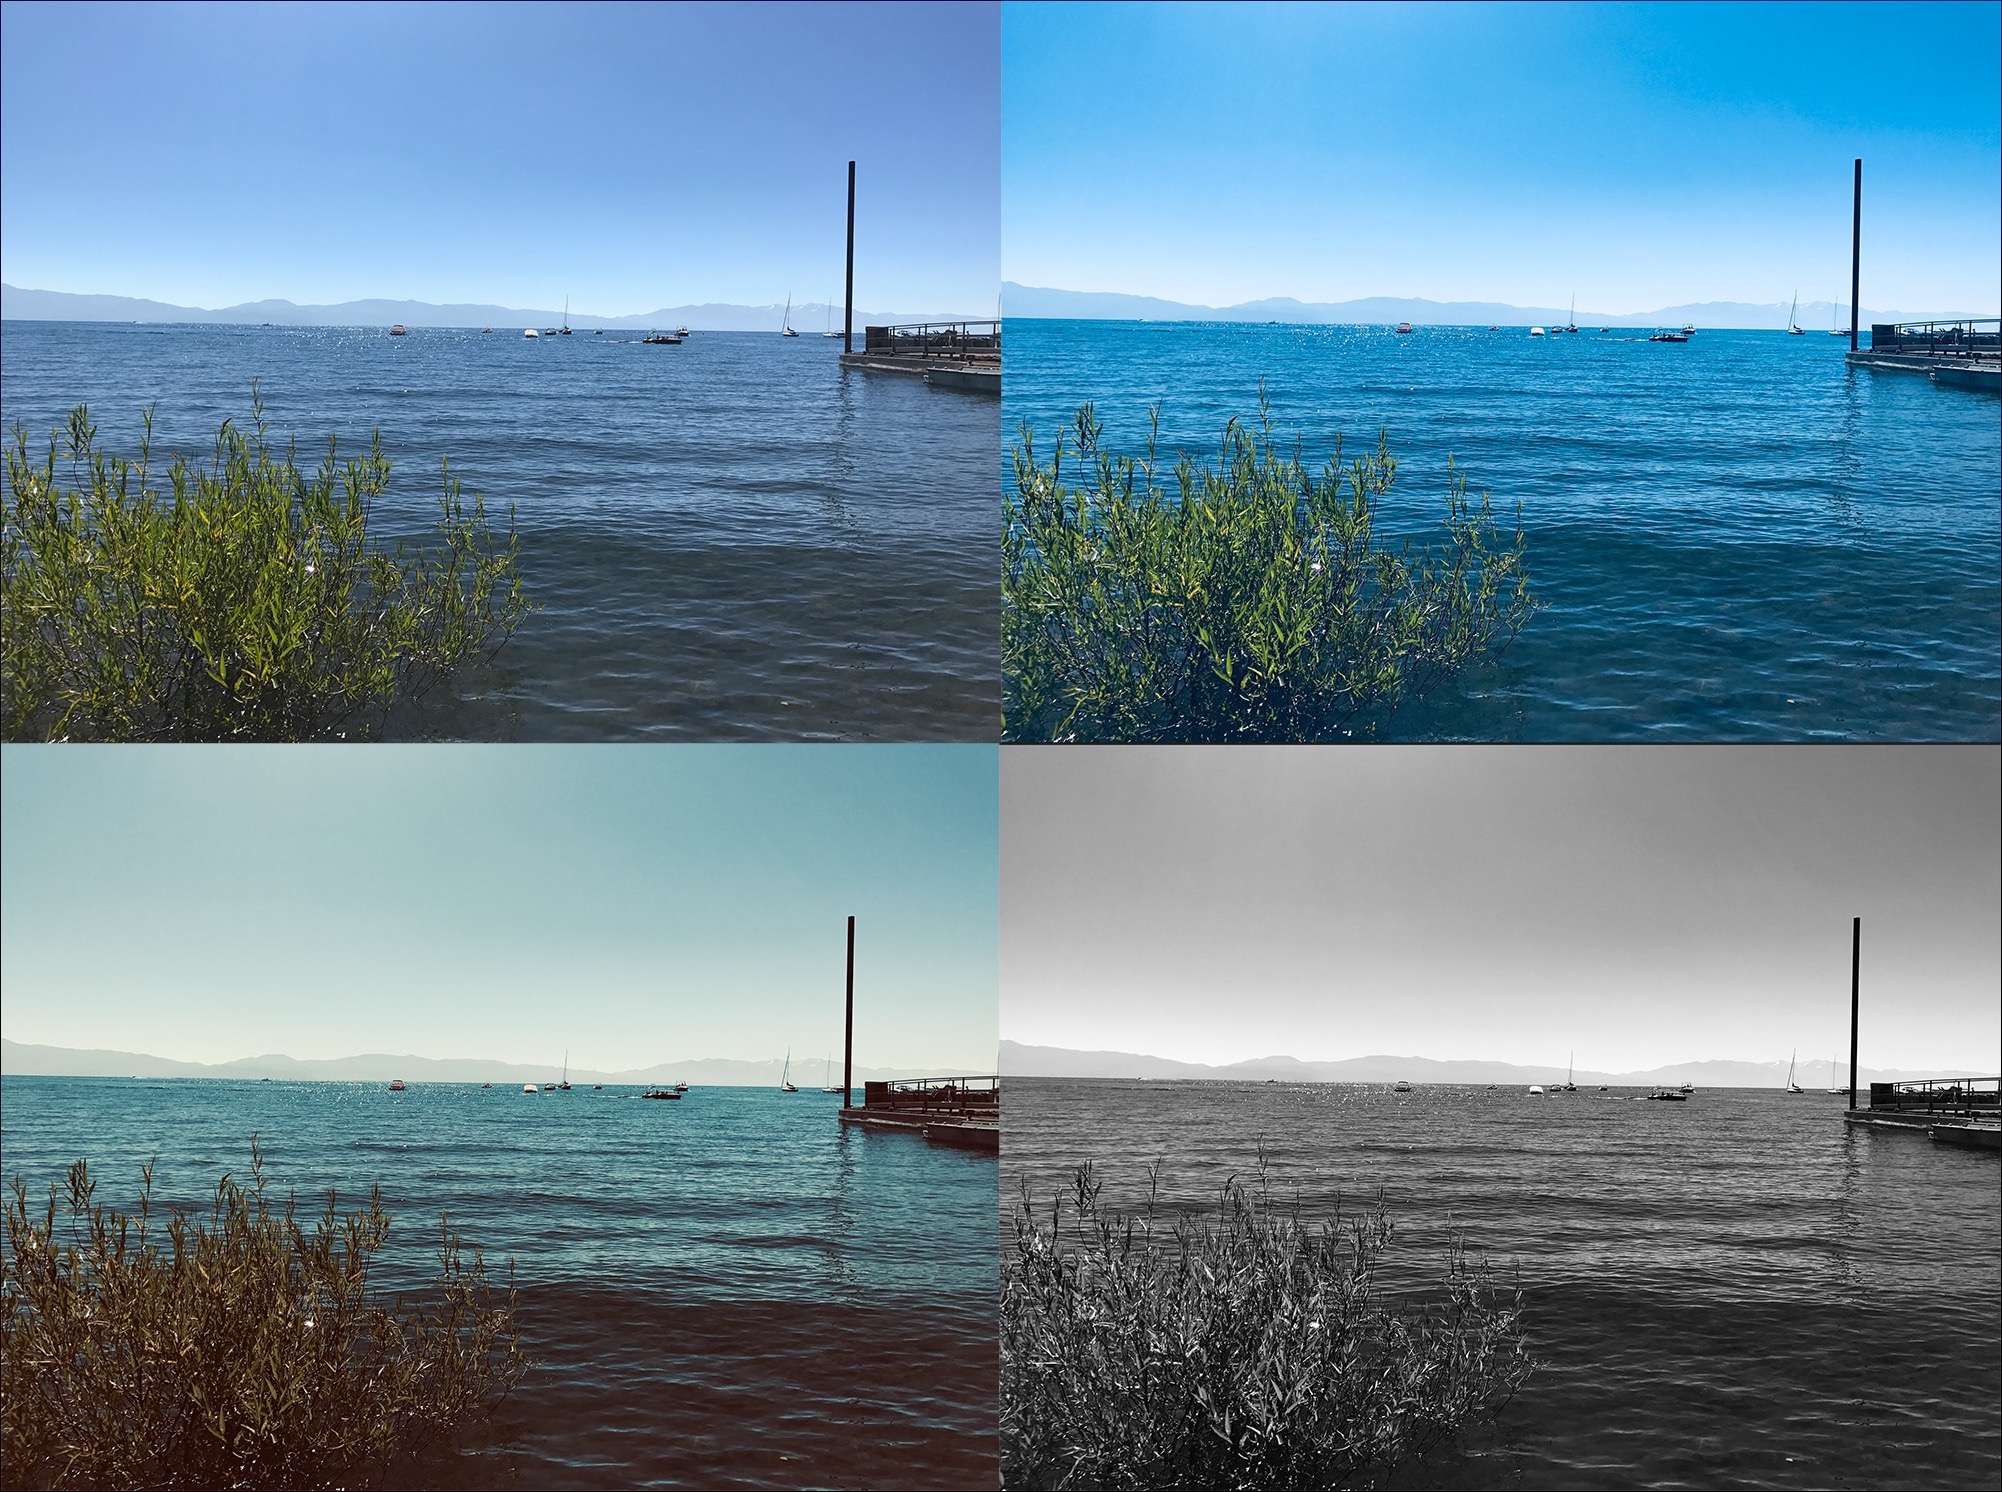
These filters come in three variations on three main concepts (Figure 71). There are three black-and-white effects (Mono, Silvertone, Noir), plus “dramatic” and “vivid” effects with warm and cool color variations.
Click a filter a second time to turn it off.
Fix Red Eye
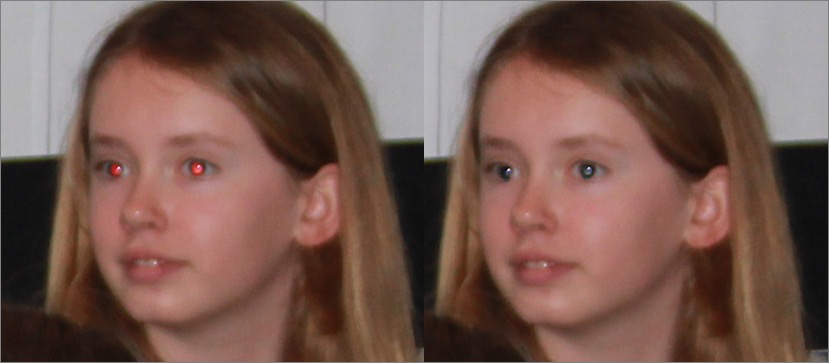
Flashes let you take pictures in dark spaces, but they have the unfortunate side effect of producing red eye—when the eyes of your subjects fill with demonic fire. Photos offers a Red Eye ![]() removal feature; to access it, click the Adjust tab.
removal feature; to access it, click the Adjust tab.
In most cases, you can trust Photos to remove red eye for you. Move the pointer over the Red Eye ![]() icon and then click the Auto button. The app highlights all the detected red eyes in the image and zaps them away (Figure 72).
icon and then click the Auto button. The app highlights all the detected red eyes in the image and zaps them away (Figure 72).
If the Auto button doesn’t quite do it for you, you can click the disclosure triangle to the left, click the paint-brush icon in the Red-eye area, and then click the red areas to let Photos work its magic. In my experience, this feature works shockingly well. If you need to adjust the size of the affected area, adjust the sliding control to the right of the paint-brush icon in the Red-eye area.
Process Photos in iOS
Though the editing features of Photos for iOS aren’t as extensive as they are on the Mac, you can still do quite a lot to adjust your images right from your iPhone or iPad.
To begin, tap Edit. You see a series of icons quite similar to those found in the editing mode of Photos for macOS:
Enhance
 : Found in the top-right corner on the iPhone and in the toolbar on the iPad, tap this to automatically enhance the image.
Red Eye
 : This icon appears only if a face has been detected, and is found in the top row on the iPhone and the toolbar on the iPad. Tap it and then tap an eye exhibiting “red eye” to remove it.
Filters
 : Apply the same nine filters that are available in macOS, to give your photo a distinct look (Figure 73).
Figure 73: Tap the Filters icon in iOS to choose from nine different filter options. Crop
 : As with macOS, you can crop an image (freely or to a specific aspect ratio) or rotate it arbitrarily, by 90 degrees or via an amount Photos automatically suggests (Figure 74).
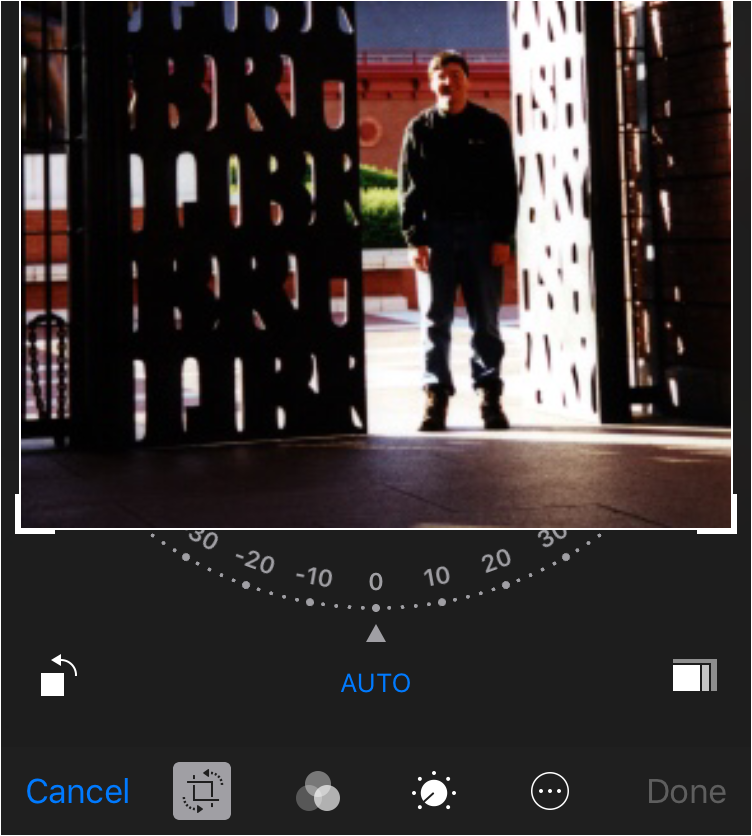
Figure 74: The Crop tool lets you rotate your image as well as crop it arbitrarily or to a specific ratio. Live Photo
 : Found at the top of the screen on the iPhone and in iPad’s toolbar, you can toggle this icon off if you’d prefer for iOS to treat an image as a still rather than a Live Photo. There’s also an audio
  icon next to it that you can use to mute Live Photo audio.
Adjust
 : Tap this icon to bring up an adjustment interface; see the Make Edits to Your Photos chapter for more.
Extensions
 : Tap here to edit an image with an extension; see the Make Edits to Your Photos chapter for more.