
The Print 3D Toolbox panel is an add-on to Blender. The first thing you need to do is install it and perform the following steps:
- Open up Blender or select File | New | Reload Start-up File, or press Ctrl + N.
- Open up the User Preferences panel, either by selecting File | User Preferences... or by pressing Ctrl + Alt + U.
- In the pop-up window, select Addons from the menu at the top.
- When the Addons menu page appears, there are two sets of menus, as seen in the following screenshot, one on the left and one on the right. Select the Mesh button at the lower-left corner:
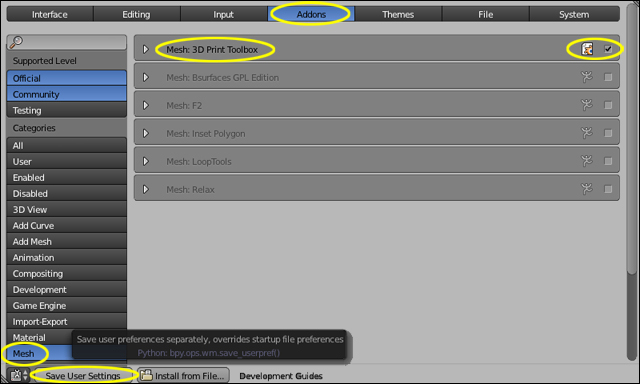
- Find the selection labeled Mesh: 3D Print Toolbox in the right-hand menu. Check the checkbox. At the lower-left corner of the window, select the Save User Settings button so that the 3D Print Toolbox will automatically be included with Blender on startup.
- Then click on the large red X at the upper-right corner of the window to close the Blender User Preferences window.
- Now the Print3D toolbox will be available to you in the Tool Shelf on the left-hand side of the 3D View window.
..................Content has been hidden....................
You can't read the all page of ebook, please click here login for view all page.