
In the previous section, we learned how to configure a Gradle project in Jenkins and how to integrate quality plugins. In this section, we will explore one more popular continuous integration tool, TeamCity. We are assuming that TeamCity is already installed and running on your machine. Therefore, we will skip the TeamCity installation and configuration details. Actually, the installation process is very simple and it can be completed in a few minutes. You can download TeamCity from the following URL: https://www.jetbrains.com/teamcity/download/ and installation instructions are available at https://confluence.jetbrains.com/display/TCD9/Installation.
By default, TeamCity runs on http://localhost:8111/ and it has one build agent that runs on the server. We will build the same plugin project using TeamCity.
Log in to TeamCtiy and click on Create a project. Provide a project name and description:
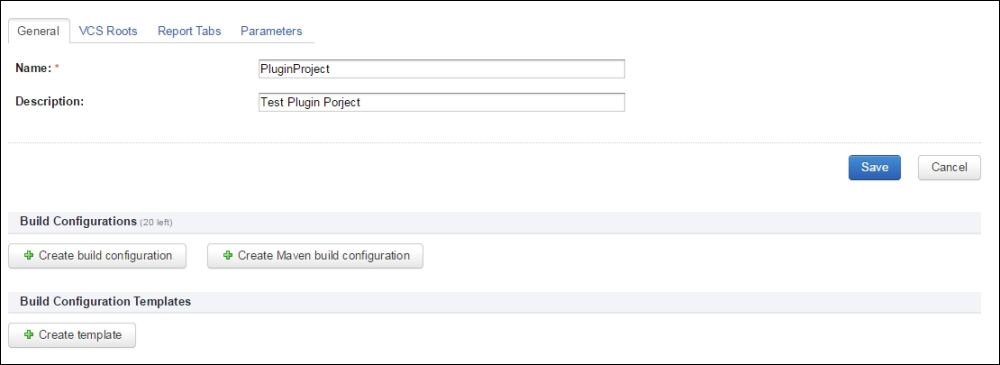
Figure 7.18
Save and then click on the Create Build Configuration button. You will need to provide general settings for the project. After general settings, proceed to Version Control Settings:
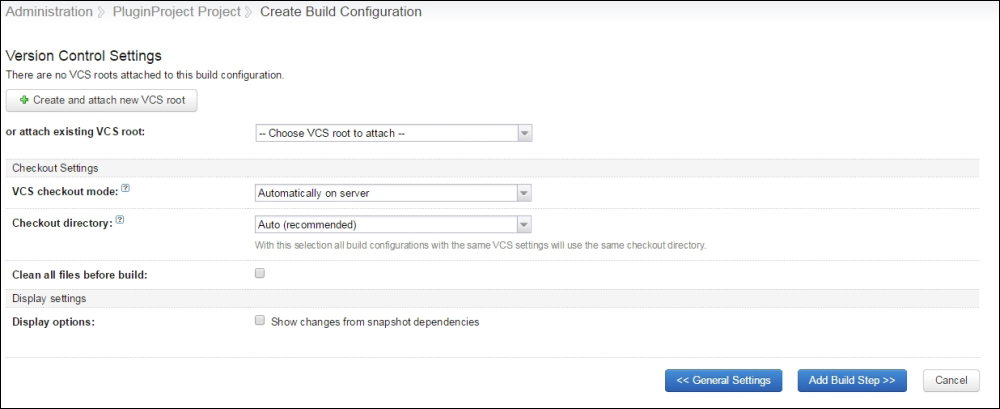
Figure 7.19
The next step is to configure Create and attach new VCS root. Choose Git from the drop down, since we are using Git as a repository, as shown in Figure 7.20:
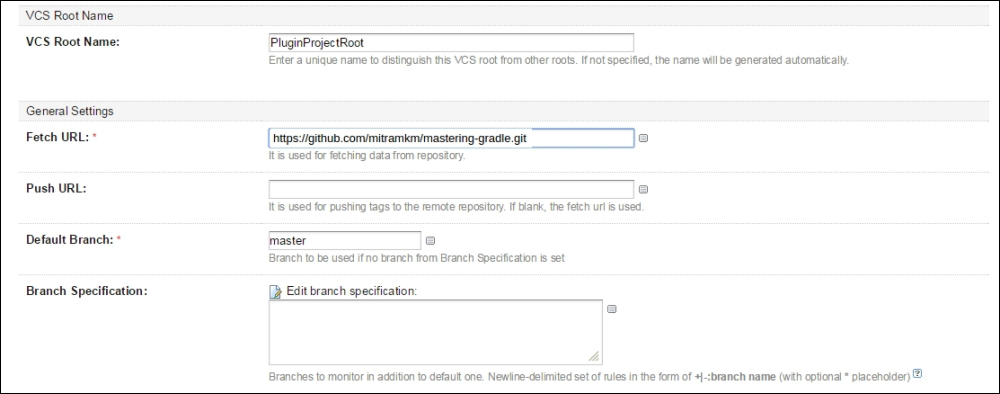
Figure 7.20
Provide General settings and the Fetch URL of the plugin project, also provide authentication, such as username/password and the Git exe location in Path To Git.
At the end of the screen, click on Test Connection. If the connection is successful, click on Save. The next step is Add Build Step.
In the build step, you need to configure the PluginProject build file details and build tasks details. For example, we need to provide some basic information such as clean build for task, working directory as Chapter7/PluginProject, and Gradle and JDK home directory:
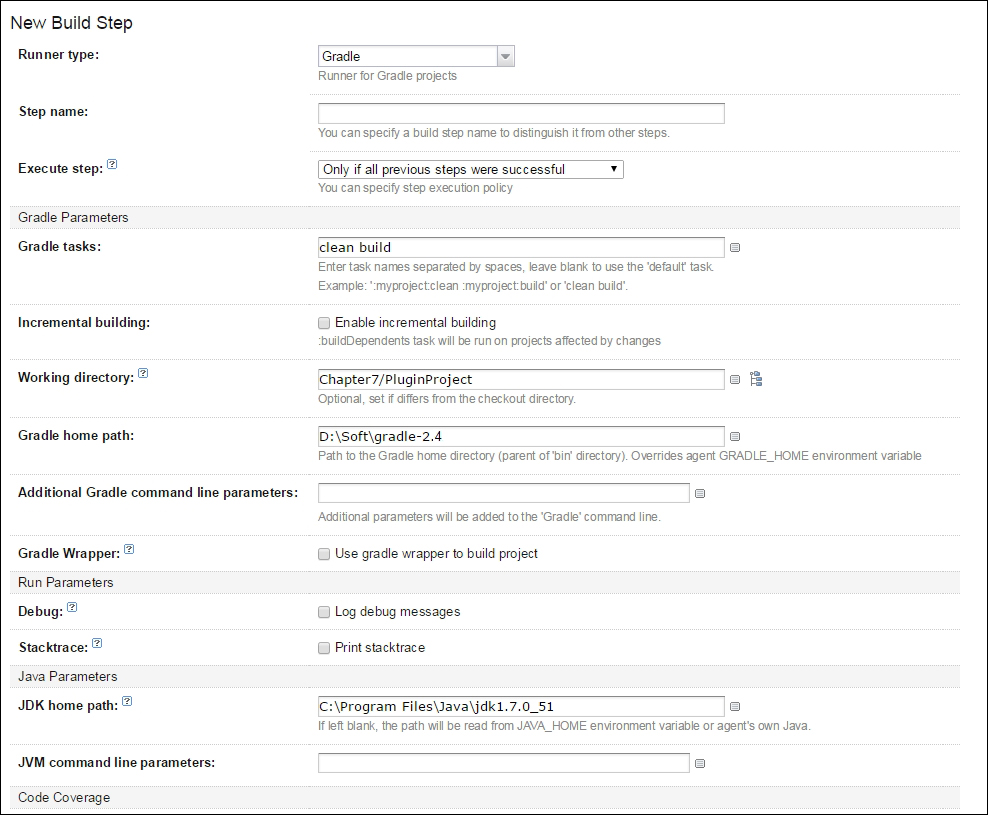
Figure 7.21
Save this configuration and the project will then be ready. The details of the build step can be reviewed in the build configuration screen, as shown in the following screenshot:

Figure 7.22
TeamCity executes the project through TeamCity Agents. TeamCity server installs an agent with the server. You can use this agent to execute the job. Otherwise, you can configure more agents through the Agents tab.
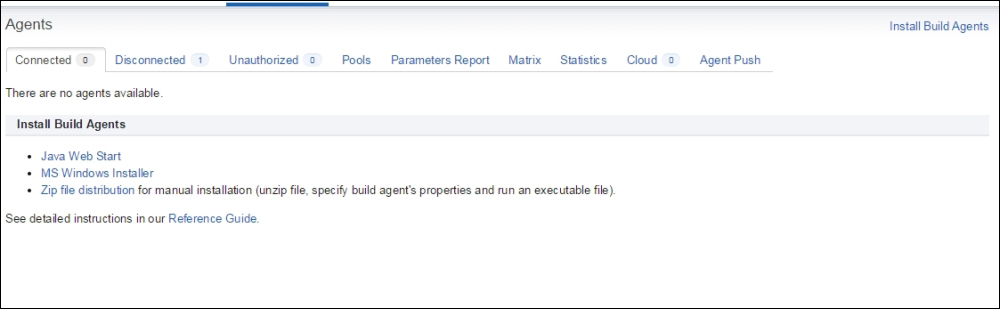
Figure 7.23
Once the agent is configured and connected, you can map the project with the build agent and you are ready to run the build job.
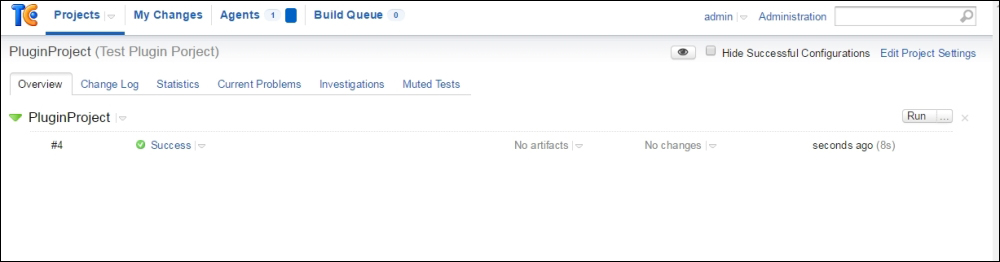
Figure 7.24
On clicking on the Run button, TeamCity server will execute the build job on mapped agent, and you can see the output of the build job as a success or failure.
In the Build Log console, you can also analyze the complete log, as shown in the following screenshot:
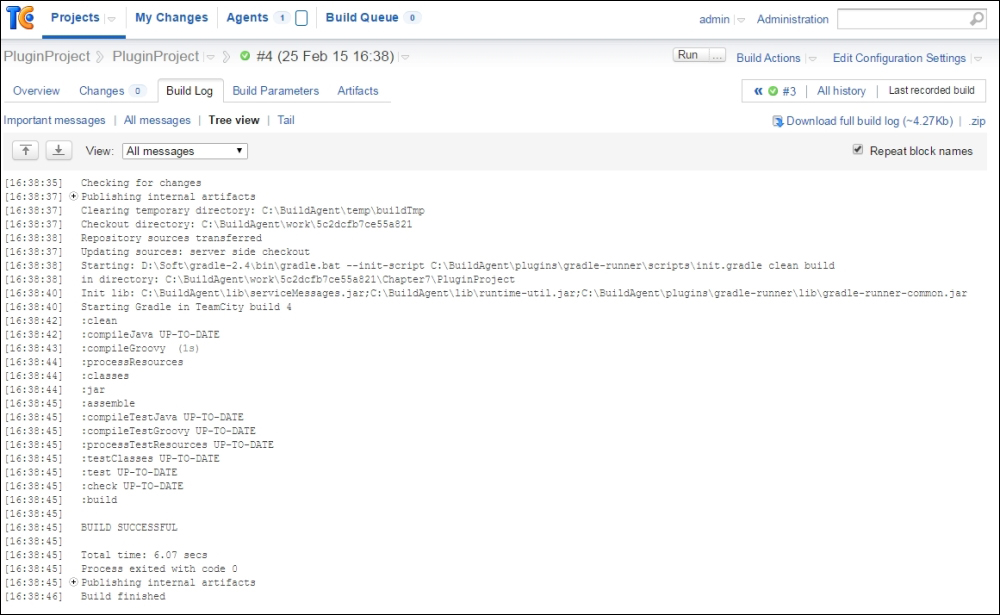
Figure 7.25