
Sonar is one of the most popular quality management tools which gives complete analysis of a project in terms of lines of code, documentation, test coverage, issues and complexities. Gradle provides seamless integration with Sonar. The only prerequisite is that sonar server should be installed and running. Details on Sonar can be found at http://www.sonarqube.org/.
To run sonar runner plugin, we just need to apply plugin sonar-runner and configure it to connect to the sonar server.
Create build file build_sonar.gradle for your project with the following contents:
apply plugin: 'groovy'
apply plugin: 'eclipse'
apply plugin: "sonar-runner"

repositories {
  mavenCentral()
}

version = '1.0'

sonarRunner {

  sonarProperties {
    property "sonar.host.url", "http://<IP_ADDRESS>:9000"
    property "sonar.jdbc.url", "jdbc:h2:tcp://<IP_ADDRESS>:9092/sonar"
    property "sonar.jdbc.driverClassName", "org.h2.Driver"
    property "sonar.jdbc.username", "sonar"
    property "sonar.jdbc.password", "sonar"
  }
}
The preceding configuration is self-explanatory. You need to add configurations such as Sonar URL, DB URL, JDBC driver details. Our build file is ready. The next step is to configure a job in the Jenkins server. To configure sonarRunner task in Jenkins, we can add a few basic steps as shown in Figure 7.16:
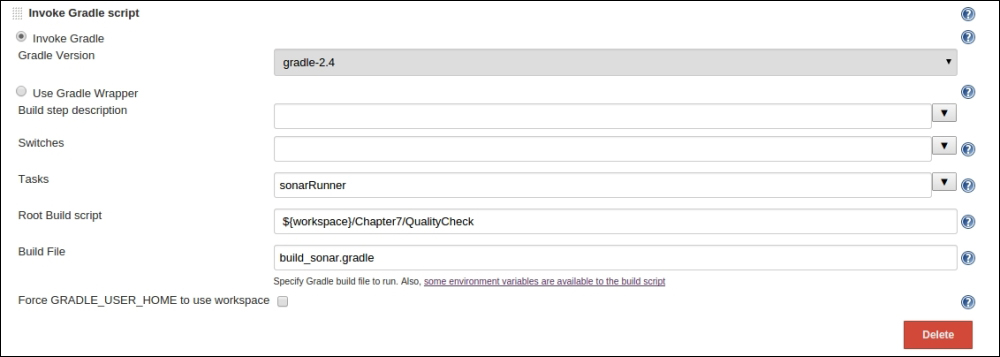
Figure 7.16
Here, the task name is sonarRunner and the build file name is build_sonar.gradle. Now, execute this job in Jenkins and you will find the output in the console. The output contains a link to the Sonar server. You can follow the link, which will redirect you to the Sonar report, as displayed in Figure 7.17:
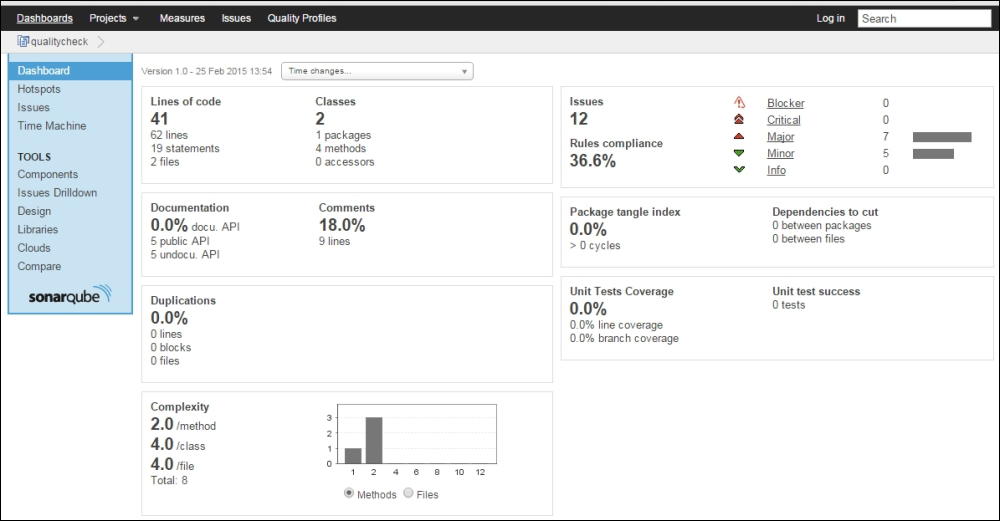
Figure 7.17
As mentioned preceding, Sonar gives an analysis of the project in different areas and you can find the details in the Sonar UI.