
This chapter covers some more plugins such as War and Scala, which will be helpful in building web applications and Scala applications. Additionally, we will discuss diverse topics such as Property Management, Multi-Project build, and logging aspects. In the Multi-project build section, we will discuss how Gradle supports multi-project build through the root project's build file. It also provides the flexibility of treating each module as a separate project, plus all the modules together like a single project. In the final section of this chapter, we will learn the automated testing aspects with Gradle. You will learn to execute unit tests with different configurations. In this section, we will learn about testing concepts with the examples of two commonly used testing frameworks, JUnit and TestNG.
The War plugin is used to build web projects, and like any other plugin, it can be added to the build file by adding the following line:
apply plugin: 'war'
War plugin extends the Java plugin and helps to create the war archives. The war plugin automatically applies the Java plugin to the build file. During the build process, the plugin creates a war file instead of a jar file. The war plugin disables the jar task of the Java plugin and adds a default war archive task. By default, the content of the war file will be compiled classes from src/main/java; content from src/main/webapp and all the runtime dependencies. The content can be customized using the war closure as well.
In our example, we have created a simple servlet file to display the current date and time, a web.xml file and a build.gradle file. The project structure is displayed in the following screenshot:
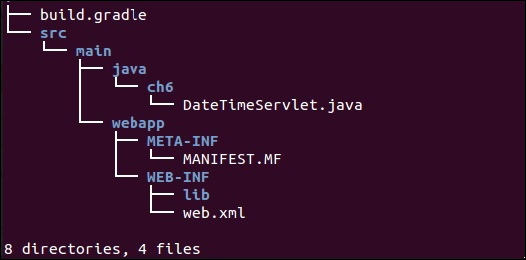
Figure 6.1
The SimpleWebApp/build.gradle file has the following content:
apply plugin: 'war'

repositories {
  mavenCentral()
}

dependencies {
  providedCompile "javax.servlet:servlet-api:2.5"
  compile("commons-io:commons-io:2.4")
  compile 'javax.inject:javax.inject:1'
}
The war plugin adds the providedCompile and providedRuntime dependency configurations on top of the Java plugin. The providedCompile and providedRuntime configurations have the same scope as compile and runtime respectively, but the only difference is that the libraries defined in these configurations will not be a part of the war archive. In our example, we have defined servlet-api as the providedCompile time dependency. So, this library is not included in the WEB-INF/lib/ folder of the war file. This is because this library is provided by the servlet container such as Tomcat. So, when we deploy the application in a container, it is added by the container. You can confirm this by expanding the war file as follows:
SimpleWebApp$ jar -tvf build/libs/SimpleWebApp.war
    0 Mon Mar 16 17:56:04 IST 2015 META-INF/
    25 Mon Mar 16 17:56:04 IST 2015 META-INF/MANIFEST.MF
    0 Mon Mar 16 17:56:04 IST 2015 WEB-INF/
    0 Mon Mar 16 17:56:04 IST 2015 WEB-INF/classes/
    0 Mon Mar 16 17:56:04 IST 2015 WEB-INF/classes/ch6/
1148 Mon Mar 16 17:56:04 IST 2015 WEB-INF/classes/ch6/DateTimeServlet.class
    0 Mon Mar 16 17:56:04 IST 2015 WEB-INF/lib/
185140 Mon Mar 16 12:32:50 IST 2015 WEB-INF/lib/commons-io-2.4.jar
  2497 Mon Mar 16 13:49:32 IST 2015 WEB-INF/lib/javax.inject-1.jar
  578 Mon Mar 16 16:45:16 IST 2015 WEB-INF/web.xml
Sometimes, we might need to customize the project's structure as well. For example, the webapp folder could be under the root project folder, not in the src folder. The webapp folder can also contain new folders such as conf and resource to store the properties files, Java scripts, images, and other assets. We might want to rename the webapp folder to WebContent. The proposed directory structure might look like this:

Figure 6.2
We might also be interested in creating a war file with a custom name and version. Additionally, we might not want to copy any empty folder such as images or js to the war file.
To implement these new changes, add the additional properties to the build.gradle file as described here. The
webAppDirName property sets the new webapp folder location to the WebContent folder. The war closure defines properties such as version and name, and sets the includeEmptyDirs option as false. By default, includeEmptyDirs is set to true. This means any empty folder in the webapp directory will be copied to the war file. By setting it to false, the empty folders such as images and js will not be copied to the war file.
The following would be the contents of CustomWebApp/build.gradle:
apply plugin: 'war'

repositories {
  mavenCentral()
}
dependencies {
  providedCompile "javax.servlet:servlet-api:2.5"
  compile("commons-io:commons-io:2.4")
  compile 'javax.inject:javax.inject:1'
}
webAppDirName="WebContent"

war{
  baseName = "simpleapp"
  version = "1.0"
  extension = "war"
  includeEmptyDirs = false
}
After the build is successful, the war file will be created as simpleapp-1.0.war. Execute the jar -tvf build/libs/simpleapp-1.0.war command and verify the content of the war file. You will find the conf folder is added to the war file, whereas images and js folders are not included.
You might also find the Jetty plugin interesting for web application deployment, which enables you to deploy the web application in an embedded container. This plugin automatically applies the War plugin to the project. The Jetty plugin defines three tasks; jettyRun, jettyRunWar, and jettyStop. Task jettyRun runs the web application in an embedded Jetty web container, whereas the jettyRunWar task helps to build the war file and then run it in the embedded web container. Task jettyStop
stops the container instance. Covering more on war configuration is beyond the scope of the book, so for more information please refer to the Gradle API documentation. Here is the link: https://docs.gradle.org/current/userguide/war_plugin.html.