
We created the application with one simple activity and now we will try to build the application with Gradle. Android Studio has automatically generated two build files for the project; one build.gradle file in the root folder of the project and other build file in the app directory. We will use the build.gradle file of the subproject (app folder) to build the Android application. This build.gradle file has the following content:
apply plugin: 'com.android.application'

android {
  compileSdkVersion 22
  buildToolsVersion "22.0.1"

  defaultConfig {
    applicationId "ch10.androidsampleapp"
    minSdkVersion 15
    targetSdkVersion 22
    versionCode 1
    versionName "1.0"
  }
  buildTypes {
    release {
      minifyEnabled false
      proguardFiles getDefaultProguardFile('proguard-android.txt'), 'proguard-rules.pro'
    }
  }
}

dependencies {
  compile fileTree(dir: 'libs', include: ['*.jar'])
  compile 'com.android.support:appcompat-v7:22.1.1'
}
In the very first line, we applied a plugin with the apply plugin: 'com.android.application' statement. This is similar to applying any other standard Gradle plugin. But from where will this plugin jar be downloaded? If you check the build.gradle file in the parent project, you will find the following entry:
buildscript {
   repositories {
       jcenter()
   }
   dependencies {
       classpath 'com.android.tools.build:gradle:1.2.3'
   }
}
In the buildscript closure, we have defined dependencies as com.android.tools.build:gradle:1.2.3. This JAR file will be downloaded from the jcenter repository and it will be added to the classpath of the build.gradle.
Next part of the build file is the android closure definition where we define all the basic configurations related to the application such as SDK version, minimum SDK version supported, target SDK version, application ID, and versioning.
Next, we have the standard dependencies closure to define compile and runtime dependencies for the application. Here, we have included the lib directory and appcompat-v7 jar as dependencies.
With these simple configurations, we are ready to build the application with Gradle. We have applied Android plugin in the build file. Now, we will explore different tasks available to build the project. Type gradle tasks on the command prompt to get the list of tasks, as shown here:
> gradle tasks

Android tasks
-------------
androidDependencies - Displays the Android dependencies of the project.
signingReport - Displays the signing info for each variant.

Build tasks
-----------
assemble - Assembles all variants of all applications and secondary packages.
assembleAndroidTest - Assembles all the Test applications.
assembleDebug - Assembles all Debug builds.
……………...
compileDebugSources
compileDebugUnitTestSources
compileReleaseSources
compileReleaseUnitTestSources
mockableAndroidJar - Creates a version of android.jar that's suitable for unit tests.
…………………….

Install tasks
-------------
installDebug - Installs the Debug build.
installDebugAndroidTest - Installs the android (on device) tests for the Debug build.
uninstallAll - Uninstall all applications.
uninstallDebug - Uninstalls the Debug build.
uninstallDebugAndroidTest - Uninstalls the android (on device) tests for the Debug build.
uninstallRelease - Uninstalls the Release build.

……………
Following are the some of the important tasks that you might need to build an Android application:
assemble: This task is same as the assemble task in the Java plugin that is used to assemble the output of the application.check: This is similar to the Java plugin check task, it runs all the checks.clean: This task removes all the artifacts created during build process.build: This task executes the assemble and check task and builds the application artifacts.androidDependencies: This task will display all the Android dependencies of the project.connectedCheck: It will execute the check task on all the connected devices in parallelinstall<buildVariant>: You can find various install tasks (such asinstallDebug,installRelease) that are used to install specificbuildVarianton a device. We will discuss more on thebuildVariantin a later section of the book.
The buildTypes configuration is used to define types or environments of build, such as debug, release, QA, and staging to build and package the app. By default, when you build the Android project, you can find both the debug and release versions that were created in the build/outputs/apk directory. By default, the debug version is signed with a key/certificate that is created automatically with a known username/password. The release build type is not signed during the build process; therefore, you can find the app-release-unsigned.apk file created for the release build type. Release build type needs to be signed before deploying it in any device.
You can customize both build and release build types and also extend the build types by adding your own build types, as follows:
buildTypes {
  release {
    minifyEnabled false
    proguardFiles getDefaultProguardFile('proguard-android.txt'), 'proguard-rules.pro'
  }
  staging.initWith(buildTypes.release)
  staging {
    debuggable true
  }
}
Here we have added one more build type staging (for staging environment), and configured it to be a copy of the release build type and added debuggable true. You can modify the following properties for any build types:
|
Property name |
Default values for debug type |
Default values for release and other types |
|---|---|---|
|
|
|
|
|
|
|
|
|
|
|
|
|
|
|
|
|
|
|
|
|
|
|
|
|
|
|
|
|
|
|
|
|
|
|
|
Table 10.1
Also, for each build type, you can define their build type-specific SourceSet such as src/<build type>. As mentioned in the preceding example, you can define a new directory src/staging and put the staging-related source code and resources in this directory.
Also for each build type, new tasks will be added by the Android plugin in the following format: assemble<buildtype>, install<buildtype>, compile<buildtype>, jar<buildtype>. This can be observed by executing the gradle task command, as shown here:
> gradle  tasks | grep -i staging
assembleStaging - Assembles all Staging builds.
compileStagingSources
compileStagingUnitTestSources
installStaging - Installs the Staging build.
uninstallStaging - Uninstalls the Staging build.
lintStaging - Runs lint on the Staging build.
testStaging - Run unit tests for the staging build.
jarStagingClasses
As mentioned previously, these task are only associated with the staging build types.
For release build type, Gradle provides access to the Proguard tool that is used to optimize and obfuscate the code. It shrinks the source code and makes the .apk file smaller in size. You can enable/disable this feature by setting minifyEnabled in the buildTypes/release closure. As mentioned in Table 10.1, the default value is set to false; so set it to true if you want to enable it.
The default setting can be obtained using the getDefaultProguardFile('proguard-android.txt') method. You can find the location of the ProGuard tool at <Android sdk dir>/tools/proguard. If you want to provide custom rules for the project, you can add it to the proguard-rules.pro file provided by Android studio. You can even add your own files with different names:
 buildTypes {
  release {
    minifyEnabled true
    proguardFiles getDefaultProguardFile('proguard-android.txt'), 'proguard-rules.pro'
  }
}
Build flavors or product flavors are different from build type. It is another level of separation, which allows building multiple flavors of the application, such as paid version, free version, phone version, and tab version. Each version of the application can have its own separate features and different hardware requirements. The combination of productFlavors and buildTypes forms a build variant and a different APK is generated for each build variant. Product flavors are defined under the productFlavors closure:
productFlavors {
  phone{
    applicationId "ch10.androidsampleapp"
    minSdkVersion 14
    targetSdkVersion 20

    versionName "1.0-phone"
  }
  tab {
    applicationId "ch10.androidsampleapp"
    minSdkVersion 15
    targetSdkVersion 22
    versionName "1.0-tab"
  }
}
Now, if we build the project with the gradle clean build command, we will find different APK files created in the build/outputs/apk/ directory. We have two flavors (phone and tab) with four build types (debug signed, debug unaligned, staging, and release). Therefore, total 2*4 = 8 APK files will be created in the build process.
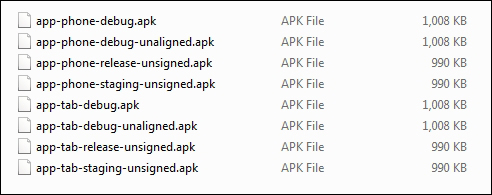
Figure 10.7
When we added staging as the build type in the previous section, we observed that Gradle had automatically created some tasks. Similarly, for each flavor configuration, Gradle will add different tasks such as assemblePhoneDebug and assembleTabDebug:
> gradle tasks | grep -i phone
assemblePhone - Assembles all Phone builds.
assemblePhoneDebug - Assembles the DebugPhone build.
assemblePhoneDebugAndroidTest - Assembles the android (on device) tests for the PhoneDebug build.
assemblePhoneRelease - Assembles the ReleasePhone build.
assemblePhoneStaging - Assembles the StagingPhone build.
compilePhoneDebugAndroidTestSources
compilePhoneDebugSources
compilePhoneDebugUnitTestSources
compilePhoneReleaseSources
compilePhoneReleaseUnitTestSources
compilePhoneStagingSources
compilePhoneStagingUnitTestSources
installPhoneDebug - Installs the DebugPhone build.
installPhoneDebugAndroidTest - Installs the android (on device) tests for the PhoneDebug build.
uninstallPhoneDebug - Uninstalls the DebugPhone build.
uninstallPhoneDebugAndroidTest - Uninstalls the android (on device) tests for the PhoneDebug build.
uninstallPhoneRelease - Uninstalls the ReleasePhone build.
uninstallPhoneStaging - Uninstalls the StagingPhone build.
connectedAndroidTestPhoneDebug - Installs and runs the tests for DebugPhone build on connected devices.
lintPhoneDebug - Runs lint on the PhoneDebug build.
lintPhoneRelease - Runs lint on the PhoneRelease build.
lintPhoneStaging - Runs lint on the PhoneStaging build.
testPhoneDebug - Run unit tests for the phoneDebug build.
testPhoneRelease - Run unit tests for the phoneRelease build.
testPhoneStaging - Run unit tests for the phoneStaging build.
jarPhoneDebugClasses
jarPhoneReleaseClasses
jarPhoneStagingClasses
Product flavors extend the configuration from the defaultConfig closure. You can overwrite the default configurations inside each product flavor. For each flavor, you can also have a separate source code and the required files as src/<flavor>/java, src/<flavor>/resources, and so on.
Once an application is built, you will want to install or run the application, either on an emulator or a physical mobile device. For simplicity, we will run the application on an emulator. During the development phase, with the help of an emulator you can test the application on different platforms without using devices. Some of the advantages of using an emulator are as follows:
- You can test the application on multiple emulator devices
- You can test with different hardware features such as sound, webcam, or sensors
- You control battery power, phone location, network settings, such as 2G or 3G, and so on
Emulators are very flexible, but using too many emulators can bring down your system performance. Based on your system configuration, you should carefully configure the emulators. You can add new emulator devices using AVD Manager as shown in the following screenshot:
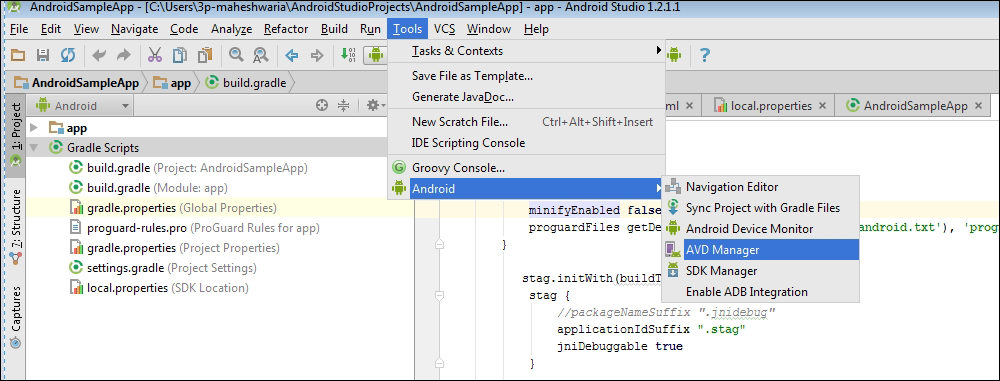
Figure 10.8
It will show the existing emulator devices. You can create a new device as per application requirement. For more information, refer to this link http://developer.android.com/tools/help/emulator.html.
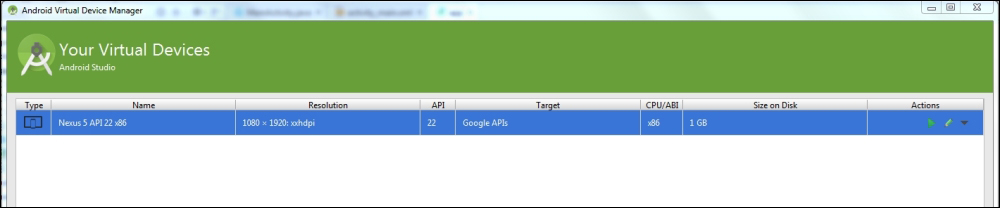
Figure 10.9
You can start the emulator by clicking on the start symbol in the Actions column. For our example, we created a Nexus 5 API 22x86 emulator to test the application. Alternatively, you can also start the emulator device by executing the following command on the command prompt:
>%ANDROID_SDK% oolsemulator.exe -netdelay none -netspeed full -avd Nexus_5_API_22_x86
It takes a while to initialize the emulator. Once the emulator is up and running, we should be able to run the application from Android Studio. Go to the Run menu and choose Run app.
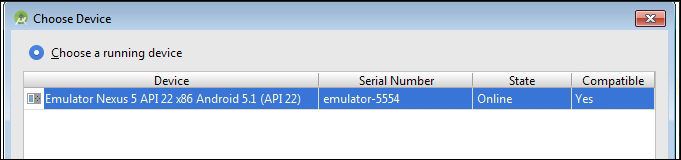
Figure 10.10
This will show all the devices (connected to the system) and the emulator that is up and running. You can select any of the running devices and click OK. The application should be visible in the emulator after few seconds.
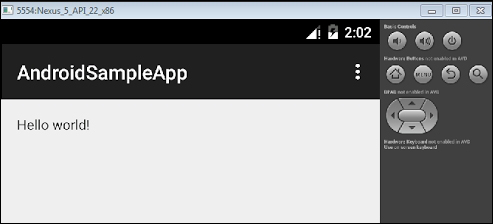
Figure 10.11
Alternatively, you can also install the application using the gradle install<buildVariant> command. We have already created different build variants and flavors in the previous section. Let's try to install the PhoneDebug variant on the emulator. This is done as follows:
> gradle installPhoneDebug
:app:preBuild UP-TO-DATE
:app:prePhoneDebugBuild UP-TO-DATE
:............
.............
:app:mergePhoneDebugAssets UP-TO-DATE
:app:compilePhoneDebugJava UP-TO-DATE
:app:compilePhoneDebugNdk UP-TO-DATE
:app:compilePhoneDebugSources UP-TO-DATE
:app:preDexPhoneDebug UP-TO-DATE
:app:dexPhoneDebug UP-TO-DATE
:app:validateDebugSigning
:app:packagePhoneDebug UP-TO-DATE
:app:zipalignPhoneDebug UP-TO-DATE
:app:assemblePhoneDebug UP-TO-DATE
:app:installPhoneDebug
Installing APK 'app-phone-debug.apk' on 'Nexus_5_API_22_x86(AVD) - 5.1'
Installed on 1 device.

BUILD SUCCESSFUL

Total time: 24.543 secs
You will be able to find the application in the phone's application list. AndroidSampleApp is the application that we installed using Gradle task. You can launch the application and check the output. It will display Hello World.
To uninstall the application using Gradle, use the gradle uninstall command as follows:
> gradle uninstallPhoneDebug
You might have observed while running gradle tasks that the release related install tasks are not created; for example, installPhoneRelease, installTabRelease, and so on. Release build type-related tasks will be available, if you sign the application using keystore. Now, we will try to sign an application using a keystore. If you already have a valid keystore, you can use that file to sign the application; otherwise you will need to generate a new keystore by using the following command:
> keytool -genkey -v -keystore myCustomkey.keystore -alias customKey -keyalg RSA -keysize 2048 -validity 10000
To create the keystore, we need to provide some basic details. On entering all the details, the preceding command will generate the myCustomkey.keystore file. Now, we have to update build.gradle with the following configurations to enable the signing of the application:
android {

......
signingConfigs {
  release {
    storeFile file("myCustomkey.keystore")
    storePassword "welcome"
    keyAlias "customKey"
    keyPassword "welcome"
  }
}
  ……………
buildTypes {
  release {
    minifyEnabled false
    signingConfig signingConfigs.release
    proguardFiles getDefaultProguardFile('proguard-android.txt'), 'proguard-rules.pro'
  }
  ………………
}
Now, if we execute the gradle tasks command, we will find new tasks have been added for the release builds. Similarly, new APK files will be created in the apk folder:
> gradle tasks | grep -i install
Install tasks
installPhoneDebug - Installs the DebugPhone build.
installPhoneDebugAndroidTest - Installs the android (on device) tests for the PhoneDebug build.
installPhoneRelease - Installs the ReleasePhone build.
installPhoneStaging - Installs the StagingPhone build.
installTabDebug - Installs the DebugTab build.
installTabDebugAndroidTest - Installs the android (on device) tests for the TabDebug build.
installTabRelease - Installs the ReleaseTab build.
installTabStaging - Installs the StagingTab build.
uninstallAll - Uninstall all applications.
....