
So far, we have learnt what is Docker and the different commands to work with Docker. In this section, we will develop a web application and we will deploy the web application in a Docker container. For simplicity, we will download a Tomcat image from the Docker repository. Then the Docker container will be started with proper port mapping, so that it can be accessed from the host machine. Finally, a web application will be deployed in the running container.
To create a Tomcat container, we will pull an image from the central repository https://registry.hub.docker.com/_/tomcat/. The repository provides support for different versions of Tomcat such as 6, 7, and 8. For this application, we will use Tomcat 7.0.57 version. This version can be downloaded from the registry by running the docker pull tomcat:7.0.57-jre7 command.
After the image is downloaded, we have to create the container using the downloaded image and then start it. The container is created and started with the docker run command with one of the options -p <host_port>:<container_port>. This option enables to access the running Tomcat container by routing the host port to the container port. The following command starts the container with the name as userdetailsservice. Additionally, the –rm option is used to remove the filesystem when the container exits. This is required for the cleanup process:
$ docker run -it --rm -p 8181:8080 --name "userdetailsservice" tomcat:7.0.57-jre7
Using CATALINA_BASE:   /usr/local/tomcat
Using CATALINA_HOME:   /usr/local/tomcat
Using CATALINA_TMPDIR: /usr/local/tomcat/temp
Using JRE_HOME:        /usr
Using CLASSPATH:     /usr/local/tomcat/bin/bootstrap.jar:/usr/local/tomcat/bin/tomcat-juli.jar
May 03, 2015 5:03:07 PM org.apache.catalina.startup.VersionLoggerListener log
INFO: Server version:        Apache Tomcat/7.0.57
...
After running the command, the Tomcat server is accessible from the host machine at http://localhost:8181:
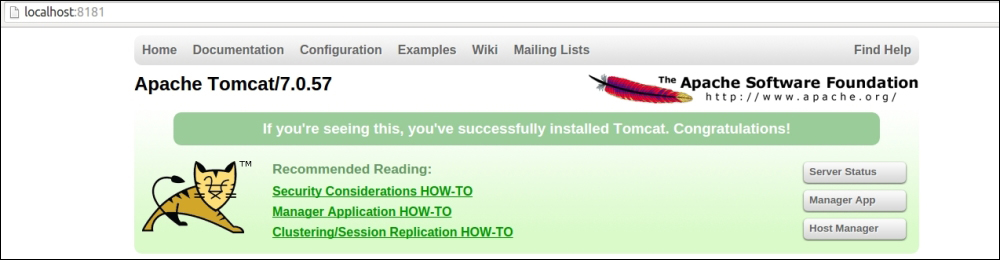
Figure 9.1
Tomcat server is up and running; and the next task is to deploy the web application in the running container. Deploying the web application can be done in multiple ways. Here we will discuss three different approaches to deploy the web application.
- Adding web application as a data volume: Already we have learnt how to mount a data volume with the container using the -v option. This approach can be applied even to deploy a web application. If we have the file structure of the web application on the host machine, it can be mounted to the webapps directory of Tomcat.
The following command shows an example of deploying an application named
userdetailsservicein the/usr/local/tomcat/webapps/directory of the Tomcat container:$ docker run -it --rm -p 8181:8080 -v ~/userdetailsservice:/usr/local/tomcat/webapps/userdetailsservice --name "userdetailsservice" tomcat:7.0.57-jre7 - Copying WAR file from host to container: Another approach is to copy the application WAR file directly from the host machine to the container. To achieve this, first we have to start the container with the run command as explained previously:
$ docker run -it --rm -p 8181:8080 --name "userdetailsservice" tomcat:7.0.57-jre7When the container is running, we have to find the long container ID. This can be done as follows using the
docker pscommand with the--no-truncoption:$ docker ps --no-trunc CONTAINER ID IMAGE COMMAND CREATED STATUS PORTS NAMES 1ad08559109a0f5eec535d05d55e76c5ad3646ae7bb6f4fffa92ad4721955349 tomcat:7.0.57-jre7 "catalina.sh run" About a minute ago Up About a minute 0.0.0.0:8181->8080/
Then, we can use the simple UNIX
cpcommand to copy the.warfile to the Docker file system as shown here:$ sudo cp ~/UserDetailsService/build/lib/userdetailsservice.war /var/lib/docker/aufs/mnt/1ad08559109a0f5eec535d05d55e76c5ad3646ae7bb6f4fffa92ad4721955349/usr/local/tomcat/webappsHowever, this approach is not recommended as copying file from host to container is not a good option. Rather we should use the data mount option.
- Tomcat Admin: Tomcat admin tool can be used to deploy web application from a web-based user interface. To deploy a web app from Tomcat admin, you need to have the proper access privilege to the Tomcat manager GUI. The Tomcat image that we downloaded for this example does not allow us to access the Tomcat admin page. So first, we have to enable access for a user by modifying the
tomcat-users.xmlfile. We can simply use the-voption to bind an existingtomcat-users.xmlfile to the container as follows:$ docker run -it --rm -p 8181:8080 -v ~/Downloads/tomcat-users.xml:/usr/local/tomcat/conf/tomcat-users.xml --name "userdetailsservice" tomcat:7.0.57-jre7This approach works well. But if you want to modify the
tomcat-users.xmlfile of the container permanently, a different approach can be taken. First, we have to start the Tomcat container with the following command:$ docker run -it --rm -p 8181:8080 --name "userdetailsservice" tomcat:7.0.57-jre7 command.Then from another terminal, enter the bash of the container using the Docker
execcommand. as shown here:$ docker exec -it userdetailsservice /bin/bash
Next step is to modify the /usr/local/tomcat/conf/tomcat-users.xml file from a text editor. To do this, we might need to install vim with the apt-get install vim command. You are free to use any text editor of your choice:
root@0ff13ab7f076:/usr/local/tomcat# apt-get update
root@0ff13ab7f076:/usr/local/tomcat# apt-get install vim
After vim is installed successfully, we have to add the following lines at the end of the tomcat-users.xml file (before </tomcat-users>), to enable access to Tomcat-admin GUI for the admin user:
<role rolename="manager-gui"/>
<user username="admin" password="admin" roles="manager-gui"/>
Now, changes have been applied to the container and we have to save the new changes by creating a new image using the docker commit command as follows:
$ docker commit 0ff13ab7f076 usedetailsimage:v1
1d4cbdbe2b6ba97048431dbe2055f1df4d780cf5564200c5946e0944baf84b8f
The new image was saved as usedetailsimage with the v1 tag. This can be verified by listing all the docker images:
$ docker images
REPOSITORY          TAG                 IMAGE ID            CREATED   VIRTUAL SIZE
usedetailsimage     v1                  1d4cbdbe2b6b        8 seconds ago       384.4 MB
hello-world         latest              91c95931e552        3 weeks ago         910 B
tomcat              7.0.57-jre7         b215f59f9987        3 months ago        345.9 MB
This newly created image can be used to start the Tomcat server as follows:
$ docker run -it --rm -p 8181:8080 --name "userdetailsservice" usedetailsimage:v1
After Tomcat is started successfully, we will be able to log in to the Tomcat administrator page at http://localhost:8181/manager/ with the admin/admin credentials. The web application can be deployed by selecting the WAR file to deploy option. Application userdetailsservice takes few seconds to start up and it will be visible on the Tomcat admin page as shown in the following screenshot:
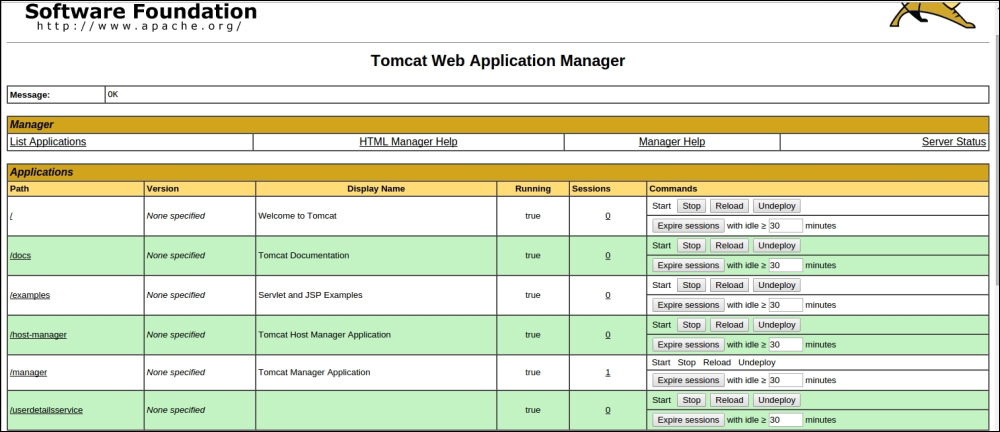
Figure 9.2